
Nespresso Prodigio XN410T - Coffee maker KRUPS - Free user manual and instructions
Find the device manual for free Nespresso Prodigio XN410T KRUPS in PDF.


| Product type | Nespresso connected coffee machine |
| Brand | Krups |
| Model | Nespresso Prodigio XN410T |
| Extraction pressure | Up to 19 bars |
| Connectivity | Bluetooth® via Nespresso app |
| Predefined coffee types | Ristretto (25 ml), Espresso (40 ml), Lungo (110 ml) |
| Water volume programming | Yes, customizable ranges (Ristretto 15-30 ml, Espresso 30-70 ml, Lungo 70-130 ml) |
| Water tank | Removable with adjustable arm (left or right position) |
| Used capsule container | Integrated, empty daily |
| Drip tray | With removable grid |
| Cup support | Height adjustable |
| Automatic shut-off | 9 minutes (adjustable to 30 minutes) |
| Descaling | Required depending on water hardness, with Nespresso kit |
| Connected functions | Capsule inventory management, remote scheduling, immediate brewing, maintenance alerts |
| Cleaning | Empty and clean daily capsule container and drip tray |
| Warranty | 2 years |
Frequently Asked Questions - Nespresso Prodigio XN410T KRUPS
User questions about Nespresso Prodigio XN410T KRUPS
0 question about this device. Answer the ones you know or ask your own.
Ask a new question about this device
Download the instructions for your Coffee maker in PDF format for free! Find your manual Nespresso Prodigio XN410T - KRUPS and take your electronic device back in hand. On this page are published all the documents necessary for the use of your device. Nespresso Prodigio XN410T by KRUPS.
USER MANUAL Nespresso Prodigio XN410T KRUPS
| EN Instruction manual | FR Manuel d'instructions 3 |
| DE Bedienungsanleitung | IT Istruzioni per l'uso 29 |
| ES Manual de instrucciones | PT Manual de Instruções 54 |
| CZ Návod k použití | HU Használati útmutató 80 |
| NL Gebruiksaanwijzing | GR Oðnyíes χρήσης 105 |
| PL Instrukcja obsługi | 132 |
Congratulations on getting Nespresso Prodigio, the first connected Nespresso machine. This machine allows you to brew a perfect coffee time after time while living a unique connected experience with your Smartphone or Tablet. To start your connected journey, you will need to get the Nespresso App and pair your device to your Nespresso Prodigio machine.
If you have it already, please update the App.
Téléchargez l'application Nespresso.
③ Click on the Machine Icon.
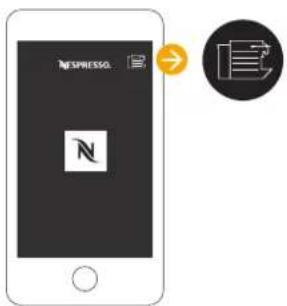
Pairing / Connectivity Functions/

Please remember that the Bluetooth® mode must be activated beforehand on your smartphone or tablet.
natural_image
Line drawing of a mechanical device with cylindrical body, ports, and base plate (no text or symbols)

When the pairing is
complete, the Nespresso Light will blink 3 times.
- Capsules stock management
- Schedule a coffee brewing
- Brew Now
- Maintenance notifications
- Descaling alert
- And more to see via the App

QUELLES SONT LES FONCTIONS DISPONIBLES?
natural_image
Line drawing of a portable water dispenser device with ports and control panel (no text or symbols)① Prodigio Coffee Machine Machine Prodigio

② Nespresso capsule tasting gift Coffret de dégustation de capsules Nespresso
3 Nespresso Welcome Brochure Brochure de bienvenue Nespresso
Prodigio Packaging Content/

INSTRUCTION MANUAL
Nespresso, an exclusive system creating the perfect Espresso, time after time. All machines are equipped with a unique extraction system that guarantees up to 19 Bar pressure. Each parameter has been calculated with great precision to ensure that all the aromas can be extracted, to give the coffee body and create an exceptionally thick and smooth crema.
CAUTION: when you see this sign, please refer to the safety precautions to avoid possible harm and damage.
i INFORMATION: when you see this sign, please take note of the advice for the correct and safe usage of your coffee machine.
INFORMATION: when you see this sign, please note that you can also use the App for this function. Consult App for more information.

XN410 Specifications/ XN410 Spécifications techniques

220-240 V-, 50-60 Hz, 1260 W
Pmax
19 bar / 1.9 MPa / Pression maximale de 19 bars / 1.9 MPa

\~ 3 kg

0.8 L

11.95 cm

53 cm

Prodigio Table des matières
Content/
MODE D'EMPLOI
Disposal and Environmental Protection /
CAUTION: the safety precautions are part of the appliance. Read them carefully before using your new appliance for the first time. Keep them in a place where you can find and refer to them later on.
CAUTION: when you see this sign, please refer to the safety precautions to avoid possible harm and damage.
i INFORMATION: when you see this sign, please take note of the advice for the correct and safe usage of your appliance.
- The appliance is intended to prepare beverages according to these instructions.
- Do not use the appliance for anything other than its intended use.
- This appliance has been designed for indoor and non-extreme temperature conditions use only.
- Protect the appliance from direct sunlight effect, prolonged water splash and humidity.
- This is a household appliance only. It is not intended to be used in: staff kitchen areas in shops, offices and other working environments; farm houses; by clients in hotels, motels and other residential type environments; bed and breakfast type environments.
• This appliance may be used by children of at least 8 years of age, as long as they are supervised
and have been given instructions about using the appliance safely and are fully aware of the dangers involved. Cleaning and user maintenance shall not be made by children unless they are older than 8 and they are supervised by an adult.
- Keep the appliance and its cord out of reach of children under 8 years of age.
- This appliance may be used by persons with reduced physical, sensory or mental capabilities, or whose experience or knowledge is not sufficient, provided they are supervised or have received instruction to use the appliance safely and understand the dangers.
• Children shall not use the device as a toy.
• The manufacturer accepts
no responsibility and the guarantee will not apply for any commercial use, inappropriate handling or use of the appliance, any damage resulting from use for other purposes, faulty operation, non-professionals repair or failure to comply with the instructions.
Avoid risk of fatal electric shock and fire.
- In case of an emergency: immediately remove the plug from the power socket.
- Only plug the appliance into suitable, easily accessible, earthed mains connections. Make sure that the voltage of the power source is the same as that specified on the rating plate. The use of an incorrect connection voids the guarantee.

Safety Precautions
The appliance must only be connected after installation.
- Do not pull the cord over sharp edges, clamp it or allow it to hang down.
- Keep the cord away from heat and damp.
- If the supply cord is damaged, it must be replaced by the manufacturer, its service agent or similarly qualified persons, in order to avoid all risks.
- If the cord is damaged, do not operate the appliance; return the appliance to the Nespresso Club or to a Nespresso authorised representative.
- If an extension cord is required, use only an earthed cord with a conductor cross-section of
at least 1.5 mm ^2 or matching input power.
• To avoid hazardous damage, never place the appliance on or beside hot surfaces such as radiators, stoves, ovens, gas burners, open flame, or similar.
• Always place it on a horizontal, stable and even surface. The surface must be resistant to heat and fluids, like water, coffee, descaler or similar liquids.
- Disconnect the appliance from the mains when not in use for a long period. Disconnect by pulling out the plug and not by pulling the cord itself or the cord may become damaged.
- Before cleaning and servicing, remove the plug from the mains socket and let the appliance cool down.
- Never touch the cord with wet hands.
- Never immerse the appliance or part of it in water or other liquid.
- Never put the appliance or part of it in a dishwasher.
• Electricity and water together is dangerous and can lead to fatal electrical shocks. - Do not open the appliance. Hazardous voltage inside!
- Do not put anything into any openings. Doing so may cause fire or electrical shock!
Avoid possible harm when operating the appliance.
- Never leave the appliance unattended during operation.
- Do not use the appliance if it is damaged or not operating perfectly. Immediately remove the
plug from the power socket. Contact the Nespresso Club or Nespresso authorised representative for examination, repair or adjustment.
- A damaged appliance can cause electrical shocks, burns and fire.
• Always completely close the slider and never open it during operation. Scalding may occur. - Do not put fingers under coffee outlet, risk of scalding.
- Do not put fingers into capsule compartment or the capsule shaft. Danger of injury!
• Water could flow around a capsule when not perforated by the blades and damage the appliance. - Never use a damaged or deformed capsule. If a
capsule is blocked in the capsule compartment, turn the machine off and unplug it before any operation. Call the Nespresso Club or Nespresso authorised representative.
- Fill the water tank only with fresh drinking water.
- Empty water tank if the appliance will not be used for an extended time (holidays, etc.).
- Replace water in water tank when the appliance is not operated for a weekend or a similar period of time.
- Do not use the appliance without the drip tray and drip grid to avoid spilling any liquid on surrounding surfaces.
- Do not use any strong cleaning agent or solvent cleaner. Use a damp cloth and mild cleaning agent to clean the surface of the
appliance.
• To clean machine, use only clean cleaning tools.
- When unpacking the machine, remove the plastic film and dispose.
- This appliance is designed for Nespresso coffee capsules available exclusively through the Nespresso Club or your Nespresso authorised representative.
- All Nespresso appliances pass stringent controls. Reliability tests under practical conditions are performed randomly on selected units. This can show traces of any previous use.
- Nespresso reserves the right to change instructions without prior notice.
• This machine contains magnets.
Descaling
- Nespresso descaling agent, when used correctly, helps ensure the proper functioning of your machine over its lifetime and that your coffee experience is as perfect as the first day.
SAVE THESE
INSTRUCTIONS
Pass them on to any subsequent user.
This instruction manual is also available as a PDF at nespresso.com
② Adjust the cable length and store the excess under the machine. Insert the remaining cable in the guide under water tank left or right socket, depending on the position chosen for the water tank. Ensure machine is in the upright position.
natural_image
Illustration of a hand pouring liquid from a cup into a clear glass (no text or symbols)③ ⑤ Rinse the water tank before filling it with fresh drinking water.
natural_image
Diagram of a kitchen appliance with labeled parts and directional arrows indicating assembly (no text or symbols present)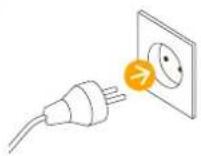
4 Place the water tank on its arm and place the drip tray and the capsule container in position.
Plug the machine into the mains.
To connect your machine, please follow the instructions in sections «Get the App» and «Pairing» on page 4.
Multiple devices can be connected to your Prodigio machine only if using a unique club members number. To pair these additional devices, please follow the instructions in the sections «Get the App» and «Pairing» on page 4.
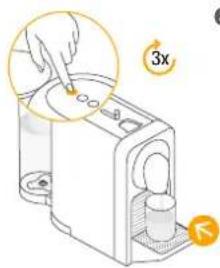
Before making any coffee, make sure to rinse your machine by:
- Placing a container under coffee outlet.
- Closing the slider and pressing the Lungo button to rinse the machine.
- Repeat three times.
natural_image
Illustration of a hand using a handheld device to interact with a container (no text or symbols visible)7 Turn the machine ON by pressing any coffee button or by opening the slider. Lights will blink. Heating up takes approximately 25 seconds. Steady lights: machine is ready.
9 To turn OFF your machine, ensure all the 3 coffee buttons are ON. Press and hold Lungo and Espresso buttons simultaneously for 3 seconds.
natural_image
Line drawing of a hand pouring liquid from a cup into a container (no text or symbols)① Fill the water tank with fresh drinking water.
natural_image
Illustration of a portable coffee maker with a cup and two cups, no text or symbols present② Place a cup under the coffee outlet.
natural_image
Illustration of a coffee maker with a hand inserting a cup into the tray (no text or symbols)3 Turn machine ON by pressing any coffee button or by opening the slider. Lights will blink. Heating up approximately takes 25 seconds. Steady lights: ready.
④ Open the slider, insert a capsule and close the slider.

Ristretto (25 ml)

Espresso (40 ml)

Lungo (110 ml)
You can select the desired coffee button, by pressing it, even while the machine is still heating up.
The selected coffee button will blink and becomes steady on when machine is ready to brew. The coffee will then flow.

To ensure hygienic conditions, it is highly recommended to not reuse a used capsule.
5 Preparation will stop automatically. The capsule will eject automatically.
natural_image
Illustration of hands using a portable coffee machine to generate coffee (no text or symbols visible)To stop the coffee flow, press the selected coffee button or slightly move the slider towards the back of the machine until the coffee flow stops. Please note, a manual top-up is not possible in this case.
To manually top up your coffee, touch any of the coffee buttons within 10 seconds from the end of preparation.
8 9 change the selected cup size during brewing select the new desired coffee button. The machine will immediately stop if the coffee volume extracted is larger than new desired coffee size.
To accommodate a milk recipe glass, lift the cup support.
natural_image
Line drawing of a portable water heater with a gauge and control panel (no text or symbols)1 Automatic OFF mode: the machine will turn into OFF mode automatically after 9 minutes of non-use.
② To change automatic OFF mode from 9 to 30 minutes:
- Ensure the machine is turned OFF - Press and hold both the Lungo and Ristretto buttons for more than 3 sec. Espresso button flashes 3 times for confirmation.
To revert back to 9 minutes, repeat the same procedure. Espresso button flashes once for confirmation.
① Any coffee button can be programmed.
- Ristretto button: from 15 to 30 ml.
- Espresso button: from 30 to 70 ml.
- Lungo button: from 70 to 130 ml.
→ - Ensure the machine is ON - Open the slider and insert the capsule.
- Close the slider
- Press and hold the selected coffee button.
- Release the button when desired volume is reached.
- The 3 coffee buttons flash for confirmation.
- Water volume is now stored for the button used during programming.
If you reset to factory settings, this will cancel the pairing, reset the capsules stock management and the descaling alert.
① Factory settings are:
- Lungo, Espresso, Ristretto coffee buttons 110ml, 40ml, 25ml.
- Automatic OFF mode after 9 minutes.
- The water hardness set by default is hard, which corresponds to around 1000 Espresso cups.
To do it via your machine:
- Ensure the machine is turned OFF.
- Press and hold Espresso & Lungo buttons for at least 5 seconds.
All the coffee buttons and LEDs will blink once as confirmation. To unpair your machine, please refer to the «Troubleshooting section».
Emptying the System before a period of non-use or for frost protection?
1 Remove the water tank. Place a container under the coffee outlet.
2 Ensure the machine is ON, press and hold the Ristretto & Lungo buttons together for at least 6 seconds.
3 The Ristretto and Lungo coffee buttons will flash for confirmation. Then close the slider to start procedure. If the slider was already closed, the emptying process starts automatically. When the procedure is finished, clean the drip tray and the cup support. Machine turns to OFF mode automatically when empty.
natural_image
Illustration of a computer mouse with highlighted parts and arrows indicating action (no text or symbols)Empty the drip tray and the capsule container every day. Also remove lid and water tank and clean them all with odorless detergent and rinse with warm / hot water.
Dry all water tank container parts with a fresh and clean towel, cloth or paper and reassemble all parts. Clean the coffee outlet and inside the machine regularly with a damp cloth.
natural_image
Technical line drawing of a mechanical device with no visible text or symbols4 Do not use any strong or abrasive solvent, sponge or cream cleaner. Do not put in the dishwasher.
Duration approximately 15 minutes. Durée approximative : 15 minutes.

Read the safety precautions on the descaling package and refer to the table for the frequency of use. The descaling solution can be harmful. Avoid contact with eyes, skin and surfaces. Never use any product other than the Nespresso descaling kit available at the Nespresso Club to avoid damage to your machine. The following table will indicate the descaling frequency required for the optimum performance of your machine, based on water hardness. For any additional questions you may have regarding descaling, please contact the Nespresso Club.
natural_image
Diagram showing mechanical components and assembly with arrows indicating motion or force (no text or symbols)① Empty the drip tray and the used capsule container.
② To enter the descaling mode, ensure the machine is ON, press and hold the 3 coffee buttons for 6 seconds until the confirmation with a beep. The 3 buttons will start blinking (buttons will flash until the exit of this mode).
natural_image
Illustration of a hand pouring liquid from a water bottle into a glass (no text or symbols)3 Fill the water tank with 1 unit of Nespresso descaling liquid and add 0.5 L of water.
natural_image
Line drawing of a mechanical device with cylindrical components and a circular button (no text or symbols)4 Place a container (minimum volume: 0.8 L) under the coffee outlet.
natural_image
Illustration of hands using a portable device to press or install a cup (no text or symbols visible)5 Ensure the slider is closed and press any coffee button to start the descaling cycle, pump will run. Machine will stop automatically when water tank is empty.
6 Refill the water tank with the used descaling agent (already passed in the machine) collected into the container.
⑦ Empty the drip tray.
natural_image
Illustration of a mechanical device with a magnified inset showing internal components (no text or symbols)⑧ Press any button to start descaling a second time. Machine will stop automatically when the water tank is empty. Empty and rinse the water tank, drip tray and cup support thoroughly to avoid any residue.
natural_image
Illustration of a kitchen appliance with a hand placing food into it, showing liquid and cups (no text or symbols)9 Refill the water tank with fresh potable water. Press any button to start rinsing the machine, pump will run. Machine will stop automatically when the water tank is empty. Repeat this twice.
To exit the descaling mode, press and hold the 3 buttons for 6 seconds until the confirmation with a beep. The machine is now ready for use.
Videos are available on the App and on www.nespresso.com - Go to section «services».
| Pairing has not succeeded. | - Check that the Bluetooth® on the smartphone or tablet is activated.- Check the compatibility of your smartphone or tablet with the machine (see page 3). | - Ensure the smartphone or tablet is placed next to the machine during the pairing- Make sure to not turn ON any microwave close to the machine during pairing. |
| If you want to unpair your machine, via the app: | - Go on the App «Name», click on «Machine status», then click on «Unpair this machine».- Click on <unpair this device> to confirm the unpairing. | - Note: in case of a unpairing, all the setups and specifications will be lost and the machine will be reset to factory settings. |
| If you want to unpair your machine, via the machine: | - Press simultaneously Ristretto and Espresso buttons and remove the plug from the mains. | - Note: this action will deactivate the Bluetooth® function from the machine. |
| If you want to reactivate the Bluetooth® on your machine, via the machine: | - Please reset to factory settings. See paragraph on «Reset to Factory Settings». | |
| No light on the coffee buttons. | - Machine turns OFF automatically. See paragraph on «Energy Saving Concept». | - Check the mains: plug, voltage, fuse. |
| No coffee, no water, unusual coffee flow. | - Check if the water tank is correctly positioned, if empty, fill with potable water.- Descale it if necessary. | |
| Coffee is not hot enough. | - Preheat cup. | - Descale the machine if necessary. |
| The slider does not close completely or the machine doesn't start brewing. | - Empty the capsule container. | - Check that no capsule is blocked inside the machine.(Note: do not put the finger inside the machine) |
| Leakage (water under the machine). | - Empty drip tray if full. | - If problem persists, call the Nespresso Club. |
| Maintenance light is ON. | - Empty the used capsule container and check no capsules are blocked.- Check the water tank. If empty, fill with potable water and brew a coffee. | - If problem persists, call the Nespresso Club. |
| Nespresso light is ON. | - It means your capsules stock is empty. You can order capsules via the App or Nespresso website. | |
| 3 coffee buttons flash quickly. | - To exit the descaling mode, press and hold the 3 buttons for 6 seconds until the confirmation with a beep. | - If problem persists, call the Nespresso Club, or check the App for more information. |
| Water or coffee flow does not stop even when pushing a coffee button. | - Gently move the slider towards the back of the machine to stop the flow. | |
| No coffee flow, water goes directly into the drip tray (despite inserted capsule). | - Pull the slider to ensure it is closed. | - If problem persists, call the Nespresso Club. |
| Machine turns to OFF mode. | - To save energy the machine will turn to OFF mode after 9 minutes of non-use.- See paragraph on «Energy Saving Concept». | - Press one of the coffee buttons to turn to "ON-mode" or open the slider. |

Dépannage
As we may not have foreseen all uses of your appliance, should you need any additional information, in case of problems or simply to seek advice, call the Nespresso Club or your Nespresso authorised representative. Contact details for your Nespresso Club or your Nespresso authorised representative can be found in the «Welcome to Nespresso» folder in your machine box or at nespresso.com
This appliance complies with the EU Directive 2012/19/EC. Packaging materials and appliance contain recyclable materials. Your appliance contains valuable materials that can be recovered or can be recycled. Separation of the remaining waste materials into different types facilitates the recycling of valuable raw materials. Leave the appliance at a collection point. You can obtain information on disposal from your local authorities. To know more about Nespresso sustainability strategy, go to www.nespresso.com/positive
Krups guarantees this product against defects in materials and workmanship for a period of two years from the date of purchase. During this period, Krups will either repair or replace, at its discretion, any defective product at no charge to the owner. Replacement products or repaired parts will be guaranteed for only the unexpired portion of the original guarantee or six months, whichever is greater. This limited guarantee does not apply to any defect resulting from accident, misuse, improper maintenance, or normal wear and tear. Except to the extent allowed by applicable law, the terms of this limited guarantee do not exclude, restrict or modify, and are in addition to, the mandatory statutory rights applicable to the sale of the product to you. If you believe your product is defective, contact Krups for instructions on where to send or bring it for repair.
natural_image
Technical line drawing of a mechanical device with cylindrical body and rectangular housing (no text or symbols)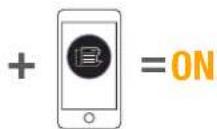
WenndieVerbindung
natural_image
Pure diagram of a mechanical or electrical component with no text, numbers, or symbolsnatural_image
Illustration of a hand pouring liquid from a cup into a clear glass (no text or symbols)natural_image
Diagram of a kitchen appliance with labeled parts and directional arrows (no text or symbols)natural_image
Illustration of a hand using a handheld device to interact with a container (no text or symbols visible)natural_image
Line drawing of a hand pouring liquid from a cup into a container (no text or symbols)natural_image
Illustration of a portable water dispenser with a cup and two cylindrical containers (no text or symbols)natural_image
Illustration of a coffee maker with a hand placing yellow dots into the cup (no text or symbols)natural_image
Line drawing of a coffee machine with a cup and side sink (no text or symbols)natural_image
Illustration of hands using a digital water dispenser to generate coffee (no text or symbols visible)natural_image
Technical line drawing of a mechanical device with cylindrical and base components (no text or symbols)natural_image
Illustration of a mechanical device with clamped parts and highlighted arrows (no text or symbols)natural_image
Technical line drawing of a mechanical device with no visible text or symbolsnatural_image
Illustration of a mechanical device with multiple components and directional arrows indicating motion (no text or symbols)natural_image
Illustration of a hand pouring liquid from a water bottle into a glass (no text or symbols)natural_image
Line drawing of a portable device with two cylindrical containers and a speaker (no text or symbols)natural_image
Illustration of hands using a handheld device to interact with a glass (no text or symbols visible)natural_image
Illustration of a hand pressing down on a device with three dots on its surface (no text or symbols)natural_image
Illustration of a kitchen appliance with a hand inserting food into it, showing a magnified view of the lid (no text or symbols present)natural_image
Technical line drawing of a mechanical device with ports and mounting base (no text or symbols)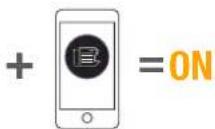
natural_image
Line drawing of a portable electronic device with ports and a lid (no text or symbols)① Máquina de café Prodigio
Máquina de Café Prodigio

MANUAL DE INSTRUÇÕES
natural_image
Pure diagram of a mechanical or electrical component with no text, numbers, or symbolsnatural_image
Illustration of a hand pouring liquid from a cup into a glass (no text or symbols)natural_image
Diagram of a hand using a handheld device to interact with a container (no text or symbols visible)natural_image
Line drawing of a hand pouring liquid from a cup into a container (no text or symbols)natural_image
Illustration of a coffee maker with a cup and side panel, no text or symbols presentnatural_image
Line drawing of a coffee maker with a hand placing yellow dots into the cup (no text or symbols)natural_image
Line drawing of a coffee maker with a glass container and coffee cup (no text or symbols)natural_image
Illustration of hands using a portable coffee machine to generate coffee (no text or symbols visible)natural_image
Diagram of a mechanical device with two cylindrical components and a base housing, no visible text or symbolsnatural_image
Illustration of a mechanical device with clamped parts and highlighted arrows (no text or symbols)natural_image
Technical line drawing of a mechanical device with no visible text or symbolsnatural_image
Diagram showing a mechanical assembly with components and directional arrows, no readable text or symbols present.natural_image
Illustration of a hand pouring liquid from a water bottle into a glass (no text or symbols)natural_image
Illustration of hands operating a portable device with a yellow circular icon (no text or symbols)natural_image
Diagram of a laboratory apparatus with a magnified view showing internal components (no text or labels)natural_image
Illustration of a hand using a blender with three cups and a close-up of the lid (no text or symbols)natural_image
Line drawing of a mechanical device with ports and a base plate (no text or symbols)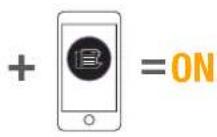
Jakmile je propojení dokončeno, Nespresso kontrolka 3krát zabliká.
natural_image
Line drawing of a portable water dispenser device with control panel and cylindrical body (no text or symbols)natural_image
Illustration of a hand pouring liquid from a cup into a glass (no text or symbols)natural_image
Diagram of a kitchen appliance with labeled parts and directional arrows indicating assembly (no text or symbols present)4 Nasad'te nádobu
natural_image
Illustration of a hand using a handheld device to interact with a cylindrical container (no text or symbols visible)natural_image
Line drawing of a hand pouring liquid from a cup into a container (no text or symbols)natural_image
Illustration of a portable water dispenser with a cup and control panel (no text or symbols)natural_image
Illustration of a coffee maker with a hand placing yellow dots into the cup (no text or symbols)natural_image
Line drawing of a coffee maker with a cup and side cups (no text or symbols)natural_image
Illustration of a hand using a small water dispenser to add beverages into a glass (no text or symbols visible)natural_image
Technical illustration of a mechanical device with cylindrical and base components (no text or symbols)natural_image
Illustration of a mechanical device with clamped parts and highlighted arrows (no text or symbols)natural_image
Technical line drawing of a mechanical device with no visible text or symbolsnatural_image
Illustration of a mechanical device with cutouts and a close-up view of a component (no text or symbols)natural_image
Illustration of a hand pouring liquid into a glass bottle (no text or symbols)natural_image
Line drawing of a portable device with two cylindrical containers and a side-mounted cup (no text or symbols)natural_image
Illustration of hands using a handheld device to press or install a container, with a yellow circular icon nearby (no text or symbols)natural_image
Illustration of a hand using a tool to interact with a device, showing no text or symbols present.natural_image
Illustration of a kitchen appliance with a hand inserting food into it, showing liquid and cups (no text or symbols)natural_image
Illustration of a hand pouring liquid from a cup into a glass (no text or symbols)natural_image
Diagram of a kitchen appliance with labeled parts and directional arrows indicating assembly (no text or symbols present)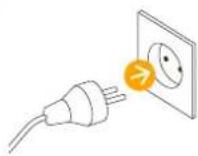
natural_image
Illustration of a hand using a handheld device to interact with a container (no text or symbols visible)natural_image
Line drawing of a hand pouring liquid from a cup into a container (no text or symbols)natural_image
Illustration of a portable water dispenser with a cup and inlet, no text or symbols presentnatural_image
Illustration of a coffee machine with a hand placing yellow dots into the top panel (no text or symbols)natural_image
Illustration of a coffee maker with a cup and side sink (no text or symbols)natural_image
Illustration of hands using a portable coffee machine to generate coffee (no text or symbols visible)natural_image
Line drawing of a portable electronic device with a pressure gauge above it (no text or symbols)natural_image
Technical line drawing of a mechanical device with cylindrical components and mounting base (no text or symbols)natural_image
Illustration of a mechanical device with clamped parts and a highlighted component (no text or symbols)natural_image
Technical line drawing of a mechanical device with no visible text or symbolsnatural_image
Illustration of a mechanical device with multiple components and directional arrows indicating motion (no text or symbols)natural_image
Illustration of a hand pouring liquid from a water bottle into a glass (no text or symbols)natural_image
Line drawing of a portable water dispenser with two cups and a cylindrical tank (no text or symbols)natural_image
Illustration of hands using a portable device to press or install a cup (no text or symbols visible)natural_image
Illustration of a laboratory instrument with a magnified view showing internal components (no text or symbols)natural_image
Illustration of a handwashing machine with a magnified inset showing teeth and cup (no text or symbols)natural_image
Illustration of a hand pouring liquid from a cup into a container (no text or symbols)natural_image
Diagram of a portable electronic device with ports and internal components, showing no text or symbols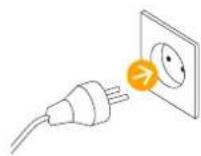
natural_image
Illustration of a hand inserting into a device with a magnified circular detail showing internal components (no text or symbols)natural_image
Line drawing of a hand pouring liquid from a cup into a container (no text or symbols)natural_image
Line drawing of a portable water dispenser with a cup and two cylindrical tanks (no text or symbols)natural_image
Illustration of a hand pressing down on a coffee machine with yellow dots and a checkmark (no text or symbols)natural_image
Illustration of a coffee maker with a cup and side panel (no text or symbols)natural_image
Illustration of hands using a portable tea machine to generate tea (no text or symbols visible)natural_image
Diagram of a mechanical device with a highlighted section showing tool positioning (no text or symbols present)natural_image
Technical diagram of a mechanical device with two cylindrical components and a base housing (no text or symbols)natural_image
Illustration of a mechanical device with exploded view and highlighted components (no text or symbols)natural_image
Technical line drawing of a mechanical device with a cylindrical component and a base plate (no text or symbols)natural_image
Illustration of a kitchen appliance with cutouts and a tray, no text or symbols presentnatural_image
Illustration of a hand pouring liquid from a water bottle into a container (no text or symbols)natural_image
Line drawing of a mechanical device with cylindrical components and a cylindrical housing (no text or symbols)natural_image
Illustration of hands using a device to press or install a container with liquid, no text or symbols presentnatural_image
Illustration of a kitchen appliance with a hand inserting into it, showing a yellow circular component and a glass bowl (no text or symbols)natural_image
Illustration of a hand placing yellow dots into a container with a cup nearby (no text or symbols)- Pairing / Connectivity Functions/
- QUELLES SONT LES FONCTIONS DISPONIBLES?
- Prodigio Packaging Content/
- INSTRUCTION MANUAL
- CAUTION: when you see this sign, please refer to the safety precautions to avoid possible harm and damage.
- XN410 Specifications/ XN410 Spécifications techniques
- Pmax
- Prodigio Table des matières
- Content/
- MODE D'EMPLOI
- Avoid risk of fatal electric shock and fire.
- Safety Precautions
- The appliance must only be connected after installation.
- Avoid possible harm when operating the appliance.
- Descaling
- SAVE THESE
- INSTRUCTIONS
- ① Factory settings are:
- Emptying the System before a period of non-use or for frost protection?
- Dépannage
- MANUAL DE INSTRUÇÕES
- Nasad'te nádobu
Brand : KRUPS
Model : Nespresso Prodigio XN410T
Category : Coffee maker