
SDB 1500 B2 - Steam cleaner SILVERCREST - Free user manual and instructions
Find the device manual for free SDB 1500 B2 SILVERCREST in PDF.


| Brand | SilverCrest |
| Model | SDB 1500 B2 |
| Product type | Steam cleaner |
| Power | 1500 W |
| Water tank capacity | 1 L |
| Weight | 2.5 kg |
| Dimensions (L × W × H) | 30 × 20 × 25 cm |
| Power supply | Mains 220-240 V ~ 50/60 Hz |
| Power cable | 4 m |
| Heating time | Approx. 3 minutes |
| Steam pressure | Up to 3 bar |
| Adjustable steam output | Yes, continuous or trigger-activated |
| Auto shut-off function | Yes, when tank is empty |
| Child safety | Trigger lock |
| Included accessories | Precision nozzle, round brush, squeegee, textile adapter |
| Usage | Cleaning hard floors, windows, joints, stoves, textiles |
| Maintenance | Regular descaling recommended |
| Repairability index | 6.5/10 |
Frequently Asked Questions - SDB 1500 B2 SILVERCREST
User questions about SDB 1500 B2 SILVERCREST
0 question about this device. Answer the ones you know or ask your own.
Ask a new question about this device
Download the instructions for your Steam cleaner in PDF format for free! Find your manual SDB 1500 B2 - SILVERCREST and take your electronic device back in hand. On this page are published all the documents necessary for the use of your device. SDB 1500 B2 by SILVERCREST.
USER MANUAL SDB 1500 B2 SILVERCREST
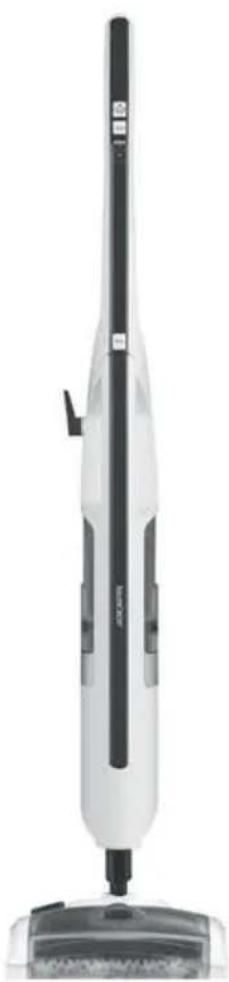
natural_image
Exterior view of a white and black vacuum cleaner (no visible text or symbols)DAMPFBESEN / STEAM MOP BALAI VAPEUR SDB 1500 B2
DE AT CH
DAMPFBESEN
Bedienungsanleitung
FR BE
BALAI VAPEUR
Mode d'emploi
CZ
PARNÍ KOŠTĚ
Návod k obsluze
PT
VASSOURA A VAPOR
Operating instructions
NL BE
VLOERSTOOMREINIGER
Gebruiksaanwijzing
ES
ESCOBA DE VAPOR
Before reading, unfold the page containing the illustrations and familiarise yourself with all functions of the device.
FR BE
natural_image
Interior view of a cleaning machine with brushwork arrangement and directional arrows (no text or symbols)Abb. 2
KOMPERNASS HANDELS GMBH
BURGSTRASSE 21
DE-44867 BOCHUM
DEUTSCHLAND
www.kompernass.com
HINWEIS
Information about these operating instructions 22
Copyright 22
Intended use 22
Safety information 23
Operating elements 27
Unpacking and installation 28
Safety information 28
Package contents and transport inspection 28
Unpacking 28
Disposal of the packaging 29
Assembling the appliance 29
Handling and use 30
Filling with water 30
Operation 31
After use 33
Cleaning and maintenance .... 3 3
Cleaning the rotary brush 34
Replacing the filter 35
Troubleshooting....36
Storage 36
Disposal 37
Attachment 37
Technical data 37
Ordering replacement parts 40
Introduction
Information about these operating instructions
Congratulations on the purchase of your new appliance.
You have selected a high-quality product. The operating instructions are part of this product. They contain important information about safety, usage and disposal. Before using the product, please familiarise yourself with all operating and safety instructions. Use the product only as described and for the range of applications specified. Please also pass these operating instructions on to any future owner.
Copyright
This documentation is protected by copyright.
Any copying or reproduction, including in the form of extracts, or any reproduction of images (even in a modified state), is permitted only with the written authorisation of the manufacturer.
Intended use
This appliance is intended exclusively for cleaning indoor floors. The appliance is not intended for any other purpose, nor for use beyond the scope described. The appliance is not intended for use in commercial or industrial environments.
The manufacturer accepts no responsibility for damage caused by failure to observe these instructions, improper use or repairs, unauthorised modifications on the use of unapproved replacement parts. The operator bears sole liability.
Safety information

RISK OF ELECTRICAL SHOCK!
- Connect the appliance only to mains power sockets supplying a mains power voltage of 220–240 V \~, 50/60 Hz.
▶ In the event of operating malfunctions, and before cleaning the appliance, disconnect the plug from the mains power socket.
▶ Always pull on the plug to disconnect the appliance from the mains; never pull on the power cable itself.
▶ Do not kink or crush the power cable, and route the cable so that it cannot be stepped on or tripped over.
▶ To avoid risks, arrange for defective plugs and/or power cables to be replaced at once by qualified technicians or our Customer Service Department. - Ensure that the power cable does not become wet or damp during use. Route the cable in such a way that it cannot be crushed or damaged.
▶ To prevent risks, stop using the appliance immediately if it is damaged. - Disconnect the appliance from the mains power socket before filling it with water, changing accessories or cleaning it.

Use the appliance only in dry indoor areas, not outdoors.
▶ Never submerse the appliance in water or other liquids!
▶ Never aim the steam jet directly at electrical appliances or equipment which contains electrical components, such as the interior of ovens.

RISK OF ELECTRICAL SHOCK!
▶ Operate the appliance only with dry hands and never without shoes (i.e. not barefoot). This will help reduce the effect of an electric shock in the event of a malfunction.
▶ Never aim the appliance at moisture-sensitive objects.
This appliance may be used by persons with limited physical, sensory or mental capabilities or lack of experience and knowledge, provided that they are under supervision or have been told how to use the appliance safely and are aware of the potential risks. Do not allow children to use the appliance as a toy. Cleaning and user maintenance tasks may not be carried out by children unless they are supervised.

WARNING! RISK OF INJURY!
▶ Some parts of the appliance may become hot during use! There is a risk of scalding!
- Allow the accessories used to cool down before dismantling them.
▶ Use only the original accessory parts for this appliance. Other accessories may not meet the safety requirements.
The appliance may not be used if it has been dropped, if there are any obvious signs of physical damage or if it is leaking.
The appliance must be kept out of the reach of children if it is switched on or is cooling down.
▶ Never direct the steam toward people or animals. Hot steam can cause serious injuries!
▶ Always pull the plug out of the power socket during each break in use, as well as after use and before any cleaning.

RISK OF BURNS!

Caution! Hot surface!

This symbol warns you about escaping steam. Please follow the safety instructions!

CAUTION! PROPERTY DAMAGE!
▶ Use the appliance only on treated floors that are impervious to water and made of marble, stone, tile, parquet flooring or hardwood.
▶ Never use the appliance ...
-... on untreated or permeable floors,
-... on glass surfaces,
-... on soft plastic surfaces,
-... on floors that have been treated with wax,
-... on carpets with wool content.
▶ Always observe the cleaning instructions of the carpet manufacturer. Before cleaning, check also whether the carpet is suitable for steam cleaning.
▶ Use the appliance only parquet floors that have been hard-sealed.
▶ Do not leave the appliance standing on wooden floors for any length of time when it is switched on. The wood could swell.
▶ Do not operate the appliance with an empty water tank. Otherwise, the pump could run empty and overheat.
- Do not use an external timer switch or a separate remote control system to operate the appliance.

CAUTION! PROPERTY DAMAGE!
▶ Never leave the appliance unattended during operation.
▶ Do not use the appliance outdoors.
- Ensure that the appliance, the power cable and the plug do not come into contact with heat sources such as hotplates or naked flames.
- Do not add any vinegar, descaling products or other perfumed substances into the tank: this will void the guarantee.
▶ Do not run over the mains cable with the rotary brush!
Operating elements
(For illustrations see the fold-out page)
Figure A:
① "Handle" release button
② Carrying handle
③ Main unit
4 Connection nozzle
5 Steam broom
⑥ Pad for hard floors
7 Dust container
⑧ Start/Stop switch "Broom" ①
9 Filter
10 Water tank
⑪ "Water tank" release button
12 POWER control lamp
13 Red control lamp "high steam level"
14 Green control lamp "low steam level"
15 MODE button
16 "Steam" button
Figure B:
⑰ Notch
18 Upper cable hook
19 On/Off switch
20 Lower cable hook
Figure C:
21 Pad for soft floors
22 Carpet ring release aid
23 Carpet ring
Unpacking and installation
Safety information
WARNING
While using the appliance, there is a risk of injury and/or damage to property!
To avoid risks, observe the following safety instructions:
- Do not allow children to play with packaging materials. Risk of suffocation.
Package contents and transport inspection
Standard delivery of the appliance includes the following components (see fold-out page):
- Main unit
- Steam broom
- Carpet ring
- Pad for hard floors
- Pad for soft floors
- Operating instructions
NOTE
▶ Check the package for completeness and for signs of visible damage.
▶ If any items are missing or damaged as a result of defective packaging or transportation, contact the service hotline (see section "Service").
Unpacking
◆ Remove all parts of the appliance and the operating instructions from the box.
◆ Remove all packaging materials and any films and labels.
Disposal of the packaging
The packaging protects the appliance from damage during transport. The packaging materials have been selected for their environmental friendliness and ease of disposal, and are therefore recyclable.

Returning the packaging to the material cycle conserves raw materials and reduces the amount of waste that is generated. Dispose of packaging materials that are no longer needed in accordance with applicable local regulations.
NOTE
▶ If possible, keep the appliance's original packaging during the warranty period so that the appliance can be packed properly for return shipment in the event of a warranty claim.
Assembling the appliance
- Undo the screw with the plastic protector ⊕ from the connection nozzle using a Phillips screwdriver.
◆ Remove the plastic protection
♦ Push the main unit ③ into the connection nozzle ④ on the steam broom ⑤.
Use the previously removed screw and a Phillips screwdriver to screw the main unit ③ onto the connection nozzle ④.
◆ Attach a pad ⑥/⑳ from below onto the steam broom ⑤.
NOTE
▶ You can use the pad for hard floors ⑥ to clean stone floors, for example. With the pad for soft floors ②1, you can clean certain types of carpets.
If you intend to clean carpeting, fit the steam broom ⑤ onto the carpet ring ②3. Make sure that the carpet ring release aid ②2 points towards the recess on the steam broom ⑤. Push the steam broom ⑤ onto the carpet ring ②3 so that it clicks into place. This will allow the steam broom ⑤ to slide over the carpet.
To remove the carpet ring 23, press your foot onto the carpet ring release aid 22. Pull the steam broom 5 carefully off the carpet ring 23.
Handling and use
This section provides you with important information on handling and using the appliance.
Filling with water
CAUTION - PROPERTY DAMAGE!
▶ Never operate the appliance without water in the water tank ⑩! The pump could overheat and be damaged!
1) Push the "Water tank" release button ⑪ downwards. At the same time, pull the water tank ⑩ off the appliance with a tilting motion towards the rear.
2) Turn the water tank ⑩ over and unscrew the cap.
3) Fill the water tank ⑩ with tap water up to the MAX mark.
NOTE
If the mains water in your location is rated as hard, we recommend that you mix the mains water with some distilled water. Otherwise, the jets for the steam blast function could become blocked with limescale prematurely.
To extend the optimal steam blast function, mix mains water with distilled water according to the table:
| Water hardness | Ratio of distilled water to tap water |
| very soft/soft 0 | |
| medium 1:1 | |
| hard 2:1 | |
| very hard 3:1 |
Ask your local water utility about the water hardness in your area.
4) Screw on the camp hand-tight.
5) Turn the water tank ⑩ back around and place it back onto the main unit ③: First, insert the lower part into the main unit ③ and then flip the top part into the appliance. Push it firmly into place so that the water tank ⑩ audibly clicks into place and sits firmly onto the main unit ③.
Operation
CAUTION - PROPERTY DAMAGE!
▶ If you are not sure whether the floor is suitable for cleaning, test an unexposed part for compatibility beforehand.
▶ Always observe the cleaning instructions of the carpet manufacturer. Before cleaning, check also whether the carpet is suitable for steam cleaning.
▶ Never use the appliance without a pad ⑥/② on the steam broom ⑤. Otherwise the floor could get scratched!
▶ Never operate the appliance without water in the water tank Ⓜ! The pump could overheat and be damaged!
NOTE
▶ To achieve the best results, first use the broom and then the steam function. If you do not want to use the broom function, we recommend vacuuming the floor first to remove any loose particles of dirt.
Once the appliance is assembled and filled with water:
1) Press and hold in the "Handle" release button ① and flip the handle upwards so that it clicks into place.
2) If you have not already done so, completely unwind the power cable from the cable hooks 18/20. To facilitate the unwinding of the cable, you can flip down the upper cable hook 18. To do this, pull the cable hook 18 out a little way and turn it at the same time.
3) Run the cable through the notch ⑰ on the rear of the handle so that the cable does not hang down into the working area.
4) Insert the plug into the mains power socket.
5) Set the On/Off switch 19 to "I". The On/Off switch 19 lights up, the red POWER control lamp 12 flashes.
6) Use the MODE button 15 to select the desired level of steam generation:
- Press 1 x: low steam level, green control lamp ⑭ lights up.
- Press 2 x: high steam level, red control lamp 13 lights up.
- Press 3 x: no steam, standby, POWER control lamp ⑫ lights up.
NOTE
▶ We recommend the high steam level especially for moisture- and heat-resistant floor coverings, such as tiles.
▶ We recommend the low steam level especially for moisture- and heat-sensitive floor coverings, such as parquet flooring.
7) Wait around 30 seconds while the appliance heats up.
8) Press the "Steam" button 16. The appliance starts generating steam. After a short time, steam is emitted through the underside of the steam broom 5.
9) If required, switch on the broom function by pressing the Start/Stop switch "Broom"
10) Wipe over the desired area.
NOTE
Once the water tank 10 is pumped empty, the pump will continue to run for a short while. The empty water tank 10 is indicated by the simultaneous flashing of the control lamps 12, 13 and 14.
If the water tank ⑩ empties during use:
- Press the "Steam" button 16 again to stop steam production.
- Set the On/Off switch 19 to "O".
- Remove the water tank 10, fill it and replace the water tank 10 as described in the section "Filling with water".
- Set the On/Off switch 19 to "I".
- Select the desired steam level as described above and press the "Steam" button 16.
11) When you are finished treating all of the surfaces, press the "Steam" button ⑯ to stop steam production.
12) If you have activated the broom function, deactivate it by pressing the Start/Stop switch "Broom" ① again.
13) Set the On/Off switch ⑲ to "O". The POWER control lamp ⑫ goes out.
14) Remove the plug from the mains power socket.
NOTE
▶ If you see streaks on the floor after cleaning with the appliance, this may be due to the previously used cleaning fluids. Simply clean the floor again using the steam mop. The smears should now be gone.
After use
1) Allow the appliance to cool down.
2) Remove the pad for hard floors ⑥ or the pad for soft floors ②1.
3) Remove the water tank 10 from the appliance and empty it.
4) Pull the upper cable hook 18 out a little and turn it back upwards. Wind the cable around the two cable hooks 18/20.
Fix the end of the power cable using the cable clip on the cable.
5) Pull the dust container ⑦ upwards out of the steam broom ⑤ and empty the dust container ⑦. Reinsert the dust container ⑦ into the steam broom ⑤.
Cleaning and maintenance

RISK OF ELECTRICAL SHOCK!
▶ Always remove the mains power plug before cleaning the appliance!

ARNING - RISK OF INJURY!
▶ Allow the appliance to cool down before cleaning it. Risk of burns!
CAUTION - PROPERTY DAMAGE
▶ Do not use abrasive or chemical cleaners, nor pointed or scratchy objects to clean the appliance's surfaces.
■ Empty the water tank ⑩ after every use.
■ After each use, remove the pad ⑥/②1 from the steam broom ⑤ and wash it out.
Note the following washing instructions when you wash the pads ⑥/21 in the washing machine:

Wash at max. 60°C

Do not tumble dry

Do not iron

Do not bleach
If necessary, wipe the appliance with a damp cloth. For stubborn soiling use a mild detergent on the cloth.
Cleaning the rotary brush
Large accumulations of dirt or threads can collect in the rotary brush "B" (see Fig. 1). If the rotary brush "B" stops turning, proceed as follows:
Remove the rotary brush "B":

RISK OF ELECTRICAL SHOCK!
Before cleaning the rotary brush "B" (see Fig. 1), remove the plug from the mains power socket.
1) Turn the steam broom ⑤ around and hold it so that the rotary brush "B" is facing you.
2) If you have not already done so, pull off the carpet ring 23.
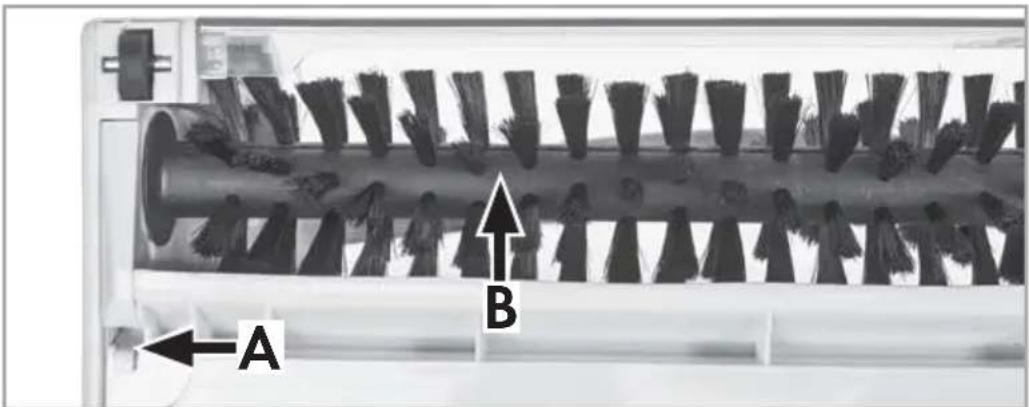
Fig. 1
3) Pull the hook on the locking device "A" (see Fig. 1).
4) Pull the rotary brush "B" upwards out of the housing and then pull it out to the side.
5) Remove any dirt (on both sides of the brush bristles) and clean the rotary brush "B". To do this, take a damp cloth and wipe the individual bristle bundles from the inside to the outside.
Reinsert the rotary brush "B":
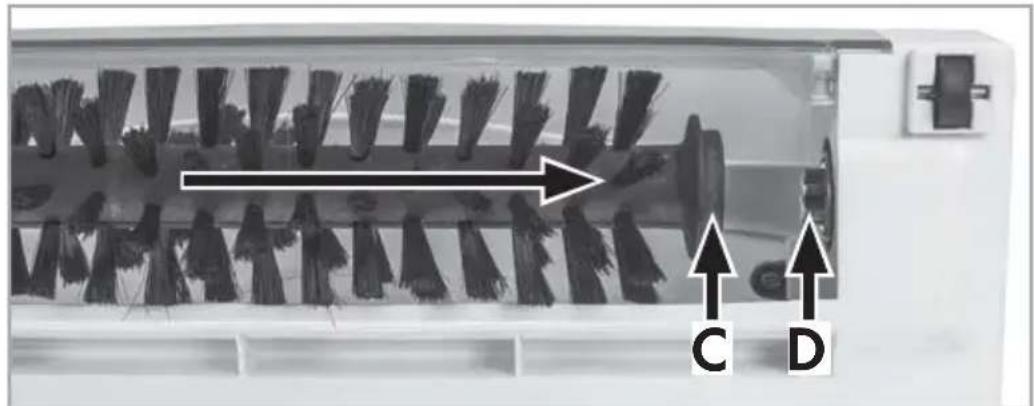
natural_image
Interior view of a laboratory incubator with rows of dried herbs and an arrow indicating direction (no text or symbols visible)Fig. 2
6) Push the side of the rotary brush "B" with the recess "C" onto the drive shaft "D" (see Fig. 2).
7) Push the other end of the rotary brush "B" into the housing so that the rotary brush "B" sits straight in the housing again.
8) Reinsert locking device "A" and let it click into place.
Replacing the filter
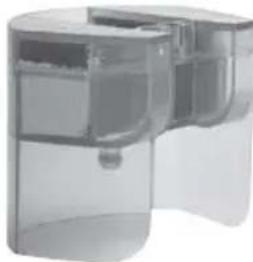
After 4-6 months, or approximately 100 cleaning cycles (one cycle corresponds to one water tank filling), you will need to change the filter ⑨. Please contact our Service Department for replacement filters.

RISK OF ELECTRICAL SHOCK!
Before changing the filter ⑨, always pull out the mains plug!
To remove the filter ⑨, first remove the water tank ⑩ from the appliance.
9) Pull the filter ⑨ upwards out of the appliance.
10) Insert the new filter ⑨.
11) Replace the water tank ⑩.
Troubleshooting
| Programme Possible causes Possible solutions | ||
| The appliance is not working. | The plug is not connected. | Connect the appliance to a mains power socket. |
| The appliance produces no steam. | The "Steam" button 16 has not been pressed. | Press the "Steam" button 16. |
| There is no water in the water tank 10. | Fill the water tank with water 10. | |
| The filter 9 is blocked. | Change the filter 9. | |
| No steam setting has been selected. | Use the MODE button 15 to select the desired steam strength. | |
| The pump makes unusually loud noises. | There is no water in the water tank 10. | Fill the water tank with water 10. |
| A whitish edge forms on the floor when the appliance stops briefly during operation. | Lime has been deposited. | Wipe the lime scale away with a damp cloth. If necessary, add a little descaler onto the cloth. |
| The rotary brush "B" (see Fig. 1 on page 34) makes loud noises when it rotates. | The rotary brush "B" is dirty. | Clean the rotary brush "B". |
| The rotary brush "B" is not inserted properly. | Check whether the rotary brush "B" is fitted correctly and correct the fitting if required. | |
Storage
- Fold the handle by pressing the "Handle" release button ①.
Pull the upper cable hook ⑱ out a little and turn it back upwards. Wind the cable around the two cable hooks ⑱/⑳. Fix the end of the cable to any part of the already wound up cable using the cable clip. - Carry the appliance using the carrying handle ②.
■ Store the appliance in a dry and dust-free location.
Disposal
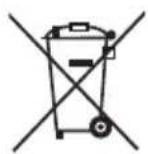
Never dispose of the appliance in your normal domestic waste. This product is subject to the provisions of European Directive 2012/19/EU-WEEE (Waste Electrical and Electronic Equipment).
Dispose of the appliance via an approved disposal company or your municipal waste facility. Please observe the currently applicable regulations. Please contact your waste disposal facility if you are in any doubt.
Attachment
Technical data
| Power supply | 220-240 V ~ (AC current), 50/60 Hz |
| Power consumption 1370-1630 W | |
| Protection class | IPX4 Protection against water splashes from any direction. |
Information about the pads ⑥/⑳
| Material composition | 6 85% polyester 15% cotton21 80% polyester 20% cotton |
 | Wash at max. 60°C |
 | Do not tumble dry |
 | Do not iron |
 | Do not bleach |
This appliance has a 3-year warranty valid from the date of purchase. If this product has any faults, you, the buyer, have certain statutory rights. Your statutory rights are not restricted in any way by the warranty described below.
Warranty conditions
The validity period of the warranty starts from the date of purchase. Please keep your original receipt in a safe place. This document will be required as proof of purchase.
If any material or production fault occurs within three years of the date of purchase of the product, we will either repair or replace the product for you at our discretion. This warranty service is dependent on you presenting the defective appliance and the proof of purchase (receipt) and a short written description of the fault and its time of occurrence.
If the defect is covered by the warranty, your product will either be repaired or replaced by us. The repair or replacement of a product does not signify the beginning of a new warranty period.
Warranty period and statutory claims for defects
The warranty period is not prolonged by repairs effected under the warranty. This also applies to replaced and repaired components. Any damage and defects present at the time of purchase must be reported immediately after unpacking. Repairs carried out after expiry of the warranty period shall be subject to a fee.
Scope of the warranty
This appliance has been manufactured in accordance with strict quality guidelines and inspected meticulously prior to delivery.
The warranty covers material faults or production faults. The warranty does not extend to product parts subject to normal wear and tear or fragile parts such as switches, batteries, baking moulds or parts made of glass.
The warranty does not apply if the product has been damaged, improperly used or improperly maintained. The directions in the operating instructions for the product regarding proper use of the product are to be strictly followed. Uses and actions that are discouraged in the operating instructions or which are warned against must be avoided.
This product is intended solely for private use and not for commercial purposes. The warranty shall be deemed void in cases of misuse or improper handling, use of force and modifications / repairs which have not been carried out by one of our authorised Service centres.
Warranty claim procedure
To ensure quick processing of your case, please observe the following instructions:
■ Please have the till receipt and the item number (e.g. IAN 12345) available as proof of purchase.
■ You will find the item number on the type plate, an engraving on the front page of the instructions (bottom left), or as a sticker on the rear or bottom of the appliance.
If functional or other defects occur, please contact the service department listed either by telephone or by e-mail.
■ You can return a defective product to us free of charge to the service address that will be provided to you. Ensure that you enclose the proof of purchase (till receipt) and information about what the defect is and when it occurred.

You can download these instructions along with many other manuals, product videos and software on www.lidl-service.com.
Service
GB Service Great Britain
Tel.: 0871 5000 720 (£ 0.10/Min.)
E-Mail: kompernass@lidl.co.uk
IE Service Ireland
Tel.: 1890 930 034
(0,08 EUR/Min., (peak))
(0,06 EUR/Min., (off peak))
E-Mail: kompernass@lidl.ie
IAN 276981
Importer
Please note that the following address is not the service address. Please use the service address provided in the operating instructions.
KOMPERNASS HANDELS GMBH
BURGSTRASSE 21
DE-44867 BOCHUM
GERMANY
www.kompernass.com
Ordering replacement parts
You can order the following replacement parts for product SDB 1500 B2:
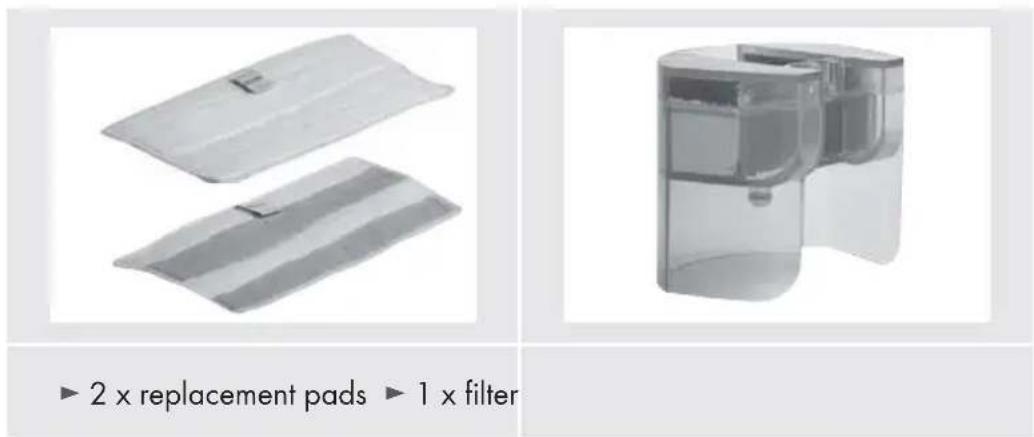
Order the spare parts via the service hotline (see section "Service") or simply visit our website at www.kompernass.com.

NOTE
▶ Have the IAN number of the appliance ready (can be found on the cover of these operating instructions) when you place your order.
Table des matières
Introduction 42
natural_image
Interior view of a refrigerator with rows of bristles and directional arrows indicating flow or movement (no text or symbols)Fig. 2
KOMPERNASS HANDELS GMBH
BURGSTRASSE 21
DE-44867 BOCHUM
ALLEMAGNE
www.kompernass.com
REMARQUE
WAARSCHUWING! LETSELGEVAAR!
8 Start/stop-schakelaar "Mop①
9 Filter
10 Waterreservoir
⑪ Ontgrendelingsknop "Waterreservoir"
AARSCHUWING - LETSELGEVAAR!
natural_image
Close-up of a mechanical device with multiple blades and a directional arrow, labeled C and D (no text or symbols on the blades themselves)Afb. 2
KOMPERNASS HANDELS GMBH
BURGSTRASSE 21
DE-44867 BOCHUM
DUITSLAND
www.kompernass.com
natural_image
Two stacked rectangular sheets with no visible text or symbols▶ 2 x reservepad ▶ 1 x filter
natural_image
Cross-sectional view of a transparent cylindrical device with internal compartments and a central component (no visible text or symbols)OPMERKING
POZOR - HMOTNÉ ŠKODY!
POZOR - HMOTNÉ ŠKODY!
natural_image
Close-up of a mechanical device with multiple blades and a central shaft, labeled A and B (no readable text or symbols beyond labels)Obr. 1
natural_image
Interior view of a laboratory or industrial equipment unit with rows of black bristles and directional arrows indicating flow or movement (no text or symbols visible)Obr. 2
KOMPERNASS HANDELS GMBH
BURGSTRASSE 21
DE-44867 BOCHUM
NĚMECKO
www.kompernass.com
UPOZORNĚNÍ
natural_image
Interior view of a mechanical device with multiple blades and a directional arrow indicating flow or movement (no text or symbols visible)Fig. 2
KOMPERNASS HANDELS GMBH
BURGSTRASSE 21
DE-44867 BOCHUM
ALEMANIA
www.kompernass.com
Pedido de recambios
INDICACIÓN
natural_image
Interior view of a mechanical device with multiple blades and a directional arrow indicating flow or movement (no text or symbols visible)Fig. 2
KOMPERNASS HANDELS GMBH
BURGSTRASSE 21
DE-44867 BOCHUM
ALEMANHA
www.kompernass.com
NOTA
KOMPERNASS HANDELS GMBH
BURGSTRASSE 21
DE-44867 BOCHUM
GERMANY
www.kompernass.com
Stand der Informationen · Last Information Update · Version des informations
Stand van de informatie · Stav informací · Estado de las informaciones · Estado das informações:
06 / 2017 · Ident.-No.: SDB1500B2-012017-3
- DAMPFBESEN / STEAM MOP BALAI VAPEUR SDB 1500 B2
- DAMPFBESEN
- BALAI VAPEUR
- PARNÍ KOŠTĚ
- VASSOURA A VAPOR
- VLOERSTOOMREINIGER
- ESCOBA DE VAPOR
- FR BE
- Abb. 2
- HINWEIS
- Safety information 23
- Operating elements 27
- Unpacking and installation 28
- Assembling the appliance 29
- Handling and use 30
- Cleaning and maintenance .... 3 3
- Replacing the filter 35
- Troubleshooting....36
- Storage 36
- Disposal 37
- Attachment 37
- Introduction
- Information about these operating instructions
- Copyright
- Intended use
- Safety information
- RISK OF ELECTRICAL SHOCK!
- WARNING! RISK OF INJURY!
- RISK OF BURNS!
- CAUTION! PROPERTY DAMAGE!
- Operating elements
- Unpacking and installation
- WARNING
- While using the appliance, there is a risk of injury and/or damage to property!
- Package contents and transport inspection
- NOTE
- Unpacking
- Disposal of the packaging
- Assembling the appliance
- Handling and use
- Filling with water
- CAUTION - PROPERTY DAMAGE!
- Operation
- After use
- Cleaning and maintenance
- ARNING - RISK OF INJURY!
- CAUTION - PROPERTY DAMAGE
- Cleaning the rotary brush
- Replacing the filter
- Storage
- Disposal
- Attachment
- Technical data
- Warranty conditions
- Warranty period and statutory claims for defects
- Scope of the warranty
- Warranty claim procedure
- Service
- Importer
- Ordering replacement parts
- Table des matières
- Introduction 42
- REMARQUE
- WAARSCHUWING! LETSELGEVAAR!
- AARSCHUWING - LETSELGEVAAR!
- OPMERKING
- POZOR - HMOTNÉ ŠKODY!
- UPOZORNĚNÍ
- Pedido de recambios
- INDICACIÓN
- NOTA
Brand : SILVERCREST
Model : SDB 1500 B2
Category : Steam cleaner