
KG39V2LEA - Refrigerator SIEMENS - Free user manual and instructions
Find the device manual for free KG39V2LEA SIEMENS in PDF.


| Product type | Combined fridge-freezer |
| Brand | Siemens |
| Model | KG39V2LEA |
| Dimensions (H x W x D) | 1860 x 700 x 700 mm (estimated) |
| Weight | Approximately 80 kg (estimated) |
| Power supply | 220-240 V, 50 Hz |
| Climate class | SN-ST (temperate to subtropical, estimated) |
| Refrigerator volume | Approximately 250 L (estimated) |
| Freezer volume | Approximately 100 L (estimated) |
| Defrost type | Manual (unconfirmed information) |
| Interior lighting | LED, replaceable by a technician |
| Number of doors | 2 |
| Shelf material | Glass (unconfirmed information) |
| Main functions | Refrigeration and freezing, adjustable shelves, vegetable drawer, bottle rack |
| Maintenance and cleaning | Interior cleaning with soft cloth, manual defrost if necessary |
| Safety | Unplug before repair, wear protective gloves, avoid electric shocks |
| Spare parts and repairability | Original parts available: door gasket, handles, hinges, shelves, bins, LED lighting. Repair possible by the consumer according to instructions |
| General information | Repair manual provided, Torx TX20 and flat screwdriver required |
Frequently Asked Questions - KG39V2LEA SIEMENS
User questions about KG39V2LEA SIEMENS
0 question about this device. Answer the ones you know or ask your own.
Ask a new question about this device
Download the instructions for your Refrigerator in PDF format for free! Find your manual KG39V2LEA - SIEMENS and take your electronic device back in hand. On this page are published all the documents necessary for the use of your device. KG39V2LEA by SIEMENS.
USER MANUAL KG39V2LEA SIEMENS


Ремонт



Ремонт
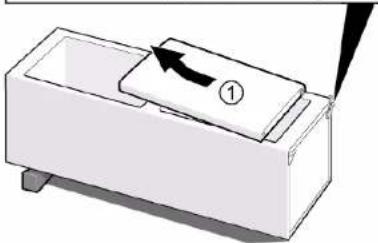
Рафтът е свален.


Ремонт


Popravak

Brtva vrata je postavljena.

Popravak


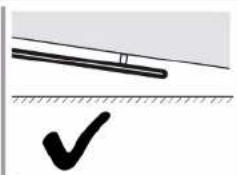

Popravak
-
- Pritisnite poklopac gornjeg zgloba s obje strane (1).
-
Izvadite poklopac gornjeg zgloba (2).
- Okrenite poklopac zgloba (3).
- Uklonite poklopac gornjeg zgloba (4).
- Odvijte dva vijka (5).
- Uklonite gornji zglob (6)
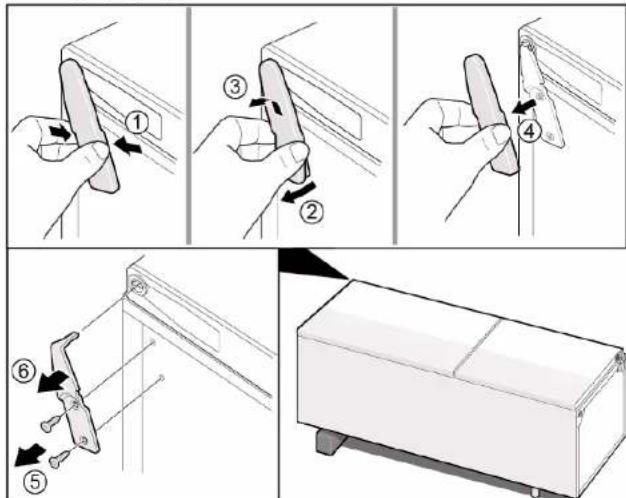

Gomji je zglob uklonjen.
4.3.2 Postavljanje gornjeg zgloba vrata
▶ Postavite obratnim redoslijedom.

Popravak
Srednji je zglob uklonjen.
4.4.2 Postavljanje srednjeg zgloba vrata
▶ Postavite obratnim redoslijedom.

Popravak

Donji je zglob vrata uklonjen.
4.5.2 Postavljanje donjeg zgloba vrata
▶ Postavite obratnim redoslijedom.

Popravak
4.6 Zamjena police
Zahtjev:
Vrata su otvorena.
4.6.1 Uklanjanje police
- Izvucite policu.

Polica za boce je uklonjena.
4.7.2 Postavljanje police za boce
▶ Postavite obratnim redoslijedom.

Popravak
Prilagodljiva posuda za vrata je uklonjena.
4.9.2 Postavljanje prilagodljive posude za vrata
▶ Postavite obratnim redoslijedom.

Popravak
4.10 Zamjena spremnika za zamrznute namirnice
Zahtjev:
Vrata su otvorena.
4.10.1 Uklanjanje spremnika za zamrznute namirnice
Spremnik za zamrznute namirnice je uklonjen.
4.10.2 Postavljanje spremnika za zamrznute namirnice
▶ Postavite obratnim redoslijedom.

Popravak
4.11 Zamjena spremnika
Zahtjev:
Vrata su otvorena.
4.11.1 Uklanjanje spremnika
- Izvadite donji spremnik hladnjaka (1).
- Izvadite gornji spremnik hladnjaka (2).
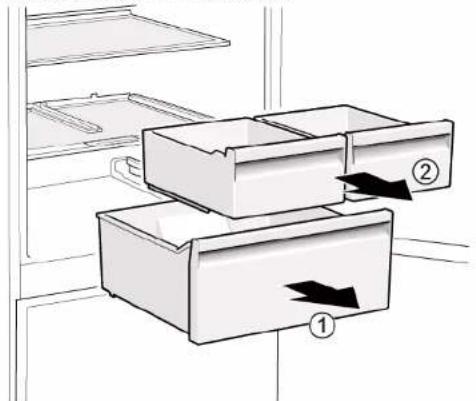
→ Spremnici su uklonjeni.
- Izvlačni spremnik je uklonjen.
4.12.2 Postavljanje izvlačnog spremnika
▶ Postavite obratnim redoslijedom.

Popravak
4.13 Zamjena LED gornjeg svjetla
Specijalni alati:
Odvijač s utorom Nož 2,4 mm x 0,4 mm x 60 mm, u kompletu [00341820]


Popravak


Oprava


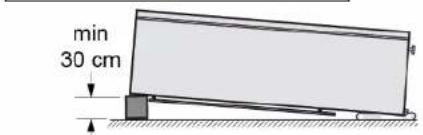


Oprava


Oprava


Reparation
- Tryk hele pakningen trinvist i rillen.



Reparation

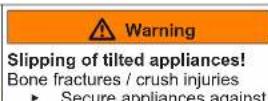
▶ Sørg for at sikre apparater mod at glide.


PAS PÅ!

Hylden er fjernet.


Reparation


Reparatie

Apparaat is losgekoppeld is van de stroomvoorziening.
Deur is open.


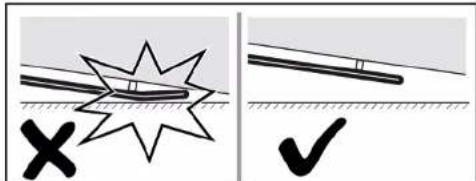

Reparatie


Reparatie
Repair hints - Fridge-freezer
i Concerning this document.... 113
1.1 Important information.... 113
1.1.1 Purpose.... 113
1.2 Explanation of symbols 113
1.2.1 Danger levels.... 113
1.2.2 Hazard symbols 113
1.2.3 Structure of the warnings.... 114
1.2.4 General symbols.... 114
Safety....
2.1 General Safety instructions 115
2.1.1 All domestic appliances 115
Tools and aids.... 116
Repair
4.7 Replacing bottle tray.... 126
4.7.1 Removing bottle tray 126
4.7.2 Installing bottle tray 126
4.8 Replacing door rack 127
4.13.1 Removing LED light.... 132
4.13.2 Installing top LED light 133
i Concerning this document
1.1 Important information
1.1.1 Purpose
These repair hints support consumer to repair appliances by himself according to the applicable eco-design regulation (as of 03/2021).
They contain information how to exchange defined spare parts including warnings and risks.
In case of questions, please contact our customer service. We will only be liable for damages if the repair hints have been followed properly.
1.2 Explanation of symbols
1.2.1 Danger levels
The warning levels consist of a symbol and a signal word. The signal word indicates the severity of the danger.
| Warning level Meaning | ||
| Danger | Non-observance of the warning message will result in death or serious injuries. | |
| Warning | Non-observance of the warning message could result in death or serious injuries. | |
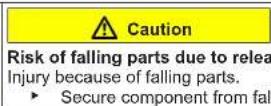
| Caution | Non-observance of the warning message could result in minor injuries. | |
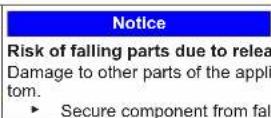
| Notice | Non-observance of the warning message could result in damage to property. | |
Table 1: Danger levels
1.2.2 Hazard symbols
Hazard symbols are symbolic representations which give an indication of the kind of danger.
The following hazard symbols are used in this document:
| Hazard symbol Meaning | ||
 | General warning message | |
 | Danger from electrical voltage | |
 | Risk of explosion | |
 | Danger of cuts | |
 | Danger of crushing |
i Concerning this document
| Hazard symbol Meaning | ||
 | Danger from hot surfaces | |
 | Danger from strong magnetic field | |
 | Danger from non-ionizing radiation | |
Table 2: Hazard symbols
1.2.3 Structure of the warnings
Warnings in this document have a standardised appearance and a standardised structure.

Type and source of danger!
Possible consequences of ignoring the danger / warning.
▶ Measures and prohibitions for preventing the danger.
The following example shows a warning that warns against electric shock due to live parts. The measure for avoiding the danger is mentioned.


Risk of electric shock due to live parts!
Death by electrocution
- Disconnect appliances from electrical supply at least 60 seconds before starting repairs.
1.2.4 General symbols
The following general symbols are used in this document:
| Gen. symbol Meaning | |
| Identification of a special tip (text and/or graphic) | |
| Identification of a simple tip (only text) | |
| Identification of a link to a video tutorial |
| Gen. symbol Meaning | |
| Identification of required tools | |
| Identification of required preconditions | |
| Identification of a condition (if ..., then ...) | |
| Identification of a result | |
| Start Identification of a key or button | |
| [00123456] Identification of a material number | |
| Status Identification of displayed text / window(in the appliance's display) | |
Table 3: General symbols
Safety
2.1 General Safety instructions
2.1.1 All domestic appliances
Risk of electric shock due to live parts!
■ Errors by repairs involving electrical components can lead to electrical shock!
■ Disconnect the appliance from the mains for at least 60 seconds before starting work.
■ After the repair have a safety test according VDE 0701 or country-specific regulations performed.
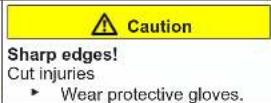
Risk of injury from sharp edges!
■ Wear protective gloves.
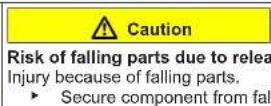
Risk of crushing during repair, maintenance, troubleshooting and service due to heavy and moving components
■ Wear protective shoes.
■ Secure heavy components from falling down.
■ Do not stick body parts into moving components.
Risk to the appliance's safety / function!
■ Only use original spare parts.
Risk of damage to electrostatically sensitive components (ESDs)!
■ Do not touch the modules, including connections and conductor paths.

Tools and aids
| Designation Details Images | ||
| Protection cloth[00342013] | 60 cm x 50 cm | 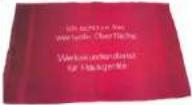 |
| Slotted screwdriver Blade 2.4 mm x 0.4 mm x60 mm, in the kit [00341820] |  | |
| Special tool[00342180] | ||
| Suction cup[00342224] | ∅50 mm | |
| Torx Bit TX20[00340865] | 6,3 mm (1/4") | 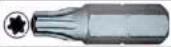 |
| Slotted screwdriver Blade 10 mm x 1.6 mm x200 mm |  | |

Repair
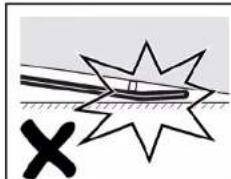
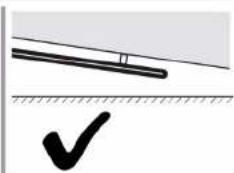
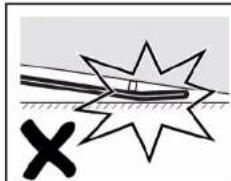
- Release door gasket from the groove on right and left corner.
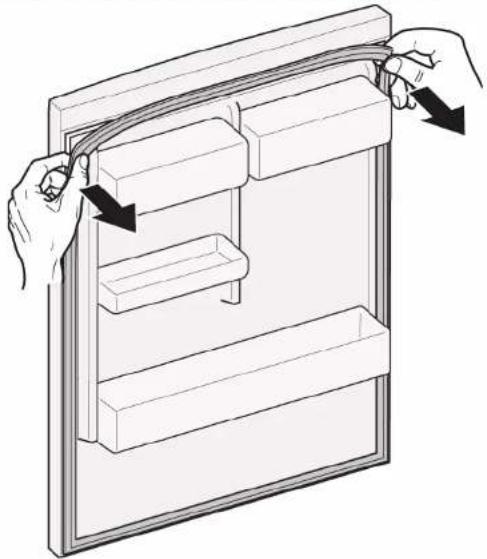
- Pull out door gasket from groove.
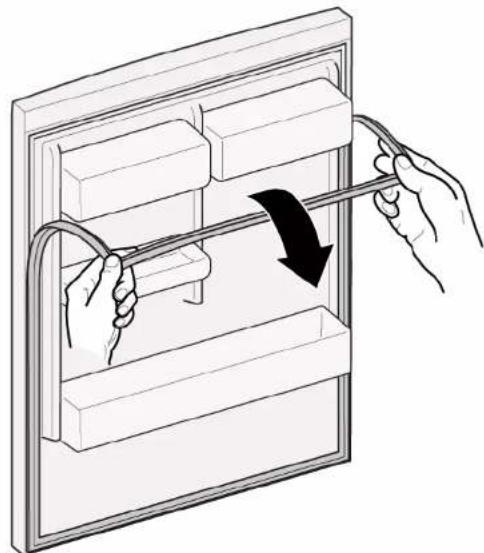

Door gasket is removed.
| Thickness of new door gasket may deviate slightly from thickness of old door gasket. This will not affect closing behavior and long-term function. | |
| If your appliance has adjustable hinges or hinge attachments, you can optimize the closing behavior subsequently. | |
| Small side holes in door gasket are functional (required for ventilation). These are not production faults. |

Repair
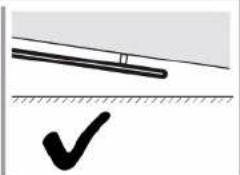
- Check groove for gasket for damage.

- ① If groove for gasket is it is damaged.
Contact customer service.
3.

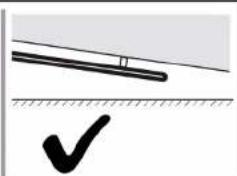
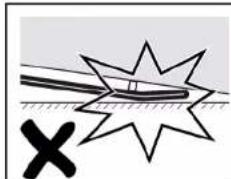
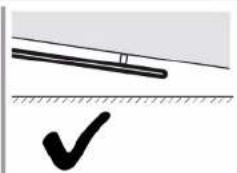
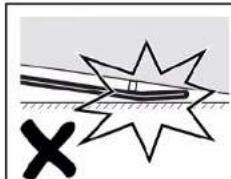
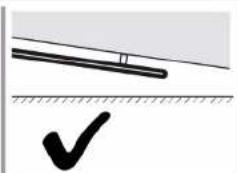
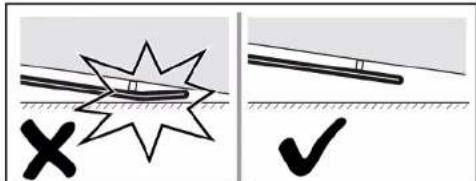
Slight deformation of door gasket is normal and does not affect its function. It is recommended to straighten door gasket before inserting it into appliance.
Heat door gasket with a hair dryer or hot water and manually reshape it.
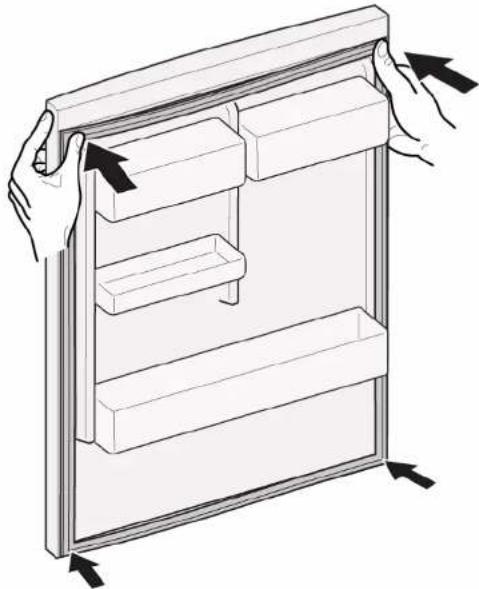
- Push corners of gasket at the top and bottom to the groove.

Repair
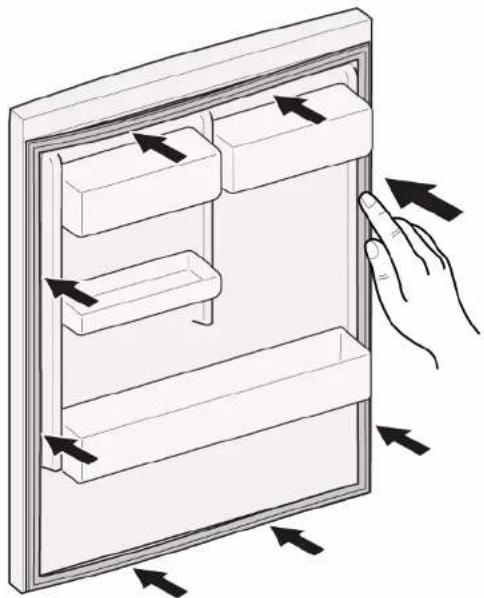
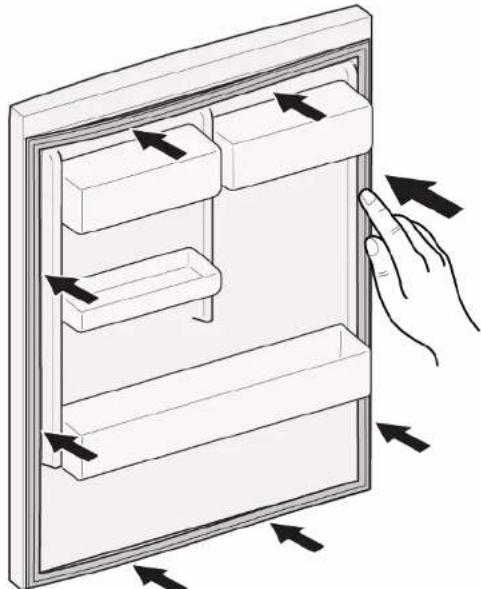
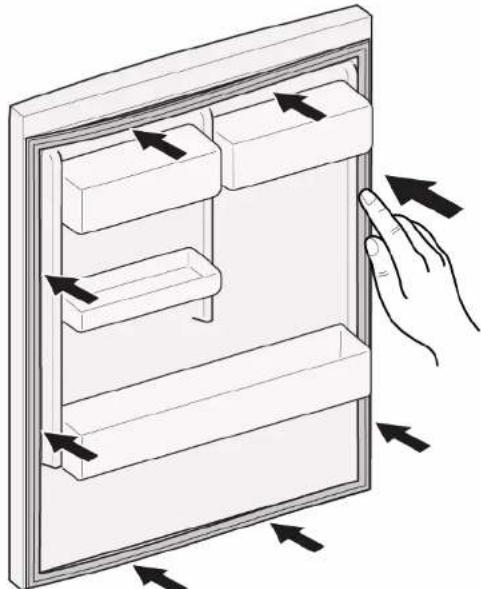
- Press whole gasket step by step into the groove.
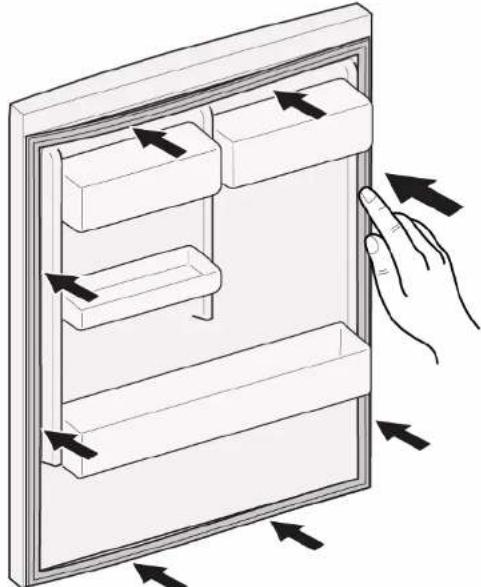

Door gasket is installed.

Repair
4.2 Replacing door handle
Required tools:
Torx Bit TX20 6,3 mm (1/4") [00340865]
Slotted screwdriver Blade 10 mm x 1.6 mm x 200 mm
Prerequisite:
√ Appliance is disconnected from power supply.
√ Door is open.
4.2.1 Removing door handle
- Remove two screw caps (1).
- Unscrew two screws (2).
- Remove door handle (3).


Door handle is removed.

Door handle for the second door can be removed in the same manner.
▶ Install in reverse order.

Repair


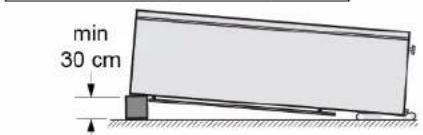
Prerequisite:
√ Appliance is disconnected from power supply.
√ Appliance interior fittings are removed.
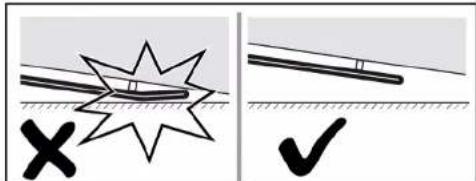
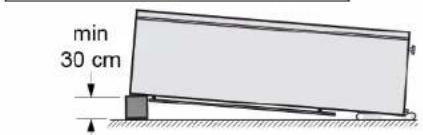
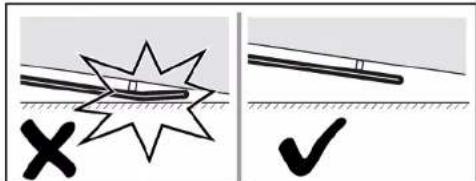
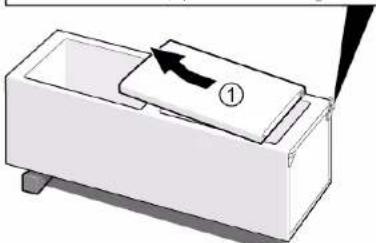
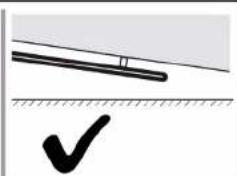
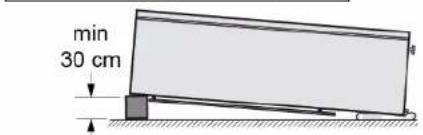
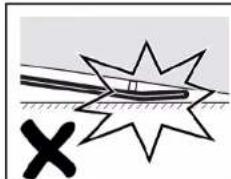
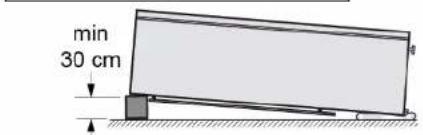
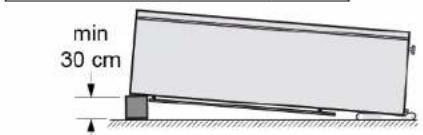
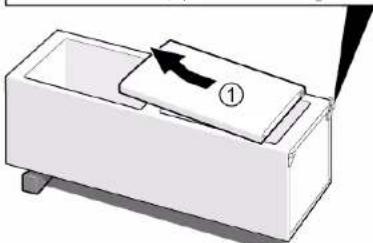
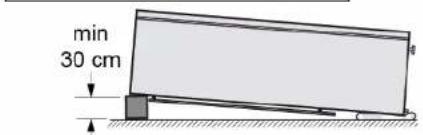
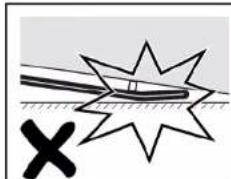
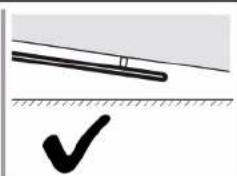
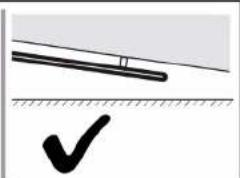
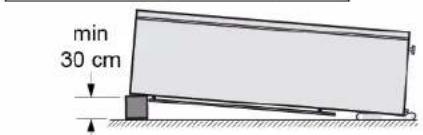
- Place appliance on the back side.


Repair
-
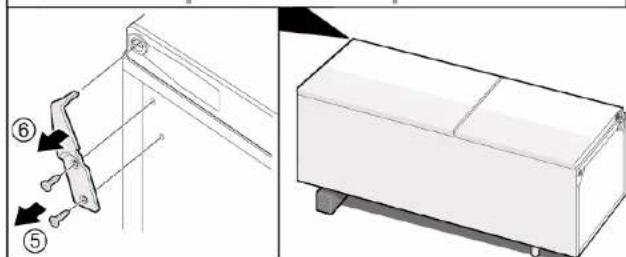
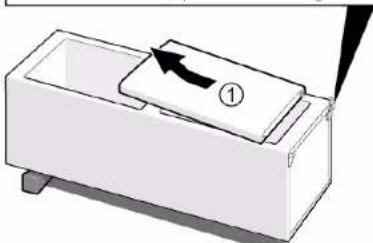
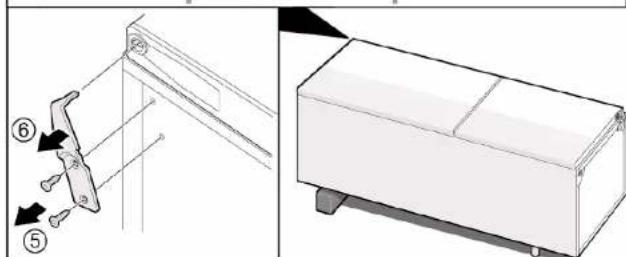
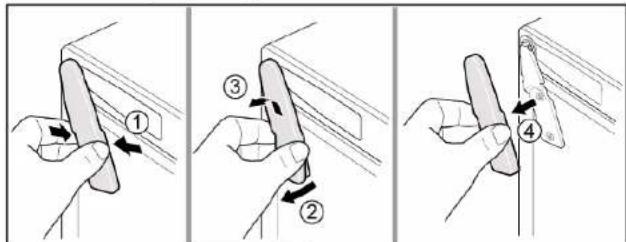
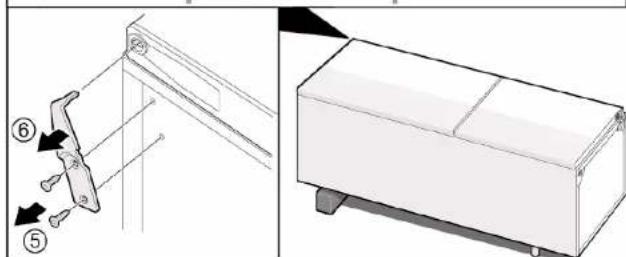
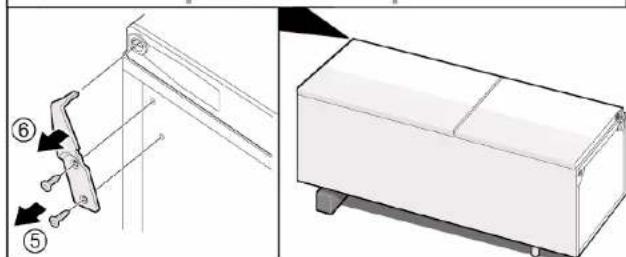
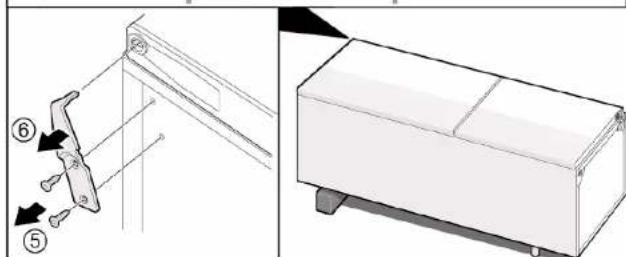
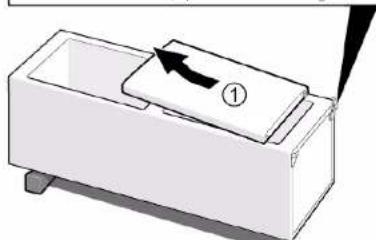
- Press upper hinge cover on both sides (1).
-
Move out upper hinge cover (2)
- Rotate hinge cover (3).
- Remove upper hinge cover (4).
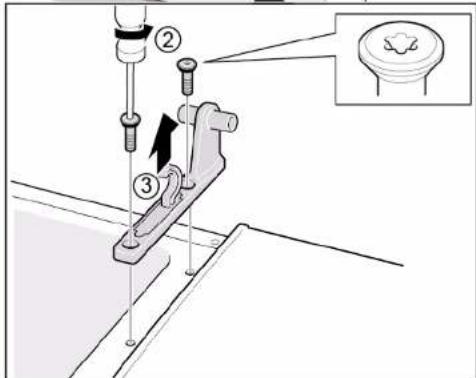
- Unscrew two screws (5).
- Remove upper hinge (6)


Upper hinge is removed.
▶ Install in reverse order.

Repair
4.4 Replacing door middle hinge
Required tools:
Torx Bit TX20 6,3 mm (1/4") [00340865]



Prerequisite:
√ Appliance is disconnected from power supply.
√ Appliance interior fittings are removed.
√ Door upper hinge is removed.
4.4.1 Removing door middle hinge
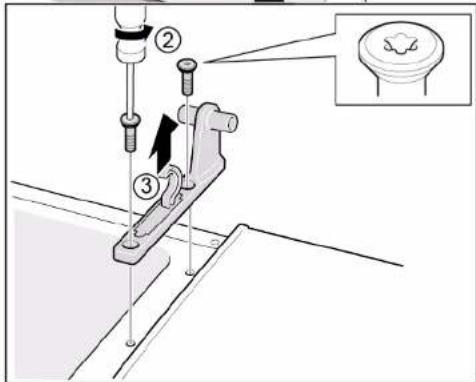
▶ 1. Remove fridge compartment door (1).
2. Unscrew two screws (2).
3. Remove middle hinge (3).

Middle hinge is removed.
▶ Install in reverse order.

Repair
4.5 Replacing door lower hinge
Required tools:
Torx Bit TX20 6,3 mm (1/4") [00340865]




Prerequisite:
√ Appliance is disconnected from power supply.
√ Appliance interior fittings are removed.
√ Upper hinge is removed.
√ Middle hinge is removed.
4.5.1 Removing door lower hinge
▶ 1. Remove freezer compartment door (1).
2. Unscrew the screw (2).
3. Turn lower hinge out (3).
4. Remove lower hinge (4).
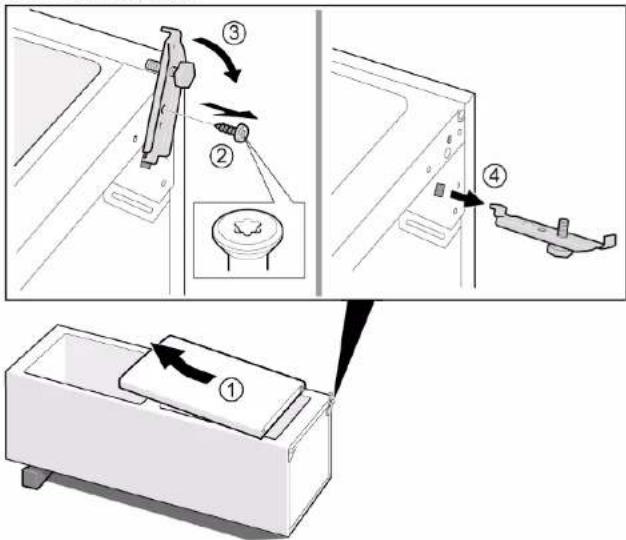
Door lower hinge is removed.
4.5.2 Installing door lower hinge
▶ Install in reverse order.

Repair
4.6 Replacing shelf
Prerequisite:
√ Door is open.
4.6.1 Removing shelf
▶ Pull out shelf.

Shelf is removed.
4.6.2 Installing shelf
▶ Install in reverse order.
Repair
4.7 Replacing bottle tray
Prerequisite:
√ Door is open.
4.7.1 Removing bottle tray
▶ Pull out bottle tray.
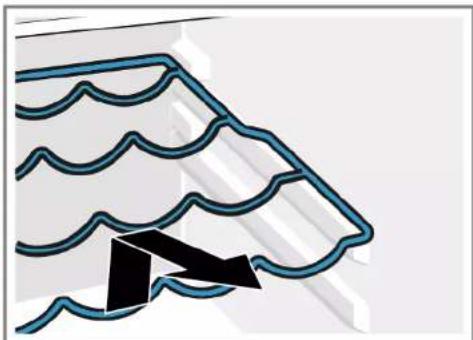
→ Bottle tray is removed.
4.7.2 Installing bottle tray
▶ Install in reverse order.

Repair
4.8 Replacing door rack
Prerequisite:
√ Door is open.
▶ Lift door rack upwards.

Door rack is removed.
▶ Install in reverse order.

Repair
4.9 Replacing adjustable door rack
Prerequisite:
√ Door is open.
4.9.1 Removing adjustable door rack
- Move high-adjustable door rack upwards until the door rack is released from the holder.
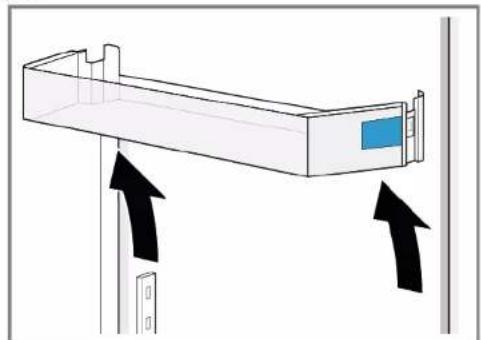
Adjustable door rack is removed.
▶ Install in reverse order.

Repair
4.10 Replacing frozen food container
Prerequisite:
√ Door is open.
4.10.1 Removing frozen food container
- Pull out frozen food container all the way (1).
- Remove food container (2).
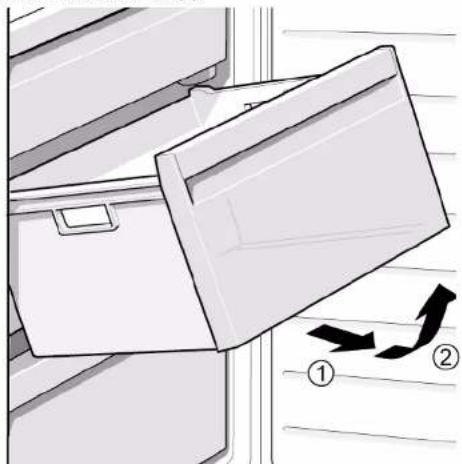
Frozen food container is removed.
4.10.2 Installing frozen food container
▶ Install in reverse order.

Repair
4.11 Replacing container
Prerequisite:
√ Door is open.
4.11.1 Removing container
- Move out lower fridge container (1).
- Move out upper fridge container (2).
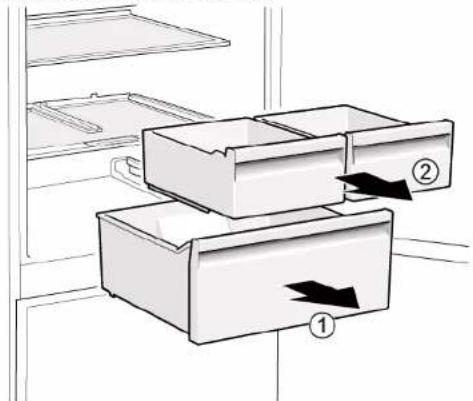

Containers are removed.
4.11.2 Installing container
▶ Install in reverse order.

Repair
4.12 Replacing extendable container
Prerequisite:
√ Door is open.
4.12.1 Removing extendable container
- Pull extendable container out all the way (1).
- Remove extendable container (2).
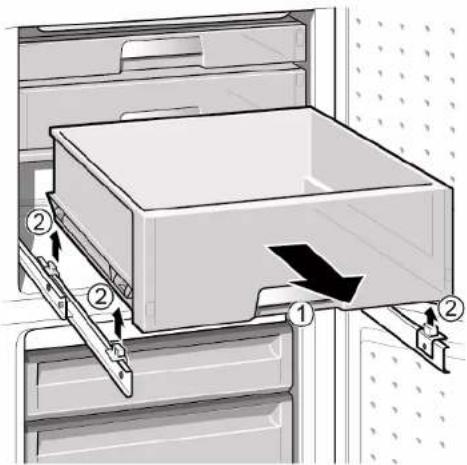
Extendable container is removed.
4.12.2 Installing extendable container
▶ Install in reverse order.

Repair
4.13 Replacing LED top light
Required tools:
Slotted screwdriver Blade 2.4 mm x 0.4 mm x 60 mm, in the kit [00341820]

Your appliance features a maintenance-free LED light.
These lights may be repaired by customer service or authorised technicians only!

Risk of electric shock due to live parts!
Danger to life through electric shock in case of improper repair
▶ Electric parts should be repaired by a qualified electricians.
After the repair have a safety test according VDE 0701 or country-specific regulations performed.


Risk of electric shock due to live parts!
Death by electrocution
- Disconnect appliances from electrical supply at least 60 seconds before starting repairs.

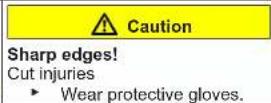
Sharp edges!
Cut injuries
▶ Wear protective gloves.
Prerequisite:
√ Appliance is disconnected from power supply.
√ Door is open.
√ Upper interior fittings are removed.
4.13.1 Removing LED light
- Move the LED light to the left side.
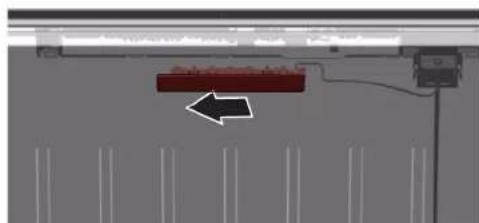
LED light electrical connection is disconnected.
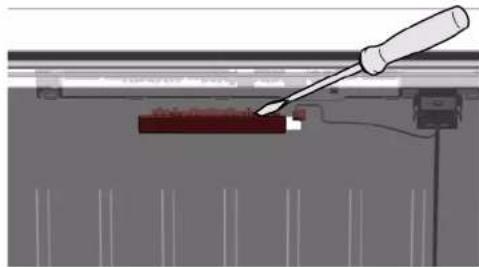
- Release LED light hooks.


Repair
- Remove LED light moving it forward.


LED light is removed.
4.13.2 Installing top LED light
▶ Install in reverse order.
Remonditeave - Kombikülmik
i Selle dokumendiga seoses 135


Remont
- Vajutage terve tihend jupphaaval soonde.



Remont


Remont
- Eemaldage LED-tuli, liigutades seda ettepoole.


Korjaus



Korjaus

Hylly on poistettu.

Korjaus

- Retirer le joint de porte de la rainure.


Réparation




Réparation


Réparation


Instandsetzen




Instandsetzen


Instandsetzen


Επισκευή



Επισκευή

To páφι αφαιρέθηκε.
To páfi pórtas éxei aφαιρεθεί.
To páfi pórtas me duvatótnta rúθμισης éxei aφαιρεθεί.
To theckopiko surtári aφαιρέθηκε.

Επισκευή


Javítás



Javítás

Javítás


Riparazione

Riparazione

Riparazione


Remonts


Durvju rokturis ir nonemts.

Otru durvju rokturi nonem tāpat.

Remonts
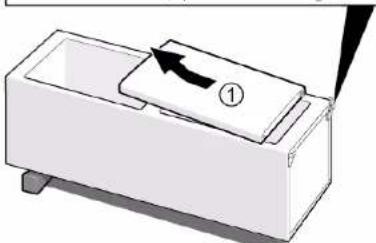
Plaukts ir izņemts.
- Izvelkamä tvertne ir iznemta.

Remonts
- Lai nonemtu LED gaismekli, virziet to uz priekšu.
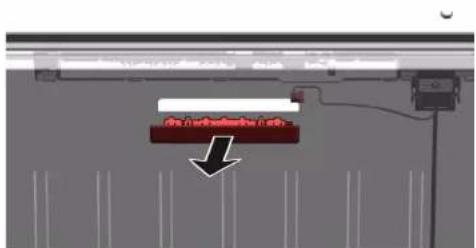
→ LED gaismeklis ir nonemts.


Remontas


Remontas

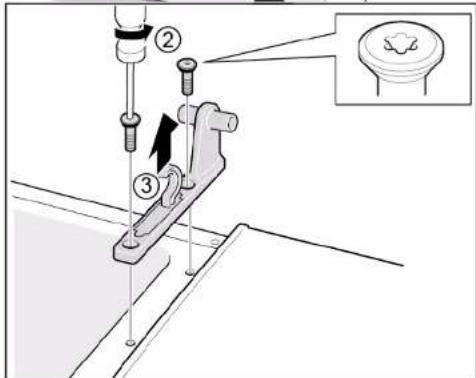

Lentyna išimta.
Talpyklos išimtos.

Remontas

LED lemputė išimta.

Reparasjon



Reparasjon
∅vre hengsel er demontert.
→ Nedre dørhengsel er demontert.
4.5.2 Montering av nedre dørhengsel
Flaskehyllen er demontert.

→ Beholderen for frysevarer er demontert.
LED-lampens elektriske tilkobling kobles fra.
- Løsne LED-lampens kroker.

Reparasjon

LED-lampen er demontert.


Naprawy



Naprawy

Półka jest wyjęta.
4.6.2 Montaż półki

Naprawy


Reparação




Reparação
-
- Pressione a tampa da dobradiça superior de ambos os lados (1).
-
Extraia a tampa da dobradiça superior (2).
- Rode a tampa da dobradiça (3).
- Remova a tampa da dobradiça superior (4).
- Desaperte dois parafusos (5).
- Remova a dobradiça superior (6).


Reparação


Repararea

Cap torx TX20 6.3 mm (1/4") [00340865]

Cap torx TX20 6.3 mm (1/4") [00340865]



Repararea

Cap torx TX20 6.3 mm (1/4") [00340865]

Cap torx TX20 6.3 mm (1/4") [00340865]

→ Containerele sunt demontate.

Repararea
- Vytiahnite tesnenie z drážky.


Oprava

Tesnenie dvierok je namontované.

Oprava



Oprava
-
- Na oboch stranách stlačte kryt horného závesu (1).
-
Vytiahnite kryt horného závesu (2).
- Otočte kryt závesu (3).
- Odoberte kryt horného závesu (4).
- Odskrutkujte dve skrutky (5).
- Odoberte horný záves (6).

Odkladací priestor na fl'aše je odobratý.
4.7.2 Montáž odkladacieho priestoru na fl'aše
Polička v dvierkach je odobratá.

Oprava

LED svetlo je odobraté.
- Tesnilo vrat izvlecite iz utora.


Popravilo
- Celotno tesnilo korak po koraku potisnite v utor.




Popravilo

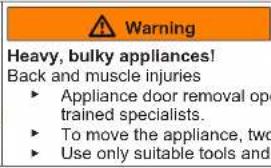
Poškodbe hrbta in mišic
Polica je odstranjena.
4.6.2 Namestitev police
- Namestite v obratnem vrstnem redu.

Popravilo
4.7 Zamenjava nosilca za steklenice
Zahteva:
Vrata so odprta.
4.7.1 Odstranjevanje nosilca za steklenice
Električni priključek lučke LED je odklopljen.
- Sprostite zatiče lučke LED.


Popravilo
- Lučko LED premaknite naprej in jo odstranite.

→ Lučka LED je odstranjena.


Reparación



Reparación


Reparación


Reparation



Reparation


Flaskhyllan har tagits bort.
4.7.2 Montera flaskhylla
Dörrhyllan har tagits bort.
4.8.2 Montera dörrhylla
Den justerbara dörrhyllan har tagits bort.
4.9.2 Montera justerbar dörrhylla

Reparation
→ LED-lampan har tagits bort.


Onarim




Onarim




Onarim

LED ışığı söküldü.
- РЕМОНТ
- POPRAVAK
- 4.3.2 POSTAVLJANJE GORNJEG ZGLOBA VRATA
- 4.4.2 POSTAVLJANJE SREDNJEG ZGLOBA VRATA
- 4.5.2 POSTAVLJANJE DONJEG ZGLOBA VRATA
- 4.6 ZAMJENA POLICE
- 4.6.1 UKLANJANJE POLICE
- 4.7.2 POSTAVLJANJE POLICE ZA BOCE
- 4.9.2 POSTAVLJANJE PRILAGODLJIVE POSUDE ZA VRATA
- 4.10 ZAMJENA SPREMNIKA ZA ZAMRZNUTE NAMIRNICE
- 4.10.1 UKLANJANJE SPREMNIKA ZA ZAMRZNUTE NAMIRNICE
- 4.10.2 POSTAVLJANJE SPREMNIKA ZA ZAMRZNUTE NAMIRNICE
- 4.11 ZAMJENA SPREMNIKA
- 4.11.1 UKLANJANJE SPREMNIKA
- 4.12.2 POSTAVLJANJE IZVLAČNOG SPREMNIKA
- 4.13 ZAMJENA LED GORNJEG SVJETLA
- OPRAVA
- REPARATION
- PAS PÅ
- REPARATIE
- REPAIR HINTS - FRIDGE-FREEZER
- I CONCERNING THIS DOCUMENT.... 113
- SAFETY
- TOOLS AND AIDS.... 116
- REPAIR
- I CONCERNING THIS DOCUMENT
- 1.1 IMPORTANT INFORMATION
- 1.1.1 PURPOSE
- 1.2 EXPLANATION OF SYMBOLS
- 1.2.1 DANGER LEVELS
- 1.2.2 HAZARD SYMBOLS
- 1.2.3 STRUCTURE OF THE WARNINGS
- 1.2.4 GENERAL SYMBOLS
- 2.1 GENERAL SAFETY INSTRUCTIONS
- 2.1.1 ALL DOMESTIC APPLIANCES
- TOOLS AND AIDS
- 4.2 REPLACING DOOR HANDLE
- 4.2.1 REMOVING DOOR HANDLE
- 4.4 REPLACING DOOR MIDDLE HINGE
- 4.4.1 REMOVING DOOR MIDDLE HINGE
- 4.5 REPLACING DOOR LOWER HINGE
- 4.5.1 REMOVING DOOR LOWER HINGE
- 4.5.2 INSTALLING DOOR LOWER HINGE
- 4.6 REPLACING SHELF
- 4.6.1 REMOVING SHELF
- 4.6.2 INSTALLING SHELF
- 4.7 REPLACING BOTTLE TRAY
- 4.7.1 REMOVING BOTTLE TRAY
- 4.7.2 INSTALLING BOTTLE TRAY
- 4.8 REPLACING DOOR RACK
- 4.9 REPLACING ADJUSTABLE DOOR RACK
- 4.9.1 REMOVING ADJUSTABLE DOOR RACK
- 4.10 REPLACING FROZEN FOOD CONTAINER
- 4.10.1 REMOVING FROZEN FOOD CONTAINER
- 4.10.2 INSTALLING FROZEN FOOD CONTAINER
- 4.11 REPLACING CONTAINER
- 4.11.1 REMOVING CONTAINER
- 4.11.2 INSTALLING CONTAINER
- 4.12 REPLACING EXTENDABLE CONTAINER
- 4.12.1 REMOVING EXTENDABLE CONTAINER
- 4.12.2 INSTALLING EXTENDABLE CONTAINER
- 4.13 REPLACING LED TOP LIGHT
- 4.13.1 REMOVING LED LIGHT
- 4.13.2 INSTALLING TOP LED LIGHT
- REMONDITEAVE - KOMBIKÜLMIK
- I SELLE DOKUMENDIGA SEOSES 135
- REMONT
- KORJAUS
- RÉPARATION
- INSTANDSETZEN
- ΕΠΙΣΚΕΥΉ
- JAVÍTÁS
- RIPARAZIONE
- REMONTS
- REMONTAS
- REPARASJON
- 4.5.2 MONTERING AV NEDRE DØRHENGSEL
- NAPRAWY
- 4.6.2 MONTAŻ PÓŁKI
- REPARAÇÃO
- REPARAREA
- 4.7.2 MONTÁŽ ODKLADACIEHO PRIESTORU NA FL'AŠE
- POPRAVILO
- 4.6.2 NAMESTITEV POLICE
- 4.7 ZAMENJAVA NOSILCA ZA STEKLENICE
- 4.7.1 ODSTRANJEVANJE NOSILCA ZA STEKLENICE
- REPARACIÓN
- 4.7.2 MONTERA FLASKHYLLA
- 4.8.2 MONTERA DÖRRHYLLA
- 4.9.2 MONTERA JUSTERBAR DÖRRHYLLA
- ONARIM
Brand : SIEMENS
Model : KG39V2LEA
Category : Refrigerator