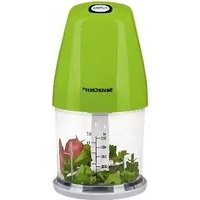
SMZS 260 I2 - Food processor SILVERCREST - Free user manual and instructions
Find the device manual for free SMZS 260 I2 SILVERCREST in PDF.


| Product type | Food processor |
| Brand | SilverCrest |
| Model | SMZS 260 I2 |
| Power | 800 W |
| Bowl capacity | 2.5 L |
| Number of speeds | 8 speeds + pulse |
| Main functions | Mix, chop, knead, beat, emulsify |
| Included accessories | Whisk, dough hook, beater, blender, chopper |
| Bowl material | Stainless steel |
| Non-slip feet | Yes |
| Dimensions (L x W x H) | 35 x 22 x 38 cm |
| Weight | 4.5 kg |
| Power supply | Mains 220-240 V, 50/60 Hz |
| Cable length | 1.2 m |
| Care and cleaning | Bowl and accessories dishwasher safe |
| Safety | Arm locking device, automatic shut-off in case of overheating |
| Spare parts and repairability | Parts available from the manufacturer, repairability index 8/10 |
| General information | CE certification, 2-year warranty |
Frequently Asked Questions - SMZS 260 I2 SILVERCREST
User questions about SMZS 260 I2 SILVERCREST
0 question about this device. Answer the ones you know or ask your own.
Ask a new question about this device
Download the instructions for your Food processor in PDF format for free! Find your manual SMZS 260 I2 - SILVERCREST and take your electronic device back in hand. On this page are published all the documents necessary for the use of your device. SMZS 260 I2 by SILVERCREST.
USER MANUAL SMZS 260 I2 SILVERCREST

MINI CHOPPER / MULTIZERKLEINERER / HACHOIR MULTIFONCTION SMZE 500 C2
GB IE
MINI CHOPPER
Short manual
FR BE
HACHOIR MULTIFONCTION
Guide abrégé
CZ
UNIVERZÁLNÍ DRTIČ
Stručný návod
SK
MULTIFUNKČNÝ KRÁJAČ
Krátky návod
DK
MULTIHAKKER
Kvikvejledning
DE AT CH
MULTIZERKLEINERER
Kurzanleitung
NL BE
MULTIHAKKER
Before reading, unfold the page containing the illustrations and familiarise yourself with all functions of the device.
DE AT CH
GB/IE Short manual Page 1
Contents
Information about this short manual 2
Intended use 2
Package contents 2
Unpacking 2
Disposal of the packaging 3
Appliance description 3
Technical data 4
Safety information 4
Before first use ....7
Operation 8
Chopping 8
Whipping cream 10
Cleaning and care 11
Storage 12
Troubleshooting 13
Disposal of the appliance 13
Service 14
Importer....14

Read these operating instructions carefully before using the appliance for the first time and retain them for future reference. Please pass these operating instructions on to any future owner(s) of the appliance.
Information about this short manual
This document is a shortened print version of the complete operating instructions.

Scanning the QR code will take you directly to the Lidl Service page (www.lidl-service.com), where you can view and download the full version of the operating instructions by entering the article number (IAN) 373139_2104.
WARNING!
Observe the information in the complete operating instructions and the safety instructions to avoid personal injury and damage to property.
The short manual is an integral part of this product. Before using the product, please familiarise yourself with all operating and safety instructions. Keep the short manual in a safe place and hand over all documents when passing the product on to any future owner/user.
Intended use
This appliance is intended for the chopping of foods in small amounts or for whipping cream and emulsifying liquids. This appliance is intended exclusively for use in domestic households. This includes observing all the information in these operating instructions, especially the safety information. All other uses are deemed to be improper and may result in property damage or even in personal injury. No liability will be accepted for damages which result from improper use of the appliance.
Package contents
The appliance is supplied with the following components as standard:
- Motor unit
• Lid - Bowl
- Blade holder with blade
- Emulsifying disc
- Non-slip ring
- Short manual
Unpacking
1) Remove all parts of the appliance and the short manual from the box.
2) Remove all packaging materials from the appliance.
NOTE
▶ Check the package for completeness and signs of visible damage.
▶ If the delivery is incomplete or damage has occurred as a result of defective packaging or during transport, contact the Service hotline (see section Service).
Disposal of the packaging
The packaging protects the appliance from damage during transport. The packaging materials have been selected for aspects of environmental friendliness and disposal, and they are therefore recyclable.

Returning the packaging to the material cycle conserves raw materials and reduces the amount of waste that is generated. Dispose of packaging materials which are no longer needed in accordance with applicable local regulations.

Dispose of the packaging in an environmentally friendly manner.
Note the labelling on the packaging and separate the packaging material components for disposal if necessary. The packaging material is labelled with abbreviations (a) and numbers (b) with the following meanings:
1-7: Plastics, 20-22: Paper and cardboard, 80-98: Composites.
NOTE
▶ If possible, keep the original device packaging for the entire duration of the warranty period so that the device can be packed properly for return shipment in the event of a warranty claim.
Appliance description
① Speed button - Level II
② Speed button - Level I
③ Motor unit
④ Blade holder fitting
5 Lid
6 Sealing ring
⑦ Blade holder
8 Blade
9 Bowl
10 Guide axis
⑪ Non-slip ring
12 Emulsifying disc
13 Catch
Technical data
| Mains voltage 220-240 V | ~ (AC), 50/60 Hz |
| Rated power 500 W | |
| Protection class | II □ (Double insulation) |
| CO time | 30 seconds when working with the blade 82 minutes when working with the emulsifying disc 12 |
| Bowl capacity 9 1200 ml | |
| Max. capacity(liquids and chopping See the table in the section "Operation"! | up to the 500 ml marking |
 | All parts of this appliance that come into contact with food are food-safe. |
CO TIME
The CO time (continuous operation time) is the amount of time an appliance can be operated without the motor overheating and becoming damaged. After the appliance has been operated for the given CO time, switch it off until the motor has cooled down.
Safety information

RISK OF ELECTRIC SHOCK
- Connect the appliance only to correctly installed mains power sockets that supply a current rating of 220 - 240 V\~, at 50/60 Hz.
▶ To prevent accidents, have defective plugs and/or power cables replaced immediately by an authorised specialist, or our Customer Service or a similarly qualified person.
▶ In event of operating malfunctions and before cleaning the appliance, remove the power plug from the mains power socket.

RISK OF ELECTRIC SHOCK
▶ Always remove the power cable from the socket by pulling on the plug, not on the power cable itself.
▶ Do not kink or crush the power cable, and route the cable so that it cannot be stepped on or tripped over.
- Do not expose the appliance to humidity and do not use it outdoors. If any liquid gets into the housing, disconnect the appliance from the mains power socket immediately and have it repaired by a qualified technician.
▶ Never hold the appliance, power cable or power plug with wet hands.
If the power cable or the motor unit are damaged, you must have the appliance repaired by qualified technicians before using it again. Do not attempt to open the motor unit housing. This can lead to risks and also invalidates the warranty.
- Disconnect the appliance from the mains power source immediately after use. The appliance is completely free of electrical power only when unplugged.

Never immerse the motor unit in liquid and do not allow any liquids to enter the motor unit casing.

WARNING! RISK OF INJURY!
Before replacing any accessories or additional parts that move during operation, the appliance must be switched off and disconnected from mains power.
▶ Never use the appliance for purposes other than those described in these instructions. There is a risk of injury if the appliance is misused!
▶ Take care when emptying the bowl! The blade is extremely sharp!
⚠ WARNING! RISK OF INJURY!
▶ Take care when cleaning the appliance! The blade is extremely sharp!
The appliance must always be disconnected from the mains when left unsupervised and before assembly, disassembly or cleaning.
▶ This appliance may not be used by children.
The appliance and its connecting cable must be kept away from children.
This appliance may be used by persons with limited physical, sensory or mental capabilities or lack of experience and knowledge, provided that they are under supervision or have been told how to use the appliance safely and are aware of the potential risks.
▶ Do not allow children to use the appliance as a plaything.
▶ Children should be supervised to ensure that they do not play with the appliance.
- Handle the extremely sharp blade with caution as it can cause injuries. Reassemble the appliance after using and/or cleaning it so that you do not injure yourself with the exposed blade. Keep the blade out of the reach of children.
▶ Never attempt to remove foodstuffs from the bowl as long as the blade is still rotating. Risk of injury!
- Wait until the blade has stopped rotating before removing the motor unit.
▶ Never try to grasp the blade if it is still rotating! Risk of injury!
- Do not operate the appliance for longer than 30 seconds with the blade or 2 minutes with the emulsifying disc. Afterwards, allow it to cool down.
CAUTION - APPLIANCE DAMAGE!
▶ Do not use the appliance to process boiling or hot food.
- Do not use the appliance to chop or grind bones, coffee beans, cereals, nutmeg or frozen food. The only exception to this rule is ice cubes.
- See the table on the recommended fill quantities in the section "Chopping". Otherwise, there is a risk of contamination due to leaking contents.
- Do not clean the motor unit in the dishwasher, as this will damage it.
▶ Never operate the appliance when it is empty.
NOTE
▶ No user action is required to switch the product between 50 and 60 Hz. The product adapts automatically to either 50 or 60 Hz.
Before first use
Thoroughly clean all component parts as described in the section Cleaning and care before using the appliance for the first time.
Operation
Chopping
1) Place the bowl ⑨ on the non-slip ring ⑪.
2) Place the blade holder ⑦ with the blade ⑧ onto the guide axis ⑩.
3) Prepare the food:
CAUTION - PROPERTY DAMAGE!
▶ Particularly hard foods should be cut into small pieces (approx. 2 cm) before processing. Otherwise, the motor unit could block. Use a pulsing processing method when working with hard foods. To do this, press the relevant speed button ①/② several times.
-Chop solid food into pieces approx. 2 cm in size.
-Removes stems and stalks from herbs.
-Remove the shell from nuts, e.g. walnuts.
-Remove bones, skin and sinew from meat.
4) Add the food to the bowl ⑨. For optimum results, we recommend the following maximum filling quantities:
| Food | Max. filling quantity | Processing time Speed | |
| Garlic 250 g | pulse approx. 5 x 2 sec. | Level II | |
| Onions 250 g | pulse approx. 5 x 1 sec. | Level I | |
| Carrots 250 g | 2 x 5 sec. Level I | ||
| Almonds 250 g | coarse: 1 x 10 sec. medium: 1 x 15 sec. fine: 3 x 15 sec. | Level II | |
| Meat (cubed 2 x 2 cm) | 300 g 6 x 5 sec. Level II | ||
| Ice cubes | 100 g* | pulse coarse 10 x 1 sec. fine 20 x 1 sec. | Level II |
| The times and quantities listed in this table are guide values and can vary depending on the composition of the processed food! | |||
| *100 g is the ideal filling quantity for crushing ice. You can add ice cubes up to the 500 ml mark. The ice will, however, not be crushed so evenly. | |||
5) Place the lid ⑤ onto the bowl ⑨ so that the sealing ring ⑥ rests on the edge of the bowl ⑨ and the blade holder ⑦ protrudes through the opening of the lid ⑤. One of the two catches ⑬ that are located on the inner ring of the lid ⑤ should point forwards, towards you.
6) Place the motor unit ③ onto the lid ⑤ so that the logo is facing it. The two catches ⑬ on the inner ring of the lid ⑤ now engage into the two recesses on the bottom of the motor unit ③. If the catches ⑬ do not slide immediately into the recesses on the bottom of the motor unit ③, turn the motor unit ③ a little until it rests flush on the lid ⑤ and the catches ⑬ have slid into the recesses.
7) Insert the plug into a mains power socket.
NOTE
▶ Hold the bowl ⑨ firmly with one hand and the motor unit ③ with the other hand while processing food.
8) Press the required speed button ①/②. The blade rotates ⑧ as long as you keep the speed button ①/② pressed. The motor stops as soon as it is released.
CAUTION - PROPERTY DAMAGE!
If the blade ⑧ stops and starts or does not turn at all, release of the speed button ①/② immediately and pull out the mains plug. Check whether the blade ⑧ is jammed as a result of too hard/tough food and free this. Otherwise, the motor unit could overheat.
NOTE
If food remains stuck on the inside of the bowl ⑨ and the blade ⑧ cannot reach it any more, open the lid ⑤ and push the food back down with a spatula or similar.
9) Once the food is fully chopped, release of the speed button ①/②.
10) Remove the power plug from the socket.

WARNING - RISK OF INJURY!
▶ Never attempt to remove food from the bowl ⑨ while the blade ⑧ is still turning. There is a risk of injury and food can also spray out and make a mess.
11) Wait until the blade ⑧ has come to a complete standstill.
12) Lift the motor unit ③ off the lid ⑤.
▶ Handle the extremely sharp blade ⑧ with caution as it can cause injuries. Keep the blade ⑧ out of the reach of children.
14) Pull the blade holder ⑦ with the blade ⑧ carefully out of the bowl ⑨.
15) Remove the food.
Whipping cream
You can also use the appliance to whip cream (min. 200 ml, max. 400 ml) with the help of the emulsifying disc ⑫:
1) Place the bowl ⑨ on the non-slip ring ⑪.
2) Push the emulsifying disc ⑫ onto the blade holder ⑦:
- To whip 200-400 ml of cream, place the emulsifying disc ⑫ onto the blade holder ⑦ so that the emulsifying disc ⑫ is in contact with both parts of the blade ⑧ and clicks into place (fig. 1):

3) Place the blade holder ⑦ with the emulsifying disc ⑫ onto the guide axis ⑩.
4) Add the cream.
5) Place the lid ⑤ onto the bowl ⑨ so that the sealing ring ⑥ rests on the edge of the bowl ⑨ and the blade holder ⑦ protrudes through the opening of the lid ⑤.
One of the two catches ⑬ that are located on the inner ring of the lid ⑤ should point forwards, towards you.
6) Place the motor unit ③ onto the lid ⑤ so that the logo is facing it. The two catches ⑬ on the inner ring of the lid ⑤ now engage into the two recesses on the bottom of the motor unit ③. If the catches ⑬ do not slide immediately into the recesses on the bottom of the motor unit ③, turn the motor unit ③ a little until it rests flush on the lid ⑤ and the catches ⑬ have slid into the recesses.
7) Insert the plug into a mains socket.
NOTE
▶ To whip cream, you should make sure that it is chilled well before whipping (max. 8° C/fridge temperature).
For 200 ml of cream, we recommend a whipping time of around 30-40 seconds at speed level I ②.
For 400 ml of cream, we recommend a whipping time of around 40 seconds at speed level I ②.
The whipping time can vary, however, depending on the amount and various factors, such as fat content or the ambient temperature. Keep an eye on the cream while you are whipping it and adjust the whipping time to suit your needs.
Cleaning and care

WARNING – RISK OF ELECTRIC SHOCK!
▶ Always remove the plug from the mains power socket before cleaning the appliance.


You must never immerse the appliance in water or hold it under running water when cleaning it.

WARNING - RISK OF INJURY!
▶ Handle the extremely sharp blade ⑧ with caution as it can cause injuries. Reassemble the appliance after using and/or cleaning it so that you do not injure yourself with the exposed blade ⑧. Keep the blade ⑧ out of the reach of children.
CAUTION - PROPERTY DAMAGE!
▶ Do not clean the motor unit ③ in the dishwasher, as this will damage it.
1) Remove the power plug from the socket.
2) Dismantle the appliance for cleaning. Pull the sealing ring ⑥ off the lid ⑤. Remove the small rubber disc located on the upper end of the blade holder ⑦.
3) Clean the motor unit ③ with a moist cloth. If necessary, add a little mild detergent onto the cloth. Wipe off with a cloth moistened only with clear water so that all detergent residues are removed.
4) Clean the bowl ⑨, emulsifying disc ⑫, lid ⑤ sealing ring ⑥, blade holder ⑦ with blade ⑧, the small rubber disc of the blade holder ⑦ and the non-slip ring ⑪ in warm water with a little mild detergent. Rinse all the parts using clean water to remove any detergent residues. Dry all parts well.
NOTE

Alternatively, you can clean the bowl ⑨, emulsifying disc ⑫, blade holder ⑦ with the blade ⑧, the lid ⑤ with the sealing ring ⑥ and the non-slip ring ⑪ in the dishwasher. Place the parts in the upper dishwasher basket if possible. Ensure that the parts cannot become jammed in any way.
5) After cleaning, push the sealing ring ⑥ back onto the flange of the lid ⑤. Ensure that the flat side of the sealing ring ⑥ rests flat on the lid ⑤.
6) Place the small rubber ring back on the upper end of the blade holder ⑦. You can now reassemble the appliance.
Storage
■ Store the cleaned appliance in a clean and dry location.
Troubleshooting
| PROBLEM | POSSIBLE CAUSE | POSSIBLE SOLUTIONS |
| The appliance is not working. | The appliance is not connected to a mains power socket. | Connect the appliance to a mains power socket. |
| The appliance is damaged. | Contact the Customer Service department. | |
| A household fuse has blown. | Check the household fuses and replace them if necessary. | |
| The appliance is possibly defective. | Contact the Customer Service department. | |
| The motor unit 3 is not placed correctly on the blade holder 7. | Place the motor unit 3 correctly on the blade holder 7. |
If the malfunction cannot be corrected using one of the suggestions above, or if you have found some other kind of malfunction, please contact our Customer Service department.
Disposal of the appliance

Never dispose of the appliance in your normal domestic waste. This product is subject to the provisions of European Directive 2012/19/EU.
Dispose of the appliance through an approved disposal facility or your municipal waste facility. Please comply with all applicable regulations. Please contact your waste disposal centre if you are in any doubt.

Your local community or municipal authorities can provide information on how to dispose of the worn-out product.

The product is recyclable, subject to extended producer responsibility and is collected separately.
Service
GB Service Great Britain
Tel.: 0800 404 7657
E-Mail: kompernass@lidl.co.uk
IE ServiceIreland
Tel.: 1890 930 034
(0,08 EUR / Min., (peak))
(0,06 EUR / Min., (off peak))
E-Mail: kompernass@lidl.ie
IAN 373139_2104
Importer
Please note that the following address is not the service address. Please use the service address provided in the operating instructions.
KOMPERNASS HANDELS GMBH
BURGSTRASSE 21
44867 BOCHUM
GERMANY
www.kompernass.com
Inhaltsverzeichnis
KOMPERNASS HANDELS GMBH
BURGSTRASSE 21
44867 BOCHUM
DEUTSCHLAND
www.kompernass.com
Table des matières
KOMPERNASS HANDELS GMBH
BURGSTRASSE 21
44867 BOCHUM
ALLEMAGNE
www.kompernass.com
Inhoud
WAARSCHUWING! LETSELGEVAAR!
⚠ WAARSCHUWING! LETSELGEVAAR!
⚠ WAARSCHUWING - LETSELGEVAAR!
WAARSCHUWING - LETSELGEVAAR!
⚠ WAARSCHUWING - LETSELGEVAAR!
KOMPERNASS HANDELS GMBH
BURGSTRASSE 21
44867 BOCHUM
DUITSLAND
www.kompernass.com
Obsah
POZOR - HMOTNÉ ŠKODY!
POZOR - HMOTNÉ ŠKODY!
POZOR - HMOTNÉ ŠKODY!
KOMPERNASS HANDELS GMBH
BURGSTRASSE 21
44867 BOCHUM
NĚMECKO
www.kompernass.com
Spis treści
KOMPERNASS HANDELS GMBH
BURGSTRASSE 21
44867 BOCHUM
NIEMCY
www.kompernass.com
Obsah
KOMPERNASS HANDELS GMBH
BURGSTRASSE 21
44867 BOCHUM
NEMECKO
www.kompernass.com
Índice
KOMPERNASS HANDELS GMBH
BURGSTRASSE 21
44867 BOCHUM
ALEMANIA
www.kompernass.com
Indholdsfortegnelse
3) Sæt knivholderen ⑦ med emulgeringsskiven ⑫ på styreakslen ⑩.
4) Hæld fløden i.
KOMPERNASS HANDELS GMBH
BURGSTRASSE 21
44867 BOCHUM
TYSKLAND
www.kompernass.com

KOMPERNASS HANDELS GMBH
BURGSTRASSE 21
44867 BOCHUM
GERMANY
www.kompernass.com
Last Information Update · Stand der Informationen · Version des informations · Stand van de informatie
Stav informaci · Stan informacji · Stav informacií · Estado de las informaciones · Tilstand af information:
08 / 2021 · Ident.-No.: SMZE500C2-062021-1
IAN 373139_2104



- MINI CHOPPER / MULTIZERKLEINERER / HACHOIR MULTIFONCTION SMZE 500 C2
- MINI CHOPPER
- HACHOIR MULTIFONCTION
- UNIVERZÁLNÍ DRTIČ
- MULTIFUNKČNÝ KRÁJAČ
- MULTIHAKKER
- MULTIZERKLEINERER
- DE AT CH
- GB/IE SHORT MANUAL PAGE 1
- CONTENTS
- INFORMATION ABOUT THIS SHORT MANUAL
- WARNING
- INTENDED USE
- PACKAGE CONTENTS
- UNPACKING
- NOTE
- DISPOSAL OF THE PACKAGING
- APPLIANCE DESCRIPTION
- TECHNICAL DATA
- CO TIME
- SAFETY INFORMATION
- RISK OF ELECTRIC SHOCK
- WARNING! RISK OF INJURY
- ⚠ WARNING! RISK OF INJURY
- CAUTION - APPLIANCE DAMAGE
- BEFORE FIRST USE
- OPERATION
- CHOPPING
- CAUTION - PROPERTY DAMAGE
- WARNING - RISK OF INJURY
- WHIPPING CREAM
- CLEANING AND CARE
- WARNING – RISK OF ELECTRIC SHOCK
- STORAGE
- TROUBLESHOOTING
- DISPOSAL OF THE APPLIANCE
- SERVICE
- IMPORTER
- INHALTSVERZEICHNIS
- TABLE DES MATIÈRES
- INHOUD
- WAARSCHUWING! LETSELGEVAAR
- ⚠ WAARSCHUWING! LETSELGEVAAR
- ⚠ WAARSCHUWING - LETSELGEVAAR
- WAARSCHUWING - LETSELGEVAAR
- OBSAH
- POZOR - HMOTNÉ ŠKODY
- SPIS TREŚCI
- ÍNDICE
- INDHOLDSFORTEGNELSE
- KOMPERNASS HANDELS GMBH
Brand : SILVERCREST
Model : SMZS 260 I2
Category : Food processor