
Pour Over - Coffee maker BEEM - Free user manual and instructions
Find the device manual for free Pour Over BEEM in PDF.


| Product type | Manual pour-over coffee maker (Pour Over) |
| Brand | BEEM |
| Model | Pour Over (ref. 03597) |
| Power supply voltage | 220 – 240 V ~ 50 – 60 Hz |
| Power | 1500 W |
| Water tank capacity | max. 1000 ml |
| Carafe capacity | max. 750 ml (approx. 6 cups) |
| Adjustable temperature range | 80 – 98 °C |
| Adjustable coffee/water ratio | 1:10 to 1:20 |
| Brewing modes | Auto (93 °C, 1:15) and Manual |
| Additional functions | Hot water preparation, timer preset, integrated scale |
| Scale | Yes, with tare function (Waage button) |
| Carafe material | Glass with silicone sleeve |
| Filters | Paper filters size 2 (10 included) |
| Main components | Body, tank lid, carafe, silicone sleeve, fixing strap, filter holder, filter rest, scale |
| Safety | Automatic shut-off, overheat protection, hot surfaces indicated |
| Cleaning | Cleaning with water; descaling with Clean program and descaling concentrate |
| Warranty | According to terms; excludes improper use, scaling, unauthorized repairs |
| Included accessories | Carafe, sleeve, filter holder, filter rest, 10 paper filters, instruction manual |
Frequently Asked Questions - Pour Over BEEM
User questions about Pour Over BEEM
0 question about this device. Answer the ones you know or ask your own.
Ask a new question about this device
Download the instructions for your Coffee maker in PDF format for free! Find your manual Pour Over - BEEM and take your electronic device back in hand. On this page are published all the documents necessary for the use of your device. Pour Over by BEEM.
USER MANUAL Pour Over BEEM
natural_image
Modern coffee maker with clear glass filter and digital display (no visible text or symbols on main body)POUR OVER
03597
Gebrauchsanleitung
Operating instructions
Mode d'emploi
natural_image
Simple icon of a balance scale with a bell and clock face, enclosed in a circle (no text or symbols)
natural_image
Thermometer icon inside a circle with no text or symbolsDE
On the fold-out page you will find all the illustrations that are referred to in these operating instructions. Open up the page before reading the operating instructions.
FR
natural_image
Close-up of a hand pouring dark liquid into a glass coffee maker with a straw buffer (no text or symbols visible)
natural_image
Close-up of a digital kitchen setup with a glass container pouring liquid from a water bottle onto a digital kitchen (no visible text or symbols)
natural_image
Close-up of a stainless steel industrial fan with a circular arrow indicating rotation or flow, partially filled with a mesh filter (no text or symbols visible)
natural_image
Close-up of a hand pouring liquid from a glass container into a glass of dark liquid (no text or symbols visible)


natural_image
Beem filter with conical contents and a handle, labeled 'BEEM' (no additional text or symbols visible)Optional erhältlich | Optionally available | Disponibles en option | Opcionalmente disponible | Disponibili come opzione

natural_image
Simple gray fan-shaped object on white background (no text or symbols)Information About Your Operating Instructions 25
Intended Use 25
Safety Instructions 26
Before Initial Use 29
Setting Up and Connecting the Device 29
Handling and Operation 30
Operating Elements 30
Time 30
Display 31
Mode 31
Brewing Temperature 31
Coffee / Water Ratio 31
Other Functions 32
Preparation 32
Filling the Water Tank 32
Preparing the Carafe for Brewing Coffee 32
Preheating Utensils 32
Use 33
Brewing Coffee 33
Brewing Coffee with a Preset Time 35
Boiling Water 35
Tips for the Perfect Pour-Over Coffee 36
The Type of Coffee 36
Grinding 36
Dosage 37
Water 37
Paper Filter 37
Cleaning and Care 38
Descaling 38
Storage 39
Troubleshooting 39
Warranty and Limitations of Liability 41
Technical Data 42
Disposal 42
Items Supplied
- Main device
- Water tank lid
- Carafe
- Silicone sleeve
- Fixing strap
- Filter cone
- Filter support
• Paper filter, Size 2 (10 x)
- Operating instructions
Check the items supplied for completeness and transport damage. If you find any damage to the device or the connection, do not use the device, but contact our customer service department.
Device Overview
Key
(Picture A + B)
Fill-level indicator
2 Display
3 Rotary knob
4 button with operating lamp
5 and buttons
6 Fixing strap
7 Silicone sleeve
8 Carafe
9 Waage button
10 Scale
II Filter support
12 Filter cone
13 Main device
14 Water tank
15 Water tank lid
16 Outlet
17 Rotating brew head
Congratulations!
Dear Customer,
We are delighted that you have chosen this coffee machine.
If you have any questions about our device and about spare parts / accessories, contact the customer service department via our website: www.beem.de
Information About Your Operating Instructions
Before using the device for the first time, please read the operating instructions carefully and keep them for future reference. If the device is given to someone else, these operating instructions should also be handed over with it. They are an integral part of the device. The manufacturer and importer do not accept any liability if the information in these operating instructions is not complied with.
Explanation of the Symbols

Danger symbols: These symbols indicate a risk of injury. Read through the associated safety instructions carefully and follow them to prevent personal injury.

Supplementary information


Suitable for food use.
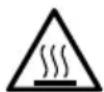
Beware of hot surfaces!

Read operating instructions before use!
Explanation of the Signal Words
Signal words indicate hazards if the associated notices are not followed.
DANGER – high risk, results in serious injury or death
WARNING – medium risk, may result in serious injury or death
CAUTION – low risk, may result in slight or moderate injury
NOTICE – may result in risk of damage to material
Intended Use
- This device is only intended to be used to make coffee using coffee powder and to heat water.
- This device is only designed for use in a private household and is not intended for commercial applications.
- The device should only be used as described in the operating instructions. Any other use is deemed to be improper.
Safety Instructions

Warning: Read all safety notices, instructions, illustrations and technical data provided with this device. Failure to follow the safety notices and instructions may result in electric shock, fire and / or injuries.
- This device may be used by children aged 8 and over and by people with reduced physical, sensory or mental abilities or a lack of experience and / or knowledge if they are supervised or have received instruction on how to use the device safely and have understood the dangers resulting from failure to comply with the relevant safety precautions.
• Children must not play with the device. - Cleaning and user maintenance may not be carried out by children, unless they are older than 8 years of age and are supervised.
• Children younger than 8 years of age and animals must be kept away from the device and the connection.

CAUTION: Hot surfaces!
The device and the accessories are very hot during and shortly after use. Only ever touch the silicone sleeve, buttons and the rotary knob while the device is in operation. Allow the device to cool down completely before it is cleaned.
- Never exceed the maximum fill level (MAX mark)! If the water tank is overfilled, it or the carafe could overflow.
- The device is not designed to be operated with an external timer or a separate remote control system.
- Never immerse the device and the connection in water or other liquids and ensure that they cannot fall into water or become wet.
-
The device must always be disconnected from the mains power when it is left unattended and before assembling, disassembling and cleaning the device.
-
In the interest of your own safety, inspect the device and the connection for damage each time before you use it. Use the device only if it is in working order.
- Do not make any modifications to the device. Do not replace the connection yourself. If the device or the connection of the device is damaged, it must be replaced by the manufacturer, customer service department or a specialist workshop in order to avoid any hazards.
- It is essential to follow the instructions in the “Cleaning and Care” chapter.

DANGER – Risk of Electric Shock
- Use the device only in closed rooms.
- Do not use the device in rooms with high humidity.
- Should the device fall into water, switch off the power supply immediately. Do not attempt to pull it out of the water while it is still connected to the mains power!
- Never touch the device and the connection with wet hands when these components are connected to the mains power.
- Make sure that the steam which emerges is not aimed directly at electrical devices and equipment containing electrical components.

WARNING – Danger of Injury
- Risk of suffocation! Keep children and animals away from the packaging material.
Danger of scalding from heat, hot steam or condensation!
- Avoid coming into contact with the rising steam. Do not open the water tank lid during the brewing process.
- The carafe and filter cone become hot as soon as they are filled with hot water or hot coffee. During and after brewing, only ever touch the silicone sleeve or the tab on the filter cone.
- Be careful when removing the filter cone after the brewing process. There may still be hot water remaining in the filter cone and in the paper filter! Always allow all parts to cool down first before they are removed / cleaned.
-
Never pour water into the water tank when the device is switched on or during the brewing process. Allow the device to cool down before filling it again.
-
Do not move the device during the brewing process.
-
The coffee which is prepared is hot! Be careful when handling hot liquids.
-
Risk from harmful germs! The carafe and the filter cone and the filter support must be completely emptied and cleaned after use.
- Make sure that the connection does not present a trip hazard. The connection may not hang down from the surface on which the device is placed in order to prevent the device from being pulled down.

WARNING – Danger of Fire
- Do not use the device in rooms containing easily ignitable dust or poisonous and explosive fumes.
- Do not operate the device in the vicinity of combustible material. Do not place any combustible materials (e.g. cardboard, paper, wood or plastic) in or on the device.
- Do not cover the device during operation.
- Do not connect the device along with other devices (with a high wattage) to a multiple socket in order to prevent overloading and a possible short circuit (fire).
- Do not use the device in conjunction with extension cables.
NOTICE – Risk of Damage to Material and Property
- The device should only be used if it has been correctly assembled! Check before each use whether the buttons on the silicone sleeve are fixed in place correctly, the filter cone is inserted correctly and the water tank is filled correctly!
- Check the carafe regularly for any scratches or cracks. If you find any damage to the carafe, do not use it.
- Do not place the carafe on a hot hob.
- Do not pour any very cold water into the hot carafe or the hot water tank.
- Switch off the device and pull the mains plug out of the plug socket if an error occurs during operation, when there is a power cut or before a thunderstorm.
- Never pull or carry the device by the mains cable. When you pull it out of the socket, always pull on the mains plug and never the mains cable!
- Protect the device from other heat sources, naked flames, sub-zero temperatures, persistent moisture, wet conditions and impacts.
- Use only original spare parts from the manufacturer in order to guarantee that there is no interference that may prevent the device from working and to avoid damage.
Before Initial Use
PLEASE NOTE!
- There may still be some production residues on the device. To avoid harmful effects to your health, clean the device before you first use it (see the “Cleaning and Care” chapter).
I. Remove all packaging materials and any possible protective films used for protection during transportation. Never remove the rating plate and any possible warnings!
2. Before you enjoy your first coffee, we recommend that you carry out a trial run to remove any possible production residues in the water system. To do this, follow the instructions in the “Setting Up and Connecting the Device” and “Use” chapters.

When the device is first used, production-related additives (e.g. grease) may cause a small amount of smoke and / or an odour to be produced. This is normal and not a device defect.
- Repeat this process twice. Do not drink this coffee!
- Clean the device and accessories (see the "Cleaning and Care" chapter).
Setting Up and Connecting the Device
PLEASE NOTE!
- Do not place the device below kitchen wall units or similar cupboards. The rising steam could cause damage to them!
- The surfaces of furniture may possibly contain elements which can attack and soften the adjustable feet of the device. If necessary, place a suitable pad below the adjustable feet.
- Only connect the device to a socket with safety contacts that is properly installed and matches the technical data of the device. The socket must also be readily accessible after connection so that the connection to the mains can quickly be isolated.
- Lay the connection in such a way that it does not become squashed or bent and does not come into contact with hot surfaces (also applies to the hot surfaces of the device!).
I. Place the device in a suitable location, following the safety instructions and the notices provided at the beginning of this chapter.
Please Note: Always set up the device with a clear space at the sides (at least 20 cm) and clear space above it (at least 30 cm) on a flat, solid and heat-resistant surface that is resistant to splashing.
- Fully unwind the connection and insert the mains plug into a properly installed socket that is easily accessible.
Handling and Operation
Operating Elements
The device has the following operating elements:
| Operating element Function | |
| Rotary knob (3) | Select a program |
Bu  | Confirm (setting the time) |
| Start / end process | |
| Switch to time display | |
  | Increase or reduce value (by 1 in each case) |
| Waage button (9) | Set scale to “0” (Tare function) |
- Each program features an LED light which indicates that it has been selected. You can turn the rotary knob to switch between the different programs.
- To change the values faster, the and buttons can be held down.
- If the carafe (8) is removed from the main device (13) while water is being dispensed, this dispensing is stopped automatically. If the carafe is placed back into the main device within around 30 seconds, the dispensing of water is resumed. If this is not done, the process is aborted.
Time
As soon as the mains plug is plugged into a plug socket, the display (2) flashes three times with all indications lit up. A beep then sounds and the time display “00:00” flashes up. The clock has a 24-hour time format.
I. Use the △ and ▽ buttons (5) to set the hours.
2. Press the button (4) to switch to the minutes.
3. Use the and buttons to set the minutes.
4. Press the ⏻ button to confirm the set time. The device switches to Brühmodus (brew mode) and "0 g" is shown on the display.

The time is saved until a new time is set or the device has been disconnected from the mains power supply.
- To change the set time, turn the rotary knob (3) to the Programm position (preset time).
- Hold down the button for around 3 seconds. The time indicator flashes on the display.
- Perform steps 1 - 3.
- Press the button to confirm the changed time.
Display
Roughly 30 seconds after the last button was pressed, the indication shown on the display (2) switches to the time, unless the device is in operation. Press any button to return to the last active display.
After around 10 minutes, the display switches off completely. Press any button to return to the last active display.
Mode
The device has two different modes: “Auto” and “Manual”. In “Auto” mode, the brewing temperature and the ratio of coffee powder to water is preset to 93 °C and 1:15. In “Manual” mode, you can set these variables individually (see the following “Brewing Temperature” and “Coffee / Water Ratio” sections). “Manual” mode is preset when the device is switched on.
I. Turn the rotary knob (3) to the position Brühmodus (brew mode).
- Use the △ and ▽ buttons (5) to set the mode you want. The selected mode is shown permanently on the display (2) and is automatically active.

The Brühmodus (brew mode) program is additionally used for weighing the coffee powder.
Brewing Temperature
The temperature of the water which is poured over the coffee powder to brew it is preset to 93 °C in “Auto” mode. In “Manual” mode you can in turn set it individually. You can choose a temperature of between 80 and 98 °C.
I. Turn the rotary knob (3) to the position Temp.
- Use the △ and ▽ buttons (5) to set the temperature you want. The selected temperature is shown on the display (2) and is automatically active.
Coffee / Water Ratio
The ratio between coffee powder and water is preset to 1:15 in "Auto" mode. In "Manual" mode you can set it individually. You can choose an option of between 1:10 and 1:20. The second figure represents the multiple of the amount of water relative to a quantity of coffee.
Example: With a ratio of 1:15 and a coffee quantity of 15 g, 15 times the amount of water, so in this case 225 ml of water, is used for brewing.
Bear in mind when selecting the ratio and the quantity of coffee powder that the quantity of the brewed coffee must not exceed 750 ml!
I. Turn the rotary knob (3) to the position K/W Verhältnis (coffee / water ratio).
- Use the △ and ▽ buttons (5) to set the option you want. The selected ratio is shown on the display and is automatically active.
Other Functions
As well as the possibility of preparing pour-over coffee with the device, it also has three further functions:
- Preset time: You can use this function to set a desired time at which your coffee will automatically be freshly brewed (see the “Preparation” chapter – “Brewing Coffee with a Preset Time”).
- Cleaning: You can use this function to descale the device (see the “Cleaning and Care” chapter – “Descaling”).
- Boil water: You can use this function to boil or heat water, e. g. for making tea (see the “Preparation” chapter – “Boiling Water”).
Preparation
PLEASE NOTE!
- Do not pour milk or other liquids into the water tank. Only ever use water to make coffee!
Filling the Water Tank
I. Take off the water tank lid (15).
2. Pour the quantity of water you want (min. 200 ml, max. 1000 ml) into the water tank (14). When you do this, note the MIN and MAX markings on the fill-level indicator (I) on the water tank!
3. Place the water tank lid on the water tank and press it on.
Please Note: The carafe has a useful volume of no more than 750 ml! It must not be overfilled! When brewing coffee, the device only takes the preset amount of water from the water tank (see the “Handling and Operation” chapter – “Mode” and “Coffee / Water Ratio”).
Preparing the Carafe for Brewing Coffee
I. Place the silicone sleeve (7) around the narrow part of the carafe (8).
2. Fix the silicone sleeve to the carafe using the fixing strap (6). Close the fixing strap just like a conventional belt.
3. Insert the filter cone (12) into the carafe.
Preheating Utensils
I. Insert a paper filter (size 2) into the filter cone (12).
2. Boil water and use it to moisten the paper filter. The hot water causes the paper filter to lose its own taste and the filter cone and the carafe (8) are preheated.
- Pour hot water into your favourite cup and preheat it.
- Remove the filter cone with paper filter by the tab of the filter cone and pour away the water from the carafe.
- Insert the filter cone back into the carafe.

Pour away the water from the cup only shortly before serving the prepared coffee.
Use
PLEASE NOTE!
- Do not operate the device without water or with less water than is required to reach the MIN mark (approx. 200 ml).
• Never overfill the filter cone. - Never start the brewing process without the carafe below the outlet.

The practical quick guide on the device helps you to start the first brewing process quickly and easily. Once you have got accustomed to using it, the quick guide can be removed from the device.
Brewing Coffee
The preparation of pour-over coffee is about more than just a quick coffee from time to time. There's a whole philosophy behind the term. It's all about taking time to enjoy the preparation and the freshly brewed coffee to the full. The way in which the coffee powder is infused in the pour-over method is the special feature and also the secret of this method of preparation. Manual pour-over preparation requires a little care, but don't worry – our coffee machine will do this for you! Pour-over coffee with perfectly balanced ingredients – always just as it should be. And even if you are looking after your guests or focusing on your beauty sleep, you do not have to do without fresh pour-over coffee. Our nimble utensil with preset time takes care of the preparation when you are otherwise engaged.

You will find tips on dosage and preparation in our “Tips for the Perfect Pour-Over Coffee” on the following pages.
I. Fill the water tank (14) with water (see the "Preparation" chapter – "Filling the Water Tank").
2. Turn the rotary knob (3) to the position Brühmodus (brew mode). "0 g" is shown on the display.
3. Place the prepared and preheated carafe (8) with filter cone (12) in the main device (13) onto the scale (10) (see the “Preparation” chapter – “Preparing the Carafe for Brewing Coffee” and “Preheating Utensils”).
4. Press the Waage button (9) to reset the scale to zero.
5. Take the carafe with filter cone out of the main device. The display (2) shows the message “----”.

If the carafe has not been placed on the scale or no coffee powder has been poured into the filter cone, the message “NOC” or “----” appears on the display. This means when the brewing process is started the device heats up the water in the water tank, but prevents the dispensing of water.
- Fill the paper filter with the desired amount of freshly ground coffee.
Tip: A conventional coffee measuring spoon (not supplied with the device) is equivalent to roughly 7 g of coffee powder.
-
Place the carafe with the filled filter cone on the scale in the main device. The amount of coffee is shown in grams on the display.
-
Repeat steps 5 – 7 if necessary until the desired amount of coffee powder has been reached.
-
Press the button ⏻ (4) to start the brewing process. The operating lamp in the ⏻ button starts to flash and the water in the water tank is heated up. You can read off the current temperature of the water on the display.
Once the set brewing temperature has been reached, the water is conveyed from the water tank into the rotating brew head (17) and from there it is distributed in circular movements on the coffee powder in the filter cone. You can read off the amount of brewed coffee in millilitres on the display.
Please Note: The brewing process is divided into two different phases: the swelling ("blooming") and infusion. This means that, after water starts to be dispensed, the device interrupts this again for approx. 30 seconds before the brewing process is continued. In these 30 seconds, the coffee powder can bloom, which is essential for the development of the flavours.
- The device stops automatically once the amount of water which is stipulated by the coffee / water ratio has run through. Five beeps sound and the operating lamp goes out. The device switches to standby mode.
Please Note: You can end the brewing process at any time by pressing the ⏻ button.

The brew head keeps rotating until the outlet (16) is back in the middle.
II. Wait until all the water has run through the filter cone and then take the carafe out of the main device.
-
Take the coffee filter out of the carafe by the tab and place it in the filter support (II) to allow it to cool down (Picture C).
-
Pour the water out of your preheated cup.
-
Now you can pour the coffee that has been made directly from the carafe.
Enjoy the perfect cup of coffee!
Brewing Coffee with a Preset Time
You have the option of setting a preset time so that the coffee is freshly prepared at the time you want.

To make coffee with a preset time, the clock needs to be set (see the “Handling and Operation” chapter – “Time”).
I. Perform steps I - 8 from the "Brewing Coffee" section.
2. Turn the rotary knob (3) to the position Programm. The hour display flashes.
-
Use the and buttons (5) to set the hours.
-
Press the ⏻ button (4) to switch to the minutes display. The minutes display flashes.
-
Use the and buttons to set the minutes.
-
Press the button to confirm the set start time.
-
Press the ⏻ button again to activate the preset time. On the display (2), PROG is shown constantly and the preset time is active.
Please Note: As long as the preset time is activated, you cannot make any further settings or use other functions.
- Press the button again to deactivate the preset time. The PROG display goes out and the preset time is no longer active.

The preset time remains stored until a new desired time is set. To reactivate the desired time which is stored, turn the rotary knob to the Programm position and wait until the hours stop flashing. Then press the ⏻ button to activate the preset time.
Boiling Water
You can individually set the temperature to which the water is heated in the Wasser program. You can choose a temperature of between 32 and 100 °C.
I. Fill the water tank (13) with water (see the “Preparation” chapter – “Filling the Water Tank”).
Please Note: The carafe has a useful volume of no more than 750 ml! It must not be overfilled!
-
Place the carafe (8) without the filter cone (12) in the main device (13) on the scale (10).
-
Turn the rotary knob (3) to the position Wasser. An indication of the temperature appears on the display (2).
-
Use the △ and ▽ buttons (5) to set the temperature you want. The selected temperature is shown on the display and is automatically active.
-
Press the button ⏻ (4) to start the heating process. The operating lamp in the ⏻ button starts to flash and the water in the water tank is heated up. You can read off the current temperature of the water on the display.
Once the set temperature has been reached, the water is conveyed from the water tank into the rotating brew head (17) and from there into the carafe.
Please Note: In this program, the brew head does not dispense the water in circular movements, but remains fixed in the middle.
- The device stops automatically as soon as all the water has been dispensed from the water tank. Five beeps sound and the operating lamp goes out. The device switches to standby mode.
Please Note: You can end the heating process at any time by pressing the ⏻ button.
- Wait until no more water drips from the outlet (16) and then take the carafe out of the main device.
Tips for the Perfect Pour-Over Coffee
Not all coffee is the same. The taste depends on many different factors – from the method of preparation via the utensils used to the coffee beans themselves.
The pour-over method is particularly suitable for bringing the best out of the valuable ingredients and taste of the coffee beans. Below we have summarised a few of the most important basics for making coffee.
The Type of Coffee
- Even if many factors play a role in the success of the perfect coffee during pour-over preparation, the most important ingredient is of course the coffee bean itself. The taste differs according to the type of coffee, the soil on which the coffee was grown, the growing region and climate, and the roasting process to which the coffee beans were subjected.
- With pour-over coffee the rule is: quality and not quantity! In particular because the coffee prepared with this technique is best enjoyed pure, without milk or sugar, it is worthwhile spending a little more when choosing your coffee beans. We recommend gently roasted, light varieties, as they contain few bitter substances and their own taste is therefore particularly well preserved.
Grinding
- Coffee loses its aroma quickly after grinding. To get the best out of the coffee beans, we recommend that you grind them just before brewing – preferably by hand. The advantage of manual coffee mills is that the grinding fineness can usually be adjusted infinitely and therefore more precisely. In addition, the coffee mills can be cleaned more conveniently, making it easy to switch between different types of coffee.
- The grinding fineness is one of the decisive factors. If it is too fine, the water takes too long to percolate through, which involves a longer brewing time. If the grind is too coarse, the brewing time is too short because the water passes through too quickly. A medium grinding fineness is therefore recommended for the pour-over method. The grain size of conventional table salt can serve as a model. If you want to be on the safe side, let a barista of your choice grind a small portion of the beans and use this as a comparison when grinding at home.
Dosage
- To obtain a successful result, the ratio of coffee powder to water is crucial. If the water content predominates, the coffee loses its taste. If you use too much coffee powder, the coffee becomes too strong. We recommend that you start off with a ratio of 1:17, which is roughly equivalent to 15g of coffee per 250~ml of water. Of course, tastes vary from person to person, so you need to get to know your own ideal ratio.
Water
- Along with the coffee beans, water is the main component of your coffee. You should therefore make sure that the quality of the water you use for brewing your coffee is good. Since tap water is often too hard, we recommend that you use filtered water. For a particularly fine taste you can also use still mineral water. Here, too, you should experiment, because not every mineral water tastes the same.
- In addition to the water quality, the water temperature is also decisive for the taste of your coffee. For best results, pour water at a temperature between 92 and 96 °C over the freshly ground coffee. Always avoid brewing the coffee with boiling water! If the water is too hot, valuable ingredients in the coffee powder can burn, which makes the coffee bitter.
Paper Filter
- The choice of paper filter should not be underestimated. The paper filter thickness can affect the aroma of the coffee. The thinner the paper filter, the fewer particles of the paper filter get into your coffee and the more permeable it is to the coffee aromas.
- In addition, you should always moisten the paper filter before filling it with freshly ground coffee powder. The hot water causes the paper filter to lose its own taste and the coffee filter and the coffee pot are preheated.
For best results we recommend our BEEM Pour Over Paper Filters 100 pcs – Size 2. The natural paper filters are not bleached and are therefore free from artificial substances, so that the taste of your coffee is not negatively affected. Due to their pointed shape they adapt wonderfully to the filter cone and ensure that everything stays in place. They also have a small tab that makes it easier for you to open the paper filters. The paper filters can be obtained from selected specialist stockists, directly via our website www.beem.de or from our customer service department on request.
As you can see, in the preparation of pour-over coffee there are many variables that can influence the final result. Therefore it is important for you to enjoy the process of experimentation until you have found the perfect mixture for you.
Cleaning and Care
PLEASE NOTE!
- Do not use any toxic, corrosive or abrasive cleaning agents or scouring sponges to clean the device. These can damage the surface.
I. Wait until the device has completely cooled down.
2. Take the paper filter with the coffee grounds out of the filter cone (12).
3. Clean the filter cone, the carafe (8) and the filter support (11) with mild detergent and warm water.
4. Wipe down the housing of the main device (13) with a damp cloth. If necessary, use a little mild detergent to remove more intense soiling.
5. Check the connection regularly for any damage.
Descaling
Limescale deposits have an adverse effect not only on the quality of the coffee, but they also cause power losses and shorten the lifespan of the device. The thicker a limescale layer is, the more difficult it is to remove.
After 50 brewing processes, the LED of the Clean program starts to flash, indicating that the device needs to be descaled.
For descaling we recommend the BEEM premium descaler concentrate. The efficient, food-safe and environmentally friendly BEEM premium descaler concentrate is available from selected specialist stockists, via our website www.beem.de or from our customer service department on request.
Descaling with the BEEM Premium Descaler Concentrate

With the Clean program, the high temperature may cause a little water to splash out of the water tank (14) at the end of the boiling process.
I. Fill the water tank with a concentrate/water solution of no more than 1:20 (one part concentrate to 20 parts water) (see the “Preparation” chapter – “Filling the Water Tank”).
Please Note: The carafe has a useful volume of no more than 750 ml! It must not be overfilled!
-
Place the carafe (8) in the main device (13) on the scale (10).
-
Turn the rotary knob (3) to the Clean position. The temperature “100 °C” appears on the display.
-
Press the button ⏻ (4) to start the heating process. The operating lamp in the ⏻ button starts to flash and the water in the water tank is heated up. You can read off the current temperature of the water on the display.
Once the temperature of 100 °C has been reached, the water is conveyed from the water tank into the rotating brew head (17) and from there in circular movements into the carafe.
- The device stops automatically as soon as all the water has been dispensed from the water tank. Five beeps sound and the operating lamp goes out. The device switches to standby mode.

The brew head keeps rotating until the outlet (16) is back in the middle.
- To rinse the device, allow two tankfuls (approx. 750 ml each) of clear water to run through it and then clean the carafe (see the “Cleaning and Care” chapter). The device is now descaled and ready to be used again.
Storage
Disconnect the device from the mains power when it is not going to be used for a prolonged period. Clean the device again if necessary (see the “Cleaning and Care” chapter) and let it dry completely.
Store the device and all accessories in a dry, clean, frost-free place that is protected from direct sunlight and cannot be accessed by children or animals.
Troubleshooting
If the device does not work properly, check whether you are able to rectify the problem yourself. If the problem cannot be solved with the steps that are listed, contact the customer service department.

Do not attempt to repair an electrical device yourself!
| Problem Possible cause Fix | ||
| The device does not switch on. | The mains plug is not inserted correctly in the plug socket. | Correct the fit of the mains plug. |
| The plug socket is defective. Try another plug socket. | ||
| There is no mains voltage. | Check the fuse of the mains connection. | |
| The fuse in the fuse box is triggered. | Too many devices connected to the same circuit. | Reduce the number of devices in the circuit. |
| Water runs out of the device. | There is too much water in the water tank (14). | Do not overfill the water tank! |
| No water runs out of the outlet (16). / The error message “NOC” or “----” appears. | The water tank is empty. | Fill the water tank with water (see the “Preparation” chapter – “Filling the Water Tank”). |
| The carafe (8) has been removed from the main device. | Within 30 seconds, place the carafe back in the main device (13) on the scale (10). | |
| The device is furred up. | Descale the device (see the “Cleaning and Care” chapter – “Descaling”). | |
| The scale was set to zero after filling the filter cone (12). | Refill and weigh the filter cone (see the “Use” chapter – “Brewing Coffee”). | |
| The coffee is too weak. | The ratio of water to coffee is set too high. | Reduce the coffee / water ratio (see the “Handling and Operation” chapter – “Coffee / Water Ratio”). |
| The scale was not reset to zero. | Set the scale to zero when the carafe with filter cone is in the device (see the “Use” chapter – “Brewing Coffee”). | |
| The coffee is too strong. | The ratio of water to coffee is set too low. | Increase the coffee / water ratio (see the “Handling and Operation” chapter – “Coffee / Water Ratio”). |
| The coffee does not taste very good. | The device needs to be cleaned. | Clean the device (see the “Cleaning and Care” chapter). |
| The coffee has been too finely or too coarsely ground (in a coffee mill). | Adjust the grinding fineness of the coffee or use another coffee powder. | |
| The coffee/water ratio is not ideal. | Individually adjust the coffee / water ratio (see the “Handling and Operation” chapter – “Coffee / Water Ratio”). | |
| The water quality is not good. | Check the water quality and filter the water if necessary. | |
| The device switches off during the brewing process. | The carafe has been removed from the main device. | Within 30 seconds, place the carafe back in the main device on the scale. |
| A large amount of steam is produced in the brewing process. | The device is furred up. | Descale the device (see the “Cleaning and Care” chapter – “Descaling”). |
| During use, an unpleasant smell is detected. | The device is being used for the first time. | A smell often develops when new devices are first used. The smell should disappear once the device has been used several times. |
| The device has previously been descaled. | Rinse out the device with clear water. | |
Warranty and Limitations of Liability
The warranty excludes any defects caused by improper use, calcification, damage or repair attempts. This also applies to normal wear and tear.
We do not accept any liability for damage or consequential damage resulting from:
- Failure to follow the operating instructions
• Non-designated use - Improper or unsuitable handling
• Repairs which are not carried out properly - Unauthorised modifications
- Use of outside parts or spare parts
- Use of unsuitable additional parts or accessories

Keep the original packaging during the warranty period of the device so that the device can be properly packaged up if it needs to be returned. The warranty claim will lapse if any damage is caused during transport.
Technical Data
Article number: 03597
Model number: CDC-503
Power supply: 220 - 240 V \~ 50 - 60 Hz
Power: 1500 W
Protection class: I
Capacity (useful volume)
Water tank: max. 1000 ml
Carafe: max. 750 ml (approx. 6 cups)
ID operating instructions: Z 03597 M BE V5 0522 mh


Disposal
Dispose of the packaging material in an environmentally friendly manner so that it can be recycled.

The adjacent symbol (crossed-out bin underlined) means that used devices should not be disposed of in the domestic waste, but should instead be taken to special collection and return systems.
Owners of used devices from private households can take them free of charge to the collection points of the public waste disposal authorities or the disposal points which are set up by manufacturers and distributors under the Electrical Equipment Act.
Businesses which market electrical and electronic devices are also obliged to take back used devices.
All rights reserved.
Composition 44
(illustration A + B)
Calls to German landlines are subject to your provider's charges.


- POUR OVER
- DE
- FR
- Optional erhältlich | Optionally available | Disponibles en option | Opcionalmente disponible | Disponibili come opzione
- Handling and Operation 30
- Preparation 32
- Use 33
- Tips for the Perfect Pour-Over Coffee 36
- Cleaning and Care 38
- Storage 39
- Troubleshooting 39
- Technical Data 42
- Disposal 42
- Items Supplied
- Device Overview
- Key
- Congratulations!
- Information About Your Operating Instructions
- Explanation of the Symbols
- Explanation of the Signal Words
- Intended Use
- Safety Instructions
- CAUTION: Hot surfaces!
- DANGER – Risk of Electric Shock
- WARNING – Danger of Injury
- Danger of scalding from heat, hot steam or condensation!
- WARNING – Danger of Fire
- NOTICE – Risk of Damage to Material and Property
- Before Initial Use
- PLEASE NOTE!
- Setting Up and Connecting the Device
- Handling and Operation
- Operating Elements
- Time
- Display
- Mode
- Brewing Temperature
- Coffee / Water Ratio
- Bear in mind when selecting the ratio and the quantity of coffee powder that the quantity of the brewed coffee must not exceed 750 ml!
- Other Functions
- Preparation
- Filling the Water Tank
- Preparing the Carafe for Brewing Coffee
- Preheating Utensils
- Use
- Brewing Coffee
- Brewing Coffee with a Preset Time
- Boiling Water
- Tips for the Perfect Pour-Over Coffee
- The Type of Coffee
- Grinding
- Dosage
- Water
- Paper Filter
- Cleaning and Care
- Descaling
- Descaling with the BEEM Premium Descaler Concentrate
- Storage
- Troubleshooting
- Warranty and Limitations of Liability
- Technical Data
- Disposal
- Composition 44
Brand : BEEM
Model : Pour Over
Category : Coffee maker