
SRW 2 A1 - Alarm clock radio SILVERCREST - Free user manual and instructions
Find the device manual for free SRW 2 A1 SILVERCREST in PDF.

| Product Type | Alarm Clock Radio |
| Brand | SilverCrest |
| Model | SRW 2 A1 |
| Category | Radio-Reveil / Alarm Clock Radio |
| Dimensions (approx) | 20 x 12 x 8 cm |
| Weight (approx) | 500 g |
| Power Supply | AC 230V~ 50Hz, Battery Backup (2x AAA, not included) |
| Display Type | LED (Red digits) |
| Alarm Functions | Dual alarm, snooze (9 min), buzzer or radio wake-up |
| Radio Band | FM (88-108 MHz) |
| Additional Functions | Sleep timer (up to 90 min), dimmer (2 levels), nap timer |
| Speaker Output | 1 W RMS |
| Color | Black (also available in white) |
| Material | Plastic (ABS) |
| Maintenance & Cleaning | Wipe with a dry, soft cloth. Do not use abrasives. |
| Safety | Do not expose to water or high humidity. Keep away from heat sources. |
| Spare Parts & Reparability | Spare parts available via SilverCrest service. Not user-serviceable. |
| Certifications | CE, RoHS |
| Package Contents | Alarm clock radio, power adapter, user manual |
Frequently Asked Questions - SRW 2 A1 SILVERCREST
User questions about SRW 2 A1 SILVERCREST
0 question about this device. Answer the ones you know or ask your own.
Ask a new question about this device
Download the instructions for your Alarm clock radio in PDF format for free! Find your manual SRW 2 A1 - SILVERCREST and take your electronic device back in hand. On this page are published all the documents necessary for the use of your device. SRW 2 A1 by SILVERCREST.
USER MANUAL SRW 2 A1 SILVERCREST
Operating instructions
DE AT CH
RADIOWECKER
Bedienungsanleitung
IAN 106864
GB IE CY
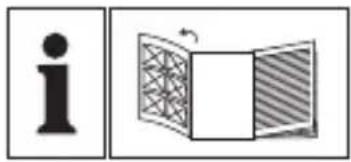
Before reading, unfold the page containing the illustrations and familiarise yourself with all functions of the device.
DE AT CH
GB/IE/CY Operating instructions Page 1
Information concerning these operating instructions ..... 3
Copyright 3
Intended use 3
Safety....5
Risk of electrocution 5
Handling batteries....6
Basic safety guidelines....7
Components 9
Initial operation....10
Check the package contents ..... 10
Disposal of packaging materials 10
Set-up location requirements 1 1
Inserting batteries 11
Connecting the power supply 12
FM wire aerial 12
Handling and operation....12
Setting the time 12
Switching radio mode on/off 14
Adjusting the volume 14
Adjusting stations manually 14
Searching for the next station 15
Saving stations manually 16
Automatic station search (AMS function) 16
Retrieving saved radio stations 16
Programming alarm times and alarm type 17
Activating the alarm function 17
Switching off the alarm 18
Switching off the alarm function 18
Snooze function 18
Automatic switch-off (sleep function) 18
Adjusting display illumination 19
Switching the night light on/off 19
Troubleshooting 19
Fault causes and rectification 19
Cleaning 21
Storage 21
Disposal....21
Disposal of the device 21
Disposing of the batteries 22
Appendix 22
Technical data 22
Notes on the Declaration of Conformity 23
Warranty 23
Service 24
Importer 24
Introduction
Information concerning these operating instructions
These operating instructions are a component part of the radio alarm SRW 2 A1 (hereinafter referred to as the device) and provides important information on the intended use, safety, the connection and operation of the device. The operating instructions must be kept near to the device at all times. These must be read and applied by everyone assigned to operate, and eliminate faults in, the device.
Keep these operating instructions in a safe place and pass them on to any future owner together with the device.
Copyright
This documentation is protected by copyright.
Any copying or reproduction, including in the form of extracts, or any reproduction of images (even in a modified state), is permitted only with the written authorisation of the manufacturer.
Intended use
This device is a domestic consumer electronics device designed for listening to radio programmes and as an alarm using an alarm tone or radio signal. It is not intended for any other use or use beyond that specified. Claims of any kind for damage resulting from misuse, incompetent repairs, unauthorised modification or the use of unauthorised spare parts will not be accepted. The risk shall be borne solely by the user.
The following warning notes are used in these operating instructions:

DANGER
A warning note at this hazard level indicates an im- minently hazardous situation.
If the hazardous situation is not avoided, it could result in death or serious physical injury.
▶ Follow the instructions in this warning note to prevent a fatality or serious personal injury.

WARNING
A warning note at this hazard level indicates a potentially hazardous situation.
Failure to avoid this hazardous situation could result in physical injury.
▶ Follow the instructions in this warning note to prevent physical injury.
CAUTION
A warning note at this hazard level indicates potential property damage.
Failure to avoid this situation could result in property damage.
▶ Follow the instructions in this warning note to prevent property damage.
NOTE
▶ A note provides additional information that will assist you in using the device.
Safety
In this section, you will find important safety instructions for using the device. The device complies with the statutory safety regulations. Improper use may result in personal injury and property damage.
Risk of electrocution

DANGER
Risk of fatal injury from electrocution!
Contact with live cables or components can result in fatal injury!
Comply with the following safety information in order to avoid the risk of electric shock:
▶ Do not use the device if the mains power plug or the connection cable are damaged.
The device housing must not be opened under any circumstances. There is a risk of electric shock or fire if live connections are touched and the electrical and mechanical structure is changed.
▶ Never touch the mains plug or the device with wet hands.
▶ When disconnecting the device from the mains supply, always pull on the plug and never on the cable.
The device consumes power in standby mode. To completely disconnect the device from mains power, the power plug must be removed from the mains power socket. The device should be positioned so that you have unrestricted access to the mains power socket at all times, and can pull out the plug immediately in an emergency.
Handling batteries

DANGER
Mishandling the batteries can cause fires, explosions, leakages or other hazards!
▶ Do not throw the batteries into a fire and do not subject them to high temperatures.
▶ Do not open, deform or short-circuit batteries, since this can lead to chemical leakage.
▶ Do not attempt to recharge batteries. Do not charge batteries unless they are explicitly labelled as "rechargeable". There is a risk of explosion!
▶ Check the condition of the batteries at regular intervals. Leaking chemicals can cause permanent damage to the device. Take particular care when handling damaged or leaking batteries. Risk of acid burns! Wear protective gloves.
▶ Chemicals which leak from a battery can cause skin irritation. In the event of contact with the skin, rinse with copious amounts of water. If the chemicals come into contact with your eyes, rinse thoroughly with water, do not rub and consult a doctor immediately.
▶ Keep batteries out of the reach of children. Children might put batteries into their mouth and swallow them. If a battery has been swallowed, seek medical assistance IMMEDIATELY.
▶ Do not mix different types of batteries.
▶ Always insert the batteries the right way round (observe correct polarity) otherwise there is a danger that they could explode.
▶ If you do not intend to use the device for a long time, remove the batteries.
Basic safety guidelines
To ensure safe operation of the device, follow the safety guidelines set out below:
This device may be used by children aged 8 years and above and by persons with limited physical, sensory or mental capabilities or lack of experience and knowledge, provided that they are under supervision or have been told how to use the device safely and are aware of the potential risks. Children must not use the device as a plaything. Cleaning and user maintenance tasks may not be carried out by children unless they are supervised.
■ Prior to use, check the device for visible external damage. Do not operate a device that has been damaged or dropped.
■ Ensure that the connecting cable of the device is not damaged and that it is not laid over hot surfaces and/or sharp edges.
■ Ensure that the power cable is not stretched tightly or kinked.
■ Do not allow the connection cable to hang over edges (Trip wire effect).
If the cables or connections are damaged, have them replaced by an authorised specialist or the Customer Service department.
All repairs must be carried out by authorised specialist companies or by the Customer Service department. Failure to make proper repairs can put the user at risk. It will also invalidate any warranty claim.
■ Defective components must always be replaced with original replacement parts. Compliance with the safety requirements can only be guaranteed by using these replacement parts.
- Do not make any unauthorised modifications or alterations to the device.
■ Never attempt to open the device.
■ Always place the device on a stable and level surface. It can be damaged if dropped.
■ Do not expose the device to direct sunlight or high temperatures. Otherwise it may overheat and be irreparably damaged.
- Do not place the product near heat sources such as radiators or other heat-generating devices.
- Do not operate the device close to naked flames (e.g. candles).
■ Place the device so that the ventilation slots are not covered.
■ The device is not designed for use in rooms with high temperatures or humidity (e.g. bathrooms) or where there is excessive dust.
■ Protect the device from drips or splashes of water. Never immerse the device in water and do not set up the device in the close vicinity of water and do not place objects filled with liquids (e.g. vases) onto the device.
If you notice a burning smell or smoke, pull out the plug immediately and remove the batteries.
■ Always disconnect the power cable from the mains power socket by the plug, not by the cable itself.
In the case of a malfunction occurring or a thunderstorm, disconnect the plug from the mains power socket.
■ Packaging materials (such as plastic film or polystyrene) must not be used as playthings.
Risk of suffocation!
Components
(see fold-out page)
1 Display
2 Power cable
3 Wire aerial
4 Night light
5 Battery compartment
6 Loudspeaker
7 /FM/AM button: Switch the radio on/off / select frequency band
8 TIME button: Set the time
9 SLEEP button: Set the automatic switch-off
10 M+/AMS button: Set station memory position / start automatic station saving
11 HR/– button: Set hours (time) / decrease volume
12 MIN/+ button: Set minutes (time) / increase volume
13 SNOOZE/LIGHT/DIM button: Pause alarm / switch night light on/off / set display light
14 AL2/UP button: Set alarm 2 / settings up
15 AL1/DOWN button: Set alarm 1 / settings down
16 Operating instructions
Initial operation
Check the package contents
The following components are included in delivery:
- Radio alarm
• These operating instructions16
Take the device and the operating instructions out of the box and remove all packing material.
NOTE
▶ Check the package for completeness and for signs of visible damage.
If the consignment is incomplete or damaged due to defective packaging or carriage, contact the Service hotline (see the section Service).
Disposal of packaging materials
The packaging protects the device from damage during carriage. The packaging materials have been selected for their environmental friendliness and ease of disposal, and are therefore recyclable.

ng the packaging to the material cycle conserves raw materials and reduces the amount of waste that is generated. Dispose of packaging materials that are no longer needed in accordance with applicable local regulations.
Set-up location requirements
For safe and trouble-free operation of the device, the set-up location must fulfil the following requirements:
The surfaces of furniture may possibly contain components that could affect the device's rubber pads and soften them. If necessary place a cover under the device's pads.
■ The mains power socket must be easily accessible so that the power cable can be easily disconnected in an emergency.
Inserting batteries
By inserting two 1.5 V batteries (type R6/LR6/AA/Mignon) you avoid losing the programmed time of day and alarm time in the event of mains power loss. The batteries make sure that the internal clock continues to run even during a power outage. The display will then automatically show the correct time when mains power is restored.
NOTE
The display, radio, alarm clock and night light do not function in emergency mode.
◆ Open the cover of the battery compartment 5 on the bottom of the device.
- Insert two 1.5 V R6/LR6/AA/Mignon batteries (not supplied) into the battery compartment ⑤. Insert the batteries as shown on the polarity diagram in the battery compartment ⑤.
◆ Close the battery compartment⑤ by replacing the cover and clicking it into place.
Connecting the power supply
CAUTION
Before connecting the device, compare the connection data (voltage and frequency) on the rating plate with that of your mains power supply. These data must agree so that no damage is sustained by the device.
◆ Insert the power plug into a mains wall socket. The time display (0:00) flashes on the display 1.
FM wire aerial
◆ Completely unwind the wire aerial 3 for FM radio reception.
Handling and operation
This section provides you with important information on handling and using the device.
Setting the time
NOTE
▶ Make the settings quickly. If you do not press a button for 5 seconds, the entry is cancelled. All settings made up to this point are saved automatically.
◆ Press the TIME button ^8 for about 2 seconds. The display ^1 flashes, showing the indicator for 24-hour mode (24h
◆ Press the MIN/+ button 12 or HR/− button 11 to change between 24-hour mode (24 and 12-hour mode ( ). 12h
NOTE
▶ If the 12-hour mode is set, a point appears in the upper right of the display ① from midday onwards (PM).
◆ Press the TIME button 8 again to accept the settings.
◆ Press the TIME button 8 again. The time flashes on the display.
◆ Press or hold the HR/– button11 to set the hours.
◆ Press or hold the MIN/+ button12 to set the minutes.
◆ Press the TIME button 8 again. The programmed time will be set.
NOTE
The time is reset to 0:00 if the device is disconnected from the power supply and no batteries are installed.
Switching radio mode on/off
NOTE
The technical properties of the device permit an adjustable frequency range outside the permitted frequency ranges of VHF (FM) 87.5–108 MHz and/or MW (AM) 526.5–1606.5 kHz. In some countries, different national regulations may apply to the assigned radio frequency ranges. Please note that information received outside of the assigned radio frequency ranges may not be exploited, passed on to third parties or otherwise misused.
◆ Press the ⏻/FM/AM button 7 to switch the device on.
◆ Press the 1YFM/AM button 7 for about 2 seconds to switch the device off.
Adjusting the volume
Use the MIN/+ button12 or HR/- button 11 to set the desired volume.
Adjusting stations manually
◆ Press the 1YFM/AM button ⑦ briefly to select the required frequency band. In the case of FM reception, a point (FM) appears on the left of the display ① or AM reception, a point (AM) appears on the left of the display ①
◆ Press the AL2/UP button14 briefly to increase the frequency.
◆ Press the AL1/DOWN button15 briefly to decrease the frequency.
NOTE
In FM reception, the frequency is set in 0.05 MHz increments. At a frequency with 0.05 MHz (e.g. 99.25 MHz) a point appears on the right of the display (0.05).
The station frequency is shown on the display 1 and the speaker 6 is switched off during the station search.
Searching for the next station
The device can automatically search for the nearest station.
◆ Press the AL2/UP button14 for about 2 seconds. The device searches for the station with the next higher frequency.
- Press the AL1/DOWN button ^15 for about 2 seconds. The device searches for the station with the next lower frequency.
NOTE
The automatic station search to the next station can only be started if a frequency is shown in the display. If the device switches to time display, you must press the AL2/UP button 14 or AL1/DOWN button 15 to switch back to the frequency display. After this, the automatic station search can be continued.
Saving stations manually
The device has 20 preset slots. There are 10 preset slots available for each frequency band (FM and AM).
◆ Set the desired station as described above.
◆ Press the TIME button ^8 . The number of the preset slot, e.g. P01 flashes on the display 1.
◆ Press the MIN/+ button ^12 or HR/− button ^11 to store the desired preset slot.
◆ Press the TIME button 8 again to store the setting.
Automatic station search (AMS function)
The device uses the AMS function to automatically search for stations and saves them in the 10 preset slots of the respective frequency band.
NOTE
▶ If you execute the following described AMS function, all the previously saved stations will be lost.
- Press the M+/AMS button ^10 for about 2 seconds. The device starts the station search and fills the preset slots P01 to P10 with the stations that are found. Every time a station is saved, the preset number flashes briefly on the display. Once all of the preset slots have been filled, the scan is stopped.
Retrieving saved radio stations
◆ Press the M+/AMS button10 repeatedly to call up the preset slots P01 to P10.
Programming alarm times and alarm type
When programming the alarm times, you can select whether an alarm tone should sound at the programmed time or whether the radio should start playing. Two different alarm times (Alarm 1/Alarm 2) can be programmed. Radio mode must be deactivated.
- Press the AL1/DOWN button 15 or AL2/UP button 14. The time flashes on the display 1 and a point appears on the lower left or right next to the alarm type "Alarm" (▲).
◆ Press or hold the HR/– button11 to set the hours.
◆ Press or hold the MIN/+ button12 to set the minutes.
If you wish to set the alarm type "Radio" ( musical), press the AL1/DOWN button 15 or AL2/UP button 14 again. A point appears on the lower left or right of the display next to the alarm type "Radio" ( musical).
◆ Wait until the time display and the dot next to the alarm type stop flashing to accept the setting.
NOTE
▶ If you want to be woken by the radio, you will also need to select the desired station and volume as well as the alarm time.
Activating the alarm function
◆ Press the AL1/DOWN button 15 or AL2/UP button 14 briefly. In the display 1 point appears to the lower left and/or right. The alarm function is now activated.
Switching off the alarm
While the alarm is sounding, press the ⏻FM/AM button ⑦ to switch off the alarm for 24 hours.
If the alarm is not manually deactivated, the device will switch it off automatically after 1 hour.
Switching off the alarm function
◆ Press the AL1/DOWN button15 or AL2/UP button 14 repeatedly until the point next to the alarm type (▲ = Alarm, = Radio) goes out.
Snooze function
While the alarm is sounding, press the SNOOZE/LIGHT/DIM button 13 to switch off the alarm for a short time. After 6 minutes the alarm sounds again.
Automatic switch-off (sleep function)
When the sleep function is activated, the device switches itself off after an interval of between 60 and 10 minutes.
◆ Press the SLEEP button ⑨ to switch the device on.
◆ The switch-off time of 60 minutes appears on the display 1
Pressing the SLEEP button 9 repeatedly reduces the switch-off time by 10 minutes each time.
- Press the SLEEP button ⑨ until the desired switch-off time is shown in the display ①. After a few seconds, the time reappears on the display ①.
To switch off the sleep function, press the SLEEP button ⑨, until OFF appears on the display ① or press the ⏻/FM/AM button ⑦ for approx. 2 seconds. The device will also be switched off.
Adjusting display illumination
◆ Press the SNOOZE/LIGHT/DIM button13 for about 2 seconds to dim the display 1
◆ Press the SNOOZE/LIGHT/DIM button13 again for about 2 seconds to brighten the display 1.
Switching the night light on/off
◆ Press the SNOOZE/LIGHT/DIM button ^13 briefly to switch on the night light 4.
◆ Press the SNOOZE/LIGHT/DIM button13 again briefly to switch off the night light 4.
Troubleshooting
This section contains important information about fault identification and rectification. Follow the instructions to avoid hazards and damage.
Fault causes and rectification
The following table will help to identify and rectify minor malfunctions:
| Malfunction Possible cause Remedy | ||
| Device does not switch on. | The plug is not connected. | Insert the power plug into the mains power socket. |
| The mains power socket is not supplying power. | Check the house's mains fuse. | |
| No sound | The volume is set to minimum. | Increase the volume by pressing the MIN/+ button 12. |
| Noise interference during radio reception | The transmitter is not properly adjusted. | Set the station using the AL1/DOWN button 15 or AL2/UP button 14. |
| The reception is weak. | Try to improve reception by realigning the wire aerial 3. | |
| The time flashes in the display 1 | Power failure and no batteries in the battery compartment 5 | Place batteries into the battery compartment 5 to retain your settings. |
| The time/alarm time must be reprogrammed. | ||
NOTE
▶ If you are unable to resolve the problem by taking any of the aforementioned steps, please contact the Customer Service department.
Cleaning

DANGER
Risk of fatal injury from electrocution!
▶ Remove the plug from the mains power socket before beginning to clean the device.
▶ Ensure that no moisture can penetrate the device during cleaning.
▶ Do not use aggressive cleaning agents or scouring powder. These can affect the surfaces of the device.
■ Clean the surfaces of the device with a soft, dry cloth.
Storage
If you do not intend to use the device for an extended period of time disconnect it from the power supply, remove the batteries and store it in a clean, dry location that is not subjected to direct sunlight.
Disposal
Disposal of the device

er dispose of the device in the normal domestic waste. This product is subject to the provisions of European Directive 2012/19/EU.
Dispose of the device via an approved waste disposal company or your municipal waste disposal facility. Please observe applicable regulations. Please contact your waste disposal facility if you are in any doubt.
Disposing of the batteries
Do not dispose of the batteries in the domestic waste. Consumers are legally obliged to dispose of used batteries at a collection point in their town/district or at a retail store. This obligation is intended to ensure that batteries are disposed of in an environmentally responsible manner. Dispose of batteries only when they are fully discharged.
Appendix
Technical data
| Operating voltage 220-240 V/ 50 Hz | |
| Protection class | II ☐ |
| Batteries for power reserve | 2 x 1.5 V batteriesType: AA/Mignon/R6/LR6(Batteries not supplied) |
| Power consumption(in operation) | max. 3 W |
| Power consumption (standby) max. approx. 0.6 W | |
| Max. loudspeaker output power 250 mW | |
| Frequency FM (VHF) 87.5-108 MHz | |
| Frequency AM (MW) 522-1620 kHz | |
| Operating temperature +5 to +40°C | |
| Humidity (no condensation) 5-70% | |
| Dimensions (W x H x D) approx. 20 x 9.7 x 9.9 cm | |
| Weight approx. 390 g | |
Notes on the Declaration of Conformity
This device complies with the essential requirements and other relevant provisions of the European Electromagnetic Compatibility Directive 2004/108/EC, the Low Voltage Directive 2006/95/EC and the Ecodesign Directive 2009/125/EC (Ordinance 1275/2008 Annex II, No. 1) as well as RoHS directive 2011/65/EU.
The complete Declaration of Conformity, in its original form, is available from the importer.
Warranty
The warranty for this appliance is for 3 years from the date of purchase. The appliance has been manufactured with care and meticulously examined before delivery.
Please retain your receipt as proof of purchase. In the case of a warranty claim, please make contact by telephone with our Customer Service Department.
Only in this way can a post-free despatch for your goods be assured.
NOTICE
The warranty covers only claims for material and manufacturing defects, but not for transport damage, wearing parts or for damage to fragile components, e.g. buttons or batteries.
This product is for domestic use only and is not intended for commercial use.
The warranty is void in the case of abusive and improper handling, use of force and internal tampering not carried out by our authorised service branch.
Your statutory rights are not restricted in any way by this warranty. The warranty period is not extended by repairs made under the warranty. This applies also to replaced and repaired parts.
Damages and defects extant at the time of purchase must be reported immediately after unpacking, resp. no later than two days after the date of purchase.
Repairs made after the lapse of the warranty period are subject to charge.
Service

Service Great Britain
Tel.: 0871 5000 720 (£ 0.10/Min.)
E-Mail: kompernass@lidl.co.uk
IAN 106864

Service Ireland
Tel.: 1890 930 034
(0,08 EUR/Min., (peak))
(0,06 EUR/Min., (off peak))
E-Mail: kompernass@lidl.ie
IAN 106864

Service Cyprus
Tel.: 8009 4409
E-Mail: kompernass@lidl.com.cy
IAN 106864
Hotline availability: Monday to Friday 08:00 - 20:00 (CET)
Importer
KOMPERNASS HANDELS GMBH
BURGSTRASSE 21
44867 BOCHUM
GERMANY
www.kompernass.com
Inhaltsverzeichnis
Einführung 27
KOMPERNASS HANDELS GMBH
BURGSTRASSE 21
44867 BOCHUM
GERMANY
www.kompernass.com
KOMPERNASS HANDELS GMBH
BURGSTRASSE 21
44867 BOCHUM
DEUTSCHLAND / GERMANY
www.kompernass.com