
SIUR 10 A1 - Alarm Clock SILVERCREST - Free user manual and instructions
Find the device manual for free SIUR 10 A1 SILVERCREST in PDF.


| Brand | SilverCrest |
| Model | SIUR 10 A1 |
| Product Type | Alarm clock radio |
| Dimensions (approx.) | 15 x 8 x 8 cm |
| Weight (approx.) | 300 g |
| Power Supply | AC mains (100-240 V) with backup battery (2 x AAA, not included) |
| Radio Bands | FM, AM |
| Display Type | LED or LCD (adjustable brightness) |
| Alarm Modes | Radio or beep |
| Number of Alarms | 1 (or dual alarm, typical) |
| Snooze Function | Yes (9 minutes, typical) |
| Sleep Timer | Yes (up to 90 minutes) |
| Backup Battery | Maintains settings during power outage |
| Additional Features | Gradual wake-up, adjustable alarm volume |
| Care and Cleaning | Wipe with a soft, dry cloth; do not use abrasive cleaners |
| Safety Warnings | Keep away from moisture and extreme temperatures; unplug during storms |
| Spare Parts Available | Not available separately (as per manufacturer policy) |
| Reparability | Not user-serviceable; contact professional for repairs |
| General Information | User manual included; CE and RoHS certified |
Frequently Asked Questions - SIUR 10 A1 SILVERCREST
User questions about SIUR 10 A1 SILVERCREST
0 question about this device. Answer the ones you know or ask your own.
Ask a new question about this device
Download the instructions for your Alarm Clock in PDF format for free! Find your manual SIUR 10 A1 - SILVERCREST and take your electronic device back in hand. On this page are published all the documents necessary for the use of your device. SIUR 10 A1 by SILVERCREST.
USER MANUAL SIUR 10 A1 SILVERCREST
Operating instructions
DK
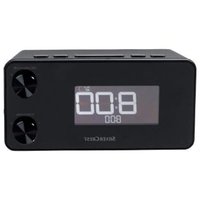
RADIO ALARM CLOCK
Before reading, unfold the page containing the illustrations and familiarise yourself with all functions of the device.
SE
GB/IE Operating instructions Page 1
| SE | Bruksanvisning | Sidan | 31 |
| DK | Betjeningsvejledning | Side | 61 |
| DE/AT/CH Bedienungsanleitung Seite 91 | |||


Table of contents
Introduction 2
Information concerning
these operating instructions ..... 2
Copyright 2
Intended use 2
Warnings 3
Safety 4
Risks from electric current ..... 4
Basic safety instructions ..... 5
Controls....6
Setting up and connecting .....7
Check the items supplied .....7
Unpacking 8
Disposal of packaging 8
Requirements for the setup location .... 9
Electrical connection 9
Inserting the data
preservation battery 9
Replacing the remote
control battery 10
Setting up the device .... 10
Providing mains power....10
VHF cable antenna 10
Handling and use 10
Switching on and off 10
Basic settings 11
Activating the settings menu 11
Setting the time 12
Setting the date 12
Setting the reminder function 13
Setting the update function 14
Setting the automatic
dimmer function 14
Setting the time format 15
Setting the operating location 15
Setting the world time 17
Setting iSync 18
Setting the snooze time 18
Setting the NAP timer ..... 19
Setting the alarm function ..... 19
When the alarm time is reached ..... 20
Radio operation .....21
Switching the radio on/off .....21
Adjusting the volume 21
Switching between
mono and stereo 21
Manual station selection....22
Saving stations manually ..... 22
Retrieving saved radio stations ..... 23
Automatic station search
(AMS function) 23
Automatic switch off (Sleep timer) .... 23
Review 24
Playing devices on the iPort ..... 24
Additional functions .....25
Locking controls 25
Manual dimmer control 25
Sound settings 25
Display representations ..... 26
Reset to factory state 26
Cleaning 26
Cleaning the housing 26
Fault rectification .....27
Fault causes and rectification ..... 27
Storage/Disposal .....28
Storage 28
Disposal of the device 28
Disposing of the batteries ..... 28
Appendix .....28
Notes on the Declaration
of Conformity 28
Technical details 29
Warranty 29
Service 30
Importer 30
Introduction
Information concerning these operating instructions
Congratulations on the purchase of your new device.
You have decided to purchase a high-quality product. The operating instructions are a constituent of this product. They contain important information with regard to safety, use and disposal. Before using the product, familiarise yourself with all operating and safety instructions. Use this device only as described and only for the specified areas of application. Please also pass these operating instructions on to any future owner(s).
Copyright
This documentation is subject to copyright protection.
Any copying or reproduction of it, including as extracts, as well as the reproduction of images, also in an altered state, is only permitted with the written authorisation of the manufacturer.
Intended use
This device is intended solely for receiving VHF radio programs, playing media from iPods, iPhones, and iPads, and serving as an alarm using an alarm tone or radio in indoor rooms. The device is designed for freestanding installation. It is not intended for any other use or for uses beyond those stated. This device is not intended for use in commercial or industrial environments.
The manufacturer assumes no responsibility for damage caused by failure to observe these instructions, improper use, incompetent repairs, unauthorized modifications, or the use of unapproved replacement parts. The operator alone bears liability.
The following Apple devices (with Apple® 30-pin interface) are compatible:
■ iPod Touch (4th generation)
■ iPod Nano (6th generation)
■ iPhone 3G, 3GS, 4, and 4S
■ iPad (1st and 2nd generation) and the new iPad (3rd generation)
NOTE
Apple devices with a Lightning connector, e.g., the iPhone 5, must use a "Lightning to 30-pin Adapter". Exceptions are all iPads with a Lightning connector, because the stability of these devices is not guaranteed and the iPort / Apple® 30-pin interface on the device could be damaged.
Made for

iPod 📁 iPhone 📄 iPad
iPod, iPhone, and iPad are trademarks of Apple Inc., registered in the USA and other countries. "Made for iPod, iPhone, iPad" means that an electronic accessory has been designed specifically for connection to an iPod, iPhone, or iPad, and the developer guarantees that the device meets Apple's performance standards. Apple is not responsible for the operation of this device or its compliance with safety and regulatory standards.
Please be advised that use of this accessory with an iPod, iPhone, or iPad may affect the performance of wireless communication.
Warnings
The following warnings are used in these operating instructions:

DANGER
A warning at this risk level indicates an imminently hazardous situation.
If the hazardous situation is not avoided, it could lead to death or serious physical injury.
▶ Follow the instructions in this warning to avoid a fatality or serious personal injury.

WARNING
A warning of this risk level indicates a potentially hazardous situation.
Failure to avoid this hazardous situation could result in physical injury.
▶ Follow the instructions in this warning to prevent physical injury.
CAUTION
A warning of this risk level indicates potential damage to property.
Failure to avoid this situation could result in damage to property.
▶ Follow the instructions in this warning to prevent damage to property.
NOTE
▶ A note indicates additional information that will assist you in handling the device.
Safety
This section provides you with important safety information regarding handling of the device.
The device complies with the statutory safety regulations.
Incorrect usage can lead to personal injury and property damage.
Risks from electric current

DANGER
Danger to life due to electric current!
Danger to life on contact with live cables or components!
Comply with the following safety information in order to avoid the risk of electric shock:
▶ Do not use the device if the mains power plug or the connection cable are damaged. ▶ Under no circumstances should you open the device housing. There is a risk of receiving an electric shock if live connections are touched or the electrical and/or mechanical construction is changed.
Handling batteries

WARNING
Risks from uses other than those intended!
For the safe handling of batteries, take note of the following safety instructions:
▶ Do not throw batteries into a fire. ▶ Never short-circuit batteries. ▶ Do not attempt to recharge batteries.
▶ Regularly check the condition of the batteries. Leaking battery acid can cause permanent damage to the device. Special caution should be shown when handling damaged or leaking batteries. Risk of acid burns!
▶ If a battery has leaked, put on a pair of protective gloves and clean the battery compartment and contacts with a dry cloth.
▶ Store batteries in a place inaccessible to children. If a battery should be swallowed, seek medical attention IMMEDIATELY.
▶ If you do not intend to use the device for an extended period, remove the batteries.
Basic safety instructions
For safe handling of the device, follow the safety information below:
■ Before use, check the device for visible external damage. Do not use a device that has been damaged or dropped.
If the cables or connections are damaged, have them replaced by an authorised specialist or customer service.
■ Persons who, due to their physical, intellectual or motor abilities, are incapable of operating the device safely may only use the device under supervision or direction from a responsible person.
■ Only permit children to use the device when under supervision.
■ Only have repairs carried out by authorised specialist companies or the Customer Service department. Failure to make proper repairs can put the user at risk. Warranty claims also become void.
■ Repairs to the device during the warranty period may only be carried out by a customer service department authorised by the manufacturer. Otherwise no additional warranty claims can be considered for subsequent damage.
■ Defective components must always be replaced with original replacement parts. It can only be guaranteed that safety requirements are complied with if original replacement parts are used.
■ Protect the device from moisture, spray and dripping water and liquid penetration. Never submerge the device in water, do not place the device in the vicinity of water and do not stand any object filled with liquid (i.e. vases) on or next to the device.
■ Never touch the device or the mains plug with wet or moist hands to avoid an electric shock.
■ Do not place any objects on the device.
■ Do not operate or place the device close to open flame (e.g., candles).
■ Avoid direct sunlight.
■ ALWAYS disconnect the power cable from the mains power socket by the plug, NOT by the cable itself.
In the case of a malfunction occurring or a thunderstorm, disconnect the plug from the mains power socket.
Controls
(For illustrations see the fold-out page)
① Mains connection cable 2 Cover for iPort / Apple® 30-pin interface 3 iPort / Apple® 30-pin interface 4 Cable antenna for VHF reception 5 Preset +, i▲ AL 2: select next memory slot, increase values, program alarm 2 6 Preset -, i▼ AL 1: select previous memory slot, decrease values, program alarm 1 7 Tuning ▲ ▶ increase receiving frequency, select next track 8 Tuning ▼ I, ▶ NAP: decrease receiving frequency, select previous track, set NAP timer 9 Display 10 Infrared sensor: receives remote control signals 11, Sleep: switch radio function on/off, adjust sleep timer 12 Mem. | AMS, ▶ II: memory slot selection | autom. station memory | start or stop playing device at iPort 13 ST. | MO. | iMenu | Enter | Set OK: stereo/mono switchover | call up iMenu | enter key 14 Display | Review: shows date and time | plays saved station 15 User|i-Sync|FUNC: user changeover|i-Sync control | switches to device connected to iPort - +|SNOOZE|Dimmer|Key Lock: volume control | snooze key | adjust display illumination | adjust key lock 17 Sleep, ⏻ : switch radio function on/off, adjust sleep timer 18 i▲ |Pr+: increase value, select next memory slot 19 FUNC: switches to device connected to iPort 20 i▶II: start/stop playing device at iPort 21 i▶▶Up: select next track 22 Vol +: increase volume 23 Set | OK: call up settings menu and switch through 24 Vol -: decrease volume 25 User: change user 26 Display: displays date and time 27 Dimmer: adjust display illumination 28 AL2 | Tone +: program alarm 2 | increase treble / bass 29 AL1 | Tone -: program alarm 1 | decrease treble / bass 30 EQ: calls up tone presets
31 Key Lock: adjust key lock 32 ST|MO: stereo/mono switchover 33 Review: starts playing saved stations 34 MEM AMS: memory slot selection | autom. station memories 35 iMenu|Enter: call up iMenu enter key 36 i▼ |Pr-: decrease value, select previous memory slot 37 i | Down: select previous track 38 iPad adapter
Setting up and connecting
WARNING
During the commissioning of the device personal injury and property damage could occur!
To avoid risks, pay heed to the following safety instructions:
▶ Packaging material must not be used as a play thing since it poses a risk of suffocation. ▶ To avoid personal injury and property damage, pay heed to the information regarding the requirements on setup location as well as the device's electrical connection.
Check the items supplied
This device is supplied with the following components as standard:
 | Clock radio SIUR 10 A1 |
 | Remote control |
 | Battery 3 V type CR2025 |

iPad adapter

This operating manual
NOTE
▶ Check the contents for completeness and for signs of visible damage.
▶ If the contents are incomplete or damaged due to defective packaging or through transportation, contact the Service Hotline (see chapter Service).
Unpacking
◆ Remove all parts of the device and the operating instructions from the box. ◆ Remove all packaging materials and protective film from the device.
Disposal of packaging
The packaging protects the device from transport damage. The packaging materials have been selected in accordance with their environmental friendliness and disposal attributes, and are therefore recyclable.

Returning the packaging to the material cycle conserves raw materials and reduces the amount of waste that is generated. Dispose of packaging material that is no longer needed in accordance with applicable local regulations.
NOTE
If possible, keep the device's original packaging during the warranty period so that the device properly for returning in the event of a warranty claim.
Requirements for the setup location
For safe and trouble-free operation of the device, the setup location must fulfil the following requirements:
■ When setting it up, place the device on a firm, flat and horizontal surface.
Set up the device so that the ventilation openings are not covered, and so that the sensitive speakers on the underside of the device are neither covered nor damaged.
Do not place the device in a hot, wet, or extremely damp environment, or in the vicinity of flammable materials.
The surfaces of furniture may possibly contain components that could affect the device's rubber pads and soften them. If necessary, place a cover under the device's pads.
The mains power socket must be easily accessible so that the power cable can be easily disconnected in an emergency.
Electrical connection
Before connecting the device, compare the connection data (voltage and frequency) on the rating plate with that of your mains power supply. This data must agree in order to avoid damaging the device.
Ensure that the connecting cable of the device is not damaged and that it is not laid over hot surfaces and/or sharp edges.
Ensure that the power cable is not over taut or kinked.
Do not allow the cable to dangle over edges (trip wire effect).
Inserting the data preservation battery
Inserting the CR 2032 battery (not included in scope of delivery) will avoid the loss of programmed times and alarm timings in the event of a possible power failure. The battery ensures that the internal clock continues to run even during a power failure. The display will then automatically show the correct time when mains power is restored.
NOTE
The device can also be operated without a battery.
Open the cover of the battery compartment on the underside of the device by turning the cover with a coin to the left as far as it will go and then lifting it off.
Insert the battery into the battery compartment. The side with the marking "+" must be facing upwards. Close the battery compartment by attaching the cover and then, using a coin, turn it to the right as far as it will go.
Replacing the remote control battery
Before using the remote control for the first time, you will have to pull out the plastic strip protruding from the battery compartment. This plastic strip insulates the battery and prevents it from discharging prematurely.
If the remote control is no longer functioning reliably, you have to replace the battery. To do this, press the lock tab in the direction of the arrow with your fingernail, and pull the battery carrier out of the remote control. Remove the discharged battery and then place a fresh battery of the same type (CR2025) in the carrier so that the "+" marking is facing upwards. Slide the battery carrier back into the remote control.

Setting up the device
Select a suitable location for the device (you should also refer to the chapter Requirements for the set up location).
Providing mains power
Insert the mains connecting cable plug 1 into a mains socket. The time display (0:00) is shown in the display 9.
VHF cable antenna
◆ Completely unwind the cable antenna for VHF radio reception.
Handling and use
This section provides you with important information on handling and using the device.
Switching on and off
Once the device has been connected to the power supply it is already switched on. You can switch between clock/standby and radio operating mode using the ⏻ key ⏱ on the device or the ⚫ key ⏱ on the remote control.
NOTE
The device is not fitted with a power switch. To disconnect the device from the power supply, the power plug must be pulled out of the power socket.
Basic settings
When the device has been connected to the power supply, it is in the clock/stand-by operating mode. The welcome message PLEASE WAIT FOR SETTING THANKS appears in the display ⑨. In the meantime, the device attempts to update its settings for the clock and date using the RDS signal. After a successful update, the time, the abbreviation for the weekday, and the date will be shown in the display ⑨. Should the automatic update fail, make the adjustments manually.
NOTE
The device is controlled using touch-sensitive control points and areas. In order to prevent inadvertent device operation, you can lock the controls with the key lock function (see also chapter Lock controls).
Activating the settings menu
To activate the settings menu, press the Set|OK control point when in clock/standby operating mode or press the Set OK key on the remote control. The hours shown in the time display start to blink. Each additional touch of the Set|OK control point or press of the Set OK key on the remote control switches to the next menu item. The menu item sequence is:
- Set the time
- Set the date
- Set reminder functions 1 - 6
- Set the update function
- Set the automatic dimmer function
- Set the time of day format
- Set the "LOC" operating location
- To set the world time, select from "CITY".
- Set I-Sync
- Set the snooze time
GB IE
NOTE
The setting menu ends automatically if you do not touch any control areas or keys for approx. 15 seconds. The settings you have carried out are then saved. ▶ Each touch of the i▼/i▲ control points 6/5 on the device or press of the i▼/i▲ keys 36/18 on the remote control will change the display in individual steps. If you touch the respective control point or press the key for more than 2 seconds, rapid adjustment will start.
Setting the time
Precondition: The device is in the clock/standby operating mode.
NOTE
The RDS function on the device will automatically set the time and date if there is sufficiently good reception. You may have to change these values manually if reception is insufficient. Alternatively, an device connected to the iPort can also transmit the correct time. ◆ Touch the Set | OK control point ⑬ on the device or the Set OK key ⑳ on the remote control again. The hour display will start to blink. Use the i▼/i▲ control points 6/5 on the device or the i▼/i▲ keys 36/18 on the remote control to adjust the hour display to the current time. - Touch the ▶▶▶I control point ⑦ on the device or press the i▶▶▶I key ⑳ on the remote control to change to setting the minutes. Use the i▼i ▲control points ⑥/⑤ on the device or the i▼/i▲ keys ③6/⑱ on the remote control to adjust the minute display for the current time. - Touch the Set | OK control point 13 on the device or press the Set OK key 23 on the remote control again to save the current setting and to change to the next menu item.
NOTE
The time of day will revert back to 00:00 if the device is disconnected from the mains power supply and no battery is inserted, or if the battery is too weak.
Setting the date
Precondition: The device is in clock/standby operating mode.
◆ Touch the Set|OK control point 13 on the device or press the Set OK key 23 on the remote control twice. The date indicator begins to blink.
Use the i▼/i▲ control points 6/5 on the device or the i▼/i▲ keys 36/18 on the remote control to set the day for the current date. - Touch the ▶▶| control point ⑦ or press the i ▶▶| key ②1 on the remote control to change to setting the month. Use the i▼/i ▲control points /6 ⑤ on the device or the i▼/i ▲keys /36 on the remote control to set the month for the current date. ◆ Touch the Set|OK control point 13 on the device or press the Set OK key 23 on the remote control again to save the current setting and to change to the next menu item.
NOTE
The date will be reset to 01.06.2013 if the device is disconnected from the mains power and no battery has been inserted, or if the battery is too weak.
Setting the reminder function
You can set up to 6 dates on which an automatic reminder will be triggered. The SDA (SDA=Special Day Alert) function is useful as a reminder, for example for a specific date or for birthdays or other repeating events.
Precondition: The device is in clock/standby operating mode.
◆ Touch the Set|OK control point 13 on the device or press the Set OK key 23 on the remote control three times. In the display 9, the SOR1 wording will be shown. Touch the Set|OK control point 13 on the device or press the Set OK key 23 in the remote control again in order to select the required memory slots SOR2 to SOR6. Then touch the ▶▶| control point ⑦ or press the i ▶▶| ②1 key on the remote control, in order to enter the required date and required alarm time using the i▼/i▲ control points ⑥/⑤ or ▶▶| control point ⑦ (or the i▼/i▲ keys ③6/⑱ or i ▶▶| keys ②1 on the remote control). If you select a specific year, you will then be programming a single-instance alarm. If you select RLL instead of a year, the device will remind you of the date every year. After this, press the i ▲ control point ⑤ on the device or press the i ▲ key ⑱ on the remote control, in order to switch the blinking OFF over to ON and therefore to activate the alarm. ◆ Proceed as above to program the remaining memory slots. ◆ Touch the Set|OK control point 13 on the device or press the Set OK key 23 on the remote control again to save the current setting and to change to the next menu item.
Setting the update function
Using this function, the device can automatically update the settings for the clock based on the RDS data.
Precondition: The device is in clock/standby operating mode.
◆ Touch the Set | OK control point 13 on the device or press the Set OK key 23 on the remote control nine times. UPDATE will appear on the display 9.
◆ Press the i▼/i▲ control points 6/5 on the device or press the i▼/i▲ keys 36/18 on the remote control to switch the function on (ON) or off (OFF).
- Touch the Set|OK control point 13 on the device or press the Set OK key 23 on the remote control again to save the current setting and to change to the next menu item.
Setting the automatic dimmer function
You can use this function to switch the automatic dimmer function on or off, and to set a period over which the display background illumination will automatically be dimmed.
Precondition: The device is in the clock/standby operating mode.
Touch the Set|OK control point 13 on the device or press the Set OK key 23 on the remote control 10 times. AUTO DIM will appear on the display 9.
Press the i▼/i▲ control points 6/5 on the device or press the i▼/i▲ keys 36/18 on the remote control to switch the function on (ON) or off (OFF).
Touch the Set|OK control point 13 on the device or press the Set OK key 23 on the remote control again to save the current settings and to change to setting the dimmer function period. OT START will appear on the display 9. The hour display will blink at the same time.
Press the i▼/i▲ control points 6/5 on the device or press the i▼/i▲ keys 36/18 on the remote control to set the time at which the display should be dimmed. Next, touch the ▶▶I control point 7 or press the i▶▶I key 21 on the remote control, and the minute display will blink.
Press the i▼/i▲ control points 6/5 on the device or press the i▼/i▲ keys 36/18 on the remote control to set the minutes for the time at which the display should be dimmed.
Touch the Set|OK control point 13 on the device or press the Set OK key 23 on the remote control. OT END will appear on the display 9. The hour display will blink at the same time.
Press the i▼/i▲ control points 6/5 on the device or press the i▼/i▲ keys 36/18 on the remote control to set the hour for the time at which the display should illuminate normally again. Next, touch the ▶ control point 7 or press the i▶▶I key 21 on the remote control, and the minute display will blink.
Press the i▼/i▲ control points 6/5 on the device or press the i▼/i▲ keys 36/18 on the remote control to set the minutes for the time at which the display should illuminate normally again.
Touch the Set|OK control point 13 on the device or press the Set OK key 23 on the remote control again to save the current setting and to change to the next menu item.
Setting the time format
You can use this function to set whether the device shows the time in 12 or 24-hour mode.
Precondition: The device is in the clock/standby operating mode.
Touch the Set|OK control point 13 on the device or press the Set OK key 23 on the remote control 13 times. The current setting for the time of day format is shown (24 = 24 hour format or 12 = 12 hour format).
Press one of the i▼/i▲ control points 6/5 on the device or press the i▼/i▲ keys 36/18 on the remote control to switch over to the other time format.
Touch the Set|OK control point 13 on the device or press the Set OK key 23 on the remote control again to save the current setting and to change to the next menu item.
Setting the operating location
You can use this function to select a city or your approximate location.
Precondition: The device is in clock/standby operating mode.
- Touch the Set | OK control point 13 on the device or press the Set OK key 23 on the remote control 14 times. LOC will appear on the display followed by an abbreviation for a city name.
Press the i▼/i▲ control points 6/5 on the device or press the i▼/i▲ keys 36/13 on the remote control in order to select a city name in which, or in whose vicinity, you live:
| Abbreviation | City |
| HNL Honolulu / USA | |
| ANC Anchorage / USA | |
| YVR Vancouver / Canada | |
| LAX Los Angeles / USA | |
| DEN Denver / USA | |
| CHI Chicago / USA | |
| MEX Mexico City / Mexico | |
| NYC New York / USA | |
| YYZ Toronto / Canada | |
| YUL Montreal / Canada | |
| CCS Caracas / Venezuela | |
| RIO Rio de Janeiro / Brazil | |
| BUE Buenos Aires / Argentina | |
| UTC Universal Time Coordinated | |
| LON London / UK | |
| BER Berlin / Germany | |
| PAR Paris / France | |
| ROM Rome / Italy | |
| CAI Cairo / Egypt | |
| IST Istanbul / Turkey | |
| MOW Moscow / Russia | |
| KWI Kuwait City / Kuwait | |
| DXB Dubai / Saudi Arabia | |
| KHI Karachi / Pakistan | |
| DAC Dacca / Bangladesh | |
| BKK Bangkok / Thailand | |
| SIN Singapore | |
| HKG Hong Kong | |
| PEK Peking / China | |
| SHA Shanghai / China | |
| TYO Tokyo / Japan | |
| SYD Sydney / Australia | |
| NOU Noumea / New Caledonia | |
| AKL Auckland / New Zealand | |
- Touch the Set|OK control point 13 on the device or press the Set OK key 23 on the remote control again to save the current setting and to change to the next menu item.
Setting the world time
You can use this function to set a time zone using a city.
Precondition: The device is in clock/standby operating mode.
- Touch the Set|OK control point 13 on the device or press the Set OK key 23 on the remote control 15 times. CITY appears on the display 9, followed by an abbreviation for a city name.
◆ Touch the control points ▼/i ▲ 6/5 on the device, or press the keys i ▼/i ▲/36/18 on the remote control, to select the name of the city for which you want to have the world time displayed:
| Abbreviation | Diff erence City | |
| HNL -10 Honolulu / USA | ||
| ANC -9 Anchorage / USA | ||
| YVR -8 Vancouver / Canada | ||
| LAX -8 Los Angeles / USA | ||
| DEN | -7 Denver / USA | |
| CHI -6 Chicago / USA | ||
| MEX | -6 Mexico City / Mexico | |
| NYC | -5 New York / USA | |
| YYZ -5 Toronto / Canada | ||
| YUL -5 | Montreal / Canada | |
| CCS | -4 Caracas / Venezuela | |
| RIO -3 Rio de Janeiro / Brazil | ||
| BUE | -3 Buenos Aires / Argentina | |
| UTC 0 | Universal Time Coordinated | |
| LON | 0 | London / UK |
| BER | +1 | Berlin / Germany |
| PAR | +1 | Paris / France |
| ROM | +1 | Rome / Italy |
| CAI | +2 | Cairo / Egypt |
| IST +2 | Istanbul / Turkey | |
| MOW | +3 | Moscow / Russia |
| KWI | +3 | Kuwait City / Kuwait |
| DXB +4 | Dubai / Saudi Arabia | |
| KHI | +5 | Karachi / Pakistan |
| DAC | +6 | Dacca / Bangladesh |
| BKK +7 | Bangkok / Thailand | |
| SIN | +8 | Singapore |
| HKG +8 | Hong Kong | |
| PEK | +8 | Peking / China |
| SHA | +8 | Shanghai / China |
| TYO | +9 | Tokyo / Japan |
| SYD +10 S | Sydney / Australia | |
| NOU +11 | Noumea / New | Caledonia |
| AKL +12 A | uckland / New | Zealand |
◆ Touch the Set | OK control point 13 on the device or press the Set OK key 23 on the remote control again to save the current setting and to change to the next menu item.
Setting iSync
You can use this function to set whether the device should update the displayed time using the device at the iPort.
Precondition: The device is in clock/standby operating mode.
◆ Touch the Set|OK control point 13 on the device or press the Set OK key 23 on the remote control 16 times. I-SYNC appears on the display 9. ◆ Press one of the i▼/i▲ control points 6/5 on the device or press the i▼/i▲ keys 36/18 on the remote control to switch the function on (ON) or off (OFF). ◆ Touch the Set|OK control point 13 on the device or press the Set OK key 23 on the remote control again to save the current setting and to change to the next menu item.
Setting the snooze time
You can use this function to set the period for the snooze function.
Precondition: The device is in clock/standby operating mode.
- Touch the Set|OK control point 13 on the device or press the Set OK key 23 on the remote control 17 times. SNOOZE will appear on the display 9 and the minute display blinks.
- Press the i▼/i▲ control points 6/5 on the device or press the i▼/i▲ keys 36/18 on the remote control to set the required period between 1 and 59 minutes.
- Touch the Set|OK control point 13 on the device or press the Set OK key 23 on the remote control again to save the current settings and to quit the settings menu.
Setting the NAP timer
The device is provided with a separate timer function with an adjustable alarm time of 1 - 120 minutes.
Precondition: The device is in clock/standby operating mode.
- Touch the NAP control point ⑧ on the device or press the i|◀◀ key ③7 on the remote control. NAP will appear on the display ⑨, and the minute display blinks.
- Press the i▼/i▲ control points 6/5 on the device or press the i▼/i▲ keys 36/12 on the remote control to set the required number of minutes after whose expiry the alarm will sound.
◆ Confirm the setting by touching the Set|OK control point on the device or press the Set OK key 23 on the remote control. The number of minutes after whose expiry a louder tone will be sounded is now shown beneath the time display.
◆ You can turn the alarm off by touching any control point or pressing any key.
In order to turn the NAP time off early, press and hold the NAP control point & on the device until the date display is shown again.
Setting the alarm function
The device offers you an alarm function with 2 separately adjustable parameters.
Precondition: The device is in the clock/standby operating mode.
- Touch the AL1 ⑥ or AL2 ⑤ control point on the device, or press the AL1 ⑲ or AL2 key ⑳ on the remote control to call up the settings for Alarm 1 or 2. The alarm display will be shown, and the weekday abbreviation will blink in the display ⑨. Use the i▼/i▲ control points ⑥/⑤ on the device or the i▼/i▲ keys 36/18 on the remote control to select the required weekday or group of days for the alarm:
| MO | = | Monday |
| TU | = | Tuesday |
| WE | = | Wednesday |
| TH | = | Thursday |
| FR | = | Friday |
| SA | = Saturday | |
| SU | = Sunday | |
| WEEK 1 - 7 | = every weekday | |
| WEEK 1 - 5 | = Monday to Friday | |
| WEEK 6 - 7 | = Saturday and Sunday | |
◆ Next, touch the ▶▶| control point ⑦ or press the ▶▶| key ②1 on the remote control. The alarm time hour display will now blink.
Use the i▼/i▲ control points ⑥/⑤ on the device or the i▼/i▲ keys 36/18 on the remote control to select the hour for the required alarm time. Next, touch the ▶▶▶ control point ⑦ or press the ▶▶▶ key ②1 on the remote control.
The alarm time minute display will now blink. Use the i▼/i▲ control points ⑥/⑤ on the device or the i▼/i▲ keys 36/18 on the remote control to select the minute for the required alarm time. Next, touch the ▶▶| control point ⑦ or press the ▶▶| key ②1 on the remote control.
AL OUT will now appear on the display, and you can select the required alarm function or deactivate the alarm setting. Use the i▼/i▲ control points ⑥/⑤ on the device or the i▼/i▲ keys 36/18 on the remote control to select the required alarm function:
iPort play: Signal tone: Radio: Deactivated:
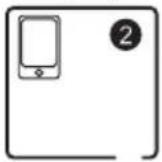


- Touch the ▶▶| control point ⑦ or press the ▶▶| key ②1 on the remote control to complete the setting.
NOTE
If approx. 15 seconds pass without any changes being made during setting, the device cancels the alarm setting.
When the alarm time is reached
In the case of the "iPort play" setting, the device connected to the iPort will be started for 60 minutes with increasing volume.
In the case of the "Signal tone" setting, a signal tone will be sounded with increasing volume. The duration of the signal is limited to 10 minutes.
In the case of the "Radio" setting, the radio will be switched on. The previously selected station will be activated for a maximum of 60 minutes at an increasing volume.
- Touch the SNOOZE control point 16 to stop the alarm for 10 minutes. The alarm number will blink for this period. A renewed alarm will sound after 10 minutes.
NOTE
The repeat alarm function is possible up to 60 minutes after the set wake time is reached.
◆ Press any button to stop the current alarm, even if the key lock is switched on.
NOTE
The alarm becomes active again when the next alarm time has arrived (i.e. on the next day).
GB IE
Radio operation
NOTE
For good radio reception the cable antenna 4 must be completely unwound. Align the aerial for the best reception in radio mode.
Switching the radio on/off
Switch the radio on by pressing the ⏻ key 11 on the device or the ⏻ key 17 on the remote control. The display shows the current reception frequency.
If you want to switch the radio off, either press the ⏻ key 11 on the device or the ⏻ key 17 on the remote control. The device will then change back to the clock/standby operating mode and show the current time.
Adjusting the volume
Stroke your finger from left to right across the Volume control point 16 on the device to increase the volume.

Stroke in the opposite direction to decrease the volume. You can also press the Vol+ key 22 to increase the volume using the remote control, or the Vol- key 24 to decrease it.
Switching between mono and stereo
If interference occurs when playing radio programs in stereo, touch the ST./MO key 13 on the device or press the ST/MO key 32 in the remote control. The Stereo wording in the display 9 will then go off.
Touch the ST./MO control point 13 on the device or press the ST/MO key 32 on the remote control to switch back to stereo play.
Manual station selection
Press the I◄► control point 8 on the device repeatedly or press the i◄► key 37 in the remote control repeatedly to search for radio stations with a lower frequency than the one shown in the display. Touch the control point for around 3 seconds, or keep the key on the remote control held down for 3 seconds, to start a search run downwards to the next sufficiently strong station. The search run will then stop and the device will play this station.
Press the ▶▶ control point ⑦ on the device repeatedly or press the i ▶▶ key ② in the remote control repeatedly to search for radio stations with a higher frequency than the one shown in the display. Touch the control point for around 3 seconds, or keep the key on the remote control held down for 3 seconds, to start a search run upwards to the next sufficiently strong station. The search run will then stop and the device will play this station.
Saving stations manually
Precondition: The device is in radio mode.
The device allows 2 users to save their favourite stations. Each user has 32 memory slots available. To save a radio station frequency, proceed as follows:
Tune in to the desired radio station as previously described. Touch the User control point 15 on the device for around three seconds or press the User key 25 in the remote control to switch between the required user (1 or 2). Touch the Mem./AMS control point 12 on the device or press the MEM/AMS key 34 on the remote control. Depending on the user selected, the display 9 now contains MEM or MEM2. The memory slot display on the right blinks at the same time.
Use the Preset+ and Preset- control points 5/6 on the device or the Pr+/Pr- keys 13 on the remote control to select the required memory slot between 1 and 32 for the set radio station.
Touch the Mem./AMS control point 12 on the device again or press the MEM/AMS key 30 in the remote control. The reception frequency of the chosen radio station is now stored in the selected memory slot. The MEM symbol remains illuminated for around 3 seconds.
Retrieving saved radio stations
Precondition: The device is in radio mode.
Use the Preset+ and Preset- control points 5/6 on the device, or the Pr+/Pr keys 18/36 on the remote control, to select the required memory slot between 1 and 32 for the saved radio station.
Automatic station search (AMS function)
Precondition: The device is in radio mode.
You can carry out a station search to automatically allocate the memory slots with sufficiently strong stations.
NOTE
▶ An automatic station search deletes all the previously saved stations. - Touch the User control point 15 on the device for around three seconds or press the User key 25 on the remote control to switch between the required user (1 or 2). - Touch the Mem. | AMS control point 12 on the device for around 3 seconds or press the MEM AMS key 34 on the remote control to start the search run. The device starts the search run and allocates memory slots 1–32 with the stations it finds for the set user.
NOTE
▶ If more than 32 stations are found, only the first 32 reception frequencies will be saved. ▶ If less than 32 radio stations are found, the last memory slots remain unchanged.
Automatic switch off (Sleep timer)
The sleep timer switches the radio function off automatically for an adjustable period of between 5 and 120 minutes.
To do this, press the ⏻- key 11 on the device or the ⏻-Sleep key 17 on the remote control for 3 seconds. If the radio function was not yet active, it will now be switched on and the maximum number of minutes for which the radio will remain switched on will be shown in the display 9 (120). Repeatedly press the ⏻- key 11 on the device or the ⏻-Sleep key 17 on the remote control to decrease the number of minutes in steps of 5 minutes. The ▶ symbol in the display 9 links while the sleep timer is active.
If you press and hold down the ⏻-key 11 on the device or the ⏻-Sleep key 17 on the remote control for another 3 seconds, the current remaining number of minutes will be shown. The radio function will be switched off when this period expires.
To turn the radio off before this period expires, press the ⏻ key 11 on the device or the ⏻ Sleep key on the remote control.
Review
◆ Touch the Review control point 14 on the device for 3 seconds or press the Review key 33 on the remote control to play all station memory slots for the currently set user for 5 seconds each, one after the other.
- Touch the Review control point 14 on the device or press the Review key 33 on the remote control again to retain the memory slot that has just played and terminate the review function.
Playing devices on the iPort
You can play audio files from iPods, iPads, or iPhones (up to Model 4S) via the iPort in the clock radio. At the same time, the device battery will be charged at the iPort while the clock radio is being powered by mains voltage.
NOTE
If you want to operate an iPad on the device, you will have to use the iPad adapter 35 provided so that the iPad has a better grip. To do this, open the cover 2 on the iPort 3 and push the iPad adapter 38 onto the cover from above.
CAUTION
If you want to operate the iPad connected to the iPort 3, hold the iPad with one hand so that the connectors are not mechanically overloaded.
◆ Open the cover 2 on the iPort and place the device carefully on the iPort 3.
Use the ⏻ key 11 on the device or the ⏻ key 17 on the remote control to activate the radio function.
- Touch the FUNC control point 15 on the device or press the FUNC key 19 on the remote control to activate the iPod function. The display 9 then shows the iPod.
◆ Wait a few seconds while the device at the iPort searches for suitable media.
Use the ▶II control point 12 on the device or the ▶II key 20 on the remote control to start or stop playing.
◆ Touch the ▶▶| control point ⑦ on the device or press the i ▶▶| key ②1 on the remote control to jump to the start of the next track.
◆ Touch the ◀◀◀ control point ⑧ on the device or press the i ◀◀◀ key ③7 on the remote control to jump to the start of the previous track.
To start a forwards or backwards search, press either the ▶▶1 control point 7 or control point on the 8 device or press the i key ▶▶1 or i l key on the remote control for 3 seconds.
Additional functions
Locking controls
You can lock the device controls against unintentional touching.
Precondition: The device is in clock/standby operating mode.
Press the key lock control point 16 for approx. 3 seconds or press the key lock key 31 on the remote control. A key symbol 📄 then appears on the display and all controls on the device are locked with the exception of the manual dimmer control. If you attempt to operate the device (even using the remote control) only LOCK is shown in the display 9
To cancel the lock, press the key lock control point 16 for around 3 seconds or press the key lock key 3 on the remote control. The key symbol will disappear from the display 8 and all controls will be released again.
Manual dimmer control
3 settings are available for the background illumination:
“HI” (= undimmed), “MI” (= slightly dimmed) and “LO” (= dimmed).
Press the Dimmer control point 16 or press the Dimmer key 27 on the remote control to adjust the background illumination as required.
Sound settings
Press the EQ key 30 on the remote control repeatedly to activate the sound presettings for CLASSIC => JAZZ => POP => ROCK => FLAT (no sound equalisation) one after the other.
Keep the EQ key 30 pressed to adjust the bass and treble as required using the TONE +/- keys 28, 29.
Display representations
◆ Touch the Display control point 14 while in radio or iPort operating mode, or press the display key 26 on the remote control in order to alternately display the frequency of the radio station already set or the title number and local time with the date. ◆ Touch the Display control point 14 on the device while in time/standby operating mode, or press the display key 25 on the remote control, to alternately display the local time with the date and the world time (CITY). ◆ Touch the Display control point 14 on the device while in any operating mode, or press the display key 26 on the remote control, to switch off the alternative display representation. ALT OFF briefly appears on the display.
The local time with the date is displayed in time/standby operating mode. The frequency of the radio station you have set, or the title number, will be displayed in radio or iPort operating modes.
Reset to factory state
◆ Touch and hold the ⏻ key 11 on the device, or the ⏻ key 17 on the remote control, until the word RESET appears in the display 9.
The device has now been reset to the factory state and the welcome message PLEASE WAIT FOR SETTING THANKS will now appear in the display ⑨. All saved settings (radio stations, SDA alarms etc.) have now been deleted and will need to be reset.
Cleaning

DANGER
Danger to life due to electric current!
▶ Remove the plug from the mains power socket before beginning to clean the device.
CAUTION
Damage to the device!
▶ To avoid irreparable damage, ensure that no moisture penetrates into the device whilst it is being cleaned.
Cleaning the housing
Clean the surfaces of the device with a soft, dry cloth.
This section contains important information on fault localization and rectification. Follow the instructions to avert hazards and damage.
WARNING
To avoid risks and property damage, pay heed to the following safety instructions:
Repairs to electrical devices may only be carried out by specialists trained by the manufacturer. Improper repairs can represent considerable risk to users and can cause damage to the device.
Fault causes and rectification
The following table will help with localizing and remedying minor malfunctions:
| Defect Possible cause Rectifi cation | ||
| The display 9 indicates nothing. | The plug is not connected. | Insert the plug into the mains power socket. |
| The mains power socket is not supplying power. | Check the house fuse. | |
| No sound. | The volume is set to minimum. Increase the playback volume. | |
| The radio is switched off . Switch the radio on. | ||
| Interference with the radio reception. | The transmitter is not properly adjusted. | Adjust the station correctly. |
| The reception is weak. | Try placing the cable antenna in a different direction in order to improve reception. | |
NOTE
If you cannot solve the problem using any of the aforementioned methods, please contact the Customer Service department.
Storage/Disposal
Storage
If you do not intend to use the device for an extended period of time, disconnect it from the mains power supply, remove the battery and store it in a clean, dry location that is not subjected to direct sunlight.
Disposal of the device

Never dispose of the device in the normal domestic waste. This product is subject to the provisions of European Directive 2002/96/EC-WEEE (Waste Electrical and Electronic Equipment).
Dispose of the device through an approved disposal centre or at your community waste facility. Please observe the currently applicable regulations. Please contact your waste disposal centre should you be in any doubt.
Disposing of the batteries

Do not dispose of the batteries in the domestic waste. Every consumer is statutorily obliged to dispose of used batteries at a collecting point in his town /district or at a retail company. This obligation is intended to ensure that batteries are disposed of in an environmentally responsible manner. Dispose of batteries only when they are fully discharged.
Appendix
Notes on the Declaration of Conformity
In regard to compliance with essential requirements and other relevant provisions, this device complies with the European Electromagnetic Compatibility Directive 2004/108/EC, the Low Voltage Directive 2006/95/EC and the Ecodesign Directive 2009/125/EC (Ordinance 1275/2008 Annex II, No. 1) as well as RoHS directive 2011/65/EU.
The full original Declaration of Conformity is available from the importer.
CE
Technical details
| Operational voltage 220-240 V / 50 Hz | ||
| Battery for data preservation | 1 x 3 V Type CR2032(Batteries not supplied) | |
| Battery for remote control | 1 x 3 V Type CR2025(supplied) | |
| Operational power consumption approx. 18 W | ||
| Standby power consumption approx. 0.3 W | ||
| Loudspeaker power output | approx. 2 x 5 W with10 % harmonic distortion | |
| Frequency range of radio (FM) 87.5 - 108 MHz | ||
| Operating temperature +15 - +35 °C | ||
| Relative humidity : ≤ 75 % | ||
| Dimensions (W x H x D): 8.8 x 24 x 17 cm | ||
| Weight approx. 1600 g | ||
| Protection class | II ☐ | |
Warranty
The warranty provided for this device is 3 years from the date of purchase. This device has been manufactured with care and inspected meticulously prior to delivery. Please retain your receipt as proof of purchase. In the event of a warranty claim, please contact Customer Service by telephone. This is the only way to guarantee free return of your goods.
NOTE
The warranty covers only claims for material and manufacturing defects, not for transport damages, worn parts or for damage to fragile components, e.g. keys or batteries.
This device is intended solely for private use and not for commercial purposes. The warranty is deemed void if this product has been subjected to improper or inappropriate handling, abuse or modifications that were not carried out by one of our authorised service centres. Your statutory rights are not restricted in any way by this warranty. The warranty period is not prolonged by repairs made under the warranty. This also applies to replaced and repaired parts. Damage and defects present at the time of purchase must be reported immediately after unpacking, or no later than two days after the date of purchase. Repairs made after expiry of the warranty period are chargeable.
Service
GB Service Great Britain
Tel.: 0871 5000 720 (£0.10/min)
E-Mail: kompernass@lidl.co.uk
IAN 86209
IE Service Ireland
Tel.: 1890 930 034
(0.08 EUR/min, peak)
(0.06 EUR/min, off-peak)
E-Mail: kompernass@lidl.ie
IAN 86209
Hotline availability: Monday to Friday from 8:00 to 20:00 (CET)
Importer
KOMPERNASS GMBH
BURGSTRASSE 21
44867 BOCHUM
GERMANY


- RADIO ALARM CLOCK
- SE
- TABLE OF CONTENTS
- INTRODUCTION
- SAFETY
- CONTROLS
- SETTING UP AND CONNECTING
- HANDLING AND USE
- RADIO OPERATION
- ADDITIONAL FUNCTIONS
- CLEANING
- FAULT RECTIFICATION
- STORAGE/DISPOSAL
- APPENDIX
- INFORMATION CONCERNING THESE OPERATING INSTRUCTIONS
- COPYRIGHT
- INTENDED USE
- NOTE
- WARNINGS
- DANGER
- A WARNING AT THIS RISK LEVEL INDICATES AN IMMINENTLY HAZARDOUS SITUATION
- WARNING
- A WARNING OF THIS RISK LEVEL INDICATES A POTENTIALLY HAZARDOUS SITUATION
- CAUTION
- A WARNING OF THIS RISK LEVEL INDICATES POTENTIAL DAMAGE TO PROPERTY
- RISKS FROM ELECTRIC CURRENT
- DANGER TO LIFE DUE TO ELECTRIC CURRENT
- DANGER TO LIFE ON CONTACT WITH LIVE CABLES OR COMPONENTS
- HANDLING BATTERIES
- RISKS FROM USES OTHER THAN THOSE INTENDED
- BASIC SAFETY INSTRUCTIONS
- (FOR ILLUSTRATIONS SEE THE FOLD-OUT PAGE)
- DURING THE COMMISSIONING OF THE DEVICE PERSONAL INJURY AND PROPERTY DAMAGE COULD OCCUR
- CHECK THE ITEMS SUPPLIED
- UNPACKING
- DISPOSAL OF PACKAGING
- REQUIREMENTS FOR THE SETUP LOCATION
- ELECTRICAL CONNECTION
- INSERTING THE DATA PRESERVATION BATTERY
- REPLACING THE REMOTE CONTROL BATTERY
- SETTING UP THE DEVICE
- PROVIDING MAINS POWER
- VHF CABLE ANTENNA
- SWITCHING ON AND OFF
- BASIC SETTINGS
- ACTIVATING THE SETTINGS MENU
- GB IE
- SETTING THE TIME
- SETTING THE DATE
- SETTING THE REMINDER FUNCTION
- SETTING THE UPDATE FUNCTION
- SETTING THE AUTOMATIC DIMMER FUNCTION
- SETTING THE TIME FORMAT
- SETTING THE OPERATING LOCATION
- SETTING THE WORLD TIME
- SETTING ISYNC
- SETTING THE SNOOZE TIME
- SETTING THE NAP TIMER
- SETTING THE ALARM FUNCTION
- WHEN THE ALARM TIME IS REACHED
- SWITCHING THE RADIO ON/OFF
- ADJUSTING THE VOLUME
- SWITCHING BETWEEN MONO AND STEREO
- MANUAL STATION SELECTION
- SAVING STATIONS MANUALLY
- RETRIEVING SAVED RADIO STATIONS
- AUTOMATIC STATION SEARCH (AMS FUNCTION)
- AUTOMATIC SWITCH OFF (SLEEP TIMER)
- REVIEW
- PLAYING DEVICES ON THE IPORT
- LOCKING CONTROLS
- MANUAL DIMMER CONTROL
- SOUND SETTINGS
- DISPLAY REPRESENTATIONS
- RESET TO FACTORY STATE
- DAMAGE TO THE DEVICE
- CLEANING THE HOUSING
- FAULT CAUSES AND RECTIFICATION
- STORAGE
- DISPOSAL OF THE DEVICE
- DISPOSING OF THE BATTERIES
- NOTES ON THE DECLARATION OF CONFORMITY
- TECHNICAL DETAILS
- WARRANTY
- SERVICE
- IMPORTER
Brand : SILVERCREST
Model : SIUR 10 A1
Category : Alarm Clock