
Moist S HU-230W - Humidifier WILFA - Free user manual and instructions
Find the device manual for free Moist S HU-230W WILFA in PDF.


| Product Type | Ultrasonic Humidifier |
| Brand | Wilfa |
| Model | Moist S HU-230W |
| Dimensions (W x D x H) | 20 x 20 x 30 cm |
| Weight | 1.2 kg |
| Power Supply | 220-240 V, 50/60 Hz |
| Power Consumption | 25 W |
| Water Tank Capacity | 2.5 L |
| Humidification Capacity | 250 ml/h |
| Coverage Area | Up to 30 m² |
| Noise Level | ≤ 35 dB |
| Main Functions | Adjustable mist output, auto shut-off, indicator light |
| Control Type | Rotary knob or button (assumed) |
| Filter Type | Replaceable demineralization cartridge (optional) |
| Cleaning | Weekly cleaning with vinegar solution; descale monthly |
| Safety Features | Automatic shut-off when water tank is empty, overheat protection |
| Spare Parts | Replacement water tank, nozzle, and filter |
| Repairability | User-serviceable components; professional repair recommended for electronic faults |
| Warranty | 2 years |
Frequently Asked Questions - Moist S HU-230W WILFA
User questions about Moist S HU-230W WILFA
0 question about this device. Answer the ones you know or ask your own.
Ask a new question about this device
Download the instructions for your Humidifier in PDF format for free! Find your manual Moist S HU-230W - WILFA and take your electronic device back in hand. On this page are published all the documents necessary for the use of your device. Moist S HU-230W by WILFA.
USER MANUAL Moist S HU-230W WILFA
natural_image
White ceramic water heater with black lid and three legs, no visible text or symbolsWilfa MOIST S
Humidifier
Bruksanvisning
Bruksanvisning
Operating Instructions
LES ALLE ANVISNINGER F∅R BRUK
LÄS IGENOM ALLA INSTRUKTIONER INNAN PRODUKTEN ANVÄNDS
LÆS ALLE VEJLEDNINGER INDEN BRUG
LUE OHJEET HUOLELLISESTI ENNEN KÄYTTÖÄ
READ ALL INSTRUCTIONS BEFORE USING
7

8
PLASSERING
VEDLIKEHOLD
natural_image
Simple line drawing of a cylindrical container with a lid and an upward arrow indicating vertical motion (no text or symbols)7
8
PLACERING
UNDERHÅLL
natural_image
Diagram of a cylindrical container with a lid and an upward arrow indicating vertical motion (no text or symbols)Veckovis underhåll
7
PLACERING
VEDLIGEHOLDELSE
natural_image
Simple line drawing of a cylindrical container with a double-headed arrow indicating upward and downward motion (no text or symbols)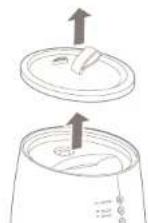
7
SIJOITUSPAIKKA
Alavalon säätäminen
natural_image
Simple line drawing of a cylindrical container with a double-headed arrow indicating upward and downward motion (no text or symbols)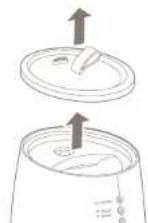
Read this manual thoroughly before using and save it for future reference.
IMPORTANT SAFETY INSTRUCTIONS....5
Product overview....7
Placement....8
Use 8
Maintenance....11
Troubleshooting....13
Technical specifications....14
IMPORTANT SAFETY INSTRUCTIONS
- If the supply cord is damaged, it must be replaced by the manufacturer, its service agent or similarly qualified persons in order to avoid a hazard.
- Please use clean tap water to prevent large foreign objects or scale blocking the water outlet, which may cause slowly refilling or water leakage.
- Ensure that the product is placed in a horizontal plane, otherwise it may affect the mist output or cause water leakage.
- For safety, pouring direction is limited as the arrow shown at the edge near the top of the humidifier, this is to avoid flooding the air outlet.
- This appliance can be used by children aged from 8 years and above and persons with reduced physical, sensory or mental capabilities or lack of experience and knowledge if they have been given supervision or instruction concerning use of the appliance in a safe way and understand the hazards involved.
• Children shall not play with the appliance. - Cleaning and user maintenance shall not be made by children without supervision.
- Do not plug in the device or pull plug out of the power supply with wet hands before or you use the product.
- Thoroughly dry your hands before you use the device, in particular after pouring water in the water tank.
6
- Avoid connectiong the device using other plugs, multi-outlet and extension cords.
- Do not use when the power cord is bundled together.
- Do not use in any surrounding that could lead to the water in the water tray or in the device to freeze. However, if the water in the water tray or the device is frozen please do not operate the device until the ice has melted. It can cause ignition or a breakdown. Check that the device does not have leakage of water before it is used.
- Avoid placing the humidifier at places with direct sunlight. There is a risk that the device discolors.
- If moving the humidifier with water inside make sure to hold it by its base to avoid water spillage.
PRODUCT OVERVIEW
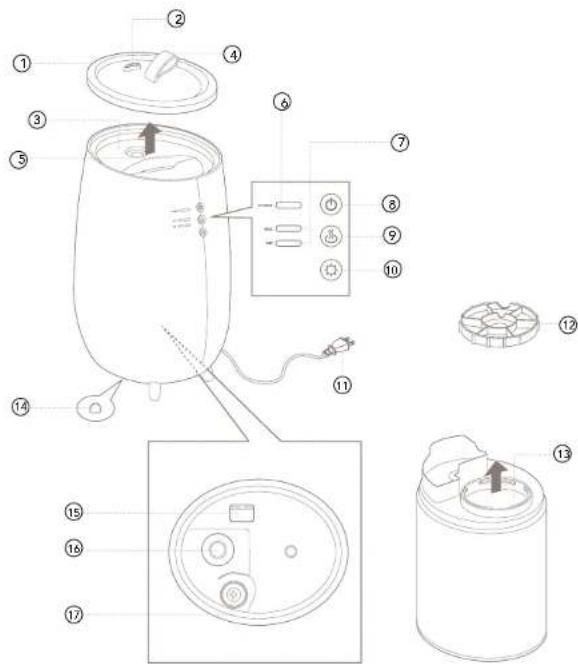
① Top cover ⑩ Light button
② Mist outlet ⑪ Power cable
③ Water tank ⑫ Water tank cap
④ Leather tag ⑬ Water supply entrance
⑤ Water tank handle ⑭ Mood light (bottom)
⑥ Power/ water supply indicator ⑮ Ventilation duct
⑦ Mist output indicators ⑯ Ultrasonic membrane
⑧ Power button
1. 2014年,公司与控股股东的关联方不存在关联关系。
⑨ Mist output button
7

PLACEMENT
- Place the product on firm, flat surface.
- The humidifier should be placed on flat horizontal surface and keep it steady.
- Do not place the product near or close to any heat sources.
- The humidifier should be far away from any heat sources, such as stoves or fire places. Do not expose the product to direct sunlight.
- Do not place the product near or close to furniture or electric appliances.
- The mist outlet from the humidifier should not be directed towards furniture and the electronic appliances, to avoid damage.
- Particles in water, such as calcium, can be part of the vapour and be deposited on objects in the vicinity.
- It is recommended that the unit be placed on a table or other surface at least 70 cm above the floor level, to ensure that the vapour will be optimally distributed throughout the room.
USE
Filling the water tank
Note: Please check that the power is off before removing the water tank from the device.
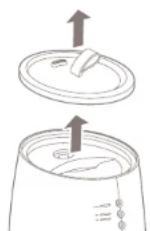
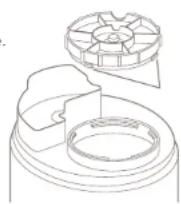
Remove the top surface cover. Hold and lift the leather tag on the top cover when removing the top cover.
Take out the water tank.
Caution: Do not tilt the device when raising the water tank. This may lead to spillage of water remaining in the device.
Turn the water tank cap counter-clockwise and remove from water tank.
Pour water in the water tank.
Caution: Do not use hot water. It may deform the shape of a water tank.
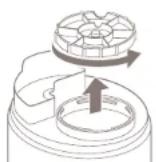
Replace the water tank cap on the water tank, carefully check that the water tank cap sealing is properly in place. Firmly turn the tank cap clockwise until it stops.
Caution: Be sure to place back the top cover after refilling the tank. If not, the mist will not be efficiently distributed.
Connecting the product
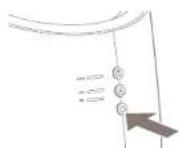
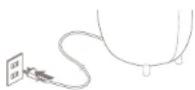
Put the power plug into a wall outlet. The power/water supply indicator will light red when the appliance is connected to the wall outlet.
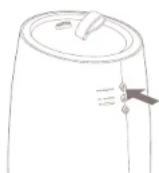
Push the power button. The power/water supply indicator will light up in blue and will start to humidify with MIN (minimum) mist output. The bottom light will lid up.
Note: If there is insufficient water in the tank when the device is turned on, the power/water supply indicator will turn from blue to red immediately. Please remove the water tank and refill it with water.
Note: The power/water supply display will flash red when there is not enough water in the water tank while in use.
Push the power button to turn off the device and pull out the plug after use.
Caution: When removing the power plug, be sure to hold it by the plug. Pulling the cord to remove the plug may cause the cable to break.
Adjusting the mist output
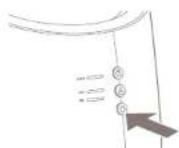
Push the power button to turn the device on. The power/water supply indicator will light blue and it will begin to humidify with MIN (minimum) mist output. The bottom light will lid up.
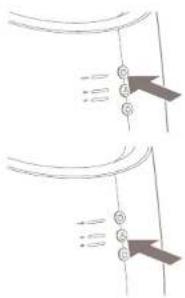
Push the mist button to increase the mist output. The mist level switches from MAX (maximum) to MIN (minimum) and back, each time the mist switch button is pushed. The selected mist level is displayed indicated by the LED. Default mist output will always be set to MIN (minimum) when the unit is turned on.
Caution: Please take adequate care to prevent excessive humidity. Wet floors from condensation can form due to the room environment and conditions of use. Please carefully adjust or turn off the device.
Adjusting the bottom light
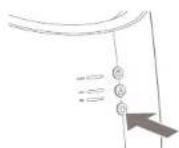
Push the light button. The light will automatically light up when the power is turned on. The light will light up again when the power is turned on again, even if it was previously switched off.
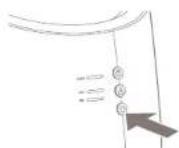
MAINTENANCE
Important: Be sure to remove the power plug from the outlet before carrying out maintenance.
Important: Do not soak or immerse the power plug or the device in water.
Important: We recommend daily maintenance to prevent the growth of bacteria and scale inside the water tank.
Daily maintenance
Switch the power button to OFF and remove the power plug;
- Remove the top cover and water tank from the device.
- Remove the water tank from the device and empty the remaining water in the tank.
- Pour a small amount of water into the water tank, firmly close the water tank cap and shake to rinse
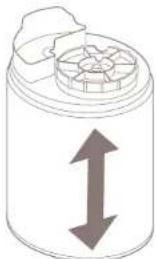
natural_image
Simple line drawing of a cylindrical container with a lid and an upward arrow indicating vertical motion (no text or symbols)Weekly maintenance
Note: If using the unit for multiple consecutive days, please carry out maintenance by applying the following procedure once a week. If this type of maintenance is not conducted, scale may form on the inside and shorten the life of the equipment or cause a breakdown. Moreover, if the device continues to be used with no maintenance, it may lead to the growth of bacterial and mould/bad odour.
Switch the power button to OFF and remove the power plug;
- Remove the top cover and water tank from the device.
- Remove the remaining water in the water tank and at the bottom of the device.
- Add dishwashing detergent to a soft sponge for dishes and wash the water surface and water tank.
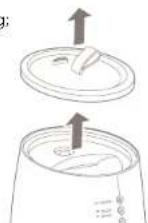
- Rinse the water tank well so that no washing up liquid remains and dry the water tank thoroughly.
• Gently clean the surface of the ultrasonic membrane with a soft, dry cloth. - Soak a soft cloth in lukewarm water and wipe the bottom and sides.
Attention: Please do not use metal scourers, melamine sponges, polishing powers, or solvents like benzene, thinner, alcohol or other.
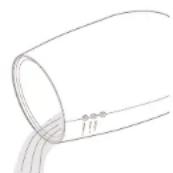
Maintenance before storing
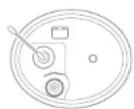
Please conduct the following maintenance before storing the device:
- Follow the same steps under 'Weekly maintenance'
- Dry each component before assembling it
- Check that each component has fully dried, then assemble the device and store it.
TROUBLESHOOTING
| ErrorSolution | |
| The power/water supply indicator does not light up and mist does not come out | Check the power plug inserted all the way to the back of the socket?Is there a power cut? |
| The power/water supply indicator is red and the power is off, even though the power button is pushed. | There is not enough water. Please fill the water tank with water. |
| Strange noises accompany the use of the product | A “burbling” sound comes out of the main body. This sound is the sound of water being supplied from the water tank to the main body and does not mean the product is defective. |
| A strange noise can be heard from the removed water tank. | When you remove an empty or nearly-empty water tank from the main body, an abnormal sound from the water tank can be heard. This sound is related to pressure within the water tank and does not mean the product is defective. |
| Mist can’t be seen even when the power is connected | Is the power/water supply display flashing red? There is insufficient water, if it is flashing red. Please fill the water tank with water.The mist may not be visible depending on the balance between the room temperature and humidity. |
| The mist output is switched to MIN (minimum) even though it is not being used. | Was the power turned on again? The default mist output will be MIN (minimum) if the power is turned on again, even if the mist volume was on MAX (maximum) prior to switching it on. |
| The bottom light is on even though it is not being used. | Was the power turned on again? The light will be on if the power is turned on again, even if the bottom light is turned off. |
| The floor is wet/ There is a water leakage. | Is the floor wet due to excessive humidity? Wet floors from mist can occur due to the room environment and condit ions of use. Please switch the mist volume to MIN (minimum), carefully adjust or turn off the device.A unique feature of the ultrasonic humidifier is that, while it has a strong humidifying ability, the mist that forms is light, and therefore doesn't soak the surrounding area. |
| How often should I replace the anti-scale and antibacterial cartridge? | Depending on usage and hardness of the water, we recommend to replace the cartridge every 3 to 6 months. We strongly advise to use the cartridge as it will extend the lifespan of your device. |
TECHNICAL SPECIFICATIONS
Voltage DC 24 V
Power 20 W
Mist output 230ml/h
Effective area 20 m
Noise 40 dBA
Max operation time 10h

This marking indicates that this product should not be disposed with other household wastes throughout the EU. To prevent possible harm to the environment or human health from uncontrolled waste disposal, recycle it responsibly to promote the sustainable reuse of material resources. To return your used device, please use the return and collection systems or contact the retailer where the product was purchased. They can take this product for environmental safe recycling.

AS WILFA
Industriveien 25
1481 Hagan
Norway
wilfa.com
- Wilfa MOIST S
- PLASSERING
- VEDLIKEHOLD
- PLACERING
- UNDERHÅLL
- Veckovis underhåll
- VEDLIGEHOLDELSE
- SIJOITUSPAIKKA
- Alavalon säätäminen
- IMPORTANT SAFETY INSTRUCTIONS
- PRODUCT OVERVIEW
- PLACEMENT
- USE
- Filling the water tank
- Connecting the product
- Adjusting the mist output
- Adjusting the bottom light
- MAINTENANCE
- Daily maintenance
- Weekly maintenance
- Maintenance before storing
- TECHNICAL SPECIFICATIONS
Brand : WILFA
Model : Moist S HU-230W
Category : Humidifier