Calypso-to-go - Breast Pump Ardo - Free user manual and instructions
Find the device manual for free Calypso-to-go Ardo in PDF.


| Product Type | Breast pump |
| Brand | Ardo |
| Model | Calypso-To-Go |
| Dimensions (pump) | 190 x 130 x 76 mm |
| Weight (pump) | 0.545 kg |
| Mains Adapter Input | 230/115 V AC ±10%, 50/60 Hz |
| Mains Adapter Output | 9 Vdc, 1.2 A (standard) or 1.4 A (regulated) |
| Battery Type | 6 x LR06/AA alkaline (e.g., Duracell) |
| Battery Life | Approximately 5 hours at medium settings |
| Vacuum Range | 50 – 330 mbar |
| Cycle Adjustment | Adjustable independently via touch controls (8 levels) |
| Operation Modes | Single pump, double pump, stimulation mode |
| Protection Class | Class II (double insulated) |
| Ingress Protection | IP21 (pump), IP20 (adapter) |
| Applied Part Type | BF (body float) |
| Lifetime | 800 hours (excluding normal wear) |
| Cleaning | Wipe with damp cloth; do not immerse; use original Pumpset parts |
| Spare Parts | Only mains adapter available; no user-serviceable parts |
| Guarantee | Defects covered; void if opened; 400-hour LED indicator |
| Standards | MDD 93/42 EEC, EN 60601-1, EN 60601-1-2, EN ISO 10079-1 |
Frequently Asked Questions - Calypso-to-go Ardo
User questions about Calypso-to-go Ardo
0 question about this device. Answer the ones you know or ask your own.
Ask a new question about this device
Download the instructions for your Breast Pump in PDF format for free! Find your manual Calypso-to-go - Ardo and take your electronic device back in hand. On this page are published all the documents necessary for the use of your device. Calypso-to-go by Ardo.
USER MANUAL Calypso-to-go Ardo
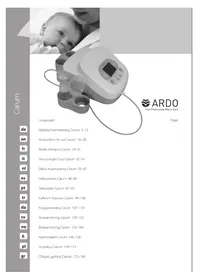
CALYPSO, CALYPSO DOUBLE PLUS, CALYPSO-TO-GO
Operating Instructions | Bruksanvisning | Käyttöohje | Bruksanvisning | Brugsanvisning | Инструкция по применению | Instrukcja obsługi | Однүгес хрі́σης | 사용 설명서 | 使用说明
natural_image
Medical device with Colypno label and ARDO branding, no visible text or symbols on the device itself.Languages Page
en
Operating Instructions Calypso, Calypso Double Plus, Calypso-To-Go
3-9
SV
Bruksanvisning Calypso, Calypso Double Plus, Calypso-To-Go 10-17
fi
Congratulations on your purchase and thank you for choosing the gentle Calypso breastpump from Ardo. In these instructions you will find important and useful details which will make your Calypso experience even more rewarding.
When using electrical devices it is very important to observe the following safety regulations. Please take the time to read through the user manual carefully before using the unit for the first time. Please start with Section 4 - (Start-up / Operation) – before you plug your Calypso into the mains power supply, or install the battery.
Table of contents
- Product description
- Important safety details
- Intended use
- Start-up / Operation
- Useful tips
- Trouble-shooting
- Accessories
- Maintenance / Care / Cleaning
- Guarantee
- Technical Information
- Transport / Storage / Disposal
1. Product description
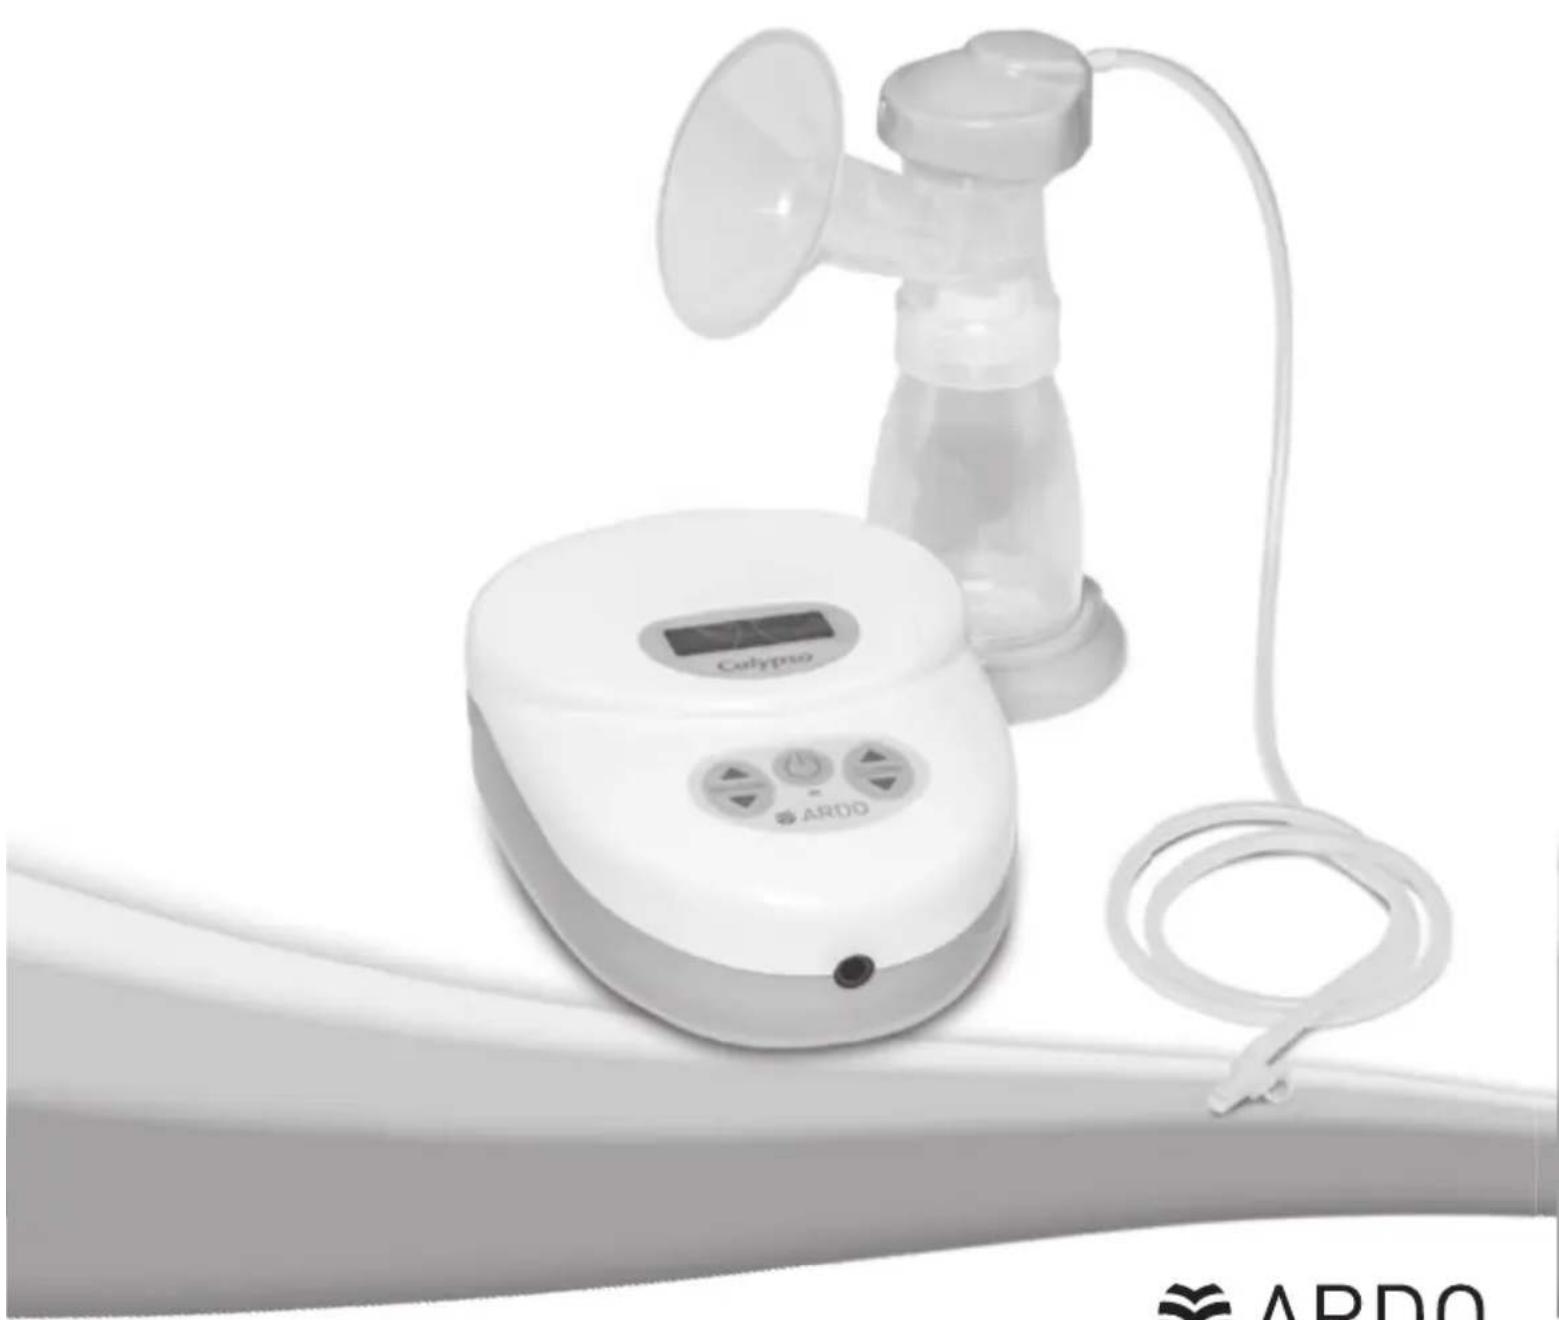
a Calypso breastpump
b Pumpset (see separate User Manual, enclosed)
c Tube connector
d Control panel
e LCD display
f Connection opening for tube connector
g Mains adapter
h Input plug of the mains adapter
i Mains connection

natural_image
Black rectangular electronic device with two labeled connectors (g and h) attached to its body, connected by wires (no visible text or symbols beyond labels)
2. Important safety details
Calypso is an electrically-operated, safe and reliable breastpump for personal use. Calypso is constructed and assembled in accordance with CE guidelines, and in compliance with safety standards EN 60601-1, EN 60601-1-2, EN ISO 10079-1, EN 60601-1-4 and EN 60601-1-6. For your safety, to avoid damage to the unit and to avoid risk of electric shock, injury or fire, please observe the following safety regulations.
Key to symbols
| Important information | |
| Warning: General risk points – check with the Instruction Manual | |
| Please note Operating Instructions | |
| CE0123 | Compliance with Directives MDD 93/42 EEC /2007/47EC and MDD 2009 |
| Manufacturer | |
| Unit type BF | |
| The unit is subject to the stipulations of WEEE Directive 2002/96/EC | |
| Class II appliance | |
| IP21 | IP21 drip-proof protection (Calypso) |
| IP20 | IP20 drip-proof protection (mains adapter) |
| Alternating current | |
| Direct current | |
| Temperature | |
| P | Air pressure |
| RH | Relative humidity |
| Fragile, handle with care | |
| Keep packaging away from heat | |
| Keep packaging away from moisture |
Safety Regulations

- After use, disconnect the Calypso from the mains power source by pulling the mains plug out of the socket.
- Do not leave old batteries in the unit - danger of leakage.
- When using the unit connected to the mains, remove the batteries.
- In the event of an accidental splash, or the unit falling into water - IMMEDIATELY disconnect it from the
- mains. Do not touch the unit until it has been disconnected.
- The Calypso with the mains adapter is designed for indoor use only. Do not use outdoors.
- Use the unit with the Ardo mains adaptor only.
- Do not open the unit (no user-serviceable parts).
- Calypso is not water-proof. Therefore the unit must never be immersed in water or other fluids, nor used or stored in places where it might fall into the water. Do not use while in the bath or while taking a shower.
- Keep the mains cable and all accessories away from sources of heat.
- Do not use Calypso in an area where oxygen gas is in use or sprays are being applied.
- Only use a genuine Ardo Pumpset and genuine Ardo parts. See Section 4 (Start-up/Operation) and
• Section 8 (Maintenance / Care / Cleaning). - Calypso should only be used for the purposes detailed in Section 3 (Application).
- Please keep these Operating Instructions handy for reference at all times.
3. Intended use
The Calypso breastpump system is intended for the expressing of breastmilk, for the collection and storage of breastmilk in the event of breastfeeding problems, illness or in the absence of either mother or baby. Contra- indications: none known: - when the unit is used for the correct purpose. Calypso can be used as both a single pump and as a double pump. The unit is intended for personal domestic use.
4. Start-up / Operation
4.1 Controls

Stand-by switch

Adjust the suction intensity / vacuum (V)

Change the cycle level (C)
4.2 Preparing the pump for use

Mains operation:
- insert the input plug (h) of the mains adapter (g) into the electrical connection socket (i) of the unit (Fig. 1). The mains adapter must correspond to the local mains electricity supply. Important: remove the batteries before plugging the unit into the mains.
Battery operation:
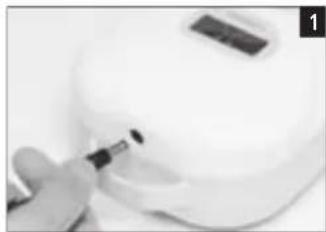
- Release the latch (Fig. 2) and slide open the battery cover.
- Six LR 06 / AA batteries are required for use. Check the + / - mark orientation of the batteries (Fig. 3).
- Close the battery compartment cover and secure by re-engaging the latch (Fig. 4). The average working life with a medium vacuum and cycle setting is approximately 5 hours (Duracell batteries). We recommend that you use Duracell batteries.
Connecting the Pumpset

The Pumpset is an applied part of Calypso. Use of the Pumpset (b) is detailed in the separate "Ardo Pumpset" Operating Instructions.
- To use the single Pumpset: attach the tube connector (c) to the pump (f) (Fig. 5). The second opening of the tube connector remains closed.
- To use the double Pumpset: Open the second opening of the tube connector and attach the second Pumpset (Fig. 6).
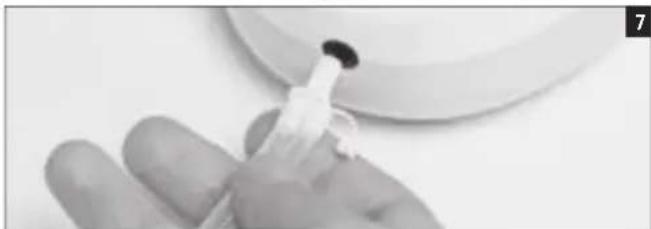
- Attach the tube connector (c) to the pump (f) (Fig.7).
natural_image
Close-up of a hand using a pen to apply a small electronic component (no visible text or symbols)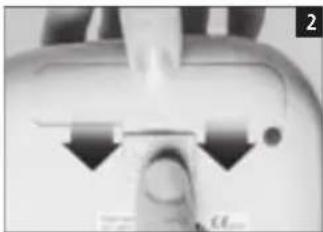
natural_image
Close-up of a medical device with a finger inserted, showing internal components and arrows indicating motion (no text or symbols visible)3

natural_image
Close-up of hands holding a small electronic device with black arrows pointing to its components (no visible text or symbols)3

natural_image
Close-up of a hand using a pen to apply a small electronic device on a white surface (no visible text or symbols)
natural_image
Close-up of hands holding a small object, possibly a tool or device, with no visible text or symbols.
natural_image
Close-up of a finger with a small object attached (no visible text or symbols)
natural_image
Close-up of a white cap and hand against a plain background (no text or symbols visible)4.3 Operation

The vacuum (suction intensity) and cycle (suction frequency) can be adjusted independently of each other. Touching the switches changes the intensity of the vacuum or the cycle by one level.
- Turn on the pump by touching the stand-by switch (Fig. 8). The green LED display will light up. Choose the settings which you find most comfortable.
- Touch the up-arrow to increase the intensity of the vacuum (suction strength). Touch the down-arrow to reduce the vacuum (Fig. 9).
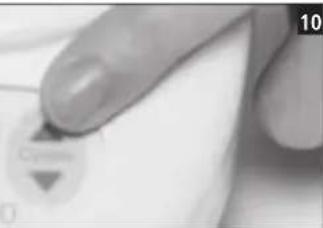
- Touch the up-arrow to step-up the cycle (suction frequency). Touch the down-arrow to reduce the cycle (Fig. 10).

natural_image
Close-up of a hand pressing a button on a white surface, no visible text or symbols
1 + u7 = 7019
natural_image
Close-up of a finger pressing a button on a white surface, no visible text or symbols5. Useful Tips
Adjusting the vacuum (suction intensity)

Expressing milk should never be painful.
- Set the vacuum intensity at the highest level which is comfortable for you.
• Take care that the nipple is centred in the breast shell. - Check whether the size of the breast shell fits your nipple. (See the "Ardo Pumpset" Operating Instructions).
- In the event that the milk is not released, try a massage – this can be really effective.
- When the Calypso is to be used at a height greater than 1000 meters above sea level (height difference), the choice of vacuum level must be checked.
- Regulate the vacuum by touching the arrow keys.
- Intensify the vacuum, until you feel a very slight discomfort, and then reduce the intensity of the vacuum until pumping is comfortable.
Adjusting the cycle (stimulation mode)
- When babies start to breastfeed, they suckle with rapid sucking motions and low suction – this causes the milk to release by stimulating the milk ejection reflex. This effect can be replicated by starting with a higher cycle level (e.g. 8 bars) and selecting a weaker vacuum.
- When using the stimulation mode, choose the levels of vacuum and cycle which suit you.
- When the milk begins to release, reduce the cycles by touching the down arrow and strengthen the vacuum by touching the up-arrow until you find the most comfortable level for you.
- If the milk flow fails, begin again in stimulation mode in order to prompt the milk to release/flow once again.
Encouraging the milk ejection reflex
The milk ejection reflex may occur later when pumping than when breast feeding. The following measures may be helpful.:
- Massage the breast before breast feeding.
- Have a warm drink.
- Relax and think about your baby.
• Gaze at a picture of your baby. - Apply a warmed compress to the breast before expressing.
- Warm the cone or funnel of the breast shell before applying.
Pumping efficiently
- Massaging the breast while using the breastpump can boost milk production, and promote better flow.
Increasing the quantity of milk
- Use a double Pumpset
- For the first 10 minutes, or until no more milk is flowing, use a double pump i.e. express from both breasts at once. Afterwards, switch to a single pump. Express from each breast for five minutes while massaging gently.
6. Troubleshooting / error indicator
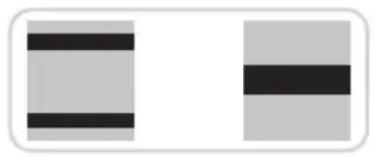
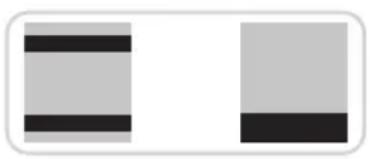
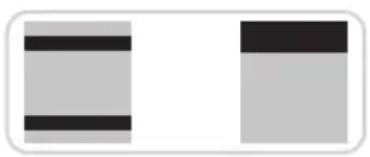
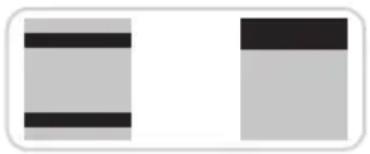
In the event of an error, the LED display flashes green and orange alternately. There are three different error-displays:
natural_image
Two vertical gray rectangles with black horizontal bars, no text or symbols presentGeneral error (time-out)
- Switch off the unit and re-start. If the error message appears again, the unit is defective and cannot be repaired.
natural_image
Two vertical rectangular blocks with black horizontal bars, no text or symbols presentVoltage too low
- Weak batteries
- Incorrect or defective mains adapter
natural_image
Two vertical gray bars with black horizontal stripes, no text or symbols presentVoltage too high
- Incorrect or defective mains adapter
Further possible errors when using the unit
- Weak or absent vacuum:
Disconnect the Pumpset from the unit. Partly close the connector opening (f) with a finger to test the suction. How ever, be careful not to completely cover the opening. If suction is detectable, then the pump is working. Test the Pumpset in accordance with the separate Operating Instructions (only use the original Ardo Pumpset).
- The pump is not working / no data on the display: Check the mains supply; if the unit still does not work it is defective.
- In the event that one of these errors occurs, and is confirmed, the unit must be brought or sent back to the point of sale. The unit must be checked out by trained service personnel, or by the manufacturer of the pump unit.
- Accessories
| Mains adapter 120 V / 60 Hz output 9 V 1.2 A UL 63.00.69 | |
| Regulated mains adapter 100-240 V 50/60 Hz, output 9 V 1.4 A Euro 63.00.141 | |
| Regulated mains adapter 100-240 V 50/60 Hz, output 9 V 1.4 A UK 63.00.142 | |
| Regulated mains adapter 100-240 V 50/60 Hz, output 9 V 1.4 A UL 63.00.143 | |
| Regulated mains adapter 100-240 V 50/60 Hz, output 9 V 1.4 A Australia 63.00.144 | |
| Regulated mains adapter 100-240 V 50/60 Hz, output 9 V 1.4 A China 63.00.145 | |
| UpgradeSet 63.00.41 | |
| Nursing-aids bag 63.00.81 | |
| Pumpset bag 63.00.83 | |
| Calypso bag 63.00.84 | |
| Cold bag - complete | 63.00.82 |
| Cooling element | 63.00.116 |
| Miscellaneous Pumpsets www.ardomedical.com | |
8. Maintenance / Care / Cleaning
The silicone pot integrated into the Pumpset ("Vacuum Seal" technology) ensures that no breast milk or air can get into the tube or Calypso unit. The closed system is so secure that it constitutes a barrier against cross contamination (infection).
The unit is maintenance-free; care of the unit and its accessories is limited to inspection and cleaning. There are no user-serviceable parts in the Calypso breastpump. With the exception of the mains adapter (g), there are no spare parts.
Visual inspection by the user before switch-on
• Is the mains adapter (g) undamaged?
• Is the accessory clean, complete and intact?
• Is the accessory correctly attached?
Ignoring these checks, or the cleaning instructions, may lead to risk of infection, electric-shock or damage to the unit.
Cleaning / disinfection

- Calypso breastpump: Important: Unplug the unit from the mains-adapter before cleaning.
Cleaning at home: As needed, wipe with a damp cloth, commercial detergent may be used. Do not put the unit into the dish-washer or into a washing-up bowl. It is not possible to clean the pump or the power unit. Attempting to do so may cause the unit to malfunction or to become contaminated – requiring suitable disposal (see section 11:Transport / Storage / Disposal).
Calypso is not waterproof. It complies with Standard IP21.
- Accessory Pumpset: Please read the separate Operating Instructions, Section: Cleaning.
9. Guarantee
Ardo medical AG guarantees its products in respect of materials and manufacturing defects. The guarantee period starts from the date of purchase. Defective materials will be replaced free-of-charge, during the life of the Guarantee, provided that the Guarantee has not been voided by unauthorised use or access to the unit. To ensure Guarantee cover, and the flawless functioning of the unit, the Operating Instructions must be followed, and only Ardo accessories used. The Guarantee is void if the unit has been opened or tampered with.
General terms and conditions
Ardo medical AG guarantees its products in respect of materials and manufacturing defects. The guarantee period starts from the date of purchase. Defective materials will be replaced free-of-charge, during the life of the Guarantee, provided that the Guarantee has not been voided by unauthorised use or access to the unit. To ensure Guarantee cover, and the flawless functioning of the unit, the Operating Instructions must be followed, and only Ardo accessories used. The Guarantee is void if the unit has been opened or tampered with.
NB
After 400 hours, the green LED display changes to orange. This means that the additional Guarantee has expired. The Calypso can however still be used without any reduction in performance.
10. Technical Information
| 10.1 Versions | |||
| Calypso | 63.00.194 | en-de-fr-it-es-nl | Calypso Euro mains plug |
| 63.00.195 | en-se-fi-el-ru-zh | Calypso Euro mains plug | |
| 63.00.232 | en-de-fr-it-es-n | Calypso UK mains plug | |
| 63.00.233 | en-se-fi-el-ru-zh | Calypso UK mains plug | |
| 63.00.234 | en-de-fr-it-es-nl | Calypso UL mains plug | |
| Calypso Double Plus | 63.00.197 | en-de-fr-it-es-nl | Calypso Double Plus Euro mains plug |
| 63.00.198 | en-se-fi-el-ru-zh | Calypso Double Plus Euro mains plug | |
| 63.00.237 | en-de-fr-it-es-nl | Calypso Double Plus UK mains plug | |
| 63.00.238 | en-se-fi-el-ru-zh | Calypso Double Plus UK mains plug | |
| 63.00.239 | en-de-fr-it-es-nl | Calypso Double Plus UL mains plug | |
| Calypso-To-Go | 63.00.63 | universal | Calypso-To-Go Euro mains plug |
| 63.00.65 | universal | Calypso-To-Go UK mains plug | |
| 63.00.66 | universal | Calypso-To-Go UL mains plug | |
| 10.2 Technical data | |||
| Pump dimensions 190 x 130 x 76 mm | Classification in accordance with MDD93/42 Class 2a | ||
| Mains adapter dimensions 100 x 60 x | 90 mm Mains adapter input voltage 230 / 115 Volt AC ± 10 % | ||
| Pump weight 0.545 kg Frequency 50 Hz / 60 Hz | |||
| Mains adapter weight 0.445 kg Mains adapter output 9 Vdc, 1.2 A | |||
| Regulated mains adapter output 9 Vdc, 1.4 A | |||
| Double insulated protection class | Class II | Vacuum range | 50 - 330 mbar |
| Protection level | BF Permitted tolerance of the vacuum strength ± 5 % | ||
| Life time (excluding normal wear and tear) | 800 hours | Operating temperatureRelative humidity | +5 - 40 °C10 - 93 % |
| 10.3 Compliance |
| In accordance with Medical Devices Directive MDD 93/42 EEC of 14.7.1993, and 2010, as well as 2007/47/CE, 2006/42/CE, EN 60601-1, EN60601-1-2, EN ISO 10079-1, EN 60601-1-4, EN 60601-1-6, EN60601-1-11 |
| 10.4 EMC Test records |
| See Page 82CE0123 |
11. Transport / Storage / Disposal
For the transport and storage of your Calypso unit, we recommend using the original packaging. We further recommend separate storage protected from UV (e.g. sunlight/halogen lamps), heat and dust (Avoid storing or using the unit on a heater. Do not store or use the unit in a dusty environment. Failure to observe these instructions can lead to the malfunction of the unit).
| Trasport and storage conditions | ||
| Up to 15 weeks | From 15 weeks, the numbers given in the “Operating Conditions” apply | |
| Temperature | -25 °C to +70 °C | +5°C to +40 °C |
| Relative humidity | 10 - 75 % | 30 - 75 % |
| Air pressure | 50 - 1060 hPa | 700 - 1060 hPa |
Disposal
The unit may be returned to the manufacturer, or be dismantled and recycled (as metal or plastic) in an environmentally-friendly manner, through a recycling firm specialising in electrical goods. There are no special or increased risk factors.
Languages Page
| en | Operating instructions | Calypso, Calypso Double Plus, Calypso-To-Go | 3-9 |
| sv | Bruksanvisning | Calypso, Calypso Double Plus, Calypso-To-Go 10-17 | |
| fi | Käyttööhje | Calypso, Calypso Double Plus, Calypso-To-Go | 18-25 |
| no | Bruksanvisning | Calypso, Calypso Double Plus, Calypso-To-Go | 26-33 |
| da | Brugsanvisning | Calypso, Calypso Double Plus, Calypso-To-Go | 34-41 |
| ru | Инструкция по применению | Calypso, Calypso Double Plus, Calypso-To-Go | 42-49 |
| pl | Instrukcja obsługi | Calypso Double Plus, Calypso-To-Go | 50-57 |
| el | Обныйых хр/months | Calypso, Calypso Double Plus, Calypso-To-Go | 58-65 |
| ko | 사용 설명서 | Calypso, Calypso Double Plus, Calypso-To-Go | 66-73 |
| zh | 使用说明 | Calypso, Calypso Double Plus, Calypso-To-Go | 74-81 |
natural_image
Close-up of a hand using a tool to apply material to a small electronic component (no visible text or symbols)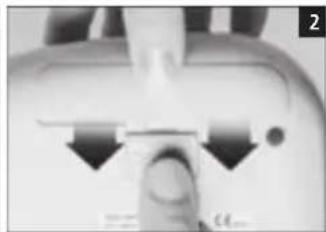
natural_image
Close-up of a hand holding a medical device with arrows indicating force or pressure direction (no visible text or symbols)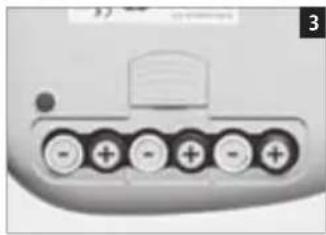
natural_image
Close-up of a battery terminal with six charging beads (no text or symbols visible)
natural_image
Close-up of hands holding a small electronic device with black triangular components (no visible text or symbols)Ansluta Pumpset

natural_image
Close-up of a hand using a pen to apply a small electronic device on a white surface (no visible text or symbols)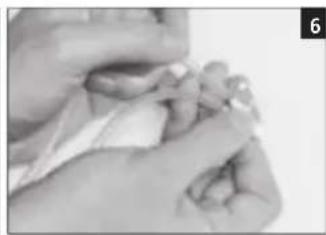
natural_image
Close-up of hands holding a small object, possibly a tool or device, with no visible text or symbols.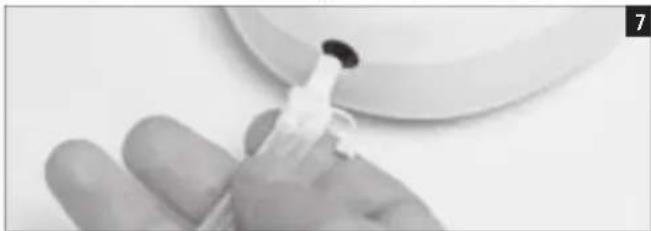
natural_image
Close-up of a hand holding a small object, possibly a pipette or tool, with no visible text or symbols.4.3 Använda Calypso

natural_image
Close-up of a hand pressing a button on a white spherical object (no visible text or symbols)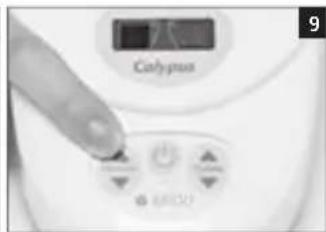

natural_image
Close-up of a finger pressing a button on an ARDO device (no visible text or symbols)5. Användbara tips
natural_image
Two vertical gray rectangular blocks with black horizontal bars, no text or symbols present.natural_image
Two vertical gray bars with black horizontal stripes, no text or symbols presentFör låg spänning
natural_image
Two vertical gray bars with black horizontal stripes, no text or symbols presentFör hög spänning
Rengöring/desinficering

natural_image
Close-up of a hand using a tool to apply a small object onto a white surface (no visible text or symbols)
natural_image
Close-up of a medical device with a finger inserted, showing internal components and arrows indicating movement (no text or symbols visible)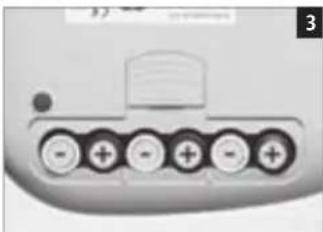
natural_image
Close-up of a battery terminal with six charging leads (no visible text or symbols)
natural_image
Close-up of hands holding a small electronic device with arrows pointing to it, no visible text or symbolsnatural_image
Close-up of a hand using a tool to apply or install a white electronic device (no visible text or symbols)
natural_image
Close-up of hands holding a small object, possibly a tool or device, with no visible text or symbols.
natural_image
Close-up of a hand holding a small object, possibly a pipette or tool, with no visible text or symbols.4.3 Calypson käyttö

natural_image
Close-up of a hand pressing a button on a white spherical device (no visible text or symbols)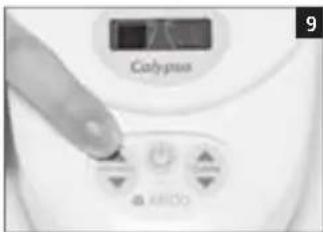

natural_image
Close-up of a finger pressing a button on an ARDO device (no text or symbols visible)natural_image
Two vertical gray rectangular blocks with black horizontal bars, no text or symbols present.natural_image
Two vertical gray bars with black horizontal stripes, no text or symbols presentnatural_image
Two vertical gray bars with black horizontal stripes, no text or symbols presentnatural_image
Black rectangular electronic device with coiled cable and terminal connector, labeled 'g' and 'h' (no visible text or symbols beyond labels)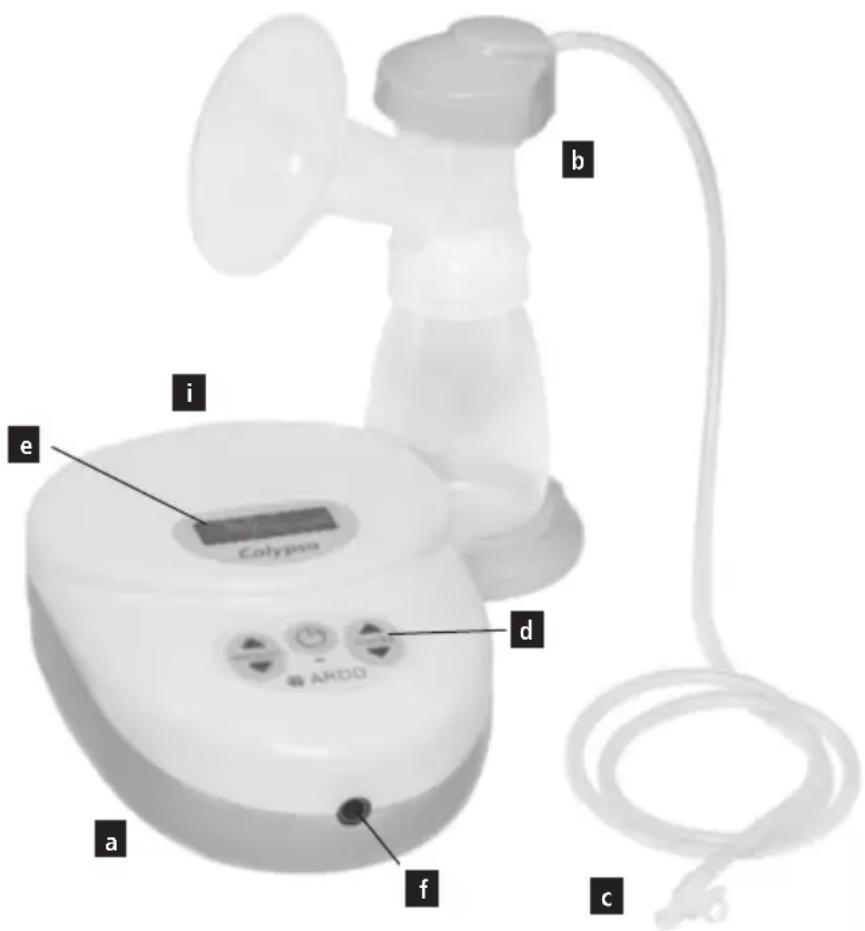
natural_image
Close-up of a hand using a screwdriver to apply a small object onto a white electronic device (no visible text or symbols)
natural_image
Close-up of a finger pressing down on a mechanical component (no visible text or symbols)
natural_image
Close-up of a battery terminal with six charging beads (no visible text or symbols)
natural_image
Close-up of hands holding a small electronic device with black arrows pointing to its components (no visible text or symbols)natural_image
Close-up of a hand using a power tool to test a small electronic component (no visible text or symbols)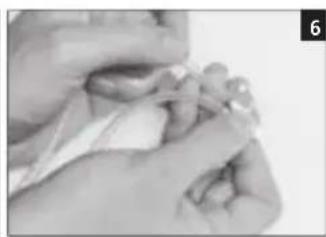
natural_image
Close-up of hands gently holding a small object, possibly a tool or device (no visible text or symbols)
natural_image
Close-up of a hand holding a small object, possibly a pipette or tool, with no visible text or symbols.natural_image
Close-up of a hand pressing a button on a white spherical device (no visible text or symbols)

natural_image
Close-up of a finger pressing a button on an electronic device (no visible text or symbols)5. Nyttige tips
natural_image
Two vertical gray rectangular blocks with black horizontal bars, no text or symbols presentGenerell feil (tidsoverskridelse)
- Slå av apparatet og start det på nytt. Hvis feilmeldingen vises på nytt, er apparatet defekt og kan ikke repareres.

natural_image
Two vertical rectangular blocks with black horizontal bars, no text or symbols presentFor lav spenning
natural_image
Two vertical gray bars with black horizontal stripes, no text or symbols presentFor høy spenning
natural_image
Black rectangular electronic device with two labeled connectors (g and h) attached to its body, connected by wires (no visible text or symbols beyond labels)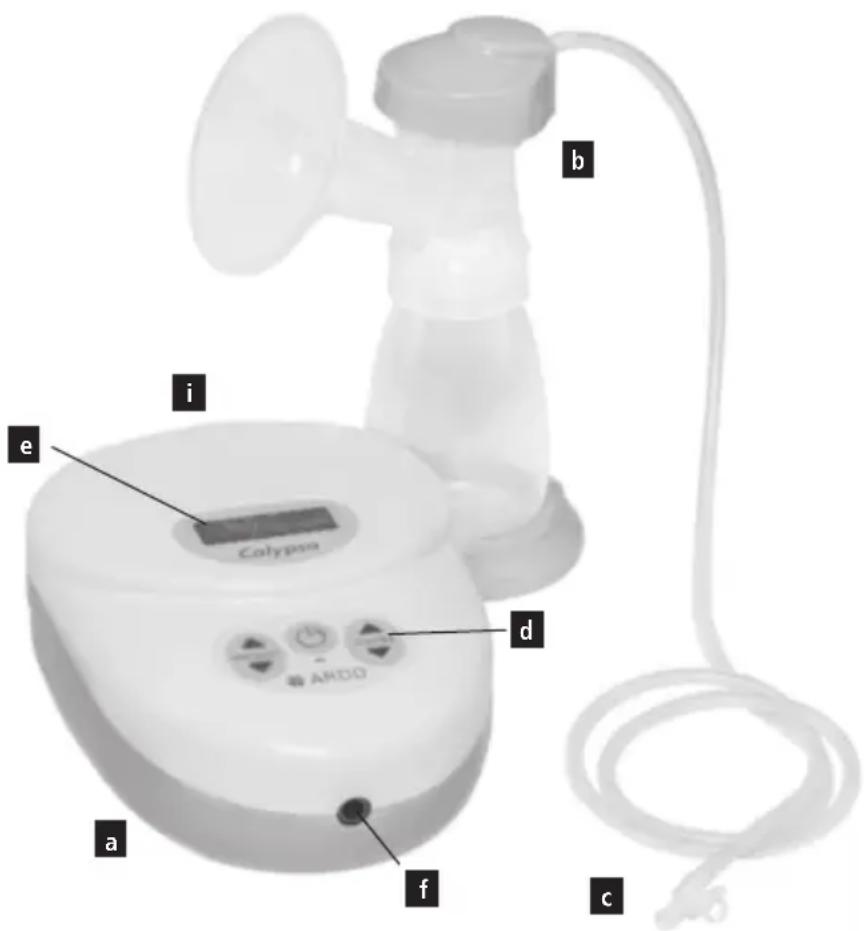
natural_image
Close-up of a hand using a tool to apply material to a small white object (no visible text or symbols)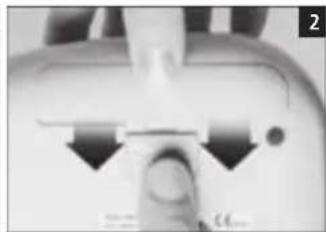
natural_image
Close-up of a medical or laboratory procedure showing a hand holding a tool over a device with arrows indicating motion (no visible text or symbols)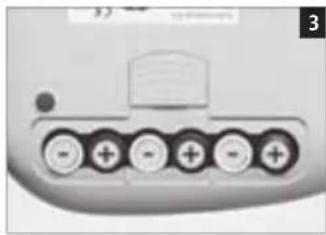
natural_image
Close-up of a battery terminal with six charging beads (no visible text or symbols)
natural_image
Close-up of hands holding a small electronic device with black arrows pointing to its top (no visible text or symbols)natural_image
Close-up of a hand using a pen to apply a small electronic device on a white surface (no visible text or symbols)
natural_image
Close-up of hands performing a gentle massage or physical therapy technique (no visible text or symbols)
natural_image
Close-up of a hand holding a small object with a black hole, next to a white plate (no visible text or symbols)natural_image
Close-up of a hand pressing a button on a white surface, no visible text or symbols

natural_image
Close-up of a finger pressing a button on an ARDO device (no visible text or symbols)5. Praktiske tips
natural_image
Two vertical gray rectangular blocks with black horizontal bars, no text or symbols present.natural_image
Two vertical rectangular blocks with black horizontal bars, no text or symbols presentFor lav spænding
- Batterierne er for svage
- Forkert eller defekt strømadapter

natural_image
Two vertical gray bars with black horizontal stripes, no text or symbols presentFor høj spænding
natural_image
Black rectangular electronic device with two labeled connectors (g and h) attached to its body, connected by wires (no visible text or symbols beyond labels)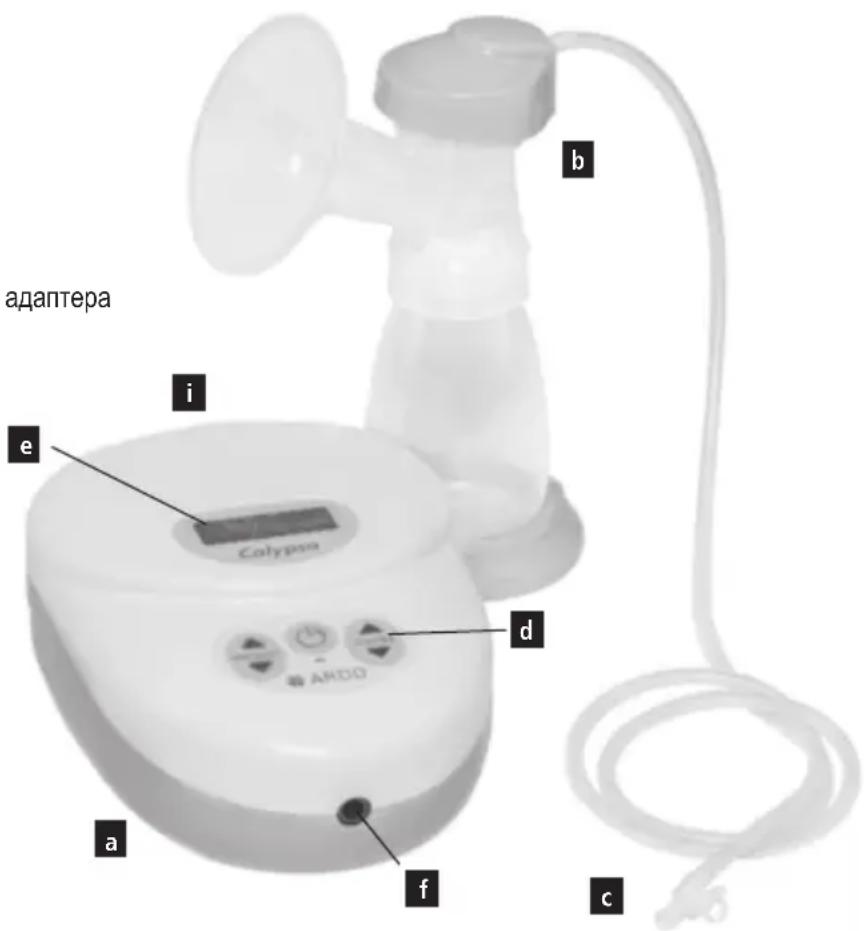
natural_image
Close-up of a hand using a screwdriver to apply a small electronic component (no visible text or symbols)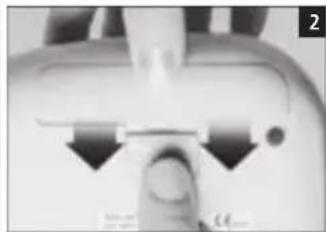
natural_image
Close-up of a medical or laboratory procedure showing a tool interacting with a device (no visible text or symbols)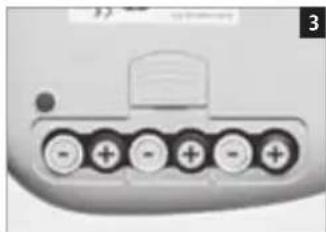
natural_image
Close-up of a battery terminal with six charging beads (no visible text or symbols)
natural_image
Close-up of hands holding a small electronic device with a coin and arrow symbols (no readable text)


natural_image
Close-up of a hand using a screwdriver to apply a small electronic device on a white surface (no visible text or symbols)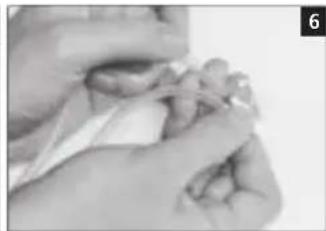
natural_image
Close-up of hands holding a small object, possibly a tool or device, with no visible text or symbols.
natural_image
Close-up of a hand holding a small object with a black circular mark, next to a white plate (no visible text or symbols)natural_image
Close-up of a hand pressing a button on a white surface, no visible text or symbols

natural_image
Close-up of a finger pressing a button on an ARDO device (no text or symbols visible)5. Полезные советы
natural_image
Two gray rectangular blocks with black horizontal lines, no text or symbols presentnatural_image
Two vertical gray bars with black horizontal stripes, no text or symbols presentnatural_image
Two gray rectangular blocks with black horizontal bars, no text or symbols presentnatural_image
Black rectangular electronic device with two labeled connectors (g and h) attached to its body, connected by wires (no visible text or symbols beyond labels)
natural_image
Close-up of a hand using a screwdriver to apply a small electronic component (no visible text or symbols)
natural_image
Close-up of a hand pressing down on a medical device with arrows indicating force direction (no text or symbols visible)
natural_image
Close-up of a battery terminal with six charging leads (no visible text or symbols)
natural_image
Close-up of hands holding a small electronic device with black arrows pointing to its components (no visible text or symbols)natural_image
Close-up of a hand using a power tool to press or inspect a small electronic device (no visible text or symbols)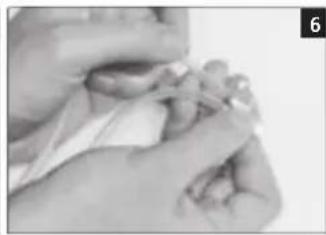
natural_image
Close-up of hands holding a small object, possibly a tool or device, with no visible text or symbols.


natural_image
Close-up of a hand holding a small pipette with a black ink droplet, next to a plate (no visible text or symbols)natural_image
Close-up of a hand pressing a button on a white circular device (no visible text or symbols)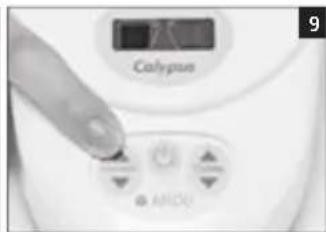

natural_image
Close-up of a finger pressing down on a device control panel with ARDO branding (no readable text or symbols beyond branding)natural_image
Two vertical gray rectangles with black horizontal bars, no text or symbols presentnatural_image
Two vertical rectangular blocks with black horizontal bars, no text or symbols presentnatural_image
Two vertical gray bars with black horizontal stripes, no text or symbols presentnatural_image
Black rectangular electronic device with attached cable and connector, labeled 'g' and 'h' (no visible text or symbols beyond labels)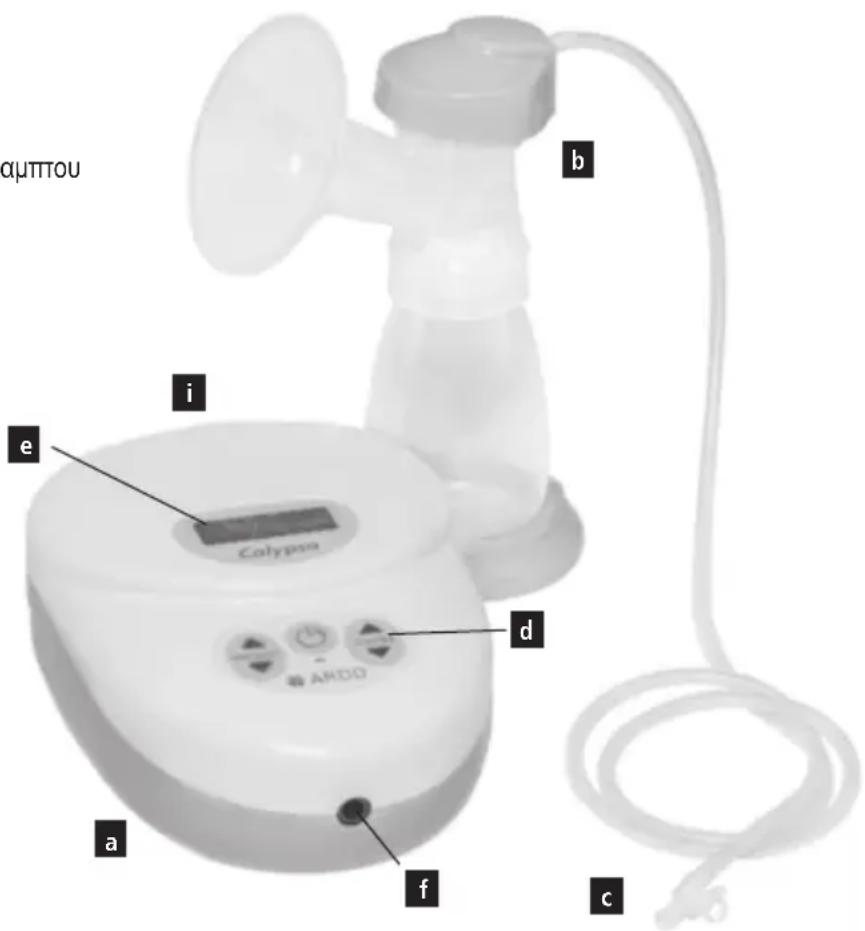
natural_image
Close-up of a hand using a screwdriver to apply a small electronic component (no visible text or symbols)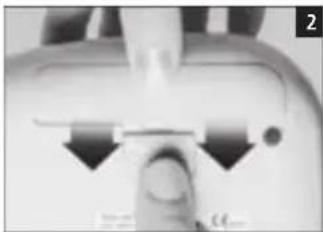
natural_image
Close-up of a hand holding a tool over a device, with arrows indicating motion or movement (no visible text or symbols)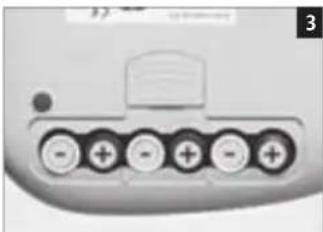
natural_image
Close-up of a battery terminal with six charging beads (no visible text or symbols)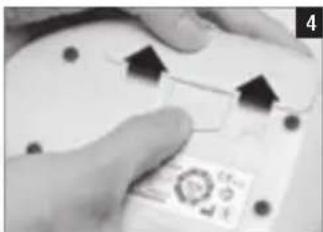
natural_image
Close-up of hands holding a small electronic device with black arrows pointing to its components (no visible text or symbols)natural_image
Close-up of a hand using a power tool to press a white circular device with buttons (no visible text or symbols)
natural_image
Close-up of hands holding a piece of bread or dough (no visible text or symbols)

natural_image
Close-up of a hand holding a small white object, possibly a pipette or tool, with no visible text or symbols.natural_image
Close-up of a hand pressing a button on a white surface, no visible text or symbols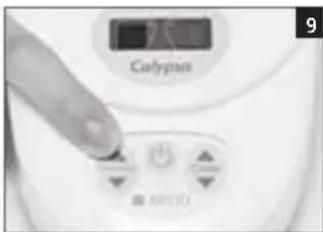

natural_image
Close-up of a finger pressing a button on an ARDO device (no text or symbols visible)natural_image
Two gray rectangular blocks with black horizontal bars, no text or symbols presentnatural_image
Two vertical rectangular blocks with black horizontal bars, no text or symbols presentΠολύ χαμηλή τάση
natural_image
Two vertical gray bars with black horizontal stripes, no text or symbols presentΠολύ υψηλή τάση
natural_image
Close-up of a hand using a screwdriver to apply a small object onto a white electronic device (no visible text or symbols)
natural_image
Close-up of a hand pressing down on a mechanical component with arrows indicating direction (no text or symbols visible)3

natural_image
Close-up of hands holding a small electronic device with a label and arrow indicators (no readable text or symbols)펌프 세트 연결하기

natural_image
Close-up of a hand using a tool to press or inspect a small object on a white surface (no visible text or symbols)
natural_image
Close-up of hands holding a small object, possibly a tool or device, with no visible text or symbols.m = 311

natural_image
Close-up of a white, textured object with a small white object on the left (no visible text or symbols)4.3 유축기 조작

natural_image
Close-up of a hand pressing a button on a white spherical device (no visible text or symbols)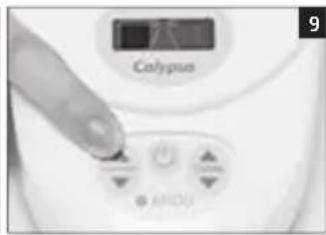
m = 311

natural_image
Close-up of a finger pressing a button on a white surface (no visible text or symbols)5. 유용한 팀
진공 강도 조절(흡입 강도)

natural_image
Two gray rectangular blocks with black horizontal lines, no text or symbols present일반적인 오류(시간 초과)
natural_image
Two gray rectangular blocks with black horizontal bars, no text or symbols present전압 너무 낮음
natural_image
Two gray rectangular blocks with black horizontal bars, no text or symbols present전압 너무 높음
natural_image
Close-up of a hand using a screwdriver to apply a small object onto a white electronic device (no visible text or symbols)
natural_image
Close-up of a hand pressing down on a mechanical component with arrows indicating motion (no text or symbols visible)
natural_image
Close-up of a battery pack with six charging leads (no visible text or symbols)
natural_image
Close-up of hands holding a small electronic device with two black arrows pointing to it, no visible text or symbols.连接吸乳器套装

natural_image
Close-up of a hand using a power tool to press or inspect a small electronic device (no visible text or symbols)
natural_image
Close-up of hands holding a small object, possibly a tool or device, with no visible text or symbols.


natural_image
Close-up of a hand holding a small white object, possibly a pipette or tool, with no visible text or symbols.4.3 可丽哺的操作

natural_image
Close-up of a hand pressing a button on a white surface, no visible text or symbols

natural_image
Close-up of a finger pressing down on a white remote control panel with directional buttons (no text or symbols visible)5. 贴心小提示

设置真空度(吸乳力度)
吸乳时不应该有疼痛感。
natural_image
Two vertical gray rectangles with black horizontal bars, no text or symbols present一般性故障(超时)
natural_image
Two vertical gray bars with black horizontal stripes, no text or symbols present电压过低
- 电池电量不足
- 电源适配器有误或受损
natural_image
Two vertical gray bars with black horizontal stripes, no text or symbols present电压过高
- 电源适配器有误或受损
吸乳时其他故障
- 无真空或真空稀薄:
| TEST REPORTIEC / EN 60601-1-2Part 1-2: Electromagnetic Compatibility Requirements and Tests | ||||
| Report reference No: | E1771-05-1~ | |||
| Tested by: | B. Belegu  | |||
| Approved by management: | Dr. F. Stuck | |||
| Date of issue: | 13 September 2012 | |||
| Number of pages: | 34 pages | |||
| Testing laboratory: | QUINEL AG |  STS 037 STS 037 | Schweizscher PhysikomderienService Suisse d'esseServizio di prova in GluziersSwiss testing service | |
| Address: | Grundstr. 2 CH-6343 Rotkreuz | |||
| Testing location: | Rotkreuz Tel. 041-799 47 04 | |||
| Applicant's Name: | Ardo medical AG, Mr. Steiner Roland | |||
| Address: | Gewerbestrasse 19, CH-6314 Unterägeri | |||
| Manufacturer: | Ardo medical AG | |||
| Address: | Gewerbestrasse 19, CH-6314 Unterägen | |||
| Test specification: | ||||
| Standards: | IEC 60601-1-2:2007, EN 60601-1-2:2007 | |||
| Test procedure: | Type testing for Swiss and EU legal requirements | |||
| Procedure deviation: | None | |||
| Non-standard test method: | None | |||
| Test-specification: | The used test setup fulfils the specification described in the relevant standards | |||
| Test item description: | Breast pump | |||
| Trademark: | Ardo medical AG | |||
| Model and/or type reference: | Calypso | |||
| Ratings: | 9VDC, 1200mA | |||
| Date of receipt of the test item(s): | 12 September 2012 | |||
| Summary of testing: | Passed | |||
| Applied standards: | ||||
| No | Title | Standard (up dated) | pages | Verdict |
| E1771-22-12 | RF disturbances | CISPR 11:2009+A1:2010EN 55011:2009+A1:2010 | 12 | P |
| E1771-06-12 | RF conducted disturbances | IEC 61000-4-8:2008EN 61000-4-6:2009 | 2 | P |
| E1771-03-12 | Radiated electromagnetic field | IEC61000-4-3:2006+A1:2007+A2:2010EN 61000-4-3:2006+A1:2008+A2:2010 | 4 | P |
| E1771-08-12 | Power frequency magnetic field | IEC 61000-4-8:2009EN 61000-4-8:2010 | 2 | P |
| E1771-04-12 | Electrical fast transient burst | IEC 61000-4-4:2012EN 61000-4-4:2004+A1:2010 | 2 | P |
| E1771-02-12 | Electrostatic discharge | IEC 61000-4-2:2008EN 61000-4-2:2009 | 2 | P |
| E1771-55-12 | Surge | IEC 61000-4-5:2005EN 61000-4-5:2006 | 2 | P |

natural_image
Black-and-white family portrait of four women, including a baby, seated together (no text or symbols visible)

ARDO
Ardo medical AG
Gewerbestrasse 19
6314 Unterägeri
Switzerland
T +41(0)41 754 70 70
F +41(0)41 754 70 71
www.ardomedical.com

- CALYPSO, CALYPSO DOUBLE PLUS, CALYPSO-TO-GO
- Languages Page
- en
- SV
- fi
- Table of contents
- Product description
- Important safety details
- Safety Regulations
- Intended use
- Start-up / Operation
- Controls
- Preparing the pump for use
- Mains operation:
- Battery operation:
- Connecting the Pumpset
- Operation
- Useful Tips
- Adjusting the vacuum (suction intensity)
- Adjusting the cycle (stimulation mode)
- Encouraging the milk ejection reflex
- Pumping efficiently
- Increasing the quantity of milk
- Troubleshooting / error indicator
- General error (time-out)
- Voltage too low
- Voltage too high
- Further possible errors when using the unit
- Maintenance / Care / Cleaning
- Visual inspection by the user before switch-on
- Cleaning / disinfection
- Guarantee
- General terms and conditions
- NB
- Technical Information
- Transport / Storage / Disposal
- Disposal
- Ansluta Pumpset
- Använda Calypso
- Användbara tips
- För låg spänning
- För hög spänning
- Rengöring/desinficering
- Calypson käyttö
- Nyttige tips
- Generell feil (tidsoverskridelse)
- For lav spenning
- For høy spenning
- Praktiske tips
- For lav spænding
- For høj spænding
- Полезные советы
- Πολύ χαμηλή τάση
- Πολύ υψηλή τάση
- 펌프 세트 연결하기
- 유축기 조작
- 유용한 팀
- 连接吸乳器套装
- 可丽哺的操作
- 贴心小提示
- 设置真空度(吸乳力度)
- 一般性故障(超时)
- 电压过低
- 电压过高
- 吸乳时其他故障
- ARDO
Brand : Ardo
Model : Calypso-to-go
Category : Breast Pump