
244-022 - After-sales service Meec Tools - Free user manual and instructions
Find the device manual for free 244-022 Meec Tools in PDF.


| Product Type | Table Circular Saw |
| Brand | Meec Tools |
| Model | 244-022 |
| Voltage | 230 V, 50 Hz |
| Output Power | 0.8 kW |
| Idling Speed | 2950 rpm |
| Cutting Height | 43 mm |
| Blade Diameter | 200 mm |
| Blade Hole | 16 mm |
| Blade Thickness | 2.5 mm |
| Table Size | 500 x 335 mm |
| Table Tilt | 0-45 degrees |
| Extractor Connection | 35 mm |
| Working Height | 845 mm |
| Weight | 9.4 kg |
| Sound Pressure Level | 92.2 dB (A), K=3 dB |
| Sound Power Level | 105.2 dB (A), K=3 dB |
| Application | Wood cutting, hobby use only |
| Included Accessories | Preassembled saw table, splitting knife with guard, length fence, pusher, support block, instructions |
| Safety Features | Upper guard, splitting wedge, ear/eye protection required |
| Maintenance | Blade change, table insert change, wedge adjustment |
| Spare Parts | Use only original spare parts, repair by supplier |
| Environmental | Do not discard with household waste; recycle at designated station |
Frequently Asked Questions - 244-022 Meec Tools
User questions about 244-022 Meec Tools
0 question about this device. Answer the ones you know or ask your own.
Ask a new question about this device
Download the instructions for your After-sales service in PDF format for free! Find your manual 244-022 - Meec Tools and take your electronic device back in hand. On this page are published all the documents necessary for the use of your device. 244-022 by Meec Tools.
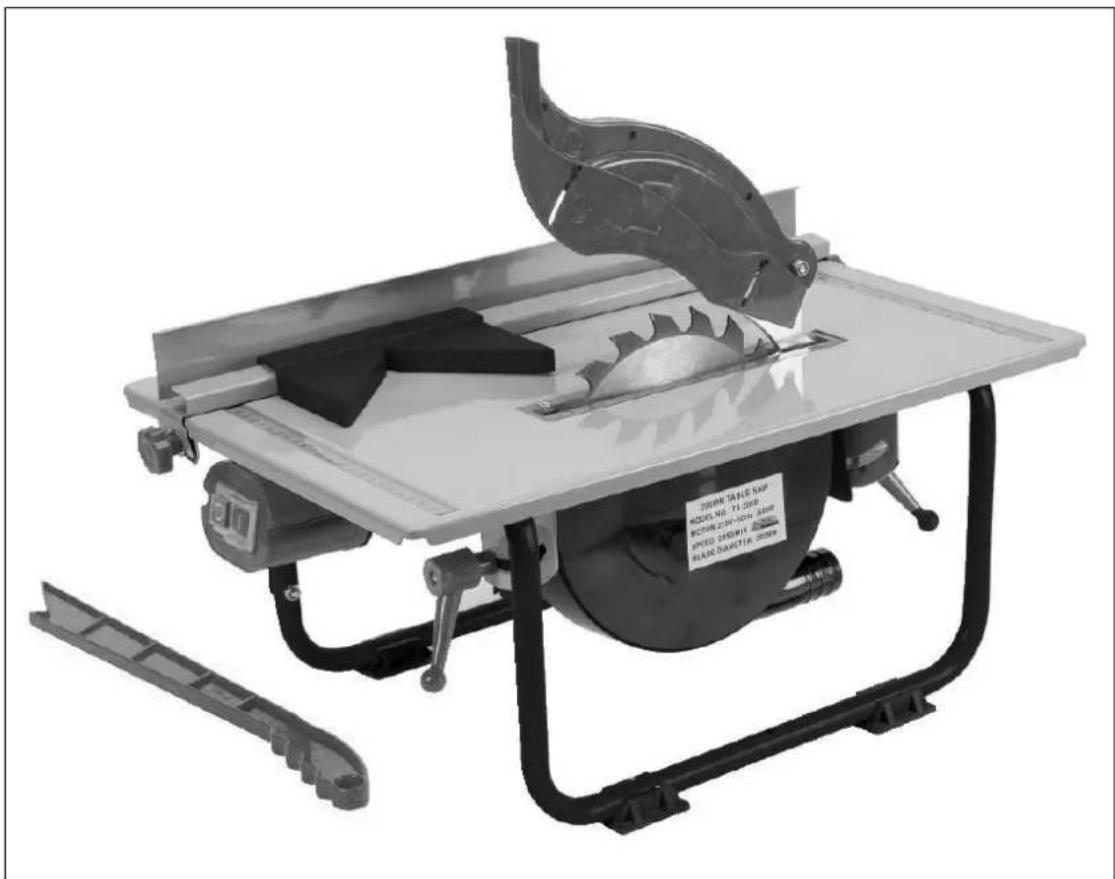
USER MANUAL 244-022 Meec Tools
Operating instructions for Table Circular Saw
244-022
natural_image
Industrial machine with a cutting tool and a circular component, no visible text or symbols on the main body.SV Bruksanvisning i original
NO Bruksanvisning i original
EN Operating instructions in original
SVENSKA 4
Safety instructions 19
Technical data 20
Description....20
Delivery and assembly 20
Use 20
Starting and stopping 20
Parallel cutting 21
Small workpieces 21
Large workpieces....22
Angled cutting 22
Maintenance 22
Changing the blade....22
Changing the table insert....22
Adjusting the splitting wedge 23
SÄKERHETSFÖRESKRIFTER
natural_image
Mechanical assembly diagram showing a base plate with labeled components A and B, no readable text or symbols present.Små arbetsstycken
natural_image
Hand operating a mechanical device with a ruler and slide (no visible text or symbols)Stora arbetsstycken
natural_image
Close-up of a mechanical component with a black arrow pointing to a detail (no visible text or symbols)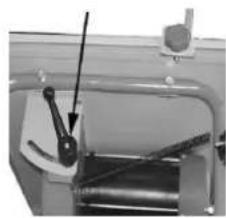
natural_image
Close-up of a mechanical device with a tool and cylindrical component (no visible text or symbols)natural_image
Mechanical assembly diagram showing a component with labeled parts A and B (no readable text or symbols beyond labels)Små arbeidsstykker
natural_image
Hand operating a mechanical device with a ruler and slide (no visible text or symbols)Store arbeidsstykker
natural_image
Close-up of a mechanical component with a black arrow pointing to a specific part (no visible text or symbols)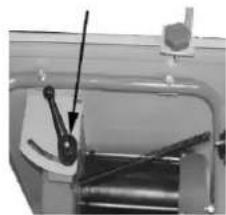
natural_image
Close-up of a mechanical device with a lever and cylindrical component (no visible text or symbols)natural_image
Mechanical assembly diagram showing a component with labeled parts A and B (no readable text or symbols)natural_image
Hand operating a mechanical device with a tool, no visible text or symbolsnatural_image
Close-up of a mechanical component with a black arrow pointing to a detail (no visible text or symbols)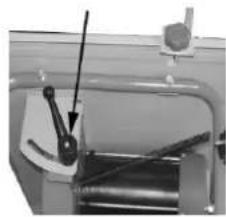
natural_image
Close-up of a mechanical device with a tool and lever mechanism (no visible text or symbols)natural_image
Mechanical component diagram showing a curved assembly with labeled parts A and B (no text or symbols beyond labels)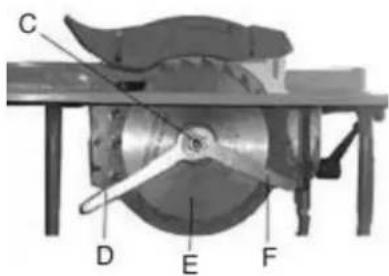
Read the Operating Instructions carefully before use!
- Read these Operating Instructions carefully before using the machine.
- Do not allow children to play with or use the machine.
- The machine must only be used to cut wood.
- Unauthorised persons are not allowed in the work area.
- The user is responsible for ensuring that the instructions are followed.
- Children and animals must be kept away from the machine during use.
- The work area must always be well lit when using the machine.
- Keep the work area clean.
• Always wear ear protection when the machine is used.
- Wear eye protection when working with the machine.
- Remove all rings, bracelets and other jewellery when using the machine.
- The machine must be connected to an extractor.
- Make sure the hoods and connections to the extractor are intact and tight.
- The machine must not be lifted by the worktables.
- Roll up your sleeves to your elbows.
- Fasten or remove all loose-fitting clothing when using the machine.
- Never wear gloves while working.
• Always use the correct tool for the job.
- Replace damaged labels on the machine.
Check that the start control is in the stop position before connecting the machine to the mains.
- Focus all your attention on the work when using the machine.
- Keep unauthorised persons away from the work area when working with the machine.
- Carefully check that all tools are removed before starting the machine.
- Do not touch rotating parts or tools with any body part or tool.
- Never force the work process.
- Wear a hair net if you have long hair.
- Check that all parts are properly tightened and intact before use.
- The saw blade must always be sharp.
• The motor must be stopped and the power cord disconnected before performing the following:
- Removing safety devices.
- Maintenance or cleaning.
- Changing the blade.
- When the machine is left unattended.
- Do not pull the power cord to disconnect the plug.
- The machine must not be changed or modified.
- All the safety devices must be in place and function when the machine is being used.
• Always be careful when starting the machine.
- Check that all screws and nuts are tightened.
- Use only original spare parts. Spare parts must not be repaired.
- The machine must not be used in explosive environments.
- Do not use the machine near flammable liquids or gases.
- The machine must be plugged into an earthed socket.
- The electrical system must be equipped with a residual current device.
- Keep the work area clean.
• Always make sure that no spanner or other tool is left on the machine before turning it on.
- Use the supplied pusher when working close to the saw blade.
- Do not expose to damp conditions.
- The machine must not be exposed to water.
- The power cord must only be replaced by the supplier.
- Repair work must be carried out by the supplier.
- Make sure the upper guard always has the correct setting.
- Only use saw blades that meet the EN 847-1 standard.
• Always be careful when handling the saw blade. Beware of cutting yourself on the sharp teeth.
• Always wear a breathing mask while working.
- Never use saw blades of HS steel.
TECHNICAL DATA
| Voltage | 230 V 50 Hz |
| Output power | 0.8 kW |
| Idling speed | 2950 rpm |
| Cutting height | 43 mm |
| Blade diameter | 200 mm |
| Hole, saw blade | 16 mm |
| Thickness, saw blade | 2.5 mm |
| Table size | 500 x 335 mm |
| Table tilt | 0-45 degrees |
| Connection extractor | 35 mm |
| Working height | 845 mm |
| Weight | 9.4 kg |
| Sound pressure level, LpA | 92.2 dB (A), K = 3 dB |
| Sound power level, LwA | 105.2 dB (A), K = 3 dB |
Wear hearing protection!
The declared vibration value, which has been measured by a standardised test method, can be used to compare different tools with each other and for a preliminary assessment of exposure.
WARNING!
The actual vibration level when using power tools may differ from the specified maximum value, depending on how the tool is used. It is therefore necessary to determine which safety precautions are required to protect the user, based on an estimate of exposure in actual operating conditions (taking into account all stages of the work cycle, e.g. the time when the tool is switched off and when it is idling, in addition to the start-up time).
DESCRIPTION
The machine is designed for cutting wood. The saw blade can be set at an angle. The machine has adjustable fences, both for straight cutting and for cutting angles.
The machine is not designed for professional use, only for hobby purposes.
DELIVERY AND ASSEMBLY
The machine is supplied in the package in the following parts.
- Preassembled saw table.
- Splitting knife fitted with top guard.
- Length fence.
- Pusher.
- Support block.
- These operating instructions.
Assemble the parts and set up the saw on a stable table. Anchor the saw to the table so that the table and saw form a stable unit.
USE
WARNING: Wear ear and eye protection and a breathing mask when working with the machine.
WARNING: Carefully read and understand all the safety instructions before use.
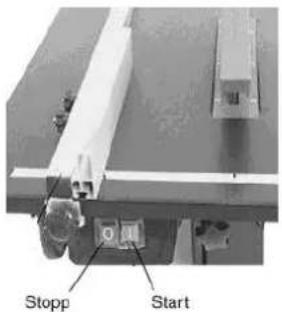
Starting and stopping
Start and stop the machine using the buttons illustrated below.
Parallel cutting
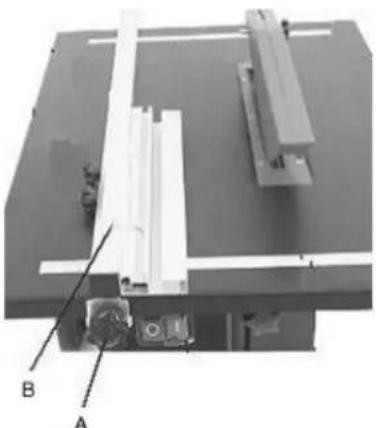
To cut parallel along the long fence, set the fence as follows:
- Loosen the screw (A) in the figure below.
- Set the fence (B) at the required distance from the blade.
- Tighten the screw (A).
Before cutting, check that:
• the fence is parallel to the blade.
• the fence is secured firmly.
• the fence is straight.
natural_image
Mechanical assembly diagram showing a component with labeled parts A and B (no text or symbols beyond labels)Small workpieces
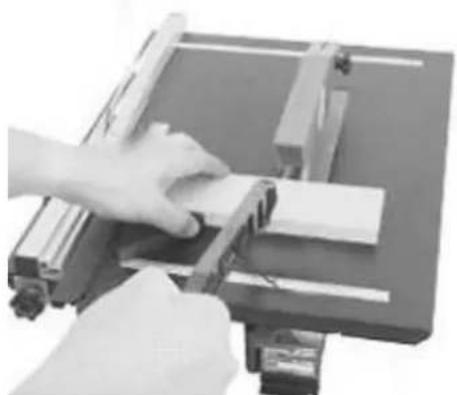
Hold the workpiece firmly and slide it slowly towards the blade without forcing it forwards.
Your hands must not come too close to the saw blade. User the pusher provided if working with small workpieces. See the figure below.
Stop the machine immediately if the workpiece gets caught in the machine.
natural_image
Hand operating a mechanical device with a ruler and slide (no visible text or symbols)Large workpieces
If cutting large workpieces, ask someone else to help you hold them.
Angled cutting
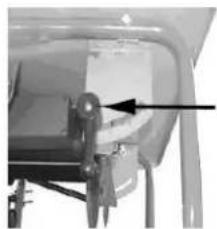
The table must be set at an angle to perform angled cuts. Set the table at an angle as shown below.
- Loosen the knobs in the figures below.
- Set the table at the required angle according to the scale by the front knob
- Lock the knobs in the figures below.
natural_image
Close-up of a mechanical component with a black arrow pointing to a detail (no visible text or symbols)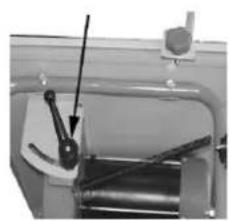
natural_image
Close-up of a mechanical device with a tool and cylindrical component (no visible text or symbols)Before cutting, check that:
• the knobs are tightened.
• the fence is secured firmly.
- the fence is straight and parallel to the blade.
MAINTENANCE
Changing the blade
Change the saw blade as follows:
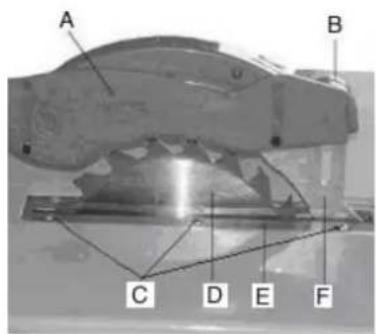
- Remove the saw blade guard by unscrewing its screw in the splitting knife
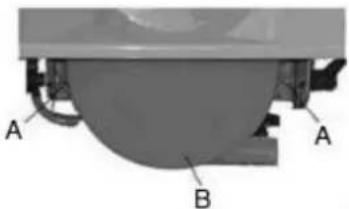
- Loosen the screws A and remove the guard B.
- Use a 19 mm spanner D and loosen the axle nut C. Hold the shaft with an 8 mm spanner F. Note that the nut has a left-hand thread!
- Remove the saw blade E.
- Clean the saw flange.
- Fit the new saw blade and ensure that the arrow faces in the direction of rotation.
- Assemble the parts in reverse order.
natural_image
Mechanical component diagram showing labeled parts A and B (no text or symbols beyond labels)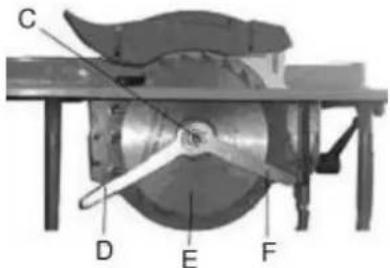
Changing the table insert
- Remove the blade guard A by unscrewing the screw B.
- Remove the six screws C and remove the table insert E.
- Install the new table insert in the reverse order
Adjusting the splitting wedge
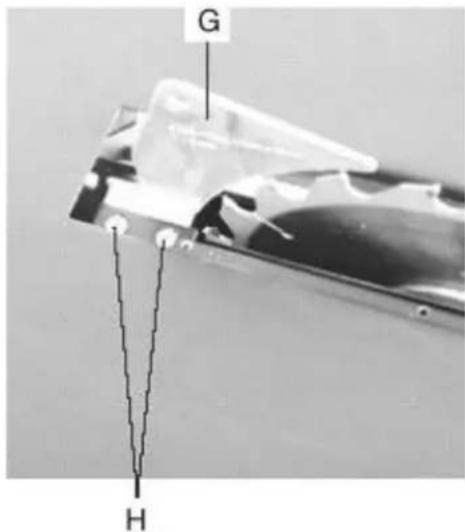
The splitting wedge is designed to take tension in the workpiece so that it does not jam around the blade. It is therefore important that the splitting wedge G is properly adjusted and fitted.
Adjust the splitting wedge as follows:
- Remove the table insert as in the previous description.
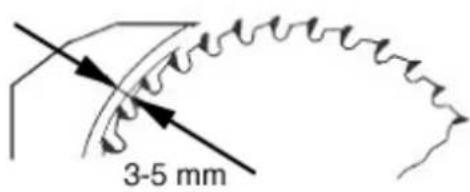
- Loosen the screws H and set the splitting wedge 3-5 mm from the saw blade.
- Fit the parts in the reverse order.
Jula reserves the right to make changes. In the event of problems, please contact our service department.
www.jula.com
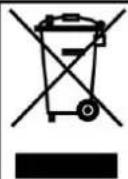
Care for the environment!
Must not be discarded with household waste! This product contains electrical or electronic components that should be recycled. Leave the product for recycling at the designated station e.g. the local authority's recycling station.
CE
EC DECLARATION OF CONFORMITY EG FÖRSÄKRAN OM ÖVERENSSTÄMMELSE EF SAMSVARSERKLÆRING DEKLARACJA ZGODNOŚCI WE

Jula AB, Box 363, SE-532 24 SKARA, SWEDEN
This product was CE marked in year -07
Name and address of the person authorised to compile the technical file:
Jonas Backstad Box 363, SE-532 37 Skara, Sweden
Skara
2013-02-27
Bo Eriksson PRODUCT MANAGER
- Operating instructions for Table Circular Saw
- SVENSKA 4
- SÄKERHETSFÖRESKRIFTER
- Små arbetsstycken
- Stora arbetsstycken
- Små arbeidsstykker
- Store arbeidsstykker
- Read the Operating Instructions carefully before use!
- Wear hearing protection!
- WARNING!
- DESCRIPTION
- DELIVERY AND ASSEMBLY
- USE
- Starting and stopping
- Parallel cutting
- Small workpieces
- Large workpieces
- Angled cutting
- MAINTENANCE
- Changing the blade
- Changing the table insert
- Adjusting the splitting wedge
- Care for the environment!
- CE
- EC DECLARATION OF CONFORMITY EG FÖRSÄKRAN OM ÖVERENSSTÄMMELSE EF SAMSVARSERKLÆRING DEKLARACJA ZGODNOŚCI WE
Brand : Meec Tools
Model : 244-022
Category : After-sales service