721-322 - Leaf blower Meec Tools - Free user manual and instructions
Find the device manual for free 721-322 Meec Tools in PDF.


| Product Type | Leaf blower |
| Brand | Meec Tools |
| Model | 721-322 |
| Power Source | Corded electric |
| Power | 2800 W |
| Air Speed | 180 km/h |
| Air Volume | 780 m³/h |
| Weight | 4.5 kg |
| Dimensions (L x W x H) | 800 x 300 x 300 mm |
| Noise Level | 105 dB(A) |
| Vibration Level | 2.5 m/s² |
| Speed Settings | Variable speed trigger |
| Functions | Blow only |
| Bag Included | No |
| Maintenance | Clean after each use; check air filters |
| Safety Features | Double insulation, overload protection |
| Spare Parts Availability | Contact Meec Tools or authorized dealer |
| Warranty | 2 years |
Frequently Asked Questions - 721-322 Meec Tools
User questions about 721-322 Meec Tools
0 question about this device. Answer the ones you know or ask your own.
Ask a new question about this device
Download the instructions for your Leaf blower in PDF format for free! Find your manual 721-322 - Meec Tools and take your electronic device back in hand. On this page are published all the documents necessary for the use of your device. 721-322 by Meec Tools.
USER MANUAL 721-322 Meec Tools
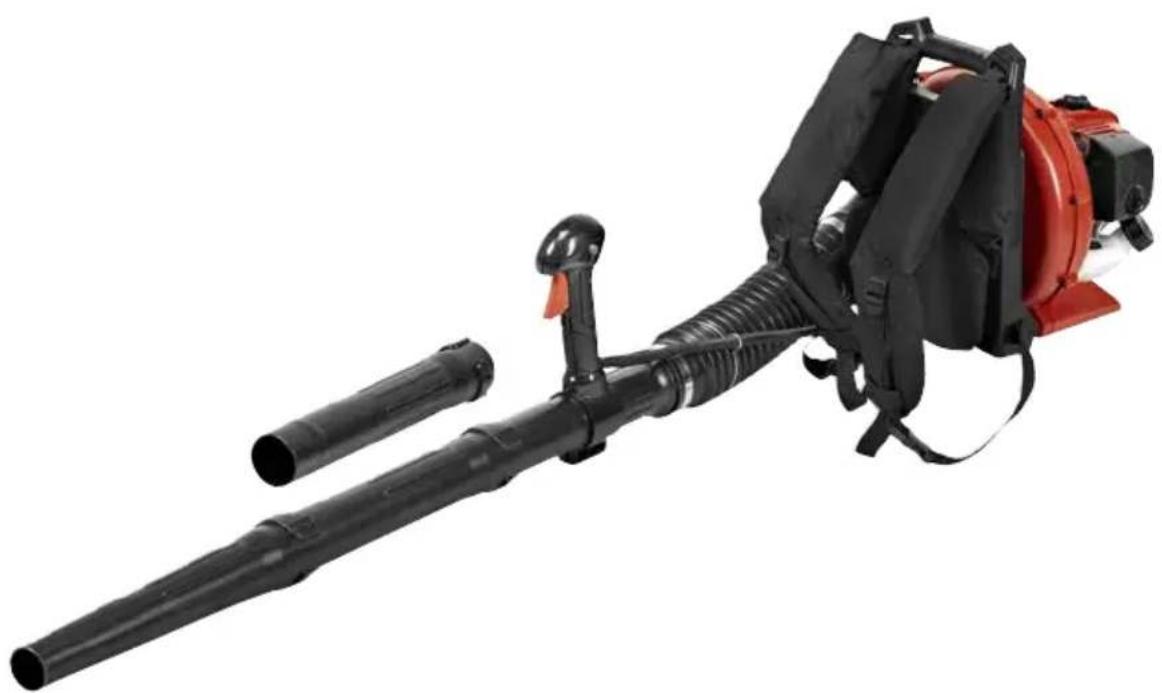
natural_image
Black and red portable air blower with attached hose and lever mechanism (no text or symbols visible)EN User Instructions for Leaf blower
SE - Bruksanvisning i original
NO - Bruksanvisning i original
EN - Operating instructions in original
Date of production: 2014-04-25
© Jula AB
SVENSKA....4
SÄKERHETSANVISNINGAR....4
TEKNISKA DATA....7
BESKRIVNING 8
MONTERING 9
HANDHAVANDE 10
SAFETY INFORMATION 43
TECHNICAL DATA 46
DESCRIPTION 47
SET UP 48
OPERATING INSTRUCTIONS. 49
Starting a cold engine 49
Idle 50
Stopping the engine....50
Fuel and lubrication 50
Adjusting the back pack, harness and control handle 50
Example of areas of use....51
MAINTENANCE 51
Cleaning the air filters 51
Cleaning the fuel filter/fuel cap....51
Adjusting the carburettor....52
Cleaning or replacing the spark plug....52
Storage....52
TROUBLESHOOTING....53
SÄKERHETSANVISNINGAR
MONTERING
Montering av flexrör
natural_image
Close-up of a hand holding a tool interacting with a mechanical component, showing a curved arrow indicating rotation (no text or symbols present)natural_image
Mechanical component diagram showing a pipe with a knob and two labeled parts A and B (no text or symbols on the main diagram)HANDHAVANDE
START AV KALL MOTOR
natural_image
Close-up of a mechanical component with a magnified inset showing a small component (no visible text or symbols)natural_image
Close-up of a mechanical component with no visible text or symbols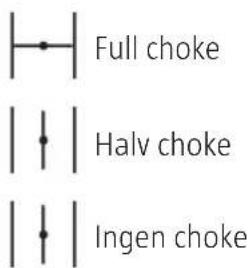
natural_image
Close-up of a mechanical component with a central circular feature and surrounding rectangular frame (no visible text or symbols)natural_image
Close-up of a mechanical component with a central shaft and flange, no visible text or symbolsnatural_image
Close-up of a mechanical component with hoses and tubing (no visible text or symbols)natural_image
Close-up of a mechanical component with a metallic tool inserted into a white cylindrical part (no visible text or symbols)natural_image
Simple line drawing of a trash bin with diagonal lines crossing it, no text or symbols present.Värna om miljön!
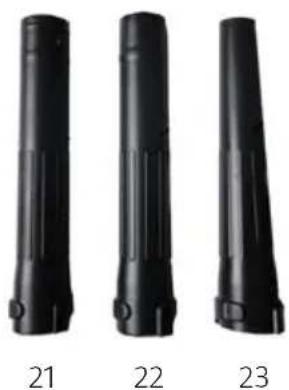
natural_image
Three black cylindrical objects labeled 21, 22, and 23, arranged horizontally (no text or symbols on objects)MONTERING
natural_image
Close-up of a hand holding a tool interacting with a mechanical component, showing a curved arrow indicating rotation (no text or symbols present)OBS! Hold gassvaieren så rett som mulig när du kobler til blåserørene.
natural_image
Mechanical assembly diagram showing a pipe fitting with labeled parts A and B (no text or symbols beyond labels)BRUK
START AV KALD MOTOR
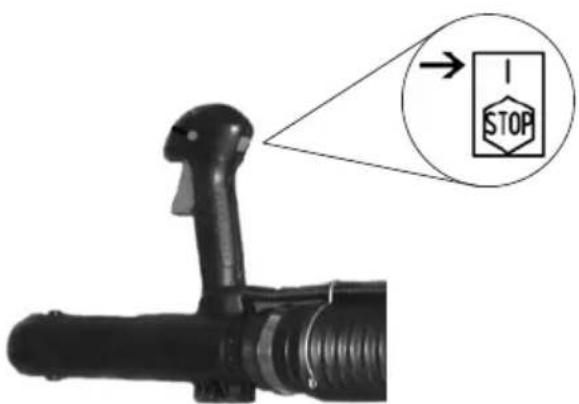
- Kontroller at tenningen er i stilling TIL (I).
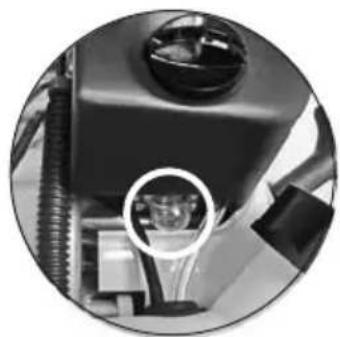
natural_image
Close-up of a mechanical component with a magnified inset showing a small circular detail (no visible text or symbols)- Trykk på drivstoffpumpen 10 ganger.
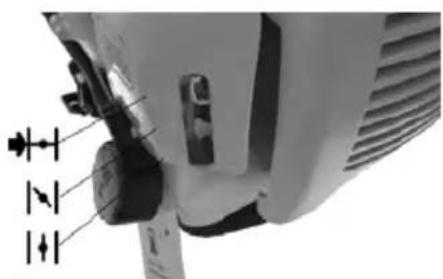
natural_image
Close-up of a mechanical component with no visible text or symbols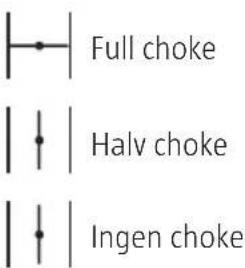
natural_image
Close-up of a mechanical component with a central circular feature and surrounding grooves (no visible text or symbols)natural_image
Close-up of a mechanical component with a white cylindrical part inserted into a black circular base (no visible text or symbols)natural_image
Close-up of a mechanical component with hoses and tubing (no visible text or symbols)natural_image
Close-up of a mechanical component with a metallic tool inserted into a white cylindrical part (no visible text or symbols)MONTAŻ
natural_image
Close-up of a hand holding a tool interacting with a mechanical component, showing a curved arrow indicating rotation (no text or symbols present)natural_image
Mechanical assembly diagram showing a pipe with a knob and two labeled parts A and B (no text or symbols beyond labels)OBSŁUGA
ROZRUCH ZIMNEGO SILNIKA
natural_image
Close-up of a mechanical device with a circular inset highlighting a component (no visible text or symbols)natural_image
Close-up of a mechanical component with directional arrows indicating movement or force (no text or symbols visible)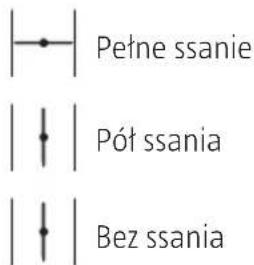
natural_image
Close-up of a mechanical component with a central circular feature and surrounding brackets (no visible text or symbols)natural_image
Close-up of a kitchen utensil with a white plastic cup and knife handle (no text or symbols visible)natural_image
Close-up of a mechanical component with hoses and a coiled pipe (no visible text or symbols)natural_image
Close-up of a mechanical component with a cylindrical shaft inserted into a white cylindrical housing (no visible text or symbols)natural_image
Pure electrical circuit lines without any symbolsDBAJ O ŚRODOWISKO!
Read the operating instructions carefully before use.
Please retain for future reference.
WARNING!
- Wear tough, close-fitting work clothes that will provide protection, such as long slacks or trousers, safety work shoes, heavy duty work gloves, hard hat, a safety face shield, or safety glasses for eye protection and a good grade of ear plugs or other sound barriers for hearing protection.
• Work at a distance of at least 15 metres from people and animals.
- Refuel in a safe place. Open fuel cap slowly to release any pressure which may have formed in fuel tank.
- Always wipe off any fuel or oil spills before starting the equipment. To prevent a fire hazard, move at least 10 feet (3 metres) from the fuelling area before starting.
- Turn the equipment off before setting it down, and also before installing or removing attachments.
- Ensure all screws and fasteners are tightly fitted and the equipment is in good working order. Never operate this equipment if it is improperly adjusted or incompletely or insecurely assembled.
- Keep handles dry, clean and free from fuel.
- Store equipment away from possible ignition sources, such as gas-powered water heaters, clothes dryers, oil-fired furnaces or portable heaters, etc.
• Always keep the engine free from debris build-up.
- Operation of the equipment should always be restricted to adults who have been properly instructed.
- Any person with respiratory problems and persons operating the leaf blower in very dusty environments should wear a dust particle mask at all times. Paper dust masks are available at most paint and hardware stores.
- Only operate the equipment at reasonable hours – not early in the morning or late at night when people might be disturbed. Comply with times listed in local ordinances.
- Operate the equipment at the lowest possible engine speed to do the job.
- Use rakes and brooms to loosen debris before blowing.
- In dusty conditions, slightly dampen surfaces.
- Use the full blower nozzle extension so the airstream can work close to the ground.
- Watch out for children, pets, open windows etc. and blow debris safety away.
- Do not use any other fuel than that recommended in your manual. Never use petrol unless it has been mixed with 2-cycle air-cooled engine lubricant with a mixing ratio of 30:1. Permanent damage to engine will result, voiding manufacturer's warranty. Do not use 2-cycle oils with a recommended mixing ratio of 100:1. Never use a fuel mixture that has been stored for over 90 days.
- Do not smoke while refuelling or operating equipment.
- Do not operate the equipment without a muffler and properly installed muffler shield.
- Do not let your hands or body come in contact with a hot muffler or spark plug wire.
- Due to the danger of exhaust fumes, never operate the blower in a confined or poorly ventilated area.
- Never point the blower in the direction of people, animals, buildings, automobiles, or windows, etc.
- Do not operate the equipment without inlet cover installed to prevent contact with impeller.
- Do not set a hot engine down where flammable material is present.
- Do not operate the equipment for prolonged periods. Take regular breaks.
- Do not add, remove or alter any of the equipment's components. Doing so could cause personal injury and/or damage the equipment voiding the manufacturer's warranty.
- Do not operate the equipment while under the influence of alcohol or drugs.
- Do not operate the equipment near or around flammable liquids or gases whether in or out of doors. An explosion and/or fire may result.
- Do not wear loose clothing, scarf, neck chains, unconfined long hair, and the like. Doing so could cause injury associated with objects being drawn into the rotating parts.
- Do not refuel a running engine or an engine that is hot.
- Never allow children to operate the appliance.
Symbols
Below is a description of the symbols present on the equipment.
 | Read the operating instructions before operating the equipment. |
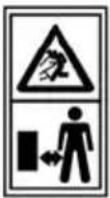 | Keep bystanders at a safe distance. Never work while people, especially children or pets, are nearby. |
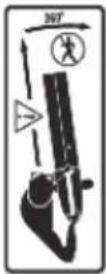 | Ensure that bystanders are not injured by foreign objects being thrown from the equipment. Ensure bystanders are kept at a safe distance away from the equipment. |
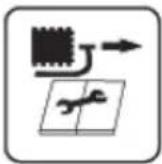 | When repairing, remove the spark plug and repair it according to the operating instructions. |
 | Warning: Engine hot. |
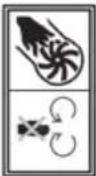 | Caution/Warning. Moving blades. Keep hands and feet away when the equipment is in operation. |
 | Do not work in the rain or leave the leaf blower outdoors whilst raining. |
 | Wear safety goggles to protect your eyes; |
 | Wear hearing protection. |
 | Wear safety footwear. |
 | Wear gloves. |
TECHNICAL DATA
Air velocity 280 km/h (78 m/s)
Air volume 8 m ^3/min
Engine displacement 26 cm ^3
Fuel tank capacity 500 ml
Fuel type unleaded
Fuel mixture ratio 30:1
Rated power 0.7 kW/7,500 min
Engine idle speed 3,500 min
Max. engine speed 9,000 min
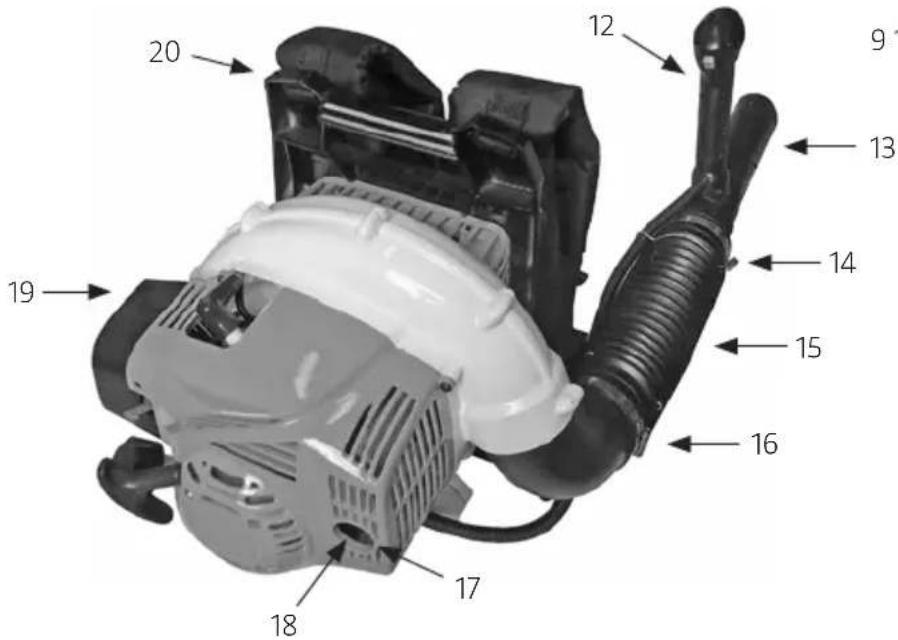
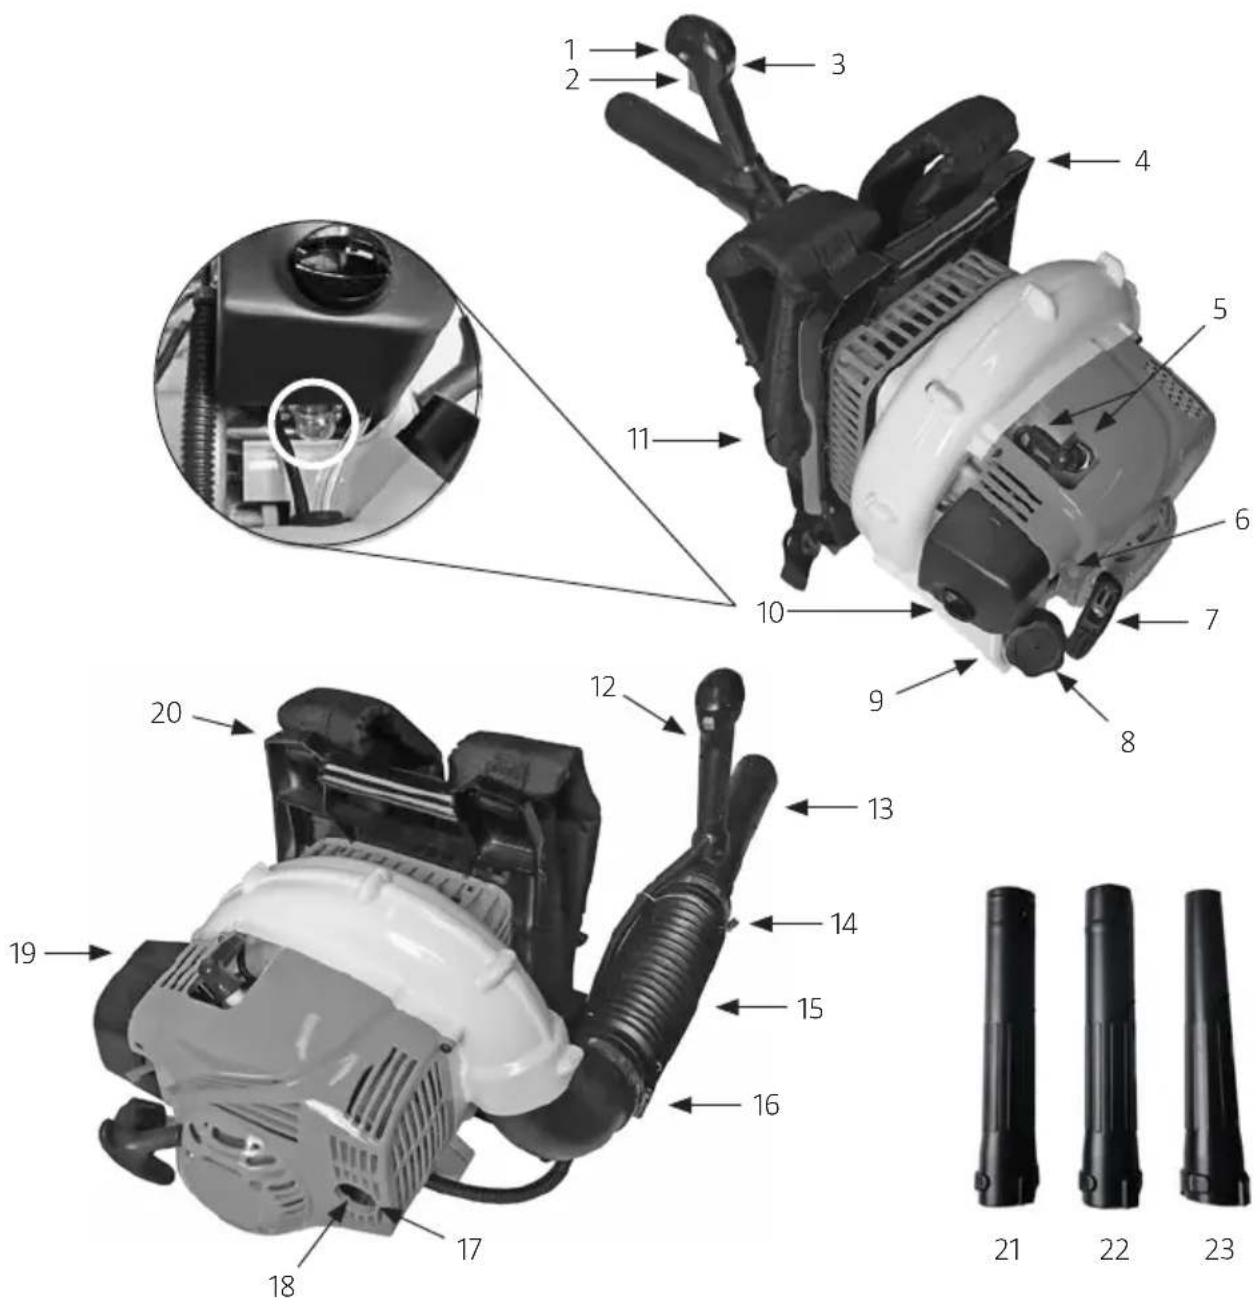
DESCRIPTION
1 Lock 9 Fuel Tank 17 Muffler Cover
2 Throttle 10 Fuel Pump 18 Spark Arrester Screen
3 On/Off Ignition Switch 11 Harness 19 Air Cleaner Cover
4 Top Assist Handle 12 Control Handle 20 Vented Back Pad
5 Spark Plug Wire/Spark Plug 13 Operating Tube 21 Intermediate Tube
6 Choke Control
14 Throttle Connector
22 56 mm Nozzle
7 Cord-starter Handle
15 Flex Tube
23 45 mm Concentrator Nozzle
8 Tank Cap
16 Hose Clamp
SET UP
Attaching the flex tube
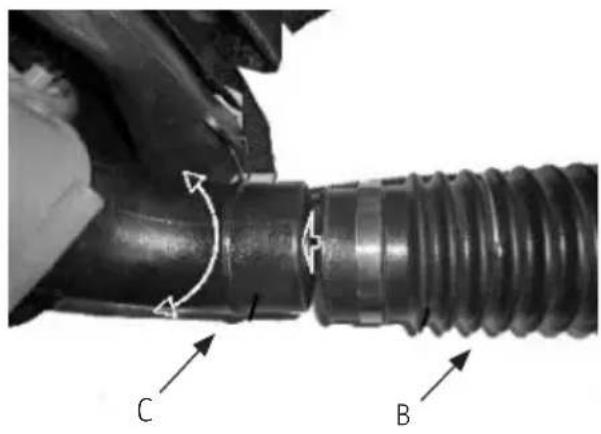
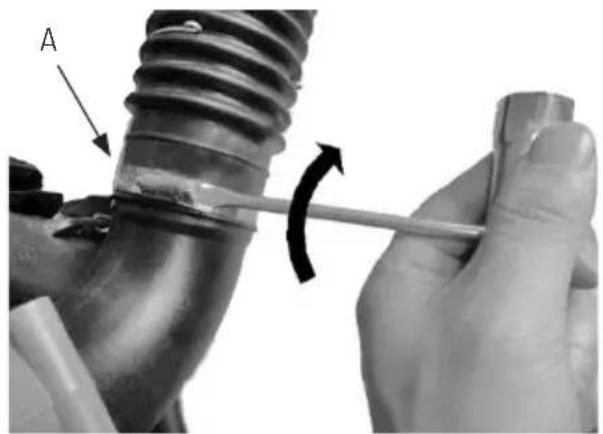
Put the hose clamp (A) onto the flex tube before you put the flex tube and fan's outlet tube together. Connect the flex tube (B) to the fan's outlet tube (C) using the hose clamp (A) and tighten securely.
natural_image
Close-up of a hand holding a tool interacting with a mechanical component, showing a curved arrow indicating rotation (no text or symbols present)Attaching the operating tube
Place the equipment on a flat surface during assembly. Ensure the clamp's screw mechanism is directed away from the operator. Attach the hose clamp (A) to the flex tube (B). Turn the rotary ring mark (C) so it is in line with the throttle handle (E). Insert the operating tube (D) into the flex tube (B) and tighten the hose clamp (A) securely. Throttle linkage clips (F) are attached at both ends of the flex tube in order to allow the throttle cable to be secured.
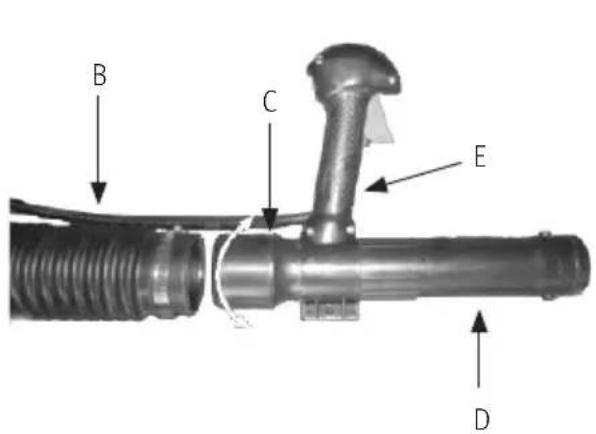
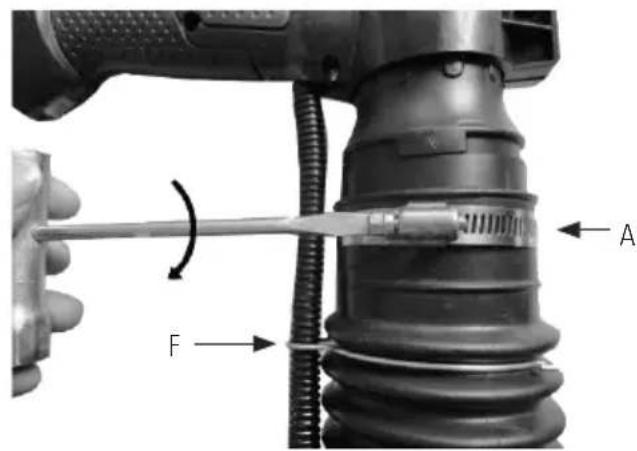
NOTE: Keep the throttle cable as straight as possible when connecting the blower tubes.
Attaching the intermediate tube and concentrator nozzle
Connect the intermediate tube (A) and air nozzle (B). Push the tubes together and turn them clockwise so they securely lock together.

natural_image
Mechanical assembly diagram showing a pipe with a knob and two labeled parts A and B (no text or symbols beyond labels)OPERATING INSTRUCTIONS
STARTING A COLD ENGINE
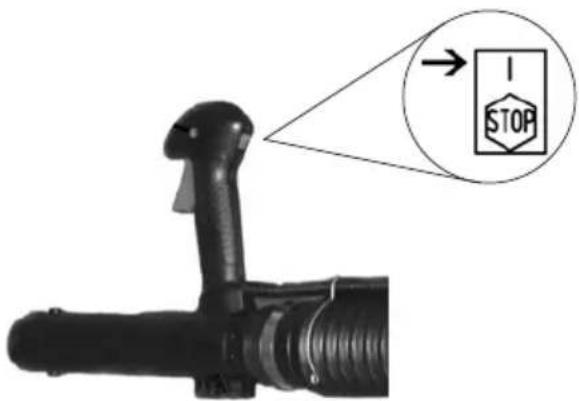
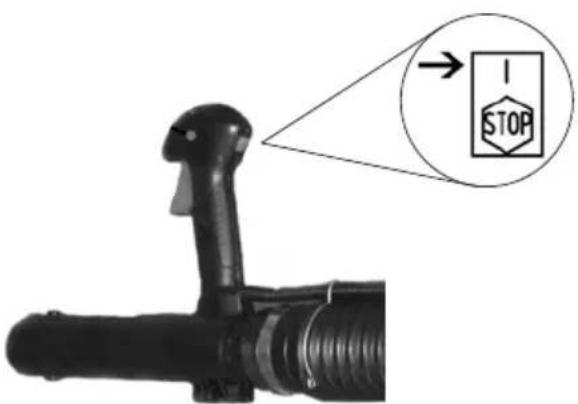
- Ensure the ignition switch is in the ON (I) position.
natural_image
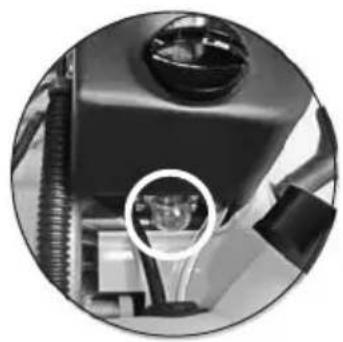
Close-up of a mechanical component with a circular inset highlighting a small feature (no visible text or symbols)- Press the fuel pump 10 times.
natural_image
Close-up of a mechanical component with directional arrows indicating movement or force (no text or symbols visible)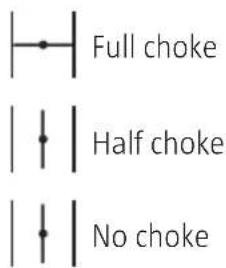
-
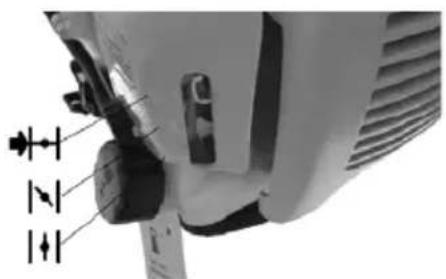
Move the choke control to the Full choke position.
-
Pull the cord-starter 4–6 times. If the equipment does not start, move the choke control to the "half choke" position and pull a further 4–6 times. Once the equipment has started, wait 10 seconds and then move the choke control the to "No choke" position.
-
Push the Lock-out button (1) and then press the throttle trigger (2) to operate the equipment.
NOTE: Always pull the cord-starter straight out so it does not scrape the loop. Always hold the starter handle when the cord retracts. Never let the cord snap back uncontrollably from its extended position. This could lead to the cord becoming stuck or frayed or the starter unit being damaged.
NOTE: If engine fails to start after repeated attempts, see "Troubleshooting" section.
STARTING A WARM ENGINE (warmed-up engine stopped for no more than 15–20 min.)
- Set throttle latch (see step 1 for starting a cold engine) and pull starter cord briskly.
- If engine does not start, or starts and then stops after five attempts to start it, follow the procedure under "Starting a cold engine".
IDLE
Due to different operating conditions (altitude, temperature, etc.), the leaf blower can in some cases require adjustment to the idle speed. If the equipment does not idle after warming up and restarting two times, follow this step to adjust the idle.
- Locate the idle adjustment screw (G) on the carburettor (Fig.15).
- Using a Phillips or slotted screwdriver, turn screw 1/4 to 1/2 turn clockwise (to the right).
The equipment should then idle properly.
STOPPING THE ENGINE
• Emergency stop procedure
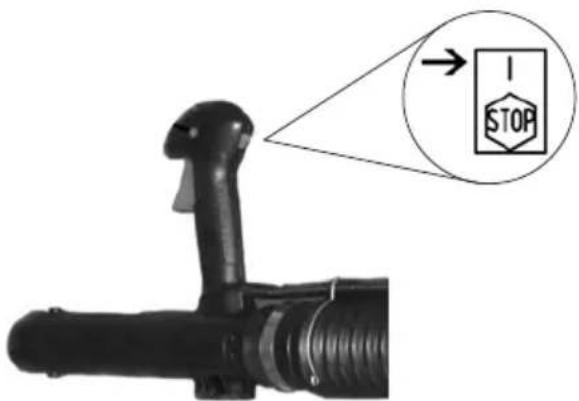
- Press "STOP" to immediately turn the leaf blower's engine off.
• Normal stopping method
- Release the trigger and let the engine's speed reduce to idling speed. Now press "STOP".
FUEL AND LUBRICATION
Mix 30 parts lead-free petrol with one part top-quality 2-cycle engine oil (mixture ratio 30:1).
Some conventional petrol are being blended with oxygenates such as alcohol or an ether compound to meet clean air standards. The engine is designed to operate satisfactorily on any petrol for automotive use including oxygenated petrol.
ADJUSTING THE BACK PACK, HARNESS AND CONTROL HANDLE
Place blower on your back by slipping arms through the shoulder straps as if you were putting on a jacket. Adjust the shoulder straps until they feel comfortable, then remove the leaf blower from your back and set it down on level ground in an upright position. Adjust backpack harness and control handle.
EXAMPLE OF AREAS OF USE
- Use the blower for trees, shrubs, flower beds, and hard-to-clean areas.
- Use the equipment around buildings and for other normal cleaning procedures.
• Use the blower around walls, overhangs, fences, and screens.
MAINTENANCE
CLEANING THE AIR FILTERS
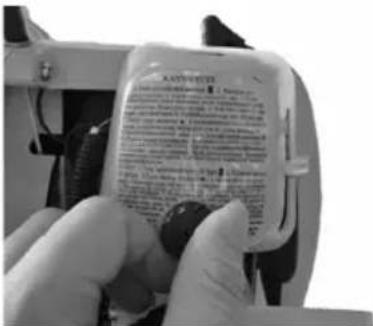
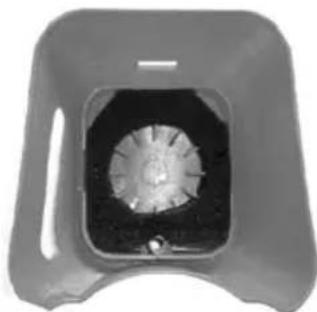
Loosen the knob which keeps the air filter cover in place, remove the cover and lift the filter out of the air box.
natural_image
Close-up of a mechanical component with a central circular feature and surrounding dark casing (no visible text or symbols)Wash the filter with soap and water (do not use petrol). Let the filter air-dry and then replace the air filter and filter cover.
CLEANING THE FUEL FILTER/FUEL CAP
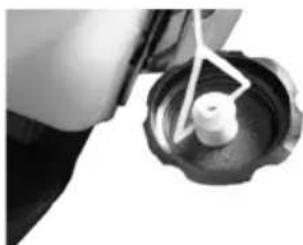
WARNING!: Remove fuel from the equipment and store in approved container before starting this procedure. Open the fuel cap slowly to release any pressure which may have formed in the fuel tank.
NOTE: Keep the vent on the fuel cap free from debris and never use the leaf blower without a fuel filter, as this can cause damage to the inside of the engine.
natural_image
Close-up of a mechanical component with a central shaft and circular base (no visible text or symbols)Completely remove the cap from the fuel tank so you can remove the fuel filter.
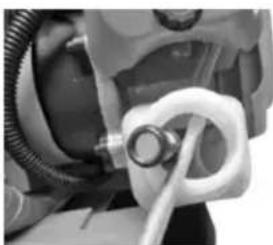
natural_image
Close-up of a mechanical component with hoses and tubing (no visible text or symbols)Use a bent piece of wire or another suitable aid to lift the filter up out of the tank.
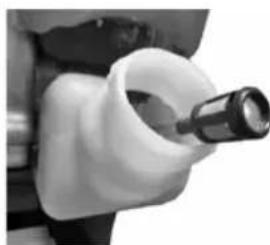
natural_image
Close-up of a mechanical component with a metallic tool inserted into a white cylindrical part (no visible text or symbols)Unscrew the fuel filter with a twisting motion and replace it with a new one. Reattach the cover.
ADJUSTING THE CARBURETTOR
The carburettor was pre-set at the factory for optimum performance. If further adjustments are necessary take your blower to an authorised repair centre.
CLEANING OR REPLACING THE SPARK PLUG
NOTE: Ensure the engine is turned off and the spark plug has cooled down before cleaning or replacing the spark plug.
- Loosen the spark plug boot and unscrew the spark plug with a suitable tool. Use a feeler gauge to check the spark gap is 0.6 mm. Attach a new spark plug if necessary, and tighten to 12 to 15 Nm. Reconnect the spark plug boot.
STORAGE
WARNING: Failure to follow these steps may cause varnish to form in the carburettor and difficult starting or permanent damage following storage.
Perform all the general maintenance recommended in the "Maintenance" section of the operating instructions.
- Clean the outside surface of the equipment.
- Drain fuel from the fuel tank.
- After fuel is drained, start engine.
- Run engine at idle until equipment stops. This will purge the carburettor of fuel.
- Allow engine to cool (approx. 5 minutes).
- Using a spark plug wrench, remove the spark plug.
- Pour a teaspoon of clean 2-cycle oil into the combustion chamber. Pull starter cord slowly several times to coat internal components. Replace spark plug.
- Store the equipment in a cool, dry place away from any source of ignition such as an oil burner, water heater, etc.
Preparing equipment after storage
- Remove the spark plug by means of a spark plug wrench.
- Pull starter cord briskly to clear excess oil from combustion chamber.
- Clean the spark plug and check the spark gap. Attach a new spark plug if necessary.
- Fill fuel tank with proper fuel/oil mixture. See "Fuel and Lubrication" section.
TROUBLESHOOTING
| Problem Probable cause Remedy | ||
| Equipment won’t start or starts but will not run. | Incorrect starting procedures.Incorrectly adjusted carburettor mixture.Fouled spark plug.Empty fuel tank.Primer bulb was not pressed enough. | Follow instructions in the operation instructions.Have carburettor adjusted by an authorised service centre.Clean/gap or replace plug.Fill fuel tank with properly mixed fuel.Press primer bulb fully and slowly 10 times. |
| Equipment starts,but engine has low power. | Fuel filter is plugged.Incorrect lever position.Dirty spark arrestor screen.Dirty air filter.Incorrectly adjusted carburettor mixture. | Replace spark arrestor screen.Move to RUN position.Replace spark arrestor screen.Remove, clean and reinstall filter.Have carburettor adjusted by an authorised service centre.Have carburettor adjusted by an authorised service centre. |
| Engine hesitates. | Incorrectly adjusted carburettor mixture.Air filter is plugged.Old or improperly mixed fuel. | Have carburettor adjusted by an authorised service centre.Have carburettor adjusted by an authorised service centre.Replace or clean the air filter.Drain gas tank/add fresh fuel mixture. |
| No power under load. | Incorrectly adjusted carburettor mixture.Old or improperly mixed fuel.Air filter is plugged.Fouled spark plug.Incorrectly gapped spark plug. | Drain gas tank/add fresh fuel mixture.Have carburettor adjusted by an authorised service centre.Drain gas tank (see storage)/ add fresh fuel mixture.Replace or clean the air filter. |
| Runs erratically. | Incorrectly gapped spark plug.Plugged spark arrestor.Dirty air filter. | Replace or clean the spark plug.Clean/gag or replace plug.Clean or replace spark arrestor. |
| Smokes excessively. | Incorrectly adjusted carburettor mixture.Incorrect fuel mixture. | Clean or replace air filter.Have carburettor adjusted by an authorised service centre.Use properly mixed fuel (30:1 mixture). |
Jula reserves the right to make changes. In the event of problems, please contact our service department. www.jula.com
natural_image
Symbol of a trash bin crossed with no text or labels, representing waste sorting or disposal (no text present)Care for the environment!
Must not be discarded with household waste!
This product contains electrical or electronic components that should be recycled.
Leave the product for recycling at the designated station e.g. the clocal authority's recycling station.
- SVENSKA....4
- SÄKERHETSANVISNINGAR....4
- TEKNISKA DATA....7
- BESKRIVNING 8
- MONTERING 9
- HANDHAVANDE 10
- SÄKERHETSANVISNINGAR
- MONTERING
- Montering av flexrör
- HANDHAVANDE
- START AV KALL MOTOR
- Värna om miljön!
- BRUK
- START AV KALD MOTOR
- MONTAŻ
- OBSŁUGA
- ROZRUCH ZIMNEGO SILNIKA
- DBAJ O ŚRODOWISKO!
- Read the operating instructions carefully before use.
- WARNING!
- Symbols
- TECHNICAL DATA
- DESCRIPTION
- SET UP
- Attaching the flex tube
- Attaching the operating tube
- Attaching the intermediate tube and concentrator nozzle
- OPERATING INSTRUCTIONS
- STARTING A COLD ENGINE
- STARTING A WARM ENGINE (warmed-up engine stopped for no more than 15–20 min.)
- IDLE
- STOPPING THE ENGINE
- FUEL AND LUBRICATION
- ADJUSTING THE BACK PACK, HARNESS AND CONTROL HANDLE
- EXAMPLE OF AREAS OF USE
- MAINTENANCE
- CLEANING THE AIR FILTERS
- CLEANING THE FUEL FILTER/FUEL CAP
- ADJUSTING THE CARBURETTOR
- CLEANING OR REPLACING THE SPARK PLUG
- STORAGE
- Preparing equipment after storage
- TROUBLESHOOTING
- Care for the environment!
Brand : Meec Tools
Model : 721-322
Category : Leaf blower