
CR-416 - Radio DENVER - Free user manual and instructions
Find the device manual for free CR-416 DENVER in PDF.


| Product Type | Clock Radio with FM Tuner |
| Brand | Denver |
| Model | CR-416 |
| Power Supply | AC 230V 50Hz; Battery Backup: 3V CR2032 Lithium (not included) |
| Frequency Range | FM 87.5 – 108 MHz |
| Preset Stations | 10 FM presets |
| Alarm | Dual alarm with weekday selection; wake to beep or radio |
| Snooze | 9-minute snooze interval |
| Sleep Timer | Adjustable 15-90 minutes |
| NAP Timer | Countdown timer 10-90 minutes |
| Clock/Calendar | Time, year, month, day, 12/24h format |
| Display | Auto-on during alarm; auto-off mode available |
| Antenna | FM wire antenna; fully extend for best reception |
| Reset | Reset button on back; returns to default settings |
| Cleaning | Wipe with mild detergent and soft cloth; avoid abrasives |
| Safety | Do not expose to liquids, naked flames, or obstruct ventilation |
Frequently Asked Questions - CR-416 DENVER
User questions about CR-416 DENVER
0 question about this device. Answer the ones you know or ask your own.
Ask a new question about this device
Download the instructions for your Radio in PDF format for free! Find your manual CR-416 - DENVER and take your electronic device back in hand. On this page are published all the documents necessary for the use of your device. CR-416 by DENVER.
USER MANUAL CR-416 DENVER
Plug the AC power cord to a household outlet AC source. This unit is equipped with a battery back up system, it requires a 3V CR2032 flat lithium battery (not included). Insert the battery in the battery compartment, making certain that the positive and negative (+ and -) battery terminals are attached to the corresponding terminals on the plate in the battery compartment. If an AC power failure occurs, the clock automatically switches to the battery power supply, the clock and timer memory continue running. When the AC power resumes, the clock switches back to AC again.
GETTING STARTED
Press the RESET button (13) locates on the back of unit after AC plug in.
- The unit will display full segment for 2 seconds, then it will enter the normal mode.
- TIME AND CALENDAR MANUAL SETTING
A. Setting Time and Calendar – Press Time set button (5) in normal mode and keep depress over 2 seconds to enter time set mode, after enter the setting mode, press Time set button (5) to change the mode cycle as follows :
Normal → Year → Month → Day → 12/24 H → Real time Hour → Real time Min → Normal
Action (during data adjustment):
- Press << / Tune -button (6) to adjust data backward.
- Press >> / Tune + button (7) to adjust data forward.
- Keep depress << or >> button for 2 seconds to enable auto forward.
B. Setting Alarm 1 and Alarm 2 – Press alarm set button (2/3) during normal mode and keep depress over 2 seconds to enter alarm set mode, after enter the setting mode, press alarm set button (2/3) to change the mode cycle as follows :
Normal → AL 1 Hour → AL1 Min → AL 1 weekday Alarm → AL 1 wake beep → AL 1 wake radio → AL 1 wake radio volume → Normal
Normal → AL 2 Hour → AL2 Min → AL 2 weekday Alarm → AL 2 wake beep → AL 2 wake radio → AL 2 wake radio volume → Normal
Select alarm weekday mode as follows
1-5 : Monday to Friday
1-7 : Whole week
6-7 : Saturday & Sunday
1-1 : One day of week
Action (during data adjustment):
- Press << / Tune -button (6) to adjust data backward.
- Press >> / Tune + button (7) to adjust data forward.
- Keep depress << or >> button for 2 seconds to enable auto forward.
- SETTING ALARM OUTPUT ON/OFF
Press MEMORY.SET / MEMORY+ / DISPLAY LIGHT AUTO ON/OFF / NAP button (1) to the Auto off mode, alarm wake up the display is auto turn on.
Press alarm 1 on/off set button (2) to toggle on and off alarm output function.
Press alarm 2 on/off set button (3) to toggle on and off alarm output function.
- ALARM DURATION AND SNOOZE FUNCTION
Alarm Duration – Beep alarm or radio alarm will continue output for 30 minutes if no key press, then it will stop automatically and wait for same alarm time on next day.
Action for Snooze :
- During alarming, press Snooze button (4) will enable snooze function, Beep alarm or Radio alarm will stop.
- Snooze interval is 9 minute (not include second offset)
- Snooze will continue unless press ON/OFF button (12) to alarm off of Buzzer alarm or Radio Alarm stop automatically after 30 minutes. Press MEMORY.SET / MEMORY+ / DISPLAY LIGHT AUTO ON/OFF / NAP button (1) to the Auto off mode, during alarming display auto turn on, press snooze / sleep button (4) will enable snooze function, buzzer alarm or radio / display will stop & off.
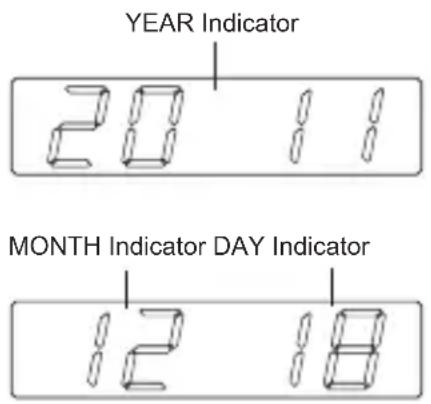
- CHANGE DISPLAY CONTENT Press << / Tune -/ YEAR/MONTH/ DAY button (6) during normal can switch to display Year / Month / Day, after 5 seconds timeout and return back to display time.
Listening to Radio
Press the ON/OFF button (9) to turn the unit on. Use the Tune + or Tune – button to select the desired FM station. If you press and hold the Tune + or Tune – button for one second, the release, the unit will automatically scan to the next broadcasting station. Press the ON/OFF button (9) to turn the radio OFF.
To set / recall the radio presets
Press the ON/OFF button (9) to turn the unit ON.
Use the Tune + or Tune -button to select the desired FM station.
Press the memory / memory + button; "P01" will blink in the display.
Press the memory / memory + button again to set the preset.
Repeat steps 2 through 4 to set more presets.
The unit can preset 10 stations totally for FM.
When "P01-P10" is blinking, press the Tune+ or Tune-button to select
the preset number.
When recalling preset stations, press memory / memory + to select the preset number.
Sleep operation
When listening to radio, press Snooze / Sleep button (4) to enter sleep mode. You can just adjust the sleep timer from 90 mins to 15 mins by pressing the Snooze / Sleep button (4). The unit will automatically turn off after the selected time.
NAP timer function (count down timer)
During radio off mode, press MEMORY.SET / MEMORY+ / DISPLAY LIGHT AUTO ON/OFF / NAP button (1) to turn on NAP mode, the NAP time will keep by 5 seconds, within 5 seconds and press MEMORY. SET / MEMORY+ / DISPLAY LIGHT AUTO ON/OFF / NAP button (1) button can change the duration from 90 min – 10 min. The alarm buzzer will sound for 30 min and then shut off automatically. To stop the alarm buzzer, press the ON/OFF button (9).
Press the MEMORY.SET / MEMORY+ / DISPLAY LIGHT AUTO ON/OFF / NAP button (1) has no effect during alram operation. Press ON/OFF button (9) to cancel NAP function.
SPECIFICATIONS
Frequency range : FM 87.5 – 108 MHz
Battery backup : 3V (CR2032 Flat Lithium battery x 1) not included Power supply : AC230V 50Hz
RESET
The reset button is located on the back of unit. Use a ballpoint pen to press it whenever you change the batteries, or unit is not performing as expected. This will return all settings to default value, and you will lose any stored data (alarm and clock settings).
Note :
- Ensure that the FM antenna is completely unrolled and extended for best FM reception.
WARNING
1 No naked flame sources, such as lighted candles, should be placed on the apparatus.
2 Do not place the product in closed bookcases or racks without proper ventilation.
3 Where the mains plug is used as the disconnect device, the disconnect device shall remain readily operable.
4 The ventilation should not be impeded by covering the ventilation openings with items, such as newspapers, table-cloths, curtains, etc.
5 It shall not be exposed to dripping or splashing and that no objects filled with liquids, such as vases, shall be placed on the apparatus.
6 Do not connect FM antenna to outside antenna.
7 The unit should not be exposed to direct sunlight, very high or low temperature, moisture, vibrations or placed in dusty environment.
8 Do not use abrasive, benzene, thinner or other solvents to clean the surface of the unit. To clean, wipe it will mild non-abrasive detergent solution and clean soft cloth.
9 Never attempt to insert wires, pins or other such objects into the vents or opening of the unit.
10. Disconnect device warning : Mains plug is used as the connection, so it should always remain ready operate.
11. Batteries shall not be exposed to excessive heat such as sunshine, fire or the like.
12.Class 1LED product.
CAUTION
Danger of explosion if battery is incorrectly replaced Replace only with the same or equivalent type
Electric and electronic equipment contains materials, components and substances that can be hazardous to your health and the environment, if the waste material (discarded electric and electronic equipment) is not handled correctly.
Electric and electronic equipment is marked with the crossed out trash can symbol, seen below. This symbol signifies that electric and electronic equipment should not be disposed of with other household waste, but should be disposed of separately.
All cities have established collection points, where electric and electronic equipment can either be submitted free of charge at recycling stations and other collection sites, or be collected from the households. Additional information is available at the technical department of your city.

ALL RIGHTS RESERVED DENVER ELECTRONICS A/S
CE
www.denver-electronics.com www.facebook.com/denverelectronics

Brand : DENVER
Model : CR-416
Category : Radio