
PixelKid1 - Camera Lamax - Free user manual and instructions
Find the device manual for free PixelKid1 Lamax in PDF.


| Product Type | Kids digital camera |
| Brand | Lamax |
| Model | PixelKid1 |
| Display Size | 2.4 inches |
| Video Resolution | 1080P / 720P |
| Video Format | AVI |
| Photo Resolution | 2MP – 8MP |
| Photo Format | JPG, JPEG |
| Memory | Micro SD card up to 32 GB (not included) |
| Connectivity | USB-C |
| Dimensions | 92 x 55 x 20 mm |
| Weight | 145 g |
| Power Source | Internal rechargeable lithium-ion battery (USB-C charging) |
| Charging Parameters | 5V / 1A (fast charger not recommended) |
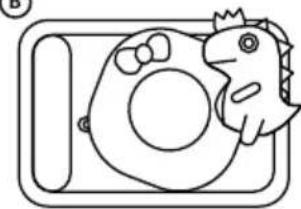
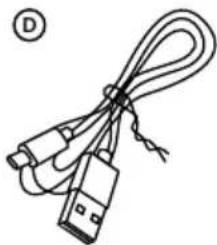
| Box Contents | Camera, silicone case, tripod, USB-C charging cable |
| Main Functions | Photo, video, self-timer, filters/effects/frames, slow motion, time-lapse, album playback, settings |
| Safety | Designed for children aged 6 and up; contains small parts; lithium-ion battery precautions |
| Maintenance & Cleaning | Wipe with a soft, lint-free cloth; avoid moisture and extreme temperatures; do not use paper towels |
| Spare Parts & Repairability | No user-serviceable parts; do not disassemble; warranty void if modified |
| Warranty | 24 months (battery 24 months, capacitor 6 months) |
Frequently Asked Questions - PixelKid1 Lamax
User questions about PixelKid1 Lamax
0 question about this device. Answer the ones you know or ask your own.
Ask a new question about this device
Download the instructions for your Camera in PDF format for free! Find your manual PixelKid1 - Lamax and take your electronic device back in hand. On this page are published all the documents necessary for the use of your device. PixelKid1 by Lamax.
USER MANUAL PixelKid1 Lamax
natural_image
Line drawing of a digital camera with concentric circular design and no text or symbolsEN - USER MANUAL
DE - BENUTZERHANDBUCH
CS – UŽIVATELSKÁ PŘÍRUČKA
SK – UŽÍVATEL'SKÁ PRÍRUČKA
PL - INSTRUKCJA OBSŁUGI
natural_image
Line drawing of a digital camera with concentric circular design and no text or symbolsCONTENTS
- BOX CONTENTS 2
- GETTING TO KNOW THE CAMERA 2
3.CHARGING 3 - INSERT THE MEMORY CARD .... 3
- OPERATING THE CAMERA .... 3
- SPECIFICATIONS ....4
- CONNECTION TO PC ....4
- SAFETY PRECAUTIONS 4
1. BOX CONTENTS
A

natural_image
Line drawing of a camera with no text or symbolsB
natural_image
Simple line drawing of a dinosaur inside a rectangular frame (no text or symbols)©

natural_image
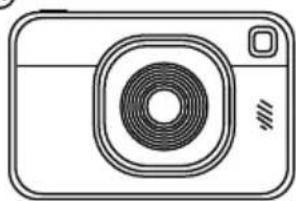
Simple line drawing of a cable with two connectors and wires (no text or symbols)A LAMAX PixelKid1 Kids Camera
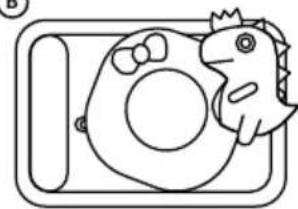
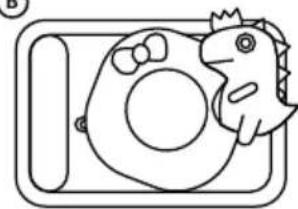
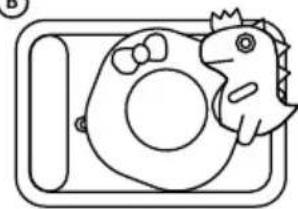
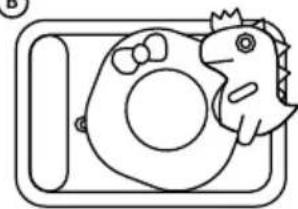
B Silicone case
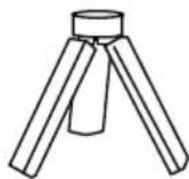
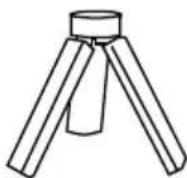
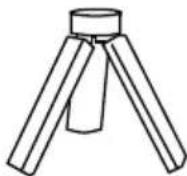
© Tripod
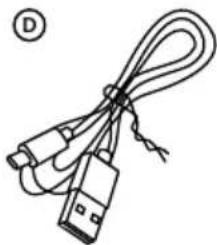
(D) USB-C charging cable
2. GETTING TO KNOW THE CAMERA
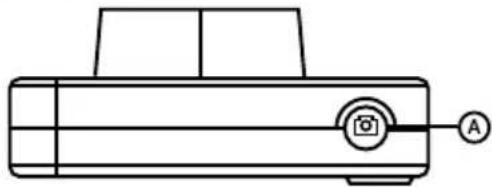
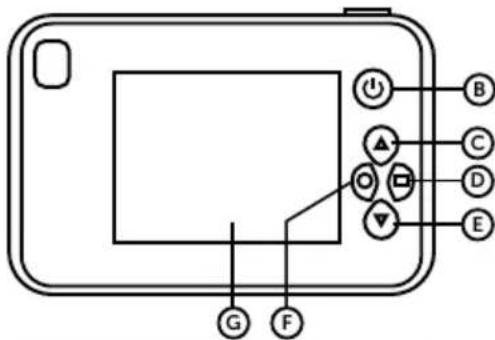
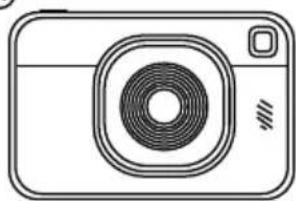
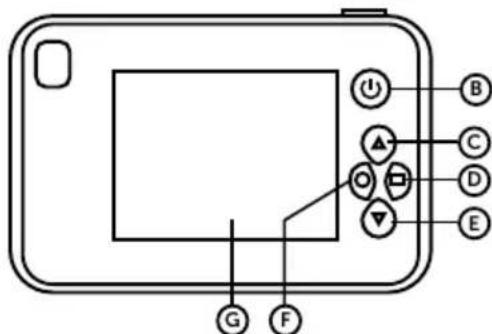
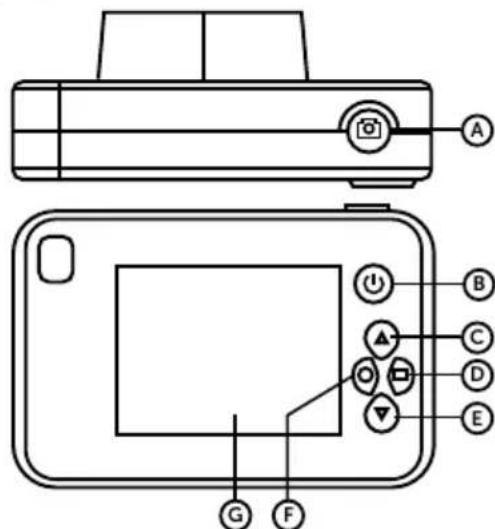
Ⓐ button to record/take photo
Button ⏻ to turn the camera on/off
© UP button
D RIGHT button
E DOWN button
F LEFT button
© Display
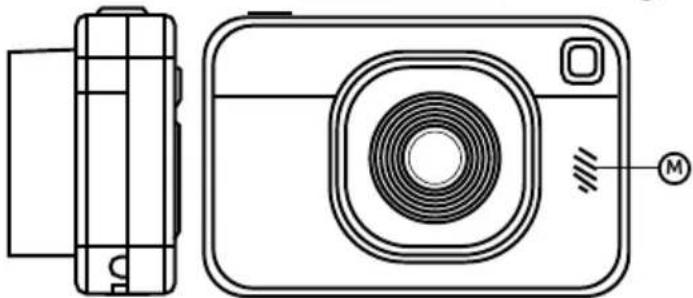
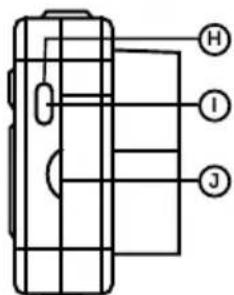
H USB-C port
① Reset button
J Memory card slot
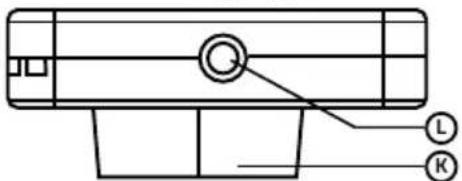
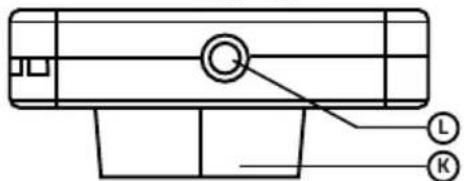
K Lens
L Thread for tripod attachment
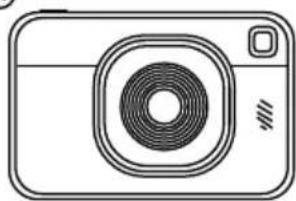
M Speaker
Note: Use only recommended accessories, otherwise the camera may be damaged.
natural_image
Line drawing of a mechanical device with a camera icon and labeled point A (no text or symbols beyond basic diagram)


natural_image
Pure technical line drawing of a mechanical component without any text, numbers, or symbols
natural_image
Line drawing of a digital camera with no text or symbols3. CHARGING
The action camera must be fully charged before first use. Use the original USB-C cable included in the box to charge.
The camera can be charged by connecting it to a computer, to a suitable mains adapter (not included; recommended parameters 5 V/1 A). Charging will start automatically, and the charging light (button backlight ⏻) will turn blue. When it goes out, the camera is fully charged.
When the low battery icon lights up on the display, the camera needs to be charged.
Note: Do not use a fast charger to charge the camera.
4. INSERT THE MEMORY CARD
If you wish to store photos or videos, you need to insert a memory card (not included).
Insert the memory card into the slot so that the contacts face in the same direction as shown in the picture next to the slot. Otherwise, the action camera will not be able to identify it.
Insert the card only when the action camera is turned off and not connected to the computer.
Format the card directly in the camera before using it for the first time.
If you need to remove the memory card, push it slightly with your finger towards the camera to release it from the slot and make it easier to remove.
Warning: Never remove the memory card from the action camera by force. There is a risk of damaging both the action camera and the memory card.
5. OPERATING THE CAMERA
TURNING ON/OFF
- Long press the ⏻ button to turn on the camera. The button ⏻ backlight will turn blue.
- Long press the ⏻ button to turn the camera off. The button ⏻ backlight goes off.
PHOTO - PHOTOGRAPHIC MODE
- With the camera on, select the camera icon and press the 🔒 button briefly to switch to photo mode.
- Press the 📷 button again briefly to take a photo. When a photo is taken, the indicator light flashes once to indicate that the photo was taken successfully.
- Press the DOWN button to switch the lens.
- Press the UP button to set the self-timer.
- Press the LEFT and RIGHT buttons to toggle filters, effects, and frames.
VIDEO - VIDEO MODE
- After turning on the device, select the camera icon and press the button briefly to switch to video mode.
- Press thee button briefly to start recording. The video light will flash, indicating that the video is being recorded.
- Press thee button briefly to stop recording.
- Press the DOWN button to switch the lens.
- Press the UP button to switch between slow motion and time-lapse mode.
- Press the LEFT and RIGHT buttons to toggle filters, effects, and frames.
ALBUM
- After turning on the device, select the picture icon and press the 🔒 button briefly to switch to album mode.
- Press the 🔒 button to play the video. Press again to stop playback.
- Press the UP button to display a dialog box prompting you to delete the selected file. Use the LEFT/RIGHT buttons to confirm or cancel the action. Press the 🔑 button to confirm the selection. Press the ⏻ button to go back one step.
- Press the DOWN button to display a dialog box prompting you to delete all files. Use the LEFT/RIGHT buttons to confirm or cancel the action. Press the 🔒 button to confirm the selection. Press the ⏻ button to go back one step.
SETTINGS
-
After turning on the device, select the gear icon and press the 🔒 button briefly to switch to settings.
-
Press the UP or DOWN button briefly to scroll through the items in the settings.
- Press the 🔒 button briefly to enter the selected item.
- Press the ⏻ button briefly to go back.
You can edit the following items, among others, in the settings:
| Photo resolution | Photo resolution setting (2Mpx – 8Mpx) |
| Self-timer | Self-timer settings (off, 2 seconds, 5 seconds, 10 seconds) |
| Video resolution | Video resolution setting (1080P/720P) |
| Time stamp | On/Off |
| Language | Choice of languages |
| Screen saver | Screen saver setting (off, 1 minute, 2 minutes, 3 minutes) |
| Auto. Off | Automatic shutdown setting (off, 3 minutes, 5 minutes) |
| Volume | Adjust volume from 0 to 7 |
| Format | Formatting the SD card |
| Date and time | Date and time setting |
| Sys. Reset | Restoring the camera to factory setting |
| Version | Firmware version information |
6. SPECIFICATIONS
| Display size | 2,4" |
| Video resolution | 1080P/720P |
| Video format | AVI |
| Photo resolution | 2Mpx – 8Mpx |
| Photo format | JPG, JPEG |
| Memory | Micro SD card up to 32 GB |
| Connectivity | USB-C |
| Dimensions | 92 x 55 x20 mm |
| Weight | 145 g |
7. CONNECTION TO PC
Connect the action camera to your computer using the supplied USB cable.
Open the folder with the connected external device and you can manage the saved files in the saved files folder.
To enable transfer, a microSD card must be inserted into the device.
Note: Do not disconnect the action camera from the computer or remove the memory card while downloading files. There is a risk of data loss.
8. SAFETY PRECAUTIONS
The consumer is required to learn the principles of safe use of the product before first use.
This camera is designed for children aged 6 and up. Keep it away from children under 6 years of age. It contains parts that could be swallowed by small children.
PRECAUTIONS AND NOTICES
For your own safety, do not use the camera's controls while driving.
A window mount is needed when using the recorder in a car. Make sure that you place the recorder in an appropriate place, so as not to obstruct the driver's view or deployment of airbags.
Make sure that no object is blocking the camera lens, and no reflective material is placed near the lens. Please keep the lens clean.
If the car's windshield is tinted or coated, it may impact the recording quality.
SAFETY PRECAUTIONS
Do not use the charger in high moister environment. Never touch the charger when your hands or feet are wet.
Allow adequate ventilation around the charger when using it to operate the device or to charge the battery. Do not cover the charger with paper or other objects that will reduce cooling. Do not use the charger while it is inside a carrying case.
Connect the charger to a proper power source. The voltage requirements are found on the product case and/or on the packaging.
Do not use the charger if it is visibly damaged. In case of damage, do not repair the equipment yourself!
In case of device overheating, immediately disconnect the power source.
Charge the device under supervision only.
Packaging contains small pieces, that can be dangerous for children. Store the product always out of reach of children. Bags or many of the pieces containing may cause suffocation after swallowing.
SAFETY NOTICES FOR LI-ION BATTERIES
Before first use, fully charge the battery.
For charging only use chargers, that is specified for this type of battery.
Use standard cables for charging, otherwise it could damage the device.
Never connect to a mechanically damaged charger or if the batteries are swollen. Do not use batteries in this condition due to risk of explosion.
Do not use any damaged adapter or charger.
Charge at room temperature, never charge at a temperature below 0°C or at a temperature higher than 40°C.
Avoid dropping the battery, don't puncture, or mutilate it. Definitely do not attempt to repair a damaged battery.
Do not expose the charger or battery to moisture, water, rain, snow or any kind of various liquids.
Do not leave the battery in the car, do not expose to direct sunlight and do not place it near heat sources. Strong light or high temperatures can damage the battery.
Never leave batteries without supervision during charging, short circuit or accidentally overcharge. Some batteries are unsuitable for fast charging or being charged excessively. This can cause a shock, or due to charger failure, may cause leakage of aggressive chemicals, explosion or subsequent fire!
In the case of excessive heating of the battery during charging, immediately disconnect it from the power supply.
Do not place charger and charging battery on or near flammable objects. Beware of curtains, carpets, tablecloths etc.
Once the battery or device with integrated battery is fully charged, disconnect it from the power supply.
Keep the battery out of the reach of children and animals.
Never disassemble the charger or battery. If the battery is integrated, do not disassemble the device, unless stated otherwise. Any such attempt is dangerous and can cause injury or damage to the product and subsequent loss of warranty.
Do not dispose worn or damaged batteries into the trash, fire or into heating devices, but hand them in at collection points for hazardous waste.
CARING FOR YOUR DEVICE
Taking good care of your device will ensure trouble-free operation and reduce the risk of damage.
Keep your device away from excessive moisture and extreme temperatures and avoid exposing your device to direct sunlight or strong ultraviolet light for extended periods of time.
Do not drop your device or subject it to severe shock.
Do not subject your device to sudden and severe temperature changes. This could cause moisture condensation inside the unit, which could damage your device. In the event of moisture condensation, allow the device to dry out completely before use.
The screen surface can easily be scratched. Avoid touching it with sharp objects.
Never clean your device when it is powered on. Use a soft, lint-free cloth to wipe the screen and the exterior of your device. Do not use paper towels to clean the screen.
Never attempt to disassemble, repair or make any modifications to your device. Disassembly, modification or any attempt at repair could cause damage to your device and even bodily injury or property damage and will void any warranty.
Do not store or carry flammable liquids, gases or explosive materials in the same compartment as your device, its parts or accessories.
To discourage theft, do not leave the device and accessories in plain view in an unattended vehicle.
Overheating may damage the device.
In the case of contact with heavily chlorinated water or sea water, rinse the camera and all used accessories, in drinking water and dry it.
Do not use an external heat source such as a microwave oven or hair dryer to dry the camera.
Always make sure that the battery door or the power port door is not ajar before swimming or diving. If they are, close them. Otherwise, the camera will not remain watertight.
Only wipe the display with a cloth that is designed for this purpose to avoid scratching it.
OTHER INFORMATION
1) For households: This marking indicates (☑) that this product should not be disposed with other household wastes throughout the EU. To prevent possible harm to the environment or human health from uncontrolled waste disposal, recycle it responsibly to promote the sustainable reuse of material resources. To return your used device, please use the return and collection systems or contact the retailer where the product was purchased. They can take this product for environmentally safe recycling. In case of incorrect disposal of this kind of wastes user can be fined according to national laws. User information for disposal of electric and electronic devices in countries outside the EU: The symbol stated above (crossed recycle bin) is valid only in countries in European Union. For correct disposal of electric and electronic devices ask your city hall or distributor of these devices. Everything is expressed by the symbol of crossed recycle bin on product, cover or printed materials.
2) You can determine a warranty service at the place of purchase. In case of technical problems or queries contact your dealer, who will inform you about the following procedure. Follow the rules for work with electric devices. User is not allowed to disassembly the device neither replace any of its components. To reduce the risk of electric shock, do not remove or open the cover. In case of incorrect setup and plug in of device you will expose yourself risk of electric shock.
The warranty period for products is 24 months, unless otherwise stated. The warranty does not cover damage caused by non-standard use, mechanical damage, exposure to extreme conditions, handling contrary to the manual or normal wear and tear. The warranty period for the battery is 24 months, and for its capacitor 6 months. For more information on the warranty, please visit www.elem6.com/warranty.
The manufacturer, importer or distributor shall not be liable for any damage caused by the installation or improper use of the product.
EU DECLARATION OF CONFORMITY
elem6 s.r.o. hereby declares that LAMAX PixelKid1 are in compliance with the requirements and other relevant provisions of Directives 2014/30/EU, 2014/53/EU and RoHS 2011/65/EU Annex II 2015/863. The all LAMAX products are intended for sale without restrictions in Germany, the Czech Republic, Slovakia, Poland, Hungary and other EU member states. The declaration of conformity can be downloaded from https://www.lamax-electronics.com/support/doc/.
MANUFACTURER:
Misprints and changes in the manual are reserved.
PixelKid1

natural_image
Line drawing of a digital camera with concentric circular design and no text or symbolsINHALT
natural_image
Line drawing of a camera with no text or symbolsB

natural_image
Simple line drawing of a cartoon dinosaur inside a rectangular frame (no text or symbols)©

natural_image
Line drawing of a USB cable with two connectors and wires (no text or symbols)Ⓐ LAMAX PixelKid1 Kinderkamera
B Silikonhülle
© Stativ
D USB-C-Ladekabel
natural_image
Line drawing of a mechanical device with a camera icon and labeled point A (no text or symbols beyond basic line drawing)


natural_image
Technical line drawing of a digital camera with front and side views (no text or symbols)3. AUFLADEN
ANDERE INFORMATIONEN
natural_image
Line drawing of a digital camera with concentric circular design and no text or symbolsOBSAH
- OBSAH BALENÍ 2
- SEZNÁMENÍ S KAMEROU....2
- NABÍJENÍ 3
- VLOŽENÍ PAMĚTOVÉ KARTY 3
- OVLÁDÁNÍ FOTOAPARÁTU 3
- SPECIFIKACE....4
- PŘIPOJENÍ K POČÍTAČI 4
- BEZPEČNOSTNÍ OPATŘENÍ 4
1. OBSAH BALENÍ
A
natural_image
Line drawing of a camera with no text or symbolsB

natural_image
Simple line drawing of a cartoon dinosaur inside a rectangular frame (no text or symbols)©

natural_image
Simple line drawing of a cable with two connectors and wires (no text or symbols)natural_image
Line drawing of a mechanical device with a labeled component (no text or symbols present)


natural_image
Technical line drawing of a digital camera with front and side views (no text or symbols)3. NABÍJENÍ
natural_image
Line drawing of a digital camera with concentric circular design and no text or symbolsOBSAH
- OBSAH BALENIA 2
- ZOZNÁMENIE S FOTOAPARÁTOM....2
- NABÍJANIE 3
- VLOŽENIE PAMÄTOVEJ KARTY 3
- OVLÁDANIE FOTOAPARÁTU 3
- ŠPECIFIKÁCIE 4
- PRIPOJENIE K POČITAČU 4
- BEZPEČNOSTNÉ OPATRENIA 4
1. OBSAH BALENIA
A

natural_image
Line drawing of a camera with no text or symbolsB
natural_image
Simple line drawing of a cartoon dinosaur inside a rectangular frame (no text or symbols)©


natural_image
Line drawing of a cable with two connectors and wires (no text or symbols)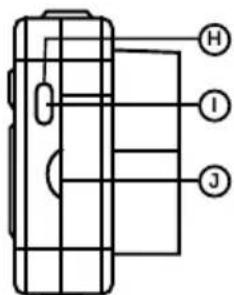


natural_image
Pure technical line drawing of a cylindrical device with no text, numbers, or symbols
natural_image
Line drawing of a digital camera with concentric rings and a labeled button (no text or symbols)3. NABÍJANIE
natural_image
Line drawing of a digital camera with concentric circular design and no text or symbolsZAWARTOŚĆ
- ZAWARTOŚĆ OPAKOWANIA 2
- ZAPOZNANIE SIĘ Z APARATEM 2
- ŁADOWANIE .... 3
- WŁÓŻ KARTĘ PAMIĘCI 3
- STEROWANIE KAMEREM 3
- SPECYFIKACJE 4
- PODŁACZENIE KOMPUTERA 4
- ŚRODKI OSTROŻNOŚCI 4
1. ZAWARTOŚĆ OPAKOWANIA
A

natural_image
Line drawing of a digital camera with no text or symbolsB
natural_image
Simple line drawing of a cartoon dinosaur inside a rectangular frame (no text or symbols)©

natural_image
Line drawing of a cable with two connectors and wires (no text or symbols)


natural_image
Technical line drawing of a digital camera with front and side views (no text or symbols)3. ŁADOWANIE
natural_image
Line drawing of a digital camera with concentric circular design and no text or symbolsTARTALMA
- DOBOZ TARTALMA 2
- ISMERKEDÉS A KAMERÁVAL 2
- TÖLTÉS 3
- HELYEZZE BE A MEMÓRIAKÁRTYÁT 3
- A KAMERA HASZNÁLATA .... 3
- MÜSZAKI ADATOK 4
- CSATLAKOZTATÁS SZÁMÍTÓGÉPHEZ 4
- BIZTONSÁGI ÓVINTÉZKEDÉSEK 4
1. DOBOZ TARTALMA
A
natural_image
Line drawing of a camera with no text or symbolsB

natural_image
Simple line drawing of a cartoon dinosaur inside a rectangular frame (no text or symbols)©


natural_image
Simple line drawing of a cord with two connectors and wires (no text or symbols)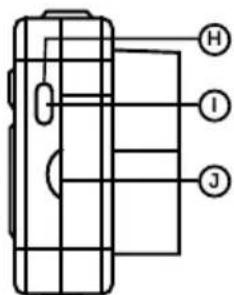

natural_image
Technical line drawing of a digital camera with front and side views (no text or symbols)3. TÖLTÉS
natural_image
Line drawing of a digital camera with concentric circular design and no text or symbolsVSEBINA
- VSEBINA PAKETA 2
- SPOZNAVANJE S KAMERO .... 2
- POLNJENJE 3
- VSTAVITE POMNILNIŠKO KARTICO ....3
- NADZOR KAMERE .... 3
- SPECIFIKACIJE 4
- RAČUNALNIŠKA POVEZAVA 4
- VARNOSTNI UKREPI ....4
1. VSEBINA PAKETA
A
natural_image
Line drawing of a camera with no text or symbolsB
natural_image
Simple line drawing of a cartoon dinosaur inside a rectangular frame (no text or symbols)©

natural_image
Simple line drawing of a cord with two connectors and wires, no text or symbols presentnatural_image
Line drawing of a mechanical device with a labeled sensor (no text or symbols present)


natural_image
Technical line drawing of a digital camera with front and side views (no text or symbols)3. POLNJENJE
natural_image
Line drawing of a digital camera with concentric circular design and no text or symbolsSADRŽAJ
- SADRŽAJ PAKIRANJA 2
- UPOZNAVANJE S KAMEROM 2
- PUNJENJE 3
- UMETNITE MEMORIJSKU KARTICU .... 3
- UPRAVLJANJE KAMEROM .... 3
- SPECIFIKACIJE 4
- POVEZIVANJE NA RAČUNALO 4
- SIGURNOSNE MJERE ....4
1. SADRŽAJ PAKIRANJA
A

natural_image
Line drawing of a camera with no text or symbolsB
natural_image
Simple line drawing of a dinosaur inside a rectangular frame (no text or symbols)©


natural_image
Simple line drawing of a cable with two connectors and wires (no text or symbols)A Dječji fotoaparat LAMAX PixelKid1
B Silikonska navlaka
© Tronožac
D USB-C kabel za punjenje
2. UPOZNAVANJE S KAMEROM
Ⓐ Gumb 📄 za snimanje/fotografiranje
B Gumb ⏻ za uključivanje/
isključivanje kamere
© Gumb GORE
© DESNI gumb
© Gumb DOLJE
F Gumb LIJEVO
© Prikaz
H USB-C priključak
① Gumb za resetiranje
J Utor za memorijsku karticu
K Objektiv
L Navoj za pričvršćivanje tronošca
B Razglas
Napomena: Koristite samo preporučenu dodatnu opremu, inače se kamera može oštetiti.

natural_image
Technical line drawing of a digital camera with front and side views (no text or symbols)3. PUNJENJE


- CONTENTS
- BOX CONTENTS
- GETTING TO KNOW THE CAMERA
- CHARGING
- INSERT THE MEMORY CARD
- OPERATING THE CAMERA
- TURNING ON/OFF
- PHOTO - PHOTOGRAPHIC MODE
- VIDEO - VIDEO MODE
- ALBUM
- SETTINGS
- SPECIFICATIONS
- CONNECTION TO PC
- SAFETY PRECAUTIONS
- PRECAUTIONS AND NOTICES
- SAFETY PRECAUTIONS
- SAFETY NOTICES FOR LI-ION BATTERIES
- CARING FOR YOUR DEVICE
- OTHER INFORMATION
- EU DECLARATION OF CONFORMITY
- MANUFACTURER:
- PixelKid1
- INHALT
- AUFLADEN
- ANDERE INFORMATIONEN
- OBSAH
- OBSAH BALENÍ
- NABÍJENÍ
- OBSAH BALENIA
- NABÍJANIE
- ZAWARTOŚĆ
- ZAWARTOŚĆ OPAKOWANIA
- ŁADOWANIE
- TARTALMA
- DOBOZ TARTALMA
- TÖLTÉS
- VSEBINA
- VSEBINA PAKETA
- POLNJENJE
- SADRŽAJ
- SADRŽAJ PAKIRANJA
- UPOZNAVANJE S KAMEROM
- PUNJENJE
Brand : Lamax
Model : PixelKid1
Category : Camera