
ColumbiaVac OPC1000 - Dehumidifier Eldom - Free user manual and instructions
Find the device manual for free ColumbiaVac OPC1000 Eldom in PDF.


| Product Type | Dehumidifier |
| Brand | Eldom |
| Model | ColumbiaVac OPC1000 |
| Dehumidification Capacity | 10 L/day at 30°C, 80% RH |
| Rated Voltage | 220-240 V ~ 50 Hz |
| Power Consumption | 210 W |
| Rated Current | 1.2 A |
| Noise Level | ≤45 dB(A) |
| Refrigerant Type | R134a / 110 g |
| Net Weight | 10 kg |
| Water Tank Capacity | 1.5 L |
| Fan Speeds | 2 (Fast, Slow) |
| Timer Function | 1-24 hours |
| Humidity Setting Range | 40% - 80% RH |
| Continuous Drainage | Yes, via hose |
| Auto Defrost | Yes (at low temperatures) |
| Air Filter | Washable, clean every 2 weeks |
| Operating Temperature Range | 5°C to 35°C |
| Minimum Clearance from Wall | 20 cm |
| Power Cord Length | Not specified |
| Accessories Included | Drain hose, user manual |
| Safety Features | Auto shut-off when tank full, child safety (8+ years) |
Frequently Asked Questions - ColumbiaVac OPC1000 Eldom
User questions about ColumbiaVac OPC1000 Eldom
0 question about this device. Answer the ones you know or ask your own.
Ask a new question about this device
Download the instructions for your Dehumidifier in PDF format for free! Find your manual ColumbiaVac OPC1000 - Eldom and take your electronic device back in hand. On this page are published all the documents necessary for the use of your device. ColumbiaVac OPC1000 by Eldom.
USER MANUAL ColumbiaVac OPC1000 Eldom
natural_image
White and black portable air purifier device with 'COLUMILA INC' branding on the front panel (no other text or symbols visible)
model: OPC1000
WARUNKI BEZPIECZEŃSTWA
natural_image
Line drawing of a portable air conditioner unit in a room with a folded curtain and a 20 cm measurement label (no text or symbols on the device itself)INSTALACJA
natural_image
Simple line drawing of a box with a tool and a cross mark, no text or symbols presentnatural_image
Line drawing of a portable air conditioner unit with cooling fan and control panel (no text or symbols)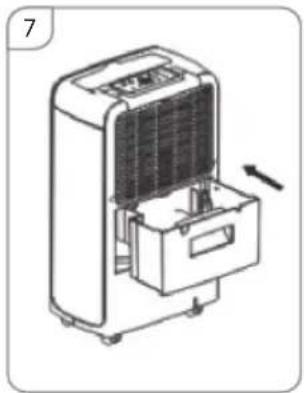
natural_image
Technical line drawing of a portable air conditioner unit with cooling fan and vent slots (no text or symbols)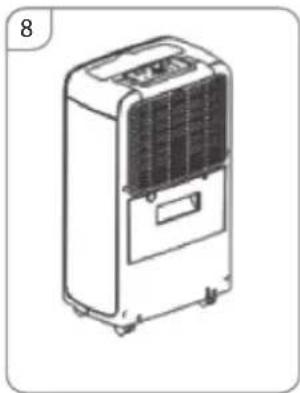
natural_image
Line drawing of a portable air conditioner unit (no text or symbols visible)natural_image
Line drawing of a portable air conditioner unit with cooling fan and vent, showing internal airflow direction (no text or symbols)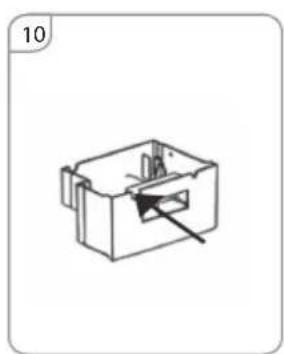
natural_image
Isometric line drawing of a mechanical component with a central slot and an arrow indicating direction (no text or symbols)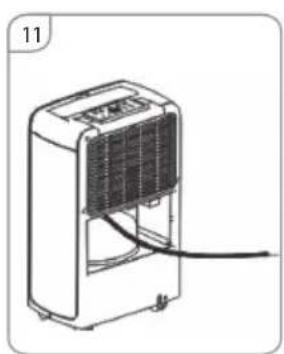
natural_image
Line drawing of a portable air conditioner unit with cooling fan and power cord (no text or symbols)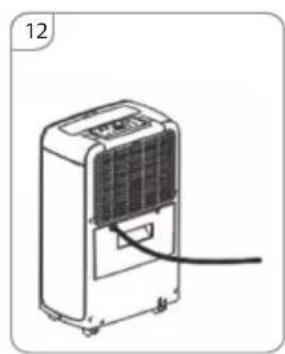
natural_image
Line drawing of a portable air conditioner unit with a coiled cable (no text or symbols)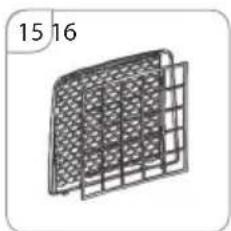
natural_image
3D wireframe diagram of a grid-like structure with no text or symbols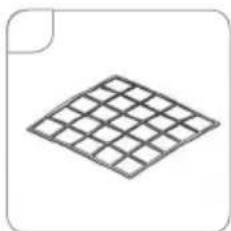
natural_image
Isometric view of a diamond-shaped grid pattern (no text or symbols)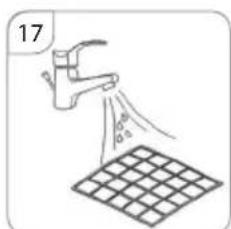
Please read all these instructions carefully before using this appliance.
-
Only use this appliance for domestic purposes and in the way indicated in these instructions. Never use for any other purposes.
-
Do not use the appliance outside and always place it in a dry environment.
-
The device can be used by children aged 8 and older and by persons with limited physical, sensory or mental capabilities, or persons without sufficient experience and knowledge only under supervision or if previously instructed on the safe use of the appliance and the possible risks. Children shall not play with the appliance. Cleaning and maintenance that are theresponsibility of the user shall not be carried out by children without supervision. Protect the appliance and the power cord against children under 8 years old.
-
From time to time, check the cord. Never use the cord, the plug or the appliance when they show any sign of damage. The cord length of this product has been selected to reduce the possibility of being injured. Do not use your appliance with an extension cord unless it has been checked and tested by a qualified electrician or electrical supplier.
-
Keep the appliance away from hot sources and direct sunlight.
-
Always switch off the appliance before unplugging it.
-
Unplug the appliance before cleaning or changing any parts of the appliance or when it's not in use.
-
Clean the appliance accord to manual.
-
Make sure that the voltage rating on the type plate corresponds to your main voltage. Any error in connecting the appliance invalidates the guarantee.
-
Prevent your children from this danger.
-
Never leave the appliance unsupervised when in use. Switch off the appliance if you have to go away for even a short time.
-
Never pull the cord to unplug or move the appliance.
- Never immerse the appliance in water or any other liquid for any reason.
- Keep the appliance away from water or oil splashes.
- Respect the instructions for cleaning.
- Do not insert sharp metallic objects or fingers in the air swinging fins of the appliance.
- Never repair the appliance yourself. All interventions made by a non-qualified person can be dangerous. As well any changing of the cord must be done by a qualified electrician.
- Never use accessories non-delivered by the supplier. This could be dangerous and could damage the appliance.
Special recommendations:
- Ambient temperature range for the device is 5^ - 35^
- Install the portable air dryer on a flat location with a large space, without obstacles. Leave a 20cm minimum space between the unit and the wall.
- The device must be installed in accordance with national installation regulations.
- The plug shall be always accessible after its installation.
- Always place the appliance in a vertical position, in order to maintain the compressor in good working condition.
- Do not tilt the device in any direction as spilled water can damage the device.
- Do not use the appliance near gas or other inflammable liquids.
- Do not block the air outlet and inlet ventilation. Do not place heavy objects on the device.
- Do not use spray (insecticides, painting) or any other inflammable products near the appliance as the plastic case may be deformed. The unit may sustain electrical damage.
Power sources
- The plug has to be well fixed and should not be damaged.
- Do not plug in the appliance with an adaptor.
- Plug into the wall socket before switching on the appliance then press on the ON/OFF button.
GENERAL DESCRIPTION
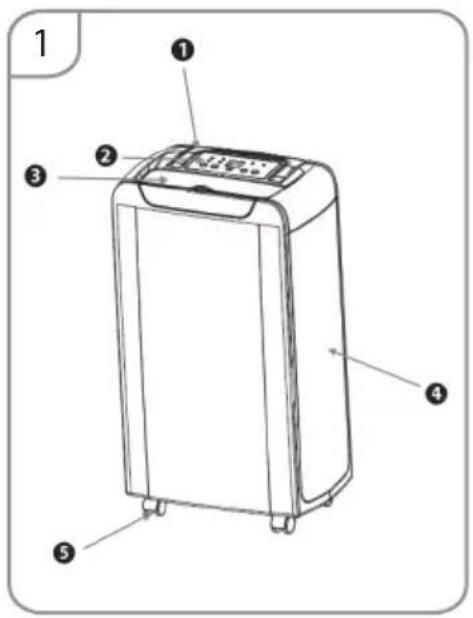
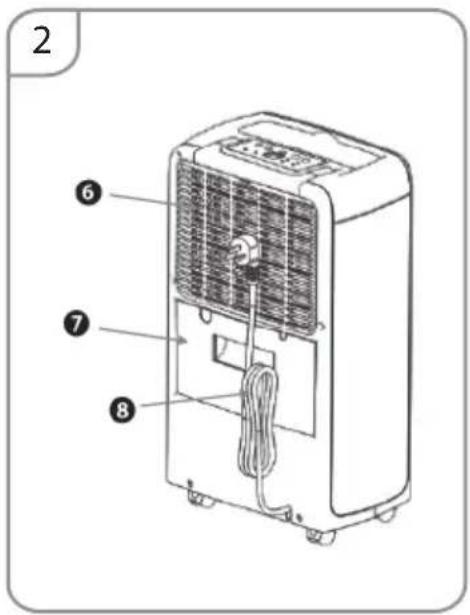
Front
- Holder
- Control Panel
- Air outlet with cover
- Housing
- Wheels
Rear
- Filter
- Water tank
- Power Cord
Additional accessories
Tube
TECHNICAL DATA
| MODEL OPC1000 | |
| Dehumidification capacity 10L/day (30°C, RH80%) | |
| Rated voltage 220-240V ~50HZ | |
| Power 210W | |
| Rated current 1,2A | |
| Noise ≤45dB(A) | |
| Refrigerant type R134a/110g | |
| Net weight 10kg | |
| Suction end pressure 0,5MPa | |
| Outlet end pressure 1,5MPa | |
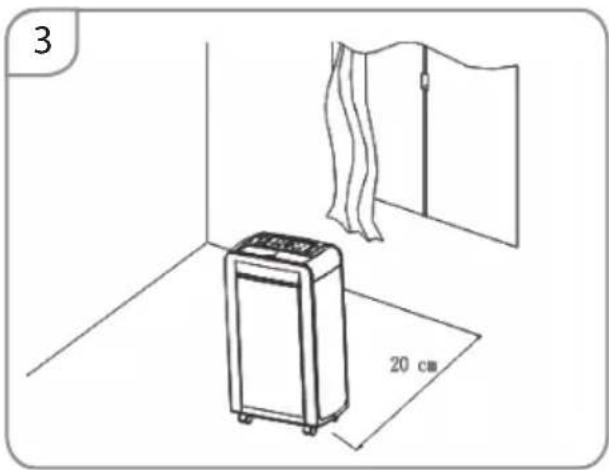
INSTALLATION
Choosing the place for installation
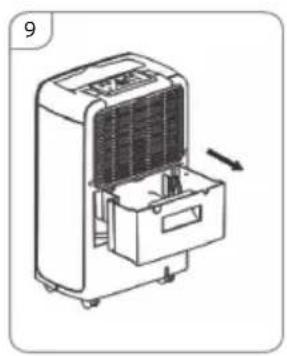
The device must be placed vertically on a flat surface, in a dry and spacious location. The room should be ventilated. At least 20 cm of clearance should be left around the device. Water accumulates in the tank (7). An attached hose (9) can be used for water discharge. The method of installation is described in “CONTINUOUS WATER DISCHARGE” section.
Any changes in settings are signalled by a sound. An air stream from the device should not be pointed directly at a person. Lift the air outlet cover (3) before switching the device on.
CONTROL PANEL
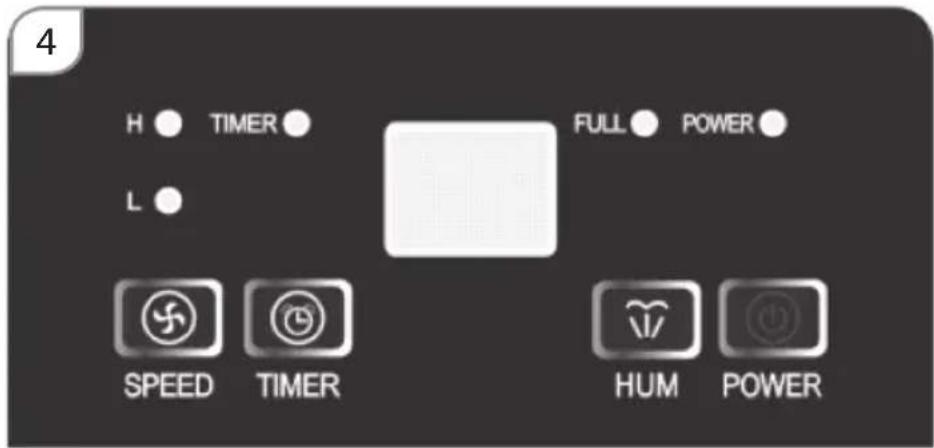
- DISPLAY - this display has 3 functions:
- with power on, it displays humidity in the room,
- while the humidity is being set, it displays data of the humidity chosen,
-
while theccfunction is being set, it displays the values in the „00-24" range,
-
Power POWER - cdisplay signals the connection of the device to the power source. When the power is on, this display lights up green, regardless of whether the device is working or not.
- The display of water tank filling FULThe display lights up red when the 1.5 capacity has been reached. The device signals it by an additional sound (15 times), and then switches off. Water tank must be emptied and placed back in the right position.
- The button - is used for selecting fan speed. The fan speed is signalled by the lights: - fast, - slow.
- The button is used for enabling and disabling the automatic switching on and off the device. To set the time this button must be pressed until the right value from the „1-24” range appears on the display. To disable this function, the “00” value must be set using the button. After switching off the device using the button, time setting will be deleted.
Enabling the function is signalled by the light .TIMER
- The button is used for setting the humidity level. Press this button to set the humidity level. The value on the display will change in the following way (initial humidity value is 50%): 50% → 55% → 60% → 65% → 70% → 75% → 80% → 40% → 45% → 50%. When the humidity in the room is below the set level, the dehumidification function will be automatically disabled – the fan will continue working. Current humidity level is shown on the display.
- The button is used for switching on/off the device. Do not unplug directly the power cord to force the shut-down of the device. The shut-down is signalled by a sound.
EMPTYING THE TANK
ATTENTION
Water collected in the dehumidifier tank is not suitable for drinking and must not be allowed to come into contact with food.
natural_image
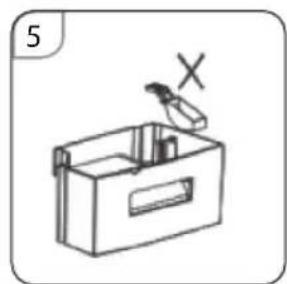
Simple line drawing of a box with a plastic bag and a cross mark, no text or symbols presentDo not put the floater out of water; otherwise the device will not stop working when the water tank fills up. Then, water will overflow, which may cause damage to the floor.
natural_image
Line drawing of a portable air conditioner unit with cooling fan and control panel (no text or symbols)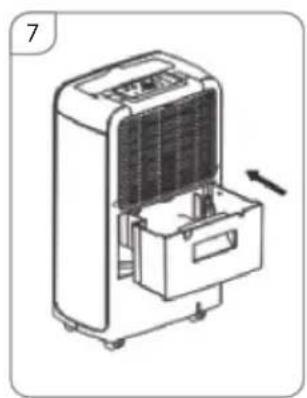
natural_image
Line drawing of a portable air conditioner unit with cooling fan and control panel (no text or symbols)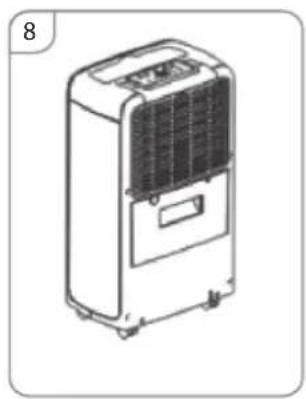
natural_image
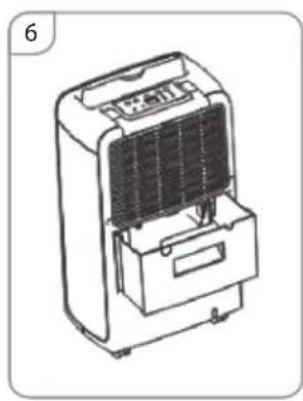
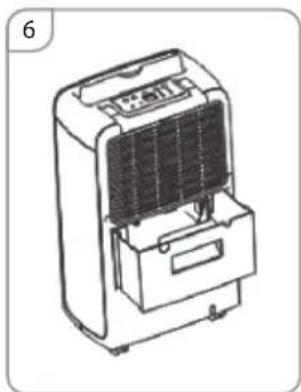
Line drawing of a portable air conditioner unit (no text or symbols visible)- Pull the tank gently at the back of the device; the tank will slide out (fig. 6).
• Pour the water out of the tank. - If the water tank is dirty, clean it with water. Do not use any acrid cleaning agents. Do not use chemical solvent (such as benzene, alcohol, gasoline). The surface may be damaged or even the whole case may be deformed. Do not sprinkle water
- Place the tank in the right position in the device (fig 7). Otherwise, the full tank indicator will still light up red and the device will not be able to work.
CONTINUOUS WATER OUTLET
natural_image
Line drawing of a portable air conditioner unit with cooling fan and vent, showing internal components and airflow direction (no text or symbols)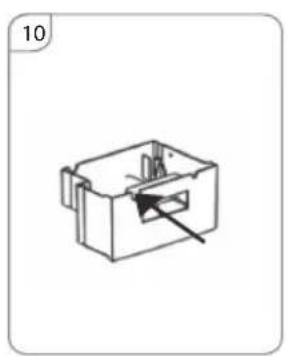
natural_image
Technical line drawing of a mechanical component with a central slot and an arrow indicating direction (no text or symbols)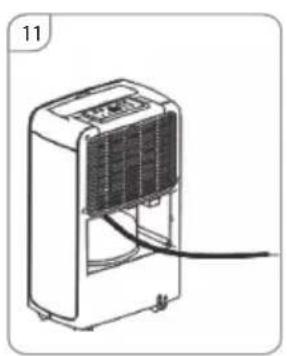
natural_image
Line drawing of a portable air conditioner unit with cooling fan and cable (no text or symbols)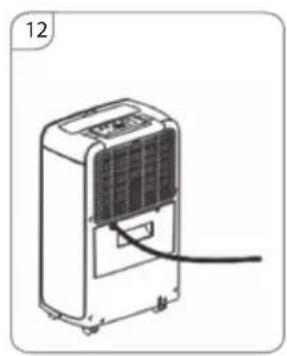
natural_image
Line drawing of a portable air conditioner unit with a coiled cable (no text or symbols)In order to use the device with the continuous water outlet connected, you should:
- Remove the water tank (7) (fig. 9).
- Remove the tank housing component (fig. 10).
- Slide a pipe (10) to the water outlet valve located in the upper section of the tank bay (fig. 11)
- Slide the tank (7) in and lead the pipe out through the cut-out (fig. 12).
- Place the other end of the pipe into a container, e.g. a bucket.
Uwaga
Never bend the drain tube. The tube outlet must always be below the water outlet from the device. Never block the water outlet from the device or the tube.
MAINTENANCE
Note:
Turn off the unit and unplug it before any maintenance or repair begins to avoid electric shock.
CLEANING
Unplug the unit before any cleaning. Clean the housing with a soft moisture cloth. Do not use chemical solvent (such as benzene, alcohol, gasoline). The surface may be damaged or even the whole case may be deformed. Do not sprinkle water on the unit.
AIR FILTER
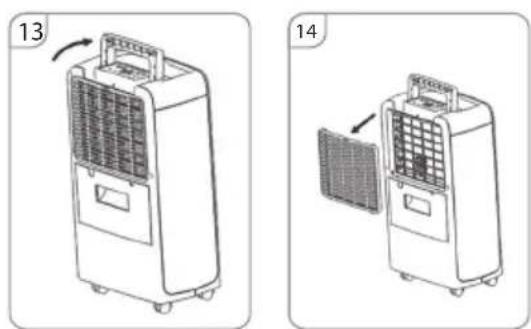
Clean the air filter every 2 weeks. If the air filter is blocked with dust, the efficiency will reduce.
natural_image
3D wireframe model of a grid-like structure with no text or symbols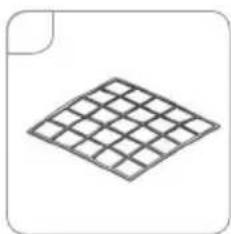
natural_image
Isometric view of a diamond-shaped grid pattern (no text or symbols)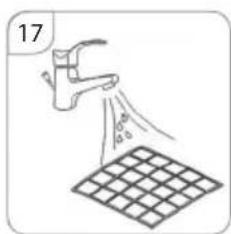
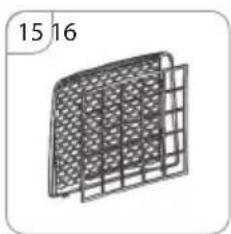
Filters must be pulled out of the housing (image 13,14), dismantled (image 15), then washed in warm water (about 40^ ) using a neutral detergent. Rinse, dry thoroughly, and then install.
Note: Do not operate the device without a properly installed filter.
STORING THE DEVICE
If the dehumidifier is not used for a longer period of time:
- Unplug the power cord from the socket and roll it.
- Empty the tank entirely of water and make sure that there is no water inside.
- Remove and clean the air filter, dry it completely and reinstall it.
- Store the dehumidifier in a cool, dry place, inaccessible to sun rays, high temperature or excessive dust.
TROUBLE SHOOTING
Before contacting the service centre, you should compare the symptoms given by the device with those listed below. The list includes normal situations which are not caused by a manufacturing defect or defective material.
| Problem Possible cause Solution | ||
| The device won’t work | No power. Connect to the power socket | and switch on |
| Water fill indicator is flashing. | Check whether the water tank is correctly installed and empty the water tank | |
| The temperature in the room is below 5°C or above 35°C. | Zadziałało zabezpieczenie zaprojektowane do°Chrony urządzenia. Urządzenie nie może działać w tych temperaturach. | |
| The “TIMER” function is active | Disable the “TIMER” function. | |
| The dehumidifier function does not work or the device switches on/off frequently | Air filter is clogged. | Clean the air filter according to the instructions. |
| Door or window is open. Close the door | / window. | |
| The device is near a heat source. Place the device in the cooler location. | ||
| Inlet or outlet channel is obstructed. | Remove the obstruction from the inlet or outlet channel. | |
| The device makes excessive noise | The device is tilted or unstable? | Place on an even, hard surface (with no vibrations). |
| Air filter is clogged? | Clean the air filter according to the instructions. | |
AUTOMATIC DEFROSTING, LOW OPERATING TEMPERATURE
- ≤ 5°C temperature ≤ 12°C, the device will defrost automatically every 30 minutes
- ≤ 13°C temperature ≤ 20°C, the device will defrost automatically every 45 minutes
Note: If the full water tank indicator turns on frequently, the device may not work properly. Contact a professional service for help.
BEZPEČNOSTNÍ PODMÍNKY
natural_image
Simple line drawing of a box with an open lid and a cross mark, no text or symbols presentnatural_image
Line drawing of a portable air conditioner unit with cooling fan and control panel (no text or symbols)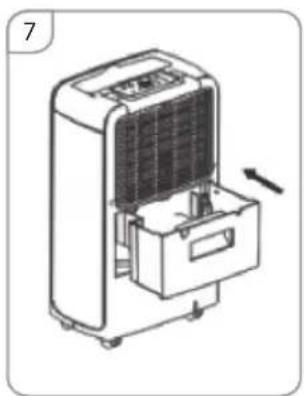
natural_image
Line drawing of a portable air conditioner unit with cooling fan and control panel (no text or symbols)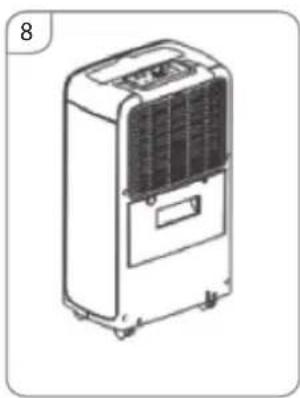
natural_image
Line drawing of a portable air conditioner unit (no text or symbols visible)natural_image
Illustration of a portable air conditioner unit with cooling fan and vent, showing internal structure and airflow direction (no text or symbols)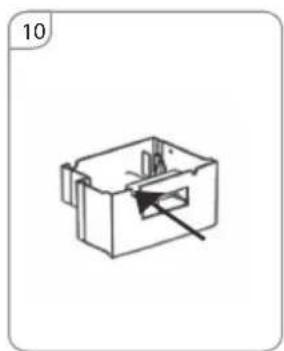
natural_image
Technical line drawing of a mechanical component with a highlighted section (no text or symbols)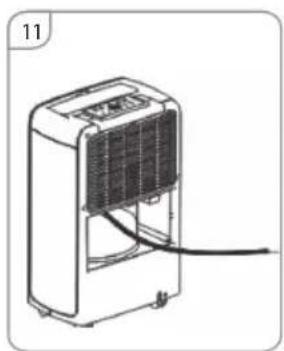
natural_image
Line drawing of a portable air conditioner unit with a coiled cable (no text or symbols)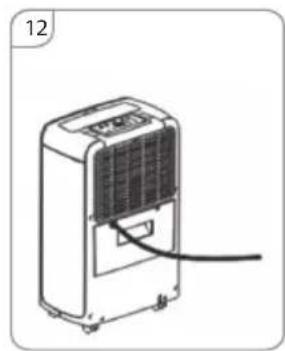
natural_image
Line drawing of a portable air conditioner unit with a coiled cable (no text or symbols)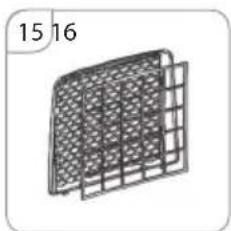
natural_image
3D wireframe diagram of a grid-like structure with no text or symbols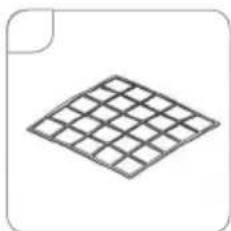
natural_image
Isometric view of a diamond-shaped grid pattern (no text or symbols)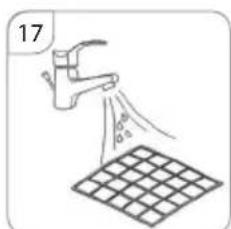
natural_image
Line drawing of a portable air conditioner unit placed in a room with a folded curtain and a 20 cm measurement label (no text or symbols on the device itself)EINRICHTUNG
natural_image
Simple line drawing of a box with a tool and a cross mark, no text or symbols presentnatural_image
Line drawing of a portable air conditioner unit (no text or symbols visible)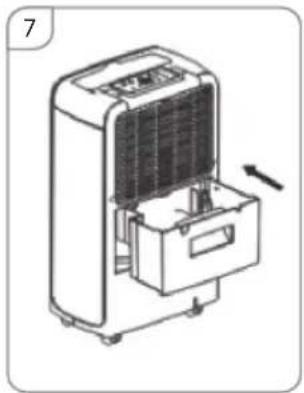
natural_image
Technical line drawing of a portable air conditioner unit with cooling fan and control panel (no text or symbols)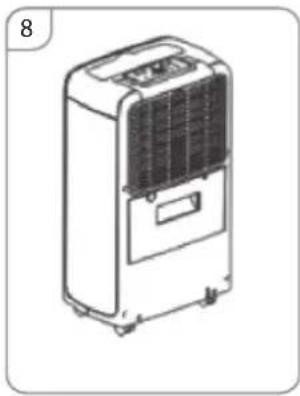
natural_image
Line drawing of a portable air conditioner unit (no text or symbols)natural_image
Line drawing of a portable air conditioner unit with cooling fan and control panel (no text or symbols)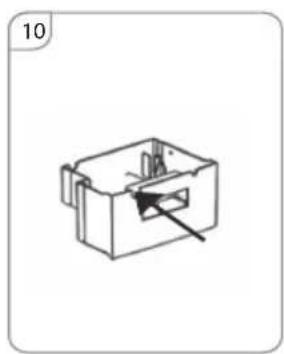
natural_image
Technical line drawing of a mechanical component with a central slot and arrow indicator (no text or symbols)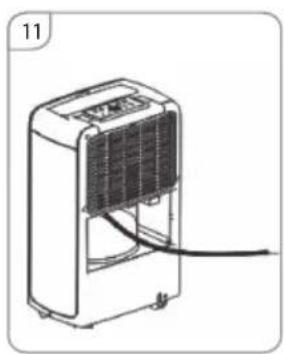
natural_image
Line drawing of a portable air conditioner unit with cooling fan and cable (no text or symbols)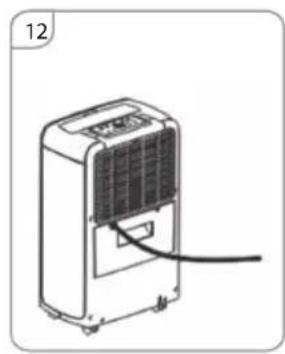
natural_image
Line drawing of a portable air conditioner unit with a coiled cable (no text or symbols)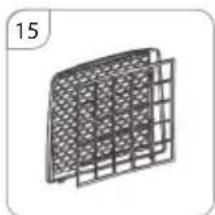
natural_image
3D wireframe grid structure with no text or symbols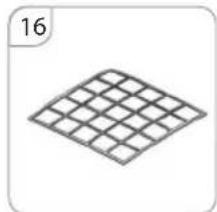
natural_image
Isometric view of a grid-patterned square structure (no text or symbols)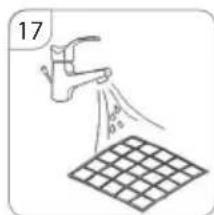
natural_image
Line drawing of a portable air conditioner unit placed in a room with a folded curtain and a 20 cm measurement label (no text or symbols on the device itself)УСТАНОВКА
natural_image
Simple line drawing of a box with a tool and a cross mark, no text or symbols presentnatural_image
Line drawing of a portable air conditioner unit with cooling panel and ventilation slots (no text or symbols)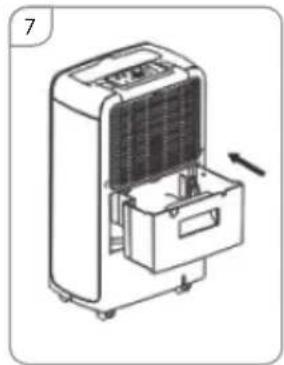
natural_image
Illustration of a portable air purifier with cooling unit and fan (no text or symbols)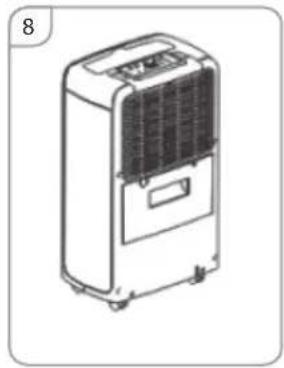
natural_image
Line drawing of a portable air conditioner unit (no text or symbols visible)natural_image
Illustration of a portable air conditioner unit with cooling fan and control panel (no text or symbols)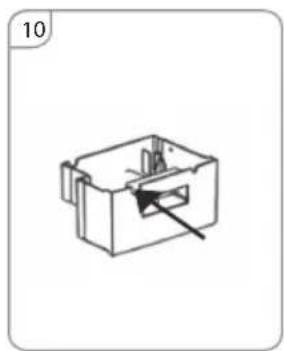
natural_image
Technical line drawing of a mechanical component with a central slot and an arrow indicating direction (no text or symbols)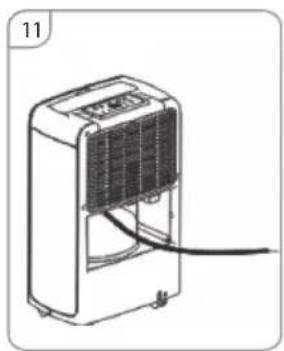
natural_image
Line drawing of a portable air conditioner unit with cooling fins and a cord (no text or symbols)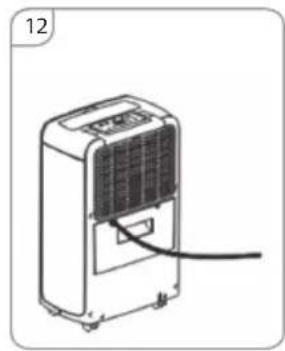
natural_image
Line drawing of a portable air conditioner unit with a coiled cable (no text or symbols)natural_image
Line drawing of a portable air conditioner unit with cooling fan and control panel (no text or symbols)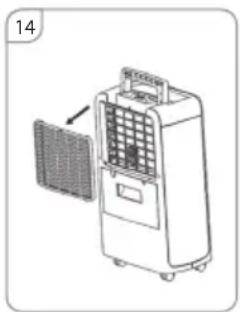
natural_image
Illustration of a portable air conditioner unit with a panel and fan (no text or symbols)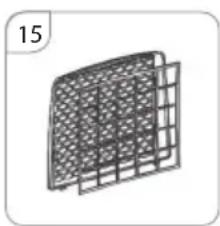
natural_image
3D wireframe diagram of a grid-like structure with no text or symbols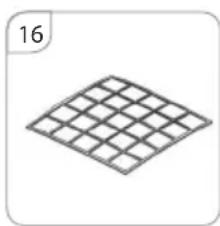
natural_image
Isometric view of a diamond-shaped grid pattern with no text or symbols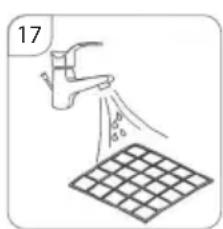
natural_image
Line drawing of a portable air conditioner unit in a room with a folded curtain and a 20 cm measurement label (no text or symbols on the device itself)MONTÁŽ
natural_image
Simple line drawing of a box with a plastic bag and a cross mark, no text or symbols presentZ nádoby na vodu nevyberajte plavák; v opačnom prípade sa zariadenie automaticky nevypne, ked'sa nádoba na vodu naplní. Následne sa voda preleje, následkom čoho sa môže poškodit' podlaha.
natural_image
Line drawing of a portable air conditioner unit (no text or symbols visible)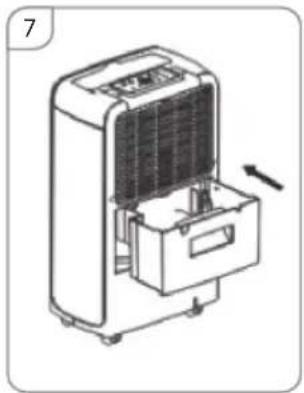
natural_image
Technical line drawing of a portable air conditioner unit with cooling fan and vent slots (no text or symbols)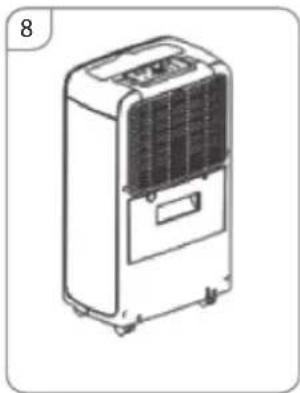
natural_image
Line drawing of a portable air conditioner unit (no text or symbols visible)natural_image
Illustration of a portable air conditioner unit with cooling fan and vent, showing airflow direction (no text or symbols)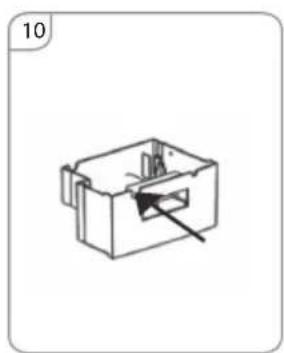
natural_image
Technical line drawing of a mechanical component with an arrow indicating a specific feature (no text or symbols present)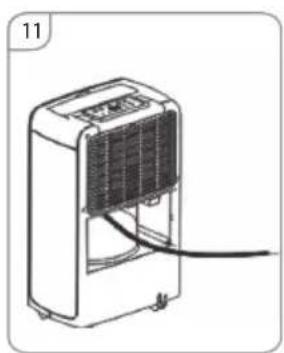
natural_image
Line drawing of a portable air conditioner unit with cooling fan and power cord (no text or symbols)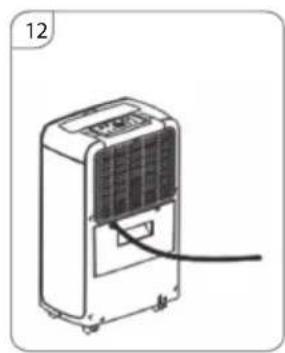
natural_image
Line drawing of a portable air conditioner unit with a coiled cable (no text or symbols)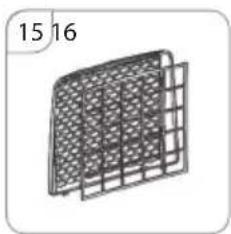
natural_image
3D wireframe diagram of a grid-like structure with no text or symbols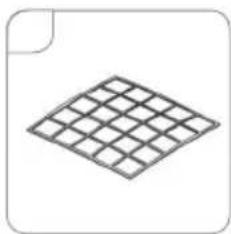
natural_image
Isometric view of a grid-patterned surface with no text or symbols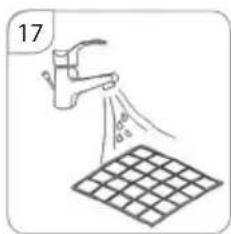
natural_image
Simple line drawing of a box with a plastic bag and a cross mark, no text or symbols presentnatural_image
Line drawing of a portable air conditioner unit (no text or symbols visible)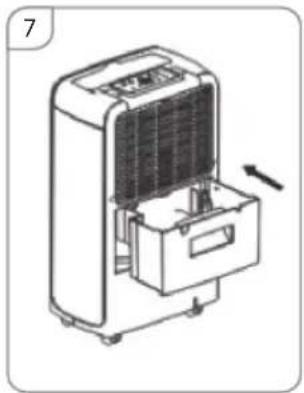
natural_image
Technical line drawing of a portable air conditioner unit with cooling fan and vent slots (no text or symbols)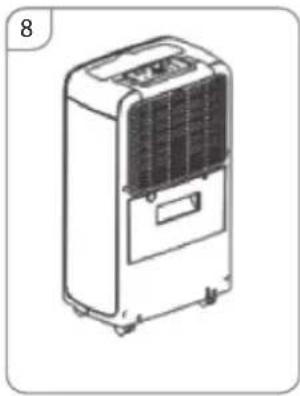
natural_image
Line drawing of a portable air conditioner unit (no text or symbols)natural_image
Illustration of a portable air conditioner unit with cooling fan and vent, showing airflow direction (no text or symbols)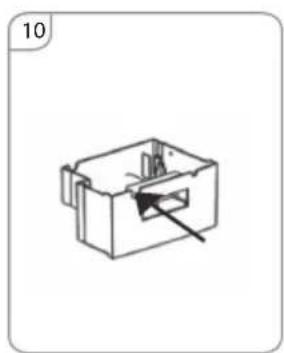
natural_image
Technical line drawing of a mechanical component with an arrow indicating a specific feature (no text or symbols present)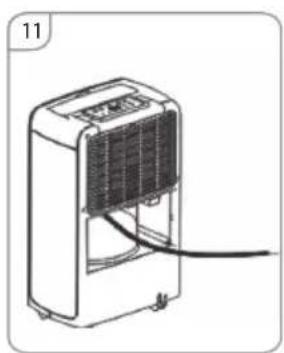
natural_image
Line drawing of a portable air conditioner unit with cooling fan and power cord (no text or symbols)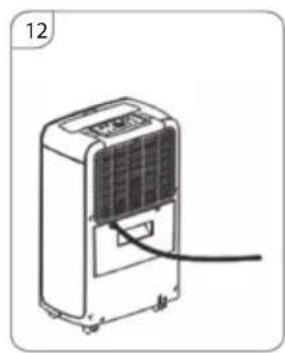
natural_image
Line drawing of a portable air conditioner unit with a coiled cable (no text or symbols)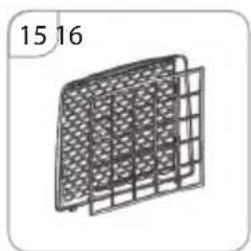
natural_image
3D wireframe diagram of a grid-patterned panel or enclosure with no visible text or symbols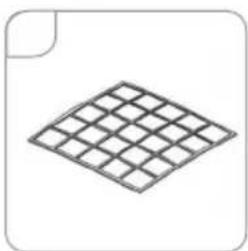
natural_image
Isometric view of a grid-patterned square structure (no text or symbols)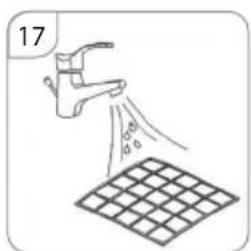
natural_image
Illustration of a hand spraying water onto a grid-patterned surface (no text or symbols)natural_image
Line drawing of a portable air conditioner unit in a room with a folded curtain and a 20 cm measurement label (no text or symbols on the device itself)INSTALACIÓN
natural_image
Simple line drawing of a box with a tool and a cross mark, no text or symbols presentnatural_image
Line drawing of a portable air conditioner unit with cooling fan and control panel (no text or symbols)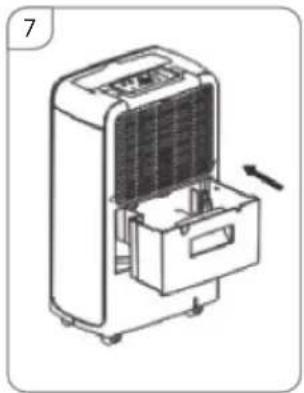
natural_image
Diagram of a portable air conditioner unit with cooling fan and internal components (no text or labels)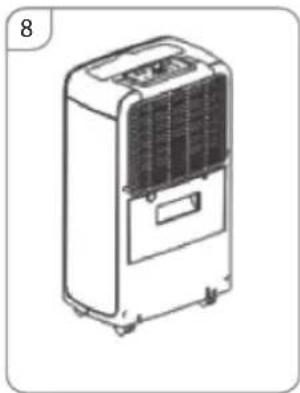
natural_image
Line drawing of a portable air conditioner unit (no text or symbols visible)natural_image
Line drawing of a portable air conditioner unit with cooling fan and vent, showing internal airflow direction (no text or symbols)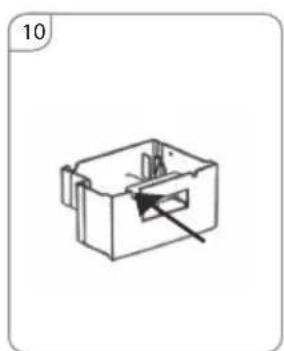
natural_image
Technical line drawing of a mechanical component with an arrow indicating a feature (no text or symbols)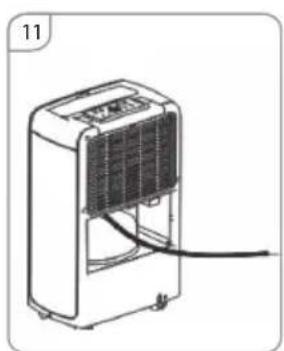
natural_image
Line drawing of a portable air conditioner unit with cooling fan and attached cable (no text or symbols)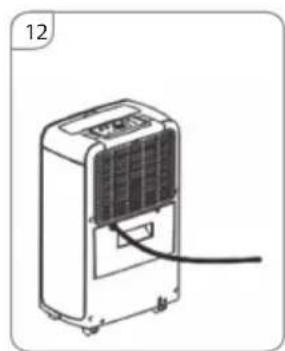
natural_image
Line drawing of a portable air conditioner unit with a coiled cable (no text or symbols)
[Non-Text]
[Non-Text]
[Non-Text]
[Non-Text]
[Non-Text]
[Non-Text]
[Non-Text]
[Non-Text]
[Non-Text]
[Non-Text]
[Non-Text]
[Non-Text]
[Non-Text]
[Non-Text]
[Non-Text]
[Non-Text]
[Non-Text]
[Non-Text]
[Non-Text]
[Non-Text]
[Non-Text]
[Non-Text]
[Non-Text]
[Non-Text]
[Non-Text]
[Non-Text]
[Non-Text]
[Non-Text]
[Non-Text]
[Non-Text]
[Non-Text]
[Non-Text]
[Non-Text]
[Non-Text]
[Non-Text]
[Non-Text]
[Non-Text]
[Non-Text]
[Non-Text]
[Non-Text]
[Non-Text]
[Non-Text]
[Non-Text]
[Non-Text]
[Non-Text]
[Non-Text]
(No text)
The Ground Truth image displays a single, solid horizontal line. According to Rule 2 (UNDERSCORE & LINE RULES), this is a stylistic or background line, not a placeholder underscore. Therefore, the OCR result must ignore it and output nothing or only meaningful text. The provided OCR content is "____", which consists of four underscores. This is an incorrect interpretation of the line as a placeholder, violating the rule that stylistic lines must be ignored. The OCR has hallucinated underscores where none should exist based on the GT's visual context. Hence, the OCR result is inconsistent with the Ground Truth.
The Ground Truth image displays a single, solid horizontal line. According to Rule 2 (UNDERSCORE & LINE RULES), this is a stylistic or background line, not a placeholder underscore. Therefore, the OCR result must ignore it and output nothing or only meaningful text. The provided OCR content is "____", which consists of four underscores. This is an incorrect interpretation of the line as a placeholder, violating the rule that stylistic lines must be ignored. The OCR has hallucinated underscores where none should exist based on the GT's visual context. Hence, the OCR result is inconsistent with the Ground Truth.
- WARUNKI BEZPIECZEŃSTWA
- INSTALACJA
- Special recommendations:
- Power sources
- Front
- Rear
- Additional accessories
- INSTALLATION
- Choosing the place for installation
- CONTROL PANEL
- - DISPLAY - this display has 3 functions:
- EMPTYING THE TANK
- ATTENTION
- CONTINUOUS WATER OUTLET
- Uwaga
- MAINTENANCE
- Note:
- CLEANING
- AIR FILTER
- STORING THE DEVICE
- If the dehumidifier is not used for a longer period of time:
- TROUBLE SHOOTING
- AUTOMATIC DEFROSTING, LOW OPERATING TEMPERATURE
- BEZPEČNOSTNÍ PODMÍNKY
- EINRICHTUNG
- УСТАНОВКА
- MONTÁŽ
- INSTALACIÓN
Brand : Eldom
Model : ColumbiaVac OPC1000
Category : Dehumidifier