
SMR 601 - Walkie-talkie SENCOR - Free user manual and instructions
Find the device manual for free SMR 601 SENCOR in PDF.


| Product Type | PMR446 Walkie Talkie |
| Frequency Band | 446 MHz (PMR446) |
| Number of Channels | 16 |
| CTCSS Sub-channels | 38 per channel |
| DCS Digital Codes | 83 per channel |
| Output Power (TX) | 0.5 W |
| Maximum Range | Up to 8 km (open area) |
| Battery Type | Rechargeable Ni-MH battery pack |
| Charging Time | 10–14 hours |
| Power Supply | 9.0 V DC / 300 mA adaptor (Model TEE 090P030) |
| VOX Function | Yes, with 3 sensitivity levels |
| Key Lock | Yes (locks UP, DOWN, MENU buttons) |
| Dual Watch Mode | Yes (monitors two channels) |
| LCD Backlight | Yes, activates for 5 seconds |
| Call Ring Tones | 15 selectable tones |
| Vibrator Alert | Yes (can be combined with call tone) |
| Roger Beep | Yes (user-selectable on/off) |
| Key Tone | Yes (user-selectable on/off) |
| Cleaning | Soft cloth dampened with water; do not use solvents |
| Safety Compliance | CE, Directive 2014/53/EU |
Frequently Asked Questions - SMR 601 SENCOR
User questions about SMR 601 SENCOR
0 question about this device. Answer the ones you know or ask your own.
Ask a new question about this device
Download the instructions for your Walkie-talkie in PDF format for free! Find your manual SMR 601 - SENCOR and take your electronic device back in hand. On this page are published all the documents necessary for the use of your device. SMR 601 by SENCOR.
USER MANUAL SMR 601 SENCOR
1. LCD Screen
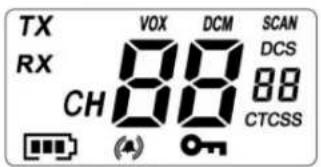
8 Channel Number. Changes from 1 to 16 as selected by the user.
88 CTCSS Code. Changes from 1 to 38 as selected by the user.
Displays the Battery change level. When the bars are reduced, the battery needs recharging.
TX Displayed when transmitting a signal.
RX Displayed when receiving a signal.
DCM Displayed when the Dual Watch function is turned ON.
DCS Displayed when the Digital Code System is turned On.
VOX Displayed when the VOX feature is enabled.
SCAN Displays when the PMR is scanning all channels.
On Displayed when the Key Lock feature is activated.
Displays the current Speaker volume level.
Displays when the call signal is ON.
(1) Displays when the vibrator function is activated.
2. Installation
2.1 Removing the Belt Clip
a. Pull the Belt Clip latch forward (away from the SMR 601) b. While pulling the Belt Clip latch, push up the Belt Clip as shown in Figure1.
2.2 Installing the Belt Clip
a. Slide the Belt Clip into the slot as shown in Figure2. A “click” indicates the Belt Clip is locked into position.
2.3 Installing the Battery pack
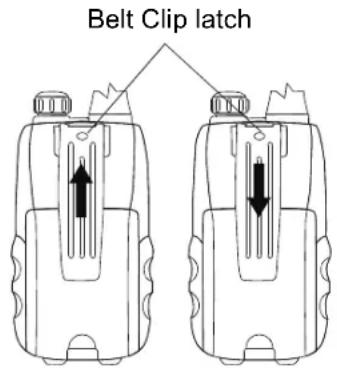
Figure 1
Figure 2
Figure 3
natural_image
Line drawing of a device casing with a handle and internal components (no text or symbols)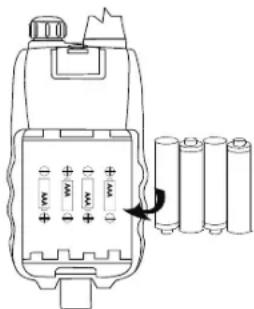
natural_image
Diagram of a battery pack with four batteries and one external resistor, showing internal structure without any text or symbols.Figure 4
natural_image
Line drawing of a device casing with an upward arrow and a circular arrow indicating rotation (no text or symbols)Caution: Observe the proper battery polarity orientation when installing batteries. Incorrect positioning can damage both the batteries and the unit.
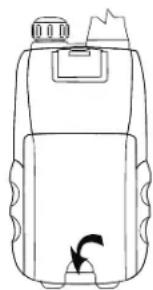
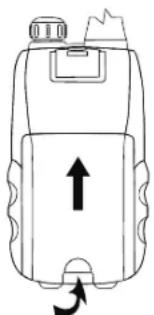
a. Slide down the Battery Compartment Cover.
b. Install the rechargeable battery pack by following the orientation as shown in Figure 3 (the arrow is showing and pointing upward.)
c. Replace the Battery Compartment Cover. See Figure 4.
Important
Read these Safety Warnings before you charge the batteries.
When placing the unit in the charger, use only the power supplies listed in the user instructions supplied with the SMR 601.
Don't try to recharge non-rechargeable batteries.
Make sure the battery compartment cover is securely locked in place when you are charging the batteries.
Dispose of used batteries safely and in a way that will not harm the environment—never try to burn them or put them anywhere, they could get burnt or punctured.
Don't leave dead batteries in your units.
They might leak if you do.
2.4 Charging the battery batteries
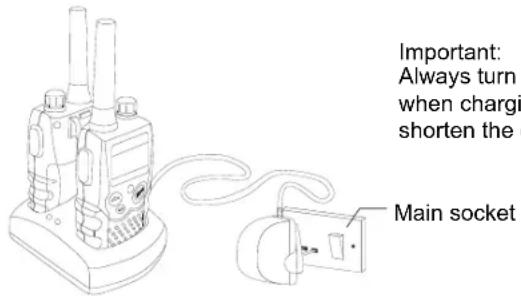
a. Insert the small plug on the end of the mains adaptor into the Power-in Connection Jack at the back of the desktop charger.
b. Plug the mains adaptor into a 230V AC, 50Hz main socket with the switch on the socket set to OFF.
c. Switch ON the main socket.
The SMR 601 must be charged using the mains adaptor provided. Using any other adaptor will result in non-compliance with EN62368-1 and will invalidate any approvals & warranty.
d. Place the units in the charge cradle in an upright position.
The Charge LED indicators will light up.
e. It takes about 10 hours to fully recharge the batteries if they are completely run down. New batteries take up to 14 hours to fully charge.
Important:
Always turn off the PMR units
when charging. This will
shorten the charging time.
f. Charging the battery batteries (using adaptor)
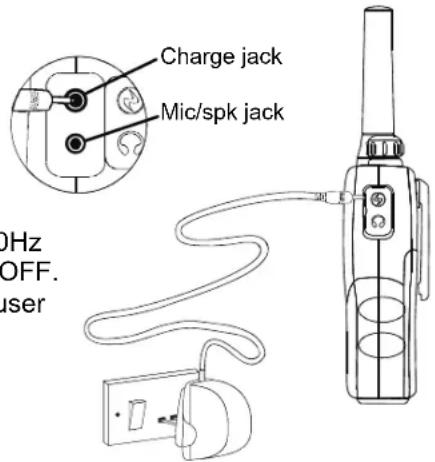
Lift the charge socket cover located on the right side of the handset.
Insert the round connector of the 9.0V DC/300mA adaptor into the charge jack.
Plug the mains adaptor into a 230V AC, 50Hz main socket with the switch on the socket set to OFF. Use only power supplies listed in the user instruction. AC Adaptor Model – TEE 090P030.
Then switch ON the main socket.
Battery meter
The battery meter is located in the left corner of the LCD Screen. It appears like a battery with three bars inside. These indicate the amount of power available. When the battery level reaches it minimum level in PMR on mode, unit will emit two beep tones and automatically the unit will power off.

The SMR 601 can detect the battery charge in 4 levels;
Battery charge at high level.
Battery charge at medium level.
Battery charge at low level. At this level, the SMR 601 will emit a “beep” sound for every 10 seconds in normal mode.
Important: Charge the unit for 10-14 hours.
Battery charge at very low level. When the battery level reach it minimum level, unit will emit two beep tone and automatically turn off the power and proceeds to watch mode.
Important: Charge the unit for 10-14 hours.
CAUTION : Risk of explosion if battery is replaced by an incorrect type. Disposed of used batteries according to the instructions.
Battery life
The SMR 601 has a built in power saver to make the batteries last longer. But when you are not using the units, turn them OFF to conserve battery power.
3. Operation
3.1 Transmitting range
The talk range depends on the environmental and terrain. It will be reach (up to about 8km) in wide open spaces, without obstructions such as hills or buildings. Don't try to use two PMR units which are less than 1.5m (5feet) apart. Otherwise, you may have experience interference.
Important safety warning
To reduce radio frequency exposure when you are using your SMR 601, hold the unit at least 5cm (2 inches) away from your face.
Never use your SMR 601 outdoors during a thunderstorm.
Don't use the SMR 601 in the rain.
If your SMR 601 gets wet, turn it off and remove he battery. Dry the battery compartment
and leave the cover off for a few hours. Don't use the unit until it is completely dry.
Keep the SMR 601 out of reach babies and young children.
3.2 Turning the Unit ON/OFF

To Turn ON;
a. Rotate the POWER/VOL button clockwise until the LCD Screen turns ON and displays the current channel.
To switch OFF;
b. Rotate the POWER/VOL button counter clockwise until the LCD screen turns blank.
Note: Every time you rotate the Power/Vol button to turn ON, the volume will also open. The volume level will increase or decrease by rotating the Power/Vol button.
3.3 Changing Channels
The SMR 601 has 16 available channels, to communicate with other SMR 601 users within a range, you must all have your SMR 601 tuned to the same channel.
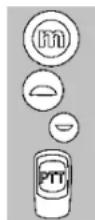
a. Press the MENU button once, the current channel number flashes on the LCD Screen.
b. Press the UP or DOWN button to select the desired channel. The channel changes from 1 to 16, or vice versa.
c. Press the PTT button to confirm the channel setting.
Note: Refer to the “Channel Table” section of this Owner’s Manual for detailed frequency listing.
3.3.1 Setting the CTCSS sub-channel
Each channel also has 38 sub-channels to let you set up group of users within the same channel for more private communication. If you have set the sub-channel, you can only communicate with other PMR users tuned to the same channel and sub-channel.
To turn the sub-channel function off, simply set the sub-channel
to 0 (zero). You can communicate with any SMR 601 user set to the same channel who also turns off the sub-channel operation (or whose have unit does not have the feature).
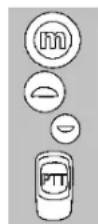
a. Press the MENU button twice, the current CTCSS sub-channel number flashes on the LCD Screen.
b. Press the UP or DOWN button to select one of the 38 CTCSS sub-channels.
c. Press the PTT button to confirm the sub-channel setting.

3.3.2 SETTING THE DCS ADVANCED DIGITAL CODE.
Each channel also has 83 digital codes to let you set up group of users for more secured private communication.
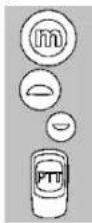
a. Press the MENU button 3 times. DCS code is blinking on the LCD screen.
b. Press the UP or DOWN button to select the desired DCS code.
c. Press the PTT button to confirm the DCS channel setting.
Transmitting and Receiving
The SMR 601 transmission is "one way-at-a-time." While you are speaking, you
• can not receive a transmission.
The SMR 601 is an open-license band. Always identify yourself when transmitting
• on the same channel.
3.4 Transmitting (sending a speech)
The unit is continuously in the Receive mode when the unit is turned ON and not transmitting. When a signal is received on the current channel, "RX" icon will be displayed on the LCD Screen and the receiver LED lights up.
3.5 Transmitting (sending a speech)
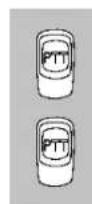
a. Press and hold the PTT (push to talk) button to transmit your voice. "TX" icon will be displayed on the LCD Screen.
b. Hold the unit in a vertical position with the MIC (Microphone) 5 cm away from the mouth. While holding the PTT button, speak into the MIC (microphone) in a normal tone of voice.
c. Release the PTT button when you have finished transmitting.
3.6 Monitor
You can use the Monitor feature to check for weak signals on the current channel.

a. Press and hold the MENU and DOWN buttons at the same time. "RX" icon will be displayed on the LCD Screen. Your SMR 601 will pick up signals on the current channel, including background noise.
b. Press the MENU button to stop the channel monitoring.
3.7 Setting the VOX (Voice Activated) Sensitivity
In VOX mode, the SMR 601 will transmit a signal only when it is activated by your voice or other sounds around you. The unit will transmit further for 2 seconds even if you stop talking.
The level of VOX sensitivity is shown by a number on the LCD Screen. At the highest level, the units will pickup softer noise (including background noise); at the lowest level, it will pick up only quite loud noise.
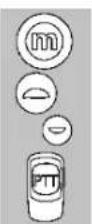
a. Press the MENU button 4 times, "VOX" icon will be displayed and "OFF" flashes on the LCD Screen.
b. Press the UP button to set the VOX sensitivity into maximum level (the maximum level is "3".) To deactivate the VOX function, press the DOWN button until "OF" appears on the LCD Screen.
c. Press the PTT button to confirm your setting. "VOX" will steadily appear on the LCD Screen as along as the VOX feature is activated.
VOX operation is not recommended if the SMR 601 will be used in a noisy or windy environment.
3.8 Activating the Auto Channel Scan
Channel scan perform searches for active signals in an endless loop for all 16 channels, 38 CTCSS codes and all 83 DCS codes.
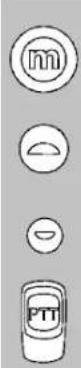
a. Press the MENU button 5 times, "SCAN" icon will display on LCD Screen.
b. Press the UP or DOWN button to begin scanning channels when an active signal is detected, channel scan pauses on the active channel.
c. Press the MENU button six times, CTCSS flashes on the LCD screen press the UP or DOWN button to begin scanning the CTCSS from 1-38.
d. Press the MENU button seven times, DCS flashes on the LCD screen. Press the UP or DOWN button to begin scanning DCS code 1-83.
e. Press the PTT button to confirm your setting.
3.9 Vibrator and Call alert
Your unit can alert you to incoming signal by emitting an audible call tone and vibration signal.
4 Call-Ring tone

You can send a Call-ring tone to other PMR users to give an alert that you want to communicate with them.
Press the CALL button
Yu will hear a ring tone for about two seconds; "TX" icon appears on the LCD Screen. Any other units within the transmitting range and tuned to the same channel and sub-channel (if applicable) will hear the Call-ring tone.
4.1 Selecting a Call- Ring tone
The SMR 601 is equipped with 15 different types of Call-Ring
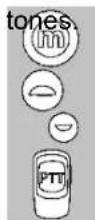
a. Press the MENU button 8 times, the "C 1" icon will display and blinking on the LCD Screen.
b. Press the UP or DOWN button to select the desired Call-ring tone. A respective Call-Ring tone sound will be played when changing from one tone to another.
c. Press the PTT button to confirm your setting.
4.2 Activating the Vibrator mode
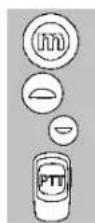
a. Press the MENU button 9 times; "3" flashes on the LCD Screen.
b. Press the UP or DOWN button to activate the vibrator function.
c. Press the PTT button to confirm your setting.
Note: Vibrator and Call tone can be activated at the same.
4.3 Setting the Roger Beep
The Roger Beep is a tone which is automatically transmitted whenever the PTT button is released. This alerts the receiving party to inform that you have intentionally ended the transmission, and you are now in receive mode.
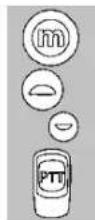
a. Press the MENU button 10 times, the "ON" icon is blinking on the LCD Screen.
b. Press the UP or DOWN button to select the Roger beep On/Off.
c. Press the PTT button to confirm your setting.
4.4 Setting the Key Tone ON or OFF
This feature allows the SMR 601 to emit a confirmation tone after pressing each
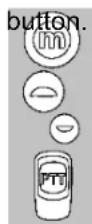
a. Press the MENU button 11 times, the "ON" icon is blinking on the LCD Screen.
b. Press the UP or DOWN button to select the Key tone On/Off.
c. Press the PTT button to confirm your setting.
4.5 Setting the Dual Watch Mode
Your SMR 601 is capable of monitoring two channels, the current and another (dual watch) channel. If the unit detects a signal on either channel, it will stop and receive the
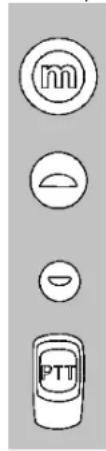
a. Press the MENU button 12 times, "DCM" icon will be displayed while "OF" flashes on the LCD Screen.
b. Press the UP or DOWN button to select the Dual Watch channel (1-16, except the current channel).
c. Continue pressing the MENU button to change the CTCSS code.
d. Press the UP or DOWN button to select the desired CTCSS code (1-38)
e. Continue pressing the MENU button to change the DCS code.
f. Press the UP or DOWN button to select the desired DCS code (1-83)
g. Press the PTT button to confirm your setting.
5 Auxiliary Features
5.1 Key Lock

The Key Lock feature allows user to disable the UP, DOWN and MENU buttons so that the SMR 601 settings could not be changed accidentally.
a. To activate the Key Lock feature, press and hold the MENU button until key lock “” icon appears on the LCD Screen.
b. To deactivate the key Lock feature, press and hold the MENU button until key lock "On" icon disappears on the LCD Screen.
Note: The PTT, and CALL buttons will remain functional even if the
Key Lock feature is activated.
5.2 LCD Screen Back Light

Every time the Power/Vol button is open (except PTT and CALL button), the LCD Screen back light will illuminate for 5 seconds.
5.3 Microphone/Earphone/Charge Jack

The SMR 601 is equipped with an auxiliary microphone, earphone, and charge jack located at the opposite side of the PTT button.
- Specifications
| Channels Available | 16 Channels |
| CTCSS Sub-channel 38 for each Channel | |
| Output Power (TX) 0.5 W | |
| Range Up to 8 Km. | |
Channel Frequency Table
| Channel | Frequency (MHz) | Channel | Frequency (MHz) | Channel | Frequency (MHz) | Channel | Frequency (MHz) |
| 1 | 446.00625 | 5 | 446.05625 | 9 | 446.10625 | 13 | 446.15625 |
| 2 | 446.01875 | 6 | 446.06875 | 10 | 446.11875 | 14 | 446.16875 |
| 3 | 446.03125 | 7 | 446.08125 | 11 | 446.13125 | 15 | 446.18125 |
| 4 | 446.04375 | 8 | 446.09375 | 12 | 446.14375 | 16 | 446.19375 |
7. Safety

CAUTION
Damaged Antenna
Do not use any SMR 601 that has a damaged antenna. If a damaged antenna comes in contact with the skin, a minor burn may result.
Batteries
All batteries can cause property damage and/or bodily injury such as burns if conductive material such as jewelry, keys, or beaded chains touches exposed terminals. The material may complete an electrical circuit (short circuit) and become quite hot. Exercise care in handling any charged battery, particularly when placing it inside a pocket, purse, or other container with metal objects.

WARNING
For Vehicles with an Air Bag
Do not place your SMR 601 in the area over an air bag or in the air bag deployment area. Air bags inflate with great force. If a SMR 601 is placed in the air bag deployment area and the air bag inflates, the SMR 601 may be propelled with great force and cause serious injury to the occupants of the vehicle.
Potentially Explosive Atmospheres
Turn your SMR 601 OFF when in any area with a potentially explosive atmosphere, unless it is a type especially qualified for such use (for example, Factory Mutual Approved). Sparks in such areas could cause an explosion or fire resulting in injury or even death.
Batteries
Do not replace or charge batteries in a potentially explosive atmosphere. Contact sparking may occur while installing or removing batteries and cause an explosion.
Blasting Caps and Areas
To avoid possible interference with blasting operations, turn your SMR 601 OFF near electrical blasting caps or in a “blasting area” or in areas posted: “Turn off the two way radio.” Obey all signs and instructions.
NOTE: Areas with potentially explosive atmospheres are often, but not always clearly marked. They include fueling areas such as below deck on boats; fuel or chemical transfer or storage facilities; areas where the air contains chemicals or particles, such as grain, dust, or metal powders; and any other area where you would normally be advised to turn off your vehicle engine.
8. Cleaning and Care
To clean your SMR 601, use a soft cloth dampened with water. Do not use cleaners or solvent, which may cause damage that may not be covered by guarantee.
Hereby Fast CR, a.s. declares that the SMR 601 type of radio equipment complies with Directive 2014/53 / EU. The full text of the EU Declaration of Conformity is available at the following Internet address: www.sencor.eu.
EN Disposal of Used Electrical & Electronic Equipment
The meaning of the symbol on the product, its accessory or packaging indicates that this product shall not be treated as household waste. Please, dispose of this equipment at your applicable collection point for the recycling of electrical & electronic equipments waste. In the European Union and Other European countries which there are separate collection systems for used electrical and electronic product. By ensuring the correct disposal of this product, you will help prevent potentially hazardous to the environment and to human health, which could otherwise be caused by unsuitable waste handling of this product. The recycling of materials will help conserve natural resources. Please do not therefore dispose of your old electrical and electronic equipment with your household waste. For more detailed information about recycling of this product, please contact your local city office, your household waste disposal service or the shop where you purchased the product.
natural_image
Line drawing of a walkie-talkie with two speakers and a connected power cord (no text or symbols)Dôležité:
V priebehu nabíjania ponechajte jednotky PMR vypnuté. Tým dosiahnete skrátenie času nabíjania.
Sietová
zásuvka
natural_image
Diagram of two identical car door holders with directional arrows indicating movement or force (no text or symbols)natural_image
Line drawing of a walkie-talkie with two speakers and a connected power cord (no text or symbols)Ważne:
W trakcie ładowania
Oprez: Pazite na polaritet baterija prilikom njihovog postavljanja. Nepravilno postavljanje može oštetiti baterije i uređaj.
a. Pomaknite poklopac odjeljka za baterije prema dolje.
b. Postavite punjivu bateriju pazeći na orijentaciju prikazanu na Slici 3 (strelica pokazuje prema gore).
c. Ponovo postavite poklopac baterija. Pregledajte Sliku 4.
Važno
natural_image
Line drawing of a walkie-talkie with two speakers and a power cord connected to a plug (no text or symbols)Važno:
a. Pritisnite tipku IZBORNIK 12 puta. Na zaslonu će se prikazati „DCM“ i treperit će „OFF“ (Isključeno).
b. Pritisnite tipku GORE ili DOLJE kako biste odabrali dvostruko praćenje kanala (1-16, osim trenutnog kanala).
c. Nastavite pritiskati tipku IZBORNIK kako biste promijenili CTCSS šifru.
d. Pritišćite tipke GORE i DOLJE za odabir CTCSS šifre (1-38).
e. Nastavite pritiskati tipku IZBORNIK kako biste promijenili DCS šifru.
f. Pritišćite tipke GORE i DOLJE za odabir DCS šifre (1-83).
g. Pritisnite tipku PTT za potvrdu postavke.
5 Pomoćne značajke
5.1 Zaključavanje tipkovnice

Kada je tipkovnica zaključana, tipke GORE, DOLJE i IZBORNIK zaključane su i postavke uređaja SMR 601 ne mogu se promijeniti nehotično.
a. Da biste zaključali tipkovnicu, držite pritisnutu tipku IZBORNIK dok se ikona zaključane tipkovnice
„0π“ ne prikaže na zaslonu.
b. Da biste otključali tipkovnicu, držite pritisnutu tipku IZBORNIK dok ikona zaključane tipkovnice
„0π“ ne nestane sa zaslona.
Oprez: Prilikom postavljanje baterije vodite računa o pravilnom polaritetu baterije. Nepravilno pozicioniranje može da ošteti obe baterije i uređaj.
a. Povucite naniže poklopac pregrade za baterije.
b. Postavite punjivu bateriju prateći orijentaciju kao što je prikazano u slici 3 (strelica pokazuje i uperena je prema naviše.)
c. Vratite poklopac baterije. Pogledajte Figuru 4.
Važno
natural_image
Line drawing of a walkie-talkie with attached electrical plug (no text or symbols)Važno:
Uvek isključite PMR
uređaje kada se
pune. Ovo će skratiti
vreme punjena.
Glavna utičnica
natural_image
Line drawing of a walkie-talkie connected to a power cord (no text or symbols)Σημαντικό:
natural_image
Two gray rectangular blocks arranged in an X-shape, with corner markers (no text or symbols)- LCD Screen
- Installation
- Removing the Belt Clip
- Installing the Belt Clip
- Installing the Battery pack
- Important
- Charging the battery batteries
- Then switch ON the main socket.
- Battery meter
- Battery life
- Operation
- Transmitting range
- Turning the Unit ON/OFF
- To Turn ON;
- To switch OFF;
- Changing Channels
- Setting the CTCSS sub-channel
- To turn the sub-channel function off, simply set the sub-channel
- SETTING THE DCS ADVANCED DIGITAL CODE.
- Transmitting and Receiving
- Transmitting (sending a speech)
- Transmitting (sending a speech)
- Monitor
- Setting the VOX (Voice Activated) Sensitivity
- Activating the Auto Channel Scan
- Vibrator and Call alert
- Call-Ring tone
- Press the CALL button
- Selecting a Call- Ring tone
- Activating the Vibrator mode
- Setting the Roger Beep
- Setting the Key Tone ON or OFF
- Setting the Dual Watch Mode
- Auxiliary Features
- Key Lock
- LCD Screen Back Light
- Microphone/Earphone/Charge Jack
- Safety
- CAUTION
- Damaged Antenna
- Batteries
- WARNING
- For Vehicles with an Air Bag
- Potentially Explosive Atmospheres
- Blasting Caps and Areas
- Cleaning and Care
- EN Disposal of Used Electrical & Electronic Equipment
- Važno
- Pomoćne značajke
- Zaključavanje tipkovnice
Brand : SENCOR
Model : SMR 601
Category : Walkie-talkie