
CDR-0816B - Tumble drier Vivax - Free user manual and instructions
Find the device manual for free CDR-0816B Vivax in PDF.

| Product Type | Condenser Tumble Dryer |
| Brand | Vivax |
| Model | CDR-0816B |
| Rated Capacity | 8.0 kg |
| Dimensions (L x W x H) | 615 x 595 x 845 mm |
| Weight | 41 kg |
| Rated Input Power | 2700 W |
| Rated Voltage | 220-240 V~ |
| Frequency | 50 Hz |
| Current | 16 A |
| Drying Programmes | Cotton Extra, Cotton Standard, Cotton Iron, Synthetics, Delicate, Mix, Wool, Jeans, Bed Linen, Sports, Shirts, My Cycle, Warm, Cool, Refresh, Time (20-60 min) |
| Additional Functions | Delay Start (1-24 h), Anti-Crease, Intensity (dryness level), Child Lock, My Cycle (favourite programme) |
| Display | LED with remaining time, error codes, filter and water container indicators |
| Lint Filter | Door-mounted filter, clean after each use |
| Heat Exchanger | Cleanable with water every 3 months |
| Water Container | Condensate tank, empty after each use |
| External Drainage | Optional condensate drain hose |
| Energy Consumption (Cotton Standard 8 kg) | 4.73 kWh |
| Energy Consumption (Cotton Standard 4 kg) | 2.55 kWh |
| Energy Consumption (Synthetic Standard 3.5 kg) | 1.65 kWh |
| Safety Features | Child lock, overheat protection, door lock, auto shut-off |
| Installation | Freestanding, leveling feet, do not install behind lockable door |
| Noise Level | Normal compressor and pump noise |
Frequently Asked Questions - CDR-0816B Vivax
User questions about CDR-0816B Vivax
0 question about this device. Answer the ones you know or ask your own.
Ask a new question about this device
Download the instructions for your Tumble drier in PDF format for free! Find your manual CDR-0816B - Vivax and take your electronic device back in hand. On this page are published all the documents necessary for the use of your device. CDR-0816B by Vivax.
USER MANUAL CDR-0816B Vivax
natural_image
Simple line drawing of an open book with no text or symbols visibleINSTALACIJA
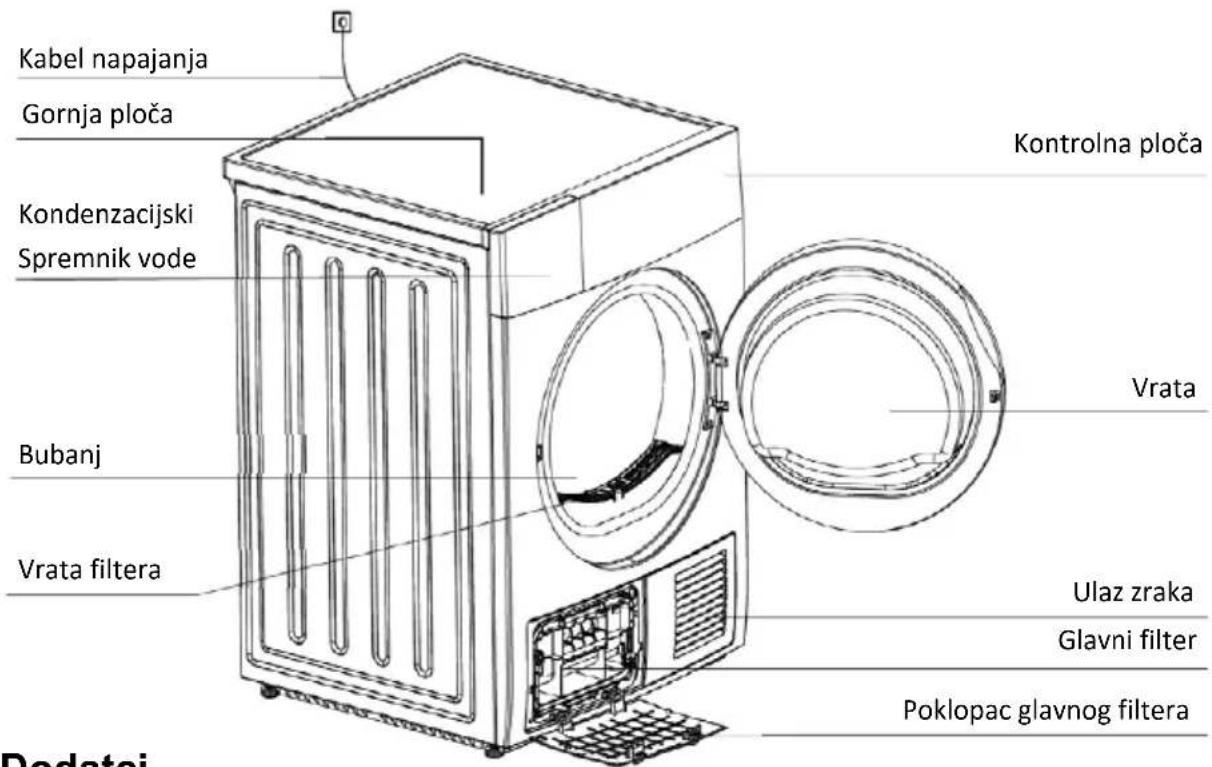
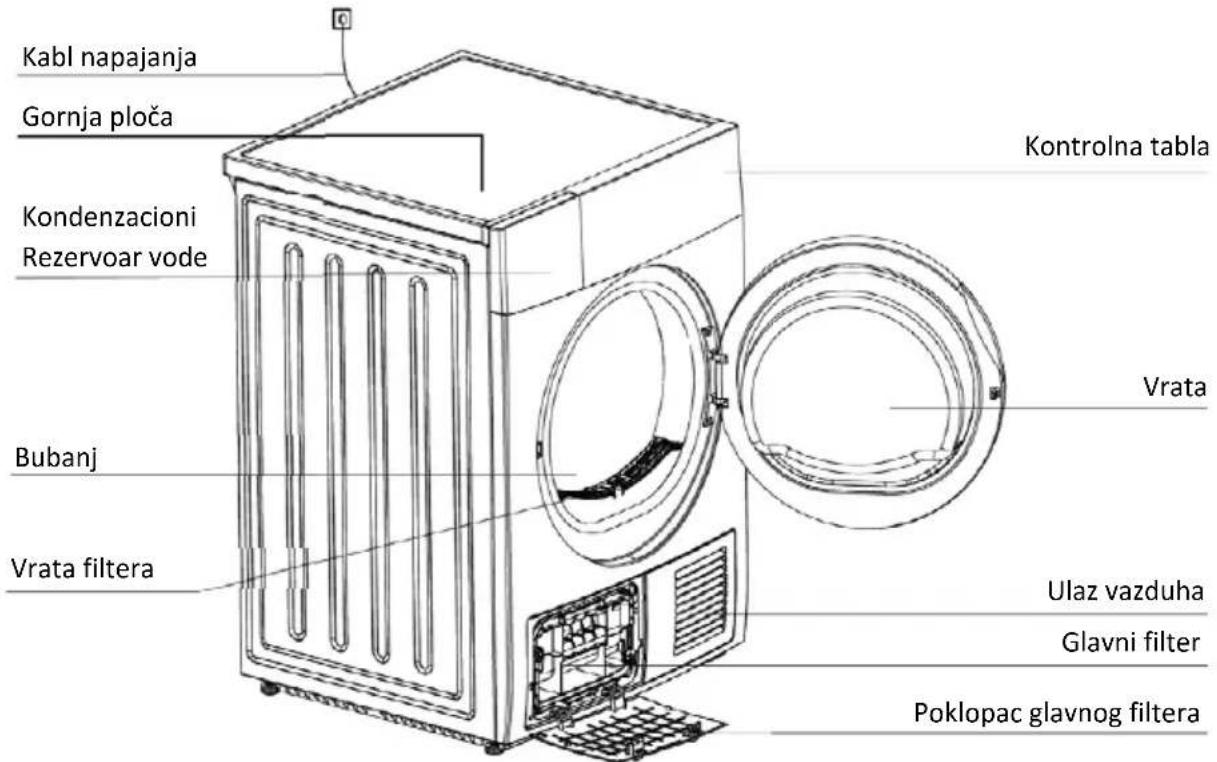
Opis proizvoda
Dodatci
Sljedeći dijelovi su opcionalni za specifične modele.
Ako vaša sušilica ima sljedeće dijelove, molimo da nosite rukavice i da ih instalirate prema dolje navedenim uputama.
natural_image
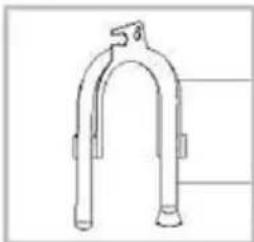
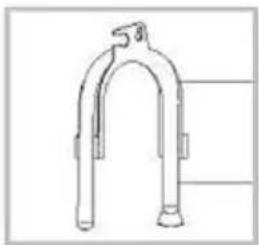
Line drawing of a U-shaped mechanical component with no text or symbolsDržač crijeva (opcionalno)
natural_image
Three diagrams showing a washing machine on a surface with cross marks, no text or symbols presentnatural_image
Diagram of a washing machine with a hand operating a tool, showing no text or symbols.natural_image
Hand using a power tool to adjust or install an electrical outlet (no text or symbols visible)natural_image
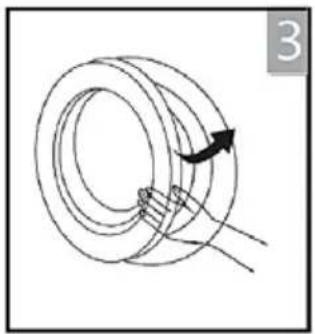
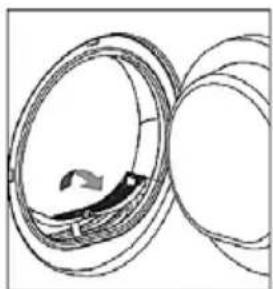
Diagram of a mechanical or fluidic system with concentric rings and a central rotating component (no text or symbols)Napunite rublje Zatvorite vrata

natural_image
Diagram of a mechanical component with a curved arrow indicating rotation (no text or symbols)Sušenje

Uklj. Odaberite program


1

natural_image
Simple line drawing of a hand holding a circular object with an arrow indicating rotation (no text or symbols)Otvorite vrata i izvadite rublje
natural_image
Diagram showing a mechanical assembly with arrows indicating direction (no text or symbols)Izvucite kondenzacijski spremnik vode
natural_image
Illustration of a computer with a monitor and mouse, no visible text or symbolsIspraznite vodu iz spremnika
natural_image
Diagram of curved mechanical or electrical components with an upward arrow, no visible text or symbolsPodignite i očistite filter

Odspojite
napajanje

Napomena!
- Ako koristite utičnicu napajanja s prekidačem, molimo vas da pritisnete prekidač i izravno isključite napajanje.
■ Prije svakog sušenja

Napomena!
natural_image
Line drawing of hands installing or adjusting a mechanical component (no text or symbols)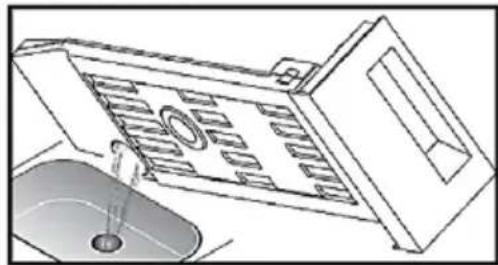
natural_image
Line drawing of a kitchen sink with a drain and a door, showing no text or symbols
Upozorenje
- Ispraznite kondenzacijski spremnik vode nakon svake uporabe. Program sušenja će se pauzirati i ikona za pun spremnik „FUL“ će se uključiti ako je spremnik vode pun tijekom procesa sušenja. Nakon pražnjenja spremnika, sušilica se može ponovno pokrenuti pritiskom na tipku [Start/Pause].
• Nemojte piti kondenziranu vodu.
• Nemojte koristiti sušilicu bez spremnika vode.
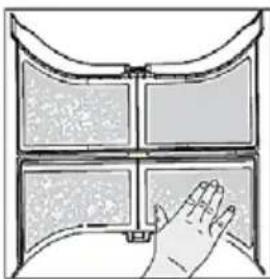
Čišćenje filtera u vratima
- Otvorite vrata.
- Izvadite filter u vratima.
- Očistite filter; obrišite nakupljene konce na filteru. Za lakše čišćenje, možete ga očistiti u vodi.
- Prije ponovnog postavljanja filtar je potrebno temeljito osušiti.
- Vratite filter u okvir vrata.
natural_image
Diagram of a coiled cable or wire with a central connector and directional arrow (no text or symbols)Filter u vratima
natural_image
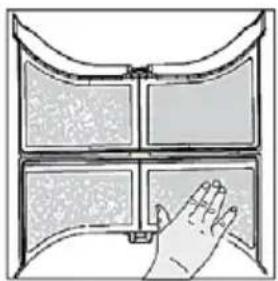
Hand touching a panel with four panels, showing surface texture and shading (no text or symbols)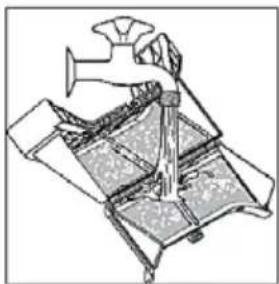
natural_image
Technical line drawing of a mechanical device with no visible text or symbols
Napomena!
- Materijal akumuliran na filteru će blokirati cirkulaciju zraka, što će uzrokovati produljenje vremena sušenja i potrošnju energije.
Preporuka je da filter u vratima očistite nakon svakog sušenja! Prilikom umetanja filtera, pripazite na smijer i orjentaciju filtera. - Obavezno isključite kabel napajnja prije čišćenja!
• Nemojte koristiti sušilicu bez filtera! - Očistite filter nakon svake uporabe da biste spriječili akumulaciju tkanine u sušilici.
natural_image
Line drawing of a computer monitor with ventilation slots and an arrow pointing to the front panel (no text or symbols)
natural_image
Diagram of a computer monitor with ventilation slots and airflow arrows (no text or symbols)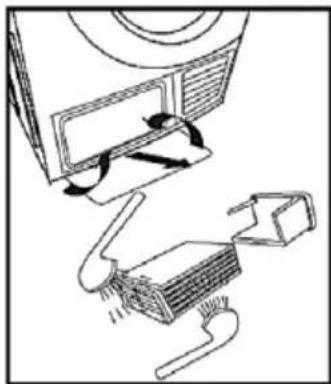
natural_image
Diagram showing a device with arrows indicating flow or movement, no text or symbols present
Upozorenje!
- Čistite izmjenjivač topline samo čistom vodom; Nemojte koristiti čvrste ili oštre predmete! Sušilic se ne smije koristiti bez izmjenjivača topline!
natural_image
Line drawing of a computer monitor with ventilation slots and a scroll wheel (no text or symbols)■ Rješavanje problema
| Prikaz Razlog Rješenja | ||
| E30 Problem s grijanjem | Molimo da kontaktirate svoj lokalni servisni centar ukoliko se problem ponavlja | |
| E32 Gređška na senzoru vlage | ||
| E33 | Greška na senzoru temperature | |

Upozorenje
natural_image
Simple line drawing of an open book with no text or symbols visibleINSTALACIJA
Opis proizvoda
Dodaci
natural_image
Line drawing of a U-shaped mechanical component with no text or symbolsDržač creva (opcionalno)
Odvodno crevo kondenzata (opcionalno)
Instalacija
Otpakivanje uređaja

Svu ambalažu držite podalje od dece
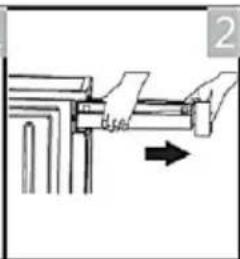
Koristite klešta da biste odstranili odvodno crevo iz konektora creva.
Umetnite
spoljašnje
crevo za
odvod.
Stavite držač creva u umivaonik ili bilo koji rezervoar za vodu.
Prevoz
natural_image
Simple line drawing of a container with a cross mark, resting on a textured surface (no text or symbols)
natural_image
Simple line drawing of a mechanical setup with a circular component and cross symbol, no text or labels present.
natural_image
Simple line drawing of a container with a circular inlet and cross symbol, placed on a surface (no text or labels)Podešavanje stabilnosti
Jednom kada postavite sušaru u radni položaj, proverite da li je sušara ravna pomoću libele. Ukoliko nije, prilagodite nagib pomoću nogica koristeći potreban alat. Sušara mora stajati na podlozi stabilno i bez „ljuljanja“.
natural_image
Diagram of a washing machine with a red-handled tool inside, showing no text or symbols
Uklj. Odaberite program


odaberite dodatnu
funkciju (opcija)
Start
Nakon sušenja
Zvučni signal ili „0:00“ na prikazu.
Izvucite kondenzacioni rezervoar vode

Napomena!
- Ako koristite utičnicu napajanja s prekidačem, molimo vas da pritisnete prekidač i direktno isključite napajanje.
■ Pre svakog sušenja

Napomena!
natural_image
Line drawing of hands operating a mechanical component (no text or symbols)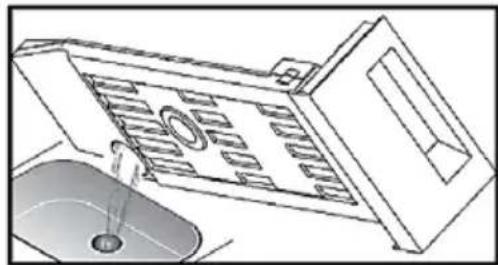
natural_image
Line drawing of a kitchen appliance with a drain and sink, showing internal components (no text or symbols)Upozorenje
natural_image
Diagram of a coiled cable or rope structure with a central component and directional arrow (no text or symbols)Filter u vratima
natural_image
Hand touching a grid of four rectangular panels, no text or symbols visible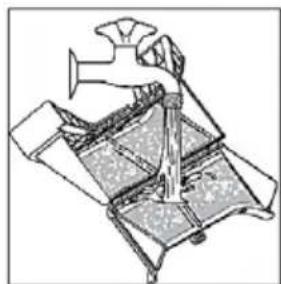
natural_image
Technical line drawing of a mechanical assembly or device with no visible text or symbols
Napomena!
- Materijal akumuliran na filteru će blokirati cirkulaciju vazduha, što će uzrokovati produženje vremena sušenja i potrošnju energije.
Preporuka je da filter u vratima očistite nakon svakog sušenja! Prilikom stavljanja filtera, pripazite na smer i orjentaciju filtera. - Obavezno isključite kabl napajnja pre čišćenja!
• Nemojte koristiti sušilicu bez filtera! - Očistite filter nakon svake upotrebe da biste sprečili akumulaciju tkanine u sušilici.
natural_image
Line drawing of a computer monitor with ventilation grilles and ventilation ducts (no text or symbols)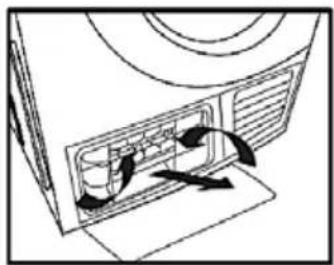
natural_image
Diagram of a computer monitor with ventilation slots and airflow arrows indicating internal components (no text or symbols)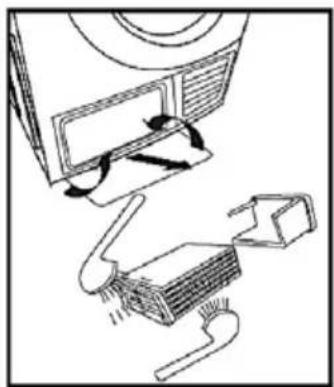
natural_image
Diagram showing a device with arrows indicating flow or movement, no text or symbols present
Upozorenje!
- Čistite izmjenjivač toplote samo čistom vodom; Nemojte koristiti čvrste ili oštre predmete! Sušilica se ne sme koristiti bez izmjenjivača toplote!

natural_image
Line drawing of a computer monitor with ventilation grilles and ventilation duct (no text or symbols)natural_image
Simple line drawing of an open book with no text or symbols visibleИНСТАЛАЦИЈА
Опис на производот
natural_image
Line drawing of a U-shaped mechanical component with no text or symbolsflowchart
graph LR
    A["3D cube"] --> B["Box with arrow"]
    B --> C["Washing Machine"]
ПРЕДУПРЕДУВАЊЕ:
natural_image
Three diagrams showing a container with cross symbols placed on a surface, no text or symbols present.natural_image
Hand using a power tool to clean or install an electrical outlet (no text or symbols visible)natural_image
Diagram of a biological or mechanical process showing a curved structure with an arrow indicating direction (no text or symbols)Наполнете со алишта

natural_image
Diagram of a coiled cable or wire with an arrow indicating direction (no text or symbols)natural_image
Simple line drawing of a hand holding a circular object with an arrow indicating rotation (no text or symbols)natural_image
Diagram showing two hands holding a mechanical component with an arrow indicating direction (no text or symbols)natural_image
Illustration of a computer mouse and a closed door with a grid pattern (no text or symbols)natural_image
Diagram of curved pipe or tube structures with an upward arrow, no text or symbols presentnatural_image
Simple line drawing of a wall socket with an arrow indicating direction (no text or symbols)natural_image
Line drawing of hands installing or adjusting a mechanical component (no text or symbols)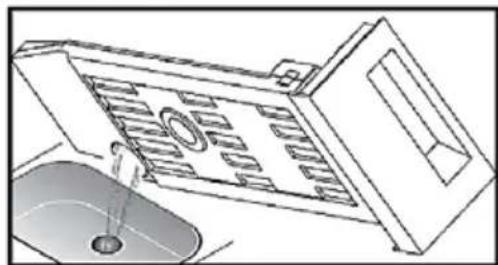
natural_image
Line drawing of a kitchen appliance with a sink and a person standing near the door (no text or symbols)
Предупредување
natural_image
Diagram of concentric circular loops with a central black segment and a small arrow, no text or symbols present.филтер во вратата
natural_image
Illustration of a hand touching a four-panel window with a textured surface (no text or symbols)
natural_image
Technical line drawing of a mechanical assembly or device with no visible text or symbols
Напомена!
natural_image
Line drawing of a computer monitor with ventilation slots and an arrow pointing to the front panel (no text or symbols)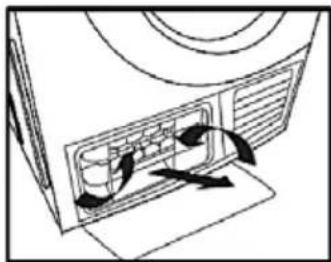
natural_image
Diagram of a computer monitor with ventilation slots and airflow arrows (no text or symbols)
natural_image
Diagram showing a device with airflow arrows and a mechanical component, no text or symbols present
Предупредување
natural_image
Technical line drawing of a computer monitor with ventilation grilles and a scroll wheel (no text or symbols)natural_image
Simple line drawing of an open book with no text or symbols visibleINSTALIMI
natural_image
Line drawing of a U-shaped mechanical component with no text or symbolsMbajtësi i zorrës
(opsionale)
flowchart
graph LR
    A["3D Cube"] --> B["Mechanical Component"]
    B --> C["Washing Machine"]
PARALAJMËRIM:
natural_image
Three identical diagrams showing a washing machine on a gravel surface, with no text or symbols present.natural_image
Diagram of a washing machine with a hand operating a button, showing no text or symbols1. On/Off
natural_image
Line drawing of hands operating a mechanical bracket or fixture (no text or symbols present)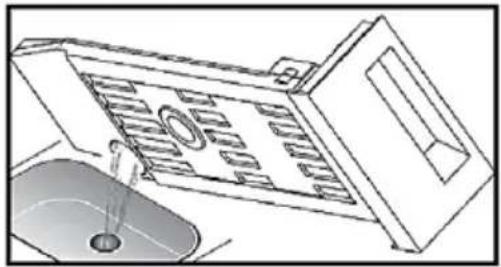
natural_image
Line drawing of a kitchen appliance with a drain and sink (no text or symbols)
Paralajmërim!
Clean the Lint door filter
natural_image
Diagram of a coiled cable or rope with a central rotating component (no text or symbols)Filter door
natural_image
Illustration of a hand touching a grid panel with four panels (no text or symbols)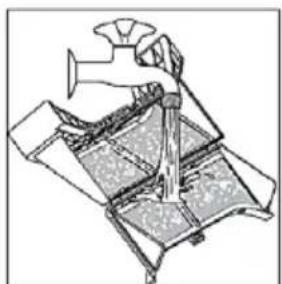
natural_image
Technical line drawing of a mechanical assembly or lifting device (no text or symbols visible)Lani kondensatorin e ajrit
natural_image
Technical line drawing of a mechanical component with internal structure and mounting bracket (no text or symbols)
natural_image
Diagram of a computer monitor with ventilation slots and airflow arrows (no text or symbols)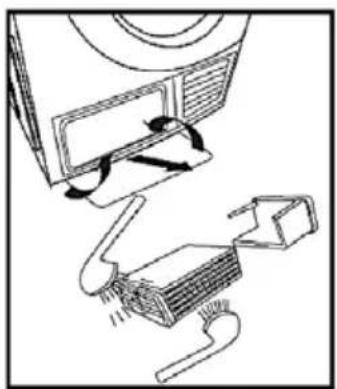
natural_image
Diagram of a device with a computer monitor and cable being inserted, showing mechanical components (no text or symbols)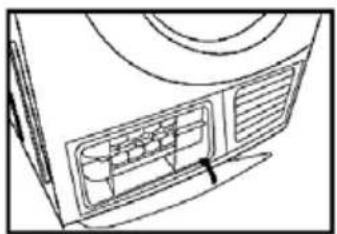
natural_image
Line drawing of a computer monitor with ventilation grilles and a scroll wheel (no text or symbols)
Paralajmërim!
| Ekrani Arsyeja Zgjidhjet | |
| E30 Heating problem | Please contact your local service center if the problem persists |
| E32 Humidity sensor error | |
| E33 Temperature sensor error |

Paralajmërim!
natural_image
Simple line drawing of an open book with no text or symbols visibleNAMESTITEV
Opis izdelka
natural_image
Line drawing of a U-shaped mechanical component with no text or symbolsflowchart
graph LR
    A["3D cube"] --> B["Mechanical device with arrow"]
    B --> C["Washing machine"]
OPOZORILO:
natural_image
Simple line drawing of a washing machine resting on a surface with a cross mark (no text or symbols)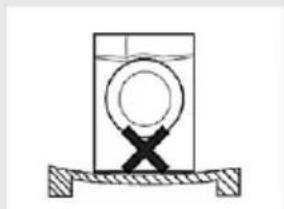
natural_image
Simple line drawing of a mechanical assembly with a central circular component and cross symbol (no text or labels)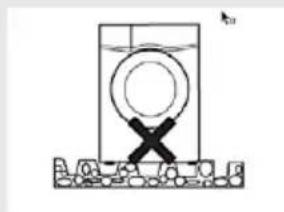
natural_image
Simple line drawing of a container with a circular inlet and cross symbol, placed on a textured base (no text or labels)Prilagoditev nivoja
natural_image
Diagram of a washing machine with a valve and control panel, no text or symbols present1. On/Off (Vklop/izklop)
natural_image
Line drawing of hands installing or adjusting a mechanical component (no text or symbols)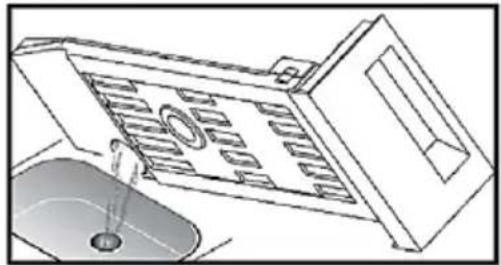
natural_image
Line drawing of a kitchen sink with a person standing near the drain (no text or symbols)Opozorilo
natural_image
Diagram of overlapping circular structures with a central arrow, no text or symbols presentFilter v vratih
natural_image
Illustration of a hand touching a four-panel wall with textured surfaces (no text or symbols)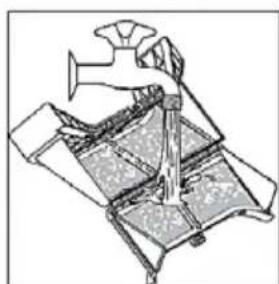
natural_image
Technical line drawing of a mechanical assembly or assembly (no visible text or symbols)
Opomba!
natural_image
Line drawing of a computer monitor with ventilation grilles and ventilation duct (no text or symbols)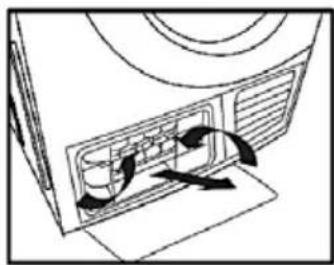
natural_image
Diagram of a computer monitor with ventilation slots and airflow arrows (no text or symbols)
natural_image
Diagram showing a device with arrows indicating flow or movement, no text or symbols present
natural_image
Line drawing of a computer monitor with ventilation slots and a scroll wheel (no text or symbols)■ Reševanje težav
- Safety Instructions .... 2
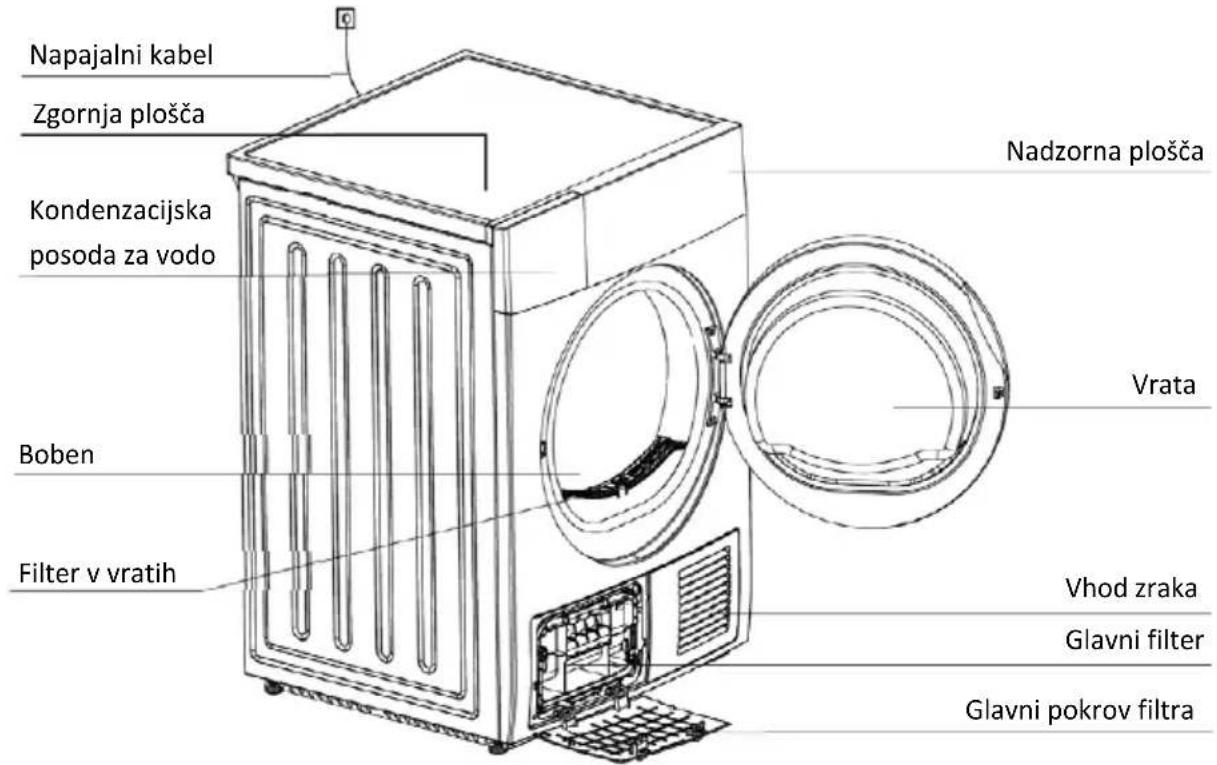
INSTALLATION
• Product Description.... 7
- Installation 7
OPERATIONS
- Quick Start....10
• Before Each Drying....10
• Control Panel 13 - Functions ...... 14
• Drying Programmes Table.... 17
MAINTENANCE
- Cleaning And Care.... 19
- Troubleshooting 21
- Technical Specifications 22
- Disposal of electrical and electronic equipment EU Declaration of Conformity 23
• Product Fiches.... End of Manual

WARNING: Please read Instruction manual carefully before you start to use appliance! Keep the operation instructions handy for later use.
If the appliance is sold or passed on then ensure that the new owner always receives these operation instructions.

Warning!
- To prevent any damages to your and other's life or property, you have to follow the safety notes.
Safety Instructions
- This product belongs to Category electrical appliances, and only for drying textiles which have been washed with water in the household. Please pay attention to the safety of power use during the operation!
- The power source with reliable earthing must be used. Its earth wire must be buried under the ground and shall not be connected with the public utilities such as city water pipe or gas pipe etc. The earth wire and null wire shall be distinguished and shall not be connected together.
- The power wire shall be met IEC and must be able to withstand the current above 16A. To ensure your and your family's safety, please make improvement immediately if any power use at your home does not meet the above-mentioned requirements.
- Do not put more load than recommended. Obey the maximum load volume. See the related chapter in the user manual.
- That the tumble dryer is not to be used if industrial chemicals have been used for cleaning.
- Do not dry unwashed items in the tumble dryer.
-
Items that have been soiled with substances such as cooking oil, acetone, alcohol, petrol, kerosene, spot removers, turpentine, waxes and wax removers should be washed in hot water with an extra amount of detergent before being dried in the tumble dryer.
-
Items such as foam rubber (latex foam), shower caps, waterproof textiles, rubber backed articles and clothes or pillows fitted with foam rubber pads should not be dried in the tumble dryer.
- Fabric softeners, or similar products, should be used as specified by the fabric softener instructions.
- The final part of a tumble dryer cycle occurs without heat (cool down cycle) to ensure that the items are left at a temperature that ensures that the items will not be damaged.
- The lint trap has to be cleaned frequently.
- The lint must not to be allowed to accumulate around the tumble dryer.
- Adequate ventilation has to be provided to avoid the back flow of gases into the room from appliance burning other fuels, including open fires. Appliances with ventilation openings in the base, instructions that a carpet must not obstruct the openings
- The exhaust air must not be discharged into a flue which is used for exhausting fumes from appliance burning gas or other fuels.
- The appliance must not be install behind a lockable door, a sliding door or a door with a hinge on the opposite side to that of the tumble dryer. In such a way that a full opening of the tumble dryer door is restricted.
- Oil-affected items can ignite spontaneously, especially when exposed to heat sources such as in a tumble dryer. The items become warm, causing an oxidation reaction in the oil. Oxidation creates heat. If the heat cannot escape, the items can become hot enough to catch fire. Piling, stacking or storing oil-affected items can prevent heat from escaping and so create a fire hazard.
- If it is unavoidable that fabrics that contain vegetable or cooking oil or have been contaminated by hair care
products be placed in a tumble dryer they should first be washed in hot water with extra detergent-this will reduce, but not eliminate, the hazard.
- The appliance should not be overturned during normal use or maintenance.
- Remove all objects from pockets such as lighters and matches.
- This appliance can be used by children aged from 8 years and above and persons with reduced physical, sensory or mental capabilities or lack of experience and knowledge if they have been given supervision or instruction concerning use of the appliance in a safe way and understand the hazards involved.
• Children shall not play with the appliance.
- Cleaning and user maintenance shall not be made by children without supervision
- Children should be supervised to ensure that they do not play with the appliance.
- If the power cable is damaged, it must be replaced by the manufacturer, its service agent or similarly qualified persons in orderto avoid a hazard.
- This appliance is for indoor use only.
- The openings must not be obstructed by a carpet.
- Children of less than 3 years should be kept away unless continuously supervised.
- Always close the door after use. In this way you will avoid the danger of:
-
Children climbing onto or into the dryer or hiding things in it.
-
Pets or other small animals climbing into it.
- If the appliance appear high temperature abnormally, please draw the mail plug immediately.
- WARNING: The appliance must not be supplied through an external switching device, such as a timer, or connected to a circuit that is regularly switched on and off by a utility.
- Remove all packages before using the appliance. Otherwise, serious damage may result.

Warning!
Never stop a tumble dryer before the end of the drying cycle unless all items are quickly removed and spread out so that the heat is dissipated.
Electric shock hazard!
- Do not draw the power cord forcefully to pull out the mains plug.
- Please do not plug/draw the mains plug with wet hands.
- Do not damage the power cord and the power plug.
Injury danger!
- Do not disassemble and install the dryer under no instruction or supervision.
- Do not stack this dryer on washing machine without stacking kits.(if want stacking on washing machine, please purchase the independent parts and it must be installed by the manufacturer, its service agent or similarly qualified persons in order to avoid a hazard.)
- Do not lean on the opened door of the dryer.
- Do not put any pyrotoxin on the dryer, such as the candle, electric cooker-
Damage danger!
- Do not dry over the rated capacity.
- Do not operate the dryer without the filter door and filter base.
- Do not dry the clothes before being spun.
- Do not expose the dryer directly under the sun, and indoor use only.
- Do not install the dryer in humid and drenching environment.
- While cleaning and maintenance, please do remember to pull out the power plug and do not directly wash the dryer with water.
Explosion danger
- Please do not dry the clothes with some flammable substances such as coal oil, alcohol or there will be explosion.
| Model | Current | Rated capacity |
| CDR-0816B 16 A 8 kg |
Please read carefully Instruction manual before you start to use appliance!

natural_image
Simple line drawing of an open book with no text or symbols visibleINSTALLATION
Product Description

Accessories
The following parts are optional for specific models.
If your dryer has following parts, please wear gloves and install them following the instruction below.
natural_image
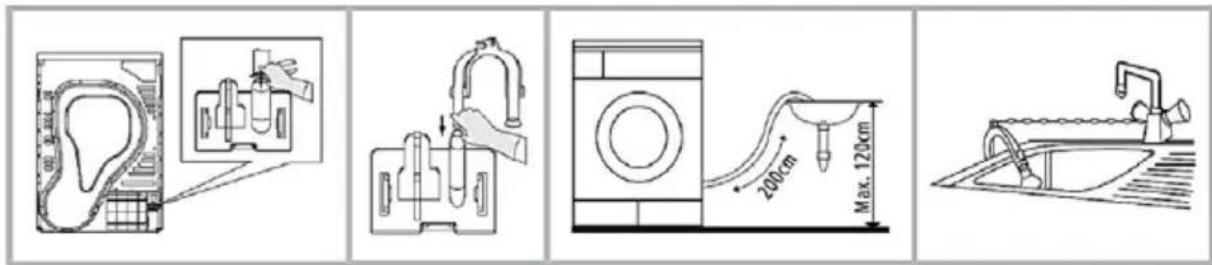
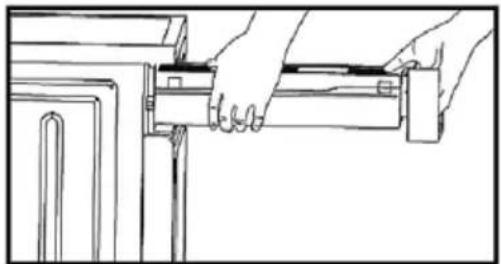
Line drawing of a U-shaped mechanical component with no text or symbolsHose holder (optional)
Condensing drain hose (optional)
Installation
Unpacking the dryer machine
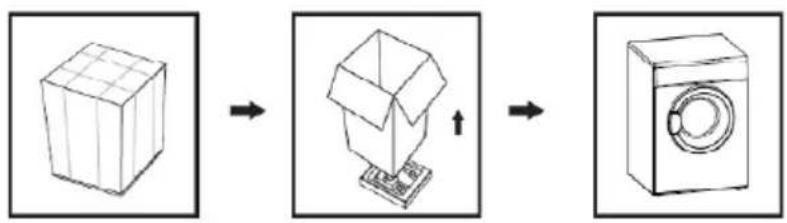
flowchart
graph LR
    A["3D Cube"] --> B["Box with Box"]
    B --> C["Washing Machine"]
WARNING:
Packaging material (e.g. Foils, Styrofoam) can be dangerous for children. There is a risk of suffocation!
Keep all packaging well away from children.
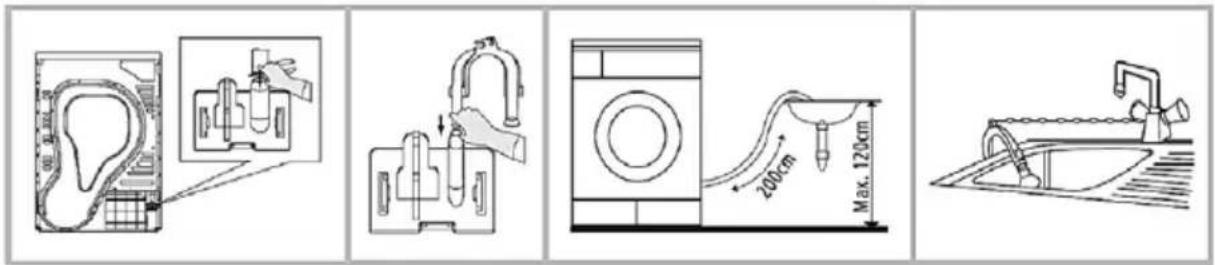
Use pliers to remove the drain hose from the hose connector.
Insert the external drainage hose.
Put the hose holder on the washing basin or any other sink.
Transport
Move cautiously. Do not grasp any salient parts of machine. The machine door can not be used as the handle for delivery. If the dryer can't be transported erectly, the dryer could be slant to right less than 30^ .
Risk of injury and damage!
Improper handling of the appliance may result in injury
The appliance is very heavy. Never transport or carry the appliance alone; always with the assistance of another person.
- Remove all obstacles on the transport route and from the installation location, e.g. open doors and clear away objects lying on the floor.
- Do not use the open door as a handhold.
- Remove all package material before using the appliance.
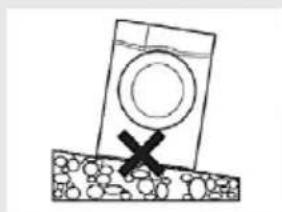
- Before setting up the tumble dryer, check it for any externally visible damage. Do not install or use a damaged tumble dryer.
- Do not install the tumble dryer in a room where there is a risk of frost occurring. At temperatures around freezing point the tumble dryer may not be able to operate properly. There is a risk of damage if the condensed water is allowed to freeze in the pump and hoses.
- Do not restrict the floor clearance through deep pile carpets, strips of wood or similar. This might cause heat built-up which would interfere with the operation of the appliance.

Warning!
Children can become entangled in the packaging film or swallow small parts and suffocate. Do not allow children to play with the packaging.
The appliance must not be installed behind a lockable door, a sliding door or a door with a hinge on the opposite side to that of the tumble dryer, in such a way that a full opening of the tumble dryer door is restricted.
Installation Position
- It is recommended that, for your convenience, the machine is positioned close to your washing machine.
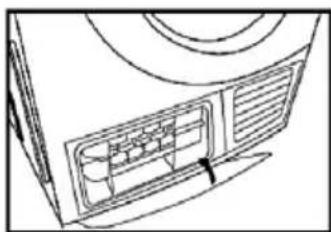
- The tumble dryer must be installed in a clean place, where dirt does not build up. Air must be able to circulate freely all round the appliance. Do not obstruct the front air inlet or the air intake grilles at the back of the machine.
- To keep vibration and noise to a minimum when the dryer is in use, it should be placed on a firm and level surface.
- The feet must never be removed. Do not restrict the floor clearance through deep pile carpets, strips of wood or similar. This might cause heat built-up which would interfere with the operation of the appliance.
natural_image
Simple line drawing of a container with a cross mark, partially submerged in a granular base (no text or symbols)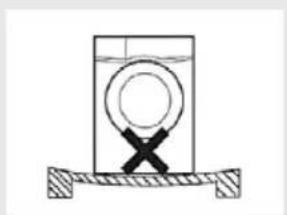
natural_image
Simple line drawing of a container with a circular element inside, supported by two supports (no text or symbols)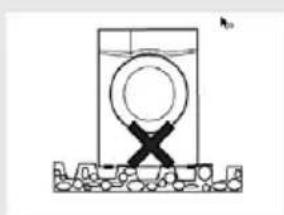
natural_image
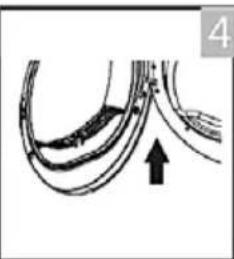
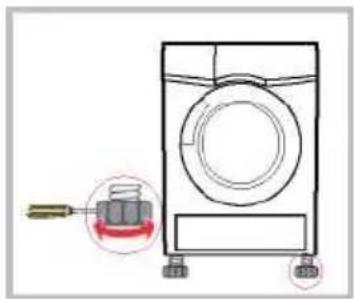
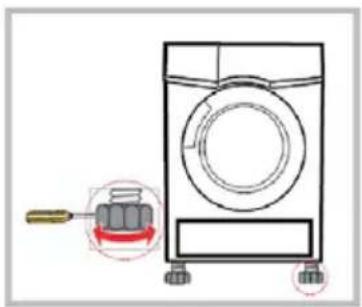
Simple line drawing of a container with a circular inlet and cross symbol, placed on a surface (no text or labels)Level Adjusting
Once in its permanent operating position, check that the dryer is absolutely level with the aid of a spirit level. If it is not, adjust the feet with a tool.
natural_image
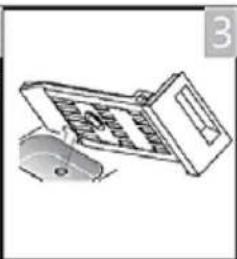
Diagram of a washing machine with a tool and a close-up view of the component (no text or symbols)Power Supply Connection
- Make sure that the voltage of the power supply is the same as the electric specification of the dryer.
- Do not connect the dryer with the power connection board, the universal plug or socket, do not use multi-plug adapters and extension cables.
OPERATIONS
Quick Start

Note!
Before using, please make sure it's installed properly.
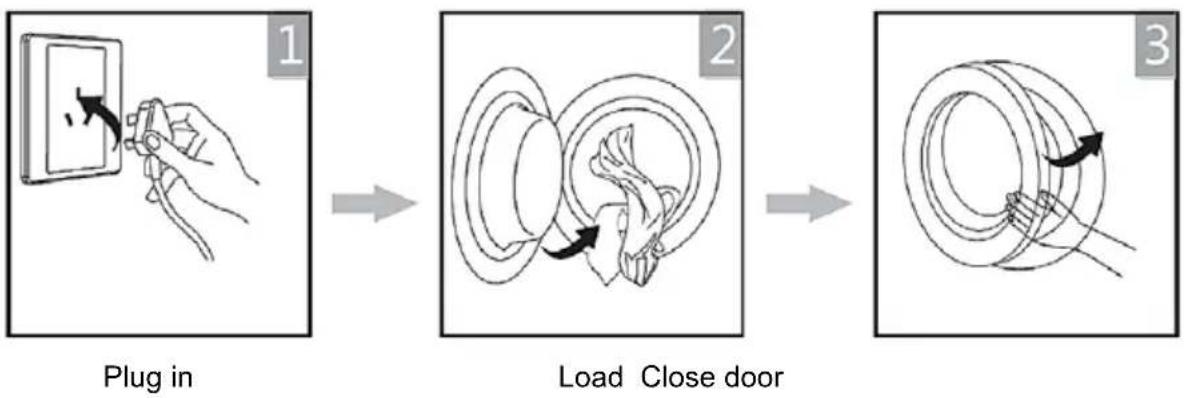
Drying


Start
On Select program Select function or
default
After Drying
Buzzer beep or "0:00" on display.

Note!
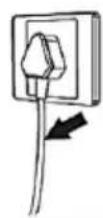
If use the socket with a switch, please press the switch to turn off the power directly.
■ Before Each Drying

Note!
- Leave it to stand for 2 hours after transporting. Before first use, please use the soft fabric to clean the inside drum.
- Put some clean rags into the drum.
- Plug the power, press [On/Off].
- Select the [Warm] Programme, press [Start/Pause] button.
- After finishing this programme, please follow the "Cleaning And Care" (refer to page 22) to clean the filter door.
-
During drying, the compressor and the water pump generate some noise which is entirely normal.
-
Before drying, thoroughly spin the laundry In washing machine. High spin speed can reduce the drying time and save energy consumption.
- For uniform drying result, sort the laundry according to fabric type and drying programme.
- Before drying, please close zips, hooks and eyelets, button up, tie fabric belts, etc. Sew in or remove underwiring from bras. Close duvet covers and pillow cases to prevent small items from being rolled up inside them. Leave jackets open and undo any long zips so that textiles dry evenly.
- Do not over dry the clothes, because over dried clothes can easily get creases.
- Do not dry the articles containing rubber or similar elastic materials.
- Keep the area around the tumble dryer clean. Coal dust or flour may cause an explosion
- The door can be opened only after the programme of the drying machine finishes to prevent human skin from being scalded by hot steam or over heated drying machine.
- Clean the lint filter and empty container after each use to avoid extension of drying time and energy consumption.
- Do not dry these clothes after dry-clean process.
- Please choose the related programme when deal with wool material clothes, to make the cloth more fresh and fluffy.
The reference weight of dry clothes (each)
 | Mixed-fabric clothes (about 800g) |  | Jacket (about 800g cotton) |  | Jeans (about 800g) |  | Towel quilt (about 900g) |
 | Single bedsheet (about 600g cotton) |  | Work clothes (about 1120g) |  | Sleepwear (about 200g) |  | Long sleeve shirt (about 300g cotton) |
 | Short sleeve shirt (about 180g cotton) |  | Short pants (about 70g cotton) |  | Socks (about 50g mixed-weave) |
Please pay attention to use the drying machine if the materials of your clothes can not be dried by it or contain the symbols as follows:

Suitable for tumble drying.

Normal drying process: Drying in the tumbler is possible under normal load and temperature 80^ C.

Mild drying process: Caution is appropriate when tumble drying. Select mild process with reduced thermal action.

Do not tumble dry: Articles unsuitable for drying in the tumbler.

Note!
- Never overload.
- Not for textile with dropping water. The dryer could be damaged, even fire.
Control Panel
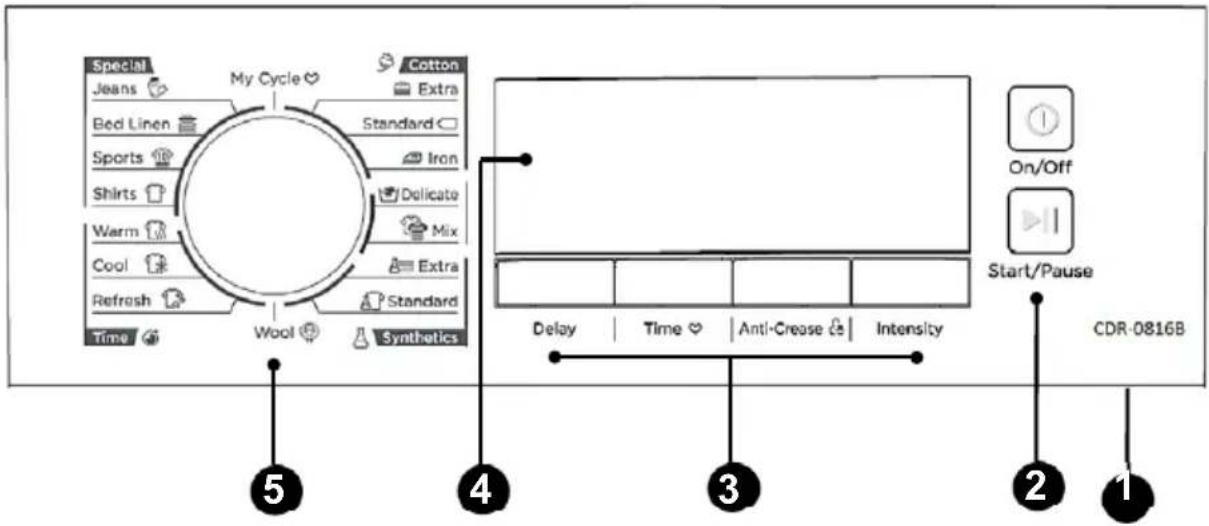
1. On/Off
Product is switched on or off.
2. Start/Pause
Press the button to start or pause the drying cycle.
3. Special functions
These buttons are used for setting additional functions (prgrams): Delay, Anti-Crease, Intensity, Setting Fav Drying program, Lock function.
Delay
Press the button continuously to delay Drying program 1-24 hours.
When the delayed programme starts, the time starts to countdown on the display and the delay icon blinks.
- Load your laundry and make sure the machine door is closed.
- Press the 【On/Off】button, then turn the programme selector knob and select the desired programme.
-
You can select the 【Anti-Crease】 function according to your need.
-
Press the 【Delay】button.
-
Continue to press 【Delay】 to select the desired delay time.
-
After the 【Start/Pause】 button is pushed, the dryer is at the run condition. The drying procedure will be automatically performed when the delay time is over.
-
If you push the [Start/Pause] button again, the delay function will be paused.
-
If you want to cancel the "Delay" function, please press the 【On/Off】 button.
Time
Press the button continuously adjust the time of drying 20-60 minutes.
This function is specially designed for few small clothes, for example, one or two cloth pcs, two pairs of socks or similar.
When the 【Warm】 or 【Cool】 or 【Refresh】 programme is selected, the 【Time】 button can be used to adjust the drying time in 10 min. steps.
It is like using timer to control drying process, but only for „Warm“, „Cool“ or „Refresh“ programmes.
Anti-Crease
This function prevents the laundry from creases. The laundry can be removed during the anti-crease phase.
At the end of the drying cycle, the anti-crease time is 30 minutes (default) or 120 minutes (selected).
The 【Anti-Crease】 light will illuminate when the anti-crease function is selected.
Function can't be selected on the following drying programmes: „Cool“, „Refresh“, and „Wool“.
Intensity
You can adjust the dryness level of the laundry by pressing the 【Intensity】button.
- The intensity function can be activated only before the programme start.
- Intensity function can't be selected on the following drying programmes: „Cotton Iron“, “Warm“, „Cool“, „Refresh“, “Wool“, and „Delicate“.
My Cycle
Used to define and save your personal favourite programme, which is used frequently.
- Select the desired programme and other drying functions.
- Press and hold the 【Time】 button for 3 seconds until the beep sounds and the desired programme has been saved.
- Turn the programme selector to the 【My Cycle】 position, then you can start your favorite programme.
If you want to change the 【My Cycle】settings, repeat the steps 1 and 2
Child Lock
- This machine incorporates a special child safety lock, which can prevent children from carelessly pressing buttons or making faulty operation.
- When the drying cycle is running, press the and [Anti-Crease] buttons for 3 seconds to activate the child lock function.
- When child lock function is set, the display will show the child lock icon and all button are deactivated, except [On/Off] button.
- To deactivate the child lock function, the 【Anti-Crease】 buttons shall be pressed for 3 seconds.
4. Function LED Display
The four LED lights indicate the setting, estimated program time remaining and status messages of your dryer.

Delay
Child lock
Anti-crease
My cycle
Remaining Time indicator / Error message
Clean filter (warning)
Empty water container (warning)
Intensity
5. Programmes
Different Dryer cycle can be selected according to the user's needs to make the clothes have more effective drying result.
OPERATIONS
Programme selector
- Press the [On/Off] button.When the LED display screen brightens up, rotate the programme knob to select the desired programme.
- Select the [Delay] or [Time], [Intensity] or [Anti-Crease] functions for additional option.
- Press the [Start/Pause] key.
- Press [On/Off] key after the programme has completed.
Programme start
The drum will keep rotating after the programme starts, the state light in the display area will flash in sequence, the remaining time displayed will change automatically.
Programme end
- The drum will stop running after the programme ends, the working state LED will show "0:00". The dryer will start [Anti-crease] function if user doesn't remove the load in time (refer to page 14).
Please press [On/Off] key to cut off power and pull the plug out. - Deal with the problems according to "Trouble Shootings", if there is a unexpected stop during the drying procedure and the dryer show information (refer to page 21).

Note!
During drying, water may collect between the wind and the seal. This does not affect the function of your dryer!
■ Drying Programmes Table
| Programme | Max Load kg | Application / Properties Dealy Time | |||
| Cotton | Extra | 8.0 | For single or multi-layer cotton laundry to be dried completely for direct storage.To dry cotton pieces of clothing. Drying level: Applicable to hang. | √ | × |
| Standard | |||||
| Iron | For single layer cotton laundry to remain damp for ironing | ||||
| Delicate 1.0 | For delicate laundry that is suitable for drying or laundry advised to be hand washed at low temperature | √ | × | ||
| Mix | 3.0 | For mixed fabrics from cotton and synthetics. | |||
| Synthetic | Extra | 3.5 | For thick or multi-layer synthetic fabrics to be dried completely | × | |
| Standard | To dry thin synthetic textiles, which are not ironed, such as easy care shirts, baby cloths or socks | ||||
| Wool | 1.0 | For machine washable wool items | √ | × | |
| Special | Jeans | 6.0 | To dry jeans or leisure clothes that are spun at high speed in the washing machine | √ | × |
| Bed Linen | 4.0 | To dry bed linen, bed sheets or other large items | |||
| Sports | 3.0 | To dry sportswear and thin fabrics from polyester, which are not ironed | |||
| Shirts | 3.0 | For easy care laundry, such as shirts and blouses equipped with anti-crease functionality to minimize the ironing effort. Place clothes loosely in the dryer. Once dried, remove quickly and hang it on a clothes hanger | |||
| My Cycle | - | Define and save your favourite programme | √ | - | |
| Time | Warm | - | To dry individual items or complete the drying process of multi-layer fabrics with different drying behavior, such as jackets, pillows or voluminous items. Min 10 min. to max. 120 min.(in 10 min.steps) | √ | √ |
| Cool | - | To air items without heating. Min. 10 min to max. 30 min.(in 10 min. steps) | |||
| Refresh | 1.0 | To refresh clothes kept at closed environment for a long time or to remove odors.Min. 20 min to max. 150 min.(in 10 min. steps) | |||

Note!
- Test programme in accordance with Regulation 392/2012/EU for energy labelling, measured in accordance with EN 61121 and suitable for drying normal cotton load at rated load capacity.
- Thick or multi-layered fabrics, e.g. bedlinen, jeans, jackets etc, are not easy to dry. You'd better choose Cotton Extra programme.
- As the uneven material, thick and multi-layered clothes are not easy to dry, it is better to choose the appropriate time drying programme to dry them if some parts of the clothes still damp after programme finished.
■ Consumption data
| Model | Program Capacity | Spin speed / Residual Humidity | Drying Time | Energy consumption | |
| 8kg | Cotton Standard | 8,0kg 1000rpm | / 60% 140 min 4,73 kWh | ||
| Cotton Standard | 4,0kg 1000rpm | / 60% 90 min 2,55 kWh | |||
| Synthetic Standard | 3,5kg 800rpm | / 40% 57 min 1,65 kWh |

Note!
- Thick or multi-layered fabrics, e.g. jackets etc., are not easy to dry. You had better choose Cotton Extra programme or use "Intensity" function.
- As uneven material, thick and multi-layered clothes are not easy to dry, it is better to choose the appropriate time drying programme to completely dry them if some parts of the clothes are still damp after programme finishes. All data are measured in accordance with EN 61121.
The actual consumption may differ from the values given in the table, depending on the amount of the laundry, type of fabric, residual moisture and any additional functions selected.
MAINTENANCE
■ Cleaning and Care
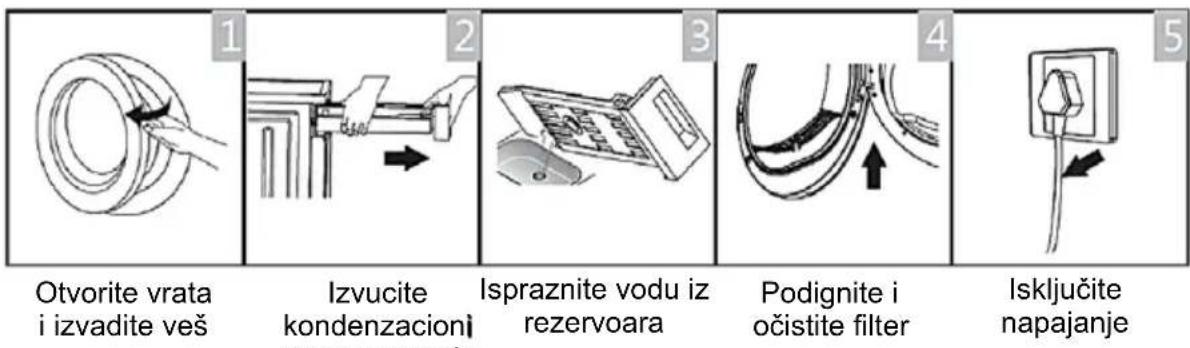
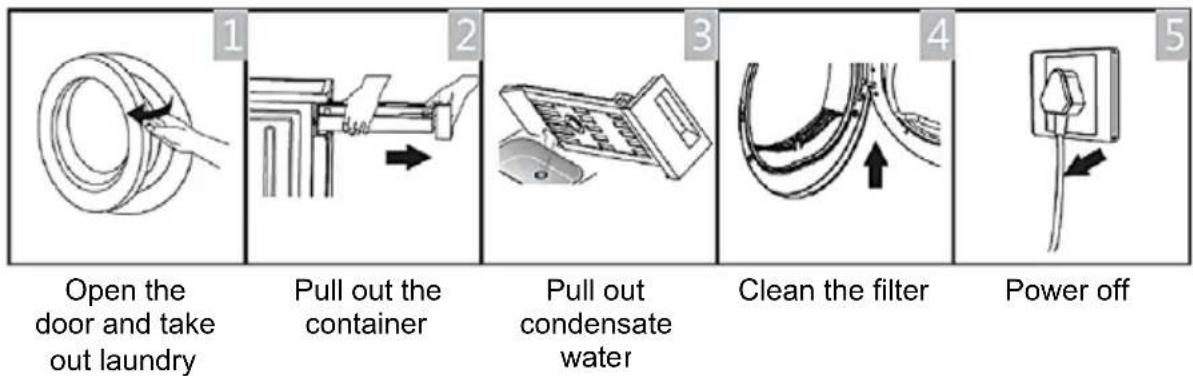
Empty the water container
- Hold and pull out the water container with two hands.
- Tilt the water container, pour out the condensate water into basin.
- Install the water container.
natural_image
Line drawing of a hand using a tool to adjust or install a mechanical component (no text or symbols present)
natural_image
Line drawing of a kitchen appliance with a drain and sink (no text or symbols)
Warning!
- Empty the water container after each use, the programme will be paused and the Full LED icon "FUL" will light if the water container is full during the drying process. After the container is emptied, the dryer can be restarted by pressing [Start/Pause] button.
• Do not drink the condensate water. - Do not use the dryer without the water container.
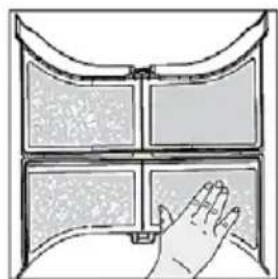
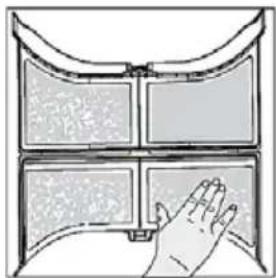
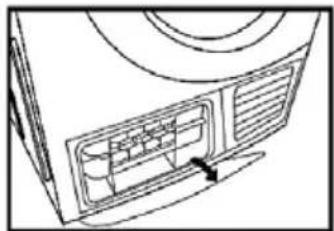
Clean the Lint door filter
- Open the door.
- Take out the filter door.
- Open the filter and remove the fluff on the filter, You can clean it in water.
- Dry the filter thoroughly before installing it back.
- Put Filter back into door.
natural_image
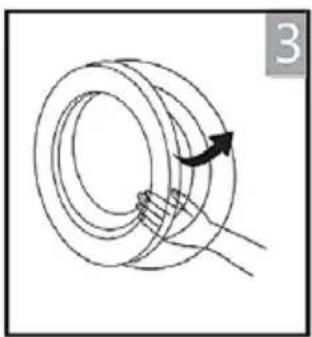
Diagram of coiled cable or wire loops with a central connector (no text or symbols)Filter door
natural_image
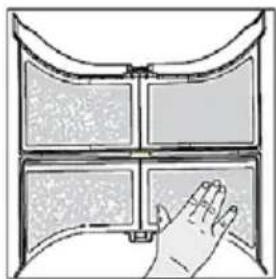
Illustration of a hand touching a grid of rectangular panels (no text or symbols)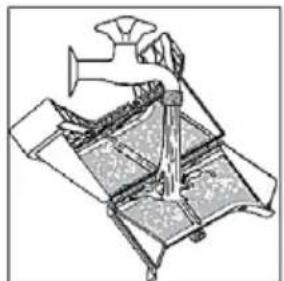
natural_image
Technical line drawing of a mechanical device with no visible text or symbols
Note!
- The fluff and lint accumulated on the filter will block the air circulation, which will cause the extension of drying time and energy consumption. Therefore the lint filter shall be cleaned after each use.
• Take notice of the correct orientation before to insert the lint filter - Do disconnect the power cord before cleaning!
- Do not operate the dryer without the filter!
- Clean the filter after each use to prevent lint accumulation inside the dryer.
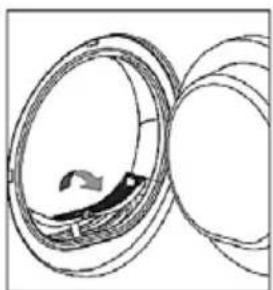
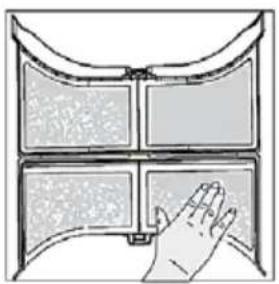
Clean Heat exchanger
Leave the dryer to cool down.
Residual water may escape, place an absorbent cloth under the maintenance cover.
- Unlock the maintenance cover.
- Completely open maintenance cover.
- Turn both locking levers towards each other.
- Pool out the Heat exchanger.
- Flush the heat exchanger with water to remove lint. let the water drain properly.
- Clean the seals.
- Re-insert the Heat exchanger, the handle at the bottom!
- Turn both locking levers.
- Close the maintenance cover until it locks into position. Please clean the air condenser approx, once every 3 months if frequently used.
Do not damage the Heat exchanger!

Warning!
- Clean with water only; do not use hard/sharpedged objects! Do not operate the dryer without the Heat exchanger!
natural_image
Line drawing of a computer monitor with ventilation slots and a scroll wheel (no text or symbols)
natural_image
Diagram of a computer monitor with ventilation slots and airflow arrows (no text or symbols)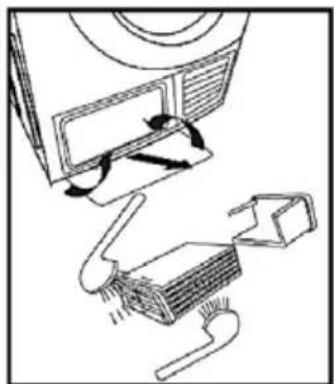
natural_image
Diagram showing airflow around a device with arrows indicating direction (no text or symbols)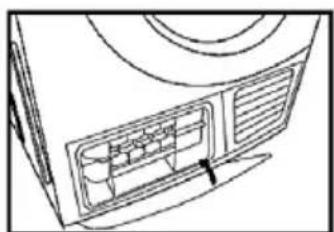
natural_image
Line drawing of a computer monitor with ventilation slots and a scroll wheel (no text or symbols)■ Trouble Shooting
Many malfunctions and faults that might occur in daily operation can be easily remedied. Time and money will be saved because a service call won't be needed.
The following guide may help you to find the reason for a malfunction and correct it.
| Display Reason Solutions | ||
| E30 Heating problem | Please contact your local service center if the problem persists | |
| E32 Humidity sensor error | ||
| E33 Temperature sensor error | ||

Warning!
- Only authorised technicians can carry out repairs.
- Before you call service, please check if you have dealt with the fault yourself or if you have followed the user instructions.
- A technician will charge you for advice, even during the warranty period.

Warning!
If you cannot deal with the fault by yourself and need help:
- Pressthe [On/Off] button.
- Pull out the mains plug and call the service.
| Problem Solution | |
| • Display is not on | • The mains plug is not inserted or no power supply. Press ON/OFF button.• Check the programme selected.• Check fuse in the house. |
| • "FUL" LED icon is on | • Empty water container.• If the light still remains on, please call the service. |
| · "Filter" LED icon is on | · Clean heat exchanger.· Clean lint filter. |
| · Dryer does not start | · Connect the tumble dryer to the mains· Check the start button has selected.· Check the the door has closed.· Check the programme has set.· Press the "Start/Pause" button |
| · Degree of dryness was not reached or drying time too long | · Clean lint filter and Heat condenser.· Empty the water container.· Check water outlet (drain hose).· Check installation place is appropriate.· Keep the air inlet clean.· Use next higher drying programme or using Timer programme. |
| · The dryer switches off at the end of the programme | · The dryer switches off automatically for energy saving. This is not an error but a normal function |
■ Technical Specifications
| ModelParameter | CDR-0816B |
| Dimension(L*W*H) 615*595*845(mm) | |
| Ambient temperature +5°C ~ +35°C | |
| Rated input power 2700W | |
| Rated voltage 220-240V~ | |
| Rated frequency 50Hz | |
| Weight of product 41kg | |
| Rated capacity 8.0kg |

Note!
- The rated capacity is the maximum capacity, make sure that the dry clothes which are loaded to the appliance do not exceed the rated capacity each time.
- Do not install the tumble dryer In a room when there is a risk of frost occurring. At temperatures around freezing point the tumble dryer may not be able to operate properly.
- There is a risk of damage if the condensate water is allowed to freeze in the pump, hoses and/or condensate water container.
DISPOSAL OF ELECTRICAL AND ELECTRONIC EQUIPMENT
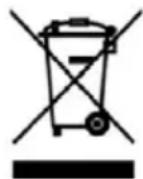
To protect our environment and to recycle the raw materials used as completely as possible, the consumer is asked to return unserviceable equipment to the public collection system for electrical and electronic.
The symbol of the crossed indicates that this product must be returned to the collection point for electronic waste to feed it by recycling the best possible raw material recycling.
By ensuring this product you will prevent possible negative effects on the environment and human health, which could otherwise be caused due to improper disposal of that product. The recycling of materials from this product, you will help to preserve a healthy environment and natural resources.
For detailed information about the collection of EE products contact the dealer where you purchased the product.
EU DECLARATON OF CONFORMITY
This device is manufactured in accordance with the applicable European standards and in accordance with all applicable Directives and Regulations.

EU declaration of conformity can be downloaded from the following link: http://doc.msan.hr/dokumentacijaartikala
JAMSTVENI LIST HR
VIVAX
MODEL UREĐAJA
SERIJSKI BROJ
DATUM PRODAJE
BROJ RAČUNA PRODAVATELJA
POTPIS I PEČAT PRODAVATELJA
POTPIS I PEČAT PRODAVATELJA
GARANCIJSKA IZJAVA
- K|ŽwOĂDĂYĐsūZwOĂDĂYtşdAĐđžsnj|ŽGăeĐđžsnjlŽEĂĐđGÜZ</DüdÕžZÜZÜZZ|ŽnjYŞÜÄsÜEă|AğGüuÄs-,GđĐĞÖZ|şYş d'ĞEDüÂYĐžDđA|AU sEİZÖ Z ÜüAĚZ E|ÄäGdsw ĐđžDşEşwÄ s Z ÜüAĚZ E Z|üGlswÄÖđAŸHÝZw üsElZ K|Žw OĂDĂYĐsūZw OĂDĂYtşd AwZI ěA dG ĐđGěwGh Z|G ÖăDĂYĐsūG dAĚšs d'Gnj OčG|GÝtZAuYZwüUZGzwisnjd AĚzWsü Gsw wAıGdsü AuZw isnjd AĚG^^|sG|GÝtZAuYZYÄE tAus Ü|AžJ|s d'sls dGd'dG ZiÜAGlGýZw EGD|sEZ ZÖAðAŸHÝZw dZÜZ
- UVJETI GARANCIJE:『ÄdÄY†Ys□dZÜ□DZēsYüG†Gds□ZË□EÄYÄ□ÜZDYüG□DdZšnj|ZËÄ□s†dÄuG□
| 60 MJESECI (5 godina) | HLADNJACI,VERTIKALNE I HORIZONTALNE ŠKRINJE |
| 36 MJESECI (3 godine) | ŠTEDNJACI, PERILICE I SUŠILICE RUBLJA, PERILICESUĐA, KUHINJSKE NAPE, UGRADBENE PEĆNICE IPLOČE, GRIJALICE VODE |
- hÜEüZeÄüZÜlÄdÄÜYÄnDädZsnjJZÜZÜüSüüGöDädGewGüZÜGÖÖAaÄYDSüGüZd'AiGnjZüGwZÜEGÖEÄdGwZüsElsDZE wZÖZdGwäDzÜZÜüAüYÄuÜÄEYsüGüZüDzÜZÜüEüXgÜEAYÄnÜZÜEGÖDädZsnjIZÜÜGwZäGÖDzdAisIsusÜEGÜYGÜD EÄYÄnD'sdsäGünjÄwssüGüüGüYÜZİsw
- 'ÄdÄYDsüÄEÇDdsnjYÄuÇEÄwZnjäAeZYÜZDYusHÇZnjZ|ÄuÓÄdÄYtYsnûsEtnÜZusnwZdÄnd'slsESDdÄ|YZHE EÄEdäÄ|ÄlsÖEÄtZwDdZÉÄuGÖDGeÄtssDZHdsEDdZÉÄ|ÄtGüüÄ
- Ă|ĂŭĂĐÕĂđAŸĐsŭG-Z EsÕZđA|ĂŒGđ|šEsîdGnjGđ|ÝGŒEšuĞuŽ|GğjÕŽEšYĂZŽEÏËÄfZwĂÜZĐYūGĞ GARANCIJA NE OBUHVAĆA:
- ZGĚŽ|ÝZĐdž|ůGđZĐăă|AŸuGZnj|j AwuG ŶZĐsùGüZ|A ÜZüS EÖhdZGČ ŸZdw AúYZw ZDždGd'ZwWdsùAÖZ njÄDžd'ZuüGÄ YüG'Ddžsnjl|ŽEÄnjÄDdswuG ŶZÜZüSýsEZ ZDsÄ YGIZH GSYseUsw ZDZtÄwÄnjÄÜZdsGtG ŸuGÖZ DđGěŽeG ŸÄEZEÖuÄEŽYŽEİ< /Dđđđ랎-
- 'ÄdÄYDsüÄEĞYĞDdşnjYÄüGZÜüGEDswÜZeÄüG|swÄ
T ÜZÜZDÄDU YGÜDdGÉZesüSEDäJÄYÖÄdAYHüüsEüsüdAeZYÜZDÜsüüÜZÜEGÜZDÄDU YsüGÜDsEdaÄ
DädZsnjÜZÄUÜZüüGÜdZsnjÜZ-ÜHädÄYÜDdG-DäJüuÄYüsüS-DZ-DäJüuÄYüZÜYGZJüAGtGÜGÜZEzD'G
T ÜZEZÜÄdZüDzünjZEüGüZüAüGüZüAüGüZüAüGüZüAüGüZüAüGüZüAüGüZüAüGüZüAüGüZüAüGüZüAüGüZüAüGüZüAüGüZüAüGüZüAüGüZüAüGüZüAüGüZüAüGü2
GüGüZüAüGüZüAüGüZüAüGüZüAüGüZüAüGüZüAüGüZüAüGüZüAüGüZüAüGüZüAüGüZüAüGüZüAüGüZüAüGüZüAüGüZüAüGüZüAüGü
äUgÜdZüdZäuGöWÜdZäuGöWÜdZäuGöWÜdZäuGöWÜdZäuGöWÜdZäuGöWÜdZäuGöWÜdZäuGöWÜdZäuGöWÜdZäuGöWÜdZäuGöWÜdZäu
- K|ÄüöÖÄdÄYtYsüsEhYGüwsüGYüAinjÄÜZYEÜÄDZtdZGäeÜÄDdÄ|Ä||ÄäGdÄZüZEYsüSü,ÇdDÇÖZ|sYsüZüZEYZDdZsnjIzGäe