
Gradior+ - Home trainer Spokey - Free user manual and instructions
Find the device manual for free Gradior+ Spokey in PDF.


| Brand | Spokey |
| Model | Gradior+ |
| Product Type | Magnetic Exercise Bike (Home Trainer) |
| Maximum User Weight | 120 kg |
| Resistance System | Magnetic |
| Resistance Levels | 24 |
| Display Functions | Time, Speed, RPM, Distance, ODO, Watt, Calories, Pulse, Body Fat % |
| Workout Programs | Manual, 8 Pre-programs, Watt Control, Body Fat, Target Heart Rate, 3 Heart Rate Control, 4 User Programs |
| Hand Pulse Sensors | Yes (on handlebars) |
| Transport Wheels | Yes (front stabilizer) |
| Adjustable Saddle | Yes (vertical height) |
| Adjustable Handlebar | Yes (height) |
| Power Source | Batteries (2x AA, not included) |
| Safety Certification | EN957 Class H.C. (domestic use only) |
| Maintenance | Regular cleaning with cloth, lubrication of moving parts, check nuts and bolts |
| Assembly Required | Yes (detailed instructions included) |
Frequently Asked Questions - Gradior+ Spokey
User questions about Gradior+ Spokey
0 question about this device. Answer the ones you know or ask your own.
Ask a new question about this device
Download the instructions for your Home trainer in PDF format for free! Find your manual Gradior+ - Spokey and take your electronic device back in hand. On this page are published all the documents necessary for the use of your device. Gradior+ by Spokey.
USER MANUAL Gradior+ Spokey
GRADIOR+ 928657
EN Magnetic exercise bike
NO.64 NO.55

STEP 4
N0.52
NO.51



B

C

D


EN USE'S MANUAL
Thank you for purchasing the Magnetic Bike. Before operating this unit, please read this manual carefully to ensure optimum performance and safety.
1. IMPORTANT SAFETY INFORMATION
- Be aware of your body's signals. Incorrect or excessive exercise can damage your health. If you do experience any of these conditions you should consult your doctor before continuing with your exercise program.
- Keep children and pets away from the equipment. The equipment is designed for adult use only.
- Use the equipment on a solid, flat level surface with a protective cover for our floor or carpet. For safety, the equipment should have at least 0.5 meter of free space all around it.
- Before using the equipment, check the nuts and bolts are securely tightened. Some parts like pedals, etc. It's easy to be ware away.
- Always use the equipment as indicated. If you find any defective components whilst assembling or checking the equipment, or if you hear any unusual noise coming from the equipment during use, stop. Do not use the equipment until the problem has been rectified.
- Wear suitable clothing whilst using the equipment. Avoid wearing loose clothing which may get caught in the equipment or that may restrict or prevent movement.
- The equipment has been tested and certified
to EN957 under class H.C. Suitable for domestic, home use only. Maximum user weight 120kg.
- The equipment is not suitable for therapeutic use.
2. HARDWARE TOOLS FOR INSTALLATION
(see fig A):
3. ASSEMBLING INSTRUCTIONS
STEP 1 (see fig B):
- Attach the front stabilizer(3) and the rear stabilizer(2) to the main frame(1) with Screw(54) and flat washer (55). The front stabilizer(3) is with transport wheel, which it is easier for you to move this equipment. And the rear stabilizer has no wheel.
- Attach the pedal (11L/R) to the crank (69L/R) with the spanner tool tightly. Be sure the right pedal(11R) marked (R) is attached to the right crank tightly in the clockwise direction. The left pedal(11L) marked(L) is attached to the left crank tightly in the anticlockwise direction.
STEP 2 (see fig C):
- Attach the saddle(5) to the saddle sliding group set (56) with flat washer(64) and nylon nut(60), then tighten saddle(5).
- Slide the saddle and bracket into the vertical saddle support post(4) and at the desired position, align holes and fix in place with the knob(61) and flat washer(59)
- Insert the saddle support post(4) into the main frame(1) with the saddle post decorative cover(6) and line up the holes. Secure the saddle in position with the adjusting knob (10). The correct height for the saddle can be adjusted after the bike is fully assembled.
Note:
Do not exceed the mark"stop".
STEP 3 (see fig D):
- Put the front post (7) into the front post decorative cover (28) first.
- Connect the console wire(14) and spread senor wire(15) together.
- Attach the front post(7) to the main frame (1) with Screw(63), flat washer(55) and curved washer(66).
STEP 4 (see fig E):
- Install the console(9) on the front post(7) with the screws(68).
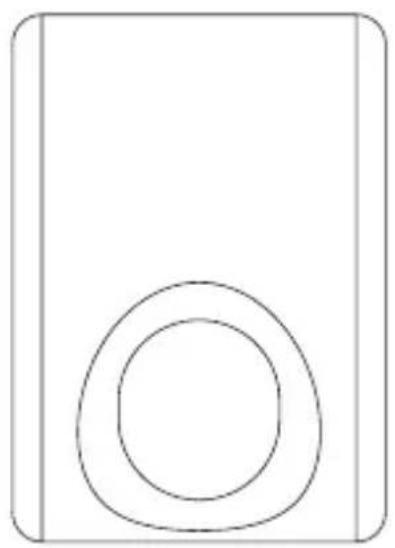
- Take out the protective plug(82), put the pulse sensor wires(19) on the handle bar(8) into the hole that on the front post (7) and pull it out. After that, put the protective plug(82) back into the hole .Fix the handle bar(8) on the handle bar fixing socket with the T-Shape knob (51) and decorative part (52) properly. Be careful not to snag the pulse sensor wire connected to the handle bar as it will affect the heart rate measurement.
- Connect hand pulse sensor wires(19) and main console wires(14) firmly, ensuring a good connection. Push all excess wires back down the stem until the console sits on the bracket.
- When connecting the console to the bracket,
please note that all the fixings are already preassembled to the back of the console.
Caution:
Now the equipment is completed assembled, if you find it not leveled on the floor, you can adjust it by the adjusting rear stabilizer tube plug(13). Make sure you have tightened all the screws and nuts well before beginning your workout.
4. CONSOLE INSTRUCTION
4.1 KEY FUNCTIONS:
- START/STOP:
- Start & Pauses workouts.
- Start body fat measurement.
3..Operates only when in stop mode. Holding key for 3 seconds will reset all function value to be zero.. - DOWN: Decrease value of selected workout parameter: TIME, DISTANCE, etc. During the workout, it will decrease the resistance load.
- UP: Increases value of selected workout parameter. During the workout, it will increase the resistance load.
- ENTER: To input desired value or work out mode.
- TEST (PULSE, RECOVERY): Press to enter into Recovery function when computer has the heart rate value. Recovery is Fitness Level 1-6 after 1 minute.F1 is the best, and F6 is the worst.
- MODE: Press to switch display form RPM to SPEED, ODO to DIST, WATT to Calories during workout.
4.2 WORKOUT SELECTION
After power-up using UP or DOWN keys to select then pressing ENTER to enter the desired mode.
- Setting Workout Parameters
After selecting your desired program, you may pre-set several workout parameters for desired results
- WORKOUT PARAMETERS:
Note: Some parameters are not adjustable in certain programs.
Once a program has been selected, pressing ENTER, will make "TIME" parameter flash. Using UP OR DOWN KEY you may select desired time value. Press ENTER KEY to input value. Flashing prompt will move to the next parameter. Continue use of UP OR DOWN KEY. Press START/STOP to start workout.
4.3 PROGRAM OPERATION
- MANUAL(P1)
Selecting "Manual" using UP OR DOWN KEY then pressing ENTER KEY . 1St parameter "Time" will flash so value can be adjusted using UP OR DOWN KEY .Press ENTER KEY to save value & move to next parameter to be adjusted. Continue through all desired parameters, pressing START/STOP to start workout.
Note: One of workout parameters counts down to be zero, it will have bi sounds and stop the workout automatically. Press START KEY to continue the workout to reach the unfinished workout parameter.
- PRE-PROGRAMS (P2-P9)
There are 8 program profiles ready for use. All program profiles have 24 level of resistance.
SETTING PARAMETERS FOR PRE-PROGRAMS
Selecting one of pre-programs using UP OR DOWN KEY then pressing ENTER KEY . 1St parameter "Time" will flash so value can be adjusted using UP OR DOWN KEY .Press ENTER KEY to save value & move to next parameter to be adjusted.
Continue through all desired parameters, pressing START/STOP to start workout.
Note: One of workout parameters counts down to be zero, it will have bi sounds and stop the workout automatically. Press START KEY to continue the workout to reach the unfinished workout parameter.
- Watt control program(P10)
Selecting "Watt control program" using UP OR DOWN KEY then pressing ENTER KEY . 1St parameter "Time" will flash so value can be adjusted using UP OR DOWN KEY .Press ENTER KEY to save value & move to next parameter to be adjusted.
Continue through all desired parameters, pressing START/STOP to start workout.
Note: One of workout parameters counts down to be zero, it will have bi sounds and stop the workout automatically. Press START KEY to continue the workout to reach the unfinished workout parameter. Computer will adjust the resistance load automatically depends on the speed to maintain the constant watt value. User can use up down key to adjust the watt value during workout.
• BODY FAT PROGRAM(P11)
Setting Data for Body Fat
Selecting "BODY FAT Program" using UP OR DOWN KEY then pressing ENTER. "Male" will flash so Gender can be adjusted using UP OR DWON KEY, press ENTER to save gender & move to next data. "175" of Height will flash so Height can be adjusted to use UP OR DOWN KEY, press ENTER KEY save value & move to next data.
“75” of Weight will flash so Weight can be adjusted to use UP OR DOWN KEY, press ENTER KEY to save vale & move to next data.
"30" of Age will flash so Age can be adjusted using UP OR DOWN KEY, press ENTER to save value.
Press START/STOP to start measurement, please also grasp hand pulse grips.
After 15 seconds the display will show out Body Fat %, BMR, BMI & BODY TYPE.
NOTE: Body Types:
There are 9 body types divided according to the FAT% calculated. W typie 1 zawartość tłuszczu sięga od 5% do 9%.
- Type 1 is from 5% to 9% .
- Type 2 is from 10% to 14% .
- Type 3 is from 15% to 19% .
- Type 4 is from 20% to 24% .
- Type 5 is from 25% to 29% .
- Type 6 is from 30% to 34% .
- Type 7 is from 35% to 39% .
- Type 8 is from 40% to 44% .
- Type 9 is from 45% to 50% .
BMR: Basal Metabolism Ratio
BMI: Body Mass Index
Press START/STOP KEY to return the main Display.
• TARGET HEART RATE Program(P12)
Setting Parameters for TARGET H.R
Selecting "TARGET H.R." using UP OR DOWN KEY then pressing ENTER KEY . 1St parameter "Time" will flash so value can be adjusted using UP OR DOWN KEY .Press ENTER KEY to save value & move to next parameter to be adjusted.
Continue through all desired parameters, pressing START/STOP to start workout.
Note:
If Pulse is above or below ( ± 5) the set TARGET H.R, computer will adjust the resistance load automatically. It will check Every 10 seconds approx. I resistance load will increase or decrease.
One of workout parameters counts down to be zero, it will have bi sounds and stop the workout automatically. Press START/STOP to continue the workout to reach unfinished workout parameter.
• HEART RATE CONTROL Program(P13-P15)
There are 3 selection for target pulse:
P13-60% TARGET H.R=60% of (220-AGE)
P14-75% TARGET H.R=75% of (220-AGE)
P15-85% TARGET H.R=85% of (220-AGE)
Setting Parameters
for HEART RATE CONTROL
Selecting "One of Heart Rate Control Program." using UP OR DOWN KEY then pressing ENTER KEY. 1St parameter "Time" will flash so value can be adjusted using UP OR DOWN KEY. Press ENTER KEY to save value & move to next parameter to be adjusted.
Continue through all desired parameters, pressing START/STOP to start workout.
Note: If Pulse is above or below ( ± 5) the TARGET H.R, computer will adjust the resistance load automatically. It will check Every 10 seconds approx. I resistance load will increase or decrease. One of workout parameters counts down to be zero, it will have bi sounds and stop the workout automatically. Press START/STOP KEY to continue the workout to reach unfinished workout parameter.
- USER PROGRAM (P16-P19)
There are four user programs can be selected form U1 to U4.
User program allows user to set their own program that can be used immediately
Setting Parameters for User Program
Selecting user using UP OR DOWN KEY then pressing ENTER KEY . 1St parameter "Time" will flash so value can be adjusted using UP OR DOWN KEY .Press ENTER KEY to save value & move to next parameter to be adjusted.
Continue through all desired parameters.
After finished set up desired parameter, the level 1 will flash, use UP OR DOWN KEY to adjust then pressing ENTER until finished. ( There are 10 times total). Press START/STOP to start workout. pozostałych parametrów, należy nacisnąć START.
Note:
One of workout parameters counts down to be zero, it will have bi sounds and stop the workout automatically. Press START/STOP KEY to continue the workout to reach unfinished workout parameter.
5. PRODUCT MAINTENANCE:
- When you don't use the exercise bike for a long time, please take out the console battery to avoid running out of battery.
- Often clean the exercise bike with clean cloth to keep the clean appearance..
- Regularly check that the elements fastened with nuts and bolts are correctly tightened.
- Remember regularly to grease moving parts.
- Storing the equipment in a clean and dry environment away from children.
PL INSTRUKCJA OBSŁUGI
BMR: Basal Metabolism Ratio (index metabolism)
4.1 TÄRKEIMMÄT TOIMINNOT
- START/STOP:
• ΔΙΑΜΌΡΦΩΣΗ ΠΑΡΑΜΈΤΡΩΝ
4.3 PROGRAMSKA PODRŠKA
• RUČNO (P1)
KROK 2 (žr. 1 pav. C):
2. SOLIS(sk. att. C):
PASSO 2 (ver Fig.C):


- EN USE'S MANUAL
- IMPORTANT SAFETY INFORMATION
- HARDWARE TOOLS FOR INSTALLATION
- ASSEMBLING INSTRUCTIONS
- STEP 1 (SEE FIG B)
- STEP 2 (SEE FIG C)
- NOTE
- STEP 3 (SEE FIG D)
- STEP 4 (SEE FIG E)
- CAUTION
- CONSOLE INSTRUCTION
- 4.1 KEY FUNCTIONS
- START/STOP
- 4.2 WORKOUT SELECTION
- 4.3 PROGRAM OPERATION
- SETTING PARAMETERS FOR PRE-PROGRAMS
- BODY FAT PROGRAM(P11)
- PRESS START/STOP TO START MEASUREMENT, PLEASE ALSO GRASP HAND PULSE GRIPS
- NOTE: BODY TYPES
- TARGET HEART RATE PROGRAM(P12)
- SETTING PARAMETERS FOR TARGET H.R
- HEART RATE CONTROL PROGRAM(P13-P15)
- SETTING PARAMETERS
- FOR HEART RATE CONTROL
- USER PROGRAM (P16-P19)
- THERE ARE FOUR USER PROGRAMS CAN BE SELECTED FORM U1 TO U4
- SETTING PARAMETERS FOR USER PROGRAM
- PRODUCT MAINTENANCE
- PL INSTRUKCJA OBSŁUGI
- BMR: BASAL METABOLISM RATIO (INDEX METABOLISM)
- 4.1 TÄRKEIMMÄT TOIMINNOT
- ΔΙΑΜΌΡΦΩΣΗ ΠΑΡΑΜΈΤΡΩΝ
- 4.3 PROGRAMSKA PODRŠKA
- RUČNO (P1)
- KROK 2 (ŽR. 1 PAV. C)
- SOLIS(SK. ATT. C)
- PASSO 2 (VER FIG.C)
Brand : Spokey
Model : Gradior+
Category : Home trainer