
WS 2468 - Weather Station HYUNDAI - Free user manual and instructions
Find the device manual for free WS 2468 HYUNDAI in PDF.

| Product Type | Weather Station |
| Brand | Hyundai |
| Model | WS 2468 |
| Power Supply (Main Unit) | 2 x LR06 AA batteries or DC 5.0V 1.2A adapter |
| Power Supply (Outdoor Sensor) | 2 x LR03 AAA batteries |
| Temperature Measurement Range | -20°C to 50°C (-13°F to 122°F) |
| Wireless Sensor | 433.92 MHz, 30 m range (open area), 3 channels selectable |
| Weather Forecast | 4 symbols: sunny, slightly cloudy, cloudy, rainy; predicts next 8 hours |
| Ice Alert | Flashing icon when outdoor temperature between -1°C and 3°C (30°F to 37°F) |
| Min/Max Memory | Records and displays minimum and maximum temperature and humidity |
| Alarm | Daily alarm with snooze function (crescendo, 2 minutes) |
| Backlight | 15-second illumination on battery; continuous on DC power; HI/LO brightness switch |
| USB Charger Output | 5V DC, 1A for charging mobile devices |
| Radio Controlled Clock (DCF) | Automatic synchronization at 1:00/2:00/3:00 AM; manual search possible |
| Time Display | 12/24 hour format, time zone adjustable (-12 to +12) |
| Display Type | LCD with segments for indoor/outdoor temp/humidity, time, forecast, alarm icons |
| Operating Temperature (Main Unit) | 0°C to 50°C (32°F to 122°F) (estimated) |
| DC Adapter Input | 100-240V, 50/60 Hz, output 5.0V 1.2A (model HX075-0501200-AG-001) |
| Compliance | Directive 2014/53/EU (Radio Equipment Directive) |
| Languages (Manual) | English, Czech, Hungarian, Polish, Slovak, and many more |
Frequently Asked Questions - WS 2468 HYUNDAI
User questions about WS 2468 HYUNDAI
0 question about this device. Answer the ones you know or ask your own.
Ask a new question about this device
Download the instructions for your Weather Station in PDF format for free! Find your manual WS 2468 - HYUNDAI and take your electronic device back in hand. On this page are published all the documents necessary for the use of your device. WS 2468 by HYUNDAI.
USER MANUAL WS 2468 HYUNDAI
natural_image
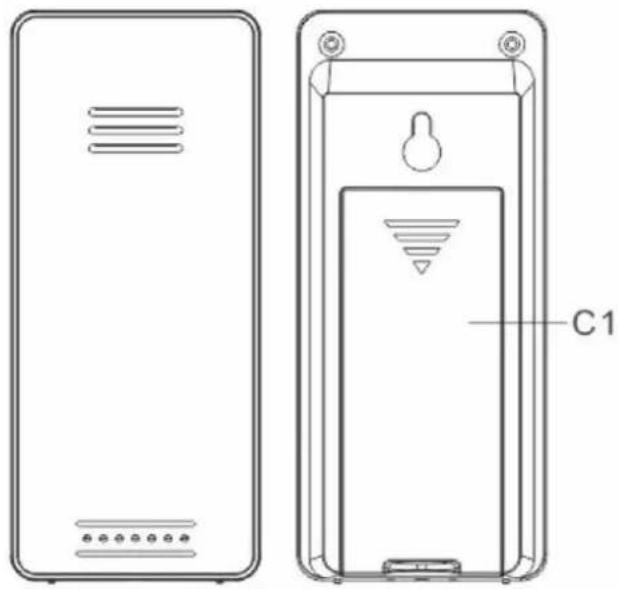
Technical line drawing of two rectangular electronic devices with labeled components (no text or symbols beyond labels)Část C - Konstrukce
natural_image
Technical line drawing of two rectangular electronic devices with labeled components (no text or symbols beyond labels)natural_image
Black-and-white graphic with suns, flowers, and grass at the bottom (no text or symbols)sunny

natural_image
Weather forecast illustration with sun, clouds, and sunflowers on a dark background (no text or symbols)slightly cloudy
natural_image
Illustration of a sky with clouds, suns, and grass under a dark sky (no text or symbols)cloudy
natural_image
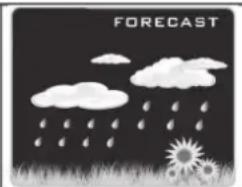
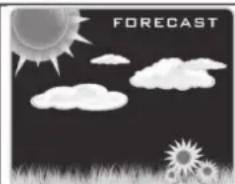
Illustration of rain and clouds over grass with a sun symbol, labeled 'FORECAST' at top (no other text or symbols)rainy
natural_image
Technical line drawing of two rectangular electronic devices with labeled components (no text or symbols beyond labels)Część C - obudowa
C1: Komora baterii
natural_image
Weather forecast illustration with suns and two flowers on grass (no text or symbols)sunny
natural_image
Illustration of a black-and-white landscape with sun, clouds, and flowers under a dark sky (no text or symbols)slightly cloudy
natural_image
Illustration of a storm scene with clouds, sunflowers, and grass under a dark sky (no text or symbols)cloudy
natural_image
Illustration of rain and clouds over grass with sun in foreground (no text or symbols)rainy
- Outdoor temperature measurement ranges: -2s0c (-13°F) - 50°C (122°F)
- Temperature alternatively in ▲ or ▼.
- Outdoor thermometer ice alert
• Maximum /minimum value record of temperature and humidity
- Wireless Outdoor Sensor:
– Wall Mount or Table Stand
- 3 Channel selectable
- 433.92 MHz RF transmitting frequency, E.i.r.p. 6,43 mW
- 30 meter transmission range in an open area
• Weather forecasting function
- Power Supply:
Weather Station:
Battery: 2 x LR06 AA and DC-POWER: DCS.OV 1.2 A
Wireless Outdoor Sensor:
Battery: 2 x LR03 AAA
Wireless Outdoor Sensor
natural_image
Technical line drawing of two rectangular electronic devices with labeled components (no text or symbols beyond labels)Part C -Struture
C1: Main unit battery compartment
C2: Wireless Outdoor Sensor battery compartment
Main Unit Appearance
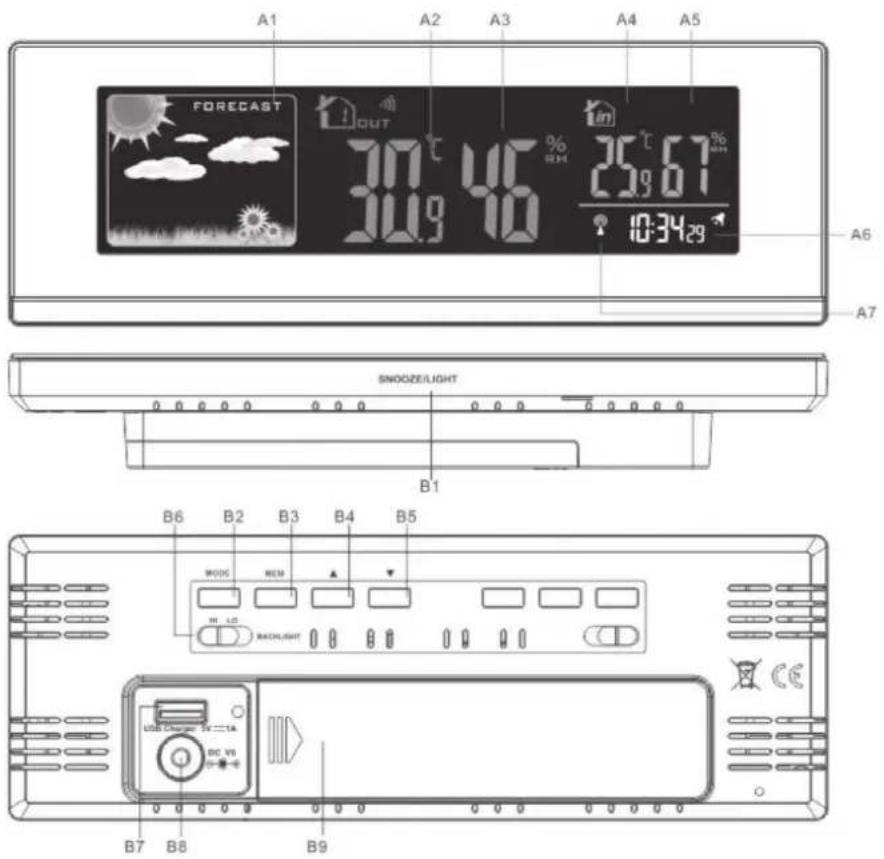
Part A-LCD
A1: Weather Forecasting A5: Indoor Humidity
A2: Outdoor Temperature A6: Time
A3: Outdoor Humidity A7: RCC Icon
A4: Indoor Temperature
Part B - Back button and power
B1: „SNOOZE/LIGHT“ touch key
B2: „MODE“ button
B3: „MEM“ button
B4: „▲“ button
B5: „▼“ button
B6: „BACKLIGHT HI/LO“ shift switch
B7: USB charger output socket
B8: DC power input socket
B9: Battery compartment
Initial operation:
- Open the Weather Station battery compartment cover
- Insert 2 x AA batteries observing polarity[„+• and“-“ marks]
- When you insert the batteries, all the icon on the LCD will light up for 3 seconds, and you will hear a beep tone, then detect indoor temperature & humidity.
- The Weather Station will now start to make a connection to the outdoor remote sensor. This operation takes about 3 minutes and is displayed by a flashing reception RF antenna symbol in the OUTDOOR" display area on the receiver.
- This now, Open the remote Sensor battery compartment cover, Insert 2 x AAA batteries observing polarity [,,+“ and „-“ marks]
- After receiver has created a connection to the outdoor remote sensor, After 3 minutes it will enter the Radio control time receive mode.
Reception of the Radio signal:
- The clock will automatically search the DCF signal after 3 minutes of any restart or changing of new fresh batteries. The radio mast icon starts to flash.
- At 1:00 /2:00 I 3:00 AM, the clock automatically carries out the synchronization procedure with the DCF signal to correct any deviations to the exact time. If this synchronization attempt is unsuccessful (the radio mast icon disappears from the display), the system will automatically attempt another synchronization at the next full one hour. This procedure is repeated automatically up to total 5 times.
- To start manual DCF signal reception, press and hold the „▲“ button for two seconds. If no signals received within 7 minutes, then the DCF signal search stops (the radio mast icon disappears) and start again at the next full one hour.
- During RC reception, To stop searching radio signal, press the „▲“ button once.
F.Y.I.:
- A flashing radio mast icon indicates that the DCF signal reception has started
- A continuously displayed radio mast icon indicates that the DCF signal was received successfully
- We recommend a minimum distance of 2.5 meters to all sources of interference, such as televisions or computer monitors
- Radio reception is weaker in rooms with concrete walls (e.g.: in cellars) and in offices. In such extreme circumstances, place the system close to the window.
- During the RC receive mode, only the „SNOOZE/LIGHT“ and „▲“ buttons have a function, other buttons are not functional, If you want to carry out other functions of operation, please press „▲“ button to exit the RC receiving mode.
Manual time setting:
- Press and hold the "MODE" button for 2 seconds, the temperature unit starts to flash.
- Now use „▲“ and „▼“ buttons to set the temperature unit in °C or °F you need.
- Press "MODE" button to confirm your setting, the 12/24HR start to flash. Now use „▲“ and „▼“ buttons to set the 12/24 hour mode you need.
- Press „MODE“ to confirm your setting, the Time zones starts to flash. Now use „▲“ and „▼“ buttons set a correct time zone (-12 to + 12).
- Press „MODE“ to confirm your setting, the Hour display starts to flash. Now use „▲“ and „▼“ buttons to set the correct hour.
- Press "MODE" to confirm your setting, the Minute display starts to flash. Now use „▲“ and „▼“ buttons to set the correct minute.
- Press „MODE“ button to confirm your setting, the weather forecast pattern displays starts to flash. Now use “▲” and “▼” buttons to select the current weather pattern.
- Press „MODE“ to confirm your setting and to end the setting procedures. Then it will return to the normal mode.
F.Y.I.:
- If there is no valid operation within 20 seconds, it will automatically return to normal time mode from the set mode.
Setting the daily alarms:
- Press once „▲“ button, LCD display the „●” “icon, the alarm function is ON, Then press once „▲“ button, the „●” icon will disappears from the display, the alarm function is OFF.
- Press once “MODE” button, LCD display alarm time, then Press and hold „MODE“ button for 2 seconds until hour of the Alarm time starts to flash. Use the „▲“ and „▼“ buttons to set the required hour.
- Press „MODE“ button to confirm your setting. The Minute of the Alarm time starts to flash. Use the „▲“ and „▼“ buttons to set the required minute.
- Press „MODE“ button to confirm your setting, the snooze time of the Alarm starts to flash. Use the „▲“ and „▼“ buttons to set the minute of snooze you need.
- Press „MODE“ button to confirm your setting and to end the setting procedure.
F.Y.I.:
- If there is no valid operation within 20 seconds, it will automatically return to normal time mode from the alarm time set mode.
- The alarm will sound for 2 minutes if you do not deactivate it by pressing any button. In this case the alarm will be repeated automatically after 24 hours.
- Rising alarm sound (crescendo, duration: 2 minutes) changes the volume 4 times whilst the alarm signal is heard.
Switching off the alarm signal
- When the alarm is ringing, press any button except the "SNOOZE/LIGHT" button to stop the alarm signal. It is not necessary to reactivate the alarm. It will ring again this time next day.
Snooze function
- When the alarm is ringing, touch the "SNOOZE/LIGHT" button the alarm mode will to get to SNOOZE mode. The alarm signal sounds again after already been set.
RF Transmission Procedure:
- The weather station automatically starts receiving transmission from outdoor thermo sensor for outdoor temperature & humidity after batteries inserted.
- The remote sensor will automatically transmit temperature and humidity signal to the Weather Station after batteries inserted.
- If the Weather Station failed to receive transmission from outdoor sensor („--.-“display on the LCD), press and hold „▼“ button for 3 seconds to receive transmission manually. RF icon „flashes on the LCD. The Weather Station to receive the remote sensor.
Query Maximum/minimum numerical value
- When the indoor / outdoor temperature / humidity are shown in the LCD. The weather station began to record temperature/humidity maximum and minimum numerical value.
- Press once “MEM” button, the LCD will display maximum value of temperature/humidity. The LCD will display the minimum value of temperature/humidity if press once „MEM“ button again when the maximum value is displayed.
- At the same time, there are „MAX“ or “MIN“ displayed on the LCD.
- The temperature/humidity maximum/minimum value will RE records after press and hold „MEM“ button 3 seconds.
F.Y.I.:
- If the temperature reading is below ranges, the LL.L will be displayed. If the temperature reading is above ranges, the HH.H will be displayed.
Ice alert
- The ice alert symbol appears and flashing next to the outdoor temperature when the outdoor temperature at - 1 °C to+ 3 °C or +30 °F to+ 37 °F.
Weather forecasting function
- Please take the weather forecast from your local weather forecasting service into account as well as the forecast from your weather station. If there are discrepancies between the information from your device and from the local weather forecasting service, please take the advice of the latter as authoritative.
- The weather forecast is calculated from evaluation of fluctuations in the barometric pressure and may deviate from the actual weather conditions.
- The weather station displays the following weather symbols:
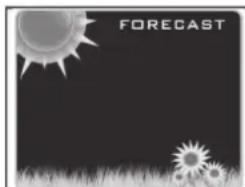
natural_image
Black-and-white graphic with suns, flowers, and grass at the bottom (no text or symbols)sunny
natural_image
Illustration of a dark sky with suns, clouds, and silhouettes of suns and grass (no text or symbols)slightly cloudy

natural_image
Illustration of a storm scene with clouds, suns, and grass under a dark sky (no text or symbols)cloudy

natural_image
Illustration of rain and clouds over grass with sunflowers, no text or symbols presentrainy
- The weather symbols indicate the weather fluctuation over the next eight hours and not the current weather.
Background lighting
- When using the battery power supply, Press the „SNOOZE/LIGHT“ button, the backlight illuminates for 15 seconds.
- When using the DC-POWER power supply, The backlight will not be extinguished.
- Product back of the „BACKLIGHT“ shift switch is pushed in the „HI“ position, the brightness of the backlight brightness high brightness
- Product back of the „BACKLIGHT“ shift switch is pushed in the “LO” position, the brightness of the backlight brightness low brightness
USB charger
- Products behind the USB socket, as a DC 5 V, 1 A charging power supply, to provide hand held mobile devices charging.
We reserve the right to change technical specifications.
WARNING: DO NOT USE THIS PRODUCT NEAR WATER, IN WET AREAS TO AVOID FIRE OR INJURY OF ELECTRIC CURRENT. ALWAYS TURN OFF THE PRODUCT WHEN YOU DON'T USE IT OR BEFORE A REVISION. THERE AREN'T ANY PARTS IN THIS APPLIANCE WHICH ARE REPARABLE BY CONSUMER. ALWAYS APPEAL TO
A QUALIFIED AUTHORIZED SERVICE. THE PRODUCT IS UNDER A DANGEROUS TENTION.

TO AVOID DANGER OF SUFFOCATION, KEEP THE PLASTIC BAG AWAY FROM BABIES AND CHILDREN. DO NOT USE THIS BAG IN CRIBS, BEDS, CARRIAGES OR PLAYPENS. THIS BAG IS NOT A TOY
DISPOSAL OF OLD ELECTRICAL & ELECTRONIC EQUIPMENT (APPLICABLE IN THE EUROPEAN UNION AND OTHER EUROPEAN COUNTRIES WITH SEPARATE COLLECTION SYSTEMS)
This symbol on the product or on its packaging indicates that this product shall not be treated as household waste. Instead it shall be handed over to the applicable collection point for the recycling of electrical and electronic equipment. By ensuring this product is disposed of correctly, you will help prevent potential negative consequences for the environment and human health, which could otherwise be caused by inappropriate
waste handling of this product. The recycling of materials will help to conserve natural resources. For more detailed information about recycling of this product, please contact your local Civic Office, your household waste disposal service or the shop where you purchased the product.
Hereby, ETA a.s. declares that the radio equipment type WS2468 is in compliance with Directive 2014/53/EU. The full text of the EU declaration of conformity is available at the following internet address: http://www.hyundai-electronics.cz/declaration_of_conformity
Jellemzók:
natural_image
Technical line drawing of two rectangular electronic devices with labeled components (no text or symbols beyond labels)| EN - English | ||
| Charging adapter | ||
| A | Manufacturer's name or trademark, business registration number and address | HUAXU ELECTRONICS FACTORY, No. 1 Shi TangBei Street 2, Shi Jie Town, Dong Guan City, 523290, Guangdong, China |
| B | Model identifier HX075-0501200-AG-001 | |
| C | Input voltage 100-240 V | |
| D | Input frequency 50/60 Hz | |
| E | Output voltage 5,0 V | |
| F | Output current 1,2 A | |
| G | Output power 6,0 W | |
| H | Average efficiency in active mode 76,57% | |
| I | Low load efficiency (10%) | |
| J | Power consumption without load | 0,090 W |
Licensed by Hyundai Corporation, Korea