
A20 - Sports camera SJCAM - Free user manual and instructions
Find the device manual for free A20 SJCAM in PDF.


| Product Type | Sports camera |
| Model | A20 |
| Chipset | Novatek 96658 |
| Sensor | Sony IMX323 |
| View Angle | 140° |
| Aperture | F2.5 |
| Lens | 6G |
| Screen Size | 2.0 inches |
| Input Voltage | 3.8V |
| Input Current | 1.3A |
| Wi-Fi Standard | 802.11b/g/n 2.4GHz |
| Operating System Compatibility | Android 4.1+ and iOS 8.0+ |
| Video Resolution | 1080P 30fps, 720P 30fps, WVGA 30fps, VGA 640x480 |
| Photo Resolution | 12M, 10M, 8M, 5M, 3M |
| Burst Mode | 3 or 5 photos |
| Video Lapse Interval | 1s, 2s, 5s, 10s, 30s, 1min |
| Loop Recording | Off, 3min, 5min, 10min |
| Motion Detection | On/Off |
| Infrared Night Vision | Auto/Manual |
| Laser Light | Yes |
| Memory Card | microSD (not included) |
| Dimensions (approx.) | 60 x 40 x 30 mm |
| Weight (approx.) | 100 g |
| Battery Type | Lithium-ion, 3.8V |
| Fast Record | Yes |
Frequently Asked Questions - A20 SJCAM
User questions about A20 SJCAM
0 question about this device. Answer the ones you know or ask your own.
Ask a new question about this device
Download the instructions for your Sports camera in PDF format for free! Find your manual A20 - SJCAM and take your electronic device back in hand. On this page are published all the documents necessary for the use of your device. A20 by SJCAM.
USER MANUAL A20 SJCAM
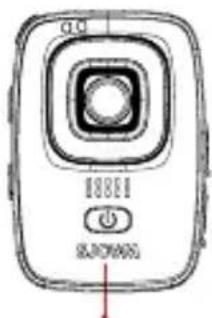
Function keys overview:
Power button  | Single press | 1. Standby status, single press to call out the mode menu. |
| 2. Menu settings, single press to re. | ||
| 3. REC mode, single press to playback. | ||
| 4. While recording, single press this button to lock the video. | ||
| Long press Long press for 2s to power on/off. | ||
Shooting button  | Single press | 1. Recoring mode, single press to start/stop recording . |
| 2. Photo mode, single press to take photo. | ||
| 3. Menu settings, single press to confirm. | ||
| Long press Menu settings, long press to start one-key recording. | ||
Laser light button  | Single press | 1. tandby or recording mode, single press to turn on/off laser light. |
| 2. Menu setting, single press to go up. | ||
In frared button  | Single press | 1. Manual infrared mode, to turn on/off infrared mode. |
| 2. Menu setting, single press to go down. | ||
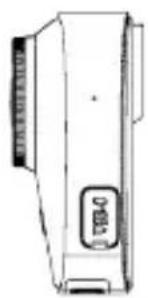
USB (  ion) ion) | Data transmission, charging port. | |
Touching gestures:
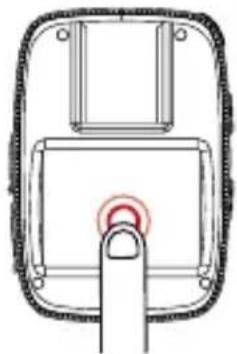
natural_image
Diagram of a device with a finger pressing a button (no text or symbols)Click
Standby,Show/hide the status bar. Menu state,Open/select the corresponding settings.
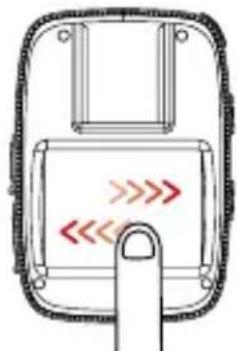
natural_image
Diagram of a device with directional arrows and a finger pointing to it (no text or symbols)Slide left&right
Standby state, Switch the shooting mode.
Playback, Page turning.
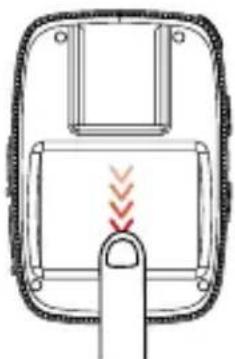
natural_image
Diagram of a device with a finger pressing a button, showing red directional arrows (no text or symbols)Slide down
Standby state, Turn on WiFi / Remote / Lock screen / Power off / Shortcut / Menu state.
Sliding options box.
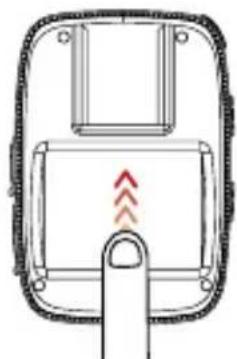
natural_image
Diagram of a device with a finger pressing a button, showing no text or symbolsSlide up
Standby state, Turn on mode menu. Menu state, Sliding options box.
Basic operation:
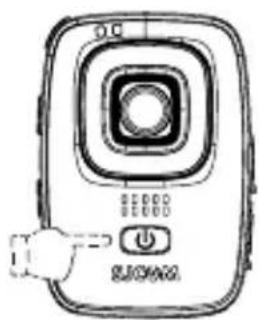
•Power on/off(fI GURE 1)
Long press the power button for 2s to boot into the standby interface.
Long press power button to turn off.
natural_image
Line drawing of a handheld electronic device with buttons and a central display (no text or symbols)(FIGURE 1)
natural_image
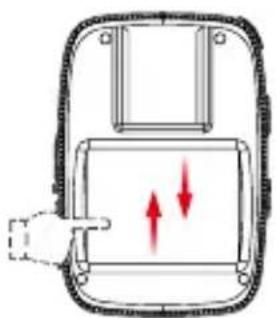
Diagram of a device with arrows indicating movement or force, no text or symbols present(FIGURE 2)
natural_image
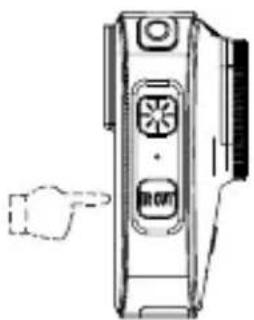
Diagram of a handheld electronic device with control panel and indicator lights (no text or symbols)(FIGURE 3)
natural_image
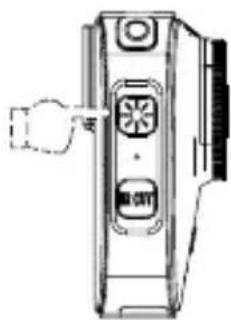
Diagram of a device rear panel with buttons and a hand pointing to the left side (no text or symbols)(FIGURE 4)
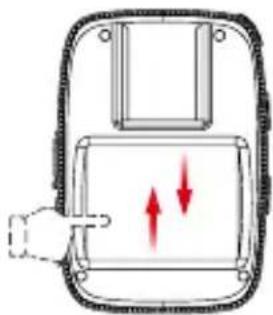
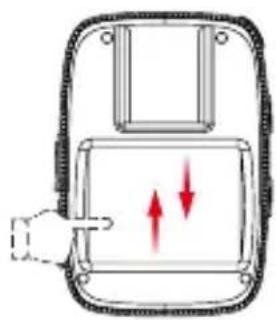
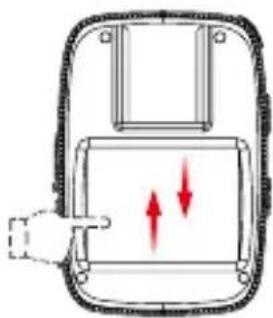
- Mode switch(FIGURE 2)
Standby state, slide up or click the " 🔊" icon to call out the mode menu, then slide up/down to browse the options.
Select the shooting mode icon, click and get into this mode.
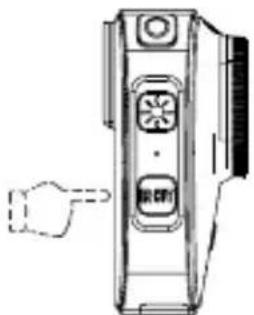
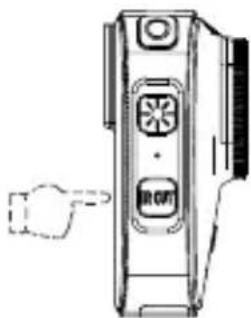
• Infrared night vision light(FIGURE 3)
Turn on to meet the demand of shooting in darkness, select the IR CUT to choose the automatic/manual infrared night vision light state.
Auto mode, equipment will automatically turn on/off the infrared night vision light by ligh & dark conditions.
Manual setting, single press the button to turn on/off infrared mode.
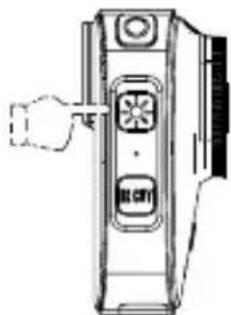
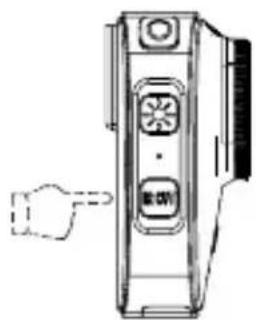
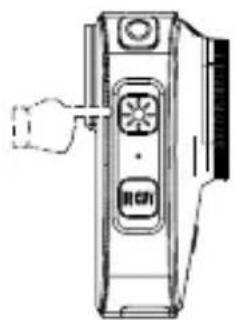
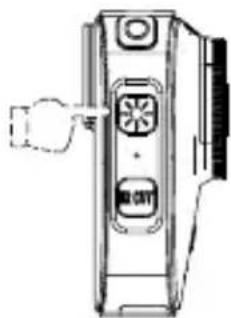
•Laser light(FIGURE 4)
Standby state or recording state, single press to turn on/off the laser light.
•Video lock
While recording, single press the power button and there will be a " 🔊" icon on screen, it means this video been locked and cannot be deleted with this device, only to format the card or connect computer to delete it.
.4.
Shooting mode:
Recording

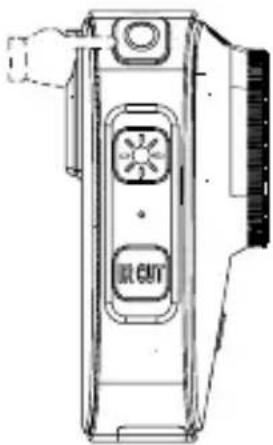
Switch to recording mode, single press the shooting button (FIGURE 5), while see red dots flashing on screen then camera recording well. Re-click the shooting button to stop recording.
Photo

Switch to photo mode, single press the shooting button (FIGURE 5), there is a "click" voice that is taking pictures and save the photo.
Burst mode

Switch to burst mode, single press the shooting button (FIGURE 5), there is several "click" voices and continuous taking photos.
natural_image
Technical line drawing of a handheld device with buttons and ports (no text or symbols)(FIGURE 5)
Voice recording

Switch to Voice recording mode, single press the shooting button, the microphone icon on screen will become red then voice recording runs well, re-click the shooting button to stop voice recording.
Playback

Select the Playback in Menu settings to enter the play back interface of photos and videos.
View photo/video: Use buttons/touching gestures to view the selected file at Playback interface.
View the voice recording: Single press power button(Voice recording mode) to enter Playback, use buttons/touching gestures to play the selected file.
Video Lapse
Switch to Video Lapse, single press the shooting button, red dot flashing on screen then videorecording well, reclick to stop recording.
Car Mode
Switch to car mode, turn on it before power off, device will automatically power on & recording while connect to charger.
Menu settings:
Click the " "icon or sliding upwards at standby state to call out mode menu, slide it and select " "icon then enter the menu interface.
(Also can set the model parameters by entering the Settings menu in different shooting mode)
Sliding to select the parameter options which need to be modified, click and choose the appropriate parameters.
Click Return key to back to standby interface after setting over.
1.deo Resolution
Video resolution include four options - "1080P 30fps, 720P 30fps, WVGA 30fps, VGA 640* 480". The larger the value, the larger the resolution, and the larger the file size, recording time will be shorter with the same size of storage and electricity; smaller number will get opposite result.
- Photo Size
Photo size include five options: "12M, 10M, 8M, 5M, 3M", respectively representing 12Megapixels to 3Megapixels. The larger the value, the larger the resolution, and the larger the file size; smaller number will get opposite result.
- Voice recording time
Voice recording time include three options--"3mins,5mins and 10mins", different option to different voice recording time.
.6.
4.urst Mode
Burst mode include two options--"3 photos and 5 photos", single press the shooting button to get multiple photos.
5.Video Lapse
Video lapse include six options--"1s, 2s, 5s, 10s, 30s, 1min", choose different time interval to creat video.
6. Loop Recording
Loop Recording include four options--" Off, 3mins, 5mins, 10mins",select this option, the device will continuously record video segmentally until the memory card is full, and then cover the contents of the previous record.
7.Motion Detection
Motion detection include two options: "Off, On". While the device been placed stationary, power on and start video recording, the device will be recording standby state if there is no moving objects in front of lens.Device will automatically start recording with moving objects and stop recording&save the file once the object stop moving.
8.Date
To turn on/off the shooting time watermark.
9.WDR
To turn on/off the WDR.
10. Photo Lapse
Photo lapse include five options: "Off, 3s, 5s, 10s, 20s". Turn on and press shooting button, device will automatically taking photos with certain interval time at photo mode, repress the shooting button then it will be stopped.
11. Image quality
Image quality include three options: " Fine, Standard, Economy".
12.ISO
ISO, also been called sensitivity, include seven options: "Auto, 100, 200, 400, 800, 1600, 3200".
13. Language
To set the language of device.
.7.
- Date/Time
To set the time, device will update the date/time automatically while it connect to WiFi and APP.
- Format
It will clear up all of your storage files, we suggest that you can export the file in advance.
16.Fast Record.
Turn on this function, camera will start recording automatically while switching to Record mode from any status (Include power on).
- Auto Power Off
Auto Power Off include four options: "Off, 3mins, 5mins, 10mins". It means that device will power off automatically if no operation after power on.
- Keypad Tone
To choose the sound volume of camera button output, the menu can be set to "On, Off".
19.Screensaver
Screensaver has five options: "30s, 1min, 3mins, 5mins, Off". Screensaver means that device will be screen off automatically and enter sleep mode after no operation after power on.
- Frequency
To choose "50Hz, 60Hz" depends on the region and requirement.
- LOGO
To turn on/off logo watermark.
- Device ID
To change the device ID.
23.WIFI
To change the WiFi SSID and password.
24.Default
Select this option to set all the settings to default.
25.Firmware version
To check the current version information of device.
.8.
Micro SD Card
To take video/photo,you need to use microSD card,please choose the card which can meet the demand of requirements.
While recording, if the storage of card been used out, then camera will stop recording and it will shows that the memory card is full on screen.
Attention: Please be careful while taking the memory card. Please avoid liquid, dust and fractionlet. To be on the safe side, please power off the camera before insert/take out the card. Please check the memory card manufacturer's instructions for use it within the proper temperature range.
Insert microSD car:
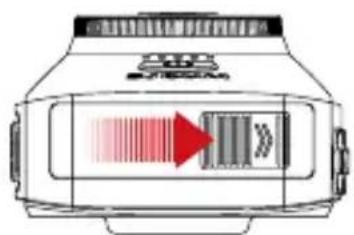
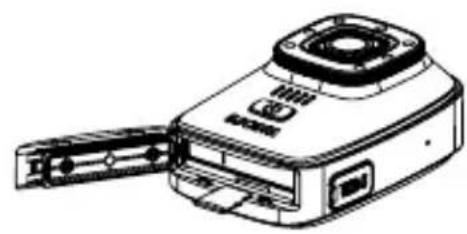
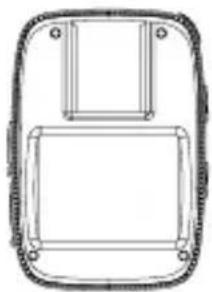
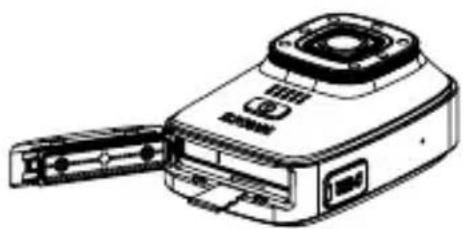
Slide to open the battery cover.(FIGURE 6)
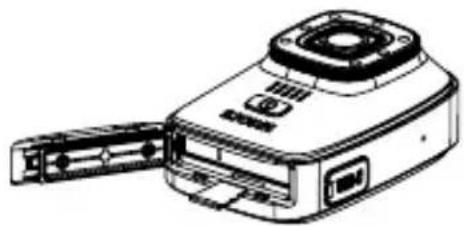
The label side of microSD card towards to battery direction,(FIGURE 7)insert it and close the battery cover.
Attention: To take out the card, please press the card with your finger nail then it will pop-up.
Reformat the microSD card.
(FIGURE 6)
natural_image
Line drawing of a portable electronic device with ports and a central screen (no text or symbols)(FIGURE 7)
In order to get optimum performance, please format the card before first using. To keep the card intact, please reformat the card regularly.
Attention: Reformat the card will clear up all of the storage files, please export the photo&videos in advance.
To reformat the card, please slide upwards and click "Settings" -> "Format" -> "Ok".
PRODUCT SPECIFICATIONS AND OTHER DETAILS
•Product : SJCAM Portable Camera
- Model : A10
- Chipset : Novatek 96658
- Sensor : Sony IMX323
•View angle : 140°
•Aperture : F2.5
- Lens : 6G
•Screen Size : 2.0"
- Input Voltage : 3.8V
- Input Current : 1.3A
●Wi-Fi Standard : Wi-Fi 802.11b/g/n 2.4GHz
Operating System : Support Android 4.1 and newer or iOS8.0
above smart phone or tablet with WiFi Function
For after-sales support service, you may contact our customer service through:
SJCAM after-sales official support at WWW.SJCAM.COM or call SJCAM
at: +86-0755-28314339
Manufacturer: SZ Hongfeng Century Technology CO,LTD
Address:4/F Building C, NO.2 Road 1, Shangxue IndustrialArea Bantian, Longgang
District, Shenzhen, China
.10.
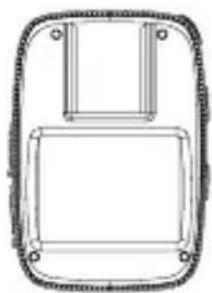
Tasten:

natural_image
Line drawing of a device casing with no visible text or symbols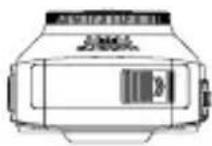
Aufnahme/Ok
Leistung
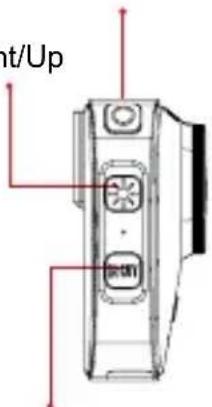
Infrarot/Down
natural_image
Pure technical line drawing of a rectangular component with mounting holes (no text or symbols)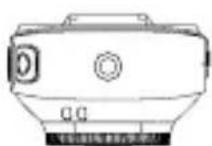
natural_image
Diagram of a device with a finger pressing a button (no text or symbols)Klick
natural_image
Diagram of a device with directional arrows and a finger pointing to it (no text or symbols)natural_image
Diagram of a device with a finger pressing a button, showing red motion arrows (no text or symbols)Nach unten wischen
natural_image
Diagram of a finger pressing a button with an arrow indicating left motion (no text or symbols)natural_image
Line drawing of a digital camera with no visible text or symbols(Abbildung 1)
natural_image
Diagram of a device with red directional arrows indicating movement or force (no text or symbols)(Abbildung 2)
natural_image
Diagram of a handheld electronic device with control panel and buttons (no text or symbols)(Abbildung 3)
natural_image
Technical line drawing of a mechanical device with ports and a handle (no text or symbols)(Abbildung 4)
natural_image
Technical line drawing of a mechanical device with two buttons and a handle (no text or symbols)(Abbildung 5)
Sprachaufzeichnung

(Abbildung 6)
natural_image
Line drawing of a handheld electronic device with ports and a circular top (no text or symbols)(Abbildung 7)
natural_image
Line drawing of a handheld electronic device with a label 'DTRD' on its side (no readable text or symbols beyond the label)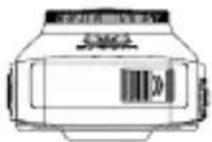
Съемка / Ок
Лазер / Вверх
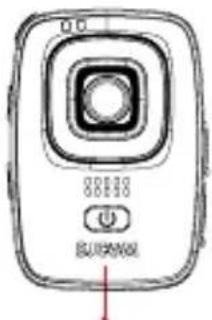
Питание
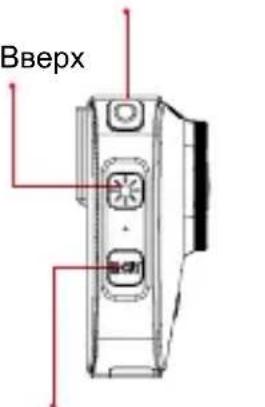
Инфракрасный / вниз
natural_image
Simple line drawing of a rectangular frame with rounded corners and a central square (no text or symbols)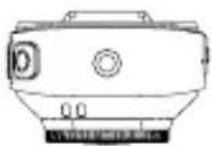
.22.
natural_image
Diagram of a device with a finger pressing a button (no text or symbols)Нажатие
natural_image
Diagram of a device with directional arrows and a finger pointing to it (no text or symbols)natural_image
Diagram of a device with a finger pressing a button, showing red motion arrows (no text or symbols)Листнуть вниз
natural_image
Diagram of a finger pressing a button with an arrow indicating left motion (no text or symbols)Листнуть вверх
natural_image
Line drawing of a digital camera with no visible text or symbols(РИСУНОК 1)
natural_image
Diagram of a device with arrows indicating direction, no text or symbols present(РИСУНОК 2)
(РИСУНОК 3)
natural_image
Diagram of a device with a handle and control panel (no text or symbols)(РИСУНОК 4)
natural_image
Technical line drawing of a handheld electronic device with two buttons and a handle (no text or symbols)( РИСУНОК 5)
Запись голоса
(РИСУНОК 6)
natural_image
Line drawing of a portable electronic device with ports and a central hub (no text or symbols)(РИСУНОК 7)
natural_image
Diagram of a device with a red circular button on the left side, no text or symbols present點擊
左右滑動
natural_image
Diagram of a finger pressing a button with red directional arrows (no text or symbols)向下滑動
natural_image
Diagram of a finger pressing a button with an arrow indicating left motion (no text or symbols)向上滑動
natural_image
Line drawing of a digital camera with buttons and a power button (no text or symbols)(圖 1)
natural_image
Diagram of a device with red arrows indicating motion or force, no text or symbols present(圖2)
natural_image
Diagram of a handheld device with control panel and buttons, no visible text or symbols(圖3)
natural_image
Diagram of a device with ports and a handle, no visible text or symbols(圖4)
- 模式切換(圖 2)
natural_image
Technical line drawing of a handheld device with buttons and ports (no text or symbols)(圖5)
回放
natural_image
Line drawing of a handheld electronic device with ports and a central hub (no text or symbols)(圖7)
.40.
重新格式化 microSD 卡
For iOS

For Android
CEFC
Scan and download the APP
Official website: www.sjcam.com | Support: support@sjcam.com
For latest detailed manual, please check http://sjcam.com/manual
V1.4
.42.


- Touching gestures:
- Basic operation:
- Shooting mode:
- Recording
- Photo
- Burst mode
- Voice recording
- Playback
- Menu settings:
- 4.urst Mode
- 5.Video Lapse
- Loop Recording
- 7.Motion Detection
- 8.Date
- 9.WDR
- Photo Lapse
- Image quality
- 12.ISO
- Language
- Micro SD Card
- PRODUCT SPECIFICATIONS AND OTHER DETAILS
- Sprachaufzeichnung
- Запись голоса
Brand : SJCAM
Model : A20
Category : Sports camera