
SJ8 Pro - Sports camera SJCAM - Free user manual and instructions
Find the device manual for free SJ8 Pro SJCAM in PDF.


| Product Type | Sports Camera |
| Brand | SJCAM |
| Model | SJ8 Pro |
| Chipset | Ambarella H22 S85 |
| Sensor | Sony IMX377, 12 Megapixels |
| Lens | 7G (2 Aspheric), 170° Field of View, F2.8, 2.8mm Focal Length |
| Video Resolution | 4K (3840×2160) up to 60fps; 1080p up to 120fps; 720p 240fps |
| Photo Resolution | Up to 12MP (4000×3000) 4:3 |
| Display | 2.33" IPS Touch Screen + 0.96" OLED Front Screen |
| Stabilization | 6-Axis Gyroscope |
| Battery | 1200mAh Detachable, Approx. 100 min (4K@30fps) |
| Storage | MicroSD up to 128GB (Class 10 U3 recommended) |
| Connectivity | Wi-Fi 2.4/5GHz, USB-C, External Microphone Support |
| Waterproof | With included housing (not in Small Box package); housing tested to 3m |
| Weight | 85g |
| Dimensions | 62.5 × 41 × 28.8 mm |
| Remote Control | Optional SJ Smart Remote (CR2032 battery, up to 10m range) |
| Video Format | MP4 (H.264/H.265) |
| Image Format | JPG |
| Special Modes | Loop Recording, Time-Lapse, Slow Motion, Burst, Distortion Correction |
| Firmware Update | Via SJCAM ZONE app or manual download |
| Maintenance | Clean with dry cloth; avoid heat; rinse housing with fresh water after saltwater use |
| Safety | Do not submerge without housing; charge away from children; avoid magnetic fields |
| Spare Parts / Repairability | Battery, remote, USB cable, waterproof housing; user-replaceable battery |
Frequently Asked Questions - SJ8 Pro SJCAM
User questions about SJ8 Pro SJCAM
0 question about this device. Answer the ones you know or ask your own.
Ask a new question about this device
Download the instructions for your Sports camera in PDF format for free! Find your manual SJ8 Pro - SJCAM and take your electronic device back in hand. On this page are published all the documents necessary for the use of your device. SJ8 Pro by SJCAM.
USER MANUAL SJ8 Pro SJCAM
We believe everyone has a dream. Our mission is to make you express yourself, your vision and dreams in order to make them real, and share them with others.
In the last 10 years of experience in Research and Development and Commercialization, we have gained world recognition from customers and retailers, with the ambition to give people the possibility to create, explore and empower their dreams. Having our own factory, controlling the whole production process, and a facility with more than 500 employees, makes us more versatile and able to reach the market fast, ensuring that the highest quality standards are met. It is all about dreams. Dare to join the SJCAM Revolution.
-SJCAM CEO
SJCAM
Congratulations on your new SJCAM Action Camera!
We know you're excited to use your SJ8 PRO, please take time to read this manual before doing anything with it. There's plenty you can do, so you need to familiarize yourself with the features now to get the most out of it.
It is important to keep your camera's firmware up to date. You may connect your camera via WiFi to the SJCAM ZONE app to automatically download and install the latest firmware, or visit www.sjcam.com/firmware.
CAUTION!
- This is a high-precision product. Do not drop.
- Do not expose the unit to strong magnetic fields, such as magnets, electrical motors, and machinery that use strong radio waves.
- Never leave the unit in high temperature areas. Electronics and optics can be damaged under prolonged exposure to heat.
- Do not submerge the camera in water without putting it in the included waterproof case.
- Always store extra batteries in a compartment away from any sharp metals and moisture.
- Avoid extended periods of battery charging. Keep it away from children and pets while charging to avoid accidents.
SJCAM
SJ8 PRO SPECIFICATIONS
CHIPSET: Ambarella H22 S85
SENSOR: SONY IMX377
SENSOR RESOLUTION: 12 MegaPixels
FRONT SCREEN: 0.96" OLED
MAIN SCREEN: 2.33" IPS Touch Screen
LENS: 7G (2 Aspheric Lens included)
ANGLE: 170°
APERTURE: F 2.8
FOCAL LENGTH: 2.8 MM
VIDEO RESOLUTION: 4K:(3840×2160)25/30/50/60fps,
1440P:(1920×1440) 25/30/50/60fps,
1080P:(1920×1080) 24/25/30/50/60/120fps. 720P:(1280×720) 240fps
BATTERY CAPACITY : 1200mAh Detachable Battery
WEIGHT: 85 G
DIMENSION: 62.5 MM 41 MM 28.8 MM
SYSTEM: WINDOWS 7, 8X or above /OS X® 10.8 or above
STORAGE SUPPORTED: MicroSD, UP TO 128GB
VIDEO FORMAT: MP4 (H264/H265)
DECODE FORMAT: H.264
VIDEO FORMAT: MOV, MP4
PHOTO RESOLUTIONS: 12M (4000×3000 4:3), 10M(3648×2736 4:3),8M 16:9 (3840×2160 16:9),
8M 4:3(3264×2448 4:3), 5M(2595×1944 4:3, 3M(2048×1536 4:3), 2MHD (1920×1080 16:9)
IMAGE FORMAT: JPG
WIFI:2.4G/5G(802.11A/B/G/N)
GYRO STABILIZATION: 6-Axis Gyroscope
BATTERY DURATION (APPROX.): 100 Minutes for 4K@30fps
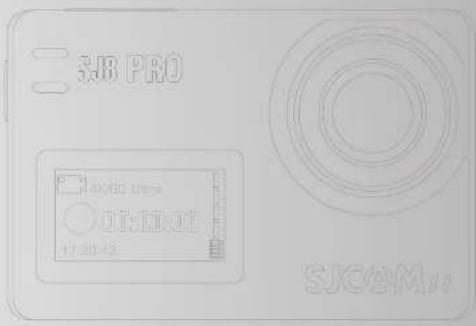
flowchart
graph TD
    A["输入"] --> B["处理"]
    B --> C["输出"]
    C --> D["反馈"]
    D --> A
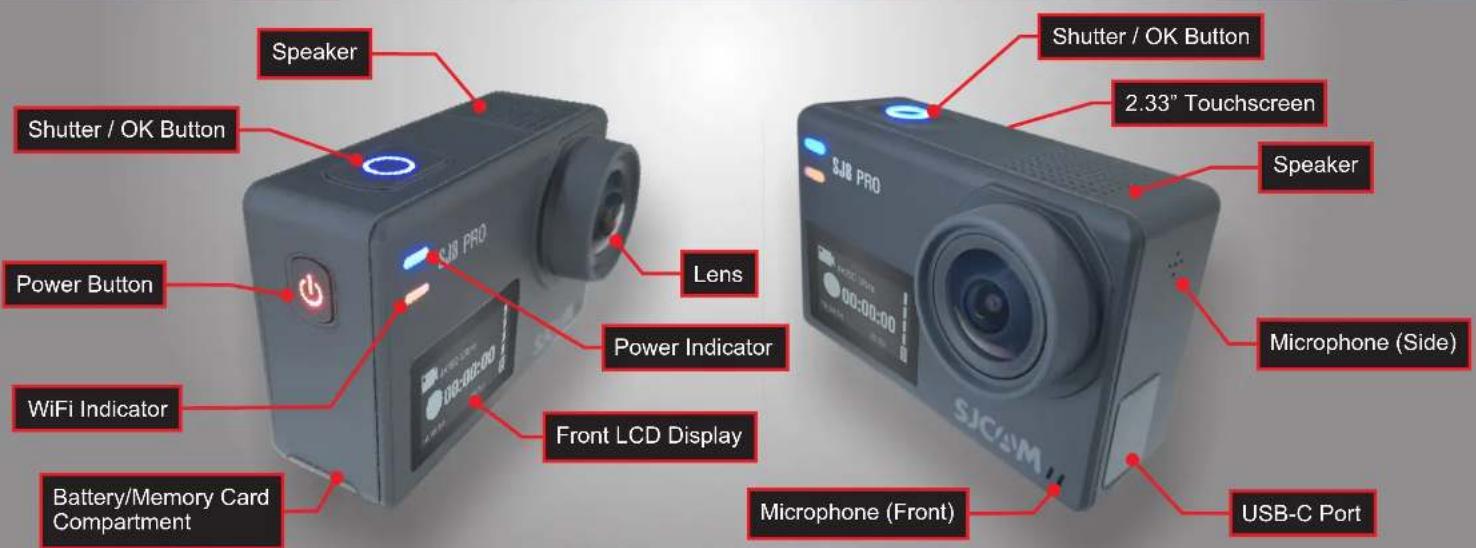
PARTS OF YOUR CAMERA
SJCAM
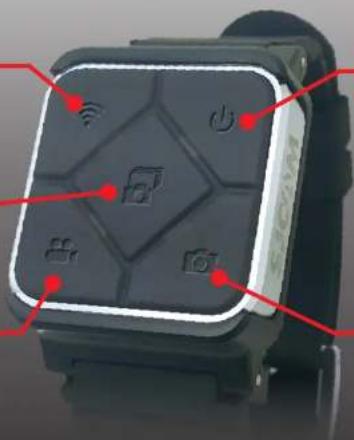
SJ SMART REMOTE (Optional)
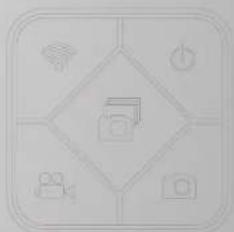
WIFI On/Off Switch
Burst Shot Button
Record Video Start/Stop
natural_image
Close-up of a smartwatch with visible function buttons and sensor placements (no text or symbols)Camera-Off Button
Shutter Button
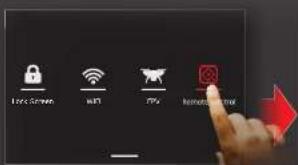
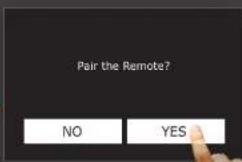

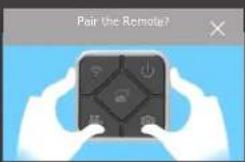
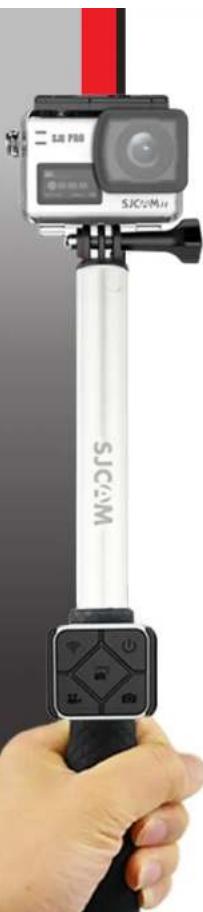
To pair your remote to your SJ8 PRO: Swipe down from the top > Select Remote Control Tap the "YES" to start pairing. A picture instruction will appear. Press the Video and Photo buttons on the Remote simultaneously. "Pairing Complete" will show when successful.
natural_image
Hand holding a camera stick with SJ.COM branding, no visible text or symbols on the device itselfSJCAM
Once your Remote is paired, you will never need to pair it again.
Once the SJ8 PRO is powered on, SJ Remote can begin sending commands to your camera.
The Remote is tested to work at a maximum distance of 10 meters (30 feet) away from your SJ8 PRO unobstructed Line-Of-Sight.
The battery on your Remote will last you a long time as it only uses power when you press any of the buttons.
The remote is powered with a Lithium CR2032 button-cell battery.
Shown here is Version2.
Can be momentarily submerged in water up to 3 Meters (approx: 10 feet). Ver.1 has white icon labels, not waterproof, and production has been discontinued.
SJCAM
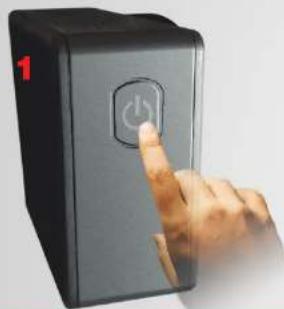
POWERING THE CAMERA ON
natural_image
Hand pressing a button on a black rectangular device (no visible text or symbols)On the right side of your camera is the Power Button. Press and hold it down to start your camera.
natural_image
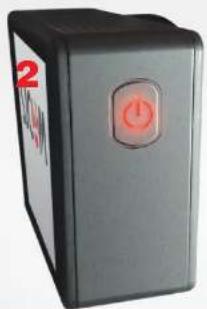
Black rectangular electronic device with a red button labeled '2' and a power button (no readable text or symbols beyond the number)The Power Button backlight will come on once the camera is active.

The SJCAM splash-screen will briefly show while the camera initializes, and will immediately proceed to the Main Screen.
If firmware files are present in the NOTE: memory card it will initialize and begin installation. The camera will then proceed to the Main Screen, ready for use.
SJCAM
INSERTING A MICRO SD CARD INTO THE CAMERA
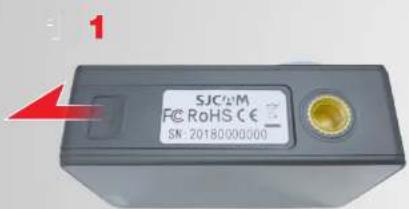
Open the battery cover by sliding it to the side.
The battery cover will spring outward.
natural_image
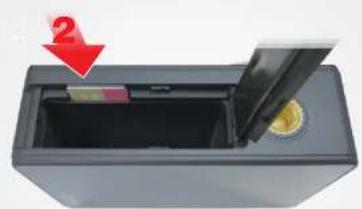
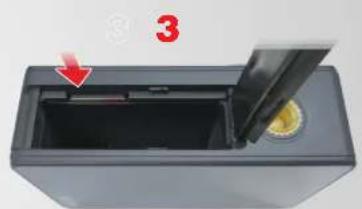
Interior view of a black rectangular electronic device with an open lid and a yellow coin slot, marked with a red arrow labeled '2' (no text or symbols on the device itself)Insert the card into the slot as shown.
The arrow on the battery also HINT: points to where the card slot is, aside from showing the battery's orientation.
natural_image
Interior view of a gray plastic waste bin with a lid removed, showing a yellow substance inside (no text or symbols visible)Gently push the card in until it clicks into place.
To remove the card, just reverse illustrations 2 & 3.
NOTE: To make sure you do not lose any data, only remove or insert your card while the camera is turned completely off.
REPLACING THE SJ8 PLUS BATTERY
SJCAM
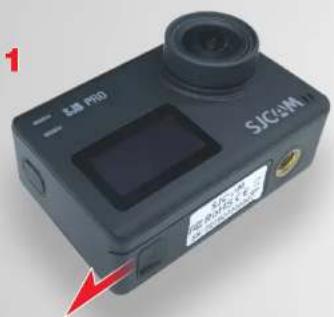
Open the battery cover by sliding it to the side.
The battery cover will spring outward.
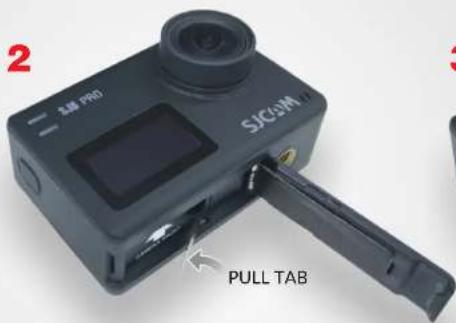
Grab the pull-tab with your fingers.

Pull the battery out.
Insert a fully-charged battery in.
NOTE: Always check the orientation of the battery before inserting it into the camera.
An arrow printed on the label at the bottom points to the front of the camera, and also the location of the MicroSD card slot.
INSERTING A USB-C CABLE
SJCAM
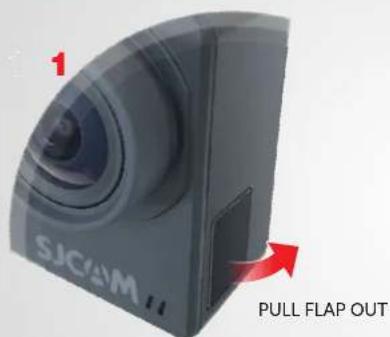
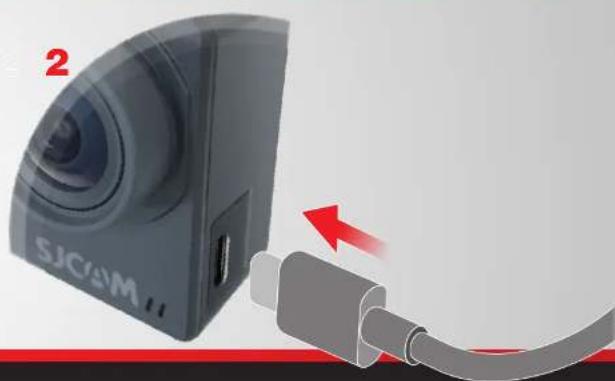
Locate the covered USB-C port on the left side of the camera. Pull the flap out.
natural_image
Close-up of a camera module connected to a cable, showing a red arrow indicating direction (no text or symbols on the device itself)Gently insert the USB-C cable included in the package all the way in.
The USB-C port can be used for a variety of purposes. It may be used to transfer files, charge the battery, connect a microphone, and using a special adaptor: output digital or analog video.
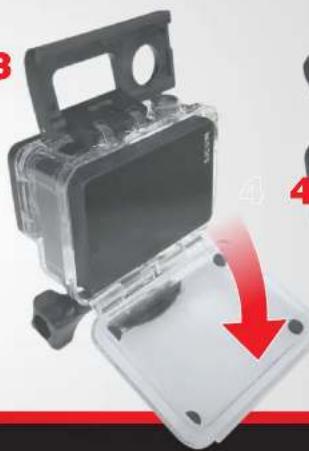
REMOVING THE CAMERA FROM THE WATERPROOF HOUSING
SJCAM
natural_image
Exterior view of a silver and black compact device with a red upward arrow indicating growth (no text or symbols)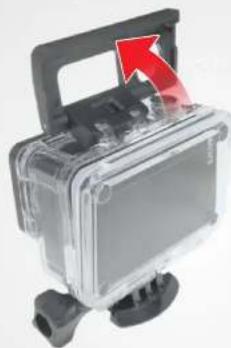
natural_image
Close-up of a transparent plastic enclosure with a red arrow indicating rotation (no text or symbols visible)3
natural_image
Close-up of a transparent plastic camera case with a red arrow pointing to a small component (no visible text or symbols)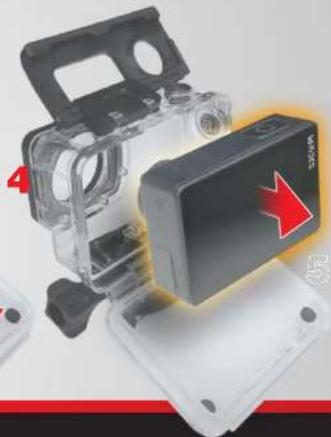
natural_image
Close-up of a black plastic enclosure with a red arrow pointing to it, surrounded by transparent casing (no text or symbols visible)5
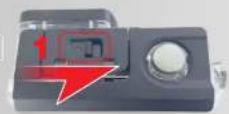
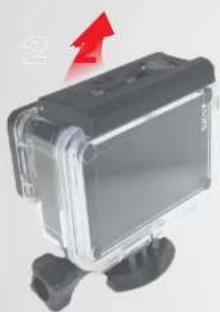
Release clasp by sliding and holding the lock.
Lift the front side of the clasp as shown.
Unhinge the clasp from the backdoor.
Swing the backdoor downwards towards you.
Pull the camera out from the waterproof housing.
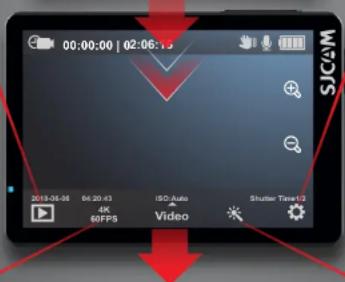
The Main Screen
Elapsed Time | Time left on Card
Current Mode Icon
Icon shows what mode you are currently in.
Current Date & Time
Status Indicator Lights
Tells you whether the camera is active even when the screen is off.

ently in.
m = 311
m = 311
m = 311
Time
Time
m = 311
:
•
-
c active
s active
it is off.
m = 311
The Ground Truth image displays a single, solid horizontal line. According to Rule 2 (UNDERSCORE & LINE RULES), this is a stylistic or background line, not a placeholder underscore. Therefore, the OCR result must ignore it and output nothing or only meaningful text. The provided OCR content is "____", which consists of four underscores. This is an incorrect interpretation of the line as a placeholder, violating the rule that stylistic lines must be ignored. The OCR has hallucinated underscores where none should exist based on the GT's visual context. Hence, the OCR result is inconsistent with the Ground Truth.
▶
The image is too blurry to recognize any text content.
051 236
ery and
corded
The image is too blurry to recognize any text content.
1
tions
The image is too blurry to recognize any text content.
trails
etails
mode
m = 311
ettings,
u're in.
ection.
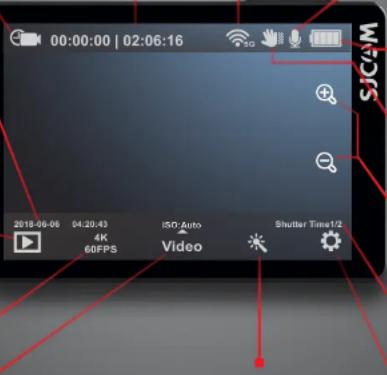

Current Mode Settings
Access and make changes to the settings of the mode you are currently in.

[Non-Text]
Microphone Active
Battery Level Indicator
Displays approximate power left on the battery. Battery blinks when almost empty.

An indicator showing that the Gyro Sensor is active. Will not show when turned off.

Tap the (+) or (-) magnifying glass icons to change the digital zoom factor.
Current Shutter Speed Details

Tap this icon to access and make changes to the General System Settings.
The Main Screen has many nested menus available by tapping or swiping.
You can also hide all the icons on screen to use the viewfinder without the onscreen icons and indicator labels by tapping anywhere in the middle.
Playback Options
| 4K (3840x2160) | 60 fps > |
| 4K Ultra (3840x2160) | 30 fps > |
| 2.7K (2/20x1520) | 30 fps > |
Resolution Options
Toggles Screen
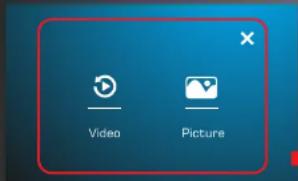
Mode Selection
General Settings
Mode Settings

Goes back to the Main Screen

More information on Modes

Common Questions and Answers
Toggles Screen
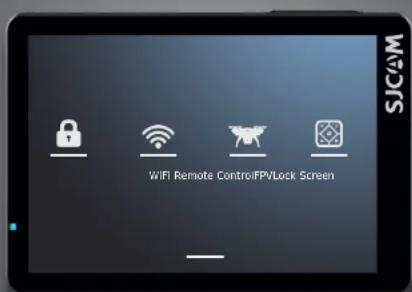
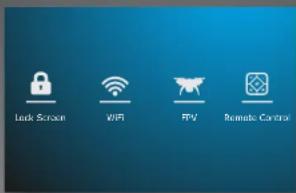
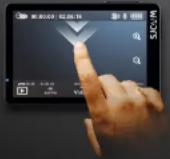
To get here, swipe down from top.

Lock Screen
Lock Screen
Tums off the display and disables the touchscreen to avoid accidental taps. Swipe the key icon to the lock to enable the touchscreen again.


WiFi
WiFi Toggle
Enable or disable the WiFi by tapping this and setting it.

FPV
FPV
Enable or disable FPV (First-Person View) via a special cable. Cable sold separately.

Remote Control
Remote Toggle
Enable the remote by tapping this and setting it to ON. You will also see the Pair SJRemote option here.

Swipe Up to return to Main Screen
Swipe this up to hide the Toggles Screen
Playback Screen
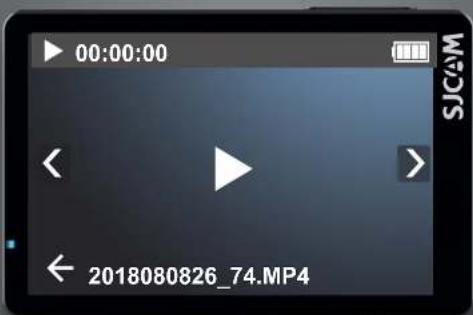
Elapsed Time
Shows how much of the file is being played
Go to previous file
Tap or swipe right to get to the previous file.

Back to File Gallery
Returns to the file selection screen.

Battery Status Indicator
Shows how much power is left.

Go to Next File
Tap or swipe left to get to the next file.
File name displayed here.
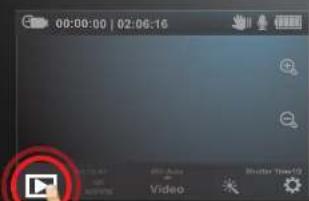
Main Screen
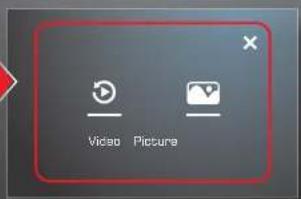
File Type Selection
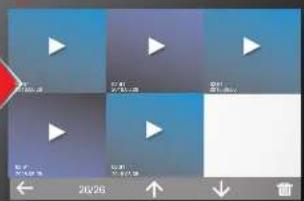
File Selection
Mode Selection


Exit to Main Screen
Tap the back-arrow icon to exit.

Hints, Tips, & FAQ
For more information, tap the
[ ? ] icon on the lower right.

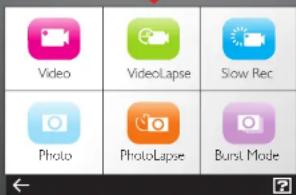
Video
15

VideoLapse

Slow Motion
Mode for recording videos.
Timelapse photography stitched on-cam to produce a video.
For recording video in slow motion.
Swipe UP to access Video+Photo, and Car Modes.


Photo

PhotoLapse

Burst Mode
Still photograph mode.
A series of still photos for creating timelapse.
Each photo will have its own file.
Fast multiple succession of snapshots,
choose the number of photos desired (Max: 10).
To get here,
tap this, or swipe up.
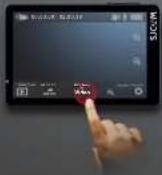

Photo+Video

Car Mode
For recording video while a sequence of photos is taken at a set interval.
Automatically starts the camera and begins recording once the engine is started
(Car Charger Cable Accessory required).

Mode Settings Screen
To get here, tap this.
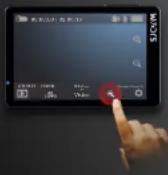

Tap this arrow icon to exit.
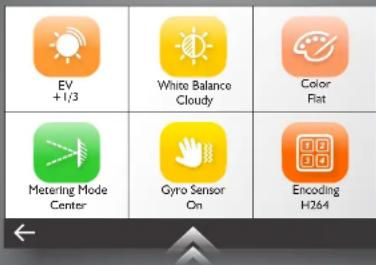
Current Menu Options
Depending on what mode you are in, the menu options will vary. All the options for the particular mode will appear by scrolling down for other items. Once set, the settings will be the same for that particular Mode every time you go back until you change it again.
Scroll up for more Mode Settings
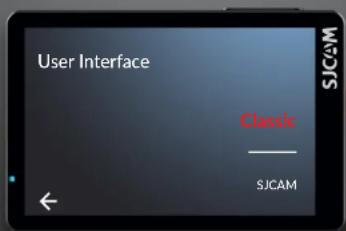
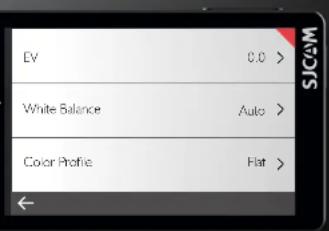
You can switch to text-only menu by going to General Settings and choose "Classic" in User Interface options.

The Front Screen
Current Mode Icon
Icon will show what mode you are currently in. The options will vary depending on the mode.
Camera Activity Ball
The ball will appear steady when in standby mode. The ball will blink when shooting a video.
Current Time
Displays current time in digits.
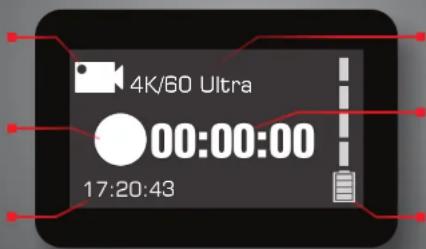
Current Resolution / Frame Rate
Will display the set resolution size and the accompanying frames per second.
Elapsed Time / Shots Taken
Shows the length of time you are recording. Or the number of images that are stored.
Battery Meter
Displays approximate power left on the battery. Battery blinks when almost empty.
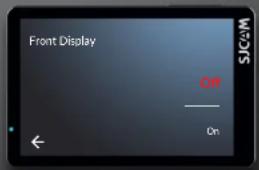
You can enable or disable the front screen by going to the General Settings menu, and choose "Off" in "Front Display"

RESOLUTION SELECTION
| 4K (3840×2160) | 60 fps > |
| 4K Ultra (3840×2160) | 30 fps > |
| 2.7K (2720×1520) | 30 fps > |
Video Modes
4K·3840x2160
Framerates: 24, 25, 30, 50, & 60 fps
4K Ultra · 3840x2160
- Framerates: 24 & 30fps
2.7K·2720x1520
- Framerates: 24, 25, 30, 50, & 60 fps
1440p · 2560x1440 ·
- Framerates: 24, 25, 30, 50, & 60 fps
1080p · 1920x1080
- Framerates: 24, 25, 30, 50, 60, & 120 fps
1080p Ultra • 1920x1080
- Framerates: 50 & 60 fps
720p · 1280x720 · 240fps
| 12MP 4000x3000 4:3 |
| 10MP 3468x2736 4:3 |
| 8MP 3840 |
Photo Modes
12MP · 4000x3000 · Aspect Ratio 4:3
10MP · 3648x2736 · Aspect Ratio 4:3
8MP • 3840x2160 • Aspect Ratio 16:9
To unlock the full potential of your SJ8 PRO, it is very strongly suggested that you use at least a Class 10 U3 card of a known brand, purchased from a reputable seller.
High resolutions and high frame-rates require writing at high speeds. Using a low-speed card may result in erratic camera performance and photos/videos may have issues playing back.
SJ8 PRO supports microSD cards up to 128GB, and can read and write in either FAT32 or ExFAT filing system.
MODE SETTINGS - Page 1

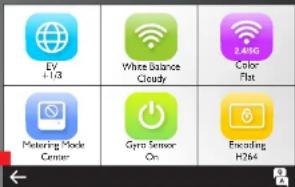
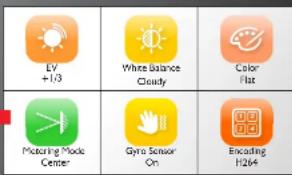
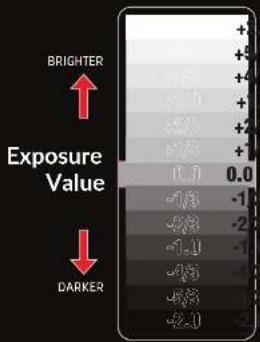
EV • Exposure Value - Adjust the exposure for the amount of light allowed in. Set this value low to compensate if the scene is too bright; set high when too dark. High EV takes longer for images to be taken, and subject may blur if moving.

WHITE BALANCE · Adjusts the color temperature of the recording to compensate for ambient lighting.

COLOR PROFILE • You are given 2 preset choices: SJCAM - Vivid, and Flat. Choose Flat to preserve color dynamics; SJCAM - Vivid to enhance colors.
METERING • Tells the camera which portion of the scene takes priority when setting the brightness level of the whole image. Options: Average, Center Weighted, or Spot.
GYRO SENSOR · Enable the Gyro Sensor to smoothen out shakiness during recording. Disable the Gyro Sensor when not needed, to gain full field-of-view of the set resolution.
ENCODING • H.264 is a standard for writing video files, high compatibility with video players. H.265 is a newer standard that compresses video much better for smaller file sizes and faster streaming, may require you to update your video player's codec.
EV works by controlling how much light is allowed in.

HINT: You will know if the Gyro Sensor is active when you see this blinking hand icon near the battery status display.
MODE SETTINGS - Page 2

VOLUME • Sets the microphone sensitivity for how loud or how soft sound is recorded into the video.
CAUTION: Setting this too high in small, enclosed spaces may distort the recorded audio.
SHARPNESS • Sets how much image detail is saved.
A higher setting will produce sharper images at the expense of file size.
Setting this low will smoothen annoying closely-knit fine lines.

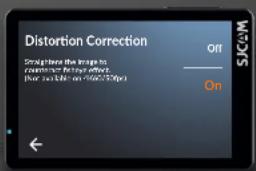
DISTORTION CORRECTION • Enable this setting to remove the fisheye effect that is inherent in wide-angle lenses. NOTE: Minor cropping of the image will occur for this to be possible.
Distortion Correct... On
LOOP RECORDING • Allows continuous recording when the memory card is full by recording over the oldest file in the folder.
FILE SIZE • Manually sets the limit of file size length..
NOTE: Cards formatted in FAT32 will have a maximum file size of 4GB, regardless of resolution or length of recording. Your SJ8 PRO supports ExFAT file format which removes this limitation.

VIDEO QUALITY • Gives you the option of recording video in high bitrate for more image detail per frame, but will result in much bigger file sizes.
A visual explanation of how
Distortion Correction works.

DISFORTION CORRECTION ON
UN

ON LDR OFF
MODE SETTINGS - Page 3

Photo Quality Fine
PHOTO QUALITY · Presets for making adjustments on how much detail is written in photos. Options: Fine, Standard, and Economy.

ISO 6400
ISO • Adjusts the image sensor's sensitivity to light. A higher ISO will collect more light at the expense of adding noise (grain) into the image when set too high.

Audio On
AUDIO · Enables or disables sound recording on your video footage.

Time Stamp Off
TIME STAMP • When enabled, will display the date and time of your recording. Great when doing timelapse videos, or for making a documentary. Otherwise just turn it off.

Shutter Speed 1/500
SHUTTER SPEED • Controls how long the image sensor stays "open" to capture an image. Fast shutter speeds allow less light, freezing movement better. Slow shutter speeds allow more light but may blur moving objects. Very long exposure settings are best for night photography.

RAW Off
MODE SETTINGS - Page 4

VideoLapse I Second
VIDEOLAPSE • Takes a series of photos at set intervals to create a video file that is immediately playable without requiring to stitch each image together. This setting is only available in VideoLapse mode.

Shutter Speed 2X
SLOW MOTION • Speeds up very slow objects or scenes such as sunsets for playing back in standard speed to create a video that shows very slow movement. This setting is only available in Slow Motion mode.

Photolapse Interval I Second
PHOTOLAPSE INTERVAL • Sets how far apart each frame is recorded. Longer intervals make slow moving objects like clouds appear to move much faster than short intervals.

Some menu items have screen hints to make it easier to understand and use.
H.265
High Efficiency Video Coding
H.265, also known as HEVC (or High Efficiency Video Coding), is a new industry standard in video encoding which writes much smaller video filesizes without compromising image quality.
HEVC is created so that large video files can stream much faster over networks, and have less storage requirement.
GENERAL SETTINGS - Page 1

Language English
LANGUAGE > Options for system language.

WIFI Off
WIFI • Switches WiFi communication to app on or off. When active: scan networks, select your camera's SSID and then connect on your phone before opening the SJCAM app.

WiFi Frequency 2.4 GHz
WIFI FREQUENCY • Switch from either standard 2.4GHz, or 5GHz (faster and farther reach).

Format
FORMAT • Completely erases everything on the memory card, then sets it up as a new drive. SJ8 PRO supports both FAT32 and ExFAT. Format the card to ExFAT on your desktop whenever possible, to allow recording files more than 4GB in size.

Auto Power Off 5 Minutes
AUTO POWER OFF • Automatically turns the camera off at a preset time. Works only if the camera is on standby and not recording.

LCD Off Time 3 Minutes
LCD OFF TIME • Automatically turns the display off at a preset time. To wake up the display, simply tap the screen or short-press any button once.

POWER-RELATED TIPS
• To conserve power, you may turn off the front screen if you are not using it.
- Set the Auto Power Off to 3 minutes to get the most out of your battery's charge. If no activity is detected within this period, your camera will power off.
- Go to LCD Off Time and set it to the shortest possible time. Configure the lightset so you know if you're recording or not.
- Plan your video recordings ahead to maximize battery power.
- When recording, avoid constantly checking the LCD to see if the camera is running. LCDs use up a lot of battery power. Use the indicator lights instead to know the status.
- Your camera uses a Lithium battery, you can charge it even if you only used half the capacity.
- Get a charger and spare battery, it relieves your current battery from stresses of constant usage.
- For faster charging, turn the camera off while it is plugged in.
GENERAL SETTINGS - Page 2

Front Display On
FRONT DISPLAY • Enables or disables the small front LCD when not needed.

Indicator Lights On
INDICATOR LIGHTS • Turns on or off all status indicator lights on the camera.

Keypad Tone On
KEYPAD TONE • Enables or disables system sounds as an audible indicator of status and button presses.

Rotate Off
ROTATE • Flips the recording 180-degrees. Turn this on when mounting the camera in an upside-down position such as on a car windshield or bike handlebar to keep the screen right side up.

Brightness
BRIGHTNESS • Screen brightness adjustment. Set to max when in bright daylight; or dim, when in the dark. Tap the X on upper right corner to exit.

Color Temperature

CAUTION:
• Always test your Waterproof Housing prior to using it underwater.
- Make sure the silicone gasket is aligned and set properly before putting the camera in.
- Check for hair, dirt, or other debris that may get caught in the gasket as this may cause a slow leak that may eventually flood the housing when fully submerged.
• Always wash the waterproof housing with freshwater after every dive to rinse off any salt or other contaminants. Keep the housing closed while doing this.
Note: The waterproof housing is not included in Small Box package..
GENERAL SETTINGS - Page 3

External Microphone Off
EXTERNAL MICROPHONE • Enables or disables external microphone. External microphone must be inserted first into the USB slot (sold separately).

Date / Time
DATE / TIME • Sets camera system date and time. Files will be labeled according to the setting here. Date / Time will also appear when Time Stamp is enabled.

Gimbal Control Off
GIMBAL CONTROL • Enables or disables camera buttons being controlled from the gimbal.

Frequency 60Hz
FREQUENCY • Sets the screen refresh rate. This setting is dependent on country's electricity Alternating Current (AC) standards. May also be used to counter screen flicker or wagon-wheel effect.

Default Setting
DEFAULT SETTING · Resets all the camera's settings to factory defaults.

Display ISO Off

CAUTION: When using your camera as a dashcam, use a car charger cable and remove the internal battery to avoid overcharging/overheating.

WARNING:
Operating your camera
while driving a vehicle is potentially dangerous. It is strongly advised to set up your camera before your trip.
DISPLAY ISO · Enables or disables displaying ISO setting information on the main screen.
GENERAL SETTINGS - Page 4

User Interface SICAM
USER INTERFACE · Options to switch to standard text-only or colored icon-based user interface.

Version
VERSION • Shows the version number of the installed firmware, including the date of installer's release.

You can access the Frequently Asked Questions and answers by going to General Settings screen and tap this Q&A icon on the bottom right.
Scroll up for more.
DIGITAL ZOOM
You can zoom in and out of your scene by tapping the zoom controls on the main screen. Note that this is a digital zoom, and only performs a crop of the actual image.

ZOOM IN
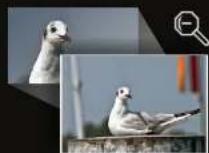
ZOOM OUT
FILE MANAGEMENT
You can transfer files from your camera by using any of these 4 methods.
-
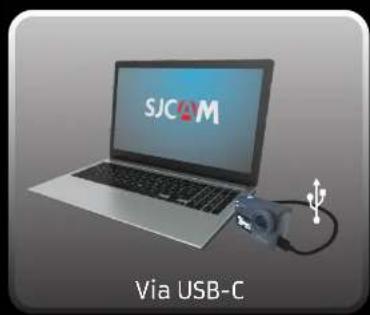
Via USB cable connected from your camera's USB-C slot to a Windows or Mac computer:
a) Connect the USB-C cable, choose "Mass Storage Device" on your camera.
b) Your device will show as a drive on your File Manager (Explorer on Windows; Finder in OSX) -
Via WIFI through the SJCAM Zone App: a) Connect your camera to your phone: Device Settings>Wifi>Choose your camera b) Go to the app, tap the Gallery icon, then download the files you wish to transfer by tapping the Down arrow icon next to each file
-
By using a microSD card adaptor: a) Power off your camera and remove the microSD card. b) Insert it to a card adaptor and plug it to your computer. c) Your card will show as a drive on your File Manager. d) When you're done transferring files, right-click the drive > choose "Eject" before removing the card from your computer.
-
By transferring the microSD card to your smartphone with removable storage: a) Power off your camera and remove the microSD card; b) Insert the microSD to your mobile device; your microSD card will show up as a drive on your mobile device's file manager; c) Transfer the files you choose to your mobile device; d) When you're done, "eject" the microSD card by choosing "Unmount"
Optional: Format the microSD card on your camera to remove files added by your mobile device.


Get the app.





Follow us


- SJCAM
- Congratulations on your new SJCAM Action Camera!
- CAUTION!
- SJ8 PRO SPECIFICATIONS
- SJ SMART REMOTE (Optional)
- POWERING THE CAMERA ON
- INSERTING A MICRO SD CARD INTO THE CAMERA
- REPLACING THE SJ8 PLUS BATTERY
- INSERTING A USB-C CABLE
- REMOVING THE CAMERA FROM THE WATERPROOF HOUSING
- The Main Screen
- Resolution Options
- Mode Selection
- Mode Settings
- Toggles Screen
- Playback Screen
- Mode Settings Screen
- Current Menu Options
- The Front Screen
- Current Mode Icon
- Camera Activity Ball
- Current Time
- Current Resolution / Frame Rate
- Elapsed Time / Shots Taken
- Battery Meter
- RESOLUTION SELECTION
- Video Modes
- Photo Modes
- MODE SETTINGS - Page 1
- MODE SETTINGS - Page 2
- MODE SETTINGS - Page 3
- MODE SETTINGS - Page 4
- GENERAL SETTINGS - Page 1
- POWER-RELATED TIPS
- GENERAL SETTINGS - Page 2
- CAUTION:
- GENERAL SETTINGS - Page 3
- WARNING:
- GENERAL SETTINGS - Page 4
- DIGITAL ZOOM
- FILE MANAGEMENT
- Get the app.
Brand : SJCAM
Model : SJ8 Pro
Category : Sports camera