SJ6 Legend - Sports camera SJCAM - Free user manual and instructions
Find the device manual for free SJ6 Legend SJCAM in PDF.


| Product Type | Sports Camera |
| Model | SJ6 Legend |
| Video Resolution | 4K (24fps, interpolated), 2K (30fps), 1080p (60fps/30fps), 720p (120fps/60fps/30fps), VGA (240fps) |
| Photo Resolution | Up to 16MP (interpolated) |
| Image Sensor | 12MP (actual) |
| Lens | 166° wide angle |
| Display | 2.0 inch LTPS touchscreen + front LCD |
| Battery | Removable 1000mAh Li-ion, up to 110 min recording |
| Memory Card | MicroSD up to 128GB (Class 10 or higher) |
| Video Format | MP4, MOV (H.264) |
| Image Format | JPEG (RAW support in still mode) |
| WiFi | Yes, with SJCAM Zone app |
| Gyro Stabilization | Yes (3 levels: Off, Low, High) |
| Waterproof | With included waterproof case (up to 30m) |
| Remote Control | Optional SJ Smart Remote (RF, up to 10m) |
| Ports | Mini-USB, MicroHDMI, MicroSD slot |
| Audio | Built-in microphone and speaker |
| Dimensions (camera) | 5.90 x 4.10 x 2.11 cm (2.32 x 1.61 x 0.83 in) |
| Weight (camera) | 82 g (0.082 kg) |
| Package Weight | 700 g (0.700 kg) |
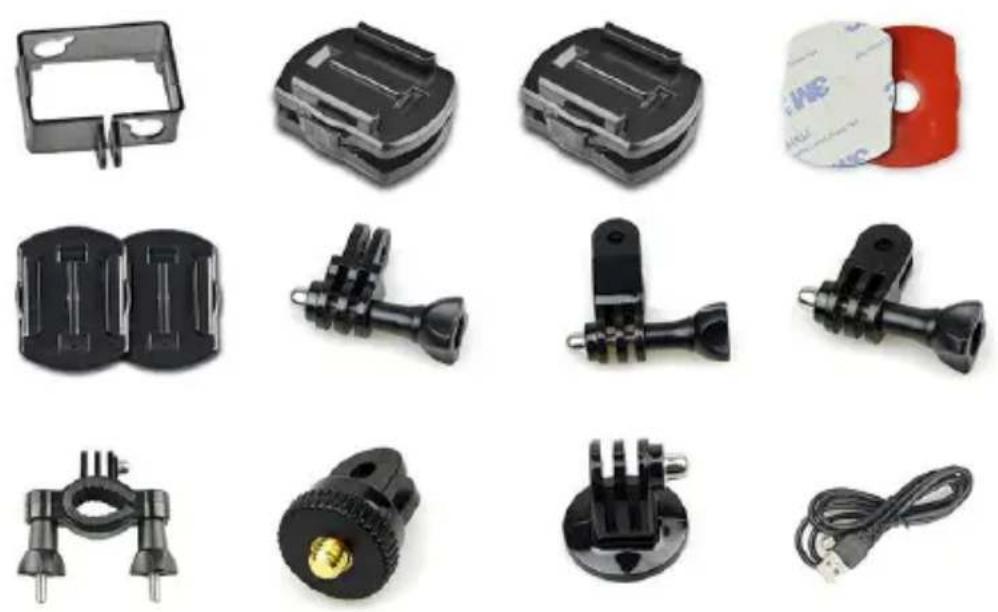
| Accessories Included | Waterproof case, USB cable, mounting accessories, manual |
| Firmware Update | Via SJCAM Zone app or website |
Frequently Asked Questions - SJ6 Legend SJCAM
User questions about SJ6 Legend SJCAM
0 question about this device. Answer the ones you know or ask your own.
Ask a new question about this device
Download the instructions for your Sports camera in PDF format for free! Find your manual SJ6 Legend - SJCAM and take your electronic device back in hand. On this page are published all the documents necessary for the use of your device. SJ6 Legend by SJCAM.
USER MANUAL SJ6 Legend SJCAM
We believe everyone has a dream. Our mission is to make you express yourself, your vision and dreams in order to make them real, and share them with others.
In the last 10 years of experience in Research and Development and Commercialization, we have gained world recognition from customers and retailers, with the ambition to give people the possibility to create, explore and empower their dreams. Having our own factory, controlling the whole production process, and a facility, with more than 500 employees, makes us more versatile and able to reach the market fast, ensuring that the highest quality standards are met. It is all about dreams. Dare to join the SJCAM Revolution.
-SJCAM CEO
SJCAM®
Congratulations on your new SJCAM Action Camera!
We know you're excited to use your SJ6 LEGEND, please take time to read this manual before doing anything with it. This is the very first touchscreen SJCAM, and there's plenty you can do, so you need to familiarize yourself with the features now to get the most out of it.
It is important to keep your camera's firmware up to date. You may connect your camera via WiFi to the SJCAM ZONE app to automatically download and install the latest firmware, or visit www.sjcamhd.com/firmware.
CAUTION!
- This is a high-precision product. Do not drop.
- Do not expose the unit to strong magnetic fields, such as magnets, electrical motors, and machinery that use strong radio waves.
- Never leave the unit in high temperature areas. Electronics and optics can be damaged under prolonged exposure to heat.
- Do not submerge the camera without putting it in the included waterproof case.
- Avoid extended periods of battery charging. Keep it away from children and pets while charging to avoid accidents.
SJCAM
SJ6 LEGEND SPECIFICATIONS
Model: SJ6 LEGEND
Type: Sports Camera
Type of Camera: 4K (interpolated)
Max External Card Supported: Micro SD 128G (not included)
Screen size: 2.0inch
Screen type: LTPS
Battery Type: Removable
Capacity: 1000mAh
Average Working Time: 110 minutes
166 degree wide angle lens
Decode Format: H.264
Video format: MOV,MP4
Video Resolution: 1080P(30fps), 1080P(60fps), 2K (30fps), 4K (24fps),
720P (120fps),720P (30fps),720P (60fps),VGA (240fps)
Video Frame Rate: 120fps,25fps,30FPS,60FPS
Image Format: JPEG
Audio System: Built-in microphone/speaker
WIFI: Yes
Gravity sensor: Yes
Language: Czech,Danish,English,French,German,Hungarian,Italian,Japanese,Korean,
Polski,Portuguese,Romanian,Russian,Simplified Chinese,Slovak,Spanish,Traditional Chinese
50Hz,60Hz
Product size (L x W x H): 5.90 x 4.10 x 2.11 cm / 2.32 x 1.61 x 0.83 inches
Package size (L x W x H): 25.00 x 13.10 x 6.40 cm / 9.9 x 5.2 x 2.5 inches
Product weight: 0.082 kg
Package weight: 0.700 kg
text_image
SJCAM SJCAM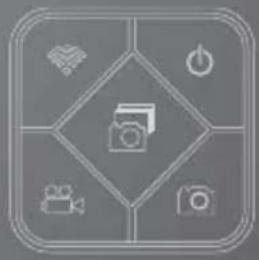
natural_image
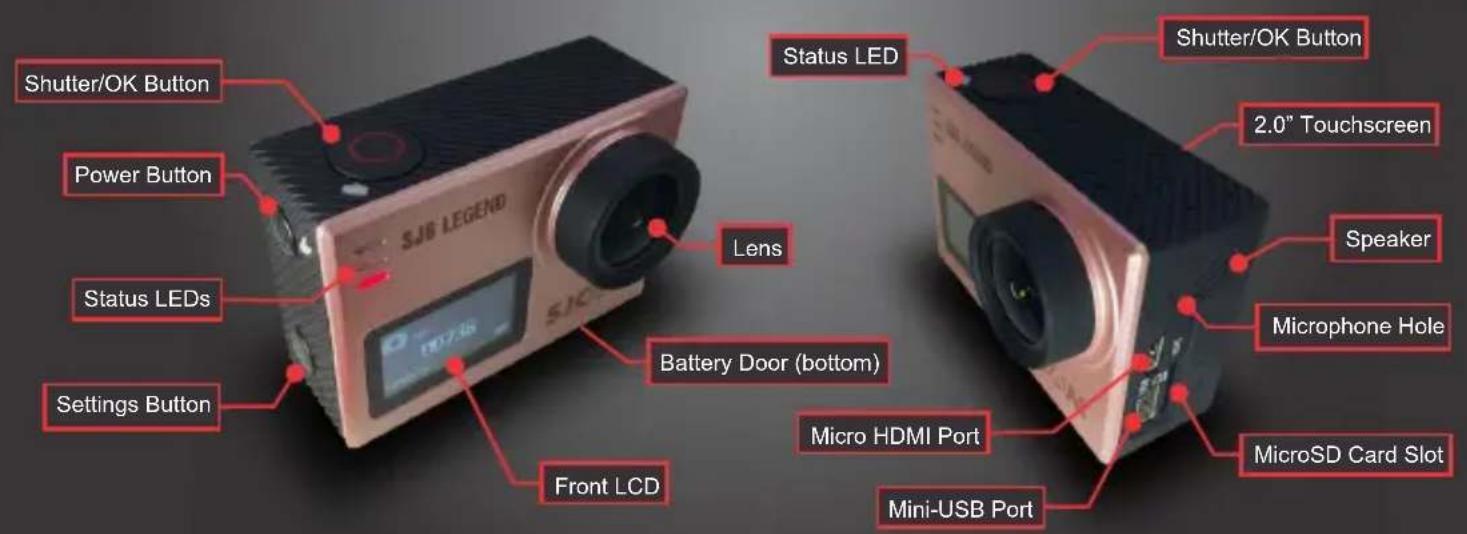
Gray-scale icon set with camera, battery, power button, video camera, and film reel symbols (no text or labels)PARTS OF YOUR CAMERA
text_image
Shutter/OK Button Power Button Status LEDs Settings Button Front LCD Battery Door (bottom) Anti-LCD Lens Status LED Shutter/OK Button 2.0" Touchscreen Speaker Microphone Hole MicroHDMI Port Mini-USB Port MicroSD Card SlotSJCAM SJ6 LEGEND
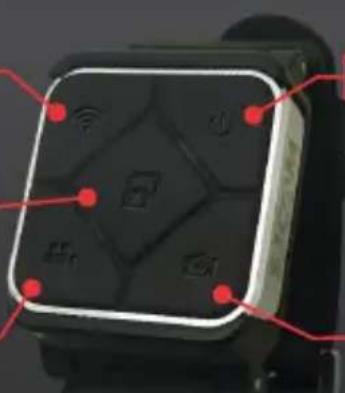
SJ SMART REMOTE (Optional)
WIFI On/Off Switch
Burst Shot Button
Record Video Start/Stop
natural_image
Close-up of a black smartwatch with red indicator lights and sensor icons on the front panel (no readable text or symbols)Camera-Off Button
Shutter Button
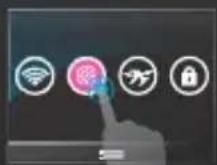

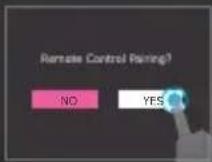

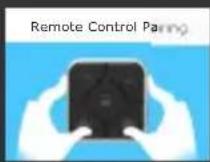
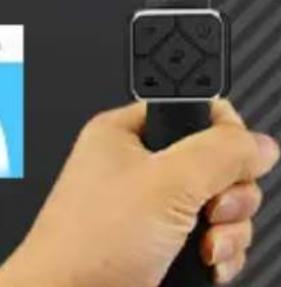
To pair your remote to your LEGEND: Swipe down from the top > Select Remote Control choose "Remote Control Pairing". A picture instruction will appear. Press the Video and the Photo buttons on the Remote simultaneously. "Pairing Completion ID" will show
SJCAM
Once your Remote is paired, you will never need to pair it again. Everytime the SJ6 LEGEND is turned on, your SJ Remote can control your camera.
The Remote is tested to work at a maximum distance of 30 feet, or 10 meters, Line-Of-Sight.
The battery on your Remote will last you a long time as it only uses power when you press any of the buttons.
The remote is powered with a Lithium CR2032 button-cell battery.
SJCAVM
natural_image
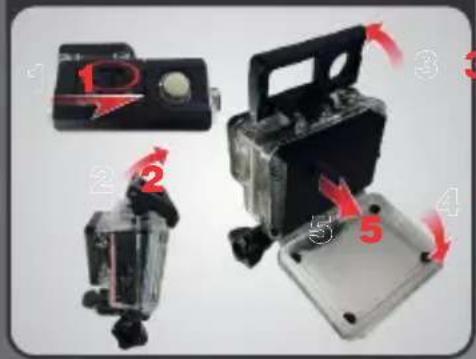
Hand holding a black remote control with a small display (no visible text or symbols)Removing the SJ6 from the Waterproof Case.
text_image
Diagram showing five labeled mechanical components with red arrows indicating motion or assembly stepsRemove the camera from the waterproof case by lifting the clasp from the front side of the case, following the steps shown above.
Once free, swing the backdoor open, then pull the camera out from the waterproof case.
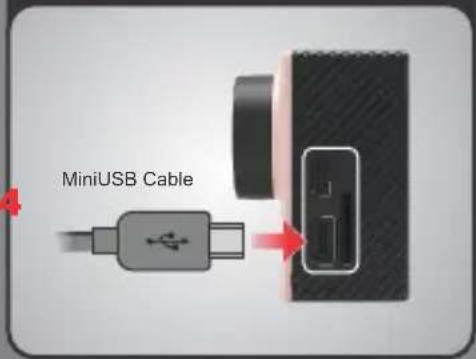
Charging your camera using the MiniUSB cable.
text_image
MiniUSB CablePlug the MiniUSB cable to the slot on the side of the camera as indicated above, and the other end to a USB wall charger with an output of 5V 1A, or plug it to a computer.
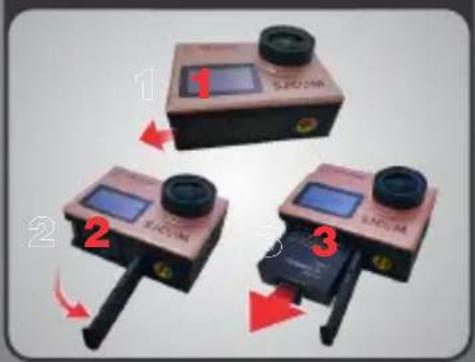
Removing the battery.
text_image
Three labeled electronic devices with red arrows indicating rotation or movement, numbered 1 to 3.Remove your battery by sliding the lock at the bottom of the camera to release the compartment door. Pull the battery out by the flap, plug it to an External Dual Charger Accessory (not shown, sold separately).
Powering ON/OFF your SJ6 Inserting / Removing
natural_image
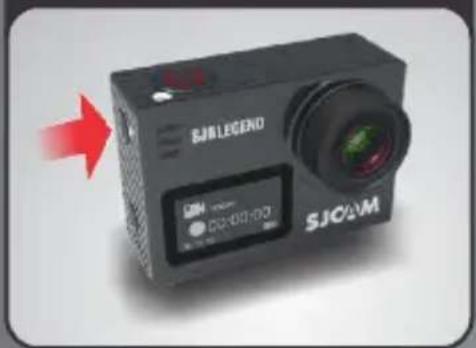
Exterior view of a black SJBLEGEND camera with a red arrow pointing to it, showing no visible text or symbols on the device itself.Press and hold the Power/Mode button to turn your camera on.
You will hear a beep, indicator LEDs will light up, and the screen will display the SJCAM logo.
To turn off your camera, press the Power button once.
Memory Cards
text_image
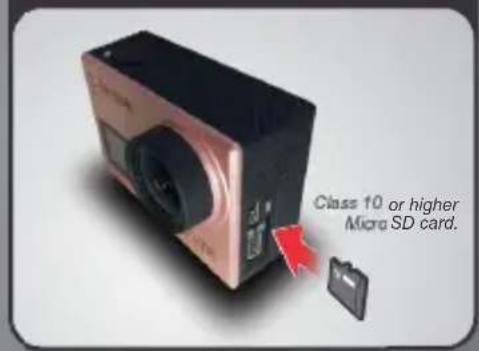
Class 10 or higher Micro SD card.Insert a MicroSD card as shown in the illustration above, with the label facing the front of the SJ6, until it clicks into place. To remove, just push it in gently and the card will eject.
To make sure you do not lose any data, NOTE: only remove or insert your card while the camera is turned completely off.
The Main Screen
Elapsed Time | Time left on Card
Current Mode Icon
Icon will show what mode you are currently in. The options will vary depending on the mode.
Status Indicator Lights
Red and Blue lights will indicate the status of the camera operation.
Go to Playback Mode
Tap this icon to go to the camera's gallery and view the videos and photos you have recorded.

00:00:00 | 02:06:16
text_image
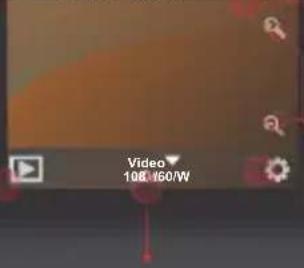
Video 108.460/W
Battery Level Indicator
Displays approximate power left on the battery. Battery blinks when almost empty.

Gyro Stabilization (On)
An indicator showing that the Gyro Sensor is active. Will not show when turned off.

Zoom Controls
Tap the (+) or (-) magnifying glass icons to change the digital zoom factor.

Go to Settings
Tap this icon to make changes to the setting for the selected mode, or for General options.
NOTE:
The SJ6 LEGEND uses an LCD that is backlit. The screen is only meant as a visual guide for composition, and will not show exposure configurations that you set.
Mode in use
Resolution/Framerate
Tap/Swipe Up to show other Mode options.
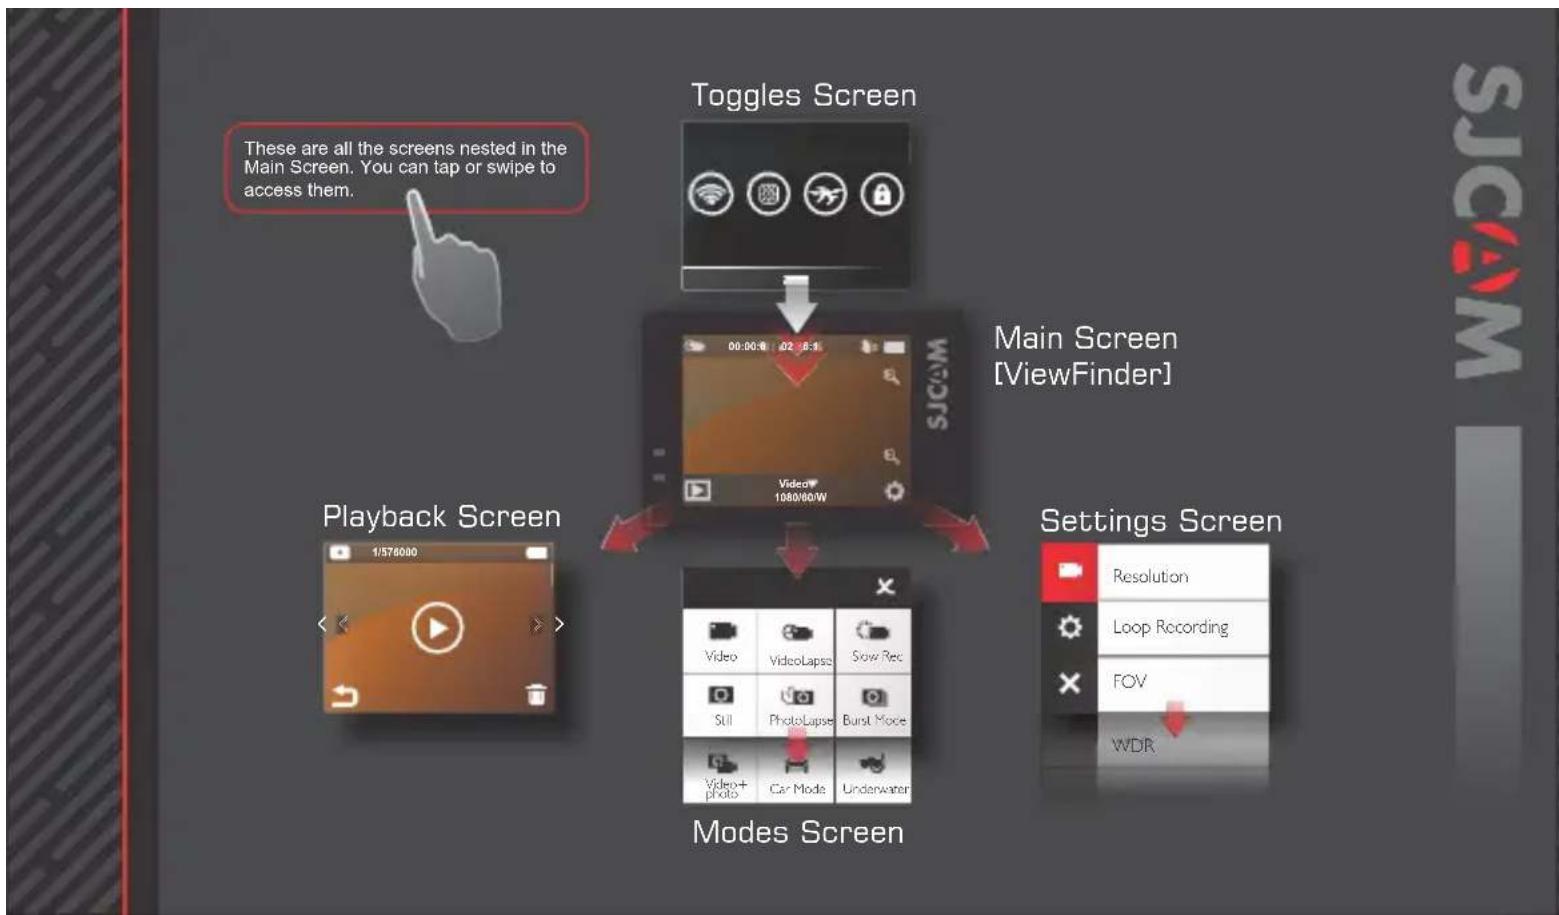
The Main Screen has many nested menus available by tapping or swiping.
You can also hide all the icons on screen to use the viewfinder without the onscreen icons and indicator labels by tapping anywhere in the middle.
flowchart
graph TD
    A["Main Screen [ViewFinder"]] --> B["Toggles Screen"]
    B --> C["Playback Screen"]
    C --> D["Settings Screen"]
    D --> E["Models Screen"]
    E --> F["Playback Screen"]
    style A fill:#f9f,stroke:#333
    style B fill:#ccf,stroke:#333
    style C fill:#cfc,stroke:#333
    style D fill:#fcc,stroke:#333
    style E fill:#cff,stroke:#333
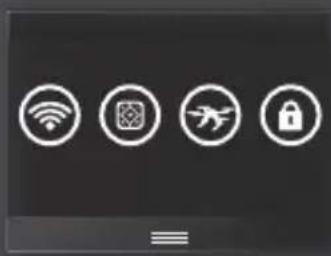
The Toggles Screen
natural_image
Four white circular icons representing Wi-Fi, app, drone, and lock symbols on a dark background (no text or labels)
Toggle WiFi On or Off
Tap this icon to turn on or turn off WiFi. Pressing the WiFi button on the side of the Legend will also do the same thing.

SJ Remote Toggle / Remote Pairing
Tap this icon to receive commands from the remote, or to disable it. You can also pair an SJ Remote through here.

Toggle FPV Mode
Turns on/off First Person View. This enables analog TV-Out via USB A/V cable, and will lock all WiFi operations to prevent interference with other FPV equipment.

Lock Screen Toggle
Disables the touchscreen and buttons cannot be accessed. Touch the LCD to show the Unlock screen.

Swipe Up to return to Main Screen
Swipe this up to hide the Toggles Screen
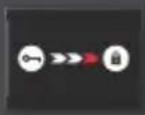
Slide the Key icon to the Lock to open.
To get here, swipe from the top.
The Playback Screen
text_image
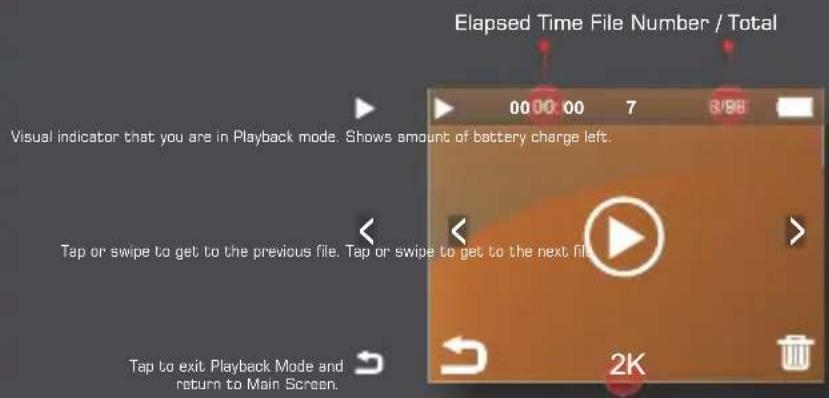
Elapsed Time File Number / Total Visual indicator that you are in Playback mode. Shows amount of battery charge left. Tap or swipe to get to the previous file. Tap or swipe to get to the next file. Tap to exit Playback Mode and return to Main Screen.
Battery Level IndicatorPlayback Icon

Go to Next FileGo to previous file

Delete Current FileReturn to Main Screen
Tap to delete the file currently shown on screen.
To get here, tap this.
File Resolution
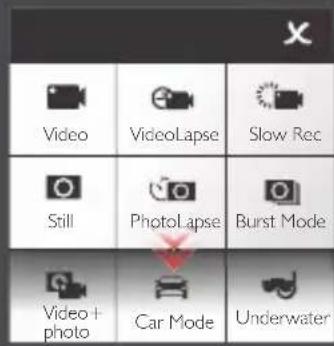
The Modes Screen
text_image
Video VideoLapse Slow Rec Still Photolapse Burst Mode Video + photo Car Mode Underwater
Exit to Main Screen
Tap this X icon to exit.
To get here, tap this, or swipe up.

Video
Mode for recording videos.

VideoLapse
Timelapse photography stitched on-cam to produce a video.

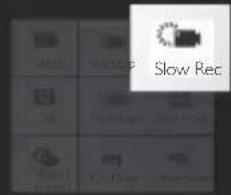
Slow Rec
For recording video in slow motion.

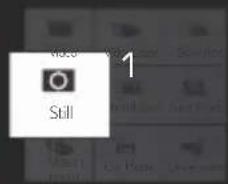
Still

PhotoLapse

Burst Mode
Swipe DOWN to access Video+Photo, Car, and Underwater Modes.

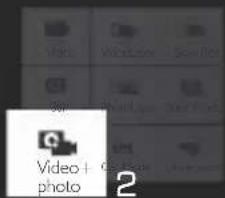
Video+ photo
Still photograph mode.
A series of still photos for creating timelapse. Each photo will have its own file.
Fast multiple succession of snapshots, choose the number of photos desired (Max: 10).

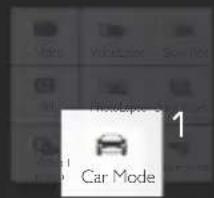
Car Mode
For recording video while a sequence of photos are taken at a set interval.

Underwater
Automatically starts the camera and begins recording once the engine is started (Car Charger Cable Accessory required).
Adds a tinge of red to photos or videos to eliminate the need for a red-filter when using the camera underwater. [Swipe Left or Right to switch from Photo to Video]
The Settings Screen
Current Mode Icon
Icon will show what mode you are currently in. The options will vary depending on the mode.
General Settings Button
Tap the icon to go to the General Settings. Changes you make will reflect on all modes.
Exit to Main Screen
Tap this X icon to exit.
text_image
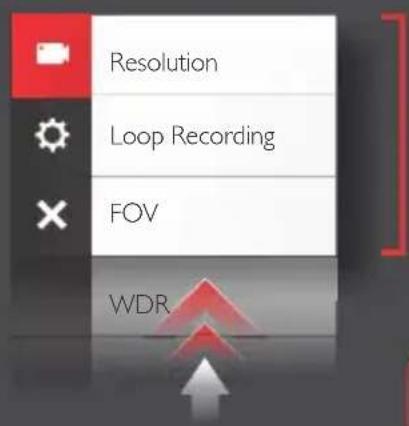
Resolution Loop Recording FOV WDRCurrent Menu Options
Depending on what mode you are in,
the menu options will vary. All the options for the particular mode will show on this side, scroll down for other items.
Once set, the settings will be the same for that particular Mode every time you go back until you change it again.
To get here, tap this.
Scroll UP for more options
Each Mode has its own set of options. Familiarize yourself with each mode and its accompanying menu.
The Front Screen
Current Mode Icon
Icon will show what mode you are currently in. The options will vary depending on the mode.
Camera Activity Ball
The ball will appear steady when in standby mode. The ball will blink when shooting a video.
Current Time
Displays current time in digits.

108060

00:00:00
17:20:43

Current Resolution / Frame Rate
Will display the set resolution size and the accompanying frames per second.
Elapsed Time / Shots Taken
Shows the length of time you are recording. Or the number of images that are stored.
Battery Status Indicator
Displays approximate power left on the battery. Battery blinks when almost empty.
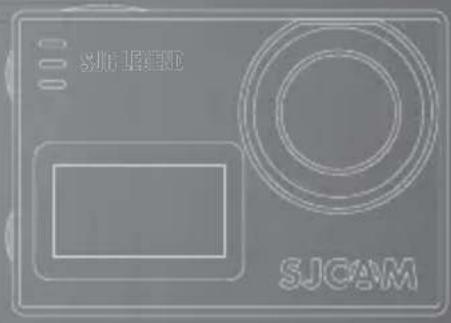
The SJ6 LEGEND is the first SJCAM that implements a front LCD display. It gives the user additional information than just having LEDs that light up as indicators.
| Resolution |
| Loop Recording |
| FOV |
| Low Light Mode |
| WDR |
| Cyro Sensor |
| Audio |
| Volume |
| Time Stamp |
| Video File Format |
| Bitpass |
| Double File |
| Sharpness |
| White Balance |
| Color |
| EV |
| Measuring |
| Disortion Correction |
VIDEO MODE OPTIONS
RESOLUTION > Changing to a higher resolution will have more detail in your video at the expense of file size. A lower resolution has a smaller filesize but will have less details in your video. Conversely, a higher resolution will contain more detail.
Note: FPS (Frames Per Second) is part of the options in video resolution: The higher the FPS, the more images will be displayed per second, and the smoother the movement in the video is, at the expense of filesize.
LOOP RECORDING > Auto-saves your video in small sections, depending on selected length. It will record over your oldest video once there is no more space left on your memory card.
FOV > Field Of View / Field Of Vision (also known as "Focal Length") The higher the setting, the wider the angle of the recorded scene becomes.
LOW LIGHT MODE: When on, the image sensor will compensate for low lighting conditions, at the expense of framecount (doubled-frames). Turning the feature off retains the current set exposure and lock to the selected framerate (FPS) regardless of lighting conditions.
WDR > Automatically adjusts the range of brightness-to-darkness that the camera will record. When turned on, it will help balance your pictures by adjusting the contrasts. Many scenes do not require WDR to be activated, use according to your preference.
GYRO SENSOR ; Enables active video-stabilization to eliminate camera shake. 3 settings available: Off, Low, and High.
AUDIO > Enable or disable recording of sound together with your video.
VOLUME > Adjusts how sensitive your camera's microphone becomes. Settings for how soft or how loud sound is recorded with your video.
TIME STAMP > When enabled, will display the date and time of your recording.
text_image
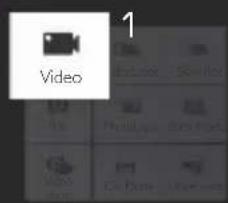
1 VideoA visual explanation of Field Of View (FOV)

text_image
AVIOR MEEAN WIZE| Resolution |
| Loop Recording |
| FOV |
| Low Light Mode |
| WDR |
| Cyro Sensor |
| Audio |
| Volume |
| Time Stamp |
| Video File Format |
| Bitrace |
| Double File |
| Sharpness |
| White Balance |
| Color |
| EV |
| Metering |
| Disortion Correction |
VIDEO MODE OPTIONS - 2
VIDEO FILE FORMAT > Choose between .MOV or .MP4. If you are unsure which to use, choose MP4, as it is more commonly used.
BITRATE > Changes how much information is included in each frame of video. Higher bitrates give more definition to your video at the expense of filesize.
DOUBLE FILE > When turned on, 2 copies of your current recording will be saved. One in the current configured resolution and another in a much lower resolution.
SHARPNESS > Changing the sharpness setting will make your images either crisper or smoother, adjust according to your preference.
WHITE BALANCE > Adjusts the color temperature of the snapshot/recording to compensate for ambient lighting.
COLOR > You are given 5 preset choices: Normal, B&W (Black and White), Retro (aka: "Sepia tone"), Warm (slight reddish hue), and Cool (slight bluish hue).
EV > Exposure Value - Changing EV compensates for the amount of light that is allowed in. You can change this value to a lower setting if the scene is too bright, to compensate. Or higher, if it is too dark, but still depends on your desired effect. A higher EV will take longer for a photo to be taken, and will add blur to videos as each frame takes longer to expose.
METERING > Prioritizes the brightness level of specific parts of the scene depending on the Metering Mode that is used: Average, Center Weighted, or Spot.
DISTORTION CORRECTION: Since the lens of your action camera has a very wide FOV (Field of View), your camera will try to fit everything in, and will result in the center appearing to be distorted or bulging. When on, this feature will straighten the image.
text_image
Video 2A visual explanation of how Distortion Correction works.

UPPROMAN CONTROL ON

OFF
| Video Lapse |
| Exposure Time |
| Resolution |
| Loop Recording |
| FOV |
| Low Light Mode |
| WDR |
| Time Stamp |
| Video File Format |
| Double File |
| Sharpness |
| White Balance |
| Color |
| HV |
| Metering |
| Distortion Correction |
VIDEOLAPSE OPTIONS
VIDEO LAPSE > Sets the time interval between shots.
EXPOSURE TIME > Sets how long the sensor collects light through the lens.
RESOLUTION > Changing to a higher resolution will have more detail in your video at the expense of file size. A lower resolution has a smaller filesize but will have less details in your video. Conversely, a higher resolution will contain more detail.
Note: FPS (Frames Per Second) is part of the options in video resolution: The higher the FPS, the more images will be displayed per second, and the smoother the movement in the video is, at the expense of filesize.
LOOP RECORDING > Auto-saves your video in small sections, depending on selected length. It will record over your oldest video once there is no more space left on your memory card.
FOV > Field Of View / Field Of Vision (also known as "Focal Length") The higher the setting, the wider the angle of the recorded scene becomes.
LOW LIGHT MODE: When on, the image sensor will compensate for low lighting conditions, at the expense of framecount (doubled-frames). Turning the feature off retains the current set exposure and lock to the selected framerate (FPS) regardless of lighting conditions.
WDR > Automatically adjusts the range of brightness-to-darkness that the camera will record. When turned on, it will help balance your pictures by adjusting the contrasts. Many scenes do not require WDR to be activated, use according to your preference.
TIME STAMP > When enabled, will display the date and time of your recording.
VIDEO FILE FORMAT > Choose between .MOV or .MP4. If you are unsure which to use, choose MP4, as it is more commonly used.
text_image
1 VideoLapse| Video Lipsc |
| Exposure Time |
| Resolution |
| Loop Recording |
| FOV |
| Low Light Mode |
| WDR |
| Time Stamp |
| Video File Format |
| Double File |
| Sharpness |
| White Balance |
| Color |
| EV |
| Metering |
| Distortion Correction |
VIDEOLAPSE OPTIONS - 2
DOUBLE FILE > When turned on, 2 copies of your current recording will be saved. One in the current configured resolution and another in a much lower resolution.
SHARPNESS > Changing the sharpness setting will make your images either crisper or smoother, adjust according to your preference.
WHITE BALANCE > Adjusts the color temperature of the snapshot/recording to compensate for ambient lighting.
COLOR > You are given 5 preset choices: Normal, B&W (Black and White), Retro (aka: "Sepia tone"), Warm (slight reddish hue), and Cool (slight bluish hue).
EV > Exposure Value - Changing EV compensates for the amount of light that is allowed in. You can change this value to a lower setting if the scene is too bright, to compensate. Or higher, if it is too dark, but still depends on your desired effect. A higher EV will take longer for a photo to be taken, and will add blur to videos as each frame takes longer to expose.
METERING > Prioritizes the brightness level of specific parts of the scene depending on the Metering Mode that is used: Average, Center Weighted, or Spot.
DISTORTION CORRECTION > Since the lens of your action camera has a very wide FOV (Field of View), your camera will try to fit everything in, and will result in the center appearing to be distorted or bulging. When on, this feature will straighten the image.
text_image
Videol apse 2| Slow Motion |
| Loop Recording |
| FOV |
| Low Light Mode |
| WDR |
| Time Stamp |
| Video File Format |
| Double File |
| Sharpness |
| White Balance |
| Color |
| LV |
| Metering |
| Distortion Correction |
SLOW REC OPTIONS
SLOW MOTION > Sets the speed of the video recording.
LOOP RECORDING > Auto-saves your video in small sections, depending on selected length. It will record over your oldest video once there is no more space left on your memory card.
FOV > Field Of View / Field Of Vision (also known as "Focal Length") The higher the setting, the wider the angle of the recorded scene becomes.
LOW LIGHT MODE: When on, the image sensor will compensate for low lighting conditions, at the expense of framecount (doubled-frames). Turning the feature off retains the current set exposure and lock to the selected framerate (FPS) regardless of lighting conditions.
WDR > Automatically adjusts the range of brightness-to-darkness that the camera will record. When turned on, it will help balance your pictures by adjusting the contrasts. Many scenes do not require WDR to be activated, use according to your preference.
TIME STAMP > When enabled, will display the date and time of your recording.
VIDEO FILE FORMAT > Choose between .MOV or .MP4. If you are unsure which to use, choose MP4, as it is more commonly used.
text_image
Slow Rec File Edit View Help| Slow Motion |
| Loop Recording |
| FOV |
| Low Light Mode |
| WDR |
| Time Stamp |
| Video File Format |
| Double File |
| Sharpness |
| White Balance |
| Color |
| EV |
| Maturing |
| Distortion Correction |
SLOW REC OPTIONS - 2
DOUBLE FILE > When turned on, 2 copies of your current recording will be saved. One in the current configured resolution and another in a much lower resolution.
SHARPNESS > Changing the sharpness setting will make your images either crisper or smoother. Adjust according to your preference.
WHITE BALANCE > Adjusts the color temperature of the snapshot/recording to compensate for ambient lighting.
COLOR > You are given 5 preset choices: Normal, B&W (Black and White), Retro (aka: "Sepia tone"), Warm (slight reddish hue), and Cool (slight bluish hue).
EV > Exposure Value - Changing EV compensates for the amount of light that is allowed in. You can change this value to a lower setting if the scene is too bright, to compensate. Or higher, if it is too dark, but still depends on your desired effect. A higher EV will take longer for a photo to be taken, and will add blur to videos as each frame takes longer to expose.
METERING > Prioritizes the brightness level of specific parts of the scene depending on the Metering Mode that is used: Average, Center Weighted, or Spot.
DISTORTION CORRECTION > Since the lens of your action camera has a very wide FOV (Field of View), your camera will try to fit everything in, and will result in the center appearing to be distorted or bulging.
text_image
Slow Rec File Edit View Help| Image Size | |
| Exposure Time | |
| Delay Capture | |
| Quality | |
| Sharpness | |
| White Balance | |
| Color | |
| ISO | |
| EV | |
| Midrange | |
| RAW | |
| Gym Senior | |
| POW | |
| WORK | |
| Distortion Coriolus | |
| Time Jump |
STILL MODE OPTIONS
IMAGE SIZE > Changes the size of still photos that will be recorded. Of course, the bigger the size the more detailed your pictures are, at the expense of filesize.
EXPOSURE TIME > Sets how long the sensor collects light through the lens.
DELAY CAPTURE > Sets a delay timer to trigger the shutter at the set number of seconds.
QUALITY > Refers to how much compression the output image will have. The higher the setting the bigger the file is, and will contain more detail.
SHARPNESS > Changing the sharpness setting will make your images either crisper or smoother, adjust according to your preference.
WHITE BALANCE > Adjusts the color temperature of the snapshot/recording to compensate for ambient lighting.
COLOR > You are given 5 preset choices: Normal, B&W (Black and White), Retro (aka: "Sepia tone"), Warm (slight reddish hue), and Cool (slight bluish hue).
ISO > Sets the image sensor's sensitivity to light. Choose "Auto" on your camera if you are not familiar with this setting. Depending on the lighting conditions, use the lowest ISO whenever possible, as higher settings will introduce more noise while pixel sensitivity also goes up. Adjust depending on your preference.
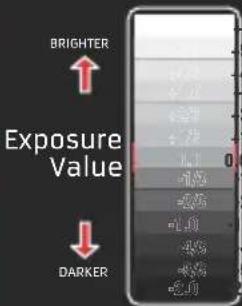
EV > Exposure Value - Changing EV compensates for the amount of light that is allowed in. You can change this value to a lower setting if the scene is too bright, to compensate. Or higher, if it is too dark, but still depends on your desired effect. A higher EV will take longer for a photo to be taken, and will add blur to videos as each frame takes longer to expose.
text_image
Video Still 1EV works by controlling how much light is allowed in.
text_image
BRIGHTER Exposure Value DARKER| Image Size |
| Exposure Time |
| Delay Capture |
| Quality |
| Sharpness |
| White Balance |
| Color |
| ISO |
| EV |
| Metering |
| RAW |
| Gyro Sensor |
| HOV |
| WDR |
| Distortion Correction |
| Time Stamp |
STILL MODE OPTIONS - 2
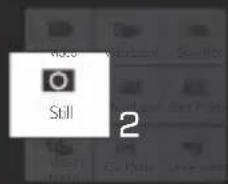
METERING > Prioritizes the brightness level of specific parts of the scene depending on the Metering Mode that is used: Average, Center Weighted, or Spot.
RAW) When turned on, an uncompressed file separate from the JPG image will be written on the card for the purpose of editing later. Use an external photo editing software to make adjustments before saving to your intended filetype.
GYRO SENSOR > Enables active image-stabilization to eliminate camera shake.
FOV > Field Of View / Field Of Vision (also known as "Focal Length") The higher the setting, the wider the angle of the recorded scene becomes.
WDR > Automatically adjusts the range of brightness-to-darkness that the camera will record. When turned on, it will help balance your pictures by adjusting the contrasts.
DISTORTION CORRECTION > Since the lens of your action camera has a very wide FOV (Field of View), your camera will try to fit everything in, and will result in the center appearing to be distorted or bulging. This feature will straighten the image.
TIME STAMP > When enabled, will display the date and time of your recording.
text_image
Video Still 2METERING MODES
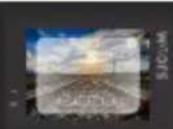
AVERAGE
Meters the whole scene's lighting.
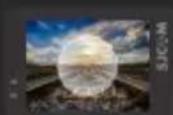
CENTER
Meters the middle part of the frame.
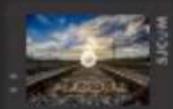
SPOT
Meters only a very small portion of the center of the scene.
| ☒ | Photolapse Time |
| ☒ | Exposure Time |
| Image Size | |
| Quality | |
| Sharpness | |
| White Balance | |
| Color | |
| ISO | |
| EV | |
| Metering | |
| RAW | |
| Cyro Sensor | |
| FOV | |
| WOR | |
| Distortion Correction | |
| Time Stamp |
PHOTOLAPSE OPTIONS
PHOTOLAPSE TIME > Sets the interval between shots.
EXPOSURE TIME > Sets how long the sensor collects light through the lens.
IMAGE SIZE > Changes the size of still photos that will be recorded. Of course, the bigger the size the more detailed your pictures are, at the expense of filesize. Available only in Photo modes.
QUALITY > Refers to how much compression the output image will have. The higher the setting the bigger the file is, and will contain more detail.
SHARPNESS > Changing the sharpness setting will make your images either crisper or smoother, adjust according to your preference.
WHITE BALANCE > Adjusts the color temperature of the snapshot/recording to compensate for ambient lighting.
COLOR > You are given 5 preset choices: Normal, B&W (Black and White), Retro (aka: "Sepia tone"), Warm (slight reddish hue), and Cool (slight bluish hue).
ISO > Sets the image sensor's sensitivity to light. Choose "Auto" on your camera if you are not familiar with this setting. Depending on the lighting conditions, use the lowest ISO whenever possible, as higher settings will introduce more noise while pixel sensitivity also goes up. Adjust depending on your preference.
EV > Exposure Value - Changing EV compensates for the amount of light that is allowed in. You can change this value to a lower setting if the scene is too bright, to compensate. Or higher, if it is too dark, but still depends on your desired effect. A higher EV will take longer for a photo to be taken, and will add blur to videos as each frame takes longer to expose.
| Image Size | |
| Exposure Time | |
| Delay Capture | |
| Quality | |
| Sharpness | |
| White Balance | |
| Color | |
| ISO | |
| EV | |
| Metering | |
| RAW | |
| Gyro Sensor | |
| HOV | |
| WOR | |
| Distortion Correction | |
| Time Stamp |
PHOTOLAPSE OPTIONS - 2
METERING > Prioritizes the brightness level of specific parts of the scene depending on the Metering Mode that is used: Average, Center Weighted, or Spot.
RAW) When turned on, an uncompressed file separate from the JPG image will be written on the card for the purpose of editing later. Use an external photo editing software to make adjustments before saving to your intended filetype.
GYRO SENSOR > Enables active image-stabilization to eliminate camera shake.
FOV > Field Of View / Field Of Vision (also known as "Focal Length") The higher the setting, the wider the angle of the recorded scene becomes.
WDR > Automatically adjusts the range of brightness-to-darkness that the camera will record. When turned on, it will help balance your pictures by adjusting the contrasts.
DISTORTION CORRECTION > Since the lens of your action camera has a very wide FOV (Field of View), your camera will try to fit everything in, and will result in the center appearing to be distorted or bulging. When on, this feature will straighten the image
TIME STAMP > When enabled, w l display the date and time of your recording.
| Burst Mode |
| Image Size |
| Quality |
| Sharpness |
| White Balance |
| Color |
| ISO |
| EV |
| Metering |
| Cyto-Sensor |
| IOV |
| WOR |
| Distortion Correction |
| Time Stamp |
BURST MODE OPTIONS
BURST MODE: Fast multiple succession of snapshots, choose the number of photos desired (Max: 10 consecutive shots).
IMAGE SIZE > Changes the size of still photos that will be recorded. Of course, the bigger the size the more detailed your pictures are, at the expense of filesize.
QUALITY > Refers to how much compression the output image will have. The higher the setting the bigger the file is, and will contain more detail.
SHARPNESS > Changing the sharpness setting will make your images either crisper or smoother, adjust according to your preference.
WHITE BALANCE > Adjusts the color temperature of the snapshot/recording to compensate for ambient lighting.
COLOR > You are given 5 preset choices: Normal, B&W (Black and White), Retro (aka: "Sepia tone"), Warm (slight reddish hue), and Cool (slight bluish hue).
ISO > Sets the image sensor's sensitivity to light. Choose "Auto" on your camera if you are not familiar with this setting. Depending on the lighting conditions, use the lowest ISO whenever possible, as higher settings will introduce more noise while pixel sensitivity also goes up. Adjust depending on your preference.
EV > Exposure Value - Changing EV compensates for the amount of light that is allowed in. You can change this value to a lower setting if the scene is too bright, to compensate. Or higher, if it is too dark, but still depends on your desired effect. A higher EV will take longer for a photo to be taken, and will add blur to videos as each frame takes longer to expose.
text_image
Burst Mode| Burst Mode | |
| Image Size | |
| Quality | |
| Sharpness | |
| Why Balance | |
| Color | |
| ISO | |
| EV | |
| Metering | |
| Gyro Sensor | |
| FOV | |
| WOR | |
| Distortion Correction | |
| Time Stamp |
BURST MODE OPTIONS - 2
METERING > Prioritizes the brightness level of specific parts of the scene depending on the Metering Mode that is used: Average, Center Weighted, or Spot.
GYRO SENSOR) Enables active image-stabilization to eliminate camera shake.
FOV > Field Of View / Field Of Vision (also known as "Focal Length") The higher the setting, the wider the angle of the recorded scene becomes.
WDR > Automatically adjusts the range of brightness-to-darkness that the camera will record. When turned on, it will help balance your pictures by adjusting the contrasts.
DISTORTION CORRECTION > Since the lens of your action camera has a very wide FOV (Field of View), your camera will try to fit everything in, and will result in the center appearing to be distorted or bulging. When on, this feature will straighten the image.
TIME STAMP > When enabled, will display the date and time of your recording.
text_image
Burst Mode| Photo Lapse Time |
| Resolution |
| Loop Recording |
| TOV |
| Low Light Mode |
| WDR |
| Gyro Sensor |
| Audio |
| Volume |
| Time Stamp |
| Video File Format |
| Bit Rate |
| Double File |
| Sharpness |
| White Balance |
| Color |
| EV |
| Metering |
| Distortion Correction |
VIDEO+PHOTO OPTIONS
PHOTOLAPSE TIME > Sets the interval between shots.
RESOLUTION > Changing to a higher resolution will have more detail in your video at the expense of file size. A lower resolution has a smaller filesize but will have less details in your video. Conversely, a higher resolution will contain more detail. Note: FPS (Frames Per Second) is part of the options in video resolution: The higher the FPS, the more images will be displayed per second, and the smoother the movement in the video is, at the expense of filesize.
LOOP RECORDING : Auto-saves your video in small sections, depending on selected length. It will record over your oldest video once there is no more space left on your memory card.
FOV > Field Of View / Field Of Vision (also known as "Focal Length") The higher the setting, the wider the angle of the recorded scene becomes.
LOW LIGHT MODE: When on, the image sensor will compensate for low lighting conditions, at the expense of framecount (doubled-frames). Turning the feature off retains the current set exposure and lock to the selected framerate (FPS) regardless of lighting conditions.
WDR > Automatically adjusts the range of brightness-to-darkness that the camera will record. When turned on, it will help balance your pictures by adjusting the contrasts. Many scenes do not require WDR to be activated, use according to your preference.
GYRO SENSOR > Enables active video-stabilization to eliminate shake.
AUDIO > Enable or disable recording of sound together with your video.
VOLUME > Adjusts how sensitive your camera's microphone becomes. Settings for how soft or how loud sound is recorded together with your video.
TIME STAMP > When enabled, will display the date and time of your recording.
text_image
Video+ photo 1DIGITAL ZOOM
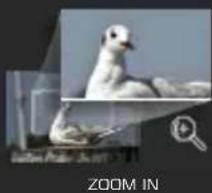
You can zoom in and out of your scene by tapping the zoom controls on the main screen. Note that this is a digital zoom, and only performs a crop of the actual image.
natural_image
Illustration of a duckling with magnifying glass overlay, no text or symbols present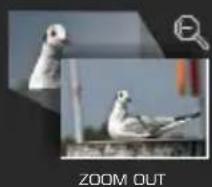
natural_image
Two birds in flight, one with a magnifying glass icon and the other labeled 'ZOOM OUT' (no other text or symbols)| Photo Lapse Time |
| Resolution |
| Loop Recording |
| TOV |
| WDR |
| Cyro Sensor |
| Audio |
| Volume |
| Time Stamp |
| Video File Format |
| Bit Rate |
| Double File |
| Sharpness |
| White Balance |
| Color |
| EV |
| Metering |
| Distortion Correction |
VIDEO+PHOTO OPTIONS - 2
VIDEO FILE FORMAT > Choose between .MOV or .MP4. If you are unsure which to use, choose MP4, as it is more commonly used.
BITRATE > Changes how much information is included in each frame of video. Higher bitrates give more definition to your video at the expense of filesize.
DOUBLE FILE > When turned on, 2 copies of your current recording will be saved. One in the current configured resolution and another in a much lower resolution.
SHARPNESS > Changing the sharpness setting will make your images either crisper or smoother, adjust according to your preference.
WHITE BALANCE > Adjusts the color temperature of the snapshot/recording to compensate for ambient lighting.
COLOR > You are given 5 preset choices: Normal, B&W (Black and White), Retro (aka: "Sepia tone"), Warm (slight reddish hue), and Cool (slight bluish hue).
EV > Exposure Value - Changing EV compensates for the amount of light that is allowed in. You can change this value to a lower setting if the scene is too bright to compensate. You may set the EV higher if the scene is too dark, but still depends on your desired effect. A higher EV will take longer for a photo to be taken, and will add blur to videos as each frame takes longer to expose.
METERING > Prioritizes the brightness level of specific parts of the scene depending on the Metering Mode that is used: Average, Center Weighted, or Spot.
DISTORTION CORRECTION: Since the lens of your action camera has a very wide FOV (Field of View), your camera will try to fit everything in, and will result in the center appearing to be distorted or bulging. When on, this feature will straighten the image.
text_image
Video Video+ Photo 2
TIP: For a more stable video or photo, turn on the Gyro Sensor. You will know if it's active when you see a blinking hand on the upper right hand of the Display.
| Resolution |
| Loop Recording |
| FOV |
| Low Light Mode |
| WDR |
| Cyro Sensor |
| Audio |
| Volume |
| Time Stamp |
| Video File Format |
| Bitrac |
| Double File |
| Sharpress |
| White Balance |
| Color |
| EV |
| Mooring |
| Distortion Correction |
CAR MODE OPTIONS
RESOLUTION > Changing to a higher resolution will have more detail in your video at the expense of file size. A lower resolution has a smaller filesize but will have less details in your video. Conversely, a higher resolution will contain more detail.
Note: FPS (Frames Per Second) is part of the options in video resolution: The higher the FPS, the more images will be displayed per second, and the smoother the movement in the video is, at the expense of filesize.
LOOP RECORDING > Auto-saves your video in small sections, depending on selected length. It will record over your oldest video once there is no more space left on your memory card.
FOV > Field Of View / Field Of Vision (also known as "Focal Length") The higher the setting, the wider the angle of the recorded scene becomes.
LOW LIGHT MODE: When on, the image sensor will compensate for low lighting conditions, at the expense of framecount (doubled-frames). Turning the feature off retains the current set exposure and lock to the selected framerate (FPS) regardless of lighting conditions.
WDR > Automatically adjusts the range of brightness-to-darkness that the camera will record. When turned on, it will help balance your pictures by adjusting the contrasts. Many scenes do not require WDR to be activated, use according to your preference.
GYRO SENSOR ; Enables active video-stabilization to eliminate camera shake. 3 settings available: Off, Low, and High.
AUDIO > Enable or disable recording of sound together with your video.
VOLUME > Adjusts how sensitive your camera's microphone becomes. Settings for how soft or how loud sound is recorded together with your video.
TIME STAMP > When enabled, will display the date and time of your recording.
text_image
Movie Voice Sound Photo Photo Car Mode 1CAUTION: When using your camera as a dashcam, use a car charger cable and remove the internal battery to avoid overcharging/overheating.
WARNING: Operating your camera while driving a vehicle is potentially dangerous. It is strongly advised to set up your camera before your trip.
| Resolution |
| Loop Recording |
| ROV |
| Low Light Mode |
| WDR |
| Cyro Sensor |
| Audio |
| Volume |
| Time Stamp |
| Video File Format |
| Bitrace |
| Double File |
| Sharpness |
| White Balance |
| Color |
| EV |
| Metering |
| Disortion Correction |
CAR MODE OPTIONS - 2
VIDEO FILE FORMAT > Choose between .MOV or .MP4. If you are unsure which to use, choose MP4, as it is more commonly used.
BITRATE > Changes how much information is included in each frame of video. Higher bitrates give more definition to your video at the expense of filesize.
DOUBLE FILE > When turned on, 2 copies of your current recording will be saved. One in the current configured resolution and another in a much lower resolution.
SHARPNESS > Changing the sharpness setting will make your images either crisper or smoother, adjust according to your preference.
WHITE BALANCE > Adjusts the color temperature of the snapshot/recording to compensate for ambient lighting.
COLOR > You are given 5 preset choices: Normal, B&W (Black and White), Retro (aka: "Sepia tone"), Warm (slight reddish hue), and Cool (slight bluish hue).
EV > Exposure Value - Changing EV compensates for the amount of light that is allowed in. You can change this value to a lower setting if the scene is too bright, to compensate. Or higher, if it is too dark, but still depends on your desired effect. A higher EV will take longer for a photo to be taken, and will add blur to videos as each frame takes longer to expose.
METERING > Prioritizes the brightness level of specific parts of the scene depending on the Metering Mode that is used: Average, Center Weighted, or Spot.
DISTORTION CORRECTION: Since the lens of your action camera has a very wide FOV (Field of View), your camera will try to fit everything in, and will result in the center appearing to be distorted or bulging. When on, this feature will straighten the image.
text_image
Video Wireless Sweller Style Style1 Car Mode 2CAUTION: When using your camera as a dashcam, use a car charger cable and remove the internal battery to avoid overcharging/overheating.

WARNING
Operating your camera
while driving a vehicle is
potentially dangerous. It is strongly advised to set up your camera before your trip.
| Resolution |
| Loop Recording |
| FOV |
| Low Light Mode |
| WDR |
| Cyro Sensor |
| Audio |
| Volume |
| Time Stamp |
| Video File Format |
| Bitrace |
| Double File |
| Sharpness |
| White Balance |
| Color |
| EV |
| Measuring |
| Disortion Correction |
RESOLUTION > Changing to a higher resolution will have more detail in your video at the expense of file size. A lower resolution has a smaller filesize but will have less details in your video. Conversely, a higher resolution will contain more detail.
Note: FPS (Frames Per Second) is part of the options in video resolution: The higher the FPS, the more images will be displayed per second, and the smoother the movement in the video is, at the expense of filesize.
LOOP RECORDING > Auto-saves your video in small sections, depending on selected length. It will record over your oldest video once there is no more space left on your memory card.
FOV > Field Of View / Field Of Vision (also known as "Focal Length") The higher the setting, the wider the angle of the recorded scene becomes.
LOW LIGHT MODE: When on, the image sensor will compensate for low lighting conditions, at the expense of framecount (doubled-frames). Turning the feature off retains the current set exposure and lock to the selected framerate (FPS) regardless of lighting conditions.
WDR > Automatically adjusts the range of brightness-to-darkness that the camera will record. When turned on, it will help balance your pictures by adjusting the contrasts. Many scenes do not require WDR to be activated, use according to your preference.
GYRO SENSOR ; Enables active video-stabilization to eliminate camera shake. 3 settings available: Off, Low, and High.
AUDIO > Enable or disable recording of sound together with your video.
VOLUME > Adjusts how sensitive your camera's microphone becomes. Settings for how soft or how loud sound is recorded with your video.
TIME STAMP > When enabled, will display the date and time of your recording.
text_image
Mids Woodbox Skullbox Snillbox Underwater| Resolution |
| Loop Recording |
| RDY |
| Low-Light Mode |
| WDR |
| Cyro Sensor |
| Audio |
| Volume |
| Time Stamp |
| Video File Format |
| Bitrac |
| Double File |
| Power On Record |
| Sharpness |
| White Balance |
| Color |
| EV |
| Measuring |
| Distortion Correction |
UNDERWATER MODE OPTIONS - 2
VIDEO FILE FORMAT > Choose between .MOV or .MP4. If you are unsure which to use, choose MP4, as it is more commonly used.
BITRATE > Changes how much information is included in each frame of video. Higher bitrates give more definition to your video at the expense of filesize.
DOUBLE FILE > When turned on, 2 copies of your current recording will be saved. One in the current configured resolution and another in a much lower resolution.
SHARPNESS > Changing the sharpness setting will make your images either crisper or smoother, adjust according to your preference.
WHITE BALANCE > Adjusts the color temperature of the snapshot/recording to compensate for ambient lighting.
COLOR > You are given 5 preset choices: Normal, B&W (Black and White), Retro (aka: "Sepia tone"), Warm (slight reddish hue), and Cool (slight bluish hue).
EV > Exposure Value - Changing EV compensates for the amount of light that is allowed in. You can change this value to a lower setting if the scene is too bright, to compensate. Or higher, if it is too dark, but still depends on your desired effect. A higher EV will take longer for a photo to be taken, and will add blur to videos as each frame takes longer to expose.
METERING > Prioritizes the brightness level of specific parts of the scene depending on the Metering Mode that is used: Average, Center Weighted, or Spot.
DISTORTION CORRECTION : Since the lens of your action camera has a very wide FOV (Field of View), your camera will try to fit everything in, and will result in the center appearing to be distorted or bulging. When on, this feature will straighten the image.
text_image
Midco WindLaser Sculflet Small Small Underwater| Language |
| Date/Time |
| Format |
| FPV |
| TV Mode |
| Fast Record |
| Quickly Photo |
| Small Screen Display |
| Auto Power OT |
| Keypad Fonte |
| Light Set |
| Screen covers |
| Frequency |
| Balance |
| LOGO Mathematic |
| Power On Mode |
| Default Setting |
| Version |
GENERAL SETTINGS
LANGUAGE > Options for system language.
DATE/TIME > Make adjustments to the camera's system date and time.
FORMAT > Completely erases everything on the memory card then sets it up as a new drive (in FAT32 filing system).
FPV > Enables live real-time analog video to be fed through the USB out (Requires AV-out cable).
TV MODE > Options are NTSC or PAL. The color encoding and Framerate for video recording. Users in the US and Asia use NTSC (60Hz), most other countries use PAL (50Hz) and is the camera's default. Please check what you use in your country.
FAST RECORD > Recording starts immediately when the device is powered on.
QUICKLY PHOTO > Camera immediately takes a snapshot when powered on.
SMALL SCREEN DISPLAY > Option to turn off front LCD (Not available on AIR model)
AUTO POWER OFF > Automatically turns the camera off at a preset time. Works only if the camera is on standby and not recording.
KEYPAD TONE > Beep sound when navigating and selecting items on camera. Best for outdoor use.
LIGHTSET > To change the number of LED status-indicator lights that are active.

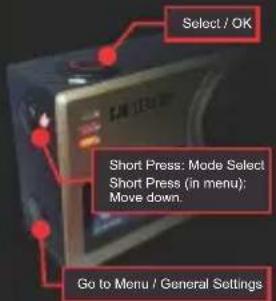
Navigating the menus using the SJ6 Legend buttons
You may access, select, and activate items on the menus without using the touchscreen by using these buttons :
text_image
Select / OK Short Press: Mode Select Short Press (in menu); Move down. Go to Menu / General Settings| Language |
| Osc/Time |
| Formal |
| FPV |
| TV Mode |
| Power On Record |
| Auto Power Off |
| Keypad Tone |
| Light Set |
| Screensavers |
| Frequency |
| Rotate |
| LOGO Watermark |
| Power On Mode |
| Default Setting |
| Version |
GENERAL SETTINGS
SCREENSAVERS > Options for how long the LCD display stays on.
FREQUENCY > For adjusting the framerate frequency (50Hz or 60Hz). May be used to counter flicker-effects of fluorescent lamps or jello-effect of fast moving objects.
ROTATE > Flips the recording 180-degrees. Turn this on when mounting the camera in an upside-down position.
LOGO WATERMARK >Adds the SJCAM logo at the bottom of your recording.
POWER ON MODE > When set, the camera will automatically start in the selected mode, and ready for shutter or recording start command.
DEFAULT SETTING > Restores the camera unit to its current firmware defaults.
VERSION > Display current firmware version and version date. Latest version is capable of being automatically updated using the SJCAM Zone app.

POWER-RELATED TIPS
- You can turn off the front screen if you are not using it.
- Set the Auto Power Off to 3 minutes to get the most out of your battery's charge. If no activity is detected within this period, your camera will power off
- Turn on Screensaver and set it to the shortest possible time. Configure the lightset so you know if you're recording or not.
- Plan your video recordings ahead to minimize long recording times.
- When recording, avoid constant checking of the LCD to see if the camera is running. LCDs use up a lot of battery power. Use the indicator lights instead to know the status.
- Your camera uses a Lithium battery, you can charge it even if you only used half the capacity.
- Get a charger and spare battery, it relieves your current battery from stresses of constant usage.
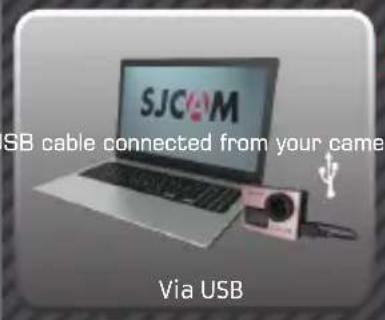
FILE MANAGEMENT
You can transfer files from your camera by using any of these 4 methods,
a> Connect the USB cable, choose "Mass Storage Device" on your camera.
b> Your device will show as a drive on your File Manager (Explorer on Windows; Finder in OSX)
- Via WIFI through the SJCAM Zone App:
a> Connect your camera to your phone: Device Settings>Wifi>Choose your camera
b> Go to the app, tap the Gallery icon, then download the files you wish to transfer by tapping the Down arrow icon next to each file
- By using a microSD card adaptor:
a> Power off your camera and remove the microSD card.
b) Insert it to a card adaptor and plug it to your computer.
c> Your card will show as a drive on your File Manager.
d> When you're done transferring files, right-click the drive > choose "Eject" before removing the card from your computer.
- By transferring the microSD card to your smartphone with removable storage:
a> Power off your camera and remove the microSD card;
b> Insert the microSD to your mobile device; your microSD card will show up as a drive on your mobile device's file manager;
c> Transfer the files you choose to your mobile device;
d, When you're done, "eject" the microSD card by choosing "Unmount"
Optional: Format the microSD card on your camera to remove files added by your mobile device.
SJCAM
text_image
SJCAM SB cable connected from your camera Via USB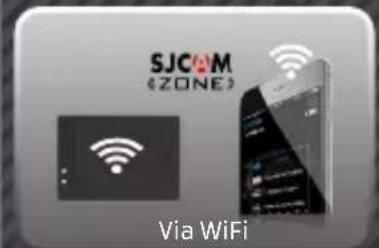
text_image
SJCOM (ZONE) Via WiFiIncluded Accessories
More accessories available on the website, sold separately.sjcamhd.com

text_image
SJC4MGet the app.

text_image
Available on the App Store
text_image
SJCAM (ZONE)
text_image
GET IT ON Google playFollow Us






Visit us at www.sjcamhd.com
support.sjcamhd.comFor technical assist