
AQD 50 - Meter PCE Instruments - Free user manual and instructions
Find the device manual for free AQD 50 PCE Instruments in PDF.


| Product Type | CO2 Data Logger |
| Dimensions | 128.5 x 88.5 x 41 mm (5.06 x 3.48 x 1.61 in) |
| Weight | 300 g (10.5 oz) |
| Power Supply | USB 5 V / 1.5 A (charging cable included), Li-Ion rechargeable battery 7.4 V / 3400 mAh |
| Main Functions | Measures temperature, relative humidity, atmospheric pressure, CO2 concentration; data logging on microSD card (up to 32 GB); configurable sampling times (30 s to 24 h); alarm with red LED and beep; graphic display with dark/light mode |
| Maintenance | Clean with damp cloth and pH-neutral cleaner; do not use abrasives or solvents |
| Safety | Do not use in explosive atmospheres; avoid extreme temperatures, direct sunlight, high humidity; only use as described; repairs by qualified PCE Instruments personnel only |
| Spare Parts and Reparability | Optional accessories: wall mounting set, ISO calibration certificates (CAL-HT, CAL-CO2, CAL-DAKKS-T); device should only be opened by PCE Instruments personnel |
| General Information | Brand: PCE Instruments; Model: AQD 50; Memory capacity: up to 1 trillion measuring points; IP30 protection class; Operating conditions: 0…+50 °C, 0…100 % RH; Storage conditions: -20…+60 °C, 0…100 % RH; Languages: Dutch, English, French, German, Italian, Polish, Spanish, Turkish |
| Integrated Sensors | Temperature (0…+50 °C, ±0.1 °C accuracy), Humidity (0…100 % RH, ±1.5 % RH), Pressure (300…1250 hPa, ±50 hPa), CO2 (0…40000 ppm, ±(40 ppm +5 % of measured value)) |
| Data Logging | microSD card (FAT32, max 32 GB); file name: PCE_dd.mm.yyyy_hh.mm.ss.csv; header includes company, website, device info |
| Battery Life | 3 to 8 months depending on sampling times (e.g., 2 min for temp/humidity/pressure, 10 min for CO2 gives ~3 months) |
| Delivery Contents | 1x CO2 data logger PCE-AQD 50, 1x 32 GB microSD card with adaptor, 1x micro USB charging cable, 1x quick start guide |
Frequently Asked Questions - AQD 50 PCE Instruments
User questions about AQD 50 PCE Instruments
0 question about this device. Answer the ones you know or ask your own.
Ask a new question about this device
Download the instructions for your Meter in PDF format for free! Find your manual AQD 50 - PCE Instruments and take your electronic device back in hand. On this page are published all the documents necessary for the use of your device. AQD 50 by PCE Instruments.
USER MANUAL AQD 50 PCE Instruments
User manuals in various languages (français, italiano, español, português, nederlands, türk, polski, русский, 中文) can be found by using our product search on: www.pce-instruments.com
2.1 Integrated sensors ....24
2.2 General....24
2.3 Approx. battery life 25
2.4 Delivery contents....25
2.5 Optional accessories....25
3 System description 26
3.1 Device....26
4 Getting started....28
4.1 Power supply ....28
4.2 Preparation 28
5 Operation 29
5.1 Start-up....29
5.2 Measurement....30
5.3 Turnoff 30
5.4 Menus and submenus....31
5.5 Files 43
6 Warranty....44
7 Disposal 44
Please read this manual carefully and completely before you use the device for the first time. The device may only be used by qualified personnel and repaired by PCE Instruments personnel. Damage or injuries caused by non-observance of the manual are excluded from our liability and not covered by our warranty.
- The device must only be used as described in this instruction manual. If used otherwise, this can cause dangerous situations for the user and damage to the meter.
- The instrument may only be used if the environmental conditions (temperature, relative humidity, ...) are within the ranges stated in the technical specifications. Do not expose the device to extreme temperatures, direct sunlight, extreme humidity or moisture.
- Do not expose the device to shocks or strong vibrations.
- The case should only be opened by qualified PCE Instruments personnel.
- Never use the instrument when your hands are wet.
- You must not make any technical changes to the device.
- The appliance should only be cleaned with a damp cloth. Use only pH-neutral cleaner, no abrasives or solvents.
- The device must only be used with accessories from PCE Instruments or equivalent.
- Before each use, inspect the case for visible damage. If any damage is visible, do not use the device.
- Do not use the instrument in explosive atmospheres.
- The measurement range as stated in the specifications must not be exceeded under any circumstances.
- Non-observance of the safety notes can cause damage to the device and injuries to the user.
- The device has been developed for fixed installation.
We do not assume liability for printing errors or any other mistakes in this manual.
We expressly point to our general guarantee terms which can be found in our general terms of business.
If you have any questions, please contact PCE Instruments. The contact details can be found at the end of this manual
2 Specifications
2.1 Integrated sensors
| Specification | Value |
| Temperature | |
| Measurement range | 0 ... +50 °C / 32 ... 122 °F |
| Accuracy | ±0.15 °C @ 0 ... 20 °C / 32 ... 60 °F±0.1 °C @ 20 ... 50 °C / 68 ... 122 °F |
| Resolution | 0.1 °C |
| Relative humidity | |
| Measurement range | 0 ... 100 % RH, non-condensing |
| Accuracy | ±1.5 % RH @ 0 ... 80 % RH±2 % RH @ 80 ... 100 % RH |
| Resolution | 0.1 % RH |
| Atmospheric pressure | |
| Measurement range | 300 ... 1250 hPa |
| Accuracy | ±50 hPa @ -20 ... 75 °C / 700 ... 1100 hPa |
| Resolution | 0.1 hPa |
| CO2 | |
| Measurement range | 0 ... 40000 ppm |
| Accuracy | ±(40 ppm + 5 % of measured value)@ 400 ... 5000 ppm @ 25 °C / 77 °F |
| Repeatability | ±10 ppm |
| Temperature drift/year | ±(5 ppm + 0.5 % of measured value) |
| Resolution | 1 ppm |
2.2 General
| Specification | Value |
| Memory capacity | microSD card of 32 GBin total 1,000,000,000,000 measuring points for all sensors |
| Sampling times | 30 s, 1, 2, 10, 15 and 30 min and 1, 2, 6, 12 and 24 h |
| IP protection class | IP30 |
| Voltage supply | USB 5 V / 1.5 A |
| Operating conditions | 0 ... +50 °C / 32 ... 122 °F0 ... 100 % RH, non-condensing |
| Storage conditions | -20 ... +60 °C / -4 ... 140 °F0 ... 100 % RH, non-condensing |
| Weight | 300 g / 10.5 oz |
| Dimensions | 128.5 x 88.5 x 41 mm / 5.06 x 3.48 x 1.61" |
2.3 Approx. battery life
| Sampling time | Battery life | |||
| Temperature | Humidity | Pressure | CO_2 | |
| 2 min | 2 min | 2 min | 10 min | 3 months |
| 10 min | 10 min | 10 min | 15 min | 4 months |
| 15 min | 15 min | 15 min | 30 min | 5.5 months |
| 1 h | 1 h | 1 h | 1 h | 8 months |
2.4 Delivery contents
1x CO₂ data logger PCE-AQD 50
1x 32 GB microSD card with adaptor
1x micro USB charging cable
1x quick start guide
2.5 Optional accessories
1x wall mounting set
1x ISO calibration certificate CAL-HT
1x ISO CO2 calibration certificate CAL-CO2
1x temperature calibration certificate CAL-DAKKS-T
3 System description
3.1 Device
This CO2 datalogger is capable of measuring four environmental parameters (temperature, humidity, pressure and CO2 ) at configurable sampling times and high accuracy.
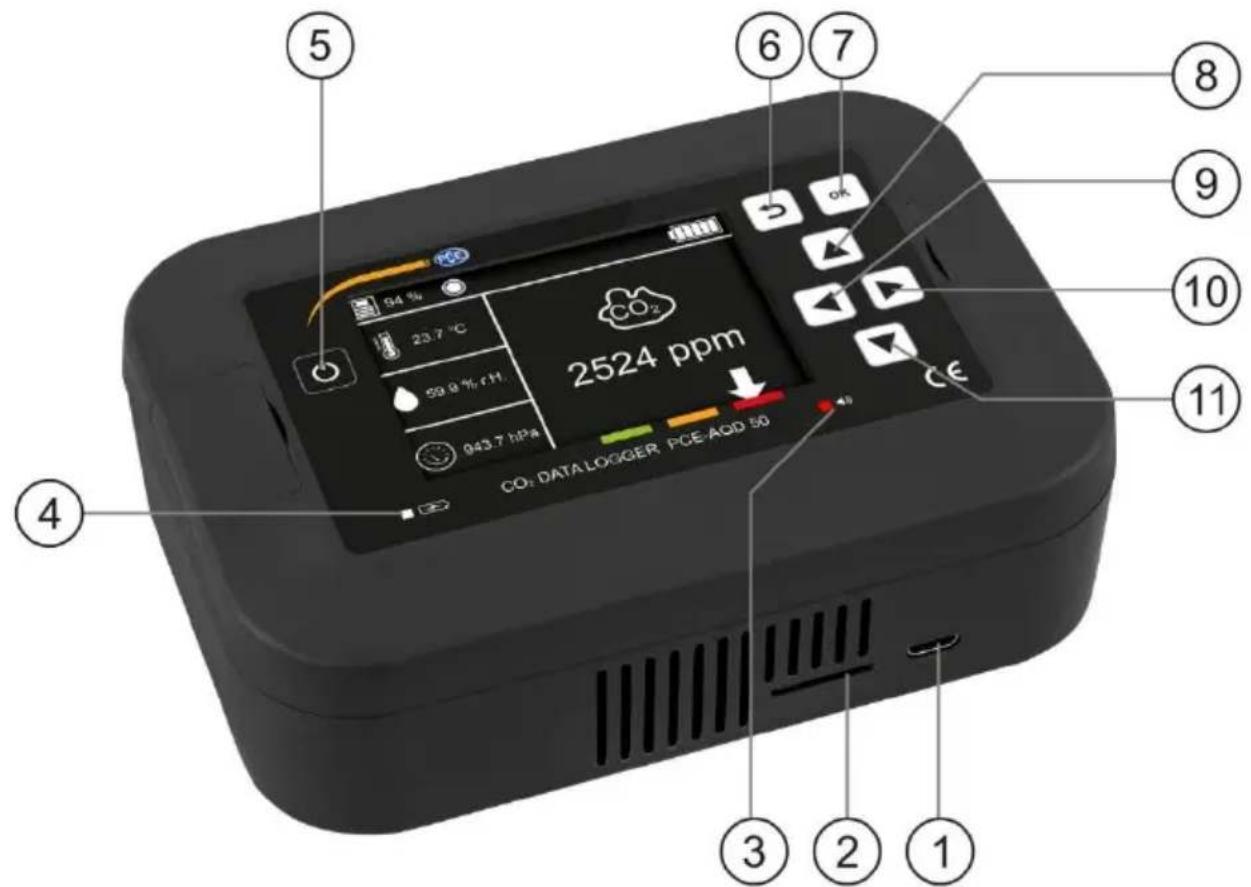
Fig. 36 PCE-AQD 50 description
| Interfaces | |
| 1 | Charging connection |
| 2 | SD card slot |
| LEDs | |
| 3 | Alarm: red when a value exceeds its threshold |
| 4 | Charger connected: green when charger is connected, until battery is completely charged |
| Key | Name | Function | ||
| 5 |  | Power key | - Press when alarm LED is on to turn it off- Press and hold for 1.5 s to turn the device on/off | |
| 6 |  | Back key | - Press and hold for 2.5 s to return to home screen | |
| 7 |  | OK key | - Confirm an entry | |
| 8 |  | Up key | - Press and hold for 1 s in home screen to display time and date if it is not displayed on the upper bar- Navigate through the menus | |
| 9 |  | Left key | - Change between sensors view and graphic view and vice versa- Change between digits in certain configurations | |
| 10 |  | Right key | - Change between sensors view and graphic view and vice versa- Change between digits in certain configurations | |
| 11 |  | Down key | - Navigate through the menus | |
4 Getting started
4.1 Power supply
The device uses a Li-Ion rechargeable battery of 7.4 V/3400 mAh that has to be charged with the 12 V/1.5 A charger provided. The charging process can increase the temperature inside the device and affect the temperature measurement.
The battery life depends on the configuration of the different sensors. It is recommended to set the same sampling time value for measuring the temperature, humidity and pressure and a higher sampling time value for the CO₂ measurement. The recommended configurations and the estimate battery lives are:
| Temperature | Humidity | Pressure | CO_2 | Battery life |
| 2 min | 2 min | 2 min | 10 min | 3 months |
| 10 min | 10 min | 10 min | 15 min | 4 months |
| 15 min | 15 min | 15 min | 30 min | 5.5 months |
| 30 min | 30 min | 30 min | 1 h | 7.5 months |
Note:
The battery life can vary depending on the ambient conditions.
The device can also be used when connected to mains power via the power charger.
4.2 Preparation
The device is designed to be mounted on the wall. For this purpose, it has two holes for screws and you can use screws with a diameter of 4 mm. To uncover the holes, pull the small tabs through the slits on the front panel of the device. In the image, the drill template can be seen.
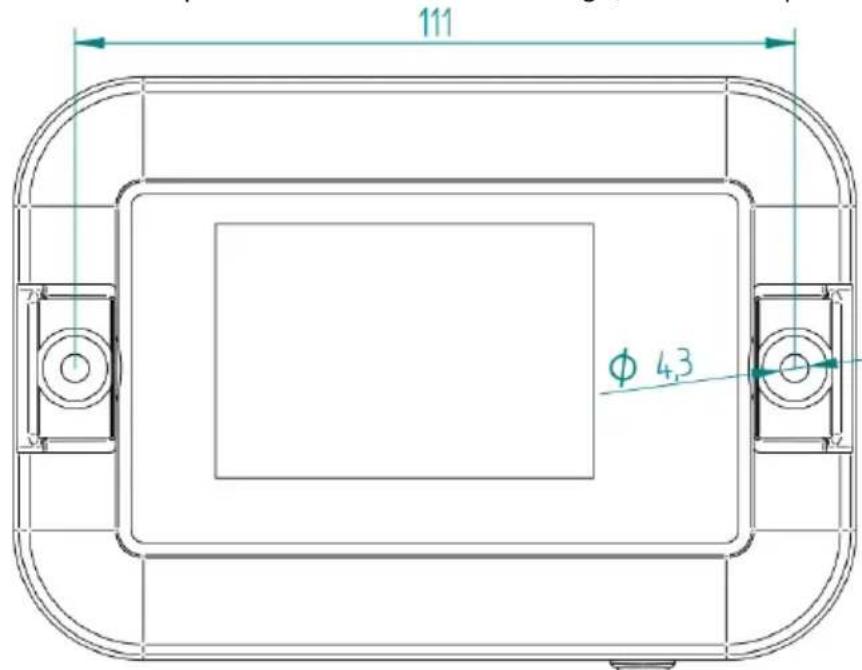
Fig. 37 Drill template
5 Operation
5.1 Start-up
To start up the device, press and hold the Power key for approx. 1.5 s. The device will display a boot screen (fig. 3), followed by the home screen (fig. 4). The number of sensors displayed on the home screen depends on the number of sensors enabled (fig. 4/5). The device will start up with the sampling times set before turning off. At first start-up, the sampling times are 2 minutes for all sensors but CO_2 the default sampling time of which is 10 minutes.
It is also recommended to set the time and date of the device (00:00 and 01/01/2021 as default on start-up).

Fig. 38 Boot screen
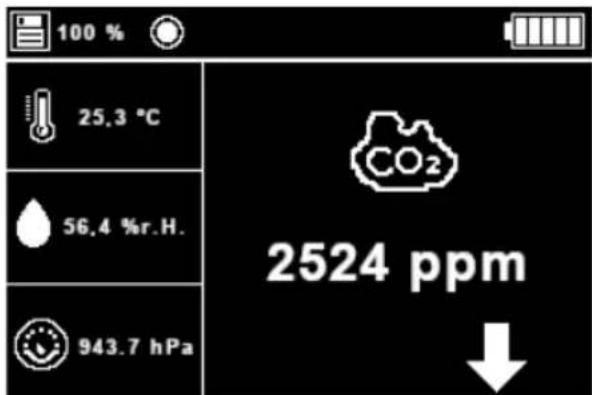
Fig. 39 Home screen with all sensors enabled
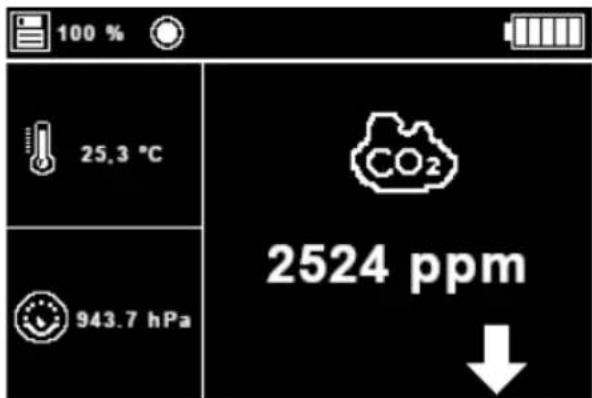
Fig. 40 Home screen with three sensors enabled
5.2 Measurement
In order to perform a measurement, follow these steps:
- Go to Menu → Sensors → Sensors configuration. Here, you can set the desired sampling time and/or turn off the desired sensors.
- Go to Menu → Senors → Start/Stop datalogging. Here, you can set the start mode and a circle will appear in the upper bar, indicating that the device is recording data. This will only happen if the SD card is inserted in the device. If not, a warning message will be displayed and the recording will be aborted.
- Go to the home screen. Here, you can select between sensors view where the measurements of all sensors are displayed or graphic view where the last fifteen CO_2 points are displayed to see the course of the concentration.
5.3 Turnoff
To turn off the device, press and hold the Power key for approx. 1.5 s. After the beep, release the key and the device will turn off completely. It will save the settings and use these as default settings for the next start-up.
The following message (fig. 6) will be displayed during power-off, until the display turns completely blank.
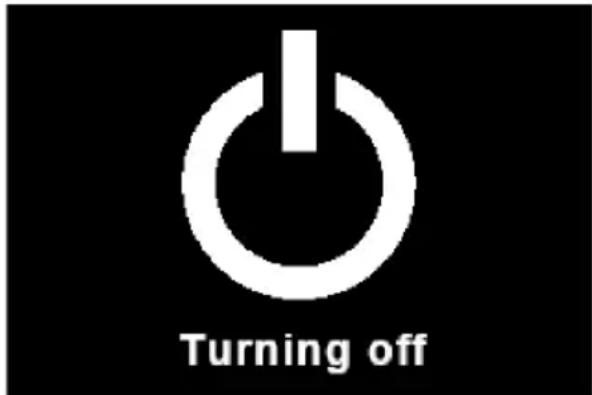
Fig. 41 Power-off screen
Note:
When the device is turned off and on again, the time and date have to be set manually again.
5.4 Menus and submenus
5.4.1 Main menu
To access the main menu from the home screen, press the OK key. The device will then display the main menu (fig. 7). Here, the arrow keys ▲, ▼, ◀ and ▶ can be used to select the submenu/function you want to access.
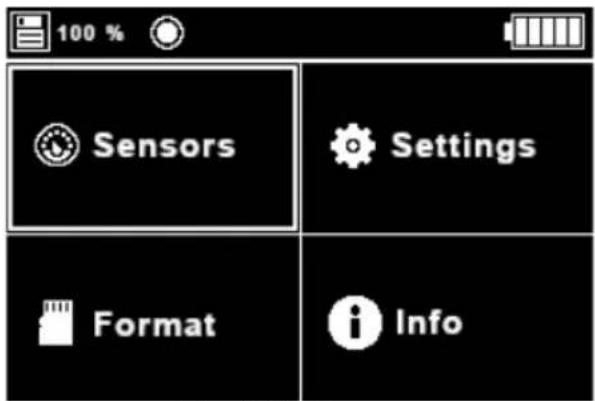
Fig. 42 Main menu
5.4.2 Sensors menu
This menu allows you to make all settings related to the sensors. It consists of three submenus (fig. 8):
- Sensors configuration: allows you to enable sensors and select the sampling time for the sensors
• Start/stop datalogging: allows you to start and stop the datalogging process
• CO 2 graph: displays a graph with the last fifteen CO 2 values measured
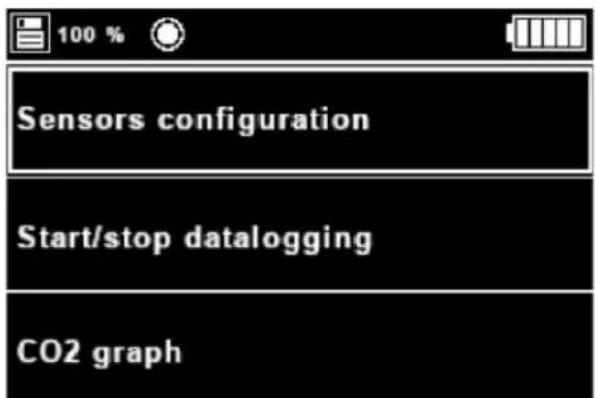
Fig. 43 Senors menu
5.4.2.1 Sensors configuration menu
This submenu allows you to set the sampling time for each sensor and also to disable each one of them. The sensors are represented by their units and the display will be updated depending on the units set for the measurements.
If a sampling time is set for any of the sensors, that sensor will be enabled. The available sampling times are: 30 seconds, 1 minute, 2 minutes, 10 minutes, 15 minutes, 30 minutes, 1 hour, 2 hours, 6 hours, 12 hours and 24 hours.
For changing the sampling time for one sensor, select the desired sensor with the arrow keys ▲ and ▼ and press the OK key; then the device will highlight the sampling time you are changing in white (fig. 10). After that, use the arrow keys ▲ (increase sampling time) and ▼ (decrease sampling time) to change between the different values for the sampling time. Once you have reached the 24 h sampling time and press the arrow key ▲ again or have selected a sampling time of 30 s and press the arrow key ▼, the device will display Off and the sensor will be disabled. In the images 9 and 10, the humidity sensor is shown as disabled.
Note:
At first start-up, the sampling times are 2 minutes for all sensors but CO _2 the default sampling time of which is 10 minutes.
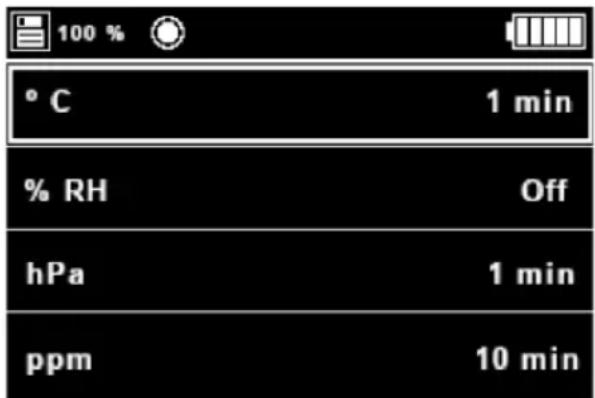
Fig. 44 Sensors selection submenu
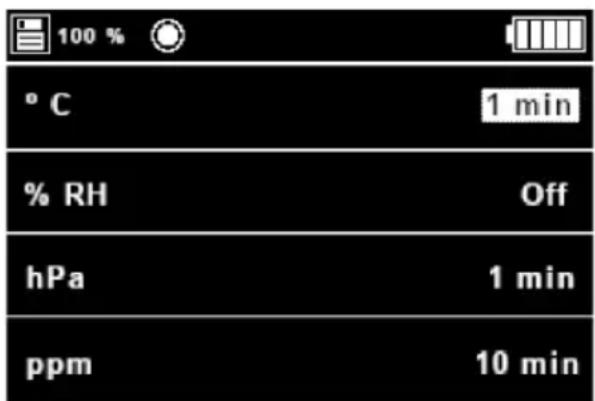
Fig. 45 Sensors selection menu - changing temperature sampling time
Note:
When selecting 30 s as sampling rate, it is recommended to use the charging adaptor.
5.4.2.2 Start/Stop datalogging menu
This submenu allows you to start and stop the datalogging process (fig. 11).
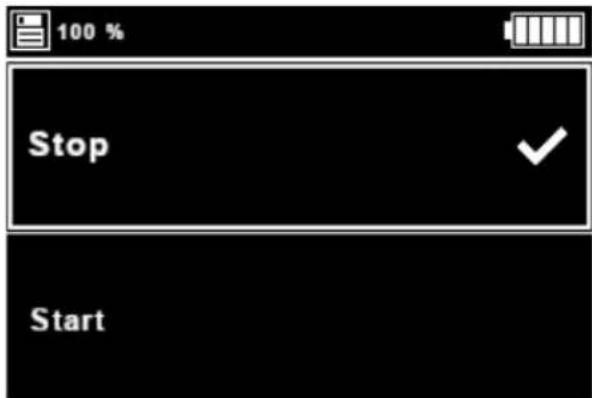
Fig. 46 Start/Stop datalogging submenu
Use the arrow keys ▲ and ▼ to select the desired action and press OK. In that moment, the √ icon will be displayed next to Stop or Start. Furthermore, if the selected action is Start, the device will show a circle in the upper bar to indicate that it is measuring (fig. 12).
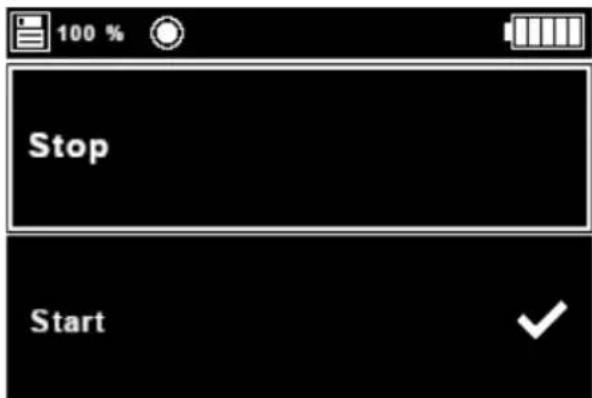
Fig. 47 Start mode active
The device will start measuring when it is turned on, no matter if datalogging is enabled or not. This is because the device can be also used to display the current ambient parameters.
5.4.2.3 CO _2 graph
This part of the menu displays a graph that shows the last 15 measured CO _2 values (fig. 13). If no measurements have been made yet, you will not be able to access this page. This page can be also accessed with the arrow keys ◀ and ▶ from the home screen. To return to the main menu from this page, press OK.
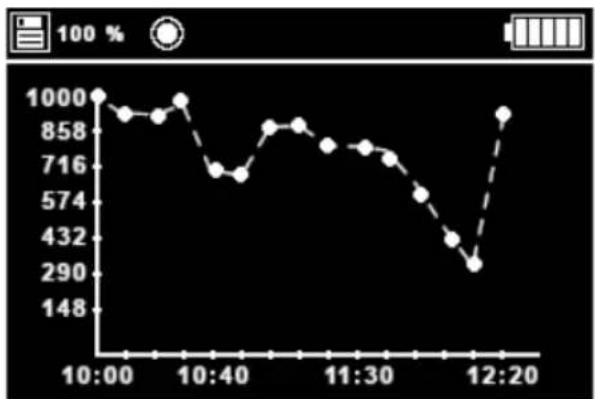
line
| Time | Value | | ------ | ----- | | 10:00 | 1000 | | 10:15 | 958 | | 10:30 | 976 | | 10:45 | 716 | | 10:60 | 858 | | 10:75 | 876 | | 11:00 | 858 | | 11:15 | 716 | | 11:30 | 674 | | 11:45 | 574 | | 11:60 | 432 | | 11:75 | 290 | | 12:00 | 958 |Fig. 48 CO₂ graph
5.4.3 Settings menu
This menu allows you to make all settings related to the device. It consists of six submenus (fig. 14 and 15):
• Language: select menu language
- Date and time: set date and time and their format
- Alerts: enable/disable alerts and set an alert threshold for each variable
- Units: change the measuring units for the variables
- Date and time on screen: enable or disable the time and date display on the upper bar
• Decimal separator: select the decimal separator for the measured variables
• Dark/light mode: select between dark or light theme for the display and menus
• Sound: enable/disable the sound of the alerts
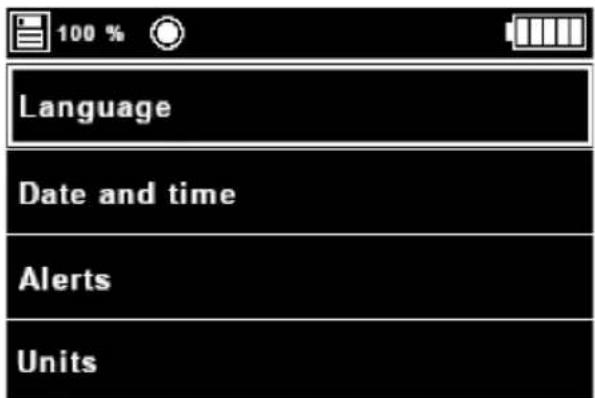
Fig. 49 Settings menu, first part
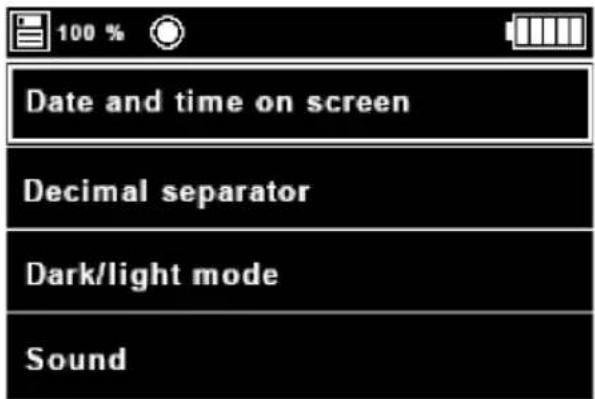
Fig. 50 Settings menu, second part
5.4.3.1 Language submenu
In this submenu, you can change the language of the device. The following options are available: Dutch, English, French, German, Italian, Polish, Spanish and Turkish. When entering this menu, the device will display a list of the languages and the icon √ next to the currently selected language (fig. 16).
To change the language, use the arrow keys ▲, ▼, ◀ and ▶ to select the desired language and select it by pressing OK. The texts of the menu will then be updated to the selected language.
| 100 % | |
| Dutch | English ✓ |
| French | German |
| Italian | Polish |
| Spanish | Turkish |
Fig. 51 Language submenu
5.4.3.2 Date and time submenu
In this submenu, you can set the time and date of the device as well as their formats (fig. 17). Use the arrow keys ▲ and ▼ to select the parameter you want to change and press OK.
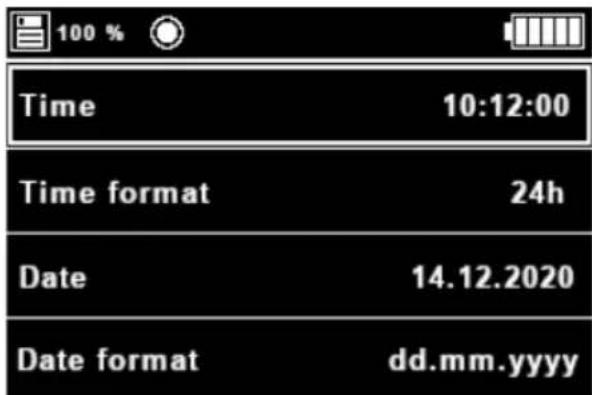
Fig. 52 Time and date submenu
After selecting Time or Date, the device will highlight the digit to be modified in white. You can change the digit using the ◀ and ▶ keys and its value with the ▲ and ▼ keys. Once the time or date is set, press OK to update the data in the display and in the system.
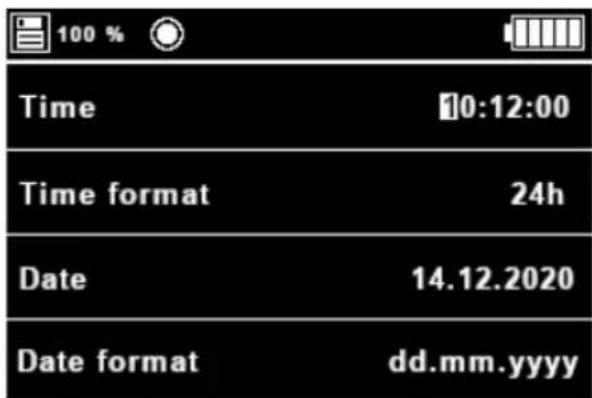
Fig. 53 Time change
![100 % Time 10:12:00 Time format 24h Date [4.12.2020] Date format dd.mm.yyyy](/content/2026/05/848629/images/d161e2b5956acb26852471db7a296976dfeb5e1d09f115fc2c34cefc37c82ef5.jpg)
Fig. 54 Date change
Note:
The time and date will be autocorrected when their maximum values are exceeded. For example, if the actual date is 31 January and the user tries to increase the 1, it will be updated to a 0.
After selecting Time format or Date format, the device will display highlight the value to be modified in white. The user can change the value with the arrow keys ▲ and ▼. The possible values for the time format are 24h and 12h and the options for the date format are dd.mm.yyyy, dd/mm/yyyy, mm.dd.yyyy, mm/dd/yyyy, yyyy.mm.dd and yyyy/mm/dd. Once the format is selected, the OK key must be pressed.
Note:
If 12h is selected for the Time format, the time will be displayed with am/pm.
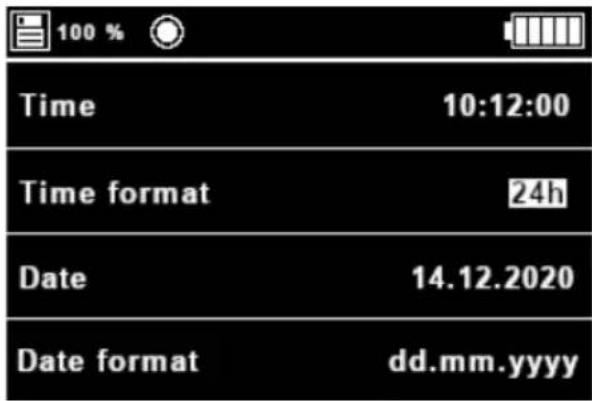
Fig. 55 Time format change
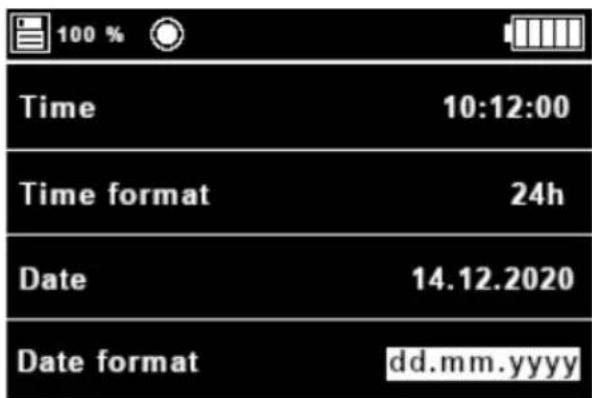
Fig. 56 Date format change
5.4.3.3 Alerts submenu
Via this submenu, you can enable/disable and define an alarm for each measured variable. In case the measured value for a certain variable exceeds the limit set in the alert, the device will beep every 2 seconds for a duration of 10 seconds and a red LED will turn on.
When you enter the menu, the device will display a list of the sensors represented by their units as well as the icon √ next to each sensor with an enabled alarm (fig. 22).
For enabling/disabling or setting an alarm, use the arrow keys ▲ and ▼ to select the sensor you wish to set. Then press OK to open the specific alarm menu for the selected sensor (fig. 23).
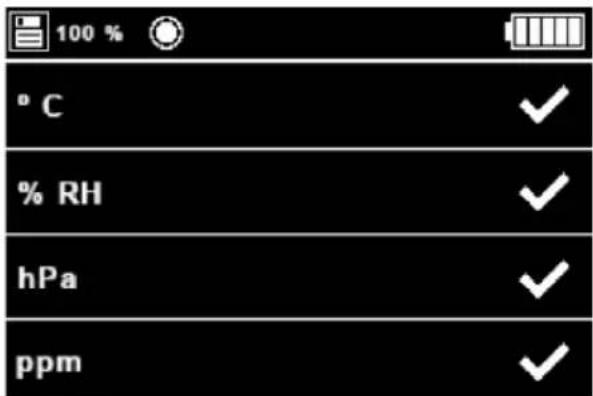
Fig. 57 Alert selection
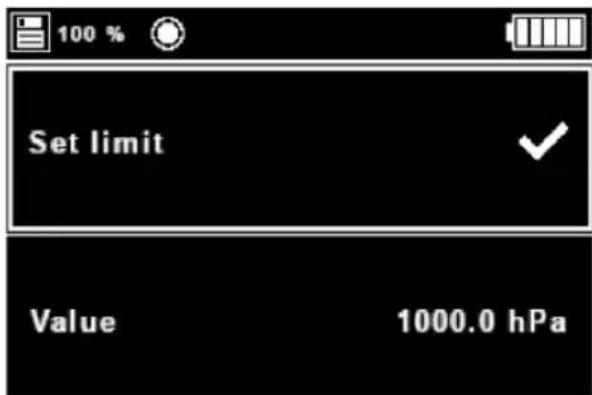
Fig. 58 Alert menu for pressure sensor
The alert menus for each sensor consist of a part which indicates if the alarm is enabled or not and another part which indicates the limit value for the alert; once the measurement exceeds that limit, the meter will beep and the LED will glow.
To enable/disable the alarm for a certain sensor, use the arrow keys ▲ and ▼ to select Set limit and then press OK. If the alarm is enabled, the icon √ will be displayed; if not, nothing will be displayed.
To set the limit, select Value and press OK. Then, the digit selected for changing will be highlighted in white (fig. 22). The default values for the alarm are 30 °C, 80 % RH, 1000 hPa, 1000 ppm (green limit) and 2000 ppm (yellow limit).
The LED will turn off when you disable all alarms or when the parameters with a set alarm fall below the limit value set.
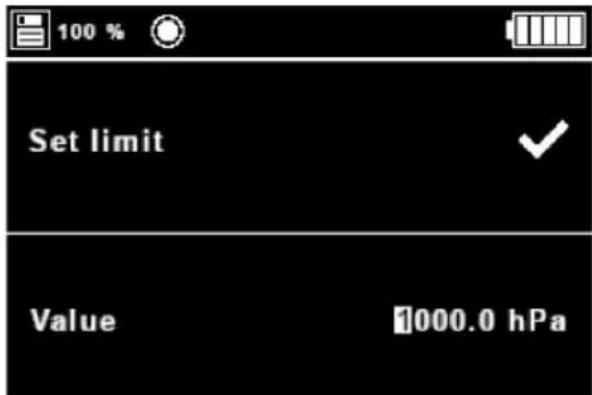
Fig. 59 Set value for alarm
5.4.3.4 Units submenu
This submenu allows you to choose between two unit systems: International System of Units (SI): °C, % RH, hPa and ppm or United States System (US): °F, % RH, psi and ppm
To change the units, use the arrow keys ▲ and ▼ to select the desired unit system and press OK. Then, a √ icon will be displayed next to the unit system selected.
![100 % SI [°C, % RH, hPa, ppm] ✓ US [°F, % RH, psi, ppm]](/content/2026/05/848629/images/81d6e45f9d4282b19d0326bec4442e4b0a4d327247b794a34904c12c1f6d1e21.jpg)
Fig. 60. Units submenu
5.4.3.5 Date and time on screen
Via this submenu, you can select whether or not to display the date and time on the top bar. Use the arrow keys ▲ and ▼ to select the desired option and press OK. Then, a √ icon will be displayed next to the selected option. In fig. 26, the time and date are displayed in the top bar.
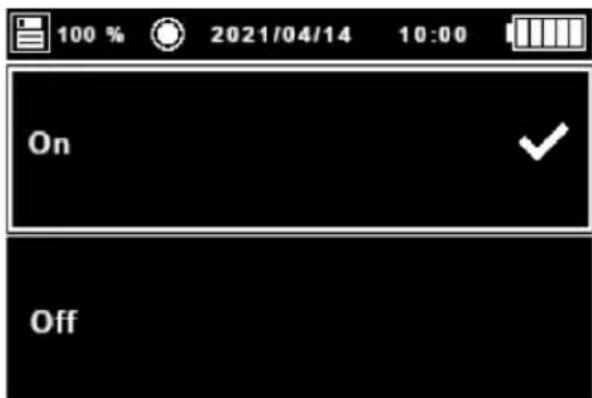
Fig. 61. Selection screen for date and time on screen
5.4.3.6 Decimal separator submenu
In this submenu, you can choose whether to use the comma or the dot as decimal separator for the display and for the data on the SD card.
To switch between the two options, use the arrow keys ▲ and ▼ to select the desired decimal separator and press OK. Then, a √ icon will be displayed next to the selected option.
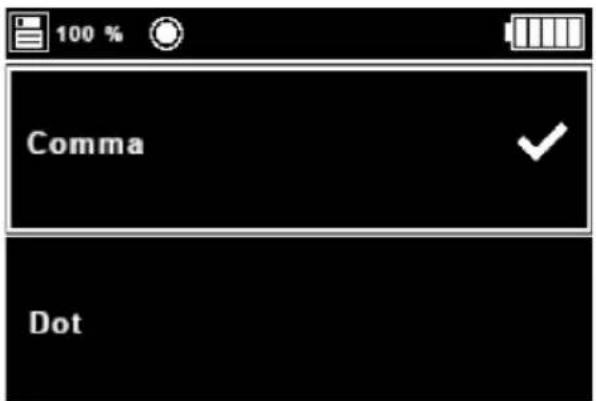
Fig. 62 Decimal separator submenu

5.4.3.7 Dark/light Mode
Via this submenu, you can select light or dark mode. When you access this menu, select the desired option with the arrow keys ▲ and ▼ and press OK. After that, a √ icon will be displayed next to the selected mode. In figures 28 and 29, you can see the two different modes.
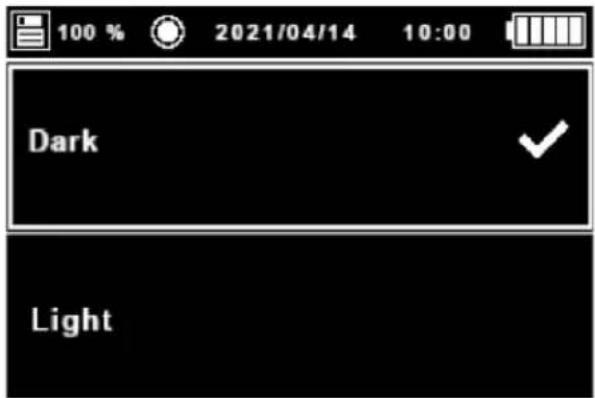
Fig. 63 Dark/light mode selection screen in dark mode
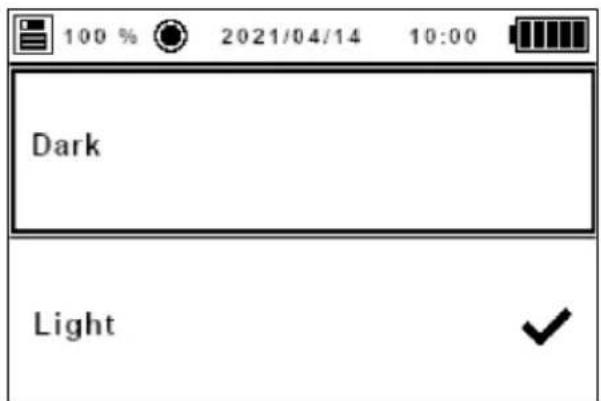
Fig. 64 Dark/light mode selection screen in light mode
5.4.3.8 Sound submenu
This submenu allows you to enable or disable the beep in case of an alert. For enabling/disabling the beep, use the arrow keys ▲ and ▼ to select the desired option and press OK. Then, a √ icon will be displayed next to the selected option.
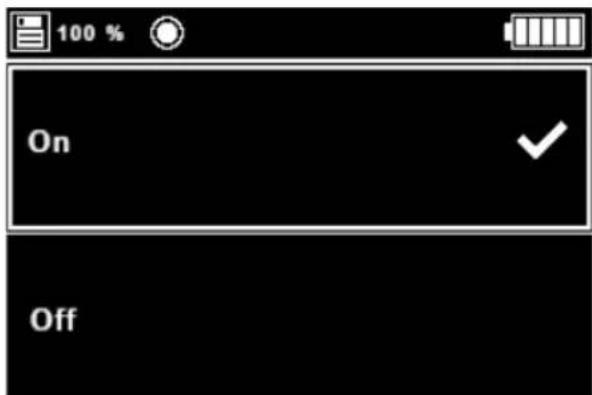
Fig. 65 Sound submenu
5.4.4 Format menu
When you select this menu option and the SD card is inserted, the device will format it and a window with an hourglass will be displayed on the screen (fig. 31). When the process is finished, the window and the hourglass will disappear. If the SD card is removed before finishing, the process will be stopped and the window and the hourglass will also disappear from the screen.
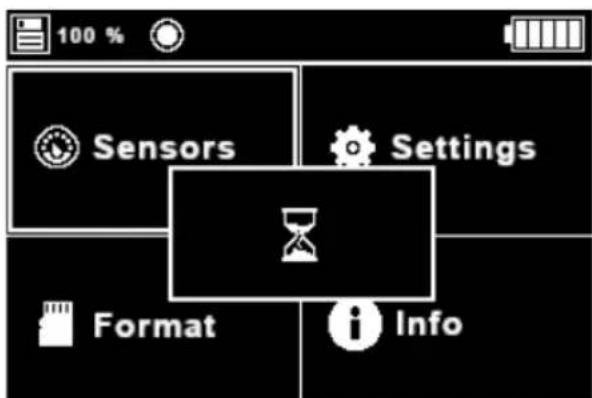
Fig. 66 Formatting process started
If the user selects this option without having inserted the SD card, a window with the message "No SD card" will appear on the screen (fig. 32).
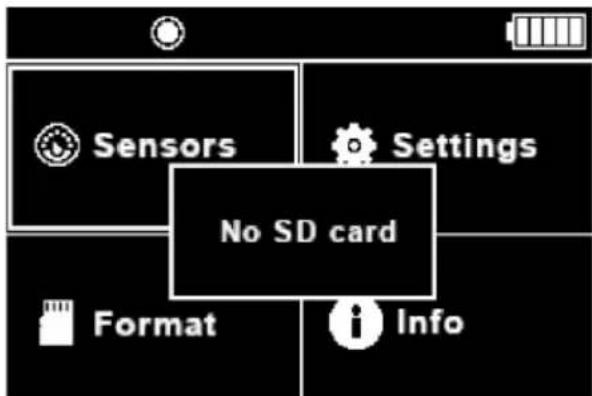
Fig. 67. Formatting process started but no SD card is inserted
If an error occurs during the formatting process, the message "Error..." is displayed (fig. 33). After this, some implausible values may be displayed in the top left corner instead of the free memory percentage value. This problem can be solved formatting the SD card again via the Format option or with a computer, removing the SD card from the device first.
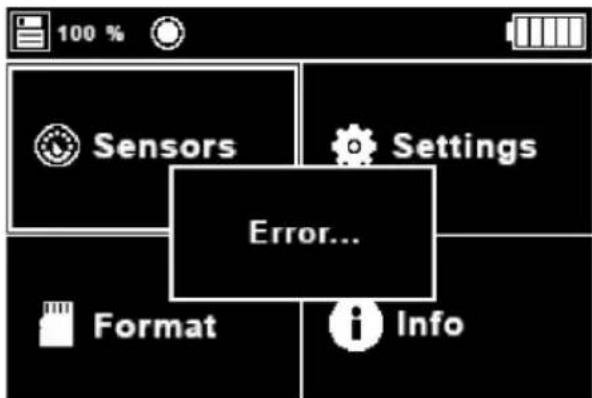
Fig. 68 Error message
5.4.5 Info menu
In this menu, you can see some information about the device such as the company logo, the name and version of the device, the serial number and the website.
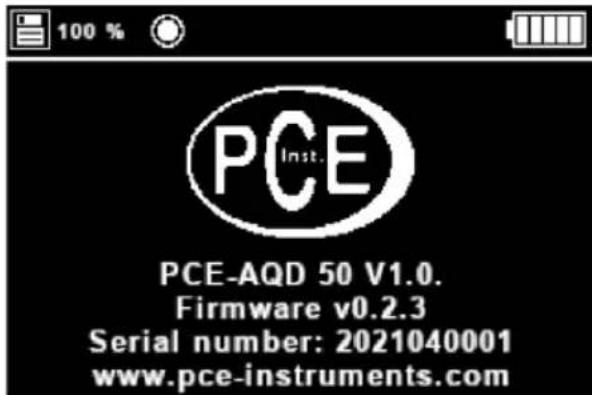
Fig. 69 Info menu
5.5 Files
As soon as a datalogging process starts, a new file will be created. Also, a new file will be created each month.
The SD card used for datalogging must be formatted in FAT32 and have a maximum size of 32 GB.
The name of the file for the SD card is structured as PCE_dd.mm.yyyy_hh.mm.ss.csv and dd.mm.yyyy and hh.mm.ss stand for the date and time when the file has been created. All files include a header with the name of the company ("PCE Instruments"), the website, the name and version of the device and the serial number.
| Company: | PCE Instruments | ||||
| Web: | www.pce-instruments.com | ||||
| Device: | PCE-AQD 50 v1.0 | ||||
| Serial number: | 2021260001 | ||||
| Time | Date | Temperature [°C] | Humidity [% r.H.] | Pressure [hPa] | CO2 [ppm] |
| 0:00:12 | 01.05.2021 | 23.1 | 39 | 941.8 | 1127 |
| 0:00:42 | 01.05.2021 | 23.1 | 39.2 | 941.8 | 1107 |
| 0:01:12 | 01.05.2021 | 23.1 | 38.9 | 941.7 | 1107 |
| 0:01:42 | 01.05.2021 | 23.2 | 38.6 | 941.7 | 1032 |
| 0:02:12 | 01.05.2021 | 23.1 | 38.5 | 941.7 | 999 |
| 0:02:42 | 01.05.2021 | 23.1 | 38.6 | 941.7 | 996 |
| 0:03:12 | 01.05.2021 | 23.1 | 38.4 | 941.7 | 993 |
| 0:03:42 | 01.05.2021 | 23.1 | 38.5 | 941.7 | 991 |
| 0:04:12 | 01.05.2021 | 23.1 | 38.5 | 941.6 | 993 |
| 0:04:42 | 01.05.2021 | 23.2 | 38.5 | 941.7 | 992 |
| 0:05:12 | 01.05.2021 | 23.2 | 38.6 | 941.6 | 991 |
Fig. 70 Example of file
6 Warranty
You can read our warranty terms in our General Business Terms which you can find here: https://www.pce-instruments.com/english/terms.
7 Disposal
For the disposal of batteries in the EU, the 2006/66/EC directive of the European Parliament applies. Due to the contained pollutants, batteries must not be disposed of as household waste. They must be given to collection points designed for that purpose.
In order to comply with the EU directive 2012/19/EU we take our devices back. We either re-use them or give them to a recycling company which disposes of the devices in line with law.
For countries outside the EU, batteries and devices should be disposed of in accordance with your local waste regulations.
If you have any questions, please contact PCE Instruments.

PCE Instruments contact information
Germany France Spain
PCE Deutschland GmbH PCE Instruments France EURL PCE Ibérica S.L.
Im Langel 4 23, rue de Strasbourg Calle Mayor, 53
D-59872 Meschede 67250 Soultz-Sous-Forets 02500 Tobarra (Albacete)
Unit 11 Southpoint Business Park
Ensign Way, Southampton
Hampshire
United Kingdom, SO31 4RF
Tel: +44 (0) 2380 98703 0
Fax: +44 (0) 2380 98703 9
info@pce-instruments.co.uk
www.pce-instruments.com/english
Italy
PCE Italia s.r.l.
Via Pesciatina 878 / B-Interno 6
55010 Loc. Gragnano Pehlivan Sok. No.6/C
Capannori (Lucca)
Italia
www.pce-instruments.com/turkish
The Netherlands
PCE Brookhuis B.V.
Institutenweg 15
7521 PH Enschede
Nederland
Telefoon: +31 (0)53 737 01 92
info@pcebenelux.nl
www.pce-instruments.com/dutch Fax: +1 (561) 320-9176
info@pce-americas.com
United States of America
PCE Americas Inc.
1201 Jupiter Park Drive, Suite 8
Jupiter / Palm Beach
33458 FL
USA
Tel: +1 (561) 320-9162
User manuals in various languages (français, italiano, español, português, nederlands, türk, polski, русский, 中文) can be found by using our product search on: www.pce-instruments.com
Specifications are subject to change without notice.


- Specifications
- Delivery contents
- Optional accessories
- System description
- Device
- Getting started
- Power supply
- Note:
- Preparation
- Operation
- Start-up
- Measurement
- Turnoff
- Menus and submenus
- Main menu
- Sensors menu
- Sensors configuration menu
- Start/Stop datalogging menu
- CO _2 graph
- Settings menu
- Language submenu
- Date and time submenu
- Alerts submenu
- Units submenu
- Date and time on screen
- Decimal separator submenu
- Dark/light Mode
- Sound submenu
- Format menu
- Info menu
- Files
- Warranty
- Disposal
- PCE Instruments contact information
- Germany France Spain
- Italy
- The Netherlands
- United States of America
Brand : PCE Instruments
Model : AQD 50
Category : Meter