USER MANUAL PHEM 1000 Philco
Famous for Quality the World Over

natural_image
Black Philips 3D air fryer with control panel and rotary buttons (no visible text or symbols on device body)
PHEM 1000
PHEM 1001
Instruction manual
Návod k obsluze
Návod na obsluhu
Instrukcja obstugi
Használati útmutató
Dear customer,
thank you for buying a PHILCO brand product. So that your appliance serves you well, please read all the instructions in this user's manual.
CONTENTS
PART 1: INTRODUCTION....3
- Important safety instructions....3
- Important safety instructions for using electrical equipment....4
• Use in accordance with intended purpose....4
PART 2: DESCRIPTION OF THE APPLIANCE ....5
• Description of the espresso machine....5
• Description of espresso machine operation....6
PART 3: USING FOR THE FIRST TIME....7
- Testing and setting water hardness....7
• Filling the coffee bean hopper....7
- Filling the water tank....7
- Inserting the water filter....8
• Controlling the fineness of ground coffee....8
• Using for the first time....9
- Turning on the appliance....9
- Turning off the appliance....10
PART 4: CONTROLS ....11
- Presetting the appliance .... 11
- Brewing coffee by pressing a touch icon....11
- Quick parameter settings for brewing beverages....12
- Setting default parameters for the brewed beverages....13
• Available coffees and warm beverages....14
• Brewing beverages....15
PART 5: APPLIANCE SETTINGS....21
- Beverage settings 21
• Water filter 25
- Adjusting the water hardness setting 26
- Setting the economical ECO mode 26
• Automatic shut-off....27
• Information 28
Language 29
- Reset - Factory settings....29
- Exiting the program settings menu....29
PART 6: CLEANING AND MAINTAINING THE APPLIANCE....30
- Cleaning the espresso machine before use....30
• Cleaning the brewing unit....30
• Descaling the espresso machine....31
- Cleaning the spent coffee grounds container and the drip tray 33
- Cleaning the water tank....34
• Cleaning the coffee bean hopper 34
- Unpacking and cleaning the milk frother....35
• Cleaning the espresso machine....35
PART 7: WARNING MESSAGES AND TROUBLESHOOTING ....36
- Warning messages....36
- Troubleshooting....37
• Transporting the appliance....38
PART 1: INTRODUCTION
Important safety instructions
- This appliance may not be used by any persons (including children) with mental disabilities, weak strength or by inexperienced persons, unless they have been properly trained or schooled in the safe use of the appliance, or unless they are properly supervised by a qualified person who is responsible for their safety.
• Children must be supervised to ensure that they do not play with the appliance.
- Read all instructions before putting the espresso machine into operation and store them for future use.
• Before first use, remove all advertising labels and stickers from the espresso machine.
- During operation, set the espresso machine on the edge of the kitchen bench or table. Always use the espresso machine on a dry even surface.
- Do not place the appliance on a hot gas or electric stove or near it or in a location, where it would be in contact with a hot oven.
- Do not use the espresso machine on a metal underlay such as for example a kitchen sink.
- Before connecting the espresso machine to an electric power socket and turning it on, check that it is completely and correctly assembled.
- ATTENTION: Do not use this appliance with a programmable switch, timer switch or any other component that automatically switches on the appliance.
- Do not use accessories that are not designed for use with this appliance.
- Only add clean cold water to the water tank. Do not use any other liquids.
- Do not turn on the espresso machine if there is no water in the water tank.
- If the espresso machine is running, do not leave it unattended.
• Before you start cleaning the espresso machine or before moving it, turn it off and allow it to cool down.
- Do not place any items on the top surface of the espresso machine.
- This appliance generates hot water and can produce water steam during operation. Be careful not to splash yourself with hot water or scald yourself with hot steam.
- Always turn off the espresso machine and disconnect the power plug from the power socket whenever it is left without supervision, after finishing using it, before you start cleaning it or before you take it elsewhere, disassemble it, assemble it or before storing it.
- Keep the appliance and its accessories in clean condition. Follow the cleaning instructions provided in this manual.
- Do not start the coffee grinder if the lid is not correctly secured. Be very careful during the grinding process, keeping your fingers, hands, hair, clothing and other items at a sufficient distance from the grinder.
Important safety instructions for using electrical equipment
• Unwind the power cord before using it.
- To prevent injury by electrical shock, do not submerge the power cord, the power plug or the actual appliance in water or any other liquid. Do not bend the power cord over the sharp edge of the working area and do not allow it to touch hot items or allow knots to form.
- Do not use this appliance for a purpose other than that for which it was designed. Do not use it in a moving vehicle or on a boat. Do not use it outdoors.
• We recommend that you regularly inspect the appliance. Do not use the appliance if the power cord, power plug or the actual appliance is damaged in any way whatsoever. If damage has occurred, to avoid a dangerous situation from arising, immediately stop using the appliance and take it to the nearest authorised service centre for inspection, repair or replacement of damaged parts.
- Any maintenance other than cleaning may only be carried out by an authorised service centre.
- In the interest of increased safety, we recommend the installation of a residual current device (protective shut-off switch) when the appliance is used.
- It is appropriate to install the residual current device with a capacity not exceeding 30 mA of residual current into the circuit to which the appliance is connected. Contact a professional electrician.
Use in accordance with intended purpose
Carefully read this user's manual before first using this appliance.
- Not respecting these instructions may result in injury or damage to the appliance. The manufacturer takes no responsibility for damages resulting from not following these instructions.
This appliance is designed for brewing coffee and other hot beverages.
This appliance is designed exclusively for household use only. It is not designed for use in:
• a location used as a staff kitchen in stores, in government offices and other workplaces
- agro-tourism
• in hotels, motels and other accommodation facilities.
- rented rooms
Any other use is considered to be inappropriate and dangerous. The manufacturer takes no responsibility for any damages caused by inappropriate use of the appliance.
NOTE:
Store this user's manual. In the event that you hand this appliance over to somebody, also give them this user's manual to use.

WARNING: HOT SURFACE!
PART 2: DESCRIPTION OF THE APPLIANCE
Description of the espresso machine
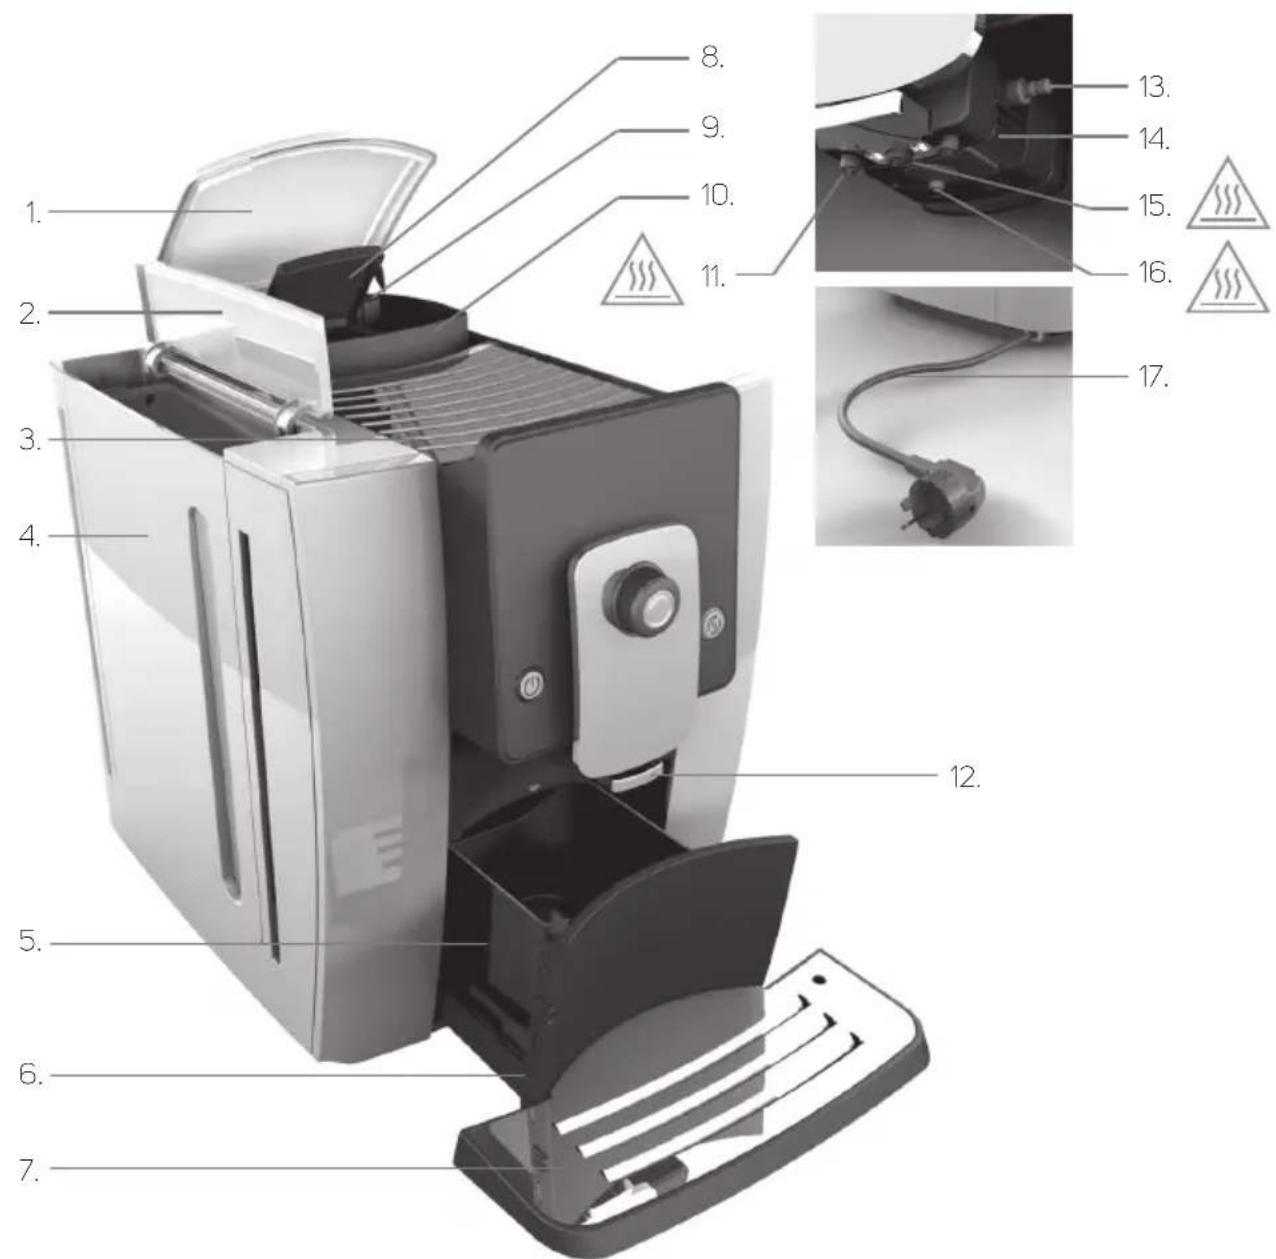
-
Cover of the coffee bean hopper
-
Lid of the water tank
-
Area for placing empty cups
-
Water tank
-
Coffee grounds container
-
Drip tray
-
Drip tray grill
-
Cover of the ground coffee container
-
Controlling the fineness of ground coffee
-
Coffee bean hopper
-
Coffee spout
-
Handle
-
Milk hose
-
Milk frother
-
Hot water spout
-
Milk and foamed milk spout
-
Power cord
Description espresso machine operation

-
Espresso icon
-
Long coffee icon (lungo, long coffee)
-
Hot water icon (hot water)
-
Main power switch
-
Display
-
Cappuccino icon
-
Coffee latte icon (caffè latte)
-
Hot milk/cream icon (hot milk/foamed milk)
-
Clean button
-
Dial button
PART 3: USING FOR THE FIRST TIME
Water hardness test
The harder the water is, the more frequently you will need to descale the espresso machine.
Hard water also fundamentally affects the final fl avour of the brewed coffee.
Test the water hardness before the first use of the espresso machine to ensure maximum protection for your new appliance and to extend its lifetime.
You can normally purchase this test at the chemist's or at other specialised stores.
As soon as you change your water source, it is necessary to perform another water hardness test.
Further instructions regarding water hardness settings based on the water hardness test results are provided in chapter Adjusting the water hardness setting on pg. 26.
Filling the coffee bean hopper
- Never add coffee beans into the coffee bean hopper that have been specially modified (e.g. with sugar, cocoa).
- Only add roasted coffee beans into the coffee bean hopper, never add other foodstuffs such as rice, soya beans, cocoa beans, nuts, sugar and spices.
- Never put hard items into the coffee bean hopper which can irreparably damage the grinder.
- The cover of the coffee bean hopper also functions as a seal and preserves the aroma of the coffee beans. Therefore, always keep the lid firmly closed.
• The maximum capacity of the coffee bean hopper is 250 g.
natural_image
Hand pouring liquid into a container with a patterned lid (no visible text or symbols)
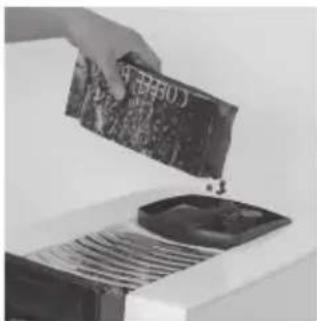
1) Remove the cover of the coffee bean hopper.
2) Pour coffee beans into the hopper.
3) Return the cover of the coffee bean hopper.
Filling the water tank
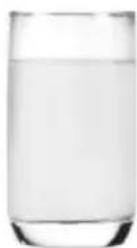
- Pour only room temperature drinking water into the water tank. Never fill the water tank with another liquid (e.g. warm water, hot water, milk). In this way you will prevent possible damage to the espresso machine. To ensure proper coffee flavour, we recommend using water at a temperature of around 25 °C. Low water temperature will negatively affect the final taste of the brewed coffee.
- To ensure that the coffee is both healthy and tasty, it is necessary to replace the water in the water tank every day.
• Never fill the water tank past the MAX level mark.

natural_image
Exterior view of a modern office building (no signage)
natural_image
Hand holding a black tool against a white background (no text or symbols visible)

natural_image
Close-up of a transparent container with a black lid, partially covered by a white surface (no visible text or symbols)
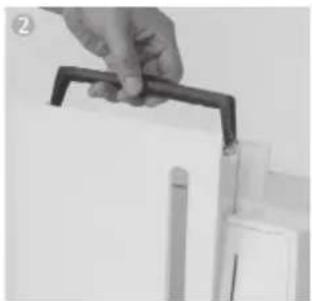
1) Open the lid of the water tank.
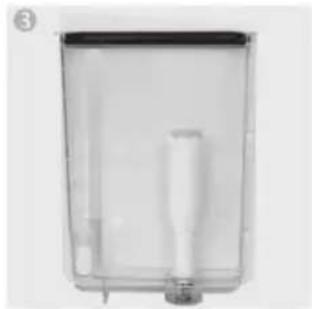
2) Take out the water tank.
3) Fill the water tank with room temperature drinking water, put the water tank back into the espresso machine.
4) Close the lid of the water tank.
Inserting the water filter
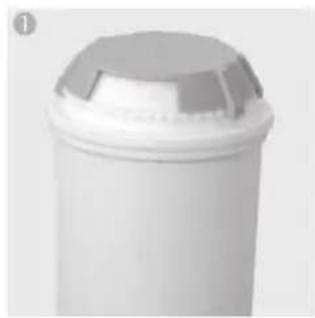
If you live in an area with hard water exceeding 10^ dH, it is recommended to use a water filter. You can purchase these filter in specialised electrical appliance stores or contact their manufacturer directly. Detailed information about the installation, cleaning and replacement of a water filter is provided in the chapter. Water filter on pg. 25.
natural_image
Close-up of a white plastic cylindrical container with a gray lid (no text or symbols visible)

natural_image
Hand holding a white cylindrical object inserted into a transparent container (no text or symbols visible)
natural_image
Transparent rectangular container with a white cylindrical object inside, no visible text or symbols
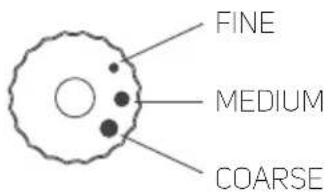
Controlling the fineness of ground coffee
- Set the grinding fineness for the coffee beans according to the type of coffee bean coffee.
- Only adjust the fineness of the grind while the grinder is running as this will avoid damaging it.
• We recommend a coarse grind setting for dark-coloured coffee beans.
• We recommend a fine grind setting for light-coloured coffee beans.
- If your coffee is flowing out slowly during the brewing process (or is not flowing at all), set a coarser grind setting.
- If your coffee is flowing out too quickly and the colour is too light, set a finer grind setting.

natural_image
Black-and-white photo of a bowl containing several small bowls of food, with one bowl partially filled (no visible text or symbols)
NOTE:
Setting the fineness of the grid will show itself only after brewing 2 cups of coffee.
Using for the first time
- As the espresso machine was tested at the factory, a small amount of ground coffee may still be inside. The actual appliance, however, is brand new.
- When it is first turned on, the automatic cleaning test will be initiated, which will help to achieve optimal operating conditions. It is not possible to skip this step.
- Hot water may drip out of the coffee spout during the cleaning process. Avoid coming into contact with hot water – risk of scalding.
Make sure that the espresso machine is connected to an el. power socket, then press the main power switch.
1) Welcome.
2.) Automatic espresso machine test.
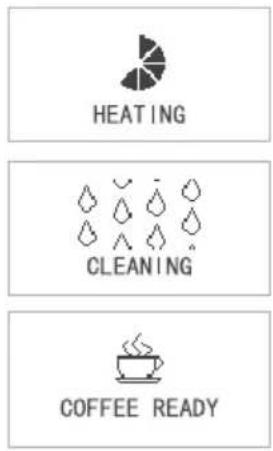
3) The espresso machine is starting to heat up. The heating system will automatically stop when the correct coffee brewing and steam temperature is reached.
4) After heating up, the espresso machine will automatically clean out the brewing unit and both the coffee and hot water spouts (the automatic cleaning system ensures the best possible freshness of the brewed coffee).
5) After the cleaning process is finished, the espresso machine is ready for operation.

flowchart
graph TD
    A["① WELCOME"] --> B["② SELF TESTING"]
    B --> C["③ HEATING"]
    C --> D["④ CLEANING"]
    D --> E["⑤ READY"]
Turning on the device
- Whenever the espresso machine is turned on, the automatic heating and cleaning process will be performed. It is not possible to stop this process. The espresso machine can only be used after this process has completely finished.
- Hot water may drip out of the coffee spout during the cleaning process. Avoid coming into contact with hot water – risk of scalding.
Make sure that the espresso machine is connected to an el. power socket, then press the main power switch.
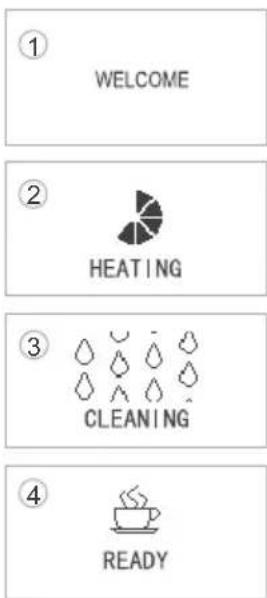
1) Welcome.
2) The espresso machine is starting to heat up. The heating system will automatically stop when the correct coffee brewing and steam temperature is reached.
3) After heating up, the espresso machine will automatically clean out the brewing unit and drain the coffee and hot water (the automatic cleaning system ensures the best possible freshness of the brewed coffee).
4) The espresso machine is now ready for use. You can start brewing coffee.
flowchart
graph TD
    A["① WELCOME"] --> B["② HEATING"]
    B --> C["③ CLEANING"]
    C --> D["④ READY"]
Turning off the device
- Whenever the espresso machine is turned off, the automatic cleaning process will be performed. It is not possible to stop this process. This process serves to clean out the internal lines of the espresso machine and to remove the remains of ground coffee.
- Hot water may drip out of the coffee spout during the cleaning process. Avoid coming into contact with hot water – risk of scalding.
Press the main power switch.


1) Cleaning the espresso machine.
2) When the message «GOODBYE» appears on the display it means that the cleaning process was successfully completed and the espresso machine will shut down automatically.
PART 4: OPERATION
Presetting the appliance
Using this espresso machine you will brew a delicious cup of coffee by simply pressing one button. Furthermore, you can select your preferred coffee strength, its volume, the amount of milk and foamed milk or the temperature and volume of the hot water.
- Brewing coffee by pressing a touch icon.
- Quick parameter settings for brewing beverages.
- Setting default parameters for the brewed beverages.
NOTE:
Press the dial button to stop the beverage brewing process.
Brewing coffee by pressing a touch icon
If the message «READY» is lit on the display, you can press one touch icon to brew your desired type of coffee.
In the following example, we will show you how to prepare an espresso coffee using the touch icons.

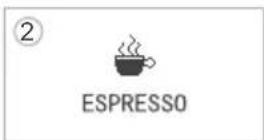
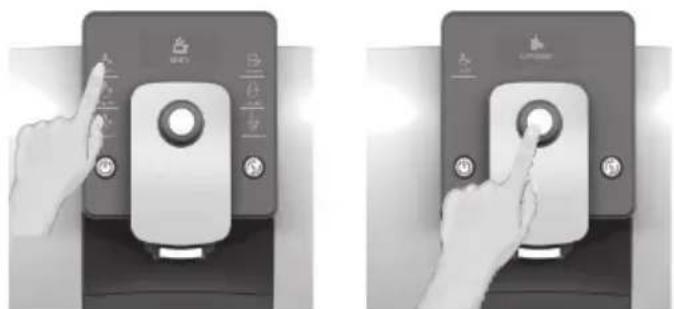
1) Press the espresso icon.
2) As soon as the icon shown in the picture appears on the display, press the dial button. Without further user interaction, an espresso coffee will be prepared with the default parameters.
3) If there is no further user interaction within 10 seconds of pressing the beverage icon, the display will show the message «READY» and the espresso machine will switch back to the main menu.



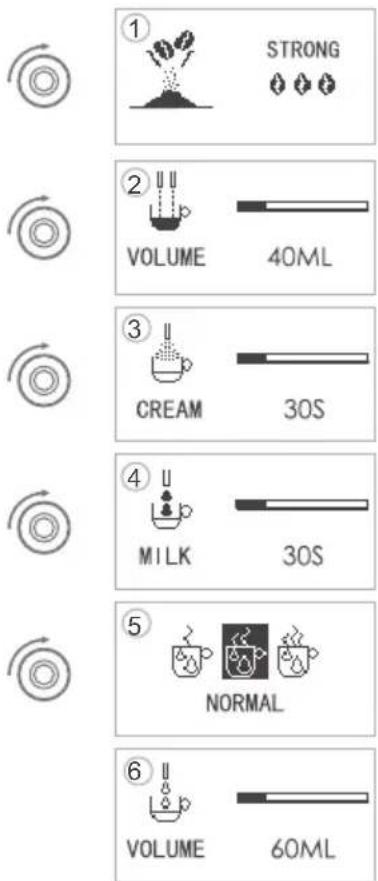
Quick parameter settings for brewing beverages
When brewing coffee, it is possible to quickly set the 8 parameters listed below.
• Amount of ground coffee for brewing a beverage.
• Volume of the brewed coffee.
- Milk frothing time when brewing a cappuccino.
- Milk heating time when brewing a latte.
• Temperature of the prepared hot water.
• Volume of the prepared hot water.
- Milk heating time when making hot milk.
- Milk heating time when making foamed milk.
The strength or volume of the brewed coffee can be temporarily set before or during the brewing process. This setting will not be stored.
Information about changes to the default parameters can be found in chapter Beverage settings.
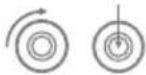
1) While the coffee is being ground, you can use the dial button to select the amount of ground coffee that will be used for the beverage currently being brewed – adjusting its strength. Turning to the left you will lower the coffee strength to MILD, turning to the right you will increase the coffee strength to STRONG. The default coffee strength is set to the medium value of NORMAL.
2) While making an espresso, cappuccino, long coffee (lungo) and caffe latte you can set the volume of the brewed coffee using the dial button. If for example the default volume is set to 40 ml, then by turning two steps to the left you will reduce the volume to 35 ml, while turning it by two steps to the right you will increase it to 45 ml.
3) While making a cappuccino it is possible during the milk frothing process to set the time of this frothing using the dial button. If for example the default time is set to 20 seconds, then turning it 2 steps to the left you will shorten the milk frothing time to 19 seconds, while turning it by 2 steps to the right you will extend it to 21 seconds.
4) While making a caffe latte it is possible during the milk heating process to set the heating time using the dial button. If for example the default time is set to 20 seconds, then turning it 2 steps to the left you will shorten the milk heating time to 19 seconds, while turning it by 2 steps to the right you will extend it to 21 seconds.
5) Before heating hot water, its temperature can be adjusted using the dial button. Turn to the left to reduce the temperature to LOW, turn to the right to increase the temperature to HIGH. The default temperature is set to the medium value of NORMAL.
6) While heating hot water, its volume can be adjusted using the dial button. If for example the default volume is set to 150 ml, then by turning two steps to the left you will reduce the volume to 145 ml, while turning it by two steps to the right you will increase it to 155 ml.
7) While making hot milk, its heating time can be adjusted using the dial button. If for example the default time is set to 20 seconds, then turning it 2 steps to the left you will shorten the hot milk heating time to 19 seconds, while turning it by 2 steps to the right you will extend it to 21 seconds.
8) While making foamed milk, its heating time can be adjusted using the dial button. If for example the default time is set to 20 seconds, then turning it 2 steps to the left you will shorten the milk frothing time to 19 seconds, while turning it by 2 steps to the right you will extend it to 21 seconds.


Setting default parameters for the brewed beverages
While heating hot water, its volume can be adjusted using the dial button. If for example the default volume is set to 150 ml, then by turning two steps to the left you will reduce the volume to 145 ml, while turning it by two steps to the right you will increase it to 155 ml. In a similar way it is also possible to change:
• Strength and volume of an espresso.
• Strength and volume of a long coffee.
• Hot water temperature and volume setting.
• Hot milk preparation time setting.
• Foamed milk preparation time setting.
• Strength and volume of an espresso for brewing a cappuccino and the foamed milk preparation time.
- Strength and volume of an espresso for brewing a caffè latte and the milk and foamed milk preparation time.
The following table presents the range of parameters that can be changed for individual types of beverages:
| Beverages Temperature Strength Volume | | | |
| Espresso Machine Approx. 80 °C | Weak: ⚠Medium: ⚡Strong: ⚢️ | Volume: 25-120 ml | |
| Long coffee /Large coffee | |
| Cappuccino Approx. 70 °C | | Weak: ⚣Medium: ⚤Strong: ⚥️ | Volume: 25-240 mlMilk preparation time: 3-120 secondsFoamed milk preparation time: 3-120 seconds |
| Coffee latte icon /Caffe latte |
| Hot water /Hot water Low: approx. 60 °CMedium: approx. 70 °CHigh: approx. 80 °C | | Volume: 25-450 ml | |
| Hot milk /Hot milk Approx. 40 °C Milk preparation time: 3-120 seconds | |
| Hot cream /Foamed milk Approx. 50 °C | Foamed milk preparation time of 3-120 seconds | |
Information about changes to the default parameters can be found in chapter Beverage settings.
Available coffees and warm beverages
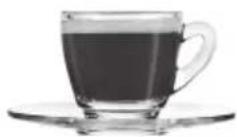
Espresso
Coffee beans: Medium roasted
Cup temperature: 55 °C
Coffee strength: Strong
Extraction temperature: 93 °C
Coffee volume: 50 ml

Long coffee (Large coffee, Lungo)
Coffee beans: Medium roasted
Cup temperature: 55 °C
Coffee strength: Medium
Extraction temperature: 93 °C
Coffee volume: 100 ml

Hot water (Hot water)
High temperature: For brewing black / green tea
Normal temperature: For direct consumption
Low temperature: For making instant beverages or dried milk.
Cappuccino
Coffee beans: Medium roasted
Cup temperature: 55 °C
Coffee strength: Weak
Milk temperature: 10°C
Milk preparation time: 15 seconds
Coffee volume: 100 ml

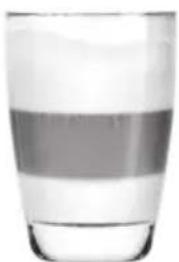
Coffee Latté (Caffè latte)
Coffee beans: Medium roasted
Cup temperature: 55 °C
Coffee strength: Weak
Milk temperature: 10°C
Milk preparation time: 15 seconds
Foamed milk preparation time: 15 seconds
Coffee volume: 100 ml

Hot milk (Hot milk)
Milk can be heated to the optimal drinking temperature without the loss of nutritional values.

natural_image
Glass of dark liquid, likely representing tea or a similar beverage (no text or symbols visible)


natural_image
Glass of liquid with a clear gradient, no text or symbols visible
natural_image
Glass of water with a horizontal band (no text or symbols visible)
Brewing beverages
In this chapter you will learn how to use this espresso machine to make various types of coffees, hot water, hot milk and foamed milk. Please read the following instructions that will help you brew the most delicious hot beverages.
The espresso machine uses hot water when brewing beverages. Avoid coming into any kind of contact with hot water – risk of scalding.
Before brewing any type of beverage, check that the message «READY» is shown on the display.
• Never use heavily roasted coffee beans.
• Store coffee beans in a dry and dark place.
- Only use room temperature drinking water. When brewing coffee, you will achieve optimal fl avour using water at a temperature of 25 °C.
- To ensure that the coffee is both healthy and full of fl avour, it is necessary to replace the water in the water tank every day.
• Brew coffee into preheated cups.
- Using the handle, set the height of the coffee spout according to the cup height which will prevent coffee from splashing out.
• The adjustable height of the coffee spout is: 80 - 140 mm.
ESPRESSO
The recommended volume for espresso coffee is between 30 and 50 ml. Due to the small volume of the espresso it is appropriate to preheat the cups before brewing.
1) Press the espresso icon.
2) Pressing the dial button you will start the grinder. At this moment, you can turn the same button to adjust the amount of ground coffee.
The default amount of ground coffee for an espresso coffee:
3) While the coffee is brewing, you can use the dial button to adjust the volume of the brewed beverage.
The default volume of an espresso coffee: 50 ml
4) As soon as the here shown picture appears on the display, the espresso coffee is ready.



LONG COFFEE (LUNGO, LARGE COFFEE)
The fl avour of lungo coffee is much fi ner than the strong fl avour of espresso coffee.

1) Press the long coffee icon (large coffee).
2) Pressing the dial button you will start the grinder. At this moment, you can turn the same button to adjust the amount of ground coffee.
The default amount of ground coffee for a long coffee:
3) While the coffee is brewing, you can use the dial button to adjust the volume of the brewed beverage.
Default volume of a long coffee: 150 ml
4) As soon as the here shown picture appears on the display, the long coffee is ready.


HOT WATER (HOT WATER)
You can adjust the temperature of the hot water to three levels: high, medium and low.
1) Press the hot water icon (hot water).
The default temperature level for hot water: medium.
2) If the temperature of the water is set to the medium level, its temperature can be increased by turning the dial button to the right.
3) If the temperature of the water is set to the medium level, its temperature can be decreased by turning the dial button to the left.
4) While heating hot water, its volume can be adjusted using the dial button.
Default volume of hot water: 200 ml


CAPPUCCINO
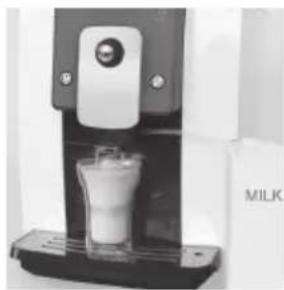
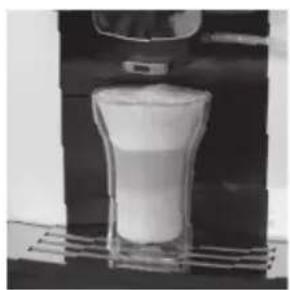
- While brewing cappuccino coffee, steam will be released from the spout. Avoid coming into any kind of contact with steam – risk of scalding.
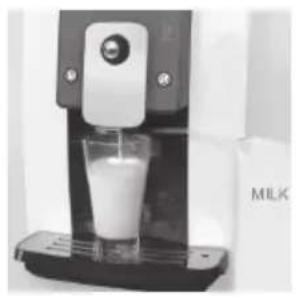
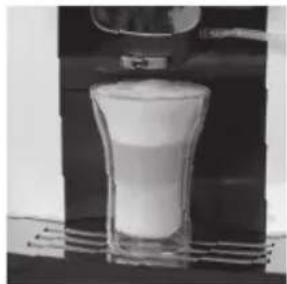
- Before brewing cappuccino or latte coffee, hot milk and foamed milk, check that milk is being supplied to the frother via a hose.
- To achieve the optimal quality of foamed milk, use milk with a temperature below 10 °C.
- If the espresso machine is set to the energy saving mode, it is necessary to activate the independent heater to create steam. It is not possible to skip this process.


1) Press the cappuccino icon.
2) If the temperature is not high enough for steam generation, the independent heater will be activated.
3) As soon as the here shown picture appears on the display, the heating process is complete.
4) Pressing the dial button you will start the grinder. At this moment, you can turn the same button to adjust the amount of ground coffee.
The default amount of ground coffee for a cappuccino:
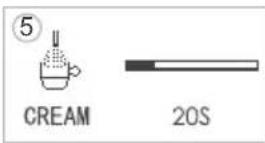
5) As soon as the here shown picture appears on the display, the milk frothing process will be started.
6) While foamed milk is pouring out, its preparation time can be adjusted using the dial button.
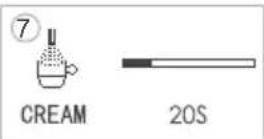
The default preparation time for foamed milk: 20 s.
7) As soon as the here shown picture appears on the display, the coffee brewing process will be started.
8) While the coffee is brewing, you can use the dial button to adjust its volume.
Default volume of a coffee: 100 ml
9) As soon as the here shown picture appears on the display, the cappuccino coffee is ready.

natural_image
White milk Millimeter with glass inside, no visible text or symbols on the device itself
natural_image
Exterior view of a milk tea machine with a glass of milk (no visible text or symbols)
natural_image
Close-up of a glass mug filled with white liquid, being heated by a machine (no visible text or symbols)
CAFFÈ LATTE (CAFFÈ LATTE)
• Use a larger cup when brewing a caffè latte.
- While brewing caffè latte, steam will be released from the spout. Avoid coming into any kind of contact with steam – risk of scalding.
- Before brewing cappuccino or latte coffee, hot milk and foamed milk, check that milk is being supplied to the frother via a hose.
1) Press the coffee latte icon.
2) If the temperature is not high enough for steam generation, the independent heater will be activated.
3) As soon as the here shown picture appears on the display, the heating process is complete.
4) Pressing the dial button you will start the grinder. At this moment, you can turn the same button to adjust the amount of ground coffee.
The default amount of ground coffee for a caffè latte:
5) As soon as the here shown picture appears on the display, the hot milk heating process will be started.


STRONG
f f f


20S


30S

110ML


140ML


ENJOY!

coffee latte


COFFEE LATTE


HEATING


LATTE READY


STRONG
◇ ◇ ◇

MILK

10S
6) While hot milk is pouring out, its preparation time can be adjusted using the dial button.
The default preparation time for hot milk: 15 s
7) As soon as the here shown picture appears on the display, the milk frothing process will be started.
8) While foamed milk is pouring out, its preparation time can be adjusted using the dial button.
The default preparation time for foamed milk: 15 s
9) As soon as the here shown picture appears on the display, the coffee brewing process will be started.
10) While the coffee is brewing, you can use the dial button to adjust its volume.
Default volume of a coffee: 100 ml
11) As soon as the here shown picture appears on the display, the caffe latte is ready.
natural_image
Product photo of a milk tea machine with glass and control panel (no visible text or symbols)

natural_image
Close-up of a milk tea machine with glass and control panel (no visible text or symbols)

natural_image
Close-up of a glass with a white liquid being poured into it, no visible text or symbols




HOT MILK (HOT MILK)
- While making hot milk, steam will be released from the spout. Avoid coming into any kind of contact with steam – risk of scalding.
- Before brewing cappuccino or latte coffee, hot milk and foamed milk, check that milk is being supplied to the frother via a hose.
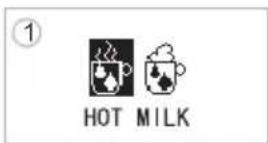
1) Press the milk/cream icon and using the dial button select the HOT MILK (hot milk) function.
2) Confir rm the selection by pressing the dial button. If the temperature is not high enough for steam generation, the independent heater will be activated.
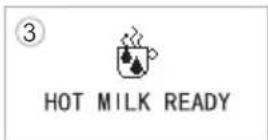
3) As soon as the here shown picture appears on the display, the hot milk heating process is complete.
4) While hot milk is pouring out, its preparation time can be adjusted using the dial button.
The default preparation time for hot milk: 20 s
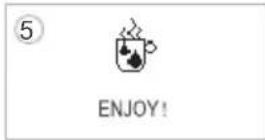
5) As soon as the here shown picture appears on the display, the hot milk is ready.





HOT CREAM (FOAMED MILK)
- While making foamed milk, steam will be released from the spout. Avoid coming into any kind of contact with steam – risk of scalding.
- Before brewing cappuccino or latte coffee, hot milk and foamed milk, check that milk is being supplied to the frother via a hose.
1) Press the milk/cream icon and using the dial button select the HOT CREAM (foamed milk) function.
2) Press the dial button to start it. If the temperature is not high enough for steam generation, the independent heater will be activated.
3) As soon as the here shown picture appears on the display, the foamed milk heating process is complete.
4) While foamed milk is pouring out, its preparation time can be adjusted using the dial button.
The default preparation time for foamed milk: 20 s
5) As soon as the here shown picture appears on the display, the foamed milk coffee is ready.
Brewing coffee from ground coffee
Use this function if you wish to brew coffee from already ground coffee.
- The ground coffee hopper is intended only for ground coffee; never fill it with instant coffee, cocoa powder or other mixtures. In this way you will prevent possible damage to the espresso machine.
- For dosing the ground coffee, use the provided measuring cup and always place only one measure of ground coffee into the ground coffee hopper. After using, place the measuring cup back in the bag with the accessories.
- Do not place ground coffee into the coffee bean hopper. In this way you will prevent possible damage to the espresso machine.
- Do not rinse out the ground coffee hopper with water. You risk injury by electric shock.
• Use quality coffee that is ground for brewing espresso coffee.
- The beverage brewing process from ground coffee is, with the exception of grinding coffee, the same as when brewing espresso coffee, long coffee, cappuccino coffee or caffe latte.
1) Open the lid of the ground coffee hopper.
2) Pour 1 measuring cup of ground coffee into the ground coffee hopper and close the lid.
3) As soon as the here shown picture appears on the display, select one of four coffee beverages. For this example, press the espresso icon.
4) As soon as the here shown picture appears on the display, confirm your selection by pressing the dial button.
5) While the coffee is brewing, you can use the dial button to adjust its volume.
Default volume of a espresso: 50 ml


6) As soon as the here shown picture appears on the display, the espresso coffee is ready.
7) If after fi lling the ground coffee hopper you wish to cancel the brewing of the beverage, fi rst continue with the brewing of the selected beverage, and then cancel the entire process by pressing the dial button.

natural_image
Close-up of a hand using a spatula to remove or brush into a container (no text or symbols visible)

natural_image
Close-up of a metallic door with a central knob and control buttons (no visible text or symbols)
natural_image
Front view of a modern office building (no signage)

PART 5: APPLIANCE SETTINGS
Beverage settings
• This chapter will guide you through the settings for individual programs.
- If the message «READY» is lit on the display, press the dial button, hold it down for 2 seconds and you will enter the program settings menu. The «MAINTENANCE» menu will appear on the display. In this chapter you will learn how to edit the default beverage brewing settings. You can change the strength of the coffee, the volume of the coffee, hot water temperature, hot water volume, hot milk and foamed milk heating time. If you wish to leave the program settings menu, use the dial button to set «EXIT» on the display and confirm by pressing the dial button.
- You will find the ranges for individual parameters on page 14.
• The parameters set through these commands will become the default settings for the individual beverages.
-
Espresso coffee settings
-
Long coffee settings
-
Hot water settings
-
Cappuccino coffee settings
-
Caffè latte settings
-
Hot milk settings
-
Foamed milk settings
ESPRESSO COFFEE SETTINGS
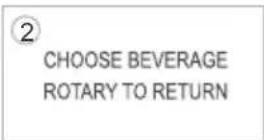
1) After entering the program settings menu, use the turn dial to set the value «BEVERAGE SETTING» on the display; confirm the selection by pressing the dial button.
2) If the here shown picture appears on the display (6 beverage brewing touch icons are simultaneously flashing), the espresso machine is ready for making beverage settings.
3) Press the espresso icon and confirm your selection by pressing the dial button.
4) As soon as the here shown picture appears on the display, you can use the dial button to set the amount of freshly ground coffee. Confirm the change to the settings by pressing the dial button
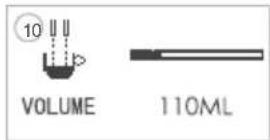
5) As soon as the here shown picture appears on the display, you can use the dial button to set the volume of the brewed coffee.
6) Press the dial button to confirm the setting changes. As soon as the here shown picture appears on the display, the espresso coffee settings are complete.

natural_image
Two identical grayscale photos showing a hand pressing a button on a device panel, no text or symbols visible.




LONG COFFEE / LARGE COFFEE SETTINGS
The instructions for setting a long coffee are the same as for espresso coffee. It is not necessary to describe them further.
HOT WATER / HOT WATER SETTINGS
1) After entering the program settings menu, use the turn dial to set the value «BEVERAGE SETTING» on the display; confirm the selection by pressing the dial button.
2) If the here shown picture appears on the display (6 beverage brewing touch icons are simultaneously flashing), the espresso machine is ready for making beverage settings.
3) Press the hot water icon and confirm your selection by pressing the dial button.
4) As soon as the here shown picture appears on the display, you can use the dial button to set the hot water temperature. Confirm the change to the settings by pressing the dial button.
5) As soon as the here shown picture appears on the display, you can use the dial button to set the hot water volume.
6) Press the dial button to confirm the setting changes. As soon as the here shown picture appears on the display, the hot water settings are complete.

natural_image
Two black-and-white photos showing a hand pressing a button on a device, with no visible text or symbols.
CAPPUCCINO SETTINGS
1) After entering the program settings menu, use the turn dial to set the value «BEVERAGE SETTING» on the display; confirm the selection by pressing the dial button.
2) If the here shown picture appears on the display (6 beverage brewing touch icons are simultaneously flashing), the espresso machine is ready for making beverage settings.
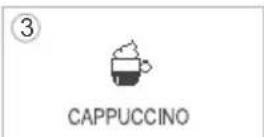
3) Press the cappuccino icon and confirm your selection by pressing the dial button.
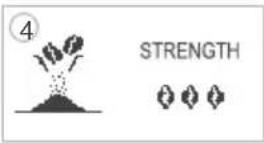
4) As soon as the here shown picture appears on the display, you can use the dial button to set the amount of freshly ground coffee. Confirm the change to the settings by pressing the dial button.




5) As soon as the here shown picture appears on the display, you can use the dial button to set the volume of the brewed coffee. Confirm the change to the settings by pressing the dial button.
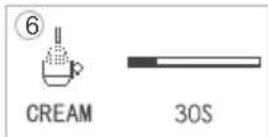
6) As soon as the here shown picture appears on the display, you can use the dial button to set the milk frothing time.
7) Press the dial button to confirm the setting changes. As soon as the here shown picture appears on the display, the cappuccino coffee settings are complete.

natural_image
Three-panel sequence showing hands pressing a circular button on a device, no visible text or symbols
COFFEE LATTE ICON / CAFFÈ LATTE SETTINGS
1) After entering the program settings menu, use the turn dial to set the value «BEVERAGE SETTING» on the display; confirm the selection by pressing the dial button.
2) If the here shown picture appears on the display (6 beverage brewing touch icons are simultaneously fl ashing), the espresso machine is ready for making beverage settings.
3) Press the caffe latte icon and confirm your selection by pressing the dial button.
4) As soon as the here shown picture appears on the display, you can use the dial button to set the amount of freshly ground coffee. Confirm the change to the settings by pressing the dial button.
5) As soon as the here shown picture appears on the display, you can use the dial button to set the volume of the brewed coffee. Confirm the change to the settings by pressing the dial button.
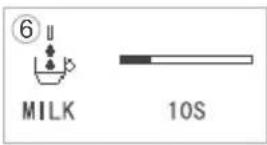
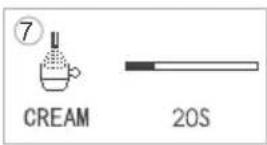
6) As soon as the here shown picture appears on the display, you can use the dial button to set the hot milk heating time. Confirm the change to the settings by pressing the dial button.
7) As soon as the here shown picture appears on the display, you can use the dial button to set the milk frothing time.
8) Press the dial button to confirm the setting changes. As soon as the here shown picture appears on the display, the café latte settings are complete.

natural_image
Three-panel black-and-white photo showing hands operating a white electronic device with a circular button, no visible text or symbols.


5

VOLUME 40ML
6

CREAM TIME
30S
7

CONFIRMED


1

BEVERAGE SETTING
2
CHOOSE BEVERAGE
ROTARY TO RETURN

coffee little

3

COFFEE LATTE


4

STRENGTH
↓ ↓ ↓


5

VOLUME 40ML
6

MILK TIME
30S

7

CREAM TIME
30S

8

CONFIRMED
HOT MILK / HOT MILK SETTINGS
1) After entering the program settings menu, use the turn dial to set the value «BEVERAGE SETTING» on the display; confirm the selection by pressing the dial button.
2) If the here shown picture appears on the display (6 beverage brewing touch icons are simultaneously fl ashing), the espresso machine is ready for making beverage settings.
3) Press the milk/cream icon, turn the dial button to mark the selection «HOT MILK» on the display and confirm by pressing the dial button.
4) As soon as the here shown picture appears on the display, you can use the dial button to set the hot milk heating time.
5) Press the dial button to confirm the setting changes. As soon as the here shown picture appears on the display, the hot milk settings are complete.

natural_image
Two-step illustration showing a hand pressing a circular button on a device, with no visible text or symbols.


1

BEVERAGE SETTING


②
CHOOSE BEVERAGE
ROTARY TO RETURN
hotmilk/cream
③

HOT MILK

4

MILK TIME
30S

5

CONFIRMED
HOT CREAM / FOAMED MILK SETTINGS
1) After entering the program settings menu, use the turn dial to set the value «BEVERAGE SETTING» on the display; confirm the selection by pressing the dial button.
2) If the here shown picture appears on the display (6 beverage brewing touch icons are simultaneously fl ashing), the espresso machine is ready for making beverage settings.
3) Press the milk/cream icon, turn the dial button to mark the selection «HOT CREAM» on the display and confirm by pressing the dial button.
4) As soon as the here shown picture appears on the display, you can use the dial button to set the milk frothing time.
5) Press the dial button to confirm the setting changes. As soon as the here shown picture appears on the display, the foamed milk settings are complete.

natural_image
Two-step illustration showing a hand pressing a circular button on a device, with no visible text or symbols.


①

BEVERAGE SETTING

2
CHOOSE BEVERAGE
ROTARY TO RETURN


3

HOT CREAM

4

CREAM TIME
30S
5

CONFIRMED
Water filter
This chapter will guide you through the replacement and installation of the water filter.
Use only original water filters purchased in specialised electrical appliance stores or contact the manufacturer directly.
Installing the water filter
1) After entering the program settings menu, use the turn dial to set the value «FILTER» on the display; confirm the selection by pressing the dial button.
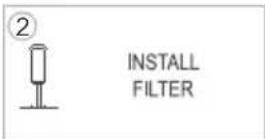
2) Use the turn dial to set the value «INSTALL FILTER» on the display; confirm the selection by pressing the dial button.
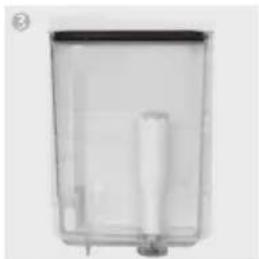
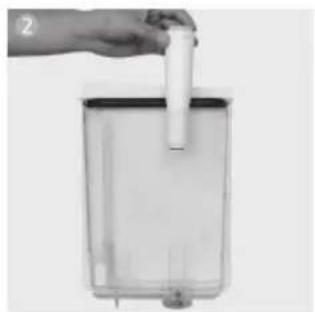
3) Take out the water filter, set the current month on it, place it back into the water tank and press the dial button.
4) After installing the water filter, flush it out by pressing the clean button.
5) Approximately 500 ml of water is required for fl using out the water filter.
6) As soon as the flushing process is finished, the message «FILTER» will appear on the display of the espresso machine. (If you wish to leave the program settings menu, use the dial button to set «EXIT» on the display and confirm by pressing the dial button.)

natural_image
White plastic cylindrical container with a lid (no text or symbols visible)

natural_image
Hand holding a white cylindrical object over a transparent container (no visible text or symbols)
natural_image
Transparent rectangular container with a cylindrical tube inside, no visible text or symbols




Replacing the water filter
1) After entering the program settings menu, use the turn dial to set the value «FILTER» on the display; confirm the selection by pressing the dial button.
2) Use the turn dial to set the value «REPLACE FILTER» on the display; confirm the selection by pressing the dial button.
3) Take the water filter out of the water tank. Set the current month on the new water filter and place it into the water tank. Press the dial button.
4) After installing the new water filter, flush it out by pressing the clean button.




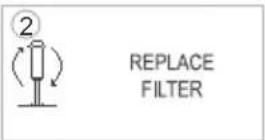


5) Approximately 500 ml of water is required for fl using out the water filter.
6) As soon as the flushing process is finished, the message «FILTER» will appear on the display of the espresso machine. (If you wish to leave the program settings menu, use the dial button to set «EXIT» on the display and confirm by pressing the dial button.)

Adjusting the water hardness setting
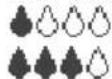
According to page 7 in the user's manual, test the hardness of the used water and according to the test results set the water hardness on the appliance according to the table below. Default factory settings:
| Water °dH Settings | | |
| Very low < 3.9 | | |
| Soft 3.9 - 7 | | |
| Moderately hard 7.01 - 14 | | |
| Hard 14.1 - 21 | | |
| Very hard > 21 | | |
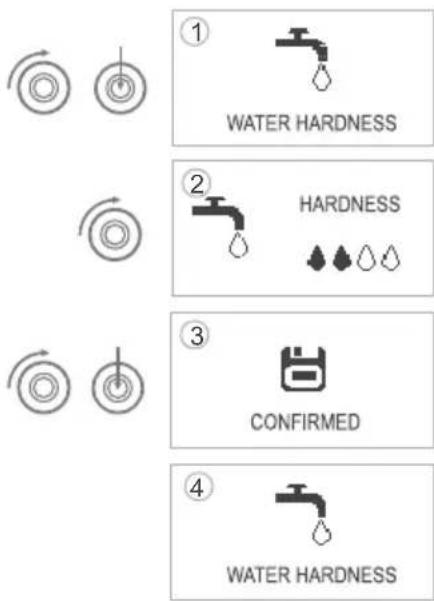
1) After entering the program settings menu, use the turn dial to set the value «WATER HARDNESS» on the display; confirm the selection by pressing the dial button.
2) Turn the turn dial to set the water hardness on the display:

3) Press the dial button to save the water hardness setting.
4) As soon as the water hardness setting is finished, the message «WATER HARDNESS» will appear on the display of the espresso machine. (If you wish to leave the program settings menu, use the dial button to set «EXIT» on the display and confirm by pressing the dial button.)
Setting the economical ECO mode
• In the energy saving mode the espresso machine needs 30 seconds to heat up when brewing cappuccino coffee, café latte, or heating hot milk and foamed milk. When brewing the above described beverages in normal mode,
the mentioned heating up is not needed. Nevertheless, normal mode has higher demands on power than the energy saving mode.
• The espresso machine is factory-set to normal mode.
1) After entering the program settings menu, use the turn dial to set the value «ECO SETTING» on the display; confirm the selection by pressing the dial button.
2) Turn the dial button to mark the energy saving mode «ECO MODE».
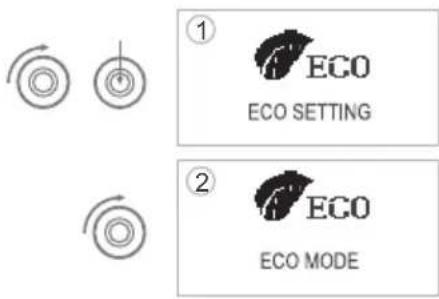
3) Or turn the dial button to mark normal mode «NORMAL MODE».
4) Confirm the selection by pressing the dial button.
5) As soon as the energy mode setting is finished, the message «ECO SETTING» will appear on the display of the espresso machine. (If you wish to leave the program settings menu, use the dial button to set «EXIT» on the display and confirm by pressing the dial button.)


NORMAL MODE

4

CONFIRMED
5

ECO SETTING
Automatic shut off
- By setting the automatic shut off mode, you save electricity.
- The default setting for the automatic shut off is 2 hours, the espresso machine will therefore turn off automatically after being idle for 2 hours.
- The required idle time can be set in the range from 15 minutes to 15 hours.
1) After entering the program settings menu, use the turn dial to set the value «AUTO-OFF» on the display; confirm the selection by pressing the dial button.
2) Turn the dial button to set the idle time of the espresso machine before automatic shut-off.
3) Confirm the selection by pressing the dial button.
4) As soon as the automatic shut off setting is finished, the message «AUTO-OFF» will appear on the display of the espresso machine. (If you wish to leave the program settings menu, use the dial button to set «EXIT» on the display and confirm by pressing the dial button.)


1

AUTO OFF

②

15 MINS

3

CONFIRMED
4

AUTO OFF
- In this program you can find out how many individual beverages were brewed during the operation of the appliance, total number of brewed beverages and number of maintenance tasks.
- Total number of brewed beverages.
- Number of brewed cups of espresso coffee.
- Number of brewed cups of long coffee.
- Number of brewed cups of long coffee.
- Number of brewed cups of cappuccino coffee.
- Number of brewed cups of caffè latte.
- Number of brewed cups from ground coffee.
- Number of brewed cups of hot milk.
- Number of brewed cups of foamed milk.
- Number of cleans.
- Number of cleans of the brewing unit.
-
Number of descaling processes.
-
Number of installations and replacements of water filters.
- Due to the testing of the espresso machine in the factory, there are already several brewed beverages recorded on first use.
1) After entering the program settings menu, use the turn dial to set the value «INFORMATION» on the display; confirm the selection by pressing the dial button.
2) Turn the dial button to display the software version of the espresso machine.
3) If you wish to view the statistics for the amount of produced beverages and maintenance, turn the dial button to set the value «NUMBER OF USE» on the display. Confirm the selection by pressing the dial button.
4) Then the total number of produced beverages will be shown on the display.
5) Turn the turn dial to now browse through the statistics of the individual beverages and types of maintenance. Press the dial button to return to the program settings menu.
6) If you wish to go from the INFORMATION menu to the program settings menu without displaying the individual statistics, use the dial button to set the value «BACK» on the display and press the dial button.

Language
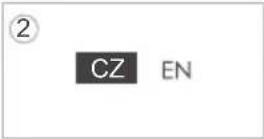
- The user interface of the espresso machine can be set to the following languages:
-
English
-
Czech
- The default language for the espresso machine is English.
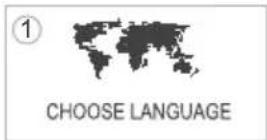
1) After entering the program settings menu, use the turn dial to set the value «CHOOSE LANGUAGE» on the display; confirm the selection by pressing the dial button.
2) Use the dial button to select the desired language.
3) Press the dial button to confirm the selection, the user interface of the espresso machine will now be set in the selected language.
4) As soon as the language setting is finished, the message «CHOOSE LANGUAGE» will appear on the display of the espresso machine. (If you wish to leave the program settings menu, use the dial button to set «EXIT» on the display and confirm by pressing the dial button.)



RESET - Factory settings
- This function will delete all user settings and their values will return to the factory settings. With the exception of the language settings and produced beverage and maintenance statistics.
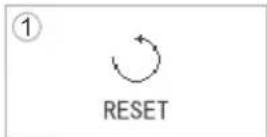
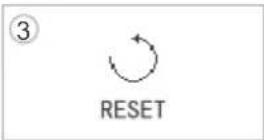
1) After entering the program settings menu, use the turn dial to set the value «RESET» on the display; confirm the selection by pressing the dial button.
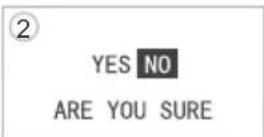
2) If you really want to delete all user settings, turn the dial button to set the value «YES» on the display. If not, set the value to «NO».
3) As soon as you confirm your selection, the message «RESET» will appear on the display of the espresso machine. (If you wish to leave the program settings menu, use the dial button to set «EXIT» on the display and confirm by pressing the dial button.)


This option serves to leave the program settings menu and to return to the main menu of the espresso machine.
1) After entering the program settings menu, use the turn dial to set the value «EXIT» on the display; confirm the selection by pressing the dial button.
2) As soon as you confirm your selection, the message «READY» will appear on the display of the espresso machine.


PART 6: CLEANING AND MAINTAINING THE APPLIANCE
Cleaning the espresso machine before use
- In this chapter you will learn information about cleaning and maintenance of this espresso machine.
- Everyday maintenance of the espresso machine will not only ensure optimal fl avour of the brewed coffee but it will also extend its lifetime.
• We recommend normal cleaning of the espresso machine to be done every day. If the cleaning indicator light is not lit, press the clean button before brewing coffee. This will preheat the brewing unit and the internal lines of the espresso machine, which will result in optimal flavour of the brewed coffee.
- Cleaning can only be started when the message «READY» is lit on the display.
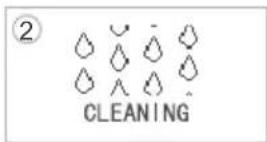
1) If the message «READY» is lit on the display and the cleaning indicator light is not lit, press the clean button and start the cleaning process of the brewing unit and coffee spout.
2) The espresso machine cleaning process cannot be interrupted, after it finishes, the espresso machine will automatically return to the «READY» state.


Cleaning the brewing unit
- After a longer period of use, ground coffee sediments will accumulate in the brewing unit. They can be removed by cleaning the brewing unit.
• The brewing unit cleaning process takes approximately 10 minutes.
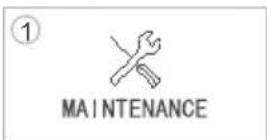
1) After entering the program settings menu, use the turn dial to set the value «MAINTENANCE» on the display; confirm the selection by pressing the dial button.
2) Use the turn dial to set the value «CLEAN BREW UNIT» on the display; confirm the selection by pressing the clean button.
3) Pull out and empty the drip tray of the espresso machine. Water may drip into it during cleaning.
4) Slide the drip tray back.
5) The brewing unit is being cleaned.




6) Open the ground coffee hopper and add a cleaning tablet.
For cleaning, only use original cleaning tablets for dissolving grease. It is available for purchase at specialised electrical appliance stores or contact the manufacturer directly.
7) Close the ground coffee hopper and press the clean button.
8) As soon as the here shown icon appears on the display, press the clean button.
9) Cleaning is taking place.
10 Empty the drip tray
11) Slide the drip tray back.
12) As soon as cleaning is finished, the message READY will appear on the display.
Use the icons below for a description of this cleaning process.



Descaling the espresso machine
- Everyday use of the espresso machine may result in scale deposits inside the espresso machine. The degree of scaling may differ depending on the hardness of the water used. Only use original descaling agents purchased at specialised electrical appliances stores.
- Descaling agents contain acid compounds, which may irritate eyes and skin, so make sure you follow the safety instructions provided by the manufacturer on the packaging of the given agent. In the even that the agent enters the eyes or comes into contact with the skin, rinse the affected part of the body with large amounts of water.
- During the descaling process and cleaning, remove the water filter from the water tank. This will prevent its possible damage.
- Dissolve the descaling agent in cold water and then pour it into the water tank. A fully dissolved descaling agent is much better at dissolving limescale deposits in the espresso machine.
• The total descaling process takes approximately 30 minutes.
- Interrupting the descaling process could damage the espresso machine. Therefore, do not interrupt the descaling process once it is started.
Limescale deposits accumulate inside the espresso machine during its use. If they reach a certain level, the messages «NEEDS DESCALE» and «PRESS RINSE» will appear on the display. In such a case, press the clean button and start the descaling mode.
In the program settings menu, use the turn dial to set the value «MAINTENANCE» on the display; confirm the selection by pressing the dial button.

natural_image
Hand holding a white cylindrical object above a transparent container with an upward arrow (no text or symbols visible)

flowchart
graph TD
    A["Start"] --> B["NEED DESCALE"]
    A --> C["PRESS RINSE"]
Use the turn dial to set the value «DESCALE» on the display; confirm the selection by pressing the dial button.
Now, press the clean button to start the descaling process, which will take approximately 30 minutes.
Do not forget to empty the drip tray before starting the descaling and cleaning process. Water may drip into it during the descaling and cleaning process.
natural_image
Person handling a mechanical device with multiple slots and a handle (no visible text or symbols)

natural_image
Close-up of a hand holding a black plastic container with a small plug, next to a mechanical component (no visible text or symbols)

natural_image
Close-up of a hand inserting a small electronic device into a computer tower (no visible text or symbols)
Dissolve the descaling agent according to the instructions in a sufficient amount of water, pour it into the water tank and return the full tank back into the espresso machine.


natural_image
Hand pouring liquid into a white refrigerator (no visible text or symbols)
natural_image
Modern coffee maker with a metallic cup on a counter (no visible text or symbols)

natural_image
Close-up of a hand holding a transparent container containing a dark, textured substance (no visible text or symbols)
natural_image
Close-up of a hand holding a transparent container with liquid, no visible text or symbols
After adding the descaling agent, press the clean button and start the descaling and cleaning process.
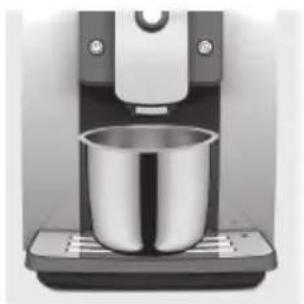
When the descaling and cleaning process is started for the first time, place a container of at least 1 litre in volume under the coffee spout.
After the end of the first descaling and cleaning process, remove the water tank, pour the remaining water out of it and clean it. Now fill the water tank with drinking water and insert it back into the espresso machine.
Press the clean button again to start the second phase of the descaling and cleaning process. This time, the remains of the limescale remains of the descaling agents will be removed from the internal lines of the espresso machine. Place a container of at least 1 litre in volume under the coffee spout.


After fi nishing the second descaling and cleaning phase, the espresso machine will start to heat up.
Once the espresso machine has heated up, the third phase of the descaling and cleaning process will be started.
As soon as the message «READY» is shown on the display, the descaling process is complete. You can continue brewing coffee.

Cleaning the spent coffee grounds container and the drip tray
- When cleaning the spent coffee grounds container and the drip tray, do not use alcohol-based, chemical or abrasive cleaning agents.
• The drip tray and the spent coffee grounds container cannot be washed in a dishwasher.
- When cleaning the spent coffee grounds container and the drip tray, do not use metal items to remove dried on and accumulated materials, this will prevent scratching.
- If your espresso machine informs you about the need for the spent coffee grounds container to be cleaned, it is necessary to clean the container without delay. In this way you will prevent possible damage to the espresso machine.
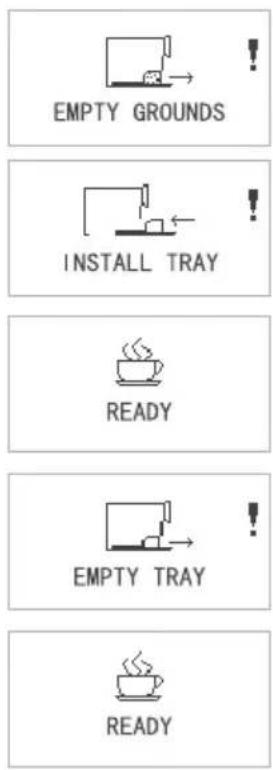
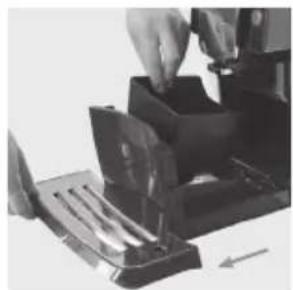
If spent coffee from 15 brewed beverages collects in the container, the display will automatically show the message «EMPTY GROUNDS». The spent coffee grounds container needs to be emptied without delay.
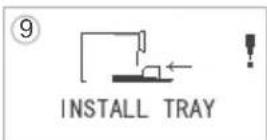
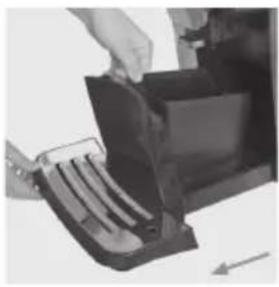
If the message «INSTALL TRAY» is shown on the display, insert the emptied spent coffee grounds container back into the drip tray and slide it back into the espresso machine.
Once the drip tray is fully inserted into the espresso machine, the message «READY» will be shown on the display.
Now it is possible to continue using the espresso machine.
If the drip tray is filled up, the message «EMPTY TRAY» will automatically be shown on the display. Pull out the drip tray from the espresso machine and carefully empty it.
Reinsert the completely emptied drip tray back into the espresso machine, the message «READY» will be shown on the display. Now it is possible to continue using the espresso machine.
flowchart
graph TD
    A["EMPTY GROUNDS"] --> B["INSTALL TRAY"]
    B --> C["READY"]
    C --> D["EMPTY TRAY"]
    D --> E["READY"]
- When the drip tray is removed together with the spent coffee grounds container, we recommend that both parts are cleaned at the same time.
- Whenever the drip tray is cleaned, always use a dry cloth to wipe the two metal contacts in the rear part of the tray.
natural_image
Close-up of a hand operating a mechanical device with a slide and tray (no visible text or symbols)
natural_image
Close-up of a hand holding a black plastic container next to a small mechanical component (no visible text or symbols)

natural_image
Close-up of a hand inserting a small electronic device into a device casing (no visible text or symbols)

natural_image
Close-up of a black plastic enclosure with a small internal component and two arrows pointing to it (no text or symbols visible)
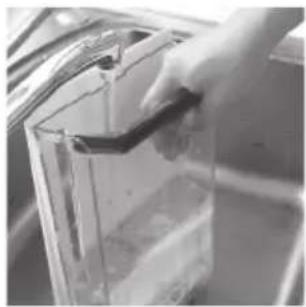
Cleaning the water tank
• We recommend that you rinse the water tank under running water before refi lling it.
- It is appropriate to thoroughly clean the water tank once a month using a damp cloth and a gentle dishwashing detergent.
- Because the water tank is made from a food contact grade environmentally-friendly material, it may easily scratch or crack. So handle the water tank with care and never drop it on the ground. If the water tank is damaged, contact an authorised service centre of the manufacturer.

natural_image
Close-up of a hand placing a dark object into a transparent container (no visible text or symbols)

natural_image
Close-up of a hand holding a transparent plastic container with a textured substance inside (no visible text or symbols)
Cleaning the coffee bean hopper
- Never clean the coffee bean hopper with water. In this way you will prevent possible damage to the grinder.
- When removing residues from the coffee bean hopper, only use a dry cloth or a paper towel.
- Because the coffee bean hopper is made from a food contact grade environmentally-friendly material, it may easily scratch or crack. Pay special attention when cleaning.
If the hopper is damaged, contact an authorised service centre of the manufacturer.

natural_image
Hand pressing down on a dark surface with a tool, no visible text or symbols
Unpacking and cleaning the milk frother
To achieve the finest foamed milk, it is necessary to clean the milk frother every day.
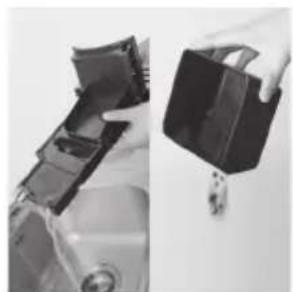
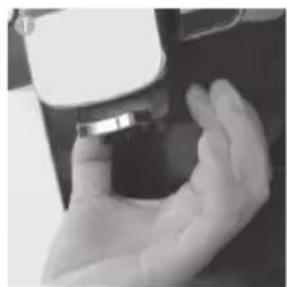
1) Push the milk frother on the sides and carefully take it out.
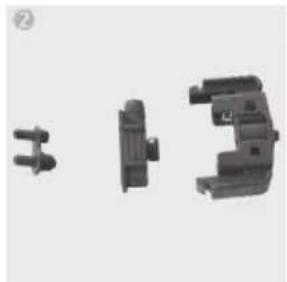
2) Disassemble the milk frother into its individual parts.
3) Wash these parts under running water.
4) Reassemble the milk frother and insert it back into the espresso machine. The cleaning of the milk frother is complete.
natural_image
Close-up of a gloved hand holding a small metallic object (no visible text or symbols)
natural_image
Three black plastic mechanical components with threaded connectors, shown from different angles (no text or symbols visible)

natural_image
Close-up of hands cleaning a water bottle with bubbles (no text or symbols visible)

natural_image
Close-up of hands holding a small electronic component (no visible text or symbols)
Cleaning the espresso machine
- Before cleaning the inside parts of the espresso machine, turn it off and disconnect it from the electrical power socket. Never submerge the espresso machine in water or in any other liquid. There is a danger of injury by electric shock.
- Regularly check that excessive amounts of ground coffee residues are not collecting inside the espresso machine. Use a brush to remove the coffee residues.
- For cleaning the control panel of the espresso machine, only use a fine dry wiping cloth. The control panel is made from glass, so pay extra attention in its vicinity; in the event that the glass is damaged there is a risk of injury by electric shock.
- For cleaning the surface of the espresso machine, only use a fine dry wiping cloth. For cleaning coffee residues, never use hard and sharp items, which could scratch the surface of the espresso machine.

natural_image
Close-up of a hand holding a small object with a white object above it, next to a blurred background (no visible text or symbols)
PART 7: WARNING MESSAGES AND TROUBLESHOOTING
Warning messages
- This chapter describes the error messages shown on the display and their solutions.
| Messages on the display Solution | | |
| If the drip tray is full, it is not possible to brew beverages. | Take the drip tray out, pour the water out of it and insert it back into the espresso machine. |  !EMPTY TRAY !EMPTY TRAY |
| If the spent coffee grounds container is full, it is not possible to brew beverages. | Take the spent coffee grounds container out, remove its contents and insert it back into the espresso machine. |  !EMPTY GROUNDS !EMPTY GROUNDS |
| If the water tank is empty, it is not possible to brew beverages. | Add water to the water tank. |  !FILL WATER TANK !FILL WATER TANK |
| If the coffee bean hopper is empty, it is not possible to brew beverages. | Add coffee beans to the coffee bean hopper and press the dial button. |  !FILL BEANS !FILL BEANS |
| There is not enough ground coffee in the ground coffee hopper. | When making the next beverage from ground coffee, add a measuring cup of ground coffee into the ground coffee hopper. |  !FILL POWDER !FILL POWDER |
| The drip tray is not inserted correctly, all the functions of the espresso machine are out of operation. | Insert the drip tray into the espresso machine in the correct way. |  !INSTALL TRAY !INSTALL TRAY |
| There is not enough water in the internal lines of the espresso machine, all the functions of the espresso machine are out of operation. | Press the dial button to fill the internal lines of the espresso machine with water. |  !UNIT EMPTY !UNIT EMPTY |
| The temperature of the espresso machine is too high and it cannot be used any further. | Turn off the espresso machine and allow it to cool for approximately 1 hour. |  !TEMPERATURE HIGH !TEMPERATURE HIGH |
| The temperature of the espresso machine is too low and it cannot be used any further. | Raise the ambient temperature above 10 °C. |  !TEMPERATURE LOW !TEMPERATURE LOW |
| The espresso machine is not working correctly, it cannot be used. | Turn off the espresso machine and then turn it on again.If the problem persists, disconnect the power cord from the power socket and contact an authorised service centre of the manufacturer. |  ERROR 1 ERROR 1 |
Troubleshooting
• This chapter describes solutions to problems that the user can remedy themselves.
- If the problem persists or it is not possible to resolve it, contact an authorised service centre of the manufacturer.
| Problem Cause Solution | |
| The coffee is too cold. The coffee cup | up was not preheated. Preheat the cup | ups with hot water before brewing coffee. |
| If you brew coffee after a longer time, the brewing unit and the internal lines of the espresso machine have cooled down. | Brew coffee regularly. |
| Coffee only drips from the brewing unit. | The ground coffee is too fine or has been ground too fine. | Adjust the grinding level to a coarser consistency or use a more suitable espresso ground coffee. |
| The filter of the brewing unit is clogged. | Launch the brewing unit cleaning program. |
| Coffee aroma is missing in the beverage. | The wrong type of coffee beans were selected. | Use coffee beans suitable for brewing espresso coffee. |
| The grinder is too loud. There are foreign items in the grinder. | Brew the coffee again, if the problem persists, contact an authorised service centre of the manufacturer. |
| The milk frother does not make foamed milk. | The milk frother is clogged. Clean the milk frother. |
| Milk is splashing out of the milk frother. | The milk frother was not correctly assembled. | Reassemble the milk frother. |
| The message «EMPTY TRAY» is shown on the display. | The metal contacts at the end of the drip tray are dirty or damp. | Wipe the contacts dry. |
| The message «INSTALL TRAY» is shown on the display. | Ground coffee is found in the bottom part of the espresso machine. | Clean away the ground coffee from the bottom part of the espresso machine. |
| The display continuously shows «FILL WATER TANK» but the water tank is full. | The water tank spout is dirty. Clean the water tank. |
| The display continuously shows «FILL BEANS» but the coffee bean hopper is full. | The coffee bean hopper is too greasy and the coffee beans stick. | Clean the coffee bean hopper. |
| «Errors 1 to 7» appear on the display. | The espresso machine is not working correctly, it cannot be used. | Turn off the espresso machine and contact an authorised service centre of the manufacturer. |
Transporting the appliance
- Carefully store the packaging material of the espresso machine for possible future use, e.g. for transporting the appliance.
- Check that you have drained all water from the espresso machine before transporting it. In this way you will prevent possible damage to the espresso machine.
- Empty water from the internal lines of the espresso machine and wipe the entire appliance inside and out.
- If you empty water from the internal lines of the espresso machine, the next time it is started, the entire system will be set to the state prior to first use (see page 9, Using for the first time).
- When draining water from the internal lines of the espresso machine, hot steam may come out of the coffee spout. So be especially careful, there is a risk of scalding.
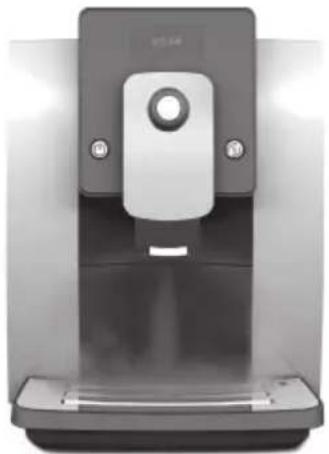
Make sure that the message «READY» is lit on the display of the espresso machine.
Remove the water tank; the display will show the message «FILL WATER TANK».
Press and hold the clean button until the message «EMPTY UNIT» is shown on the display. The espresso machine will automatically start draining water from the internal lines and water will come out of the coffee spout.
• After draining the internal lines, the espresso machine will turn off automatically.
After turning off the espresso machine, take out the drip tray and pour the water out of it.
natural_image
Exterior view of a modern stainless steel water dispenser (no visible text or symbols)


PART 8: TECHNICAL SPECIFICATIONS
| Input voltage / frequency 220 V ~ / 50 HZ | |
| Heating output 1,400 W | |
| Grinding power 20 W | |
| Pump pressure 19 bar | |
| Water tank capacity 1.8 l | |
| Coffee bean hopper capacity 250 g | |
| Spent coffee grounds container capacity 15 cups | |
| Brewing unit capacity 7 - 14 g | |
| Adjustable height of the coffee spout 80 - 140 mm | |
| Length of the power cord 1.2 m | |
| Net weight 13 kg | |
| Dimensions (l x w x h) 450 mm × 302 mm × 370 mm | |
NOTE:
All the here provided data is subject to change.
Dispose of used packaging material at a site designated for waste in your municipality.
DISPOSAL OF USED ELECTRICAL AND ELECTRONIC EQUIPMENT

This symbol on products or original documents means that used electric or electronic products must not be added to ordinary municipal waste. For proper disposal, renewal and recycling hand over these products to determined collection points. Or as an alternative in some European Union states or other European countries you may return your products to the local retailer when buying an equivalent new product. Correct disposal of this product helps save valuable natural resources and prevents damage to the environment caused by improper waste disposal. Ask your local authorities or collection facility for more details. In accordance with national regulations penalties may be imposed for the incorrect disposal of this type of waste.
For business entities in European Union states
If you want to dispose of electric or electronic appliances, ask your retailer or supplier for the necessary information.
Disposal in other countries outside the European Union
This symbol is valid in the European Union. If you wish to dispose of this product, request the necessary information about the correct disposal method from the local council or from your retailer.

This appliance complies with EU rules and regulations regarding electromagnetic and electrical safety.
Changes in the text, design and technical specifications may be made without prior notice and we reserve the right to make such changes.
Vážený zákazníku,
natural_image
Hand pouring liquid into a container with striped contents (no visible text or symbols)
natural_image
Exterior view of a modern office building (no signage)

natural_image
Hand holding a black tool handle attached to a white cabinet (no visible text or symbols)

natural_image
Close-up of a transparent container with a black lid and liquid, no visible text or symbols
natural_image
White plastic cylindrical container with a lid (no text or symbols visible)
natural_image
Hand holding a white cylindrical object above a transparent container (no text or symbols visible)

natural_image
Transparent rectangular container with a cylindrical tube inside, no visible text or symbols
natural_image
Black and white photo of a bowl with a cylindrical container, surrounded by scattered nuts (no text or symbols visible)
POZNÁMKA:
První použití
natural_image
Two grayscale images showing a hand pressing a button on a device, no text or symbols visible.
natural_image
Glass of dark liquid, likely representing tea or a similar beverage (no text or symbols visible)


natural_image
Glass of liquid with a horizontal band, no text or symbols visible

natural_image
Glass of water with horizontal bands (no text or symbols visible)
Příprava nápojů
natural_image
Modern coffee machine with a cup and side panel, no visible text or symbols
ESPRESSO
HOT WATER (HORKÁ VODA)
natural_image
Close-up of a milk Millimeter with a glass of milk being poured into it (no visible text or symbols)

natural_image
White milk dispenser with glass cup and control panel (no visible text or symbols)
natural_image
Close-up of a glass mug filled with white liquid, being heated by a machine (no visible text or symbols)





COFFEE LATTE (KÁVA LATTÉ)
natural_image
Product photo of a milk tea machine with glass and control panel (no visible text or symbols)

natural_image
Close-up of a milk tea machine with a glass on top, labeled 'MILK' on the side (no other text or symbols visible)

natural_image
Close-up of a glass coffee maker using a pour-over machine (no visible text or symbols)



HOT MILK (HORKÉ MLÉKO)
natural_image
Person using a spatula to remove or brush from a tray of food (no text or symbols visible)
natural_image
Close-up of a gray electronic device with a central button and two buttons (no visible text or symbols)

natural_image
Front view of a modern office building (no visible text or symbols)


ČÁST 5: NASTAVENÍ PŘÍSTROJE
Nastavení nápojů
natural_image
Two grayscale images showing a hand pressing a button on a device panel (no visible text or symbols)


NASTAVENÍ LONG COFFEE/VELKÉ KÁVY
natural_image
Two-step photo showing a hand pressing a button on a device, with no visible text or symbols.
CHOOSE BEVERAGE
ROTARY TO RETURN
3

HOT WATER
4

5

VOLUME
60ML
6

CONFIRMED
1

BEVERAGE SETTING
2
CHOOSE BEVERAGE
ROTARY TO RETURN
3

CAPPUCCINO
4

natural_image
Three-panel sequence showing hands pressing a circular button on a device, no text or symbols visible


5

VOLUME 40ML
6

CREAM TIME
30S
7

CONFIRMED
NASTAVENÍ COFFEE LATTE/KÁVY LATTÉ
natural_image
Three-panel black-and-white photo showing hands operating a white electronic device with a circular button, no visible text or symbols.


①

BEVERAGE SETTING
2
CHOOSE BEVERAGE
ROTARY TO RETURN

coffee lotta

3

COFFEE LATTE


4

STRENGTH
4 4


5

VOLUME
40ML
6

MILK TIME
30S

7

CREAM TIME
30S

8

CONFIRMED
NASTAVENÍ HOT MILK/HORKÉHO MLÉKA
natural_image
Two black-and-white photos showing a hand pressing a button on a device, with no visible text or symbols.


1

BEVERAGE SETTING
②
CHOOSE BEVERAGE
ROTARY TO RETURN


hot/milk/cream
③
HOT MILK

4

MILK TIME
30S

5

CONFIRMED
NASTAVENÍ HOT CREAM/MLÉČNÉ PĚNY
natural_image
Two-panel image showing a hand pressing a circular button on a device, with no visible text or symbols.


①

BEVERAGE SETTING


hot milk farm
2
CHOOSE BEVERAGE
ROTARY TO RETURN
3

HOT CREAM


4

CREAM TIME
30S
5

CONFIRMED
Vodní filtr
natural_image
Close-up of a white plastic cylindrical container with a hexagonal top (no text or symbols visible)

natural_image
Hand holding a white cylindrical object above a transparent container (no visible text or symbols)

natural_image
Transparent rectangular container with a cylindrical tube inside, no visible text or symbols



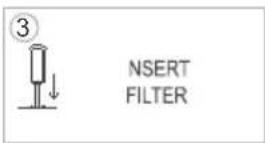



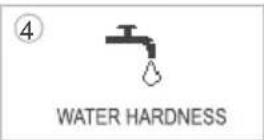


Jazyk


natural_image
Hand holding a white cylindrical object inserted into a transparent container with an upward arrow indicating motion (no text or symbols visible)

flowchart
graph TD
    A["NEED DESCALE"] --> B["PRESS RINSE"]
    B --> C["Water Drop"]
    style A fill:#f9f,stroke:#333
    style B fill:#bbf,stroke:#333
natural_image
Three-panel sequence showing a hand inserting a device into a container, with arrows indicating direction (no text or symbols)
natural_image
Three-panel black-and-white photo showing a hand pouring liquid into a container, a clear cup on a stand, and a hand holding a cloth over a plastic tray (no text or symbols visible)
natural_image
Close-up of a hand placing a small object into a transparent container (no visible text or symbols)

DECALCIFYING


PRESS RINSE

natural_image
Close-up of hands operating a mechanical device with a cutting board and a slide (no visible text or symbols)

natural_image
Two-panel image showing a hand holding a black plastic container and a small object, both without any visible text or symbols.

natural_image
Close-up of a hand inserting a device into a black box, with an arrow indicating direction (no text or symbols visible)

natural_image
Close-up of a black plastic enclosure with two metallic clips and two arrows pointing to the interior (no text or symbols visible)
natural_image
Close-up of a hand placing a dark object into a transparent container (no visible text or symbols)

natural_image
Close-up of a hand holding a transparent plastic container with a textured substance inside (no visible text or symbols)
natural_image
Hand pressing down on a dark tray with a small object, no visible text or symbols
natural_image
Close-up of a hand holding a small electronic device (no visible text or symbols)
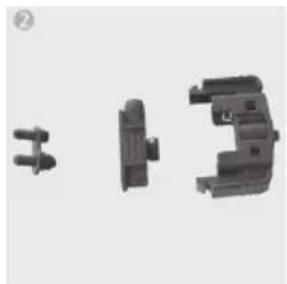
natural_image
Three black plastic mechanical components with no visible text or symbols

natural_image
Close-up of hands cleaning a glass container with water droplets (no text or symbols visible)

natural_image
Close-up of a hand holding a small electronic device component (no visible text or symbols)
Čištění kávovaru
natural_image
Close-up of a hand holding a small object next to a device (no visible text or symbols)
ČÁST 7: VAROVNÁ HLÁŠENÍ A ŘEŠENÍ POTÍŽÍ
Varovná hlášení
natural_image
Exterior view of a modern stainless steel water dispenser (no visible text or symbols)
natural_image
Hand pouring liquid into a container with a lid, no visible text or symbols
natural_image
Black and white photo of scattered nuts and a cylindrical object (no text or symbols visible)
natural_image
Two grayscale images showing a hand pressing a button on a device, no text or symbols visible.
natural_image
Glass of dark liquid, likely representing tea or a similar beverage (no text or symbols visible)


natural_image
Glass of liquid with a clear gradient, no text or symbols visible

natural_image
Close-up of a transparent glass with a horizontal band (no text or symbols visible)
Príprava nápojov
natural_image
Exterior view of a modern coffee machine with a white cup and control panel (no visible text or symbols)
ESPRESSO
natural_image
Exterior view of a milk tea machine with glass and control panel (no visible text or symbols)

natural_image
Exterior view of a milk shaver machine (no visible text or symbols)
natural_image
Close-up of a glass mug filled with milk being heated by a coffee maker (no visible text or symbols)
COFFEE LATTE (KÁVA LATTÉ)
natural_image
Product photo of a milk tea machine with glass and control panel (no visible text or symbols)
natural_image
Exterior view of a milk tea machine with glass and control panel (no visible text or symbols)
natural_image
Black and white photo of a glass cup with a tiered top, no visible text or symbols


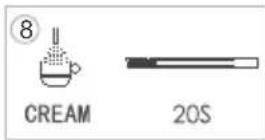


HOT MILK (HORÚCE MLIEKO)
natural_image
Close-up of a hand using a spatula to remove or brush into a container (no text or symbols visible)
natural_image
Close-up of a metallic door with a central knob and control buttons (no visible text or symbols)
natural_image
Front view of a modern bathroom toilet with a white vent and two buttons (no visible text or symbols)


ČAST 5: NASTAVENIE PRÍSTROJA
Nastavenie nápojov
natural_image
Two grayscale photos showing a hand pressing a button on a device panel (no visible text or symbols)


espresso


NASTAVENIE LONG COFFEE / VELKEJ KÁVY
natural_image
Two black-and-white photos showing a hand pressing a button on a device, with no visible text or symbols.


1

BEVERAGE SETTING
2
CHOOSE BEVERAGE
ROTARY TO RETURN
3

HOT WATER
4
5

VOLUME 60ML
6

CONFIRMED
CHOOSE BEVERAGE
ROTARY TO RETURN
3

CAPPUCCINO
4

natural_image
Hand pressing a button on a device (no visible text or symbols)

natural_image
Hand holding a circular button on a device (no visible text or symbols)
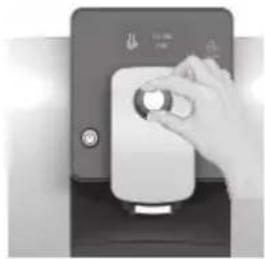
natural_image
Hand placing a circular button on a white device (no visible text or symbols)
NASTAVENIE COFFEE LATTE / KÁVY LATTÉ
natural_image
Hand holding a white electronic device with a circular button, mounted on a dark surface (no visible text or symbols)
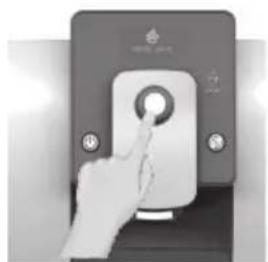
natural_image
Hand pressing a button on a device (no visible text or symbols)
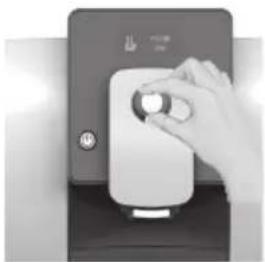
natural_image
Hand placing a circular button on a device (no visible text or symbols)


5

VOLUME 40ML
6

CREAM TIME
30S
7

CONFIRMED


1

BEVERAGE SETTING


2
CHOOSE BEVERAGE
ROTARY TO RETURN


3

COFFEE LATTE


4

STRENGTH


5

VOLUME 40ML
6

MILK TIME
30S

7

CREAM TIME
30S

8

CONFIRMED
NASTAVENIE HOT MILK / HORÚCEHO MLIEKA
natural_image
Two-step illustration showing a hand pressing a circular button on a device, with no visible text or symbols.


1

BEVERAGE SETTING
②
CHOOSE BEVERAGE
ROTARY TO RETURN
③
HOT MILK
4

MILK TIME
30S
5

CONFIRMED
NASTAVENIE HOT CREAM / MLIEČNEJ PENY
natural_image
Two-step illustration showing a hand pressing a circular button on a device, with no visible text or symbols.


1

BEVERAGE SETTING
2
CHOOSE BEVERAGE
ROTARY TO RETURN
3

HOT CREAM
4

CREAM TIME
30S
5

CONFIRMED
Vodný filter
natural_image
Close-up of a white plastic cylindrical container with a dome-shaped lid (no text or symbols visible)

natural_image
Hand holding a white cylindrical object above a transparent container (no text or symbols visible)

natural_image
Transparent rectangular container with a cylindrical tube inside, no visible text or symbols


Úprava nastavenia tvrdosti vody
Jazyk

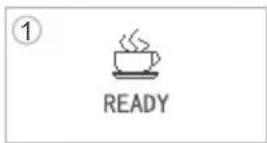
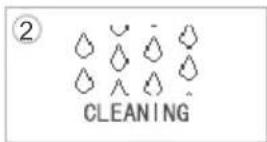
natural_image
Hand pouring liquid into a transparent cylindrical container with an upward arrow (no text or symbols visible)
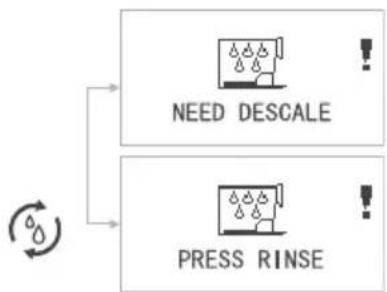
flowchart
graph TD
    A["NEED DESCALE"] --> B["PRESS RINSE"]
    B --> C["Warning symbols"]
    style A fill:#f9f,stroke:#333
    style B fill:#bbf,stroke:#333
natural_image
Three-panel sequence showing a hand inserting a device into a container, with no visible text or symbols.
natural_image
Three-panel image showing a hand pouring liquid into a container, a clear stand in a beaker, and a hand holding a cloth over a plastic tray (no visible text or symbols)
natural_image
Close-up of a hand holding a transparent container with liquid, no visible text or symbols


natural_image
Close-up of hands operating a mechanical device with a cutting board and a tool (no visible text or symbols)

natural_image
Two-panel image showing a hand holding a black container and a small object, both without any visible text or symbols.

natural_image
Hand placing a hand on a device into a storage unit (no visible text or symbols)

natural_image
Close-up of a black plastic enclosure with two metallic clips and two arrows pointing to the interior (no text or symbols visible)
natural_image
Hand placing a dark object into a transparent container (no visible text or symbols)

natural_image
Close-up of a hand holding a transparent plastic container with a textured substance inside (no visible text or symbols)
natural_image
Hand pressing down on a dark tray with a small object, no visible text or symbols
natural_image
Close-up of a hand holding a small electronic device (no visible text or symbols)

natural_image
Three black plastic mechanical components with no visible text or symbols

natural_image
Close-up of hands cleaning a glass container with liquid (no text or symbols visible)
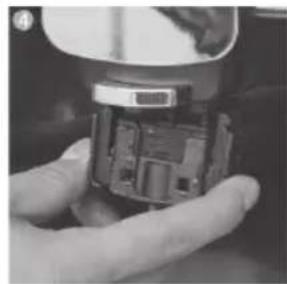
natural_image
Close-up of hands holding a small electronic device component (no visible text or symbols)
Čistenie kávovaru
natural_image
Close-up of a hand holding a small object, possibly a device or tool, with no visible text or symbols.
ČASŤ 7: VAROVNÉ HLÁSENIA A RIEŠENIE ŢAŽKOSTÍ
Varovné hlásenia
natural_image
Exterior view of a modern stainless steel water dispenser device (no visible text or symbols)
natural_image
Hand pouring liquid into a container with a patterned lid (no visible text or symbols)
natural_image
Exterior view of a modern office building (no signage)
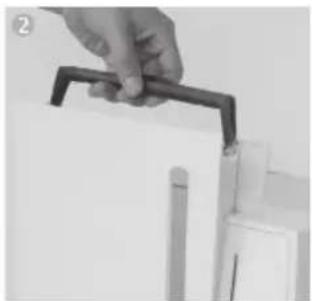
natural_image
Hand holding a black tool against a white background (no text or symbols visible)

natural_image
Close-up of a transparent container with a black lid, no visible text or symbols
natural_image
Close-up of a white plastic cylindrical container with a lid (no visible text or symbols)

natural_image
Hand holding a white cylindrical object inserted into a transparent container (no text or symbols visible)
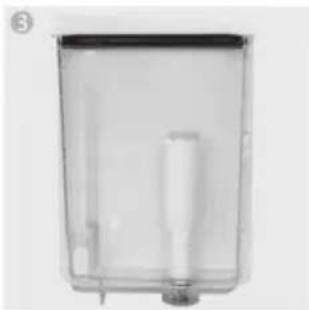
natural_image
Transparent rectangular container with a central cylindrical object, no visible text or symbols
natural_image
Black and white photo of a bowl with scattered nuts and a cylindrical container (no text or symbols visible)
MEGJEGYZÉS:
Első használat
natural_image
Glass of dark liquid, likely representing tea or a similar beverage (no text or symbols visible)


natural_image
Glass of liquid with a horizontal layer, no text or symbols visible
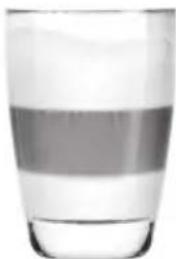
natural_image
Glass of water with a horizontal band (no text or symbols visible)
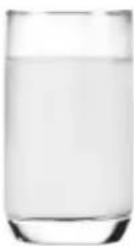
Ital készítése
natural_image
Modern coffee machine with a white cup and control panel, no visible text or symbols

LONG COFFEE (LUNGO, HOSSZÚ KÁVÉ)
HOT WATER (FORRÓ VÍZ)
natural_image
Exterior view of a milk tea machine with glass and control panel (no visible text or symbols)

natural_image
Exterior view of a milk tea machine with glass cup and control panel (no visible text or symbols)

natural_image
Close-up of a glass mug filled with milk, being heated by a coffee maker (no visible text or symbols)


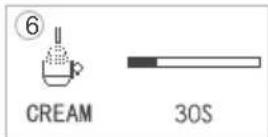


COFFEE LATTE (CAFÉ LATTE)
natural_image
Close-up of a milk Millimeter with glass inside and control panel (no visible text or symbols)

natural_image
Close-up of a milk Millimeter with a glass cup and control panel (no visible text or symbols)
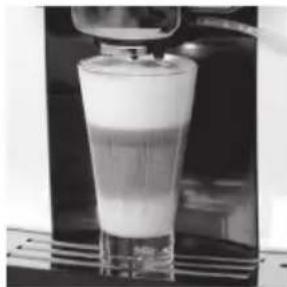
natural_image
Close-up of a glass with a creamy mixture being poured into it (no visible text or symbols)


HOT MILK (FORRÓ TEJ)
natural_image
Hand using a spatula to remove or brush into a square container (no text or symbols visible)
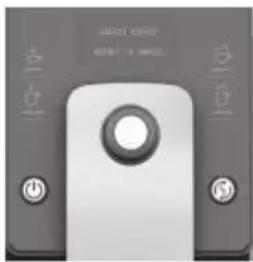
natural_image
Close-up of a gray electronic device with a central knob and two side buttons (no visible text or symbols)

natural_image
Close-up of a white electronic device with a circular button and two buttons, mounted on a dark surface (no visible text or symbols)


natural_image
Two grayscale images showing a hand pressing a button on a device panel (no visible text or symbols)
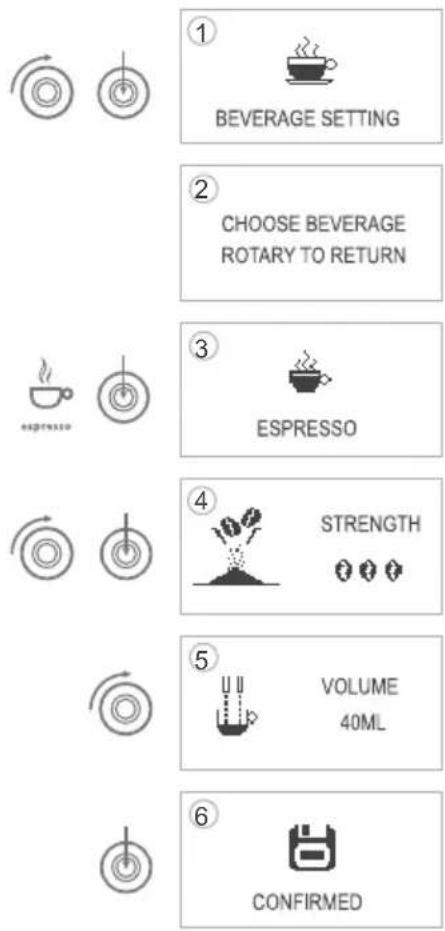
flowchart
graph TD
    A["① BEVERAGE SETTING"] --> B["② CHOOSE BEVERAGE ROTARY TO RETURN"]
    B --> C["③ ESPRESSO"]
    C --> D["④ STRENGTH"]
    D --> E["⑤ VOLUME 40ML"]
    E --> F["⑥ CONFIRMED"]
LONG COFFEE/HOSSZÚ KÁVÉ BEÁLLÍTÁSA
natural_image
Two black-and-white photos showing hands interacting with a device, one pointing at the button and the other holding a circular button (no visible text or symbols)


1

BEVERAGE SETTING
2
CHOOSE BEVERAGE
ROTARY TO RETURN
③

HOT WATER
4
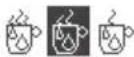
NORMAL
5

VOLUME
60ML
6

CONFIRMED
CAPPUCCINO BEÁLLÍTÁSA
CHOOSE BEVERAGE
ROTARY TO RETURN
3

CAPPUCCINO
4

STRENGTH

natural_image
Three-panel sequence showing hand pressing a circular button on a device, with no visible text or symbols
COFFEE LATTE/LATTE KÁVÉ BEÁLLÍTÁSA
natural_image
Three-panel sequence showing hands pressing a circular button on a device, no visible text or symbols


5

VOLUME 40ML
6

CREAM TIME
30S
7

CONFIRMED


1

BEVERAGE SETTING


2
CHOOSE BEVERAGE
ROTARY TO RETURN


3

COFFEE LATTE


4

STRENGTH
↓ ↓ ↓


5

VOLUME
40ML
6

MILK TIME
30S

7

CREAM TIME
30S

8

CONFIRMED
HOT MILK/FORRÓ TEJ BEÁLLÍTÁSA
natural_image
Two grayscale images showing a hand pressing a circular button on a device, with no visible text or symbols.


1

BEVERAGE SETTING
②
CHOOSE BEVERAGE
ROTARY TO RETURN
③

HOT MILK
4

MILK TIME
30S
5

CONFIRMED
HOT CREAM / TEJHAB BEÁLLÍTÁSA
natural_image
Two black-and-white photos showing a hand pressing a circular button on a device, with no visible text or symbols.


①

BEVERAGE SETTING
2
CHOOSE BEVERAGE
ROTARY TO RETURN
3

HOT CREAM
4

CREAM TIME
30S
5

CONFIRMED
Vízszűrő
natural_image
Close-up of a white plastic cylindrical container with a lid (no text or symbols visible)
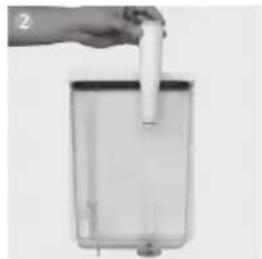
natural_image
Hand holding a cylindrical object above a transparent container (no visible text or symbols)

natural_image
Transparent rectangular container with a cylindrical tube inside, no visible text or symbols




A vízszűrő cseréje


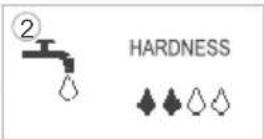

Nyelv


natural_image
Hand pouring liquid into a cylindrical container with an upward arrow indicating flow (no text or symbols visible)
natural_image
Three-panel sequence showing a hand inserting a device into a container, with no visible text or symbols.
natural_image
Three-panel black-and-white photo sequence showing a hand pouring liquid into a container, a micrometer in a beaker, and a hand holding a cloth over a plastic tray (no text or symbols visible)
natural_image
Close-up of a hand placing a small object into a transparent container (no visible text or symbols)

DECALCIFYING


PRESS RINSE

natural_image
Close-up of a hand cleaning a transparent plastic container (no text or symbols visible)
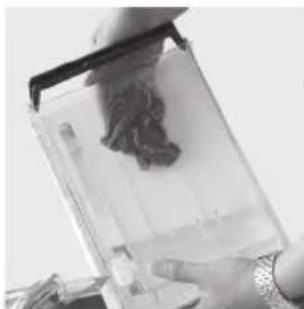
natural_image
Close-up of hands holding a transparent container with a dark, textured substance inside (no visible text or symbols)
natural_image
Hand pressing down on a dark surface with water flowing (no text or symbols visible)
natural_image
Close-up of a hand holding a small object, possibly a tool or device, with no visible text or symbols.
natural_image
Exterior view of a modern stainless steel water dispenser (no visible text or symbols)
natural_image
Hand pouring liquid into a container with a patterned lid (no visible text or symbols)
natural_image
Black and white photo of a small cylindrical object with a circular base, surrounded by scattered round objects (no visible text or symbols)
UWAGA:
natural_image
Two identical grayscale images showing a hand pressing a button on a device, no text or symbols visible.
Long coffee /Duża kawa, Lungo
natural_image
Glass of dark liquid, likely representing tea or a similar beverage (no text or symbols visible)
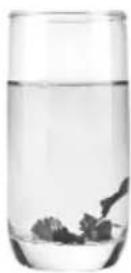

natural_image
Glass of liquid with a clear gradient, no text or symbols visible
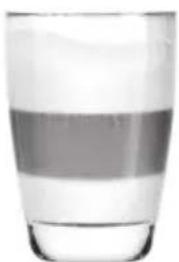
natural_image
Glass of water with a horizontal band (no text or symbols visible)

natural_image
Exterior view of a modern coffee machine with a white cup and control panel (no visible text or symbols)
ESPRESSO
HOT WATER (GORACA WODA)
natural_image
Exterior view of a milk tea machine with glass and control panel (no visible text or symbols)

natural_image
Exterior view of a milk tea machine with glass cup and control panel (no visible text or symbols)

natural_image
Close-up of a glass mug filled with milk, placed on a metal rack (no visible text or symbols)
COFFEE LATTE (KAWA LATTE)
natural_image
Exterior view of a milk tea machine with glass and control panel (no visible text or symbols)
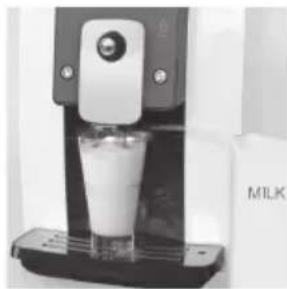
natural_image
Exterior view of a milk tea machine (no signage or text visible)

natural_image
Close-up of a glass mug being poured into a machine (no visible text or symbols)

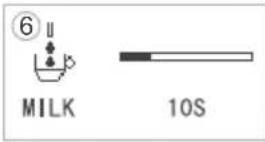


HOT MILK (GORACE MLEKO)
natural_image
Close-up of a hand using a spatula to cut or remove a tray of food (no visible text or symbols)
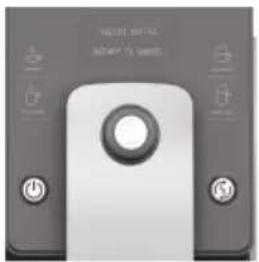
natural_image
Close-up of a gray electronic device with a central knob and control buttons (no visible text or symbols)

natural_image
Front view of a white electronic device with buttons and a central screen (no visible text or symbols)


CZEŚĆ 5: USTAWIENIA URZĄDZENIA
Ustawienia napojów
natural_image
Two identical grayscale photos showing a hand pressing a button on a device panel, with no visible text or symbols.


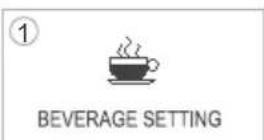
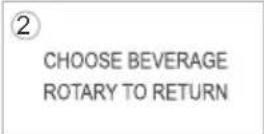
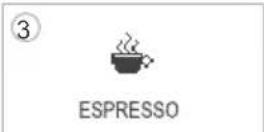
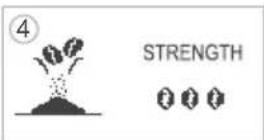


USTAWIENIA LONG COFFEE/DUŽEJ KAWY
natural_image
Two black-and-white photos showing a hand pressing a button on a device, with no visible text or symbols.


1

BEVERAGE SETTING
2
CHOOSE BEVERAGE
ROTARY TO RETURN
3

HOT WATER
4
NORMAL
5

VOLUME 60ML
6

CONFIRMED
USTAWIENIA CAPPUCCINO
CHOOSE BEVERAGE
ROTARY TO RETURN
3

CAPPUCCINO
4

STRENGTH
◇ ◇ ◇
natural_image
Three-panel sequence showing hand pressing a circular button on a device, with no visible text or symbols
USTAWIENIA COFFEE LATTE/KAWY LATTE
natural_image
Three-panel black-and-white photo showing hands pressing a button on a device, no visible text or symbols


5

VOLUME 40ML
6

CREAM TIME
30S
7

CONFIRMED
1

BEVERAGE SETTING
2
CHOOSE BEVERAGE
ROTARY TO RETURN
3

COFFEE LATTE
4

STRENGTH
↓ ↓ ↓
5

VOLUME 40ML
6

MILK TIME
30S
7

CREAM TIME
30S
8

CONFIRMED
USTAWIENIA HOT MILK/GORĄCEGO MLEKA
natural_image
Two-step illustration showing a hand pressing a circular button on a device, with no visible text or symbols.


1

BEVERAGE SETTING
2
CHOOSE BEVERAGE
ROTARY TO RETURN
③

HOT MILK
4

MILK TIME
30S
5

CONFIRMED
USTAWIENIA HOT CREAM/PIANY MLECZNEJ
natural_image
Two-step illustration showing a hand pressing a circular button on a device, with no visible text or symbols.


①

BEVERAGE SETTING
2
CHOOSE BEVERAGE
ROTARY TO RETURN
3

HOT CREAM
4

CREAM TIME
30S
5

CONFIRMED
Filtr wody
natural_image
Close-up of a white plastic cylindrical container with a dome-shaped lid (no text or symbols visible)

natural_image
Hand holding a cylindrical object above a transparent container (no visible text or symbols)

natural_image
Transparent rectangular container with a cylindrical tube inside, no visible text or symbols






Wymiana filtra wody
Język



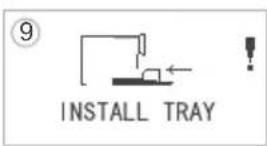

natural_image
Hand pouring liquid into a transparent cylindrical container with an upward arrow (no text or symbols visible)

flowchart
graph TD
    A["NEED DESCALE"] --> B["PRESS RINSE"]
    B --> C["↓"]
    style A fill:#f9f,stroke:#333
    style B fill:#bbf,stroke:#333
natural_image
Close-up of a hand inserting a device into a black box with visible internal components (no text or symbols)
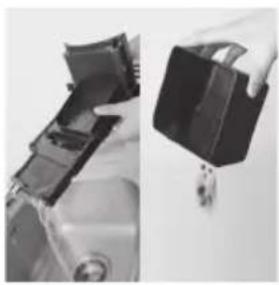
natural_image
Close-up of a hand holding a black plastic container next to a metallic device (no visible text or symbols)

natural_image
Close-up of a hand inserting a card into a computer tower (no visible text or symbols)
natural_image
Hand pouring liquid into a container (no visible text or symbols)
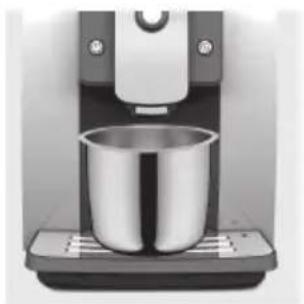
natural_image
Close-up of a modern coffee maker with a metallic cup and stand (no visible text or symbols)
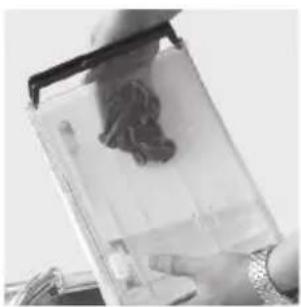
natural_image
Close-up of a hand holding a transparent container containing a dark, textured substance (no visible text or symbols)

natural_image
Close-up of a hand placing a small object into a transparent container (no visible text or symbols)
natural_image
Close-up of a hand placing a dark object into a transparent container (no visible text or symbols)

natural_image
Close-up of a hand holding a transparent plastic container with a textured substance inside (no visible text or symbols)
natural_image
Hand pressing down on a dark tray with a small object, no visible text or symbols
natural_image
Close-up of a hand holding a small electronic device (no visible text or symbols)

natural_image
Three black plastic mechanical components with threaded connectors, shown from different angles (no text or symbols visible)

natural_image
Close-up of hands cleaning a glass container with liquid (no visible text or symbols)

natural_image
Close-up of hands holding a small electronic device with internal components (no visible text or symbols)
natural_image
Close-up of a hand holding a cloth or fabric next to a white electronic device (no visible text or symbols)
CZEŚĆ 7: KOMUNIKATY O BŁĘDACH I ROZWIĄZYWANIE PROBLEMÓW
natural_image
Exterior view of a modern stainless steel water dispenser device (no visible text or symbols)
is a registered trademark used under license from Electrolux International Company, U.S.A.



