
PHEM 1003L - Coffee maker Philco - Free user manual and instructions
Find the device manual for free PHEM 1003L Philco in PDF.


| Product Type | Drip Coffee Maker |
| Brand | Philco |
| Model | PHEM 1003L |
| Dimensions (W x D x H) | 25 x 20 x 30 cm |
| Weight | 1.5 kg |
| Power Consumption | 1000 W |
| Voltage / Frequency | 220-240 V ~ 50/60 Hz |
| Capacity | 1.2 L (approx. 10 cups) |
| Brewing Type | Drip brewing with permanent filter or paper filter |
| Keep Warm Function | Automatic keep warm plate |
| Anti-Drip System | Yes, prevents dripping when carafe is removed |
| Auto Shut-Off | Yes, after 30 minutes of inactivity |
| Water Level Indicator | Yes, transparent water tank with markings |
| Filter Type | Permanent mesh filter or standard paper filter (#4 cone) |
| Carafe Material | Glass carafe with lid and handle |
| Maintenance | Removable filter basket, descale periodically |
| Safety Features | Overheat protection, auto shut-off |
| Spare Parts Availability | Carafe, filter basket, water tank available from Philco |
| Reparability | Repairable by authorized service centers; spare parts available |
| Warranty | 2 years warranty (check local conditions) |
Frequently Asked Questions - PHEM 1003L Philco
User questions about PHEM 1003L Philco
0 question about this device. Answer the ones you know or ask your own.
Ask a new question about this device
Download the instructions for your Coffee maker in PDF format for free! Find your manual PHEM 1003L - Philco and take your electronic device back in hand. On this page are published all the documents necessary for the use of your device. PHEM 1003L by Philco.
USER MANUAL PHEM 1003L Philco
Famous for Quality the World Over
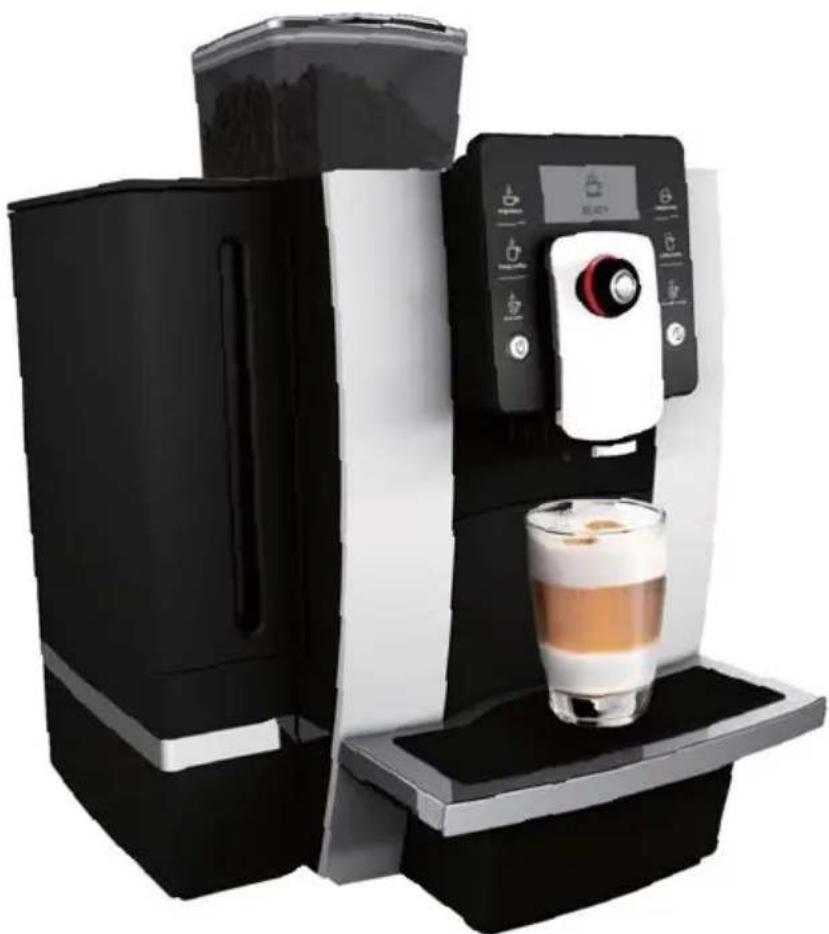
natural_image
Modern coffee machine with black and white panels, featuring a glass of coffee and digital display (no visible text or symbols)PHEM 1003L
User's manual
Návod k obsluze
Dear customer,
Thank you for buying a PHILCO brand product. So that your appliance serves you well, please read all the instructions in this user's manual.
OBSAH
SAFETY INSTRUCTIONS....5
Precautions....5
PROHIBITIONS....7
INSTRUCTIONS OF COFFEE MACHINE PARTS....9
COFFEE MACHINE OPERATION INTERFACE INSTRUCTIONS....10
PROPER OPERATION....11
Safety Tips....11
INSTRUCTIONS FOR USE 11
Coffee machine model....11
Symbol description....11
INSTRUCTIONS FOR FIRST-TIME USE....12
Power connection 12
Fill water tank....12
Fill beans....12
Grinding wheel 12
FIRST-TIME USE 13
Power on....13
Power off....13
MAKING BEVERAGES 14
Preparing coffee by touch icon....14
Single time setting of coffee parameters....15
Detailed instructions....15
Preparing coffee with coffee powder 16
PROGRAM SETTING....16
Maintenance setting....17
Beverage setting....17
Setting beverage parameters and range....17
Temperature Setting....18
Energy-saving setting....18
Automatic switch-off....18
Reset....18
Information 19
Language 19
EXIT 19
CLEANING AND MAINTENANCE....20
Cleaning the coffee machine before operation....20
Cleaning brewing unit....20
Rinse milk unit....21
Descaling the coffee machine 22
Cleaning coffee grounds container and drip tray....24
Cleaning water tank 25
Cleaning bean container 25
Disassembling and cleaning the milk frother 25
Installing milk pipe 26
Cleaning milk pipe....26
Cleaning coffee machine....26
FAILURES HANDLING 27
DISPLAY INFORMATION....28
TRANSPORT AND RECYCLE....29
Transport....29
Recycle 29
INSTALLATION INSTRUCTIONS 30
Machine Installation....30
Special Introduction....30
PHEM 1003L WATER INLET MODE SETTING....31
NOTICE AND EXCEPTION HANDLING 32
TECHNICAL DATA 33
SAFETY INSTRUCTIONS
Please see specification label is in back of coffee machine and technical data is indicated in instruction manual (P33).
Precautions
- Please do not touch heating parts of coffee machine to avoid scalding.
- To avoid operator's injury caused by burn, electric shock or other unexpected reasons, please do not contact the power cord, plug, and main body with water.
- This appliance can be used by children aged from 8 years and above if they have been given supervision or instruction concerning use of the appliance in a safe way and if they understand the hazards involved. Cleaning and user maintenance shall not be made by children unless they are older than 8 and supervised. Keep the appliance and its cord out of reach of children aged less than 8 years. Children shall not play with the appliance.
- Appliances can be used by persons with reduced physical, sensory or mental capabilities or lack of experience and knowledge if they have been given supervision or instruction concerning use of the appliance in a safe way and understand the hazards involved.
- If the supply cord is damaged, it must be replaced by the manufacturer, its service agent or similar qualified persons in order to avoid a hazard.
- Unplug from outlet when stop using and before cleaning. Allow to cool before disassembling and cleaning the coffee machine.
- Use of parts that are not explicitly recommended would result in a fire of coffee machine, electric shock, or injury to persons.
- Please do not use the machine outdoor.
- Please do not hang up the power cord to the edges of the table, for it might be abased to an electric leakage, and cause injury to operators.
- Please place the machine in a fixed and stable workbench, and keep far away from high temperature (e.g. gas stoves, electric cookers, induction cookers, etc).
- Power off the machine, until the cleaning program finished and no indication on screen, and then unplug the power.
- When using espresso, long coffee and hot water, liquid in high temperature will flow from coffee spout and hot water spout. Please do not touch it to avoid scalding.
- When using cappuccino, coffee latte, hot milk/cream, please confirm that the milk pipe has been connected from the milk frother to milk before making cappuccino, coffee latte, and hot milk/cream. Otherwise, high temperature steam may cause personal injury.

Warnings
Never disassemble and repair the machine without authorization. If there is any error, please send it to authorized service center for repairing.
PROHIBITIONS
Except for cleaning and daily maintenance to coffee machine, if it fails to work please send it to authorized after-sale service center for repairing, or contact with customer service for after-sale services.
- Never immerse the machine into water, and do not put the machine near the water tap or water tank.
- Never disassemble coffee machine without authorization, for any maintenance needs disassembling the machine, please return it to Service Centre or contact after-sales service center.
- Never use an unmatched voltage to the electric specification of the machine; otherwise, the machine would be burnt.
- Only purified water in room temperature is allowed to be filled into the water tank. Never put warm water, hot water, milk or other liquid into it.
- Never carry or move the coffee machine while working. For moving or carrying the coffee machine, please switch it off and unplug the power cord firstly.
- The machine may release heat. Therefore, when placing the machine in the workbench, at least 3cm must be left against its surface, sides and wall side; at least 15cm must be left against its top. Prohibit placing the machine into a narrow space. As for dimension of the machine, please look at the Technical Data of User Manual (Page 33).
-
Never use non-family usage detergent to wipe the machine, otherwise it may cause corrosion of coffee machine, and result in a risk of electric shock.
-
Never use wet rag to wipe coffee machine, may result in a risk of electric shock.
- Never use hard edged tool or rough rag to clean the stain on the machine, it will damage the machine.
- Never put instant coffee powder or cocoa powder or other mixture powder into the bean container or powder container. It would cause coffee machine damaged.
- Never fill specially treated coffee bean (e.g. cocoa, sugar coated) into the bean container, it would cause coffee machine damaged.
- Only roasted coffee bean is allowed to put into the bean container. Rice, soybean, chocolate bean, nut, sugar, spice, etc., are prohibited. Otherwise it would cause coffee machine damaged.
- Never wash bean container or powder container with water, it will damage the machine.
- Never use coffee machine in the environment temperature below 0 °C.
- Water inside the machine will freeze and cause the coffee machine damaged.
- Never expose the machine in rainy, snowy, frosty environment. It would cause coffee machine damaged.

Damages
due to above reasons are not covered under warranty.
INSTRUCTIONS OF COFFEE MACHINE PARTS
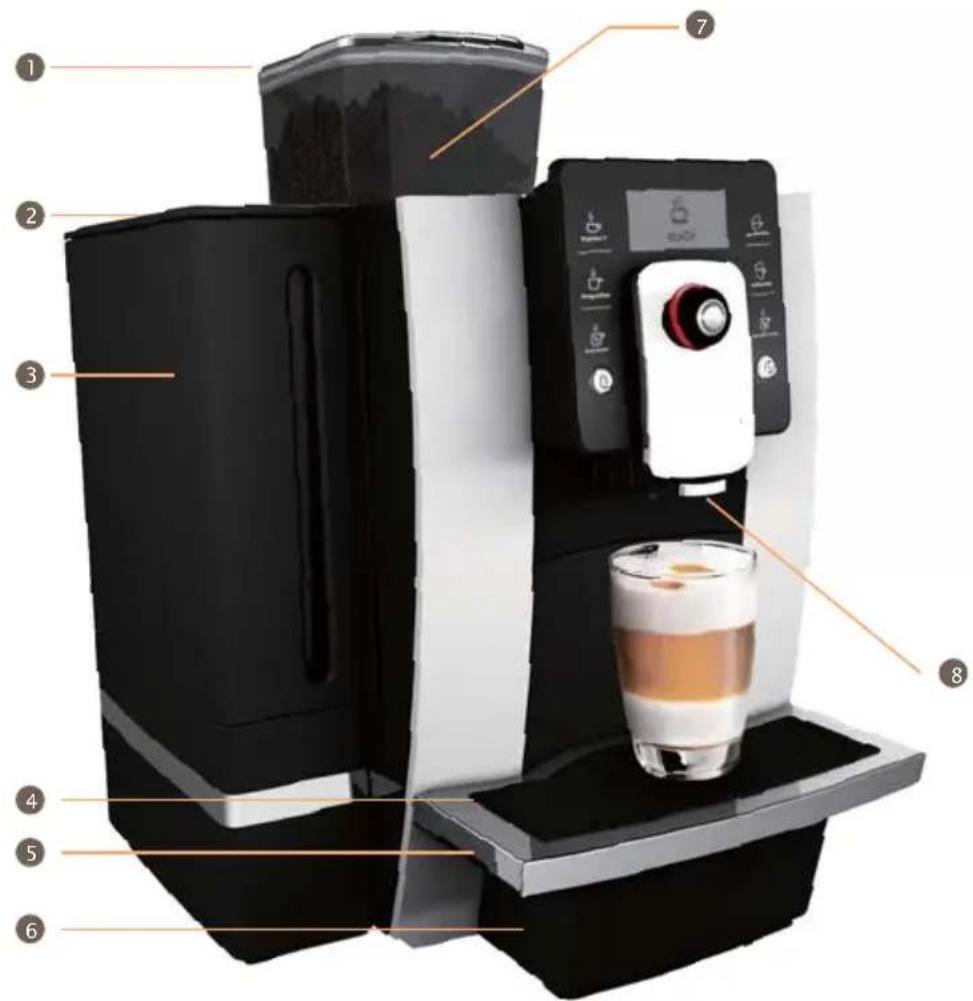
① Bean container cover
② Water tank lid
③ Water tank-6L
4 Drip tray grid
⑤ Drip tray
6 Coffee grounds container
⑦ Bean container
8 Foam unit
COFFEE MACHINE OPERATION INTERFACE
INSTRUCTIONS
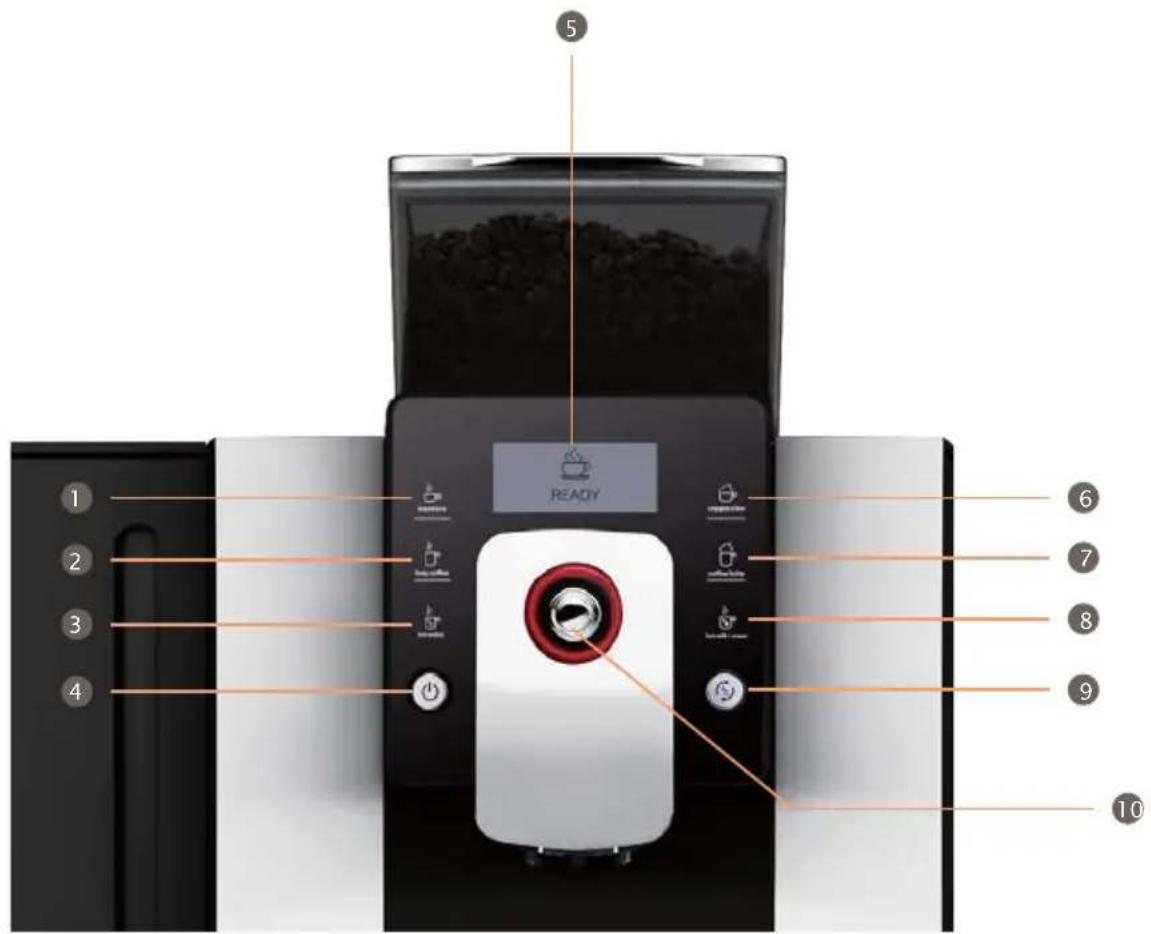
① Espresso icon
② Long coffee icon
③ Hot water icon
4 Power switch
5 Screen
6 Cappuccino icon
⑦ Coffee Latte icon
8 Milk/cream icon
⑨ Cleaning button
10 Rotary button
PROPER OPERATION
In order to ensure the coffee flavor, please use water around 25°C.
Coffee machine can only be used for preparing coffee, hot milk, milk foam, and hot water. Do not use it for any other intended use. We will not take any responsibility for the consequences of improper use. Please carefully read all the contents of this manual, so that you can know the coffee machine sufficiently.
Please keep this instruction properly so that you may read it at any time.
Safety Tips
Please notice the following tips to avoid personal injury from electric shock.
- Do not operate the coffee machine if the appliance or the power cord is damaged.
- When encountering breakdowns of the machine (if any burning smell or smoke), unplug the power cord immediately and contact with service center.
- If the power cord of the coffee machine is damaged, please contact with service center.
- Place the coffee machine and the power cord far away from heat sources.
- Please don't contact power cord with sharp tools.
- Do not repair the coffee machine without authorization or operate it in the way that was not mentioned in this manual, to avoid personal injury.
- Place the coffee machine out of the reach of children.
- When Coffee machine is unused for long periods, unplug the power cord and put it away, so that not to trip up people or damage to the power cord.
- Please don't use unoriginal parts, otherwise, it may cause the machine damaged.
INSTRUCTIONS FOR USE
Reading this manual will help you be familiar with the coffee machine, and use it properly.
"Instructions for first-time use, introduces the operation process of coffee machine step-by-step, for first time use.
"failures handling" will provide information when encountering problems.
Coffee machine model
This manual only applies to PHEM 100x, model PHEM 1003L.
Symbol description
| Non-compliance with the operation, may cause electric shock, and threat to life. |  |
| Non-compliance with the operation may cause Coffee machine damaged, or personal injury. |  |
| Non-compliance with the operation, may cause scalded or burn injury. |  |
| This symbol, if prompted, please carefully read it. |  |
| This symbol, if prompted, represents recycle. |  |
INSTRUCTIONS FOR FIRST-TIME USE
This chapter will help you understand the basic operations and settings for your first time use.
Power connection
- Place the coffee machine on a stable workbench that is not close to water.
- Keep the coffee machine far away from high temperature heat source.
- Be sure to use power supply that is in accordance with specification label.
- Please turn on the power switch on the back of the coffee machine.
Fill water tank
- Only purified water at room temperature is allowed to fill in the water tank, never fill any other liquid (e.g. warm water, hot water, milk). It will damage coffee machine. In order to ensure the taste of coffee, it is recommended to use water at 25°C. Low temperature water will not make a good taste.
- To ensure healthy and the taste of coffee, please change the water in the tank every day.
- The amount of water in the water tank cannot exceed the height of the MAX mark.


Fill beans
- Never put the coffee beans that have been specially treated (e.g. sugar, cocoa) into the bean container.
- Only roasted coffee beans can be put into the bean container, never put others like rice, soybeans, chocolate beans, nuts, sugar, and spices.
- Never put hard objects into the bean container, otherwise it will damage the grinder.
- The bean container cover playing a role as seal. It keeps the aroma of coffee beans maximally. Please do not lose the cover.
- Don't fill the liquid in the bean container.


natural_image
Close-up of a glass bottle pouring liquid into a white container on a black stand (no visible text or symbols)Grinding wheel
- Please adjust the fineness of coffee bean powder according to the coffee beans.
- Please adjust the grinding wheel when the grinder is running, or the grinder will be damaged.
- If your coffee beans are in dark color, it is recommended to set to the rough mode(4).
- If your coffee beans are in light color, it is recommended to set to the fine mode(2).
- During making coffee, if the coffee outflows very slowly or completely does not outflow, please set it to the rough mode.
- If the coffee outfits very quickly and the color of crema on the top is very light, please set it to the fine mode.
- The adjustment of grinding wheel will be effective only after making two or more cups of coffee.


natural_image
Close-up of coffee beans on a dark surface with a circular vent, no visible text or symbols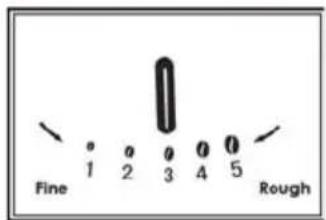
FIRST-TIME USE
Power on
As the machine has been tested at factory, there may be a little coffee powder left. We promise the machine is brand new.
The coffee machine will start self-testing and cleaning at the first-time use, this helps the coffee machine achieve the best working condition, and this process cannot be skipped
Every time powering on the coffee machine, it will automatically complete heating and cleaning for one time, and the process cannot be stopped. The coffee machine can only be used after finished the above cycle process.
During the cleaning process, some hot water may flow out of the coffee spout into the drip tray. Please avoid contacting the spilling hot water.
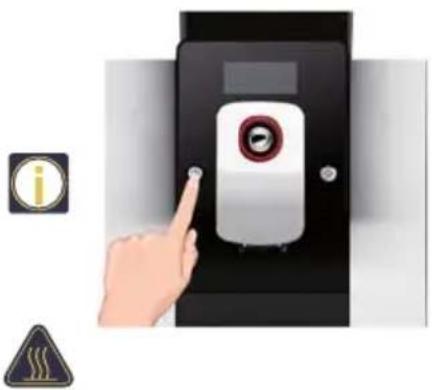
Please ensure the power is connected before pressing ⏻ power button.
Power off
Every time when powering off the coffee machine, it will automatically complete cleaning process for one time, and the process cannot be stopped. This operation is to clean up the coffee pipelines and remove the coffee grounds.
During the cleaning process, some hot water will flow out of the coffee spout into the drip tray. Avoid touching spilt hot water, so as not to be burned.
Only after using milk/cream/cappuccino/lattee, the Rinse Milk Unit function will be operated when power off.
When you press ⏻ power button, the machine will be power off after auto cleaning.
natural_image
Hand interacting with a digital door panel and a circular dial, with warning icons (no text or symbols on the main objects)
MAKING BEVERAGES
This chapter instructs you making various kinds of coffee, hot water, hot milk and milk foam by this coffee machine. Please read the following instructions carefully to help you make high-quality beverages.
The temperature of the hot water is high, please do not touch it to avoid being scalded.
The volume of the prepared beverage may not correspond exactly to the volume selected on the appliance.
Before we make all kinds of coffee, please ensure "READY" is indicated on the display.
- Never use dark roasted coffee beans.
- The coffee beans should be put at dry place and avoid sunlight.
- Only purified water at normal temperature can be used. To make the coffee taste better, it is recommended to use water around 25°C.
- To ensure the quality of coffee, please change the water in water tank every day.
- Please warm the coffee cup before making coffee for better taste.
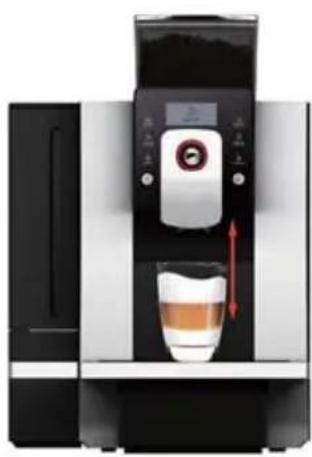
- Please adjust the height of the coffee spout according to the height of the cup in order to avoid coffee splashing.
- Adjustable height of coffee spout: 100-160mm.


natural_image
Modern coffee machine with digital display and glass cup, no visible text or symbolsPreparing coffee by touch icon
You can make 4 kinds of coffee by touch icons, when the screen shows "READY" Take espresso for example to explain how to make coffee by touch icons.
The volume of espresso is suggested between 30 to 50ml.
Because of the small volume of espresso, please warm the coffee cup before making coffee.


Touch the espresso icon for espresso function.

natural_image
Hand interacting with a digital water dispenser or digital counter (no visible text or symbols)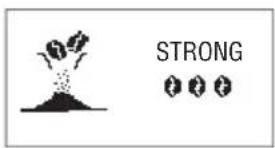

The grinder will begin to grind. At this time you can adjust the amount of coffee beans by rotating the rotary button.
Default amount of coffee beans for espresso:

natural_image
Hand pressing a button on a digital device (no visible text or symbols)
During making coffee, you can adjust the volume of coffee by rotating the rotary button.
Default volume of espresso: 50ML

When the screen shows as the left picture, it means the espresso is ready, please enjoy it.
Single time setting of coffee parameters
8 items as bellow can be set at single time.
- Set the amount of coffee beans during grinding process.
- Set the volume of coffee when making coffee
- Set the making lime of milk foam to control volume when making cappuccino
- Set the making time of milk to control volume when making latte
- Set the temperature of hot water before making hot water
- Set the hot water volume when making hot water
- Set the making time of hot milk to control volume when making hot milk
- Set the making time of hot cream when making hot cream
Detailed instructions
You can set the strength of coffee and the volume of beverage before or during making the beverage at single time, the setting will not be saved.
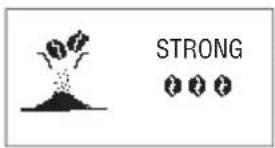

When grinding the coffee beans, you can rotate the rotary button to adjust the amount of coffee beans, to left is mild ⚡, and to right is strong ⚡The default amount is normal ⚡
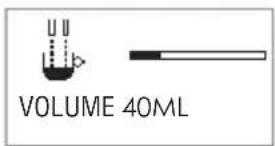

When making coffee, coffee volume can be adjusted by rotary button. For example, the current volume is 100ml, 2 cells to left to reduce to 95ml, and 2 cells to right to increase to 105ml.
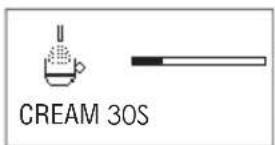

When making cappuccino, milk foam or coffee latte, cream making time can be adjusted by rotating the rotary button while milk foam outflows. For example, the current time is 20s, 2 cells to left to reduce to 19S, and 2 cells to right to increase to 21S.


When making hot milk or coffee latte, milk making time can be adjusted by rotating the rotary button. For example, the current milk making time is 20S, 2 cells to left to reduce to 19S, and 2 cells to right to increase to 21S.


Before making hot water, the temperature can be adjusted by rotating the rotary button. To left is low, to right is high. The default temperature is normal.


When making hot water, the hot water volume can be adjusted by rotating the rotary button. For example, the current volume is 150ML, 2 cells to left to reduce to 145ML, and 2 cells to right to increase to 155ML.
Preparing coffee with coffee powder
You can choose this function if you want to make coffee with coffee powder.
- Prohibit fi lling other mixtures such as instant coffee powder or cocoa powder in the powder container. Otherwise it will damage the machine.
- Do not fill the coffee powder into the coffee bean container, otherwise, it will damage the machine.
- Do not rinse the powder container with water, or it will result in operator's injury by electric shock.
- Please use proper grounded coffee powder for espresso.
- Only 7-14g coffee powder can be added. Machine will be damaged with more powder.
- The process of using coffee powder to make coffee only skips the process of grinding coffee beans, other operations are the same as making espresso, long coffee, cappuccino, and coffee latte. This chapter illustrates with espresso.


Long press rotary button to enter into setting when the coffee machine is "READY".
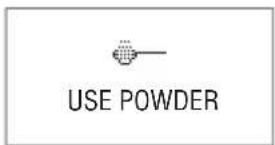

Display shows "USE POWDER" page after entered into setting. Press rotary button to make coffee.

Open powder container cover and fill the coffee powder, then close cover. Touch the beverage icon you need to make coffee. Press rotary button to cancel.


natural_image
Close-up of a dark, curved surface with a small circular object on top, possibly a container or sample (no visible text or symbols)PROGRAM SETTING
- This chapter will give instructions on program setting.
- Ensure the coffee machine shows "READY", long press the rotary button, then you can enter into the program setting menu.

Maintenance setting
Please read the detailed instructions about rinsing the brewing unit and decalcifying on str. 20 and 22.
Beverage setting
- This chapter will instruct you how to set beverages. The setting parameters include coffee strength, volume of coffee, temperature of hot water, volume of hot water, time of making hot milk, time of making hot cream and waiting time of making latte.
-
The parameters accomplished by beverage setting will be the default values for each beverage.
-
Epresso setting
- Long coffee setting
- Hot water setting
- Cappuccino setting
- Coffee latte setting
- Hot milk setting
- Hot cream setting
Setting beverage parameters and range
The parameters as strength, volume, temperature and time can be set for the beverages below.
• The strength and volume of espresso can be set
• The strength and volume of long coffee can be set
- The strength and volume of coffee part in cappuccino can be set
- The strength and volume of coffee part and the waiting time in latte can be set
- The temperature and the volume of hot water can be set
• Hot milk making time can be set
• Hot cream making time can be set
• The cream making time in cappuccino can be set
Please read the following table for the detail setting parameters and adjustment range
| Drinks Strength Volume | ||
| espresso | Mild: ⚙Normal: ⚙♀Strong: ⚙♀♀ | Volume: 15-120 ml |
| long coffee Volume: 15-240 ml | ||
| cappuccino | Mild: ⚙Normal: ⚙♀Strong: ⚙♀♀ | Volume: 15 - 240MLMilk time: 3 - 120SECCream time: 3 - 120SEC |
| coffee Latte | ||
| hot water Milk time: 3 -120SEC | ||
| hot milk Cream time: 3 -120SEC | ||
| hot cream Volume: 25 -450ML | ||
Temperature Setting
- The coffee temperature can be adjusted to meet your favor with the "Temperature setting" function and you can choose:
- Low
2 Middle
3 High
The default temperature is middle, and it's only workable for coffee not milk.
Energy-saving setting
- In the energy-saving mode, the machine needs 30 seconds to warm up and then to make Cappuccino, Coffee Latte, Hot milk and Cream. While for normal mode, making above beverages do not need waiting heat up. The normal mode is more energy consumption than the energy-saving mode.
- The factory default setting of the machine is normal mode.
- After entering the program setting, please turn the rotary button to "ECO SETTING" option, then press the rotary button, setting is finished.

Automatic switch-off
- The machine's default switch off time is 30 minutes, which means the machine will automatically switch off after the last use on 30 minutes.
- The setting range of automatic switch-off is from 15 minutes to 24 hours.
- After entering the program setting, please turn the rotary button to the "Auto-off" option. Then press the rotary button, the setting is completed.

Reset
- This function will reset all the menu setting and default beverage parameters to the factory settings (except the language options). In addition, the information options will not be reset.
- After entering the program setting, please turn the rotary button to "RESET" option then press the rotary button to confirm, the setting is completed.

Information
- In this program you can view the information on numbers of produced each drinks, total drinks numbers, and maintenance times.
- Total numbers on produced drinks
- Numbers of produced espresso
- Numbers of produced long coffee
- Numbers of produced hot water
- Numbers of produced cappuccino
- Numbers of produced coffee Latte
- Numbers of produced coffee by coffee powder
- Numbers of produced hot milk
- Numbers of produced cream
- Numbers of rinsing operations
- Numbers of rinsing brewing unit operations
- Numbers of decalcifying operations
-
Numbers of rinsing milk unit
-
Numbers of installing and replacing the water filter (optional)
- At the first-time use, there is already a number of produced beverages because each coffee machine has been tested before leaving factory.
Language
- You can set your preferred language on the coffee machine.
- After entering the program setting, turn the rotary button to the "CHOOSE LANGUAGE" option, then press the rotary button, rotate the rotary to choose the language, and press the rotary button, setting is completed.
EXIT
- After entering the program setting, please turn the rotary button to the "EXIT" option. Then press the rotary button. After completing setting, the machine will return to "READY".

CLEANING AND MAINTENANCE
This chapter will instruct you how to clean and maintain the coffee machine.
Paying attention to daily maintenance of coffee machine, not only ensure the taste of each cup of coffee, but also extend the life of the coffee machine.

Cleaning the coffee machine before operation
This chapter will instruct you how to clean and maintain the coffee machine.
Before making coffee, press the cleaning button before the cleaning light is on. It will pre-heat the brewing unit and inner pipeline, to improve the taste of the coffee next time.

Cleaning function must be processed in "READY" status.


When the coffee machine is in "READY" status and the cleaning indicator light is not on, press the cleaning button to start cleaning the brewing unit and coffee spout.

natural_image
Hand pressing a button on a digital kitchen control panel (no visible text or symbols)
The process of cleaning coffee machine cannot be interrupted, and it will automatically return to "READY" status after cleaning.
Cleaning brewing unit
After a long-term use, there will be some coffee powder left on the brewing unit. Remove the powder by deeply cleaning brewing unit.
The process of cleaning brewing unit takes about 10 minutes.
Please use cleaning tablets to clean brewing unit.


After entering the program settings, turn the rotary button to the "MAINTENANCE" option, and press the rotary button.


When the screen shows the picture as left, it indicates cleaning brewing unit program has been selected. Press the cleaning button to start cleaning brewing unit.
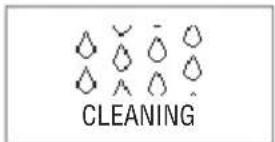
The brew unit is cleaning.
OPEN COVER ADD CLEANING TABLET
CLOSE COVER PRESS RINSE

CLEAN

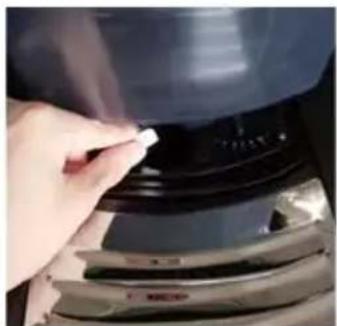
Open the coffee powder container lid, add the cleaning tablet.
Close the coffee powder container lid, press the cleaning button to start it.
natural_image
Close-up of a hand using a tool to clean or store food on a kitchen appliance (no visible text or symbols)

READY
When screen displays as the left picture, please press the cleaning button to clean the brew unit.
Brew unit is under cleaning.
After cleaning fi nished, the machine enters into "READY" status.
Please empty the drip tray after the cleaning program is completed.
Rinse milk unit
- After a long-term use, some waste would be left in the Milk unit and need be cleaned.

MAINTENANCE


RINSE MILK UNIT

Enter program setting, Turn the rotary button to "MAINTENANCE" page and pressed on.
When showing left picture in the display, it is in unit cleaning, press to start.

REMOVE MILK PIPE

PRESS RINSE
Remove the milk pipe from the milk box/container and insert to the hole of the drip tray grid according to the display.
Press rinse button to rinse milk unit.

Milk unit is cleaning.
After cleaning fi nished, the machine enters into "READY" status.
Please empty the drip tray after the cleaning program is completed.
Descaling the coffee machine
- The daily usage will cause calcareous deposited in coffee machine. The depositing rate varies with the local water hardness.
- Decalcifi er contains acidic substances that would stimulate your eyes and skin, so you must strictly comply with the security warnings noted by manufacturer on the packaging. If you have contacted it with your eyes or skin by accident, please wash it with clean water immediately.
- Dissolve the decalcifi er in clean water, and then put the mixed liquid into the water tank. Fully dissolve the decalcifi er can descale the coffee machine more thoroughly.
- The whole descaling process takes about 30 minutes.
- The termination during the descaling process will damage the coffee machine. So once you start the descaling process, please do not terminate it midway.


flowchart
graph TD
    A["NEED DESCALE"] --> B["PRESS RINSE"]
    B --> C["MAINTENANCE"]
    C --> D["DESCALE"]
    D --> E["30 MINS PRESS RINSE"]
    E --> F["Feedback to Need"]
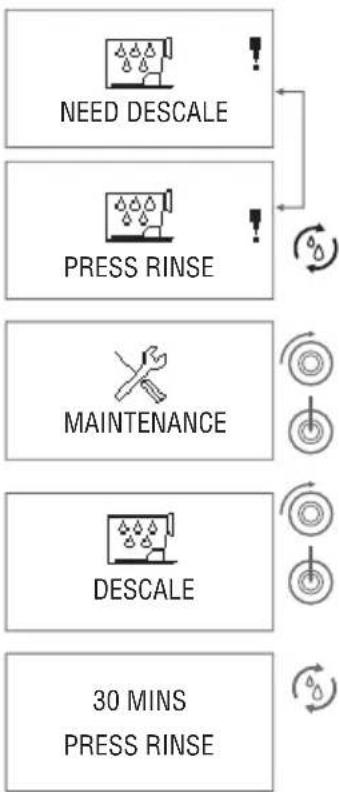
After a certain time use, if it reaches the degree of descaling, "NEEDS DESCALE „and" PRESS RINSE „will automatically display on the screen alternately. Now, press the cleaning button to enter the descaling program.
Turn the rotary button to maintenance setting option, press rotary button to enter.
Turn the rotary button to descaling option, press rotary button to enter.
After entering the descaling program, press cleaning button to start the descaling program; it will takes 30 minutes.

natural_image
Hand pouring liquid into a white container (no text or symbols visible)
natural_image
Close-up of a mechanical component with a black ventilation grille and a red arrow pointing to a specific area (no text or symbols visible)

Take a bag of decalcifi er and suffi ciently dissolves it in clean water, then put this mixed liquid to the water tank, and reinstall the water tank to coffee machine.
After adding decalcifier, press cleaning button to start descaling and cleaning.
natural_image
Close-up of a kitchen sink with water spray and a magnified inset showing the interior (no text or symbols visible)
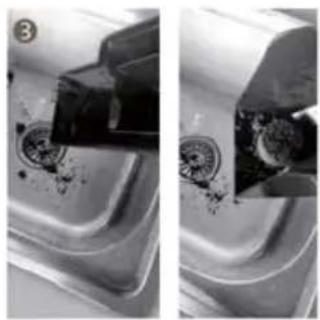
To start descaling and cleaning for the first time, put a container, of which the capacity is more than 1L, under the coffee spout.
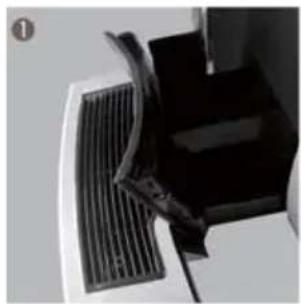
Empty tray.

natural_image
Close-up of a mechanical component with a red arrow pointing to a textured surface (no visible text or symbols)
Install tray.

After descaling and cleaning for the first time, take the water tank out, empty the rest water and clean it. Add purified water again, and reinstall it to the coffee machine

natural_image
Close-up of a white and black industrial machine with two metallic cups on a base (no visible text or symbols)
Press cleaning button to enter descaling and cleaning for the second time. To clean the residual decalcifi erin water in pipes at this time. Put a container, of which the capacity is more than 1L, under the coffee spout.

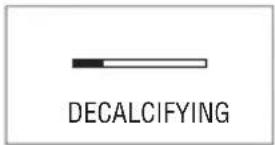
Decalcifying.

natural_image
Hand holding a black electronic device with a blue cover, no visible text or symbols
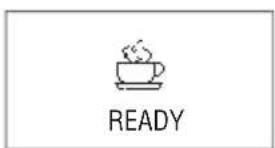
When the screen shows "READY", it indicates the descaling is completed; Now, you can continue to make coffee.

natural_image
Close-up of a mechanical component with a black rectangular base and metal pipe (no visible text or symbols)Please empty the drip tray after the cleaning program is completed.
Cleaning coffee grounds container and drip tray
- Do not use chemical solvents and erosive cleaner or alcohol to clean the coffee grounds container and drip tray.
- The drip tray and coffee grounds container cannot be cleaned in dishwasher.
- Do not use metal objects to clean dirt or coffee precipitate to avoid scraping the drip tray and coffee grounds container.
- When prompted to clean the coffee grounds, coffee grounds must be cleaned up, or it will cause the machine damaged.


natural_image
Close-up of a mechanical component with a black handle and ribbed surface (no visible text or symbols)
When it cumulates to 35 cups, it will automatically indicate "EMPTY GROUNDS".

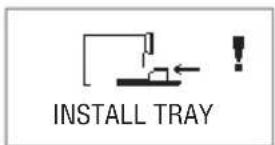
When it shows "INSTALL TRAY", please remove coffee grounds of the drip tray and coffee grounds container. This will take more than 3 seconds.

Reinstall the water drip tray to the machine, it returns to "READY" status. You can continue using the machine.

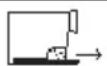
If the drip tray is full, the machine will automatically indicate "EMPTY TRAY". Take out the water drip tray and pour the waste water.

After clearing the waste water, reinstall the drip tray to the coffee machine, it returns to "READY" status. You can continue using the machine.

natural_image
Close-up of a kitchen sink with a hand holding a tool, showing surface paint and a close-up of the interior (no text or symbols visible)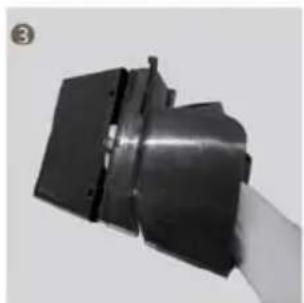
natural_image
Close-up of a black mechanical component with a white handle, no visible text or symbols
natural_image
Two black plastic electronic components with mounting holes, shown against a plain background (no text or symbols visible)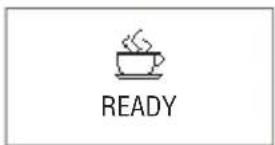


natural_image
Close-up of a black plastic electronic component with a metallic connector and red directional arrows indicating movement (no text or symbols visible)- Every time when cleaning coffee grounds and waste water in the drip tray, please empty the drip tray and coffee grounds container.
- Every time after cleaning coffee grounds and waste water in the drip tray, please firstly rinse the tray with clean water, and wipe dry the 2 steel plates at the end of drip tray, then reinstall the drip tray to the coffee machine.
Cleaning water tank
- Suggested that, each time adding water, clean the tank thoroughly with running water first.
- Cleaning water tank regularly (about 1 time per month) it would be better to use wet rag and some mild cleaning fluid.
- Because the water tank is made from food-grade and environmental materials, it might be friable to crack. Please gently pick it up and put it down, and never let it fall down. If the water tank damaged, please contact with customer service center.


natural_image
Hand holding a blue plastic clip attached to a black electronic device (no visible text or symbols)Cleaning bean container
- Please do not use water to wash the beans container, it would cause the grinder damaged.
- Please use a dry rag or a paper towel to clean the residuary grease in the bean container.
- Because the bean container cover is made from food-grade and environmental materials, it might be friable to crack. Please gently pick it up and put it down, and never let it fall down. If the bean container lid damaged, please contact with customer service center.


Disassembling and cleaning the milk frother
In order to guarantee the fine and smooth milk foam, please clean the milk frother every day.
- Carefully take off the milk frother.
- Disassemble each part of the milk frother thoroughly.
- Wash the parts with running water.
- Reassemble the milk frother, and install it to the coffee machine. Then the milk frother cleaning is completed.

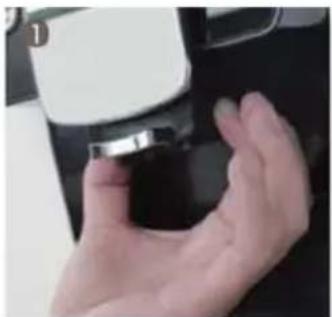
natural_image
Close-up of a hand pressing a button on a black surface (no visible text or symbols)
natural_image
Three black plastic mechanical components with no visible text or symbols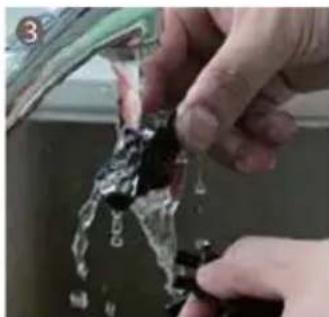
natural_image
Close-up of hands cleaning a water bottle with black liquid (no text or symbols visible)
natural_image
Close-up of a hand holding a small mechanical component, possibly a camera or sensor device (no visible text or symbols)Installing milk pipe
• Install the milk pipe to the milk frother inlet.
Cleaning milk pipe
In order to keep milk pipe clean, please clean it every day.
• Take off milk pipe carefully.
- Clean milk pipe in running water.
Cleaning coffee machine
Before cleaning the interior of the coffee machine, power it off, and pull out plug. Never immerse the coffee machine in water. There will be a risk of electric shock.
Regularly check the coffee machine whether there is excessive coffee powder precipitate inside the machine. You can use a brush to remove the coffee precipitate.
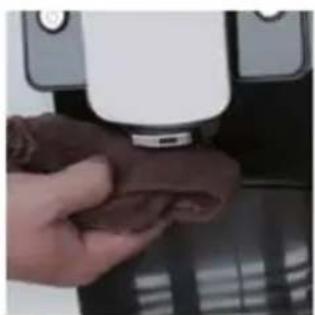
Use a dry and soft rag to wipe the touch panel of the machine.
As the touch panel is made of glass, please do not hit it to avoid the risk of electric shock once the glass broken.
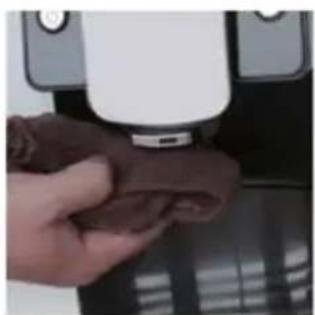
Use a dry and soft rag to wipe the surface of the machine, and never use hard objects to clean coffee leftover on the surface, otherwise it would cause the surface damaged.

natural_image
Close-up of a hand holding a transparent plastic tube inserted into a black electronic device (no visible text or symbols)
natural_image
Close-up of hands holding a transparent plastic tube in a metal bowl (no visible text or symbols)
natural_image
Close-up of a hand holding a brown cloth next to a white electronic device (no visible text or symbols)

FAILURES HANDLING
This chapter will instruct you some errors that may encounter and the solutions.
If there are some failures cannot be resolved by the following methods, please contact with the customer service center.

| Problem Cause Solutions | ||
| The coffee temperature is too low. | The coffee cup was not pre-heated. | Wash the coffee cup with hot water before making coffee. |
| Several minutes have passed since the last time of coffee making, so the brewing unit and the internal pipes are already cold. | Make some more cups of coffee. | |
| Coffee only comes out from the coffee spout drop by drop. | Over fi ne coffee powder or coffee bean has been grounded too fi ne. | Adjust the grinding wheel to a rough state or use the suitable coffee powder. |
| Brewing unit fi liter was blocked. | Run the brewing unit washing program. | |
| Insuffi cient coffee oil. | Picked the wrong coffee bean type. | Use the suitable coffee beans. |
| The grinder arising noises. | There are foreign objects in the grinder. | Make coffee again, if it still failures, please contact with the customer sevice center. |
| The milk frother cannot make any milk foam. | The milk frother is blocked. | Cleaning the milk frother (refer to P25). |
| Milk sprays from the milk frother. | The milk frother was not assembled correctly. | Reassemble the milk frother. |
| Screen always indicates „EMPTY TRAY”. | The sheetmetals at the end of the drip tray are dirty or wet. | Wipe the sheetmetals to dry (refer to P25). |
| creen always indicates „INSTALL TRAY”. | Coffee grounds in the bottom of the machine are not cleaned. | Clean the coffee grounds in the bottom. |
| Screen always indicates "FILL WATER TANK", but the water tank is full. | The water tank inductor is trapped. | Clean the water tank (refer to P25). |
| Screen always indicates "FILL BEANS", but the bean container is full. | The bean container is too oily and sticky for coffee beans. | 1. Stir coffee beans in bean container.2. Observe if the coffee beans are over roasted or charcoal roasted.3. Clean the beans container (refer to P25). |
| "Errors 1 to 7"is displayed. | The coffee machine failures, cannot continue to be used. | 1. Restart coffee machine.2. If "errors" still exists, switch off the main power, and contact with the customer sevice center. |
DISPLAY INFORMATION
- This chapter will instruct you the information shows on the screen and the solutions.

| Causes Solutions | ||
 EMPTY TRAY EMPTY TRAY | If the water drip tray is full, any function of making beverage will be out of service. | Take the drip tray out, empty the waste water in the drip tray and reinstall it to the machine. |
 EMPTY GROUNDS EMPTY GROUNDS | If the coffee grounds container is full, any function of making beverage will be out of service. | Take the coffee grounds container out, empty the coffee grounds container and reinstall it. |
 FILL WATER TANK FILL WATER TANK | If water in the water tank is used up, any function of making beverage will be out of service. | Fill the water tank with water. |
 FILL BEANS FILL BEANS | If coffee beans in the bean container are used up, function of making coffee will be out of service. | Add beans into bean container, and press the rotary button to release. |
 FILL POWDER FILL POWDER | There is not enough coffee powder in the powder container. | Next time when making coffee with coffee powder, please put a full spoon of powder. |
 INSTALL TRAY INSTALL TRAY | The drip tray is not installed correctly; any function is out of service. | Install the drip tray correctly. |
 UNIT EMPTY UNIT EMPTY | The water in the pipe inside the machine is not enough; any function is out of service. | Press the rotary button to release, to run the water replenishing system. |
| [XXYS] TEMPERATURE HIGH | Temperature of the machine is too high, the machine cannot be used. | Power off the main power, and use it 1 hour later. |
| [WWBT] TEMPERATURE LOW | Temperature of the machine is too low, the machine cannot be used. | Increase environmental temperature to above 10°C. |
 ERROR 1 ERROR 1 | The coffee machine failures, may not be able to be used. | 1. Power off, restarting up;2. If still unresolved, please pull out the plug. Contact with customer sevice center. |
 PRESSURE HIGH PRESSURE HIGH | 1. Using dark roasted coffee beans or over fi ne coffee powder; 2. The fl tler of the brewer is clogged. | 1. Adjust grinder wheel to rougher;2. Start brewer cleaning procedure (refer to 20). |
| VALVE RESET RESTART MACHINE | Dispenser valve is blocked. Restart coffee machine. | |
TRANSPORT AND RECYCLE
Transport
- Please save the packaging of the coffee machine for future transportation.
- Make sure to empty water inside the machine before transportation, otherwise, it will damage the machine.
- After emptying the waterway, please wipe the machine both inside and outside to dry.
- Once the empty waterway program was executed, the system will rerun to the program of "fi rst-time use", when the coffee machine is used again. (refer to P5, First-time use)
- While emptying the waterway, there will be a high-temperature steam sprays from coffee spout. Please pay special attention to avoid being scalded.


The machine is on the status of "READY".
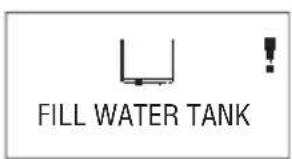
Take out the water tank, and the machine indicates "FILL WATER TANK".


long pressing the cleaning button until the screen shows „EMPTY UNIT“, the machine begins to clean up the waterway automatically, and steam will spray from the coffee spout, please keep distance to avoid scalding.

natural_image
Modern coffee machine with digital display and glass cup (no visible text or symbols)
After emptying the waterway, the machine will automatically power off. Take the drip tray out after the power is switched off, and clear the water in the drip tray.
Recycle
When recycling the machine, some inner parts can be recycled to use again. Please pay attention to recycle them for environmental protection.

INSTALLATION INSTRUCTIONS
Machine Installation
- Two types of water inlet: water tank and barreled water. According to actual needs, turn the water switch up or down, and select the appropriate procedure according to the water inlet.

Water tank mode program setting The machine defaults to the tank + large basement mode, don't need to set program.
Barreled water mode program setting: Please refer to P31 (PHEM 1003L water inlet mode setting)
- Connect water pipe with the inlet port, and confirm the connection is good.
- Insert the hose into the barreled water.
Special Introduction
- After connected the suction pipe, machine will show the system of water shortage, it is normal phenomenon, please follow machine prompts to fill system water by pressing the middle button.
- Not to remove the filter from suction pipe, otherwise, the impurities will enter the coffee machine result in piping blockage.


natural_image
Blue water dispenser bottle with label, placed on tiled floor against red background (no visible text or symbols)PHEM 1003L WATER INLET MODE SETTING
Turn on the machine, when screen shows 'READY' long press the rotary button enter 'USE POWDER' interface, then rotate the button to 'EXIT' interface. Please press the button with 3 seconds, enter engineer setting.
< WATER SELECT>
Press the middle button to 'WATER SELECT', then choose 'WATER PIPE', press the middle button confirmation.
< CONFIRMED >
After completed setting, the screen will automatically turn to' WATER SELECT' interface.
< EXIT >
Rotate counterclockwise to ,EXIT' interface,- pressing the middle button to exit.
< READY >
Coffee machine is ready now.

After changing the engineering installation, it is necessary to turn off the machine and restart to take effect.
NOTICE AND EXCEPTION HANDLING

The first boot is going to replenish water repeatedly.
If happen system water shortage during working, please confirm as below:
1) Confirm if the barreled water is used up or not.
2) Confirm if the suction pipe's filter immerse completely in water or not.
3) Confirm if suction pipe is connected with coffee machine well or not.
4) Confirm if the pipe was pressed or not.
Introductions of how to deal with coffee grounds and waste water
1) The basement can hold 35cakes coffee grounds, please clean it after the machine informed.

If do not clean the slag box, too much coffee grounds will damaged the coffee machine.
2) When the drip tray reminds 'EMPTY TRAY' must to clean the drip tray everyday, if you find too much waste water, please remove slowly to avoid spatter.
3) Please note to clean the two sheet metals of drip tray too.
TECHNICAL DATA
| Voltage/Frequency 220 - 240 V~ 50 Hz /60 Hz | |
| Power 1400 W | |
| Pump pressure 19 bar | |
| Capacity of water tank 6 L | |
| Capacity of bean container 1000 g | |
| Capacity of coffee grounds container 35 cakes | |
| Capacity of the brewing unit 7 - 14 g | |
| Adjusting height of coffee spout 100 - 160 mm | |
| Length of power cord 1.8 m | |
| Net weight 17.2 kg | |
| Dimensions (W×D×H) 391mm×506mm×581mm |
INSTRUCTIONS AND INFORMATION REGARDING THE DISPOSAL OF USED PACKAGING MATERIALS
Dispose of packaging material at a public waste disposal site.

DISPOSAL OF USED ELECTRICAL AND ELECTRONIC APPLIANCES
The meaning of the symbol on the product, its accessory or packaging indicates that this product shall not be treated as household waste. Please, dispose of this product at your applicable collection point for the recycling of electrical & electronic equipment waste. Alternatively in some states of the European Union or other European states you may return your products to your local retailer when buying an equivalent new product. The correct disposal of this product will help save valuable natural resources and help in preventing the potential negative impact on the environment and human health, which could be caused as a result of improper liquidation of waste. Please ask your local authorities or the nearest waste collection centre for further details. The improper disposal of this type of waste may fall subject to national regulations for fi nes.
For business entities in the European Union
If you wish to dispose of an electrical or electronic device, request the necessary information from your seller or supplier.
Disposal in other countries outside the European Union
If you wish to dispose of this product, request the necessary information about the correct disposal method from local government departments or from your seller.

This product meets all the basic EU regulation requirements that relate to it.
Changes to the text, design and technical specifications may occur without prior notice and we reserve the right to make these changes.
PHILCO®
Famous for Quality the World Over

natural_image
Modern coffee machine with black and white panels, featuring a glass of coffee and digital display (no visible text or symbols)PHEM 1003L
Návod k obsluze
Vážený zákazníku,
INFORMACE NA DISPLEJI....28
PŘEPRAVA A RECYKLACE....29
Přeprava....29
Recyklace....29
POKYNY PRO INSTALACI 30
Instalace prístroje....30
natural_image
Close-up of a black bottle pouring liquid into a transparent container (no visible text or symbols)natural_image
Close-up of a dark, circular object with small white markings on its surface, possibly a lid or vent (no visible text or symbols)
PRVNÍ POUŽITÍ
Zapnutí napájení
natural_image
Hand interacting with a digital camera device displaying a circular eye symbol, accompanied by warning icons (no text or symbols on the device itself)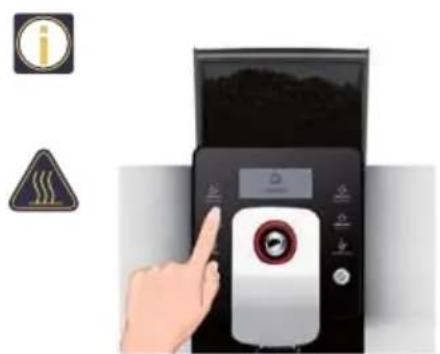
PŘÍPRAVA NÁPOJŮ
natural_image
Modern coffee machine with digital display and glass cup, no visible text or symbolsnatural_image
Hand interacting with a digital kitchen appliance control panel (no visible text or symbols)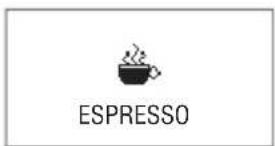

natural_image
Hand pressing a button on a digital kitchen control panel (no visible text or symbols)


natural_image
Close-up of a small brown granular substance being placed on a black surface, with a white plastic container above (no text or symbols visible)NASTAVENÍ PROGRAMU
natural_image
Hand pressing a button on a digital kitchen appliance (no visible text or symbols)
OPEN COVER ADD CLEANING TABLET
CLOSE COVER PRESS RINSE

CLEAN

natural_image
Close-up of a hand using a tool to clean or store food on a kitchen appliance (no visible text or symbols)

READY
natural_image
Hand pouring liquid into a white container with a dark lid (no text or symbols visible)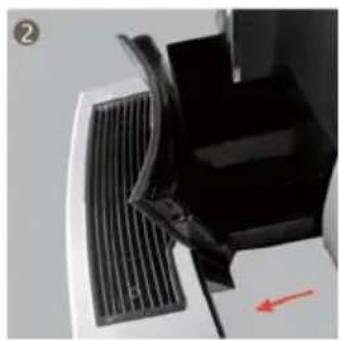
natural_image
Close-up of a mechanical component with a black handle and ventilation grille, showing a red arrow pointing to a specific area (no text or symbols visible)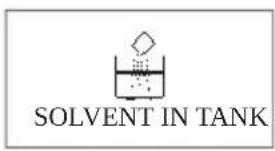

natural_image
Close-up of a kitchen sink with water spray and a magnified inset showing the interior (no text or symbols visible)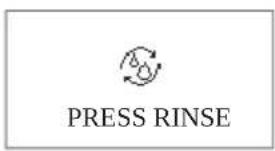
natural_image
Close-up of a mechanical device with a black component and red arrow indicator (no visible text or symbols)
Vložte misku.

natural_image
Close-up of a white and black industrial machine with two metallic cups on a base (no visible text or symbols)

natural_image
Hand holding a black electronic device with a blue cover, no visible text or symbols
Odvápňování.

natural_image
Close-up of a metallic container with liquid being poured into it by a piping bag (no visible text or symbols)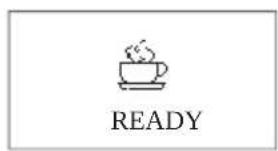
natural_image
Close-up of a mechanical component with a black slatted surface and a curved handle (no visible text or symbols)
natural_image
Close-up of a car door with visible paint and discoloration, showing mechanical components (no text or symbols)
natural_image
Close-up of a black mechanical component with a white handle, no visible text or symbols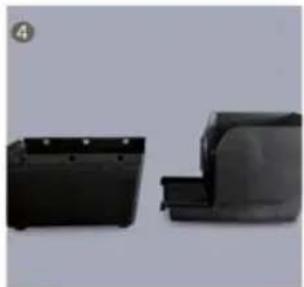
natural_image
Two black plastic electronic components with mounting holes, shown from different angles (no text or symbols visible)

natural_image
Close-up of a black plastic electronic component with two red arrows indicating direction (no text or symbols visible)natural_image
Hand holding a blue plastic clip attached to a black electronic device (no visible text or symbols)natural_image
Hand placing a blue object into a transparent container on a black appliance (no text or symbols visible)natural_image
Close-up of a hand holding a small black object, possibly a device or tool, with no visible text or symbols.
natural_image
Three black plastic mechanical components with no visible text or symbols
natural_image
Close-up of hands cleaning a water surface with black plastic drops (no text or symbols visible)
natural_image
Close-up of a hand holding a small mechanical component, possibly a camera or sensor device (no visible text or symbols)natural_image
Close-up of a hand holding a transparent plastic tube inserted into a black electronic device (no visible text or symbols)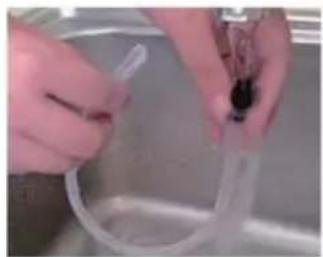
natural_image
Close-up of hands holding a transparent plastic tube in a stainless steel bowl (no visible text or symbols)
natural_image
Close-up of a hand holding a brown cloth next to a white cylindrical device (no visible text or symbols)

ŘEŠENÍ PROBLÉMŮ
INFORMACE NA DISPLEJI

natural_image
Modern coffee machine with digital display and glass cup (no visible text or symbols)
Recyklace



- OBSAH
- SAFETY INSTRUCTIONS
- Precautions
- Warnings
- PROHIBITIONS
- Damages
- PROPER OPERATION
- Please keep this instruction properly so that you may read it at any time.
- Safety Tips
- INSTRUCTIONS FOR USE
- Coffee machine model
- INSTRUCTIONS FOR FIRST-TIME USE
- Power connection
- Fill water tank
- Fill beans
- Grinding wheel
- FIRST-TIME USE
- Power on
- Power off
- MAKING BEVERAGES
- Preparing coffee by touch icon
- Single time setting of coffee parameters
- Detailed instructions
- Preparing coffee with coffee powder
- PROGRAM SETTING
- Maintenance setting
- Beverage setting
- Setting beverage parameters and range
- Temperature Setting
- Energy-saving setting
- Automatic switch-off
- Reset
- Information
- Language
- EXIT
- CLEANING AND MAINTENANCE
- Cleaning the coffee machine before operation
- Cleaning brewing unit
- Rinse milk unit
- Descaling the coffee machine
- Cleaning coffee grounds container and drip tray
- Cleaning water tank
- Cleaning bean container
- Disassembling and cleaning the milk frother
- Installing milk pipe
- Cleaning milk pipe
- Cleaning coffee machine
- FAILURES HANDLING
- DISPLAY INFORMATION
- TRANSPORT AND RECYCLE
- Transport
- Recycle
- INSTALLATION INSTRUCTIONS
- Machine Installation
- Special Introduction
- PHEM 1003L WATER INLET MODE SETTING
- NOTICE AND EXCEPTION HANDLING
- The first boot is going to replenish water repeatedly.
- If do not clean the slag box, too much coffee grounds will damaged the coffee machine.
- INSTRUCTIONS AND INFORMATION REGARDING THE DISPOSAL OF USED PACKAGING MATERIALS
- DISPOSAL OF USED ELECTRICAL AND ELECTRONIC APPLIANCES
- For business entities in the European Union
- Disposal in other countries outside the European Union
- PHILCO®
- PRVNÍ POUŽITÍ
- Zapnutí napájení
- PŘÍPRAVA NÁPOJŮ
- NASTAVENÍ PROGRAMU
- ŘEŠENÍ PROBLÉMŮ
- INFORMACE NA DISPLEJI
- Recyklace
Brand : Philco
Model : PHEM 1003L
Category : Coffee maker