
Camroad 4.5 - Dash cam Overmax - Free user manual and instructions
Find the device manual for free Camroad 4.5 Overmax in PDF.


| Brand | Overmax |
| Model | Camroad 4.5 |
| Product Type | Dash Cam |
| Video Resolution | 1920x1080, 1208x720, 848x480, 640x480 |
| Loop Recording | Off, 1 min, 3 min, 5 min |
| G-Sensor | Off, Low, Medium, High |
| WDR (Wide Dynamic Range) | On / Off |
| Motion Detection | On / Off |
| Parking Guard | On / Off |
| Photo Resolution | 12M, 10M, 8M, 5M, 3M, 2M, VGA, 1.3M |
| Photo Capture Modes | Single, Self-timer (2/5/10 sec), Continuous |
| White Balance | Auto, Daylight, Cloudy, Tungsten, Fluorescent |
| ISO | Auto, 100, 200, 400 |
| Exposure Compensation | -2 to +2 |
| Image Stabilization | On / Off |
| Battery | Built-in rechargeable (charged via car charger or USB) |
| Memory Card | MicroSD (TF), Class 6 or 10 recommended |
| Connectivity | Mini USB, HDMI, AV output |
| Display | Built-in screen |
| Date/Time Stamp | On / Off |
| Sound Recording | On / Off |
Frequently Asked Questions - Camroad 4.5 Overmax
User questions about Camroad 4.5 Overmax
0 question about this device. Answer the ones you know or ask your own.
Ask a new question about this device
Download the instructions for your Dash cam in PDF format for free! Find your manual Camroad 4.5 - Overmax and take your electronic device back in hand. On this page are published all the documents necessary for the use of your device. Camroad 4.5 by Overmax.
USER MANUAL Camroad 4.5 Overmax
Before using, please read the user manual carefully.
All the contents of the manual are subject to change without prior notice. Product illustration:
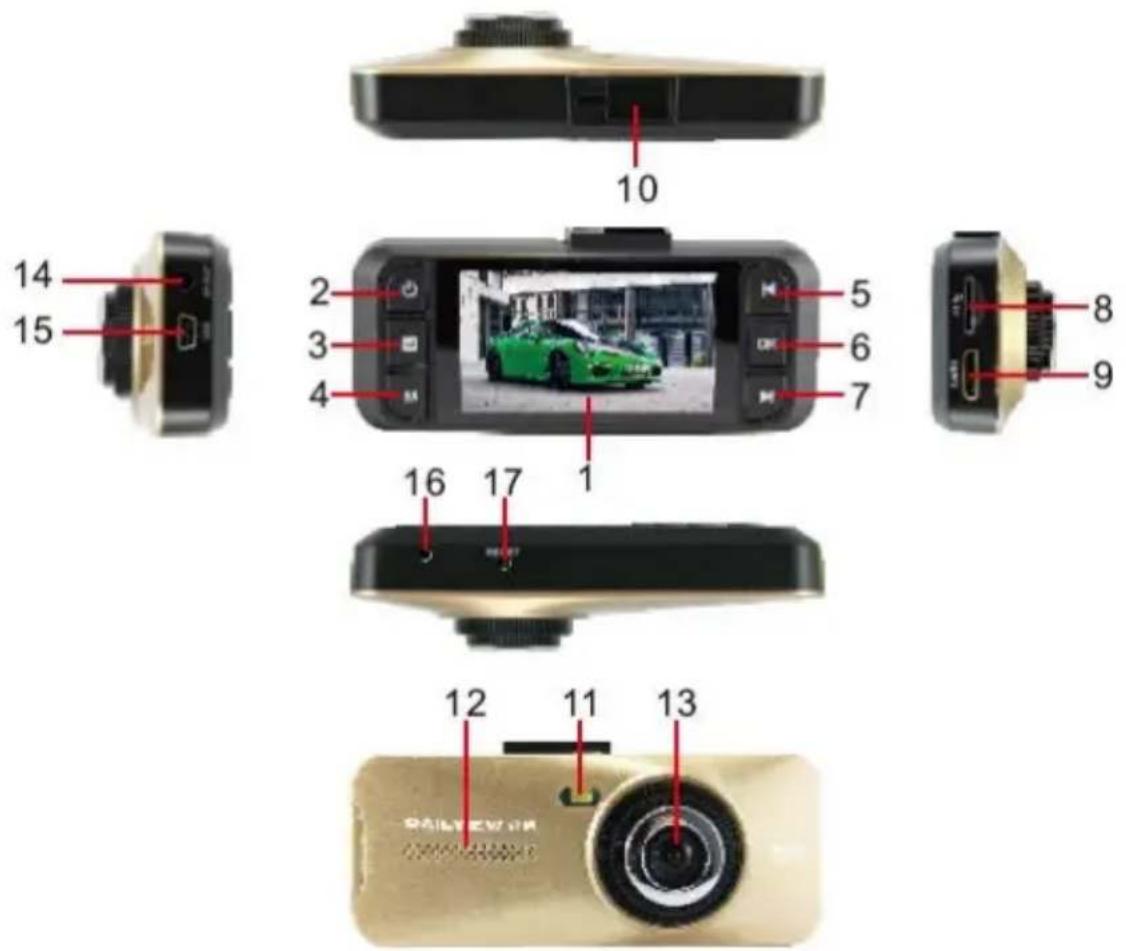
- Display
- Power button
- Menu button
- Mode button
- Up button
- OK button
- Down button
- MicroSD memory card slot
- HDMI port
- Mounting hole
- LED indicator
- Speaker
- Lens
- AV output
- MiniUSB port
- Microphone
- Reset button
Buttons description:
| Button name | Description | |
| Power button | Press and hold to turn the camera on/off.Short press to turn the LED on/off. | |
| Menu button | Short press to enter the Menu.Short press again to enter the second Menu.Press a third time to exit the Menu. | |
| Mode button | Press and hold during recording to protect / unprotect the recording file.Short press to switch between a video, photo and preview mode. | |
| Direction buttons | Up | Menu: press to select the next / previous item.Recording mode: press to zoom in.Photo mode: press to zoom in. |
| Down | Menu: press to select the next / previous item.Recording mode: press to zoom out.Photo mode: press to zoom out. | |
| OK button | Menu: press to confirm.Recording mode: press to start recording; press again to stop recording.Photo mode: press to take a photo. | |
Battery charging
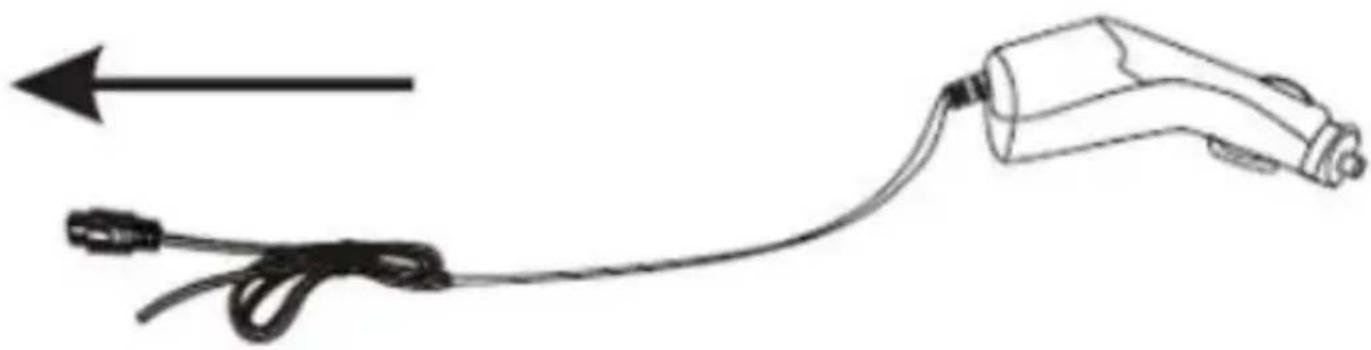
- Using a car charger: The charging process starts automatically when you connect the camera to a car charger. It is not necessary to turn on the camera in order to charge it.
natural_image
Line drawing of a handheld electric shock absorber with attached cable and power cord (no text or symbols)- Using a USB port:
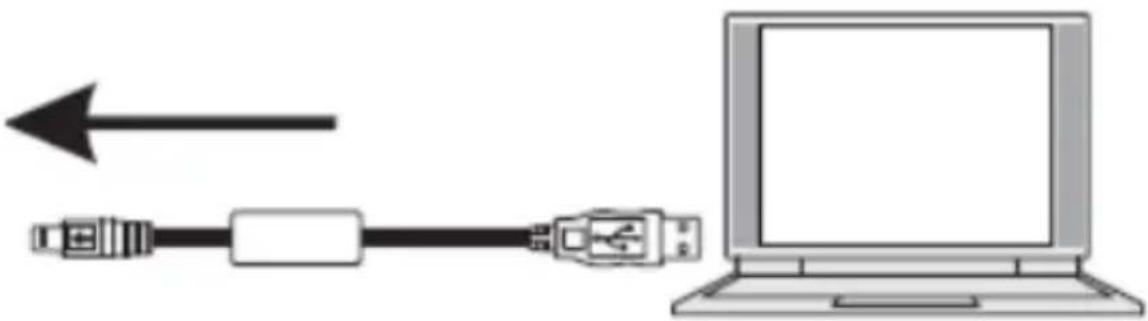
You can also charge your camera by connecting it to a USB port in a computer using a USB cable. It is not necessary to turn on the camera in order to charge it.
natural_image
Diagram showing a USB cable connecting to a laptop via an arrow (no text or symbols present)Memory card insertion / removal
-
Insert a TF memory card into the camera card slot according to the indicated direction, and make sure that it is properly secured.
-
In order to remove the card from the slot, push it gently to unlock it and then pull it out.
Remarks:
-
If the camera is on, it turns off automatically just after the card insertion. In order to start to use it, you need to turn the camera on again.
-
If a memory card is not recognized, remove it and then insert it into the camera card slot again. If it does not work, please try to use another card.
-
We recommend using MicroSD cards with a Speed Class 6 or 10.
Operations
- Turning on / off
Press and hold the Power button to turn the device on / off.
- Switching between modes
Short press the Mode button to switch between the camera modes in the following order: video mode - photo mode - preview mode.
- Settings
Press the Menu button to open the system settings interface.
- Recording
When the device enters the video mode, the camcorder icon appears on the screen. In order to start recording, just press the OK button. The red LED blinks during the recording. To stop the recording process, press the OK button again. The red LED stops blinking.
You can also zoom in and out while recording.
- Video mode settings
In the video mode, press the Menu button to open the settings window.
- Resolution: 1920*1080/ 1208*720/ 848*480/ 640*480/
- Loop recording: Off / 1 minute / 3 minutes / 5 minutes (recording file length)
- WDR: On / Off
- Exposure: adjust brightness -2\~+2
- Motion detection: On / Off
- Sound recording: On / Off
- Date and time stamp: On / Off
- Parking guard: On / Off
- G-Sensor: Off / low / medium / high
6. Taking photos
When the device enters the photo mode, the camera icon appears on the screen. Point the camera lens at the subject and use the Down button to zoom in, or the Up Button to zoom out. Press the OK button to take a photo.
7. Photo mode settings
In the photo mode, press the Menu button to open the settings window.
Capture mode: single photo / self timer (2 seconds / 5 seconds / 10 seconds) / continuous shooting.
- Resolution: 12M / 10M / 8M / 5M / 3M / 2M / VGA / 1.3M
- Sequence: On / Off
- Quality: High / Medium / Low
- Sharpness: High / Medium / Low
- White balance: Auto / Daylight / Cloudy / Tungsten light / Fluorescent lamp
- Color: Colors / Black-White / Sepia
- ISO: Auto / 100 / 200 / 400
- Exposure: -2\~+2
- Image stabilization: On / Off
- Date and time stamp: Off / Date / Date and time
8. Preview mode
In the video mode, short press the Menu button twice to enter the preview mode. Then, use the Up and Down buttons to browse pictures and videos.
In the preview mode, press the Menu button to open a tab with such options as: "Delete", "Lock" or "Slideshow".
To delete a file: use the Up and Down buttons to select a file, press the OK button, and choose "Delete a current file"
. Press the OK button again. You will be requested to confirm the operation. In order to do so, press the OK button once more.
To prevent a file from being deleted (or to stop the protection), select it and press the OK button to show the following options: lock the selected file / unlock the selected file / lock all / unlock all.
Press the OK button to adjust slide duration: 2 seconds / 5 seconds / 8 seconds
9. Data backup
USB mode
Use the USB cable to connect your camera to a computer. Press the Power button, select "Storage" in the popped-up window, and press the OK button to confirm. Use the computer to open the "My Computer" folder on the desktop. There will be a new removable disk icon in it. Double-click it to open the camera storage. Photo files are saved in the "PHOTO" folder, while the recorded videos can be found in the "MOVIE" one.
10. Additional information:
- Supported computer operating systems: XP / VISTA / Windows 7 / Windows 8 / Windows 8.1.
- You can choose the "PC camera" option in the popped-up window (while turning the camera on) to use the device as a webcam.
- The camera turns off when you disconnect the USB cable.
TV connection
In order to view the recorded files on a TV screen, connect the camera to the TV using a proper cable.
- Use the HDMI cable to connect the camera to a HD TV. Now, the files stored in the camera's memory card can be displayed on a TV screen.
- Use the AV cable to connect the camera to a TV. Now, the files stored in the camera's memory card can be displayed on a TV screen.
CamRoad 4.5
User Manual
natural_image
Line drawing of a handheld electric shock absorber with cable and probe, showing wiring and motion direction (no text or symbols)natural_image
Diagram showing a USB cable connecting to a laptop via an arrow (no text or symbols present)natural_image
Line drawing of a handheld electric shock absorber with attached cable and probe (no text or symbols)- Pomocí USB portu.
natural_image
Diagram showing a USB cable connecting to a laptop via an arrow (no text or symbols present)natural_image
Line drawing of a handheld electric shock absorber with attached cable and probe (no text or symbols)- Pomocou USB portu.
natural_image
Illustration of a laptop connected via USB cable to a network (no text or symbols)natural_image
Line drawing of a handheld electric shock absorber with attached cable and probe (no text or symbols)natural_image
Diagram showing a USB cable connecting to a laptop via an arrow (no text or symbols present)natural_image
Line drawing of a handheld electric shock absorber with attached cable and probe (no text or symbols)a töltés).
natural_image
Diagram showing a USB cable being inserted into a laptop, with an arrow indicating data flow (no text or symbols present)natural_image
Line drawing of a handheld electric vehicle with cable and plug, showing wiring and a left-pointing arrow (no text or symbols)- USB pesa kaudu:
natural_image
Diagram showing a USB cable connecting to a laptop via an arrow (no text or symbols present)Mälukaardi sisestamine/eemaldamine
Declaration of Conformity
We, the undersigned:
Declare the following apparatus:
| Products name: | Car Camera |
| Brand and Model name: | OV-CamRoad 4.5 |
Hereby we confirm above product compliance with the European directive of CE:
Below standards were tested and passed:
| EMC : | ETSI EN 301 489-1 V1.8.1 (2008-04)ETSI EN 301 489-17 V2.1.1 (2009-05) |
| LVD : | EN 60950-1:2006 + A11:2009 + A1:2010+ A12:2011 |
Release date: 21.09.2014
www.overmax.eu
Brand : Overmax
Model : Camroad 4.5
Category : Dash cam