
CG 3009 - Cooking appliance ROWENTA - Free user manual and instructions
Find the device manual for free CG 3009 ROWENTA in PDF.
User questions about CG 3009 ROWENTA
0 question about this device. Answer the ones you know or ask your own.
Ask a new question about this device
Download the instructions for your Cooking appliance in PDF format for free! Find your manual CG 3009 - ROWENTA and take your electronic device back in hand. On this page are published all the documents necessary for the use of your device. CG 3009 by ROWENTA.
USER MANUAL CG 3009 ROWENTA
natural_image
Exterior view of a Rowenta Prelude air fryer with control knobs and indicator lights (no text or symbols on the device itself)
natural_image
Exterior view of a modern Rowenta Prelude water heater with open vent (no text or symbols on the device itself)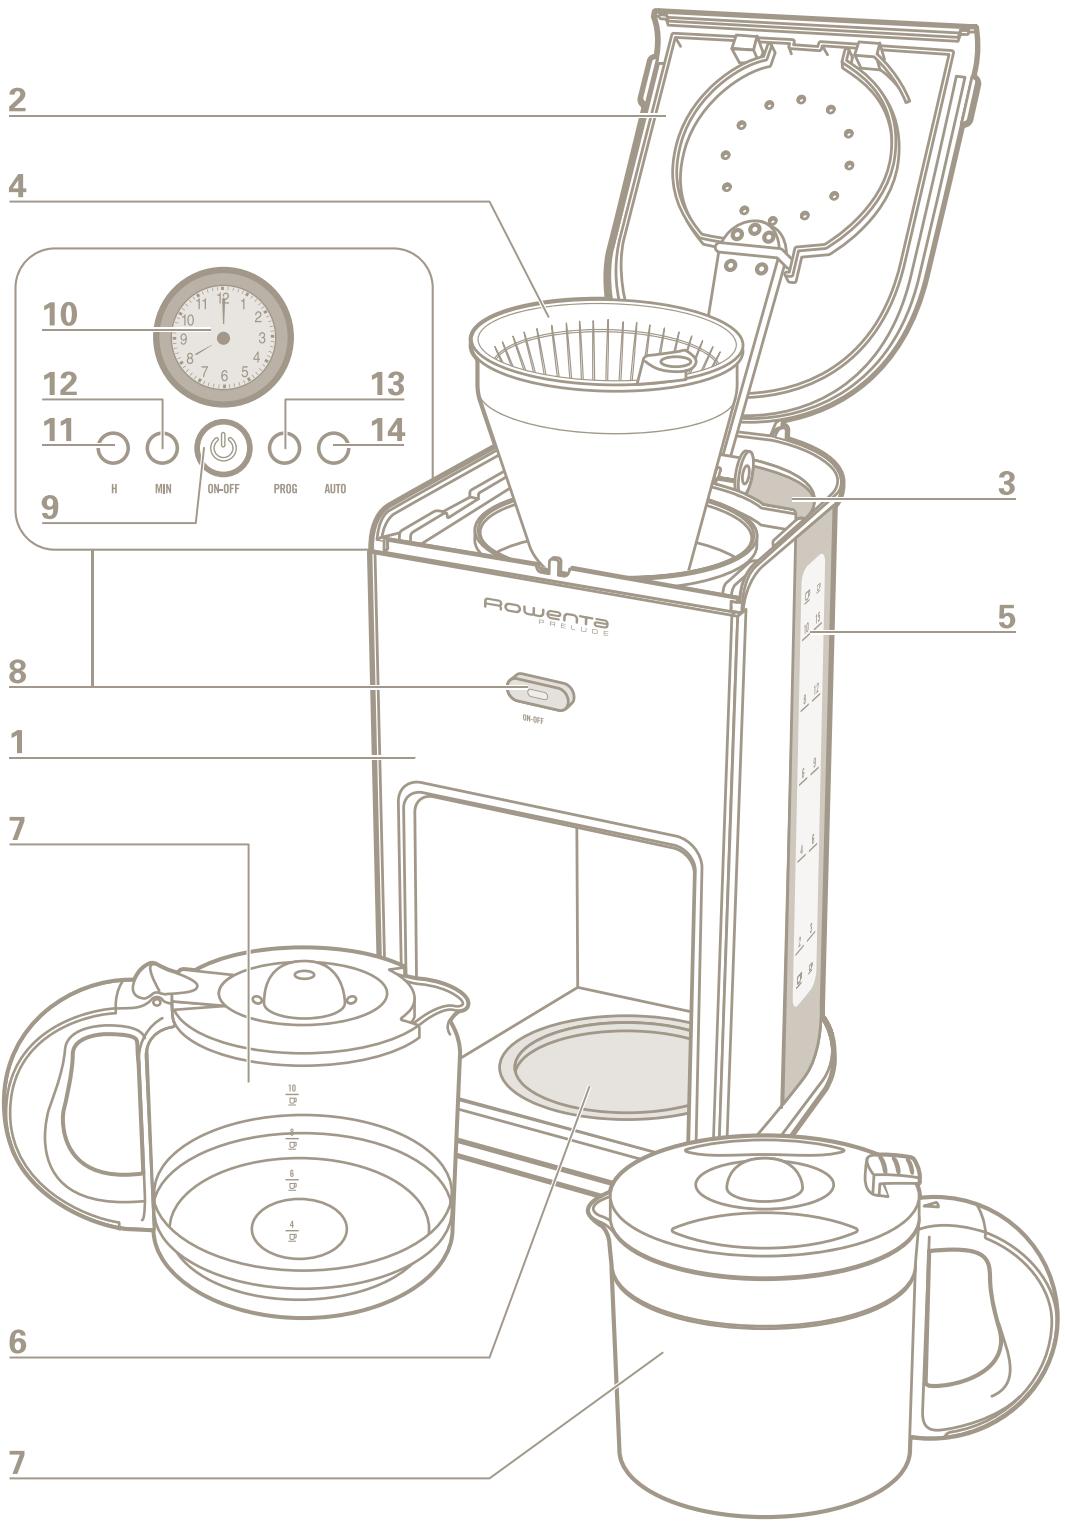
text_image
2 4 10 12 13 11 9 H MIN ON-OFF PROG AUTO 14 8 1 7 6 5 4 3 5 Rowenta PRELUDE ON-OFF 10 15 8 12 6 9 4 3 2 12 6 4 3 2 12 7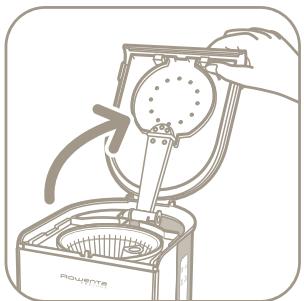
natural_image
Line drawing of a hand using a power shaver to lift a circular component (no text or symbols)fig.1
text_image
Flowentefig.2
text_image
10 15 8 12 6 9 4 6 2 3fig.3
natural_image
Illustration of a kitchen appliance with a funnel and fan, showing a downward arrow indicating process (no text or symbols)fig.4

natural_image
Illustration of a hand using a power switch to clean or store items from a portable appliance (no text or symbols visible)fig.5
natural_image
Illustration of a hand using a device to press or install a circular component, with no visible text or symbols.fig.6
text_image
BROUETTE 400gfig.7
natural_image
Illustration of a hand pouring liquid from a coffee machine into a bowl, with arrows indicating flow direction (no text or symbols)fig.8
natural_image
Illustration of a hand pouring liquid into a container with a curved arrow indicating rotation (no text or symbols)fig.9
natural_image
Illustration of a microwave oven with a lid and lock, showing mechanical components and directional arrows (no text or symbols)fig.10

natural_image
Simple line drawing of a circular device with a lock and directional arrow (no text or symbols)fig.11

natural_image
Illustration of a hand pouring liquid from a container into a cup (no text or symbols)fig.12
BESCHREIBUNG:
1 Main body
2 Lid
3 Tank
4 Filter holder
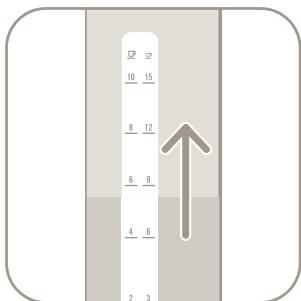
5 Water level
6 Warming plate
7 Glass coffeepot or thermal jug (according to model)
8 ON-OFF button, or control screen (according to model)
SAFETY INSTRUCTIONS:
- Read the instructions carefully before you start using your machine: any use which does not conform to these instructions will absolve the manufacturer of any liability.
- This appliance is not intended for use by: children; or persons who may suffer from a mental and/or physical impairment - unless they are adequately supervised in its operation and use.
Persons who have a limited or no understanding in the operation and use of this appliance must first read and fully understand the contents of the enclosed instruction booklet, and where appropriate seek additional guidance on its operation and use from the person responsible for their safety."
- Before plugging in the appliance, check that the voltage of your appliance matches that of your power supply and that your power socket is properly earthed.
- Only use this coffee maker on a flat, stable, heat-resistant surface away from water splashes and any heat sources.
Any connection error would render the guarantee null and void.
- This product has been designed for domestic use only. Any commercial use, inappropriate use or failure to comply with the instructions, the manufacturer accepts no responsibility and the guarantee will not apply.
- Unplug your appliance as soon as you stop using it or to clean it.
- Do not use your appliance if it is not operating properly or if it has been damaged. In such cases, contact an approved service centre.
Programmable models
9 ON-OFF button
10 Clock
11 Hours button, H
12 Minutes button, MIN
13 PROG button
14 AUTO button
- All operations other than cleaning and usual maintenance must be performed by an approved service centre.
- If the power cord or plug is damaged, do not use the appliance. To avoid all hazards, have the power cord replaced by an approved service centre.
- Do not put the machine, power cord or plug in water or any other liquid.
- Do not leave the power cord hanging within children's reach.
- The power cord must never be near or in contact with the hot parts of the machine, near a source of heat or over a sharp edge.
- For your own safety, only use manufacturer accessories and spare parts suited to your machine.
- Do not disconnect the plug from the socket by pulling on the cord.
- Do not use the coffeepot or thermal jug on an open flame or on electric cooker plates.
- Do not add water in the appliance if it is still hot.
- Always keep the lid (2) closed when the coffee maker is operating.
- All our machines undergo strict quality control. Hands-on tests are carried out on machines at random, which accounts for any traces of use.
- Never put your thermal jug in a microwave oven, in a dishwasher or on a cooker plate.
- Never put your hand inside the thermal jug.
- Never use the coffeepot or thermal jug without the lid.
BEFORE USING YOUR MACHINE FOR THE FIRST TIME:
Run the coffee maker once without coffee with 1 litre of water to rinse out the circuit..
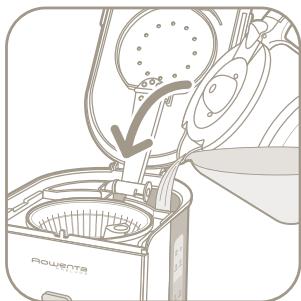
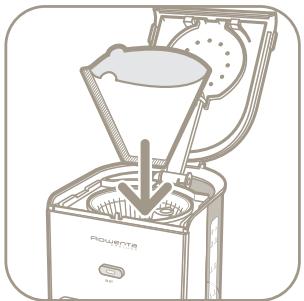
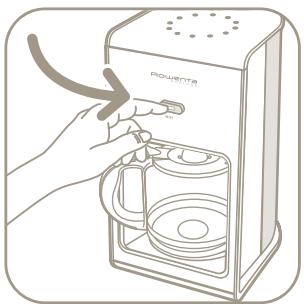
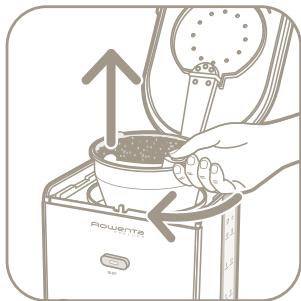
MAKING COFFEE:
(Follow illustrations 1 to 7)
- Only use cold water and a no. 4 paper filter. Never use the thermal jug without its lid.
- Do not exceed the maximum amount of water indicated on the tank water level.
- This coffee maker is equipped with a drip-stop system which enables you to serve coffee before all the water has dripped through. Quickly put the coffeepot or thermal jug back in place to avoid any spillage.
- For better heat retention, rinse out the thermal jug with hot water before use.
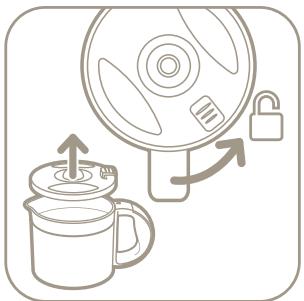
- The lid of the thermal jug must be firmly screwed on when the coffee is being made and to keep it warm, figures 10 and 11.
- To serve the coffee, press the lever on the lid of the thermal jug downwards, figure 12.
- Wait a few minutes before making another pot of coffee.
FOR THE PROGRAMMABLE MODEL:
Setting the time:
- Plug in the coffee maker, the time display (10) blinks.
- Press the "H" button to set the hours. The screen indicates "AM" for the morning hours and "PM" for the afternoon.
- Press the "MIN" button to set the minutes.
- The setting is validated automatically.
Operation in manual mode:
- Press the "ON-OFF" button, the button light comes on and the coffee maker switches on.
- Press the "ON-OFF" button again to stop the appliance.
Operation in programme mode:
- Press the "PROG" button: the display unit resets itself (the hands of the clock indicate
12:00) and the "ON-OFF" button blinks. (The display unit goes back into Time mode if no setting is entered within 5 seconds).
- Press the "H" button to set the time.
- Press the "MIN" button to set the minutes.
- The setting is validated automatically after 5 seconds.
- Press the "AUTO" button to activate the programme function. The "ON-OFF" button becomes green.
At the time programmed, the button becomes red and the coffee maker starts to operate.
- Press the "ON-OFF" button to stop the appliance.
- You can cancel the programme at any time by pressing the "AUTO" button. The green button will turn off. To reactivate the programme, press the "AUTO" button again.
Note on the two operating modes: The coffee maker automatically stops operating after 2 hours, if you haven't stopped it at the end of the cycle by pressing the "ON-OFF" button.
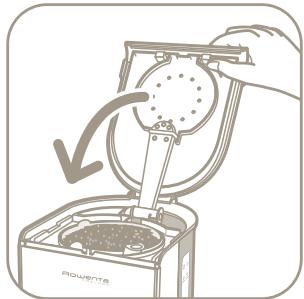
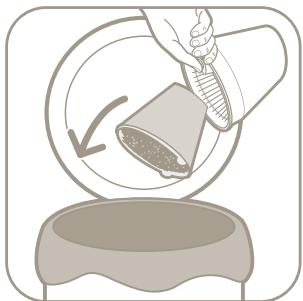
CLEANING:
- To get rid of the used coffee grounds, remove the filter holder (4) from the coffee maker (figures 8 and 9).
- Unplug the appliance.
- Do not clean the appliance when hot.
- Clean with a damp cloth or sponge.
- Never put the appliance in water or under running water.
- The filter holder as well as the glass coffeepot can be washed in a dishwasher.
SCALE REMOVAL:
- Descale your coffee maker every 40 cycles. You can use:
- either a sachet of scale remover diluted in 2 big cups of water.
• or 2 big cups of spirit vinegar.
- Pour the descaler into the tank (3) and turn on the coffee maker (without coffee).
- Let the equivalent of one cup of liquid drip into the coffeepot or thermal jug (7), then stop the appliance.
- Leave to work for one hour.
- Turn the coffee maker back on to complete the dripping.
- Rinse out the coffee maker by operating it 2 or 3 times with 1 litre of water.
The guarantee excludes coffee makers which have stopped working or do not work properly due to lack of descaling.
ACCESSORIES:
- Thermal jug
- Glass coffeepot
TROUBLESHOOTING:
- Check:
- the electrical connection
- that the "ON-OFF" button (light turned on) is in the ON position
- that the filter holder is locked in position
- If the water takes too long to drip through or if the machine makes excessive noise:
- descale your coffee maker.
If your appliance is still not working: Contact our Helpline (UK only): 0845 602 1454 or consult our web site: www.rowenta.co.uk
ELECTRICAL OR ELECTRONIC PRODUCT AT THE END OF ITS USEFUL LIFE:

Environment protection first!
① Your appliance contains valuable materials which can be recovered or recycled.
Leave it at a local civic waste collection point.