
VT-6401 - Weather Station Vitek - Free user manual and instructions
Find the device manual for free VT-6401 Vitek in PDF.


| Type | Weather Station |
| Brand | Vitek |
| Model | VT-6401 |
| Display | LCD, monochrome |
| Indoor Temperature Range | 0°C to 50°C (32°F to 122°F) |
| Outdoor Temperature Range (via sensor) | -30°C to 50°C (-22°F to 122°F) |
| Humidity Measurement Range | 20% to 99% RH |
| Barometric Pressure Range | 600 to 1100 hPa |
| Clock | 12/24 hour format, with calendar |
| Alarm | Yes, with snooze |
| Wireless Sensor | Included, 433 MHz, range up to 30 meters |
| Power Supply (Main Unit) | 2 x AAA batteries |
| Power Supply (Sensor) | 2 x AAA batteries |
| Dimensions (Main Unit) | Approx. 120 x 80 x 20 mm |
| Weight (Main Unit) | Approx. 150 g |
| Material | Plastic |
| Color | Black/White |
| Mounting | Tabletop or wall-mountable (see manual) |
| Additional Features | Temperature trend indicator, min/max memory |
Frequently Asked Questions - VT-6401 Vitek
User questions about VT-6401 Vitek
0 question about this device. Answer the ones you know or ask your own.
Ask a new question about this device
Download the instructions for your Weather Station in PDF format for free! Find your manual VT-6401 - Vitek and take your electronic device back in hand. On this page are published all the documents necessary for the use of your device. VT-6401 by Vitek.
USER MANUAL VT-6401 Vitek
Weather station VT-6401 with color display
Description
Main block
1 - LCD display
| Button name | Button functions | ||
| Pressing button Pressing and holding button for 3 sec | |||
| 2 SNOOZE/LIGHT | Switching on signal repeat function and LCD backlight while operating using battery power supply | ||
| 3 MEMORY Display of maximal/minimal measured temperature values | Reset of indicated values | ||
| 4 CLOCK Time, date | and week day indication | Time and data setting | |
| 5 ▲▼ | Changing input parameter value | Fast changing input parameter value | |
| 6 ALARM Alarm time | display, switching alarm on/off | Setting alarm time | |
| 7 CHANNEL Switching between receive channels for data from different remote sensors, cyclic mapping of temperature and humidity data in different channels ( ) | Searching signal from remote sensor | ||
| 8 HEAT INDEX / DEW POINT | Heat index and dew point | ||
| 9 PRESSURE Switching between different pressure units. | Setting altitude above sea level | ||
| 10 C/F Switching between different temperature units. (°C/°F) | |||
11 - Display BACKLIGHT switcher (Auto/High/Low/Off)
12 - AC adapter jack (6 V DC)
13 - Battery compartment (for 3 batteries of "AAA" type (1,5 V)).
English
Remote temperature and humidity sensor
- LED
- Battery compartment (for 2 batteries of "AAA" type).
- Sensor reset button after changing channel number Tx
- Button for witching between Fahrenheit/Celsius scales C/F
- Channel switcher (1-2-3)
- Opening for mounting the unit on a wall
Safety Precautions
- Read this operation manual carefully before you start using these appliances.
- Do not immerse these appliances into water.
- Do not use abrasive chemicals for cleaning these appliances, as they could cause housing and internal parts damage.
- Do not expose these appliances to strong physical impacts and strikes (dust and moisture are dangerous too) as they may cause malfunctions, shorten time of service, battery damage, and housing details deformation as result.
- Do not disassemble this unit, doing so leads to warranty cancellation. There are no serviceable parts inside demanding user's attention.
- Use new batteries only, meeting the specifications of operating manual exactly. Do not install old and new batteries at the same time.
- Use only AC adapter included into delivery set.
Before you begin
Install remote sensor within the range of effective data transfer, as close to basic block as possible. Locate basic and remote sensors at places where the interference is minimal to provide the best data transmission. Take into account that data transfer range of remote sensor depends upon constructional material of partition walls and their number in the room. Try several variants of installation. In spite of the fact that remote sensor is protected against negative weather it is required to install it thus to avoid exposure to direct sun radiation, rain or snow. Household appliances (doorbell, signaling, etc) may create interference while receiving signal from sensor by the main block. This is normal, and this doesn't influence on the general performance of the appliances. Signal receives and data transfer would be resumed immediately after temporary interference is over.
English
Installation of batteries into remote sensor
- Turn off the screws on the batteries compartment.
- Select data transfer channel by channels switcher «1-2-3».
- Install 2 batteries ("AAA", 1.5 V), following polarity.
- Close battery compartment cover and turn up the screws.
Connecting AC-power adapter to basic block/ Installation of batteries into basic block. Connect AC-power adapter (6,0V; DC) to basic block through the jack for an external power source located below the batteries compartment.
or
- Open the cover of batteries compartment.
- Install three batteries ("AAA", 1.5 V), following polarity.
- Close battery compartment cover.
Note:
Basic block is intended for power supply from external source, batteries are used as reserve power source.
Replacing Batteries
On appearance of adequate icon indications displaying that the batteries are down replace remote sensor batteries.
Get Started
By first startup, switch main block on, and switch on remote sensor. Set data transfer channel by channel switcher «1-2-3» located on remote sensor. Hold button CHANNEL on main block, you will hear sound signal. Main block starts searching remote sensor signal. Pres button Tx to reset the sensor. When connection between sensor and main block is set on, temperature and humidity indications from remote sensor will appear on LCD.
Setting pressure parameters by switching on the unit first time
- After connecting basic block to power supply line pressure units' icon starts blinking. Use buttons «▼/▲» to select pressure units, inHg, hPa, mBar or mmHg. Press button PRESSURE for confirmation.
- Use buttons «▼/▲» to set the value of altitude above sea level. Press button PRESSURE for confirmation.
Setting pressure parameters via first startup is imperative for precise weather forecast.
English
Symbolic weather forecast
Weather forecast is composed according to atmosphere pressure time history. Based on acquired data weather station is able predicting weather for the next 12-24 hours.

Sunny

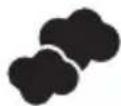
cloudiness
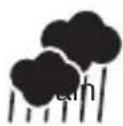
storm warn
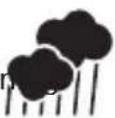
Predictions accuracy: 70%; prediction of the considerable weather changes (for example, from sunny weather to rain) is more accurate then prediction of negligible weather changes (from partly cloudy to cloudiness).
Weather station predicts possible weather, thus symbols could not agree with current weather. Forecast: SUNNY for night means cloudless sky.
For more precise weather forecast it is required setting altitude above sea level. Use buttons «▼/▲» to choose pressure units. Press button PRESSURE for confirmation. Use buttons «▼/▲» to set altitude above sea level. Press button PRESSURE for confirmation.
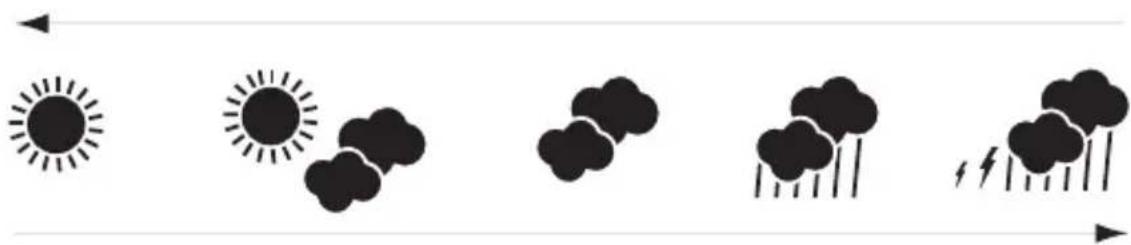
Attention! If your weather station is indicating “rain” or “storm warning” for a long time, and this indications do not comply with the real situation, try changing altitude above sea level gradually (in 20 meters/60 feet range) until the weather station indications get in accordance with real weather conditions.
Increasing altitude above sea level
natural_image
Five black-and-white icons representing weather and precipitation symbols: sun, sun, cloud, rain, and lightning (no text or labels)Decreasing altitude above sea level
English
Temperature and humidity indications
Basic block is able receiving data from tree remote sensors, each of them has each own channel for temperature and humidity data transmission. Centigrade or Fahrenheit degree can be selected as temperature units. Use C/F to select temperature units.
Switching between data receiving channels
Press button CHANNEL to switch between remote sensors' data receiving channels (Ch 1, Ch 2, Ch 3), indoors (IN), switching between different channels' temperature data indication (i) in cycle.
Temperature and humidity trends
Temperature and humidity trends are displayed by arrows (increasing, constant, decreasing) near the adequate data.
Heat Index
Temperature and humidity data are used for calculation of heat index. Press button HEAT INDEX/DEW POINT once, symbols "HEAT INDEX" will appear on LCD. If heat index is too high, the next symbols are displayed on LCD:
| Caution Undue fatigability while doing casual work. | |
| Extreme Caution Strong tiredness, heat spasms are possible | |
| Danger Heat stroke is possible | |
| Extreme Danger Heat stroke danger | |
Dew point
Dew point is the temperature at given pressure the air is to ne cooled down to, in order to make water vapor condensation.
Press button HEAT INDEX/DEW POINT two times to display dew point, symbols "DEW POINT" will appear on LCD.
Comfort level
Temperature and humidity data are used for calculation of comfort level, which is presented by tree symbols: wet, comfort, dry.
Viewing minimal/maximal value of temperature and humidity
Each pressing on button MEMORY switches between the next parameters' indication:
• Current temperature and humidity
- Minimal temperature and humidity
• Maximal temperature and humidity
English
Minimal/maximal temperature and humidity values reset
Press and hold button MEMORY for 3 seconds to clear all channels' memories.
Notice: Remote sensor batteries voltage may decrease while operating at temperature below 0^ C, thus remote sensor range of action would be shortened too.
Atmosphere pressure trend
Atmosphere pressure trend is displayed as arrows (increasing, constant, decreasing) near the adequate data.
Setting date and current time
Basic block is able viewing current time and date. Press button CLOCK to switch between current time, date and day of week.
Press and hold button CLOCK for 3 seconds to set current time and date. You can choose time indication format (12 hours or 24 hours) and date format (day/month or month/day), set current time (hours, minutes) and date.
Use buttons «▼/▲» to input parameters. Press button CLOCK for confirmation.
Setting alarm
Press button ALARM to switch on alarm mode. Symbol «AL» appears on LCD. Press this button once more to switch alarm ON/OFF, when alarm is on symbol 🧑s on LCD.
Pre button ALARM for more then 3 seconds to set alarm time. Alarm hours digits start blinking. Use buttons «▼/▲» to set alarm hours digits. Press button ALARM for confirmation. Alarm minutes digits start blinking. Use buttons «▼/▲» to set alarm minutes digits. Press button ALARM for confirmation.
Alarm sound signal repeat
Alarm signal could be switched off for 10 minutes by pressing button SNOOZE/LIGHT. Symbols «Zz» are displayed on LCD. After 10 minutes alarm signal will be repeated. Press ALARM button to switch alarm off.
LCD backlight modes
Use switcher «DISPLAY BRIGHT-NESS» to select one of the following backlight modes:
Auto: LCD backlight brightness is set automatically depending on illumination, which is measured by sensor located near button SNOOZE/LIGHT.
Notice: It is recommended switching on this mode for saving electricity.
High: high backlight brightness level Low: low backlight brightness level.
Off: backlight is off In case the main block is supplied by batteries, press button SNOOZE/ LIGHT to switch LCD backlight on
English
SPECIFICATION
| Temperature measurements | |
| Main block from 0 to +50,0°C | (from +32,0 to +122,0°F) |
| Remote sensor From -20,0 to +6 | 0,0°C(from -4,0 to +140,0°F) |
| Resolution of temperature measurement | 0,1°C |
| Relative humidity measurement from 20% to 99% | |
| Resolution of relative humidity measurement | 1% |
| Data transfer from remote sensor | |
| Data transfer frequency 434 MHz | |
| Number of connected sensors maximum 3 | |
| Range of action maximum 75 meters (246 feet) | |
| Power supply | |
| Main block | |
| AC adapter 6,0 V DC,3 batteries “AAA” type, 1.5 V | |
| Remote sensor 2 batteries “AAA” type, 1.5 V | |
Attention!
- Because of printing limitations display presented in these instructions may differ from the actual display in appearance.
- Manufacturer keeps right to change characteristics of the appliances without any prior announcements.
The manufacturer reserves the right to make changes to the characteristics of the device without prior notice.
The service life of the device is no less than 2 years.
Guarantee
Details regarding guarantee conditions can be obtained from the dealer from whom the appliance was purchased. The bill of sale or receipt must be produced when making any claim under the terms of this guarantee.

This product conforms to the EMC-Requirements as laid down by the Council Directive 89/336/EEC and to the Low Voltage Regulation (23/73 EEC)
Русский
natural_image
Five black-and-white icons representing weather and environmental themes: sun, cloudy, rain, lightning, and storm (no text or symbols)natural_image
Five black-and-white weather icons: sun, sun, cloud, rain, and lightning (no text or symbols)natural_image
Five black-and-white icons representing weather and energy symbols: sun, cloudy, rain, lightning, and wind (no text or labels)natural_image
Five black-and-white icons representing weather and environmental conditions: sun, sun, cloud, rain, and lightning (no text or symbols)Денгиз сатхидан баландликни камайтириш
Ўзбек
ХАРОРАТ ВА НАМЛИК ДАРАЖАСИНИ КУРСАТИШ
Асосий блок учта ташки датчикдан сигнал кабул килади ва бу датчикларнинг хар бири харорат ва намлик хақидаги маълумотни узатадиган каналга эга бўлади. Харорат Целсий ёки Фаренгейтда кўрсатилиши мумкин. Хароратни кўрсатиш бирлигини танлаш учун С/F тугмасини босинг.
A production date of the item is indicated in the serial number on the technical data plate. A serial number is an eleven-unit number, with the first four figures indicating the production date. For example, serial number 0606xxxxxxx means that the item was manufactured in June (the sixth month) 2006.
RUS
- Weather station VT-6401 with color display
- Description
- Main block
- English
- Remote temperature and humidity sensor
- Safety Precautions
- Before you begin
- Installation of batteries into remote sensor
- Note:
- Replacing Batteries
- Get Started
- Setting pressure parameters by switching on the unit first time
- Symbolic weather forecast
- Temperature and humidity indications
- Switching between data receiving channels
- Temperature and humidity trends
- Heat Index
- Dew point
- Comfort level
- Viewing minimal/maximal value of temperature and humidity
- Minimal/maximal temperature and humidity values reset
- Atmosphere pressure trend
- Setting date and current time
- Setting alarm
- Alarm sound signal repeat
- LCD backlight modes
- Attention!
- Guarantee
- Русский
- Ўзбек
- ХАРОРАТ ВА НАМЛИК ДАРАЖАСИНИ КУРСАТИШ
- RUS
Brand : Vitek
Model : VT-6401
Category : Weather Station