
BKS 2226 - Vacuum Cleaner BEKO - Free user manual and instructions
Find the device manual for free BKS 2226 BEKO in PDF.

| Product Type | Canister Vacuum Cleaner |
| Brand | Beko |
| Model | BKS 2226 |
| Bagless | Yes (cyclonic dust separation) |
| Dust Capacity | 1.5 L |
| Power Consumption | 750 W |
| Filtration | HEPA 12 washable filter |
| Noise Level | 75 dB (A) |
| Cable Length | 6 m |
| Operating Radius | 8 m |
| Weight | 4.5 kg |
| Dimensions (L x W x H) | 400 x 250 x 300 mm |
| Floor Nozzle Type | Combination (carpet/hard floor) |
| Accessories Included | Crevice tool, dusting brush, upholstery nozzle |
| Automatic Cord Rewind | Yes |
| Variable Power Control | No (single power level) |
| Suction Power | 250 air watts |
| Construction Materials | ABS plastic body |
Frequently Asked Questions - BKS 2226 BEKO
User questions about BKS 2226 BEKO
0 question about this device. Answer the ones you know or ask your own.
Ask a new question about this device
Download the instructions for your Vacuum Cleaner in PDF format for free! Find your manual BKS 2226 - BEKO and take your electronic device back in hand. On this page are published all the documents necessary for the use of your device. BKS 2226 by BEKO.
USER MANUAL BKS 2226 BEKO
Vacuum Cleaner User Manual
natural_image
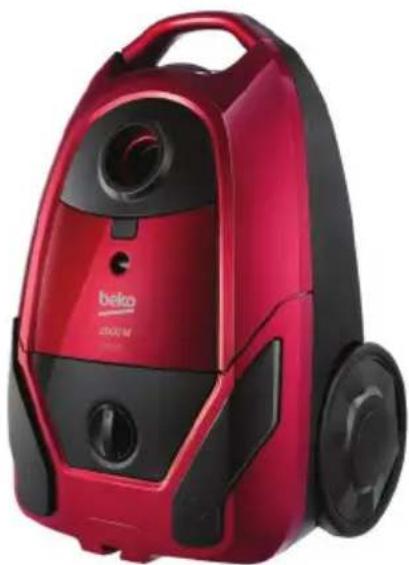
Red and black vacuum cleaner device with visible branding (no text or symbols on body)BKS 2226
ENTR TM KK RU | BS | MK | SQ \$R TH
01M-8833063200-2216-05

Please read this user manual first!
Dear Customer,
Thank you for preferring a Beko product. We hope that you get the best results from your product which has been manufactured with high quality and state-of-the-art technology. Therefore, please read this entire user manual and all other accompanying documents carefully before using the product and keep it as a reference for future use. If you handover the product to someone else, give the user manual as well. Follow all warnings and information in the user manual.
Explanation of symbols
Throughout this user manual the following symbols are used:

Important information or useful hints about usage.

Warning for hazardous situations with regard to life and property.

Protection class for electric shock.

This product has been produced in environmentally friendly, modern facilities.
CONTENTS
1 Important instructions for safety and environment 4-5
1.1 General safety 4
1.2 Compliance with the WEEE Directive and disposal of waste products.... 5
1.3 Package information 5
2 Your vacuum cleaner 6
2.1 Overview 6
2.2 Technical data....6
3 Use 7-8
3.1 Intended use ....7
3.2 Attaching/removing the hose....7
3.3 Attaching/removing the telescopic tube ...7
3.4 Attaching/removing the parquet/ carpet brush 7
3.5 Adjusting the parquet/carpet brush .....7
3.6 Operation 7
3.6.1 Adjusting the suction power .....7
3.6.2 Dust indicator 7
3.7 Accessories....8
3.8 Switching off and parking the vacuum cleaner
4 Cleaning and maintenance 8-9
4.1 Replacing the dust bag....8
4.2 Cleaning the filters....9
4.2.1 Motor protection filter 9
4.2.2 Foam filter 9
4.3 Storage....9
1 Important instructions for safety and environment
This section contains safety instructions that will help protect from risk of personal injury or property damage.
Failure to follow these instructions invalidates the granted warranty.
1.1 General safety
- This appliance complies with the international security standards.
- This appliance can be used children aged from 8 years and above and persons with reduced physical, sensory or mental capabilities or lack of experience and knowledge if they have been given supervision or instruction concerning use of the appliance in a safe way and understand the hazards involved. Children shall not play with the appliance. Cleaning and user maintenance shall not be made by children without supervision.
- Do not use it if the power cable or humidity and heat sources, the appliance itself is damaged. Contact an authorized service.
- Your mains power supply should comply with the information supplied on the rating plate of the appliance.
- The mains supply of the appliance must be secured with a minimum 16 A fuse.
- Do not use the appliance with an extension cord.
In order to prevent the power cable from getting damaged, make sure that it doesn't get by stuck, twisted or rub against sharp surfaces.
- Do not touch the appliance or its plug when it is plugged if your hands are damp or wet.
- Do not pull the power cable when unplugging the appliance.
- Do not vacuum flammable materials and when vacuuming cigarette ashes make sure that it got cold.
- Do not vacuum water or other liquid materials.
- Protect the appliance from rain,
1 Important instructions for safety and environment
- Never use the appliance• If your store the package in or near to combustible material, keep it out of the or inflammable places and reach of children. materials.
- Unplug the appliance before cleaning and maintenance.
- Do not dip the appliance or in cable in water to clean it.
- Check the hose of the appliance regularly. Do not use if it is damaged and contact an authorized service.
- Do not attempt to dismantle the appliance.
- Only use the original parts of parts recommended by the manufacturer.
- If heavily used for cleaning dust such as cement or grout the dust indicator will lit earlier then expected, in such case replace the dust bag even it is empty.
- Do not use the appliance without filters; otherwise it can get damaged.
- When vacuuming the stairs, the appliance should be located below the user.
1.2 Compliance with the WEEE Directive and disposal of waste products
This product does not include harmful and prohibited materials specified in the "Regulation for Supervision of the Waste Electric and Electronic Appliances" issued by the Ministry of Environment and Urban Planning. This appliance conforms to the WEEE regulation. This product has been manufactured with high quality parts and materials which can be reused and are suitable for recycling. Therefore, do not dispose the product with normal domestic waste at the end of its service life. Take it to a collection point for the recycling of electrical and electronic equipment. Ask the local authority in your area for these collection points. Contribute to the preservation of environment and natural sources by taking the used products to the recycling points.
1.3 Package information
Package of the product is made of recyclable materials in accordance with our National Legislation. Do not dispose of the packaging materials together with the domestic or other wastes. Take them to the packaging material collection points designated by the local authorities.
2 Your vacuum cleaner
2.1 Overview
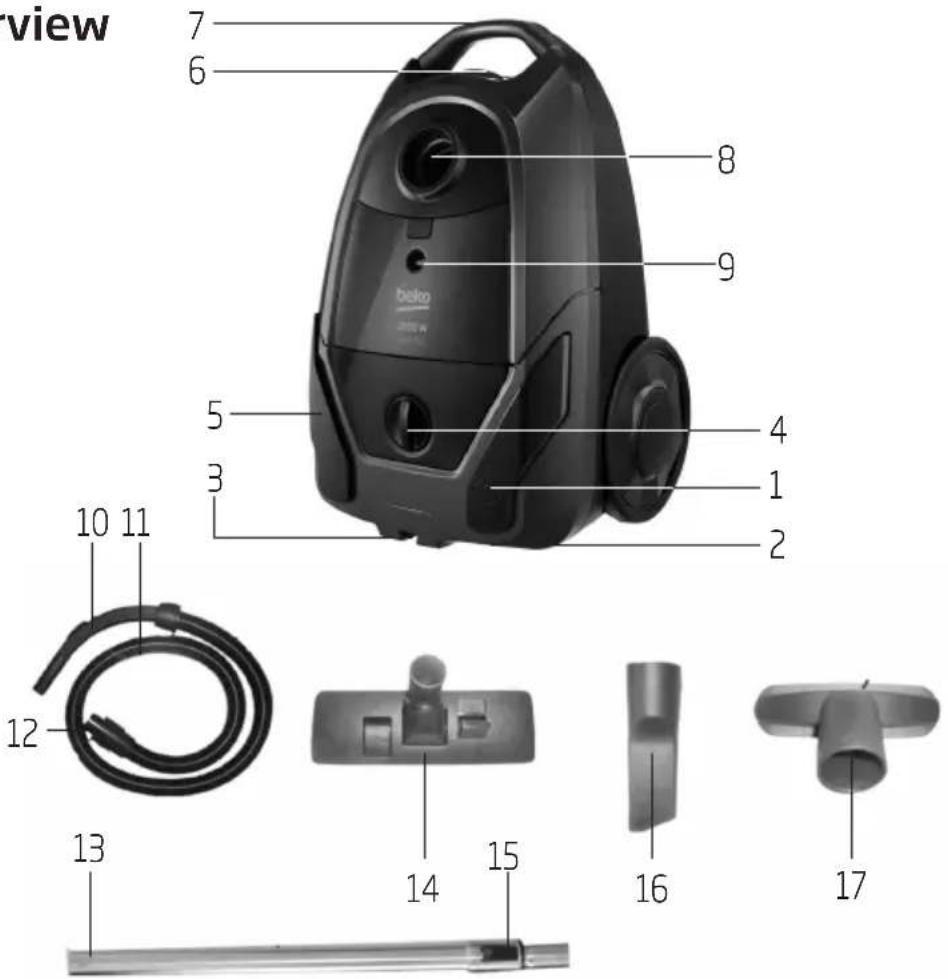
- Power cable winding button
- Plug
- Park channel
- Suction power adjustment knob
- On/Off button
- Lid release button
- Carrying handle
- Suction nozzle
- Dust indicator
- Handle
- Hose
- Hose cap
- Telescopic tube
- Parquet/carpet brush
- Telescopic tube adjustment latch
- Narrow crevice tool
- Wide-mouth nozzle
2.2 Technical data
Nom. power : 2000 W
Max power : 2600 W
Net weight : 5 kg
Supply voltage : 220-240 V\~, 50 Hz
Dust Volume : 3L
Power cord length : 6 m
Rights to make technical and design changes are reserved.
The values which are declared in the markings affixed on your product or the other printed documents supplied with it represent the values which were obtained in the laboratories pursuant to the pertinent standards. These values may vary according to the usage of the appliance and ambient conditions.
3 Use
3.1 Intended use
The appliance was designed to be used in houses, and is not fit for industrial use.
3.2 Attaching/removing the hose
- To attach the hose (11) push the hose cap (12) to match it with the suction nozzle.
- The tabs on the hose cap (12) must be seated correctly.
- To remove the hose (11) press on the tabs on the hose cap (12) and pull it.
3.3 Attaching/removing the telescopic tube
-
Attach the telescopic tube (13) to the handle (10).
-
Pull the telescopic tube from the handle (10) to remove it.
-
Push the telescopic tube adjustment latch (15) in the arrow direction and pull the telescopic tube (13) to adjust its length.

natural_image
Mechanical shaft component with a directional arrow indicating motion (no text or symbols)3.4 Attaching/removing the parquet/carpet brush
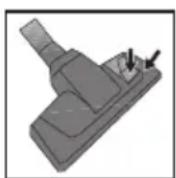
You can install/remove the telescopic tube (13) from/to the parquet carpet brush (14).
3.5 Adjusting the parquet/ carpet brush
By pressing the adjustment latch (14) located on the parquet carpet brush;
- Use position for hard surfaces and parquet.
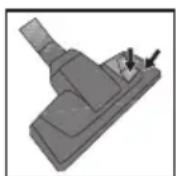
- Use "" for carpets.

3.6 Operation
-
Plug the appliance after pulling the power plug located at the back of the appliance.
-
Press on/off button (5) to switch on your appliance.
3.6.1 Adjusting the suction power
You can adjust the suction power of the appliance by turning the suction power button (4) located on the body of the device clockwise according to the type of the surface to be cleaned. To decrease the suction power turn the button counterclockwise.
3.6.2 Dust indicator
When the dust bag is full the dust indicator (9) on the body will light in red. Replace the dust bag (see 4.1).
3 Use
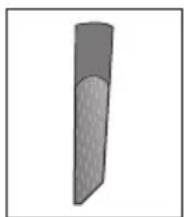
3.7 Accessories
Crevice tool
natural_image
Simple 3D illustration of a cylindrical object with a shaded cross-section (no text or symbols)Suitable for the cleaning of the surfaces which are difficult to clean, such as the areas remaining under the sofas and furniture.
Wide-mouth nozzle
Suitable for the cleaning of the floorings, stair steps, inside of the cars, sofas, armchairs etc.

WARNING: Do not make cleaning by using the handle's (10) end part.
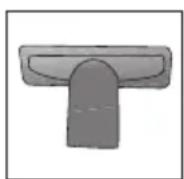
3.8 Switching off and parking the vacuum cleaner
- Switch off the appliance with the on/off button (5) and unplug it.
- Wind the electric cable by pressing the power cable winding button (1).
Vertical parking feature
Insert the hook of the parquet/carpet brush into the parking channel located at the bottom section of the appliance.
Horizontal parking feature
Insert the hook of the parquet/carpet brush into the parking channel located at the rear section of the appliance.
4 Cleaning and maintenance
Switch off and unplug the appliance before cleaning it.

WARNING: Never use gasoline, solvent, abrasive cleaning agents, metal objects or hard brushes to clean the appliance.
4.1 Replacing the dust bag
When the dust indicator (9) on the body turn to red replace the dust bag.
- Open the top lid pressing the button (6) for opening the dust container.
- Lift the dust bag upwards and remove it from the bag holder.
-
Remove the dust bag from its guide pulling it from its clips.
-
Close the cover of the full dust bag and dispose it.
- Holding its clips, push the new dust bag into the bag holder. Ensure that it is fully seated.
- Close the appliance's upper cover.

WARNING: Do not forcethe top lid to close it, otherwise the plastic sections can be damaged.

WARNING: Dust bags provided from locations other than the authorized dealers and services are not original. Such dust bags have a lesser quality and they become torn in a shorter period and render your appliance unoperational. Faults caused by using unauthentic dust bags are not covered by the scope of the warranty.
4 Cleaning and maintenance

WARNING: Do not wash the dust bag.
4.2 Cleaning the filters
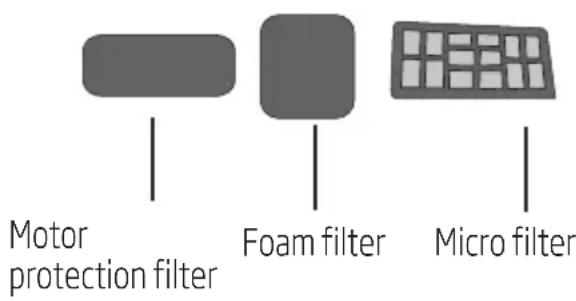
After each 5 dust bag replacement (may vary depending on the frequency and area of usage) clean the filters.

WARNING: Do not use appliances producing hot air such as hair dryer or heater to dry the filters.

WARNING: Do not install the filters without completely drying them; otherwise smell of moisture may occur during the use, water can leak from the back of the appliance or the filters may get damaged.

WARNING: When the filters dry, replace them into their positions.
4.2.1 Motor protection filter
- Open the top lid pressing the button (6) for opening the lid.
- Remove the foam filter from the grid inside.
- Wash it under running water after shaking it off.
- After washing the foam, gently wring it and leave it to dry.
4.2.2 Foam filter
- Open the rear cover.
- Remove the foam filter behind the cover and wash it.
- After washing the foam, gently wring it and leave it to dry.
4.3 Storage
- If you do not intend to use the appliance for a long time, store it carefully.
• Pull the appliance's plug out. - Keep the appliance out of the reach of children.
natural_image
Mechanical shaft component with a directional arrow indicating motion (no text or symbols)natural_image
Simple 3D illustration of a cylindrical object with a shaded cross-section (no text or symbols)natural_image
Three simple geometric shapes: a rounded rectangle, a square, and a grid-patterned rectangle, each mounted on a stand (no text or symbols)Motor koruma filtresi
Sünger filtre
Mikro filtre
Simwollaryň manylary
natural_image
Close-up of a cylindrical mechanical component with an arrow indicating direction (no text or symbols visible)3.4 Parket/haly sübsesini dakmak/aıyrmak
Siz teleskopik turbany (13) parket haly sübsesine/den gurnap/aýyryp bilersiňiz(14).
3.5 Parket/haly sübsesini sazlamak
Parket haly sübsesinde yerleşyän (14) sazlayys ilginçegini basmak bilen;
- Gaty we parket rüzler üçin"____"pozisiany ulanyň.
natural_image
Simple 3D illustration of a cylindrical object with a textured top and base, no text or symbols present.natural_image
Mechanical shaft component with a directional arrow indicating motion (no text or symbols)natural_image
Simple 3D illustration of a cylindrical object with a curved top surface (no text or symbols)natural_image
Close-up of a cylindrical mechanical shaft with a pointed end and an arrow indicating direction (no text or symbols)natural_image
Simple 3D illustration of a cylindrical object with a textured top and curved base (no text or symbols)natural_image
Three simple geometric shapes: a rounded rectangle, a rounded square, and a grid-patterned rectangle, each mounted on a stand (no text or symbols)Фильтр для защиты
natural_image
Close-up of a cylindrical mechanical shaft with a pointed end and an arrow indicating direction (no text or symbols)3.4 Stavljanje/skidanje četke za parket/tepih
natural_image
Simple 3D illustration of a cylindrical object with a shaded cross-section (no text or symbols)- If you do not intend to use the appliance for a long time, store it carefully.
• Pull the appliance's plug out. - Keep the appliance out of the reach of children.
natural_image
Close-up of a cylindrical mechanical shaft with a pointed end and an arrow indicating direction (no text or symbols)When the dust bag is full the dust indicator (9) on the body will light in red. Replace the dust bag (see 4.1).
natural_image
3D rendered image of a cylindrical object with textured surface (no text or symbols)natural_image
Three gray rectangular shapes with vertical lines, one rounded and one grid-patterned, arranged on a white background (no text or symbols)Филтер за заштита на моторот
Сунгерест филтер
Микрофилтер
natural_image
Close-up of a cylindrical mechanical shaft with an arrow indicating direction (no text or symbols)natural_image
Simple 3D illustration of a cylindrical object with a shaded cross-section (no text or symbols)natural_image
Close-up of a cylindrical mechanical shaft with an arrow indicating a cut or indentation (no text or symbols visible)3.4 Stavljanje/skidanje četke za parket/tepih
Možete staviti ili skinuti teleskopsku cev (13) sa četke za tepih i parket (14).
3.5 Prilagođavanje četke za parket/tepih
natural_image
Simple 3D illustration of a cylindrical object with a shaded cross-section (no text or symbols)Uzbekistan St. Chhattis, Thailand, Malaysia, Singapore, Malaysia
natural_image
Mechanical shaft component with a directional arrow indicating movement (no text or symbols)natural_image
Simple 3D illustration of a vertical cylindrical object with textured surface (no text or symbols)الفوهة العريضة
natural_image
Mechanical shaft component with a directional arrow indicating motion (no text or symbols)natural_image
Simple 3D-rendered vertical object with textured surface, no visible text or symbolsسَرِى دهان گشاد
natural_image
Mechanical shaft component with a directional arrow indicating motion (no text or symbols)natural_image
Red and black compact vacuum cleaner with visible branding (no text or symbols on body)BKS 2226
FAAR
beko

- Vacuum Cleaner User Manual
- Please read this user manual first!
- Explanation of symbols
- CONTENTS
- Important instructions for safety and environment 4-5
- Your vacuum cleaner 6
- Use 7-8
- Cleaning and maintenance 8-9
- Important instructions for safety and environment
- General safety
- Compliance with the WEEE Directive and disposal of waste products
- Package information
- Your vacuum cleaner
- Technical data
- Use
- Intended use
- Attaching/removing the hose
- Attaching/removing the telescopic tube
- Attaching/removing the parquet/carpet brush
- Adjusting the parquet/ carpet brush
- Operation
- Adjusting the suction power
- Dust indicator
- Accessories
- Crevice tool
- Wide-mouth nozzle
- Switching off and parking the vacuum cleaner
- Vertical parking feature
- Horizontal parking feature
- Cleaning and maintenance
- Replacing the dust bag
- Cleaning the filters
- Motor protection filter
- Foam filter
- Storage
- Simwollaryň manylary
- Parket/haly sübsesini dakmak/aıyrmak
- Parket/haly sübsesini sazlamak
- Stavljanje/skidanje četke za parket/tepih
- Prilagođavanje četke za parket/tepih
- الفوهة العريضة
- سَرِى دهان گشاد
Brand : BEKO
Model : BKS 2226
Category : Vacuum Cleaner