
VCC 34118 WD - Vacuum Cleaner BEKO - Free user manual and instructions
Find the device manual for free VCC 34118 WD BEKO in PDF.

| Product Type | Upright Vacuum Cleaner |
| Brand | Beko |
| Model | VCC 34118 WD |
| Power Consumption | 1600 W (Nominal) / 1800 W (Max) |
| Supply Voltage | 220-240 V ~, 50/60 Hz |
| Dust Capacity | 2.1 L |
| Operating Radius | 6.5 m |
| Sound Level | 83 dBA |
| Filtration System | Motor Protection Filter + Air Outlet Filter |
| Dust Bag Type | Replaceable cloth dust bag |
| Accessories Included | Upholstery tool, Parquet/Carpet brush, 2-piece telescopic tube |
| Brush Adjustment | Yes (hard floor or carpet mode) |
| Parking Feature | Vertical and horizontal parking slots |
| Cable Rewind | Yes (button-operated) |
| Dust Indicator | Yes (mechanical indicator for bag fullness) |
| Safety Features | Thermal overload protection, automatic shut-off if clogged |
| Intended Use | Household use only |
| Weight | Approximately 5.5 kg (estimated) |
| Dimensions (HxWxD) | Approximately 350 x 280 x 220 mm (estimated) |
Frequently Asked Questions - VCC 34118 WD BEKO
User questions about VCC 34118 WD BEKO
0 question about this device. Answer the ones you know or ask your own.
Ask a new question about this device
Download the instructions for your Vacuum Cleaner in PDF format for free! Find your manual VCC 34118 WD - BEKO and take your electronic device back in hand. On this page are published all the documents necessary for the use of your device. VCC 34118 WD by BEKO.
USER MANUAL VCC 34118 WD BEKO
natural_image
Simple line drawing of a decorative pattern with circular motifs inside a square frame (no text or symbols)VCC34118WD
EN - TR - TH - SR - MK - SQ - RU
Please read this manual first!
Dear Valued Customer,
Thank you for preferring this Beko appliance. We hope that you get the best results from your appliance which has been manufactured with high quality and state-of-the-art technology. For this reason, please read this user manual and all other provided documents carefully before using the appliance and keep it as a reference for future use. If you hand over the appliance to someone else, give the user manual as well. Follow the instructions by paying attention to all the information and warnings in the user manual.
Remember that this user manual may also apply to other models. Differences between models are explicitly described in the manual.
Meanings of the Symbols
Following symbols are used in various sections of this manual:

Important information and useful hints about usage.

WARNING: Warnings against dangerous situations concerning the security of life and property.

Protection class for electric shock.

This product has been manufactured in environmental friendly modern plants without giving any harm to the nature.
CONTENTS
ENGLISH 04-11
| TÜRKÇE | 12-19 |
| İnş 20-27 | |
| СРПСКИ | 28-35 |
| МАКЕДОНСКИ | 36-43 |
| SHQIPTARE | 44-52 |
| RUSSIAN | 53-67 |
1 Important safety and environmental instructions
This section contains safety instructions that will help protect from risk of personal injury or property damage.
Failure to follow these instructions invalidates the granted warranty.
1.1 General safety
• This appliance complies with the international security standards.
• This appliance is not intended for use by persons (including children) with reduced physical, sensory or mental capabilities, or lack of experience and knowledge, unless they have been given supervision or instruction concerning use of the appliance by a person responsible for their safety.
- This appliance can be used by children aged from 8 years and above and persons with reduced physical, sensory or mental capabilities or lack of experience and knowledge if they have been given supervision or instruction concerning use of the appliance in a safe way and understand the hazards involved. Children shall not play with the appliance.
Cleaning and user maintenance shall not be made by children without supervision.
• Children should be supervised to ensure that they do not play with the appliance.
- If the supply cord is damaged, it must be replaced by the manufacturer or its agent or similarly qualified person in order to avoid hazard.
- Do not use it if the power cable or the appliance itself is damaged. Contact an authorized service.
- Your mains power supply should comply with the information supplied on the rating plate of the appliance.
• The mains supply of the appliance must be secured with a minimum 16 A fuse.
- Do not use the appliance with an extension cord.
- In order to prevent the power cable from getting damaged, make sure that it doesn't get stuck, twisted or rub against sharp surfaces.
1 Important safety and environmental instructions
- Do not touch the appliance or its plug when it is plugged if your hands are damp or wet.
- Do not pull the power cable when unplugging the appliance.
- Do not vacuum flammable materials and when vacuuming cigarette ashes make sure that it got cold.
- Do not vacuum water or other liquid materials.
- Protect the appliance from rain, humidity and heat sources.
- Never use the appliance in or near to combustible or inflammable places and materials.
- Unplug the appliance before cleaning and maintenance.
- Do not dip the appliance or its cable in water to clean it.
- Check the hose of the appliance regularly. Do not use if it is damaged and contact an authorized service.
- Do not attempt to dismantle the appliance.
- Only use the original parts or parts recommended by the manufacturer.
• The plug must be removed from the socket-outlet before cleaning or maintaining the appliance.
- If heavily used for cleaning dust such as cement or grout the dust indicator will lit earlier then expected, in such case replace the dust bag even it is empty.
- Do not use the appliance without filters; otherwise it can get damaged.
- Keep fingers, hair and loose clothing from moving parts and openings whilst using the vacuum cleaner.
- When vacuuming the stairs, the appliance should be located below the user.
- If your store the package material, keep it out of the reach of children.
1 Important safety and environmental instructions
1.2 Compliance with the WEEE Directive and Disposing of the Waste Product
This product complies with EU WEEE Directive (2012/19/EU). This product bears a classification symbol for waste electrical and electronic equipment (WEEE).
This symbol indicates that this product shall not be disposed with other household wastes at the end of its service life. Used device must be returned to official collection point for recycling of electrical and electronic devices. To find these collection systems please contact to your local authorities or retailer where the product was purchased. Each household performs important role in recovering and recycling of old appliance. Appropriate disposal of used appliance helps prevent potential negative consequences for the environment and human health.
1.3 Compliance with RoHS Directive
The product you have purchased complies with EU RoHS Directive (2011/65/EU). It does not contain harmful and prohibited materials specified in the Directive.
1.4 Package information

Packaging materials of the product are manufactured from recyclable materials in accordance with our National Environment Regulations. Do not dispose of the packaging materials together with the domestic or other wastes. Take them to the packaging material collection points designated by the local authorities.
2 Your vacuum cleaner
2.1 Overview
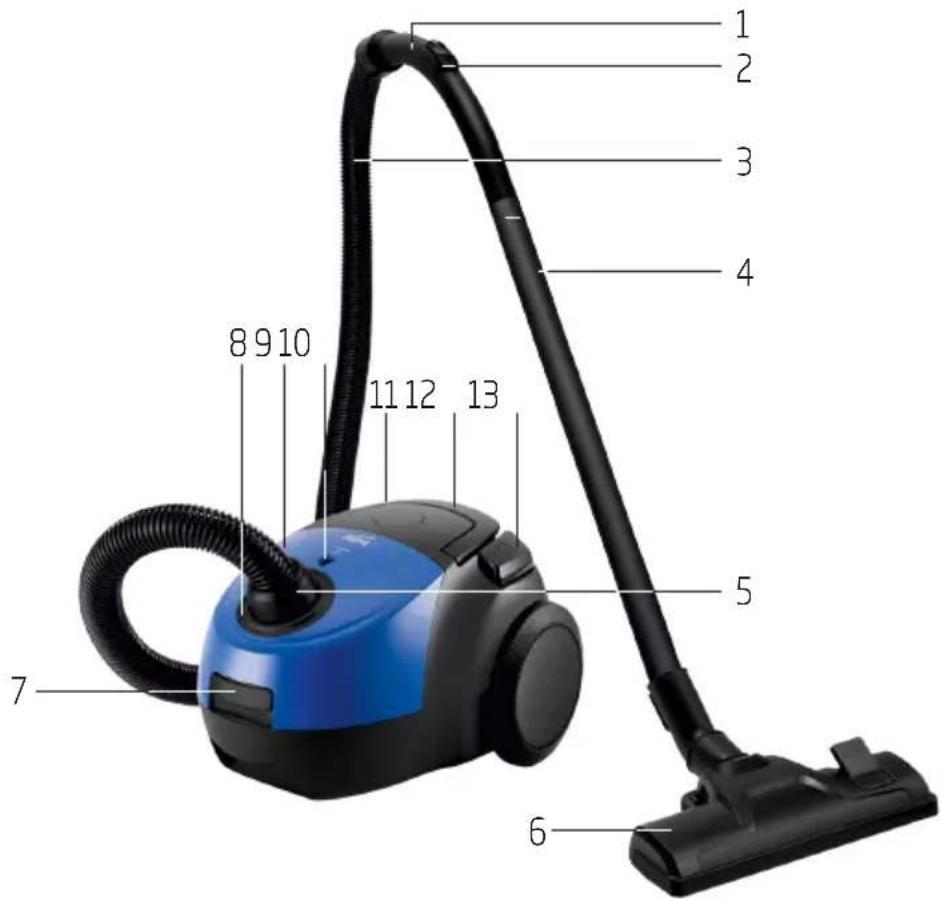
- Handle
- Vacuum adjustment control
- Hose
- 2 pieces plastic tube
- Suction nozzle
- Parquet/carpet brush
- Dust container opening latch
- Hose cap
- Top lid
- Dust indicator
- Power cable winding button
- Carriage handle
- On/Off button
2.2 Technical data
Power : 1600W Nom.
: 1800W
Supply voltage : 220-240V\~, 50-60Hz
Sound level : 83 dbA
Dust capacity : 2.1L
Operating radius : 6.5 m
Technical and design modification rights are reserved.
The values which are declared in the markings affixed on your appliance or other printed documents supplied with it represent the values which were obtained in the laboratories pursuant to the pertinent standards. These values may vary according to the usage of the appliance and ambient conditions.
3 Usage
3.1 Intended use
The appliance has been designed for household use and is not suitable for industrial use.
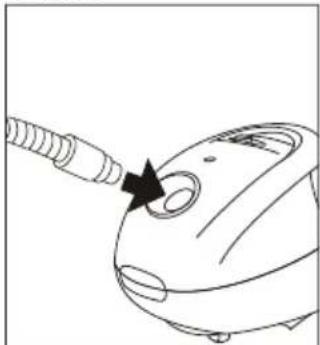
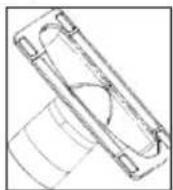
3.2 Attaching/removing the hose
- Insert the hose in the coupling on the appliance and press as far as it will go.
- To remove the hose press the buttons on the sides of the hose.
natural_image
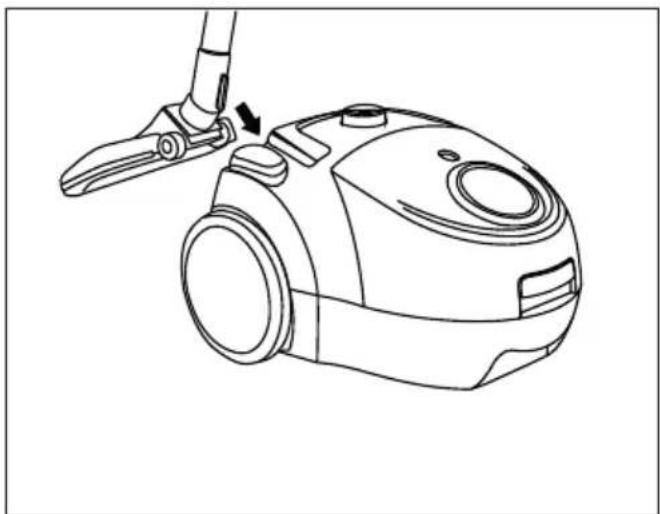
Line drawing of a vacuum cleaner with a probe inserted, showing the nozzle and handle (no text or symbols)3.3 Attaching/removing the parquet/carpet brush
You can install/remove the narrow end of the telescopic tube (4) from/to the parquet/carpet brush (6).
3.4 Adjusting the parquet/ carpet brush
Perform the following actions on the adjustment latch located on the parquet/carpet brush (6);
- Use "position for hard floors and parquet."
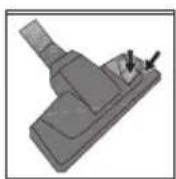
- Use "" position for rugs and carpets.

3.5 Operation
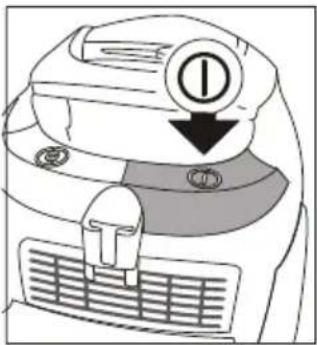
- Plug in the appliance after pulling the power plug located at the back of the appliance.
- Press the on/off button (13) to switch on your appliance.
natural_image
Diagram of a car interior with a numbered circular component and directional arrow (no text or symbols)3 Usage
3.5.1 Dust indicator
Dust indicator (10) indicates the fullness of the dust bag. When the indicator displays red zone more than 50%, replace the dust bag. (see 4.1).
3.6 Accessories
Upholstery tool
Suitable for cleaning the floorings, stair steps, inside of the cars, sofas, armchairs etc.

WARNING: Do not perform cleaning tasks using the end part of the handle (1).
3.7 Switching off and parking the appliance
- Switch off the appliance with the on/off button (13) and unplug it.
- Wind the power cable by pressing the power cable winding button (11).
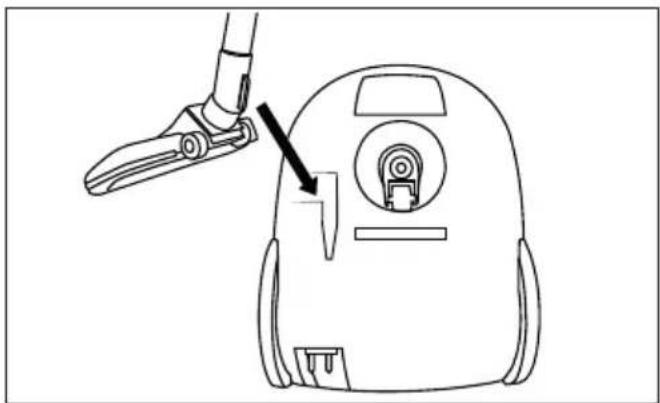
Vertical parking feature
Insert the parking hook of the parquet/carpet brush (6) into the parking groove located at the bottom section of the appliance.
natural_image
Line drawing of a vacuum cleaner with handle and mounting bracket (no text or symbols)Horizontal parking feature
Insert the parking hook of the parquet/carpet brush (6) into the parking groove located at the rear section of the appliance.
natural_image
Line drawing of a robotic arm gripping a small mechanical component (no text or symbols)4 Cleaning and care
Switch off and unplug the appliance before cleaning it.

WARNING: Never use gasoline, solvent, abrasive cleaning agents, metal objects or hard brushes to clean the appliance.
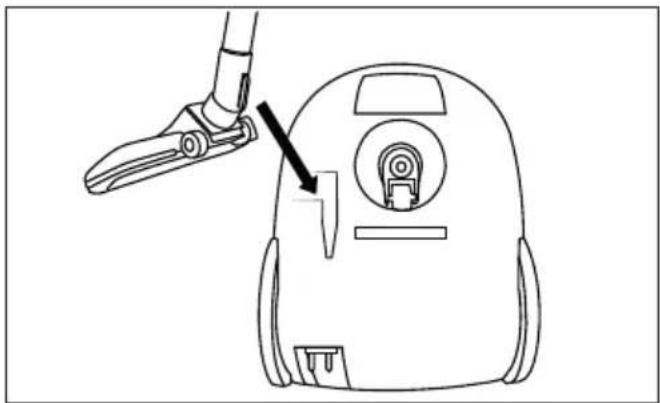
4.1 Replacing the dust bag
- Open the top lid by pressing the dust container opening latch (7).
- Remove the full dust bag from its guide, sliding it in upwards direction.

natural_image
Illustration of a hand inserting a card into a patient's ear with an upward arrow (no text or symbols)- Dispose the full dust bag.
- Insert the new dust bag holding it in the arrow direction indicated on it. Ensure that it is fully seated.
natural_image
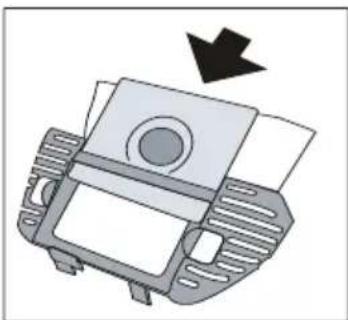
Diagram of a car front panel with a black arrow indicating direction (no text or symbols)- Close the appliance's top lid (9).

WARNING: Do not force the top lid to close it, otherwise the plastic sections can be damaged.

WARNING: Dust bags purchased from locations other than the authorized dealers and services are not original. Unoriginal dust bags have a lesser quality and they become torn in a shorter period and render your appliance nonoperational. Faults caused due to using unauthentic dust bags are not covered within the warranty.

WARNING: Do not wash the dust bag.
4.2 Cleaning the filters
natural_image
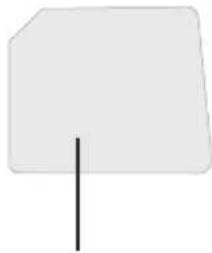
Simple geometric shape with a vertical line across it (no text or symbols)Motor Protection Filter
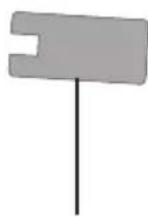
Air outlet filter
After each 5 dust bag replacement (may vary depending on the frequency and area of usage), clean the filters.

WARNING: Do not use appliances producing hot air such as hair dryer or heater to dry the filters.

WARNING: Do not install the filters without completely drying them; otherwise, smell of moisture may occur during use, water can leak from the back of the appliance or the filters may get damaged.

WARNING: Attach the filters into their places after they have dried.
4 Cleaning and care
4.2.1 Motor protection filter
- Open the top lid by pressing the dust container opening latch (7).
- Press down on the latch of the filter cassette to remove the cassette.
- Remove the motor protection filter from the cassette inside.

natural_image
Diagram of a hand holding a container with a brush and arrow indicating direction (no text or symbols)- After washing the motor protection filter under running water, wring it out slightly and let it dry (for 24 hours minimum).
4.2.2 Air outlet filter
.1 Push down the rear cover opening latch to open the cover.
2. Remove the micro filter placed on the back of the lid to rinse it.
3. After rinsing, gently squeeze the micro filter.
4.3 Storage
- If you do not intend to use the appliance for a long time, store it carefully.
- Unplug the appliance.
- Keep the appliance out of the reach of children.
4.4 Handling and transportation
- During handling and transportation, carry the appliance in its original packaging. The packaging of the appliance protects it against physical damages.
- Do not place heavy loads on the appliance or on the packaging. The appliance may get damaged.
- Dropping the appliance may render it non-operational or cause permanent damage.
natural_image
Line drawing of a vacuum cleaner with a probe inserted, showing the nozzle and handle (no text or symbols)natural_image
Illustration of a car front view with a numbered circular badge and directional arrow (no text or symbols)3 Kullanım
natural_image
Line drawing of a vacuum cleaner with handle and mounting bracket (no text or symbols)Yatay park özelliği
natural_image
Line drawing of a robotic arm gripping a device, with an arrow pointing to the handle (no text or symbols present)4 Temizlik ve bakım
natural_image
Illustration of a hand inserting a card into a patient's ear with an upward arrow (no text or symbols)natural_image
Mechanical component diagram showing a housing with a circular opening and a black arrow indicating direction (no text or symbols)natural_image
Diagram of a car interior showing a gridded tray and handle, with no visible text or symbolsไFKExK###V###y##ng###k###k###k###k###k###k###k###k###k###k
natural_image
Line drawing of a vacuum cleaner with a black arrow pointing to the handle (no text or symbols)natural_image
Illustration of a car front bumper with a warning symbol (no text or labels)3 การใช้งาน
natural_image
Line drawing of a vacuum cleaner with handle and mounting bracket (no text or symbols)natural_image
Line drawing of a robotic arm gripping a small device (no text or symbols)natural_image
Illustration of a hand holding a medical device with an upward arrow, no text or symbols presentnatural_image
Diagram of a car interior showing a vehicle with a circular vent and directional arrow (no text or symbols)natural_image
Simple geometric shape with a vertical line and a blank plane (no text or symbols)natural_image
Diagram of a hand holding a container with a brush inside, showing an arrow indicating direction (no text or symbols present)1 Important safety and environmental instructions
natural_image
Line drawing of a vacuum cleaner with a black arrow pointing to the handle (no text or symbols)3.3 Postavljanje/uklanjanje četke za parket/tepih
- Možete da postavite/uklonite uzak kraj teleskopske cevi (4) na/sa četku/-e za parket/tepih (6).
3 Upotreba
3.5.1 Indikator prašine
natural_image
Line drawing of a vacuum cleaner with handle and valve (no text or symbols)Funkcija horizontalnog parkiranja
Ubacite kuku za postavljanje četke za parket/tepih (6) u žleb koji se nalazi na zadnjoj strani uređaja.
natural_image
Line drawing of a robotic arm gripping a small device (no text or symbols)natural_image
Illustration of a hand holding a medical device with an upward arrow, no text or symbols presentnatural_image
Mechanical component diagram showing a housing with a circular opening and a black arrow indicating direction (no text or symbols)- Zatvorite gornji poklopac uređaja (9).

UPOZORENJE: Nemojte da zatvarate gornji poklopac na silu jer .se plastični delovi mogu oštetiti

UPOZORENJE: Kese za prašinu koje se ne kupuju kod ovlašćenih prodavaca i servisa nisu originalne. Takve kese za prašinu su nižeg kvaliteta i mogu se pocepati za kraći period čime što dovodi do toga da vaš uređaj bude van funkcije. Kvarovi izazvani korišćenjem neoriginalnih kesa za prašinu nisu pokriveni .garancijom

UPOZORENJE: Nemojte da .perete kesu za prašinu
4.2 Čišćenje filtera
natural_image
Simple geometric shape with a vertical line and rounded corners, no text or symbols present.Motor Protection Filter
natural_image
Diagram of a hand holding a brush inside a container with an arrow indicating direction (no text or symbols)- Nakon pranja filtera za zaštitu motora pod tekućom vodom, iscedite ga blago i ostavite ga da se osuši (minimalno 24 časa).
4.4 Prenos i transport
- Tokom prenosa i transporta, nosite aparat u njegovom originalnom pakovanju. Pakovanje aparata ga štiti od fizičkih oštećenja.
- Nemojte stavljati teške predmete na aparat ili njegovo pakovanje. Aparat se može oštetiti.
- Ako vam aparat ispadne, to može izazvati trajno oštećenje, odnosno aparat može postati nefunkcionalan.
natural_image
Line drawing of a vacuum cleaner with a probe inserted, showing the nozzle and handle (no text or symbols)You can install/remove the narrow end of the telescopic tube (4) from/to the parquet/carpet brush (6).
natural_image
Diagram of a car interior with a numbered circular component and directional arrow (no text or symbols)natural_image
Line drawing of a vacuum cleaner with handle and valve (no text or symbols)natural_image
Line drawing of a robotic arm gripping a device, with an arrow pointing to the component (no text or symbols present)natural_image
Illustration of a hand holding a medical device with an upward arrow indicating force or pressure (no text or symbols present)natural_image
Diagram of a car interior showing a vehicle with a circular component and a downward arrow indicating motion (no text or symbols)natural_image
Simple geometric shape with a vertical line and rounded corners, no text or symbols present.Филтер за заштита на моторот
natural_image
Diagram of a hand holding a brush inside a container with an arrow indicating direction (no text or symbols)natural_image
Line drawing of a vacuum cleaner with a probe inserted, showing the nozzle and handle (no text or symbols)natural_image
Illustration of a car front view with a numbered circular icon and directional arrow (no text or symbols)3 Përdorimi
3.5.1 Treguesi i pluhurit
natural_image
Line drawing of a vacuum cleaner with handle and mounting bracket (no text or symbols)Veçoria e parkimit horizontal
natural_image
Line drawing of a robotic arm gripping a device, with an arrow pointing to the component (no text or symbols present)natural_image
Illustration of a hand holding a heart-shaped device with an upward arrow, no text or symbols presentnatural_image
Mechanical component diagram showing a housing with a circular opening and a black arrow indicating direction (no text or symbols)natural_image
Diagram of a hand holding a cleaning brush inside a container, with an arrow indicating the brush's direction (no text or symbols present)natural_image
Simple line drawing of a decorative pattern with circular motifs inside a square frame (no text or symbols)VCC34118WD
RU
natural_image
Line drawing of a vacuum cleaner with a probe inserted, showing the nozzle and handle (no text or symbols)3 Использование
natural_image
Line drawing of a vacuum cleaner with handle and mounting bracket (no text or symbols)natural_image
Line drawing of a robotic arm gripping a device, with an arrow pointing to the handle (no text or symbols present)4 Очистка и уход
natural_image
Illustration of a hand holding a heart-shaped device with an upward arrow, no text or symbols presentnatural_image
Diagram of a mechanical component with a downward arrow indicating direction (no text or symbols present)natural_image
Two abstract geometric shapes: a white irregular shape and a gray rectangular signpost with a small V-shaped notch (no text or symbols)natural_image
Diagram of a hand holding a cleaning brush inside a trash bin (no text or symbols)(Suzhou Chunju Electric Co., Ltd., 902 West Chunshenhu Road, Huangqiao, Xiangcheng District, Suzhou, China, Tel: +86 512 65468852) Китай