HW2000 - Uncategorized Cocraft - Free user manual and instructions
Find the device manual for free HW2000 Cocraft in PDF.


| Product Type | Wallpaper Steamer/Stripper |
| Model | HW2000 (PS-ZP-20-UK / PS-ZP-20) |
| Power Consumption | 2000 W |
| Water Tank Capacity | 4 liters |
| Mains Voltage | 230 V AC, 50 Hz |
| IP Rating | IPX4 |
| Usage Time per Tank | Approximately 80 minutes |
| Safety Cut-off Temperature | 115 °C |
| Mains Lead Length | 2 meters |
| Hose Length | 3 meters |
| Steam Pad Size | 200 × 275 mm |
| Pressure Relief Valve | Yes, built-in safety feature |
| Thermostat | Regulates temperature and prevents overheating |
| Assembly | Connect hose to steam outlet, steam pad to hose, fill water tank |
| Operation | Plug in, wait ~15 min for steam, hold pad against wallpaper for 10 sec |
| Descaling | Required periodically using citric acid or commercial descaler |
| Safety Precautions | Do not point at electrical items, never open lid when hot, use RCD, place on level surface |
| Residual Water Drainage | Empty tank after use, store with empty tank |
| Compliance | Machinery Directive 2006/42/EC, EMC 2014/30/EU |
Frequently Asked Questions - HW2000 Cocraft
User questions about HW2000 Cocraft
0 question about this device. Answer the ones you know or ask your own.
Ask a new question about this device
Download the instructions for your Uncategorized in PDF format for free! Find your manual HW2000 - Cocraft and take your electronic device back in hand. On this page are published all the documents necessary for the use of your device. HW2000 by Cocraft.
USER MANUAL HW2000 Cocraft
REMOVES OLD WALLPAPER EASILY AND GENTLY WITHOUT CHEMICALS
Read the entire instruction manual carefully and make sure that you fully understand it before you use the equipment. Keep the manual for future reference.
Viktig information:
natural_image
Blue and white portable hair dryer with black hose and blue lid, placed on asphalt surface (no text or symbols visible)Art.no Model
18-3134
40-7022
PS-ZP-20-UK
PS-ZP-20
Ver. 20161021
Original instructions
Bruksanvisning i original
Originalbruksanvisning
Please read the entire instruction manual before using and save it for future use. We apologise for any text or photo errors and any changes of technical data. If you have any questions concerning technical problems please contact our Customer Service Department (see address on reverse).
Safety
- Before starting to use the tool, check that it is complete and undamaged. The tool or its accessories must not be used if they have been dropped or damaged in any way.
- The power lead should be checked regularly. If the power cable is damaged it can only be replaced by the retailer or qualified service technician.
- The nozzle of tool must not be pointed in the direction of electrical appliances or fittings.
- Never open the lid of the water tank or unscrew the hose during use or before the tool has cooled. Wait at least 5 minutes after the tool has been unplugged.
- Do not move the stripper by pulling the lead, use the handle.
- Do not stand on the tool and avoid standing on the hose.
- Keep the hose in order. If it should kink or become tangled, unplug the stripper at once and let it cool down before rectifying the fault.
- Make sure that the mains power at the socket is 230 V AC, that extension leads have an area of at least 1.5 mm ^2 and that an RCD is fitted.
- Do not cover or block the pressure relief valve.
- Place the wallpaper stripper on an even and level surface, otherwise it might overheat.
- Always hold the steam pad away from your face. Watch out for drops of water, especially when working over head height.
- Use only clean water and do not overfill.
- Never add detergent or other chemicals to the water.
- Never direct the steam towards people, animals or anything that might be damaged.
• Always unplug the tool from the wall socket after use and before cleaning.
- Never leave the tool unattended whilst it is plugged in.
- Never place the tool close to sources of heat such as fires, radiators, fan heaters, etc.
- The tool is fitted with a thermostat that regulates the temperature and prevents overheating. If the temperature continues to rise above working temperature, unplug the tool immediately. Send the tool in for service.
- Never cover the tool during or directly after use.
Product description
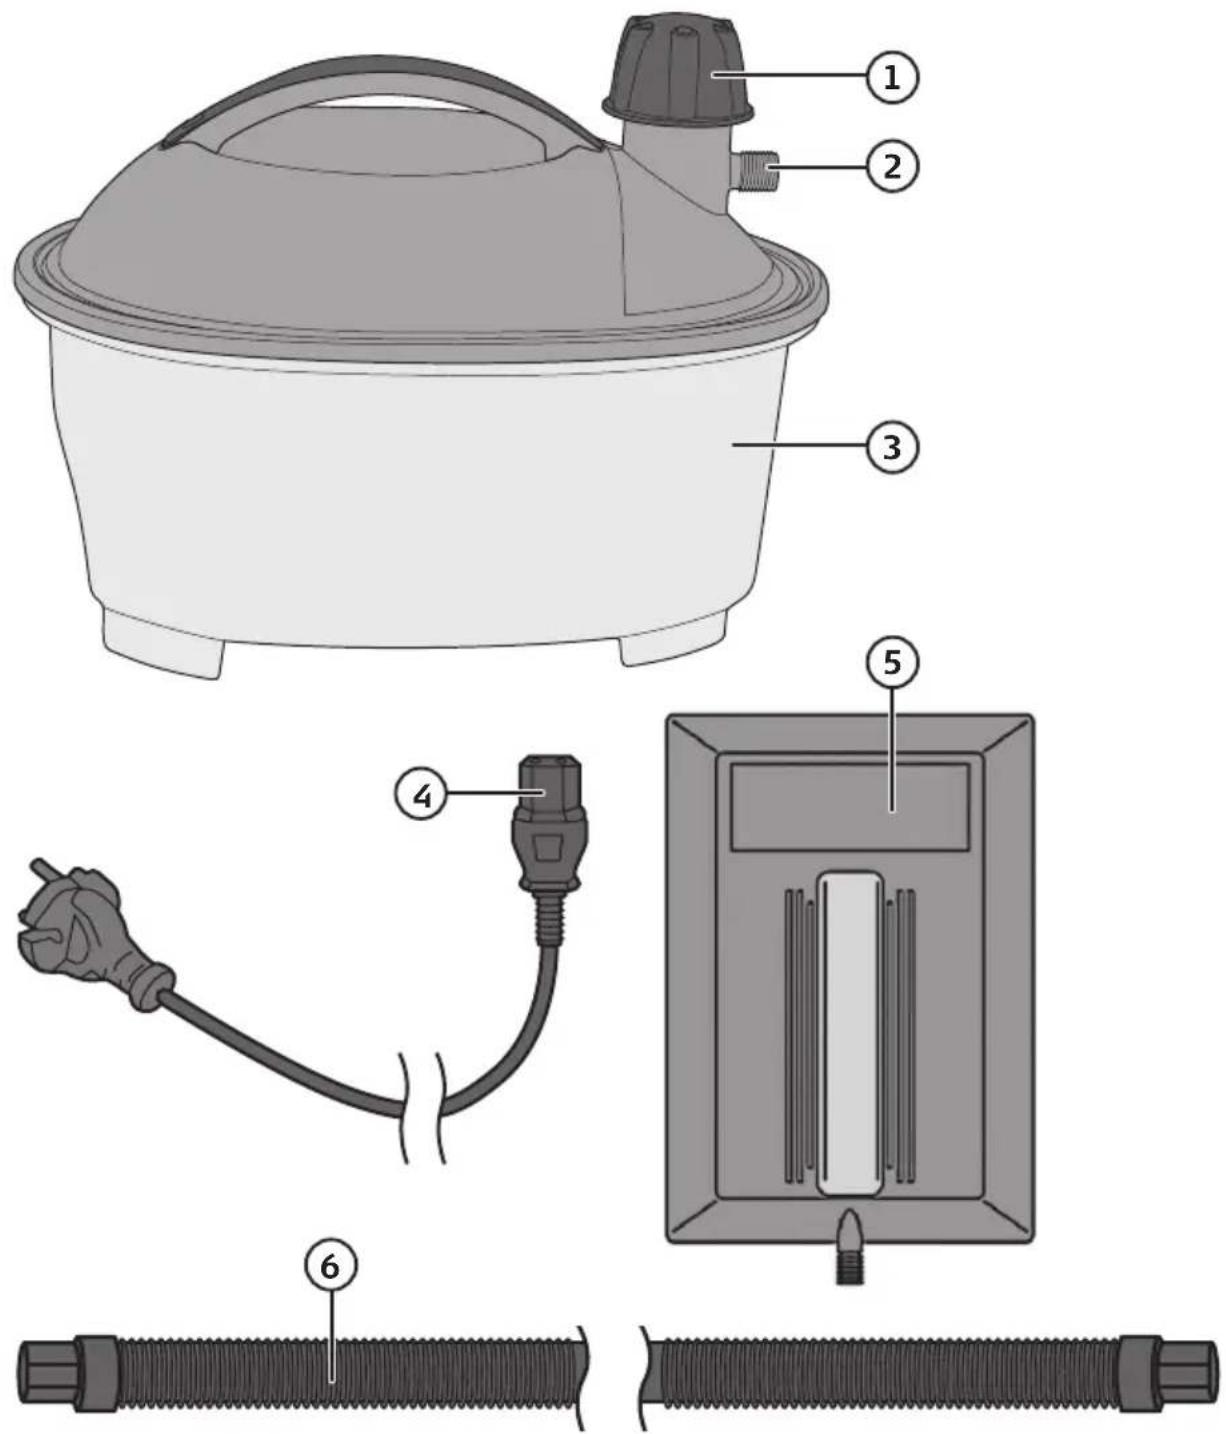
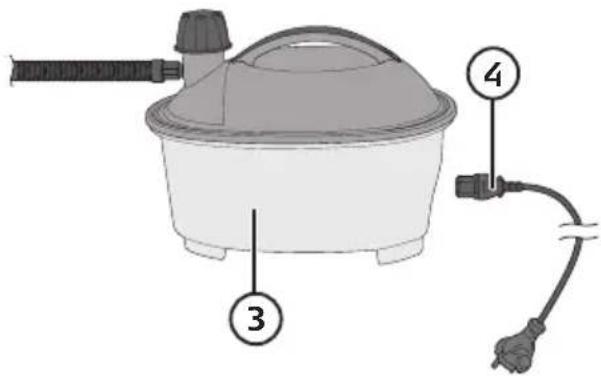
- Lid with pressure relief valve
- Steam outlet
-
Water tank
-
Mains lead
- Steam pad
- Hose
Assembly
Note: Always unplug the tool from the wall socket before changing accessories.
Assembly
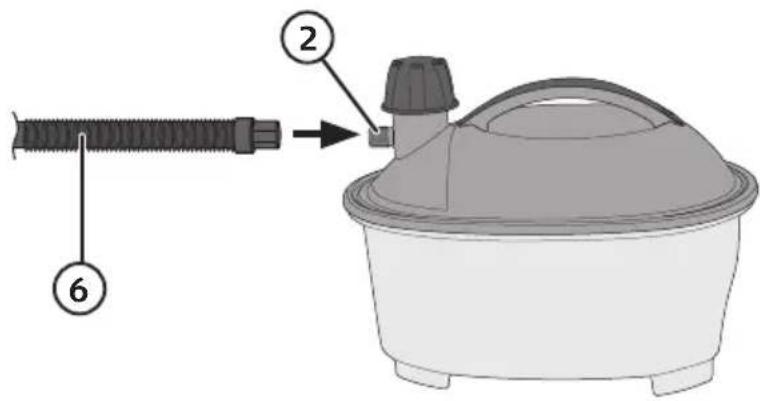
- Connect one end of the hose (6) to the steam outlet (2).
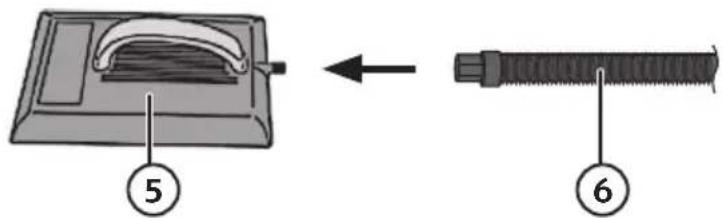
- Connect the steam pad (5) to the other end of the hose (6).
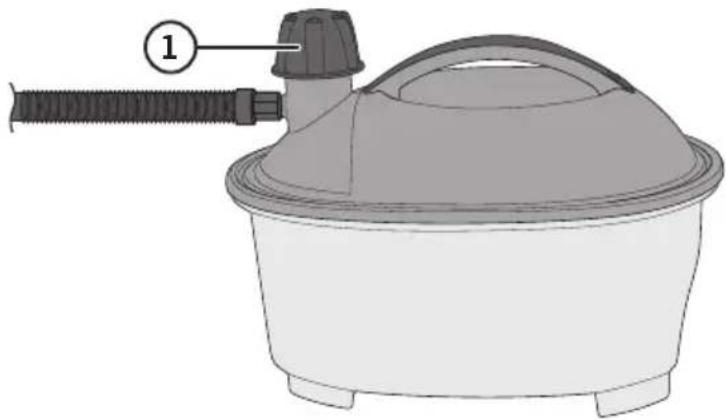
- Remove the lid (1). Fill the water tank with clean water up to the maximum level, no higher. Then replace the lid.
natural_image
Diagram of a portable air purifier with a hose and lid, labeled with number 1 (no text or symbols on the diagram itself)Note:
- Do not overfill the water tank and do not let the water level drop below the minimum mark.
- Do not use additives or chemicals.
Operation
Note: Make sure that all connections are tight before starting to use the stripper. Make sure that your power supply is 230 V AC, 50 Hz.
- Connect the mains lead (4) to the water tank (3).
- Connect the lead to the wall socket.
-
Steam will be produced after about 15 minutes, depending on the amount of water and its temperature. Sometimes a little water can seep out through the steam pad before it has turned into steam. This is quite normal.
-
After use, unplug the stripper from the wall socket.
-
Allow the tool to cool before moving or emptying it.
Removing wallpaper
Hold the steam pad against the surface for approximately 10 seconds. Move the steam pad slowly across the surface of the wallpaper. The wallpaper should now come off easily with the help of a scraper. Certain types of wallpaper can take longer to dislodge and might not come off at the first attempt.
Tip
When the water is low, unplug the tool and let the water tank cool for at least 5 minutes before taking off the lid and topping up the water level. Watch out for the steam! Similarly, when you have finished using the stripper, let it cool before emptying it. Always store the stripper with an empty tank.
Safety cut-off
A safety cut-off prevents the heating element from overheating if the water level drops too low. If the water stops boiling during use, it might be because of the safety cut-off. Wait 5 minutes before taking off the lid and topping up the water. The safety cut-off resets itself after 15 minutes, and work can be resumed.
Pressure relief valve
The wallpaper stripper is equipped with a pressure relief valve. If too much pressure builds up inside the tank, the relief valve allows steam and a little water to escape. Overpressure can be caused by the hose being blocked or overfilled. If this should occur; unplug the stripper from the wall socket and let it cool before checking the valve/hose. Under no circumstances must the pressure relief valve be blocked. A little water and steam might escape from the valve during normal use.
Unplug the stripper from the wall socket and wait at least 5 minutes before removing the hose or other accessory.
Descaling
- The appliance should be descaled as and when required, depending on how hard the water is and how often the stripper is used. Descaling agents such as citric acid can be found in any supermarket.
- Switch the stripper off and unplug it from the wall socket.
- Pour the descaling solution into the tank. One pint of descaling solution should be enough.
- Disconnect the hose and switch the stripper on.
- Allow the descaling solution to boil for about 5 minutes.
- Switch the stripper off and unplug it from the wall socket. Allow the solution to remain in the tank for about 10 minutes. Let both the tool and the solution cool down.
• Empty the tool and flush it out with clean water.
Responsible disposal
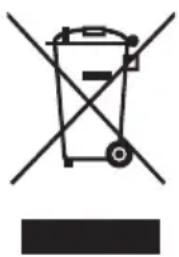
This symbol indicates that this product should not be disposed of with general household waste. This applies throughout the entire EU. In order to prevent any harm to the environment or health hazards caused by incorrect waste disposal, the product must be handed in for recycling so that the material can be disposed of in a responsible manner. When recycling your product, take it to your local collection facility or contact the place of purchase. They will ensure that the product is disposed of in an environmentally sound manner.
natural_image
Symbol of a trash bin crossed with no visible text or labelsSpecifications
Power 2000 W
Water capacity 4 litres
Mains supply 230 V AC, 50 Hz
IP class IPX4
Use from one tank Approx. 80 minutes
Safety cut-off At 115 °C
Mains lead 2 metres
Hose 3 metres
Steam pad 200 × 275 mm
Tapetborttagare
Art.nr 18-3134 Modell PS-ZP-20-UK
40-7022
PS-ZP-20
natural_image
Diagram of a portable stove or oven with a handle and labeled component (no text or symbols present)Obs:
Ta bort tapeter
natural_image
Symbol of a trash bin crossed with no visible text or labelsSpecifikationer
Effekt 2000 W
Vattenkapacitet 4 liter
Nätspänning 230 V AC, 50 Hz
IP-klass IPX4
Drifttid på en tank Cirka 80 minuter
- Lokk med overtrykksventil
- Damputgang
-
Vanntank
-
Strømkabel
- Dampplate
- Slange
Å komme i gang
natural_image
Diagram of a portable kitchen appliance with a handle and base, labeled with number 1 (no text or symbols on the device itself)Obs:
- Påse at vannivået i vanntanken er mellom maks. og min. merkene ved bruk.
• Vannet må ikke tilsettes kjemikaler.
Bruk
natural_image
Symbol of a trash bin crossed with no text or numbers, representing waste sorting or disposal (no text present)Spesifikasjoner
Effekt 2000 W
natural_image
Diagram of a portable shower unit with a hose and base, labeled with number 1 (no text or symbols on the device itself)Huom.!
Tapettien poistaminen
natural_image
Symbol of a trash bin crossed with no text or labels, accompanied by a black rectangular block below (no readable text or symbols)Tekniset tiedot
Teho 2000 W
natural_image
Symbol of a trash bin crossed out by two crossed lines, with no text or labels present.Technische Daten
Declaration of Conformity
Declares that this product complies with the requirements of the following directives and standards
Machinery directive 2006/42/EC
EN 60335-1:2012+A11
EN 60335-2-54:2008
+A11:2012
EN 62233:2008
EMC directive 2014/30/EU
EN 55014-1:2006/A1+A2
EN 55014-2:1997/A1+A2
EN 61000-3-2:2014
EN 61000-3-3:2013
Henrik Alfredsson
Manager Technique & Quality
Insjön, Sweden, 2016-10-21
Sverige
Postal 10 - 13 Market Place
Kingston Upon Thames
Surrey
KT1 1JZ
Deutschland
Kundenservice


- REMOVES OLD WALLPAPER EASILY AND GENTLY WITHOUT CHEMICALS
- Viktig information:
- Safety
- Product description
- Assembly
- Note:
- Operation
- Removing wallpaper
- Tip
- Safety cut-off
- Pressure relief valve
- Descaling
- Responsible disposal
- Specifications
- Tapetborttagare
- Obs:
- Ta bort tapeter
- Specifikationer
- Å komme i gang
- Bruk
- Spesifikasjoner
- Huom.!
- Tapettien poistaminen
- Tekniset tiedot
- Technische Daten
- Declaration of Conformity
- Sverige
- Deutschland
Brand : Cocraft
Model : HW2000
Category : Uncategorized