MPS533 - Mp3 player CURTIS - Free user manual and instructions
Find the device manual for free MPS533 CURTIS in PDF.


| Brand | Curtis |
| Model | MPS533 |
| Product type | MP3 Player |
| Memory capacity | 512 MB (internal) |
| Supported audio formats | MP1, MP2, MP3, WMA |
| Recording formats | WAV (microphone), WMA (Line In) |
| Equalizer | Normal, Rock, Jazz, Classical, Pop |
| Playback modes | Normal, Repeat All, Repeat One, Shuffle, Full Shuffle, Preview |
| A-B repeat | Yes |
| Lyrics display | Yes (LRC files) |
| Recording function | Built-in microphone and Line In input |
| Scheduled shutdown | Yes (adjustable: 2, 10, 30 min or off) |
| PC connection | High-speed USB (removable disk) |
| Operating systems | Windows 98/SE/ME/2000/XP (driver required for Win98) |
| Display | LCD matrix 132x32 pixels |
| Backlight | Multicolor (Yellow, Red, Cyan, Blue, Green, White, Purple, Auto) |
| Power supply | Alkaline battery (optional) |
| Temperature conditions | -5°C to 40°C |
| Care and cleaning | Avoid moisture, shocks, magnetic fields, solvents; clean with a dry cloth |
| Hearing safety | Set volume moderately; do not use while driving or walking |
| Menu languages | English & Korean, English & Japanese, English & European, English & GB5 |
Frequently Asked Questions - MPS533 CURTIS
User questions about MPS533 CURTIS
0 question about this device. Answer the ones you know or ask your own.
Ask a new question about this device
Download the instructions for your Mp3 player in PDF format for free! Find your manual MPS533 - CURTIS and take your electronic device back in hand. On this page are published all the documents necessary for the use of your device. MPS533 by CURTIS.
USER MANUAL MPS533 CURTIS
Operating Conditions 7
Accessories 8
Main Unit Interface 9
LCD Illustration 10
Battery (Optional) Information 11
Function Summary 12
General Functions 13
Menu Selection 13
Mode Selection 13
Lock Button -15
Playing Music 16
General Operation 16
Sound Effect Mode -17
Lyric Display 19
Play Mode 19
A-B Repeat 21


CONTENTS
Recording 23
Recording Settings----23
Recording Operation 24
Other Operations 27
Backlight Setting 27
Power Setting 29
LCD Contrast Setting 30
Language Setting 31
Deleting files 32
About Exit 33
USB Disk Application 34
About Version 35
How to copy songs and files to your player 36
Troubleshooting 37
Technical Specification 38
With reference to environmental protection 39
Precautions

Notice
Do not leave the player in a place subject to moisture or with temperatures higher than 40°C or lower than -5°C.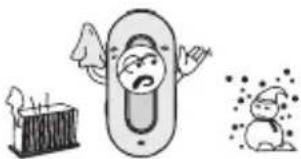 | Avoid heavily impacting the player. | Prevent other objects entering into the player.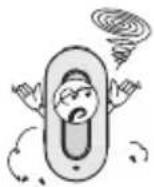 |
Do not place heavy articles on top of the player.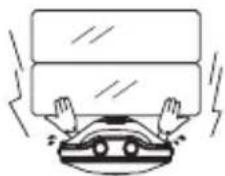 | Keep away from benzene, thinner, acid and other chemicals.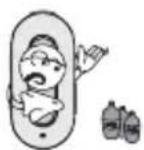 | Keep away from magnetic objects. |
Keep away from strong light or calorific instruments. | Do not expose the player to dusty environments.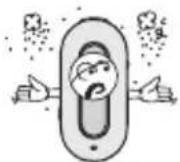 | Do not break, fix or attempt to dissemble the player by yourself. |


Precautions

Earphone Information
- Protect your hearing
- Always select a suitable listening volume.
- Do not turn the volume up too high.
- Place the earphones correctly, L stands for left and R stands for right. It will affect the timbre and dimensional sound if you wear the earphones the wrong way around.
- To avoid interference, please keep away from electromagnetic fields.
- Transportation safety
- Do not listen to music when driving.
- Do not listen to music when walking, running or during other potentially hazardous activities.

Operating Conditions
• External temperature: 5-30°C
- Moisture: 10 - 70%
Accessories

Accessories
ENGLISH


Earphones USB Cable Manual
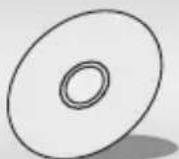


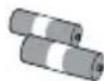
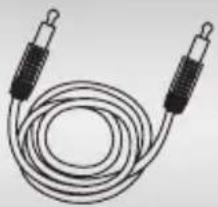
Drive disc Line in Cable Alkaline Battery (Optional)
Main Unit Interface

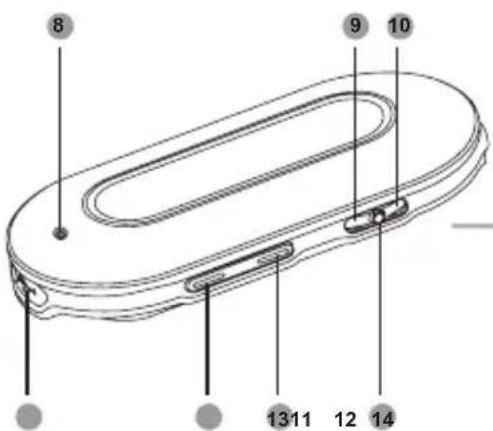
1 Earphone jacks
② LCD screen
3 Earphone line hole
4 Volume decrease
5 Volume increase
6 Hold button
7 Line in jack
8 Built in microphone
9 Skip track/forward
10 Previous track/backward
11 USB port
12 Power on/play/confirm/power off
13 A-B button
14 Menu button
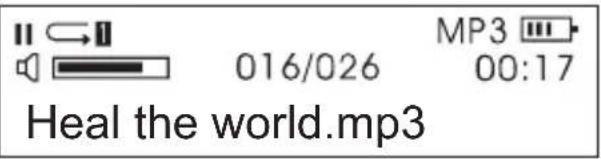
LCD Illustration

1 Play
2 Play mode
3 Current music
4 Sound effect mode
5 Hold
6 File format
7 Battery status
8 Volume
9 Play time
10 Music title

Please pay attention to the display of the LCD screen, it helps to operate the player correctly.
Battery (Optional) Information

Battery (Optional) Information

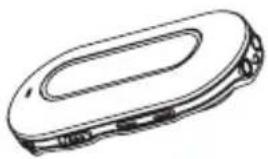
Do not use defective batteries, these can provide an unstable electric current.
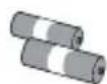

Remove the battery (optional) when you are not using the device for a prolonged period of time.

Do not attempt to recharge or heat up batteries. Batteries should be disposed of in an environmentally friendly manner.
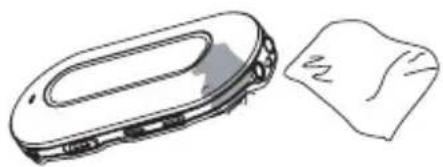
Should fluid escape from the battery (optional), wipe it away immediately to protect the player.
Function Summary
• Supports multi-audio formats
For example: MP1, MP2, MP3, WMA and so on.
- No USB driver required
Operated directly through "removable disc" of "my computer".
It does not require installation of any driver in WIN2000 or above.
• Record/ Repeat function
The MP3 Player can record voice by microphone and be saved as a voice file in WAV format. Sections can be repeated for language learning.
• 5 sound effect equalizers
Normal, Rock, Jazz, Classical, Pop.
- Multi-play modes
Normal, Repeat all, Repeat one, Random, Random all, Preview.
- Power OFF timer
Preserves battery (optional) life.
- Simple menu
Easy to use menu.


General Functions

Menu Selection
The menu can be divided into main menu and submenu. Press the Menu button to open the main menu. The menu can be selected by pulling Next/Last Music button.

Notice: The reference "press Menu button" later in this manual operates the same as showed in the diagram.

Mode Selection
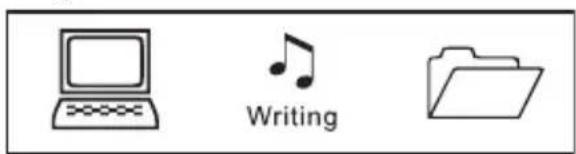
Different modes can be selected from the main menu. LCD screen displays as follows.
- Main Menu (press the Menu button)


General Functions
- Play mode
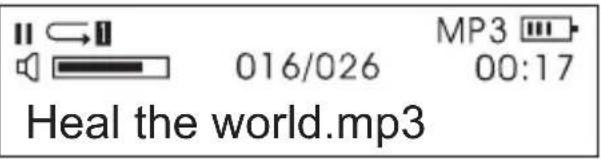
- Record mode
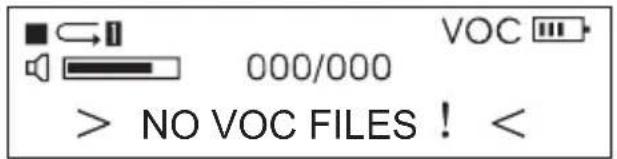
- Interface setting
- USB mode (connecting with PC)


General Functions

Lock Button

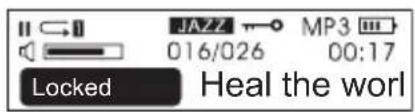
In any status, push the HOLD button in the direction indicated by the arrow to lock the buttons.
When the buttons are locked, the LCD screen displays as follows:


When buttons are locked When buttons are unlocked

- When buttons are locked, the buttons on the player will lose their functionality (When the player is OFF, it cannot be turned ON if the buttons are locked).
- When buttons are locked, data cannot be transferred via the USB connection. Data can only be put in when the buttons are unlocked.
Playing Music

General Operation
- Power ON / Play
Press the “▶” button and the player will turn ON after 3 seconds. In the Music mode, the player reads the default music automatically, but does not start playing. The left upper corner of LCD screen will display the “■” symbol. The player is in stop status. Press the “▶” button again to start playing, the left upper corner of the LCD screen will display the “▶” symbol and its music type, for example, MP3.
- Music Selection
Previous music button: select previous music. Holding, backward. Next music button: select next music. Holding, forward.
• Volume Control
Volume + : Volume increase Volume - : Volume decrease

In the stop status, the player will shut OFF automatically after the time set in "Setting/Power set" has elapsed.


Playing Music

Sound Effect Mode
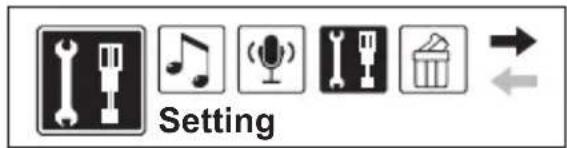
- Press the Menu button to enter the main menu, pull the Next Music button to select "Setting".
Pull the Next Music button to select

Notice: The reference "pull Next Music button" later in this manual operates the same as shown in this diagram.
The LCD screen displays as follows (the selected one displays black)
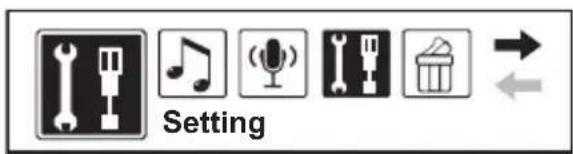
- Press the Menu button to confirm. Pull the Next Music button to select "EQ Set".

Playing Music
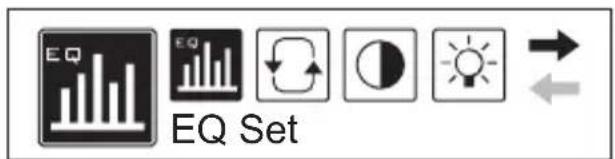
- Press the Menu button to confirm. The sound effects will switch by pulling the Next Music button. Press the Menu button to confirm the sound effect you need. The LCD screen displays as follows:

- There are 5 sound effects to select from. They are Normal, Rock, Jazz, Classical, Pop.
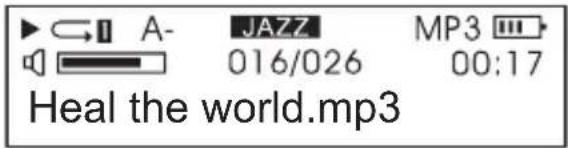
- After sound effect selection, the menu will return to the previous menu automatically. Pull the Next Music button; select "Exit" to return to the playing interface (the player will also return to playing interface automatically if there are no operations for 10 seconds). At that time, the LCD screen will display the selected sound effect mode as follows:
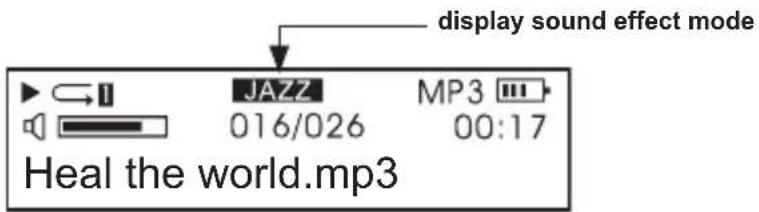
- The LCD screen displays sound effects: NORMAL, ROCK, JAZZ, CLASSICAL, POP


Playing Music

Lyric Display
The player supports "LRC" file. This enables music files and lyrics to be played and displayed synchronously.
- How can "Lyrics be displayed"?
Put the lyric file in the same directory with the music file. The lyric file must have the same name as the music file.
For example: if the file of the music title is "Yesterday once more.mp3", the file of Lyric should be "Yesterday once more.lrc".
• How to know the existence of Lyric files.
The player examines for Lyric files automatically. If there is a Lyric file, the music file and Lyric file are display synchronously.

Play Mode
- Press the Menu button to enter the main menu. Pull the Next Music button to select "Setting". The LCD screen displays as follows (the selected one displays black).
Playing Music
- Press the Menu button to confirm. Pull the Next Music button to select "Play mode". The LCD screen displays as follows:

- Press the Menu button to confirm. The play mode will switch by pulling the Next Music button. Press the Menu button to confirm the play mode you need. The LCD screen displays as follows:
![[Normal]](/content/2026/05/814288/images/bb5987451b8539f29e4a617e841c69b41f91677d68d052dca6153f7e9d6822e7.jpg)
- There are 6 play modes for you to select from. They are:

-20-

Playing Music
- After selecting play mode, the menu will return to the previous menu automatically. Pull the Next Music button and select "Exit" to return to the playing interface (the player will also return to the playing interface automatically if no operations are made for 10 seconds). At this time, the LCD screen will display the selected play mode as follows:

- In stop status, pressing the A-B button can also switch the play mode directly.

A-B Repeat
- When playing music, press the A-B button to select the start point. The LCD screen displays as follows:
Playing Music
- Press the A-B button again to select the end point. The LCD screen displays as follows:

- Press the Play button and the player will play the set repeat period. Press the A-B button to cancel the repeat function.
- Repeat the steps above to reset Repeat.
- The repeat of a Recorded file operates the same as in the above procedure.
-22-

Recording
The player has a record function, it can transfer recorded voice files to .WMA file.

Recording Settings
- Press the Menu button to enter the main menu. Pull the Next Music button to select "Setting". The LCD screen displays as follows:

- Press the Menu button to confirm. Pull the Next Music button to select "Record Set". The LCD screen displays as follows:

- Press "Record Set" to set up source, sample, encoder, channel and so on. The LCD screen displays as follows:
![[Source] C](/content/2026/05/814288/images/5f8dd875578d5d44cab9bd92319390ab33f0e464cab4bca6df6bae36adc0b276.jpg)
Recording
- Pull the Next Music button to switch among options. Press the Menu button to confirm an option. Take "source" as an example, when pressing the Menu button, "Microphone" will switch to "Line in". The LCD screen displays as follows:
![[Source] MIC](/content/2026/05/814288/images/298c9ad448c9f74951586fc25822f92dc4f72351bea576199f0fda493e92d815.jpg)

Recording Operation
A. Voice Record: Recording External Voice
- Press the Menu button to enter the main menu. Pull the Next Music button to select "Voice". The LCD screen displays as follows:

- Press the Menu button to confirm. The LCD screen displays as follows:

-24-

Recording
- Press the A-B button to start recording. The LCD screen displays as follows:

- During recording, press the Play button “▶” to pause. The left upper corner of the LCD screen displays a pause symbol. Press the Play button again to continue recording.

- The player saves the recorded file as .WAV format automatically.
- The recorded files will be saved in the VOICE folder. The files will be named numerically increasing by one each time a new file is saved. Do not remove .WMA file in the folder to a subdirectory, this may cause damage to the player.
- During recording, press the A-B button to stop. It will transfer to playing the recorded file automatically. The A-B Repeat feature operates the same as when playing music.
- Exit "recording" and "recorded file playing": press the Menu button to enter the main menu and pull the Next Music button to select "Play Music"
Recording
B. Line in Recording: Recording from other audio equipment
- Connect the LINE OUT Jack of the external equipment (MD player, CD player and so on) to the LINE IN jack of the player, as illustrated:
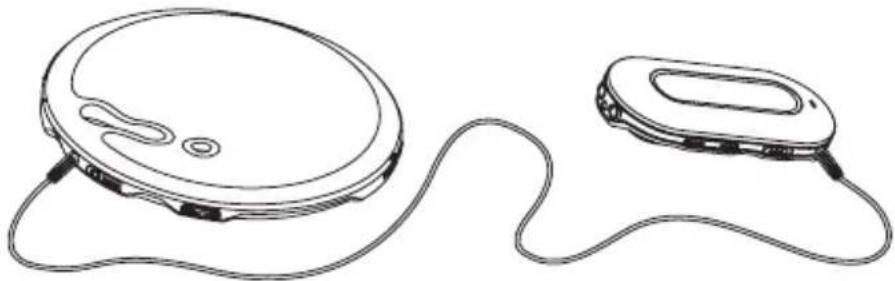
- In "Record set", select "LINE-IN" of "Source". Exit the Record mode.
- When the external equipment {recorder, CD player and so on} outputs audio signal (eg: music), press the A-B button simultaneously to start recording.
- The remainder of the procedure operates the same as Microphone record. Ensure that audio input is of a suitable volume. It is suggested to listen to a short recorded sample to ensure it is sufficiently loud and there is no distortion.

- Ensure that the battery (optional) is fully recharged.
- If there is no space to record new files, delete other files to create sufficient space.

Other Operations

Backlight Setting
- Backlight Colour Setting
- Press the Menu button to enter the main menu, pull the Next Music button to select "Setting".
- Press the Menu button to confirm. Pull the Next Music button to select "Backlight colour". The LCD screen displays as follows:
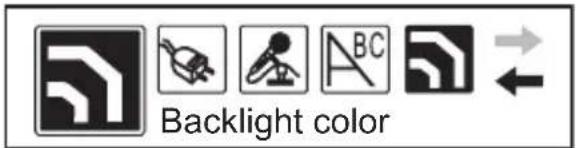
- Press the Menu button to confirm. The LCD screen displays as follows:

- Y represents Yellow, R represents Red, C represents Cyan, B represents Blue, G represents Green, W represents White, P represents Purple, A represents Auto.
- Press the Next Music button to select the colour you want. Press the Menu button to confirm.
Other Operations
- Backlight Time Setting
- Press the Menu button to enter the main menu, pull the Next Music button to select "Setting".
- Press the Menu button to confirm and pull the Next Music button to select "Backlight". The LCD screen displays as follows:

- Press the Menu button to confirm. The LCD screen displays as follows:

- Pull the Next Music Button to select the backlight time required. Press the Menu button to exit.
-28-

Other Operations

Power Setting

The "Power Set" means that in stop status, the player will shut down automatically to preserve the battery (optional), if there is no operation for some time.
- Press the Menu button to enter the main menu, pull the Next Music button to select "Setting".
- Press the Menu button to confirm and pull the Next Music button to select "Power Set". The LCD screen displays as follows:
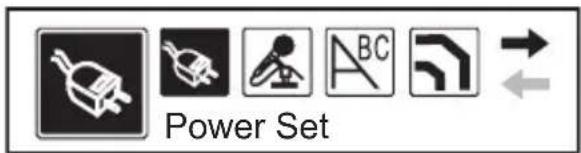
- Press the Menu button to confirm. The LCD screen displays as follows:

- Pull the Next Music Button to select the required time. Press the Menu button to exit.
Other Operations

LCD Contrast Setting
- Press the Menu button to enter the main menu. Pull the Next Music button to select "Setting".
- Press the Menu button to confirm and pull the Next Music button to select "Contrast". The LCD screen displays as follows:

- Press the Menu button to confirm. The LCD screen displays as follows:

- Pull the Next Music Button to select the Contrast level required. Press the Menu button to exit.
-30-

Other Operations

Language Setting
- Press the Menu button to enter the main menu, pull the Next Music button to select "Setting".
- Press the Menu button to confirm and pull the Next Music button to select "Language". The LCD screen displays as follows:

- Press the Menu button to confirm. The LCD screen displays as follows:

-
Pull the Next Music Button to select the language required. Press the Menu button to exit.
-
The player supports ENGLISH & KOR, ENGLISH & JAP, ENGLISH & EUR, ENGLISH & GB5 and so on. The menu will be the relative language you choose.
- If the music title is in English, while the language you select is not English. The player will display the music title as disorderly codes.
Other Operations

Deleting files
- Press the Menu button to enter the main menu. Pull the Next Music button to select "Del".

- Press the Menu button to confirm and pull the Next Music button to select "Delete music files". The LCD screen displays as follows:
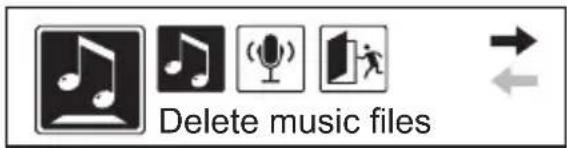
- In this menu, you can select the file types you want to delete. MP3 music files, or WAV recorded files.
-
In the "Del" interface of the player, the default operation is "NO" to prevent accidental deletion.
-
Pull the Next Music button to select the file you need to delete, press the A-B button to switch to "YES" and press "→" to delete the file.
-
Exit "Del" status: press the Menu button and return to the previous interface, press Next Music button and select "Exit".


Other Operations

About Exit
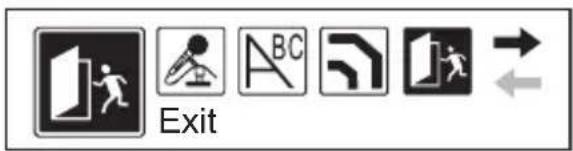
During the non-playing status, press the Menu button in any menu (except the main menu) to return to the previous interface. Pull the Next Music button and select "Exit" to exit. For example, to exit "Setting", the LCD screen displays as follows:
Other Operations

USB Disk Application
The player can be used as a USB disk under Windows98 operating system (after the driver has been installed), for Windows2000 operation system and above (no need to install driver).
When connecting with a PC, there are three Modes.
- Waiting

- Downloading
- Uploading


Ensure to remove the USB disk safely when disconnecting the player from the PC. Do not remove the player whilst transferring information in case of any damage to the unit or files.


Other Operations

About Version
- Press the Menu button to enter the main menu and pull the Next Music button to select "About". The LCD screen displays as follows:



About

- Press the Menu button to confirm. You may see the version information of the player moving from the top down. The LCD screen displays as follows:
VER: 2.611
INT: 512MB
Other Operations

How to copy songs and files to your player
ENGLISH
The CD driver supplied with the MP3 player will NOT be required if your PC is using the Windows XP or 2000 operating system (the CD is only needed if using Windows 98). For quick set up please follow the instructions below.
- Connect the MP3 player to the USB cord and insert into the USB slot of your PC.
- The PC should recognize the MP3 player and will pop up a New Hardware Found window on the screen.
- By viewing your disk drives under "My Computer" on the PC desktop, you should now have a new drive named Removable Disk followed by the drive letter.
- Using the Windows Explorer application, music files from your PC can now be copied to this "Removable Disk" drive and the files will be saved onto the MP3 player.
- To do this, find the Windows Explorer application (usually under 'accessories' found under all programs in your start menu. You can then simply drag and drop your music files from your PC folder into the "Removable Disk" drive. Refer to the Windows Help application on your PC for instructions on copying files.
Please note this MP3 player does not contain software to enable downloads or copying of music of any kind. You must have music files on your PC in order to copy them onto this MP3 player. Please also note that the MP3 player will only recognize .MP3 or .WMA files. It will not read files such as .WAV. Files that are encrypted with DRM (digital rights management) such as files purchased off the internet, only work with DRM capable models (Depend on model).
Troubleshooting
| No power supply | Ensure the battery (optional) is properly loaded. Ensure that the power is ON. |
| No sound form the earphones | Ensure that the volume has not been adjusted to the lowest position and the earphones are well connected.Ensure that the earphones are clean.Damaged MP3 files may produce a different degree of noise or may even be unplayable. Please keep the file intact. |
| The LCD screen displays disorderly codes | Ensure to select the correct language. |
| Files cannot be downloaded | Check if the USB cable has been damaged.Check if the player has been well connected with the PC USB port.Ensure that driver has been installed properly. Check that there is sufficient memory space. |
| The memory capacity displaying in the operation system is different from the standard capacity | The software of the player uses part of the memory. Therefore, the memory capacity displaying may be less than the standard capacity. |
Technical Specification
| Display Screen Matrix (132*32) LCD | ||
| USB Interface High Speed | USB (Read 1000K Byte, Write 800K Byte) | |
| Memory Capacity | ||
| Record | Sample Rate 8KHz | |
| Record Format WMA(32K bps) | ||
| Maximum Record Time 5 Hours | ||
| MP3. WAV | Maximum Earphone Output 8K bps-320K bps | |
| Bit Rate 5K bps-384K bps | ||
| Frequency Response 20Hz-20KHz | ||
| Signal/Noise Ratio 85dB | ||
| Decoding Format MP1, MP2, MP3, WMA | ||
| Operating Temperature -5°C ~ 40°C | ||
| Language Support | ENGLISH & KOR, ENGLISH & JAP, ENGLISH & EUR, ENGLISH & GB5 | |
| Operation System WIN98/SE/ME/2000/XP(WIN2000 and above no driver needed) | ||
With reference to environmental protection

Packing materials are raw materials and can be used again.
Keep packing materials separate. For more information about recycling contact your local administration.
Old devices do not belong in the domestic refuse!
Dispose of old devices responsibly, and contribute to environmental protection.
Your local administration will inform you about collecting points and opening times.

Old batteries do not belong in the domestic refuse!
Dispose of old batteries accordingly and contribute to environmental protection.
Your local administration will inform you about collecting points and opening times.
INHALT

Line in Kabel Alkaline Batterie (Optional)

-16-

Musikwiedergabe
-20-

Musikwiedergabe
-22-

Aufnahme

Interface principal 8
Illustration Ecran LCD 9

Illustration Ecran LCD



- Mode multi-play (lecture multiple)

Fonctions Usuelles
- Mode lecture


Mode Lecture
-20-

Mode Lecture
-22-

Mode Enregistrement


Funciones Generales
-20-

Grabación

Auricolari Cavo USB Manuale


Disco Drive Cavo d'ingresso Batteria alcalina (optional)

1 Jack auricolari
② Display LCD
3 Ingresso auricolari
4 Abbassa Volume
5 Aumenta volume
6 Tasto Hold
7 Jack d'ingresso
• Supporta formati multi-audio
Ad esempio: MP1, MP2, MP3, WMA etc.
Normale, Rock, Jazz, Classica, Pop.
Riproduzione Musica
ITALANO
-20-

Riproduzione Musica

-22-

Registrazione

- Scaricare
- Fare uploading

- ACCESSORIES 8
- MAIN UNIT INTERFACE 9
- LCD ILLUSTRATION 10
- BATTERY (OPTIONAL) INFORMATION 11
- FUNCTION SUMMARY 12
- GENERAL FUNCTIONS 13
- PLAYING MUSIC 16
- CONTENTS
- RECORDING 23
- OTHER OPERATIONS 27
- TROUBLESHOOTING 37
- TECHNICAL SPECIFICATION 38
- WITH REFERENCE TO ENVIRONMENTAL PROTECTION 39
- PRECAUTIONS
- NOTICE
- EARPHONE INFORMATION
- OPERATING CONDITIONS
- ACCESSORIES
- MAIN UNIT INTERFACE
- LCD ILLUSTRATION
- BATTERY (OPTIONAL) INFORMATION
- FUNCTION SUMMARY
- GENERAL FUNCTIONS
- MENU SELECTION
- MODE SELECTION
- LOCK BUTTON
- PLAYING MUSIC
- GENERAL OPERATION
- POWER ON / PLAY
- MUSIC SELECTION
- VOLUME CONTROL
- SOUND EFFECT MODE
- LYRIC DISPLAY
- PLAY MODE
- A-B REPEAT
- RECORDING
- RECORDING SETTINGS
- RECORDING OPERATION
- VOICE RECORD: RECORDING EXTERNAL VOICE
- LINE IN RECORDING: RECORDING FROM OTHER AUDIO EQUIPMENT
- OTHER OPERATIONS
- BACKLIGHT SETTING
- BACKLIGHT COLOUR SETTING
- BACKLIGHT TIME SETTING
- POWER SETTING
- LCD CONTRAST SETTING
- LANGUAGE SETTING
- DELETING FILES
- ABOUT EXIT
- USB DISK APPLICATION
- WHEN CONNECTING WITH A PC, THERE ARE THREE MODES
- ABOUT VERSION
- HOW TO COPY SONGS AND FILES TO YOUR PLAYER
- WITH REFERENCE TO ENVIRONMENTAL PROTECTION
- INHALT
- MUSIKWIEDERGABE
- AUFNAHME
- ILLUSTRATION ECRAN LCD
- FONCTIONS USUELLES
- MODE LECTURE
- MODE ENREGISTREMENT
- FUNCIONES GENERALES
- GRABACIÓN
- RIPRODUZIONE MUSICA
- REGISTRAZIONE
Brand : CURTIS
Model : MPS533
Category : Mp3 player