
Ensemble - Hi-Fi System Apogee - Free user manual and instructions
Find the device manual for free Ensemble Apogee in PDF.


| Product Type | Thunderbolt™ 2 Audio Interface |
| Brand | Apogee |
| Model | Ensemble |
| Analog-to-Digital Conversion | Up to 24-bit/192kHz |
| Playback | Up to 32-bit via ESS Sabre32 DAC |
| Total I/O | 30 inputs, 34 outputs |
| Microphone Preamps | 8 Advanced Stepped Gain with phantom power |
| Instrument Inputs | 4 rear panel (combi), 2 front panel (Hi-Z guitar) |
| Headphone Outputs | 2 front panel (1/4" stereo) |
| Digital I/O | Yes (via Thunderbolt) |
| Connectivity | 2 Thunderbolt 2 ports for daisy-chaining |
| Display | 2 high-resolution OLED screens |
| Control Software | Apogee Maestro (Mac app) |
| Included Accessories | 3-pin IEC power cable, rubber feet, Quick Start Guide, Warranty Booklet |
| Power Supply | AC via included IEC cable |
| Operating System | Mac OS X 10.9.3 or later |
| Memory Requirement | 4GB RAM minimum, 8GB recommended |
| Registration | www.apogeedigital.com/register |
Frequently Asked Questions - Ensemble Apogee
User questions about Ensemble Apogee
0 question about this device. Answer the ones you know or ask your own.
Ask a new question about this device
Download the instructions for your Hi-Fi System in PDF format for free! Find your manual Ensemble - Apogee and take your electronic device back in hand. On this page are published all the documents necessary for the use of your device. Ensemble by Apogee.
USER MANUAL Ensemble Apogee
Ensemble Product Tour....6
Getting Started....8
System Requirements 8
Install Ensemble Software....8
Apogee Maestro....8
Connect Ensemble to your Computer....9
Powering the unit On/Off 10
Update Ensemble's Firmware 11
To Play Sound Out....12
Setting Up Ensemble with your DAW 13
Connect Speakers ....16
Connect Headphones....17
To Get Sound In....18
Select the Input Source 19
Adjust the Input Gain 20
Toggling Phantom Power....21
Monitoring the Input Signal 22
Using your DAW to Monitor 22
Using Maestro's Mixer for Direct Monitoring 23
Additional Support 26
Overview
Introduction
Apogee Ensemble is the all-in-one Thunderbolt™ 2 audio interface offering unsurpassed sound quality, lowest latency performance and the most comprehensive studio functionality ever. Ensemble includes 8 Advanced Stepped Gain mic preamps, monitor controller functionality including talkback, front panel Guitar I/O, two headphone outputs and digital I/O for a total of 30 x 34 I/O. Blending acclaimed innovations, groundbreaking new features and an effortless user interface, Ensemble frees you to capture inspiration when creative lightning strikes.
Features
- Thunderbolt™ 2 Mac audio interface
- Analog-to-digital conversion (ADC) for recording up to 24-bit/192kHz
- Proprietary Thunderbolt audio driver and ESS Sabre32 DAC offer full 32-bit playback
- Groundbreaking low latency performance
- Core Audio-optimized hardware DMA Engine frees your Mac CPU
- 2 high-resolution OLED displays show levels and settings
- Input select buttons and controller knob for convenient selection of parameters and settings
- 4 assignable buttons to control:
- Talkback mic (built-in or external)
- Output settings such as speaker set selection, mute, dim, sum to mono
- Complete input/output control with Apogee's Maestro software
- Works with Pro Tools, Logic, Ableton and any Core Audio compliant app on Mac
- Designed in California – Assembled in the U.S.A.
Package Contents
The following items are included in the box with Ensemble:
Ensemble
3-pin IEC power cable
Rubber feet
Quick Start Guide
Warranty Booklet
Register your product
- Access Apogee's expert Technical Support for free
- Receive important product update information by email
• Take the Customer Satisfaction Survey for a chance to win Apogee gear!
Register now: www.apogeedigital.com/register
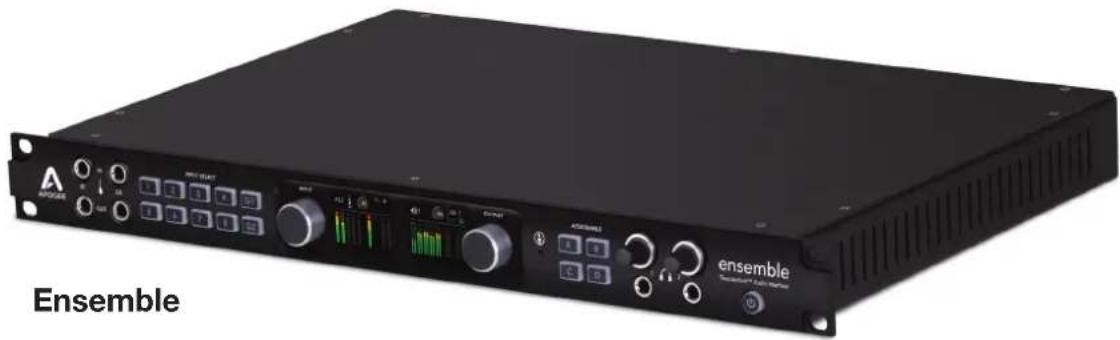
natural_image
Black electronic audio workstation with control knobs and a labeled 'Ensemble' button (no readable text beyond labels)


3-pin IEC power cable Quick Start GuideRubber feet Warranty Booklet
Ensemble Product Tour
Front Panel
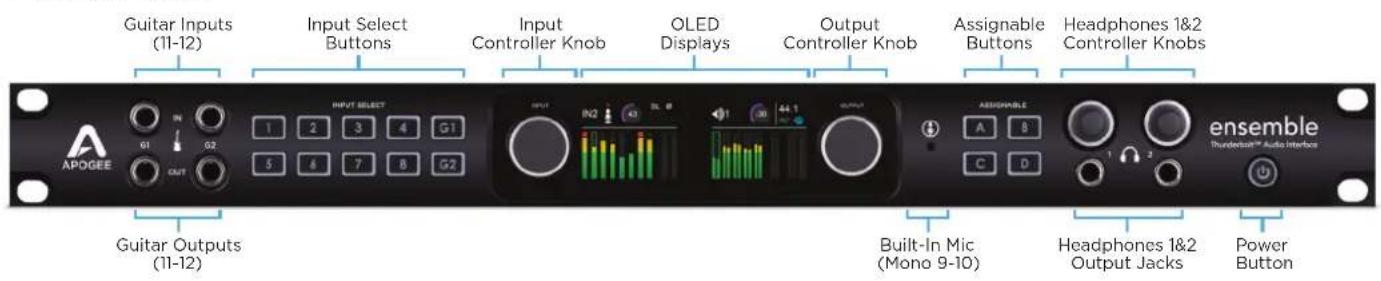
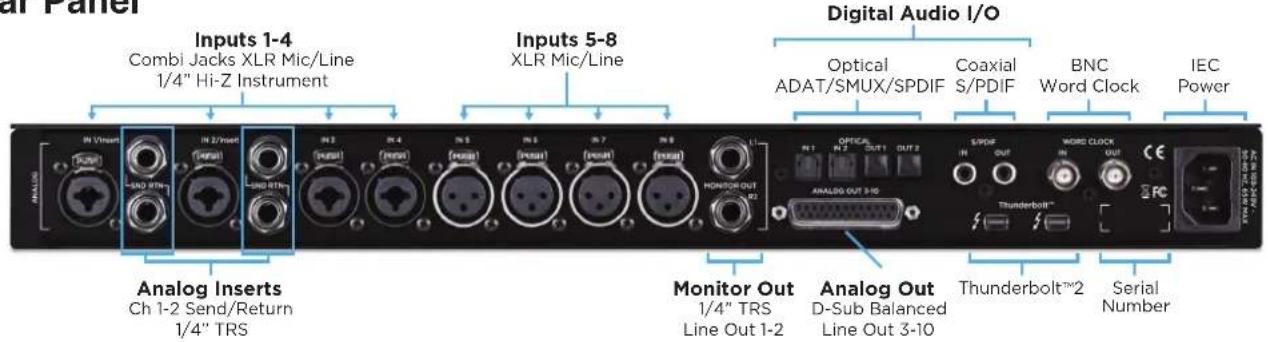
Rear Panel
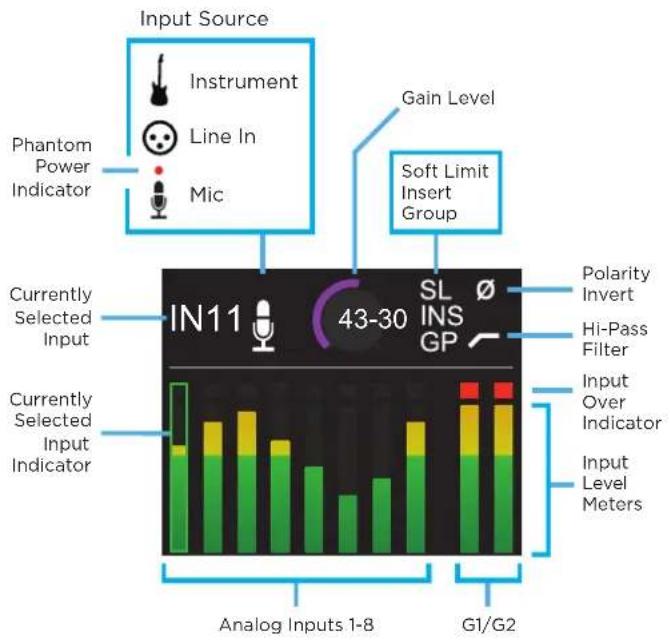
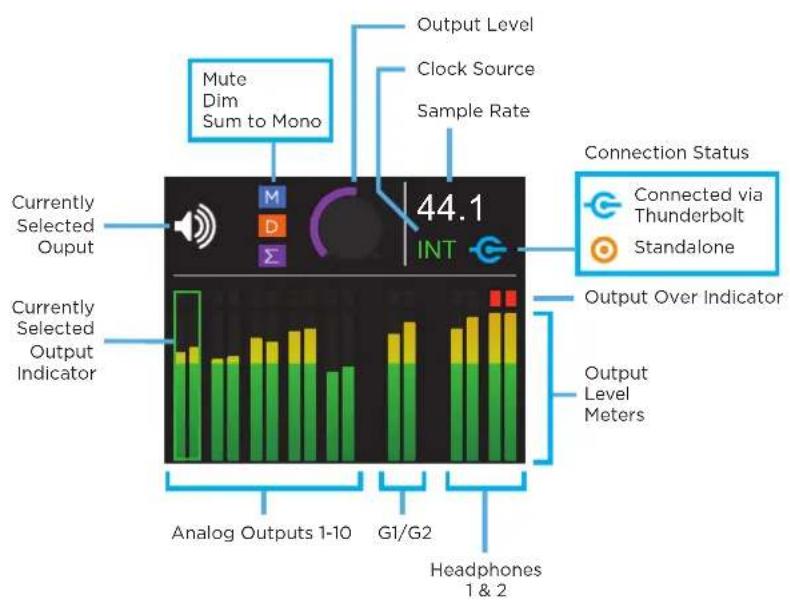
Input Display Output Display
bar
| Category | Value | |---|---| | Mute Dim Sum to Mono | 44.1 | | Output Level | 0 | | Clock Source | 0 | | Sample Rate | 0 | | Connection Status | Connected via Thunderbolt | | Standalone | 0 | | Output Over Indicator | 0 | | Output Level Meters | 0 | | Headphones 1 & 2 | 0 | | Analog Outputs 1-10 | 0 | | G1/G2 | 0 | | Currently Selected Output Indicator | 0 | | Currently Selected Output | 0 |Getting Started
System Requirements
• Computer: Thunderbolt™ equipped Mac
• Memory: 4GB RAM minimum, 8GB RAM recommended
- OS X 10.9.3 or greater
Install Ensemble Software
- Go to http://www.apogeedigital.com/support/ensemble-thunderbolt
- Download the latest Ensemble software installer.
- Open the downloaded .dmg file and double-click Ensemble Software Installer.pkg that's inside.
- Follow the prompts. You will be required to restart your computer.

Apogee Maestro
Apogee Maestro is a controller software for Ensemble. All of Ensemble's settings and parameters can be controlled from this application. When installing the latest software from the Apogee Website, Apogee Maestro is placed in your Mac's Application folder.
Connect Ensemble to your Computer
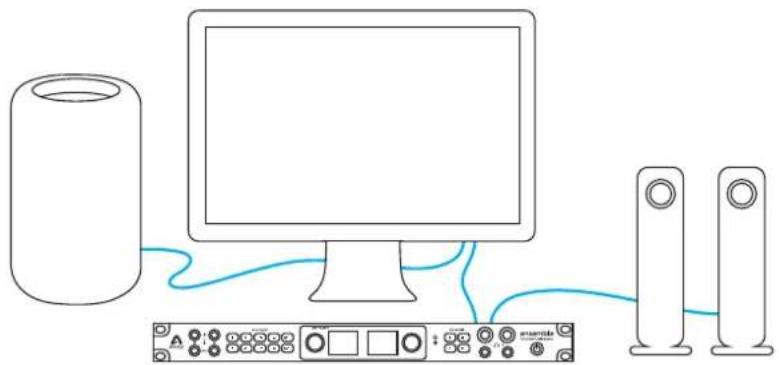
Ensemble features two Thunderbolt™ 2 connections to enable daisy-chaining of other Thunderbolt peripherals to your computer. It does not matter which position Ensemble is placed in the chain.
- Using a certified Thunderbolt cable, connect Ensemble to a Thunderbolt port on your computer.
- Connect other certified Thunderbolt devices to Ensemble's remaining Thunderbolt port.
Make sure that your Mac has the Thunderbolt logo. The Mini DisplayPort, featured on many pre-Thunderbolt Macs, is the exact size of a Thunderbolt port but does NOT support Thunderbolt devices. See the difference below:
natural_image
Line drawing of a computer setup with monitor, tower, and speaker (no text or symbols)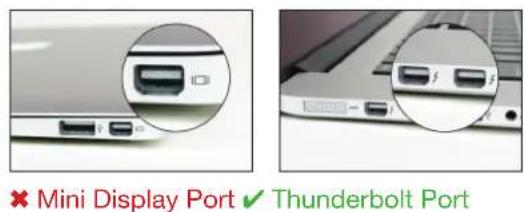
Note: Apogee cannot guarantee performance if utilizing an uncertified Thunderbolt device in the same chain as Ensemble. To see if a device is certified, please go to:
https://thunderbolttechnology.net/products
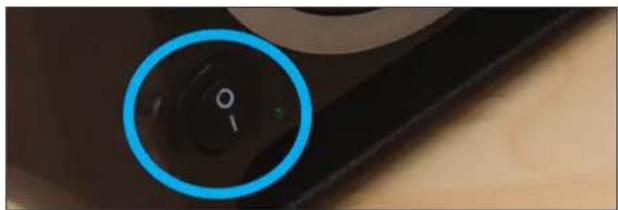
Powering the Unit On
- Ensure any speakers or amplifiers connected to the outputs are turned off, or the volume turned to the minimum setting.
natural_image
Close-up of a camera dial with a blue circular overlay highlighting the lens (no text or symbols visible)- Press Ensemble's Power button.
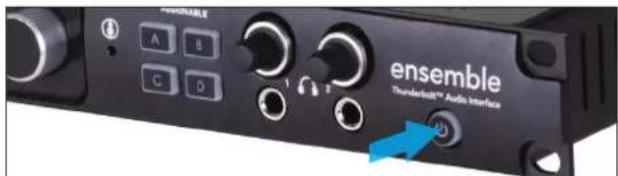
After a moment, the unit will power up.
- Power on or raise the volume level of any speakers or amplifiers connected to Ensemble's outputs.
Powering the Unit Off
Powering the Ensemble off is the reverse of powering the unit on.
-
Power off, or turn the volume to minimum, any speakers or amplifiers connected to Ensemble's outputs.
-
Press Ensemble's Power button.
Note: Thunderbolt peripherals will continue to operate when Ensemble is powered off.
Update Ensemble's Firmware.
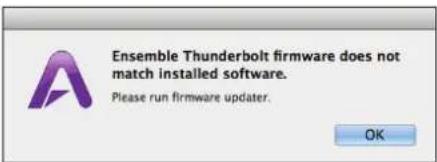
After the software installation, you may be prompted to update the firmware.
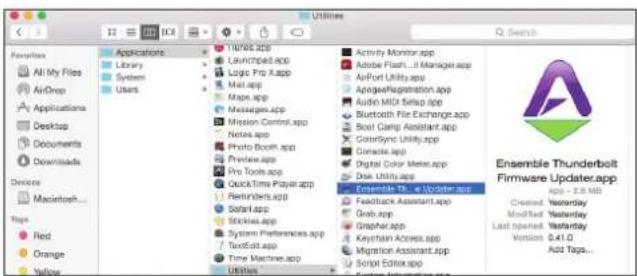
- Open Ensemble Thunderbolt Firmware Updater.app located in your computer's Applications > Utilities folder.
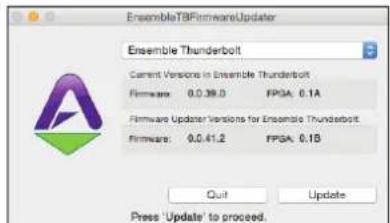
- Select "Update".
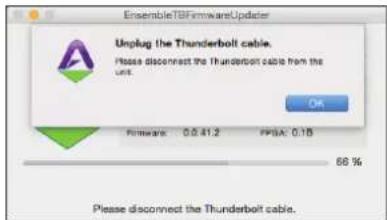
- Follow any prompts that may appear.
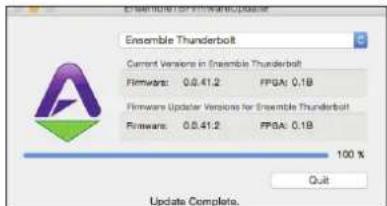
- When the progress reaches 100% and says "Update Complete", you are done and can quit the updater.
To Play Sound Out
Select Ensemble for Mac System Sound Output
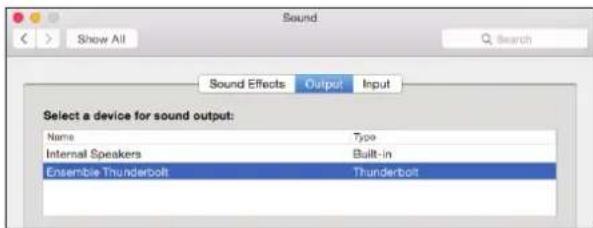
To get sound from general audio applications such as iTunes and Safari to play out of Ensemble, it must be selected as the output device in Mac System Preferences:
- Select the 📁 icon in the upper-left corner of your Mac's display.
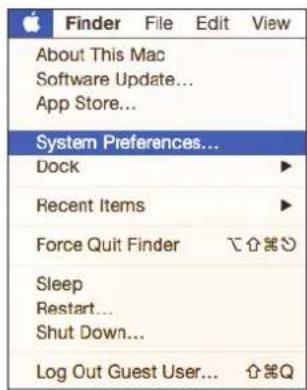
- From the drop-down menu, select "System Preferences...".
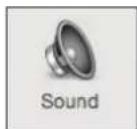
- In the System Preferences control panel, select "Sound".
-
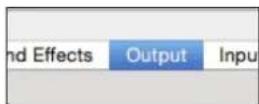
At the top of the Sound Preferences panel, select the "Output" tab.
-
Under "Select a device for sound output:" select Ensemble Thunderbolt.
Setting Up Ensemble with your DAW
Most professional applications have their own audio preferences that are separate from the Mac System Preferences. Basic steps for setting up Ensemble are provided. For more detail on this topic, refer to the documentation that comes with your recording program.
Select Ensemble in Logic Pro X
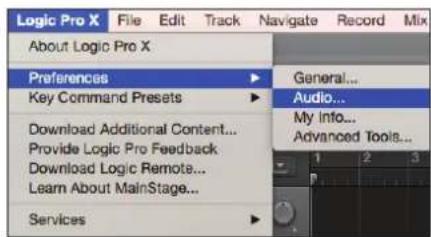
- Go to Logic Pro X > Preferences > Audio.
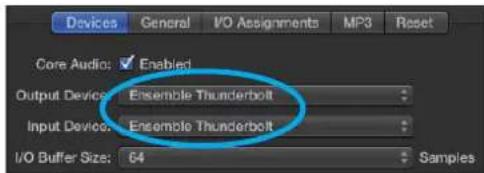
- In the Devices Tab, select "Ensemble Thunderbolt" in the Output Device and Input Device drop-down boxes.
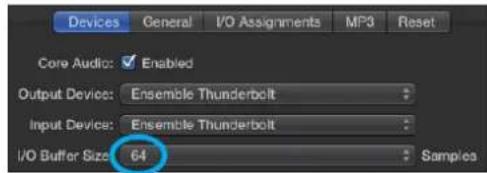
- Start by setting the I/O Buffer Size to "64 Samples". Adjust the setting based on your computer's performance.
- Select "Apply Changes" and close the Preferences window.

Select Ensemble in Pro Tools 11
- Go to Setup > Playback Engine. 3. Start by setting the H/W Buffer Size to "64
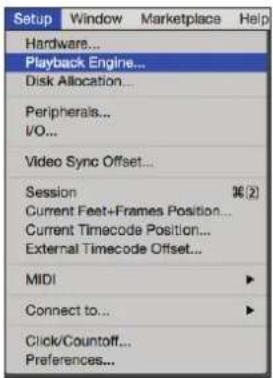
Samples". Adjust the setting based on your computer's performance.
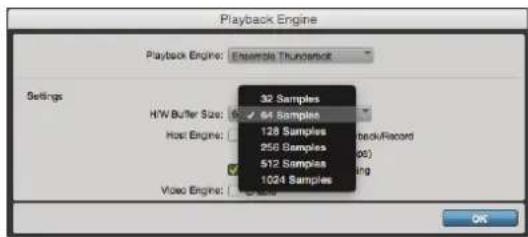
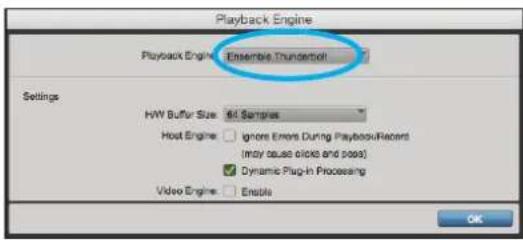
- In the Playback Engine drop-down box, select "Ensemble Thunderbolt".
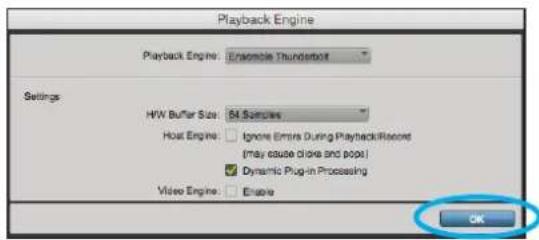
- Select OK. Pro Tools will restart.
Select Ensemble in Ableton Live
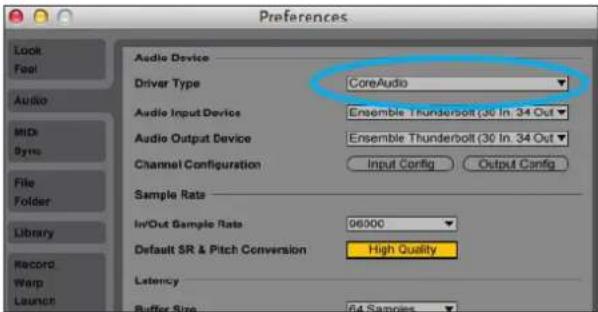
- Go to Live > Preferences. Select the Audio tab.
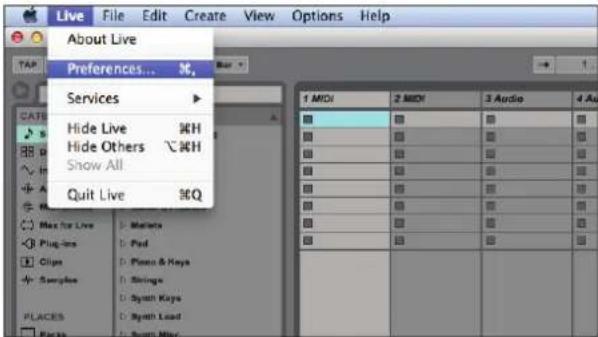
- In Driver Type, select "CoreAudio".
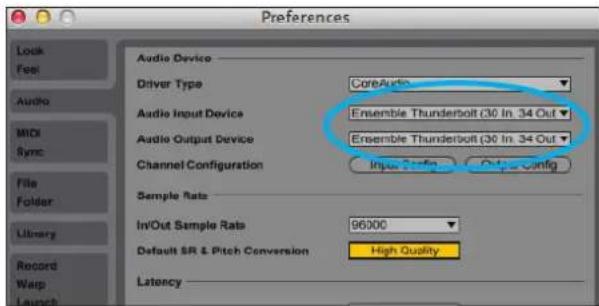
- In Audio Input & Audio Output Device, select "Ensemble Thunderbolt".
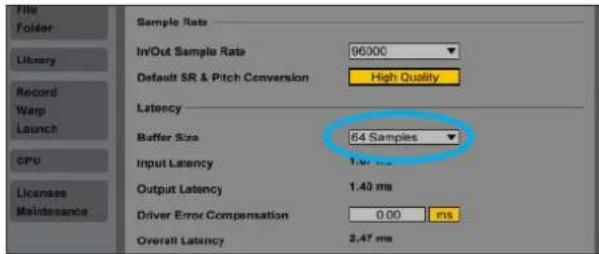
- Start by setting the buffer size to "64 samples". Adjust the setting based on your computer's performance.
Connect Speakers
The balanced Monitor Outputs 1 & 2 on Ensemble's rear panel are specifically designed for connecting studio monitors.
- Using 1/4" TRS cables, connect the left monitor speaker to Monitor Out 1, and the right monitor speaker to Monitor Out 2.

From the Front Panel From Maestro
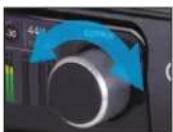
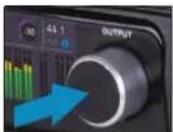
- Turn the Output knob to adjust the volume to your speakers.
-
Press the Output knob to toggle the monitor output mute on and off.
-
Open Maestro and locate the volume knobs in the upper-right corner of the window.

-
Drag the speaker volume knob up or down to adjust the speaker volume level.
-
Click the mute button next to the speaker volume knob to toggle the speaker output's mute on or off.
Connect Headphones
Ensemble provides two headphone output jacks on the front panel. By default, these headphone outputs mirror the main monitor outputs 1 & 2.
- Connect to the headphone output with a 1/4" Stereo headphone plug.

From the Front Panel From Maestro
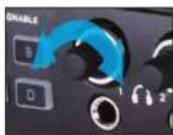
- Turn the corresponding Headphone Output knob to adjust the volume to your headphones.
-
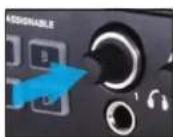
Press the Headphone Output knob to toggle the Headphone Output mute on and off.
-
Open Maestro and locate the volume knobs in the upper-right corner of the window.

-
Drag the headphone 1 or Headphone 2 volume knob up or down to adjust the headphone volume level.
-
Click the mute button next to the Headphone 1 or Headphone 2 volume knob to toggle the Headphone output mute on or off.
To Get Sound In
Ensemble is equipped with eight premium-quality Advanced Stepped Gain microphone preamps and four instrument inputs on the rear panel, as well as two guitar inputs on the front panel.
Connect a microphone or line level input to any of the eight XLR inputs on Ensemble Thunderbolt's rear panel.

Connect a high impedance (Hi-Z) instrument such as a keyboard or guitar with a 1/4" cable to one of the combi connectors on the rear panel.

natural_image
Front panel of a black electronic device showing multiple ports and connectors (no visible text or labels)Connect to one of the two Hi-Z guitar inputs on the front panel.

Select the Input Source
From the Front Panel From Maestro
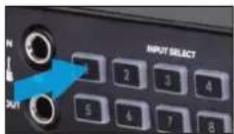
- Press and hold the desired Input Select button for at least 1 second.
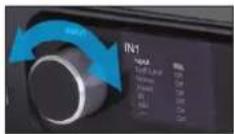
- Turn the Input knob to highlight "Input".
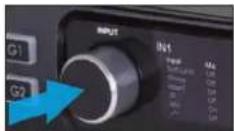
- Press the Input knob to change the input source.

- Set to "Mic" if connecting a microphone. - Set to "Inst" if connecting instruments. - Set to "+4dBu" or "-10dBV" if connecting a line level signal such as an external preamp or mixer.
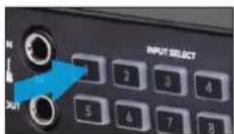
- Press and hold the Input Select button for at least 1 second to return to the Input level meter screen.
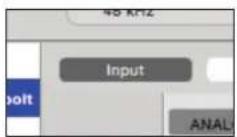
-
Open Maestro and select the Input tab at the top (or use the keyboard combination [command 1]).
-
To the right of Analog Level, click the box in the desired input channel to select your input source.
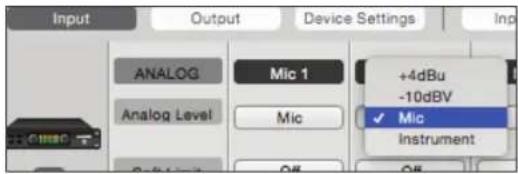
- Set to "Mic" if connecting a microphone. - Set to "Inst" if connecting instruments. - Set to "+4dBu" or "-10dBV" if connecting a line level signal such as an external preamp or mixer.
NOTE: G1 and G2 are always instrument inputs and therefore have no option to change the input source.
Adjust the Input Gain
From the Front Panel From Maestro
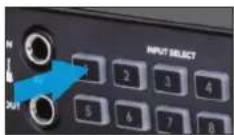
- Press the desired Input Select button.
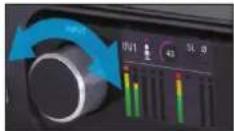
- Turn the Input knob.
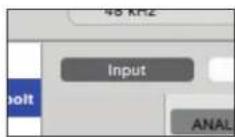
- Open Maestro and select the Input tab at the top (or use the keyboard combination [command 1]).
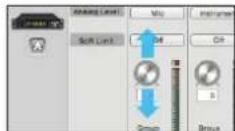
- On the desired input channel, drag the Gain knob up or down to adjust the gain level.
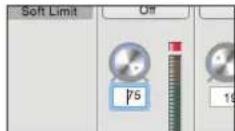
- Alternatively, you can type a gain value in the box below the knob.
Toggling Phantom Power
Phantom power is required to use condenser microphones.
From the Front Panel From Maestro
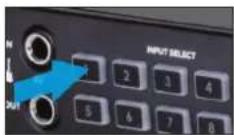
- Press and hold the desired Input Select button for at least 1 second.
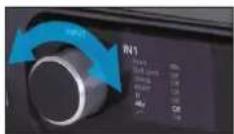
- Turn the Input knob to highlight "48v".
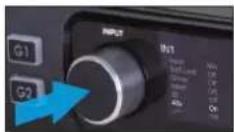
- Press the Input knob to toggle "ON" or "OFF".
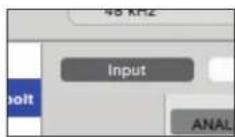
- Open Maestro and select the Input tab at the top (or use the keyboard combination [command 1]).

- At the bottom of the desired input channel, click the "48" button to toggle phantom power on or off.
Monitoring the Input Signal
Using your DAW to Monitor
By default, Ensemble assumes monitoring will be handled by your recording software or DAW. Basic steps on enabling the monitor feature for the most popular recording programs are below. For more detailed information on this topic, see the documentation that comes with your recording program.
Enable Input Monitor in Logic Pro X
Select the "I" button in each track you'd like to input monitor.

Enable Input Monitoring in Pro Tools
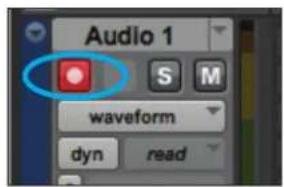
Record enable the track to activate input monitoring (Pro Tools Native).
Enable Input Monitoring in Ableton Live
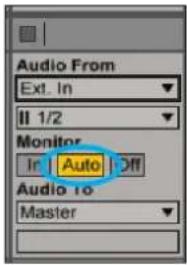
In the track I/O section, set the Monitor switch to "Auto", or "In".
Using Maestro's Mixer for Direct Monitoring
If you do not have any recording software open, or do not want to use its monitoring function due to issues such as high latency, then you can use one of the Low Latency Maestro Mixers built into Ensemble to monitor your signal instead.
- Disable input monitoring in your DAW.
- Open Maestro and select the Output Routing tab (or use the keyboard combination [command 5]).

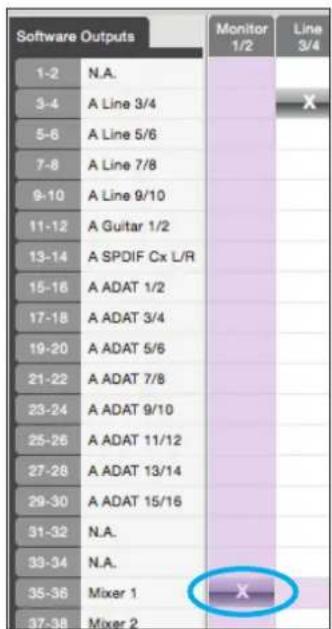
- To monitor using speakers connected to Ensemble's Monitor Out 1&2, click the left-most box next to Software Output "35-36 Mixer 1". Now the signal from the Maestro Mixer 1 will be sent to your speakers.
Using Maestro's Mixer for Direct Monitoring (Cont'd)
- To monitor using headphones connected to Headphone Output 1, click the box to the right of the Software Output "Mixer 1" and below Hardware Output "HP 1 L/R". Now the signal from the Maestro Mixer will be sent to your headphones.

Using Maestro's Mixer for Direct Monitoring (Cont'd)
You can control the amount of input signal verses software playback volume heard using the Maestro Mixer controls:
- Select the Mixer tab (or use the keyboard combination [command 6]).
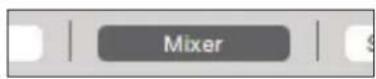
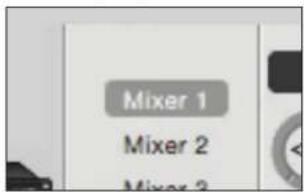
- Select "Mixer 1".
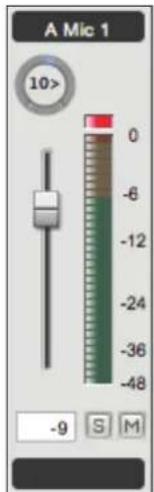
- Adjust the level of input heard by adjusting the Input Fader.
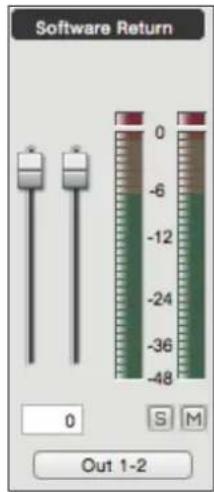
- Adjust the audio playback level from software with the Software Return Fader.
Additional Support
For more information
- Ensemble User's Guide
- Apogee KnowledgeBase and FAQs
• Apogee Product Registration
• How to contact Apogee Technical Support
Please visit: www.apogeedigital.com/support

APOGEE

Designed in California Made in U.S.A.
Apogee Electronics Corp. Santa Monica, CA www.apogeedigital.com
7010-0072-0160 Revision 1.0


- Getting Started....8
- Additional Support 26
- Overview
- Introduction
- Features
- Package Contents
- Register your product
- Ensemble Product Tour
- Getting Started
- System Requirements
- Install Ensemble Software
- Apogee Maestro
- Connect Ensemble to your Computer
- Powering the Unit On
- Powering the Unit Off
- Update Ensemble's Firmware.
- To Play Sound Out
- Select Ensemble for Mac System Sound Output
- Setting Up Ensemble with your DAW
- Select Ensemble in Logic Pro X
- Select Ensemble in Pro Tools 11
- Select Ensemble in Ableton Live
- Connect Speakers
- From the Front Panel From Maestro
- Connect Headphones
- To Get Sound In
- Select the Input Source
- Adjust the Input Gain
- Toggling Phantom Power
- Monitoring the Input Signal
- Using your DAW to Monitor
- Enable Input Monitor in Logic Pro X
- Enable Input Monitoring in Pro Tools
- Enable Input Monitoring in Ableton Live
- Using Maestro's Mixer for Direct Monitoring
- Using Maestro's Mixer for Direct Monitoring (Cont'd)
- Additional Support
- For more information
Brand : Apogee
Model : Ensemble
Category : Hi-Fi System