
M5 - Media player FiiO - Free user manual and instructions
Find the device manual for free M5 FiiO in PDF.


| Product Type | Portable HD Lossless Music Player |
| Supported Audio Formats | MP3, WAV, WMA, APE, FLAC, AAC, ALAC, DSD, ISO, Ogg Vorbis |
| Max Sample Rate | 384 kHz / 32-bit |
| Output Ports | 3.5mm headphone/coaxial/line out |
| Bluetooth Version | Bluetooth 5.0 (estimated) |
| Bluetooth Codecs | SBC, AAC, aptX, aptX HD, LDAC |
| Recording | Built-in microphone, saves as MP3 or WAV |
| Pedometer | Yes, with history |
| Storage | Micro SD card up to 2 TB |
| Battery Charging | DC 5V, 1A adapter; charging time ~2.5 hours |
| USB Modes | Storage and DAC modes |
| Firmware Upgrade | Via SD card |
| Power Saving | Adjustable standby and sleep settings |
| Operating Systems Supported | Windows, macOS, Linux |
| Maintenance | Keep dry and clean; wipe with a soft cloth |
| Safety | Use recommended 5V/1A charger; avoid extreme temperatures |
| Reparability | No user-serviceable parts; contact FiiO support |
Frequently Asked Questions - M5 FiiO
User questions about M5 FiiO
0 question about this device. Answer the ones you know or ask your own.
Ask a new question about this device
Download the instructions for your Media player in PDF format for free! Find your manual M5 - FiiO and take your electronic device back in hand. On this page are published all the documents necessary for the use of your device. M5 by FiiO.
USER MANUAL M5 FiiO
M5 Complete user manual
(This manual is for player introduction only and is subject to subsequent changes without prior notice.)
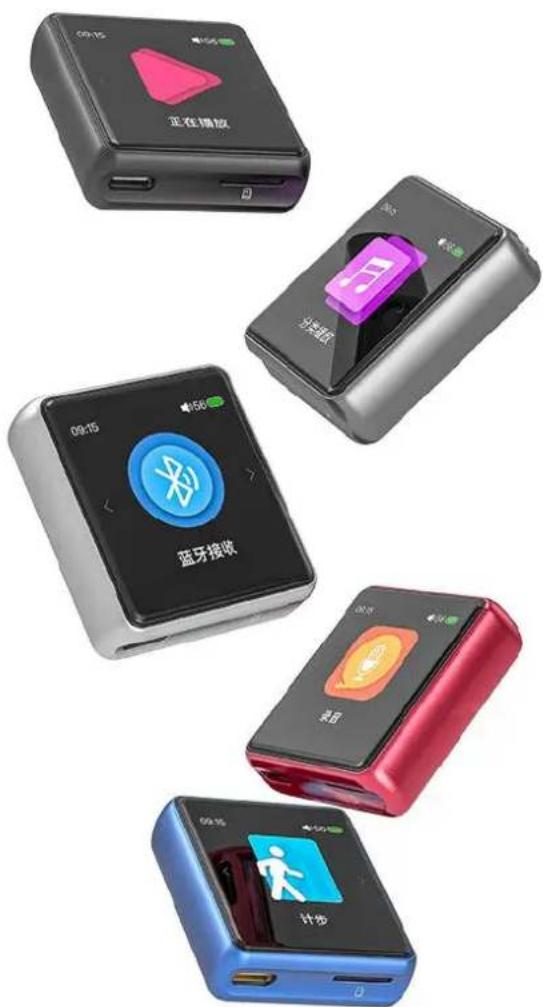
Thank you for purchasing FiiO's M5, our 384KHz/32Bit portable HD lossless music player. To let you better utilize the M5 to enjoy high-quality music, we have prepared this complete user manual and collected and answered some frequently asked questions by users. We hope this manual will help you go to know the X5 and unleash its full potential.
Contents
1 Introduction.... - 5 -
2 Buttons and ports introduced....- 5 -
2.1 Buttons/Ports Diagram: - 5 -
2.2 Button and Interface Instructions.... 5 -
2.2.1 Power / lock screen button....5 -
2.2.2 Volume "+" - 5 -
2.2.3 Volume"-6-
2.2.4 Pickup hole.... - 6 -
2.2.5 Headphone/Coaxial output.... - 6 -
2.2.6 USB interface....- 6 -
2.2.7 Micro card slot.... - 6 -
3 Page display introduction....- 6 -
3.1 Switch machine and home page....6 -
3.2 Main interface menu....7 -
3.3 Lock screen clock....7 -
3.4 Status Bar....7 -
3.5 Indicator display....8 -
3.6 Recording....9 -
3.7 Step counter.... - 10 -
3.8 Classification play.... 10 -
3.8.1 All songs.... - 10 -
3.8.2 Artist.... 10 -
3.8.3 Album.... - 10 -
3.8.4 Genre....- 11 -
3.8.5 Favorites.... - 11 -
3.8.6 Playlist.... - 11 -
3.9 Now playing.... 11 -
3.10 Browse files.... - 11 -
3.11 Bluetooth receiving.... 12 -
3.12 Settings.... 12 -
3.13 Bluetooth transmitter.... - 13 -
3.14 Play settings.... 13 -
3.14.1 Play mode.... 14 -
3.14.2 Resume mode.... - 14 -
3.14.3 Playback gap.... 14 -
3.14.4 Max volume.... 14 -
3.14.5 Fixed volume setting.... 14 -
3.14.6 Balance.... - 14 -
3.14.7 Equalizer.... 14 -
3.14.8 Play through folder.... - 14 -
3.15System settings.... 15 -
3.15.1Brightness.... 15 -
3.15.2 Backlight time.... 15 -
3.15.3 Power saving standby.... - 15 -
3.15.4sleep standby.... - 15 -
3.15.5 USB mode.... 16 -
3.15.6 Recording quality.... - 16 -
3.15.7 Lock screen clock.... 16 -
3.15.8 Clock face.... - 16 -
3.15.9 Slect output.... 16 -
3.15.10 SPDIF output.... - 16 -
3.15.11 display direction.... 16 -
3.15.12 Double tap the screen.... 17 -
3.15.13 Raise hand to turn on the screen....- 17 -
3.15.14 power button.... - 17 -
3.15.15 Time setting.... 17 -
3.15.16 setting the date.... 18 -
3.15.17 Language.... 18 -
3.15.18 Factory restore.... 18 -
3.15.19 Restore factory settings.... 18 -
3.15.20 firmware upgrade...... - 19 -
3.15.22 About M5.... - 19 -
3.16 Update media library.... - 20 -
4 Playback page.... 20 -
5 Shortcut menu.... 21 -
3 Delete playlist....- 22 -
6 notes:.... - 23 -
7 FAQs.... - 23 -
7.1 What power sources can the M5 be used to charge? 23 -
7.2 What is the charging current of M5? 23 -
7.3 How long is the charging time of .M5?......- 23 -
7.4 Can M5 listen to songs while charging? 23 -
7.5 Can M5 be charged with other Micro USB cable? 23 -
7.6 Why can't the M5 be charged by some desktop USB sockets or the charging speed...is..slow?... - 23 -
7.7 How to judge the status of M5 charging? 24 -
7.8 Which operating systems does M5 support for copying songs? 24 -
7.9 M5 supports USB interface standard data copy? 24 -
7.10 Does the M5 support file be directly dragged and deleted by the file manager on the .compute24 -
7.11 Does the M5 online computer need to be installed with a driver? 24 -
7.12 How do I know if M5 has the latest firmware? 24 -
7.13 How to upgrade the M5 firmware?......- 24 -
7.14 Will the upgrade fail to become brick? What if I change the..brick?......- 24 -
7.15 What types of cards does the M5 support? 24 -
7.16 M5 pick card? - 24 -
7.17 What size card does the M5 support? 24 -
7.18 How to format Micro SD card into FAT32 format?...... - 24 -
7.19 All files on the Micro SD card cannot be displayed on M5....25 -
7.20 Files on the Micro SD card (FAT32) only show partial files..on..M5.... 25 -
7.21 How do I reset the database files in M5 storage? 25 -
7.22 What formats does the M5 support for Micro SD card recording? 25 -
7.23 M5 supports APE, why my APE can't play.... 25 -
7.24 Does M5 support CUE playback? 25 -
7.25 My songs have CUE files. Why not supported?......- 25 -
7.26 Why can't I see the CUE file saved in the browse...file? 25 -
7.27 How to play random folders across folders? 25 -
7.28 Why can't my lyrics be displayed? 26 -
7.29 Why is the cue playing interface displaying garbled characters? 26 -
7.30 Why did you copy the songs and press singers, genres, and albums? 26 -
7.31 Why is the total number of songs displayed by M5 different from the number of songs I copied into?
7.32 How to extend the endurance of the M5? 26 -
1 Introduction
The M5 is a high fidelity digital audio player, supporting lossy and lossless music formats including MP3,WAV, WMA APE, FLAC, AAC,ALAC,DSD,ISO and Ogg Vorbis. A maximum sample rate of 192kHz/32bit is supported and other features include Bluetooth and CUE sheets. The M5 also can support headphone output, Lineout, digital coaxial output and 2.5mI balanced output. It's a portable high-performance music player. The following are some illustrations to introduce the M5.
2 Buttons and ports introduced
2.1 Buttons/Ports Diagram:
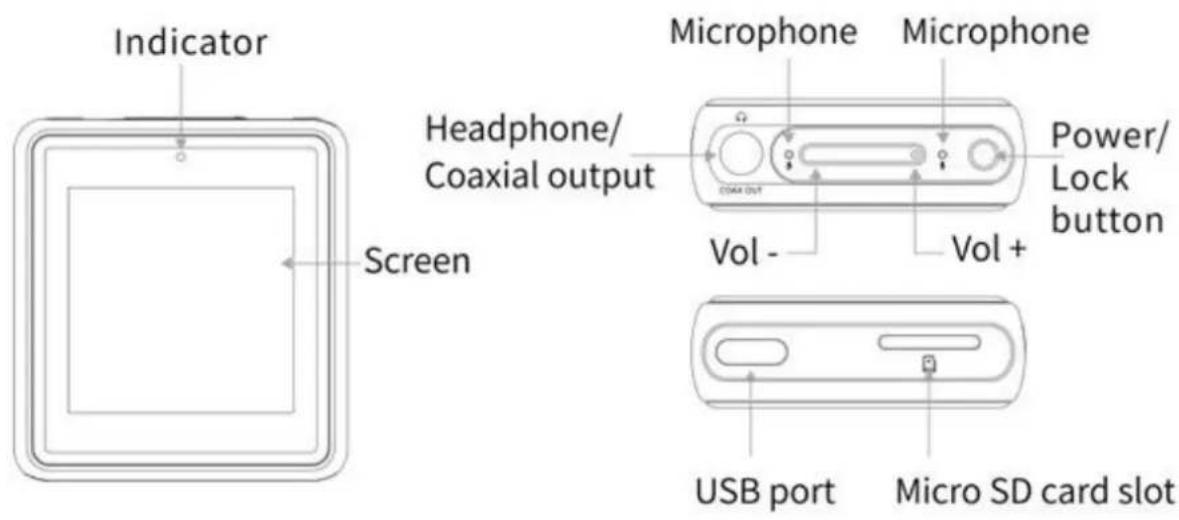
2.2 Button and Interface Instructions
2.2.1 Power / lock screen button
Hold the Power/Lock button to turn on the M5. Click the preferred language onscreen to enter main UI. Hold the "Power/Lock" button while the M5 is on, click "Yes" on the pop-up power off dialogue to turn it off. Double click the "power button" while powered on to turn screen on / off. Hold the button for about 2 seconds to power off (hold for 10 seconds for a forced shutdown).
2.2.2 Volume "+"
When the display is on, Press briefly to change volume" +"by one increment, hold down to change volume continuously until to the maximum.
If the player is in the playing state when the display is off, press and hold the volume" +" button to switch to the next track.
If the player is on lock screen clock interface when the display is locked, press and hold the volume"+" button to
switch to the next track.
2.2.3 Volume"-"
When the display is on, Press briefly to change volume"-"by one increment, hold down to change volume continuously until to the mute.
If the player is in the playing state when the display is off, press and hold the volume"-" button to switch to the previous track.
If the player is on lock screen clock interface when the display is locked, press and hold the volume "-" button to switch to the previous track.
2.2.4 Pickup hole
Microphone pickup hole (Do not cover this position when using the recording function, so as not to affect the recording effect)
2.2.5 Headphone/Coaxial output
3.5mm headphone output interface, support for 3-segment and 4-segment headphones (not supported for remote control). Meanwhile, support for the line out and coaxial out, it is available for you to choose to set in the system settings.
2.2.6 USB interface
For data exchange, battery charging, etc.
2.2.7 Micro card slot
Use standard Micro SD (TF) card to support up to 2TB capacity.
3 Page display introduction
3.1 Switch machine and home page
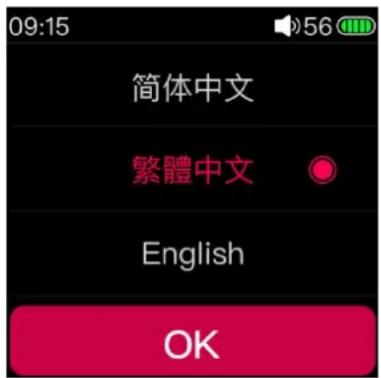
Press and hold the power button in the off state, it will start up in about 2s; when you turn on the phone for the time, the language selection interface will appear. You can slide the cursor through the touch bar as needed, select the corresponding display language and press the confirm button to confirm the save (also in the system settings - Switch other languages to display in Language). As shown above.
Press and hold the power button during the power-on state, and the player will turn off the button after the shutdown animation appears.
(Note: If you are unable to shut down normally when there is a crash, you can press and hold the power button f
seconds to force the shutdown)
3.2 Main interface menu
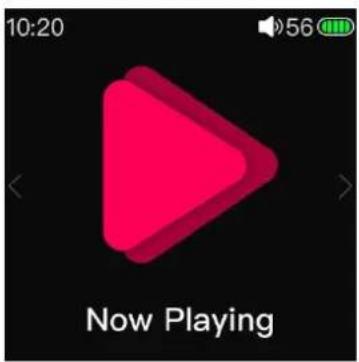
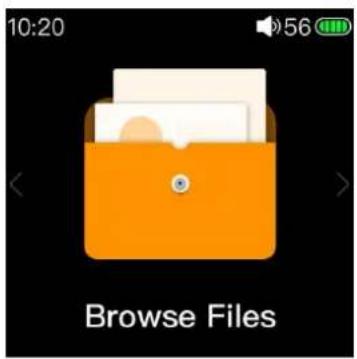
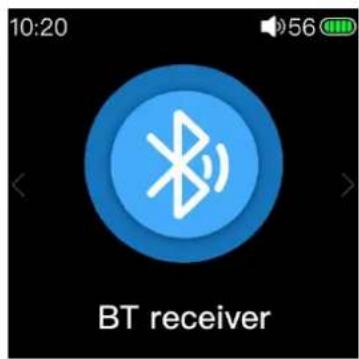
In the main interface, you can scroll the cursor by sliding the touch bar, select the corresponding item as required, and then press the touch bar or the side confirmation button to enter the project.
3.3 Lock screen clock
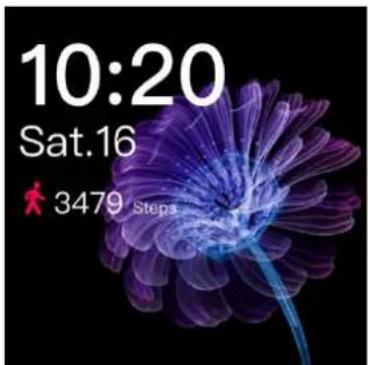
In the system setting, when the "lock screen clock" item is turned on, when the player reaches the backlight time to automatically lock the screen (off the screen) or the user presses the power button to manually lock the screen, press the power button to activate the screen, the interface shown above will display.
In this interface, you can slide the touch bar up or down to unlock, enter the display interface before the lock scr or you can press the power button again to unlock the interface.
The user can set the "Lock Screen Clock" item of the system setting to off, so that the lock screen clock interface not appear when the lock screen wakes up.
In the lock screen clock interface, if there is a song playing, then press and hold the volume plus button to switch the next song (short press is still the volume plus); long press the volume down button to switch to the previous track (short press is still the volume minus).
For more different lock screen clock style, you can select it into the clock face of the system settings.
3.4 Status Bar

The status bar is as shown above:
①Home: Click to return home page
②Clock: Time display
③Line out: Output is set to LO
④Step counter on: Step counter has been turned on
⑤Coaxial out: Output is set to SPDIF
⑥Headphone out: Output is set to PO
⑦Sleep on: Sleep has been turned on
⑧Bluetooth codec format as Bluetooth transmitter : M5 has connected to Bluetooth headphone, Bluetooth codec format is SBC
⑨Bluetooth codec format as Bluetooth transmitter : M5 has connected to Bluetooth headphone, Bluetooth codec format is APTX
⑩Bluetooth codec format as Bluetooth transmitter : M5 has connected to Bluetooth headphone, Bluetooth codec format is LDAC
⑪ Bluetooth codec format as Bluetooth transmitter :Bluetooth transmitter option is on and the M5 hasn't connected to Bluetooth headphone
⑫Play status: Current playback status is 'play'
⑬Play status: Current playback status is 'pause'
⑭Volume: Current volume value
⑮Battery: Current battery level icon
(Note: Some icons need to be displayed in the corresponding state, and the icons displayed in different states may not be the same)
3.5 Indicator display
The indicator only lights up at Bluetooth receiving mode, it won't light up at non-Bluetooth receiving mode.
- Status indicator display (when not playing)
| Status | Blue light | Red light |
| Low battery | Off | Indicates the current working status |
| Connected | Flashes every 3 seconds | Off |
| Charging | Indicates the current working statu | Off |
| Charging completed | indicates the current working statu | off |
2、Indicator display of different input codes (when playing)
| Codec | In normal state | Low battery | Charging |
| SBC | Blue light pulsates | Red light indicates the current working status | Codec indicator light stays steadily on |
| AAC | Cyan light pulsates | ||
| aptX | Purple light pulsates | ||
| aptX HD | Yellow light pulsates | ||
| LDAC | White light pulsates |
3.6 Recording
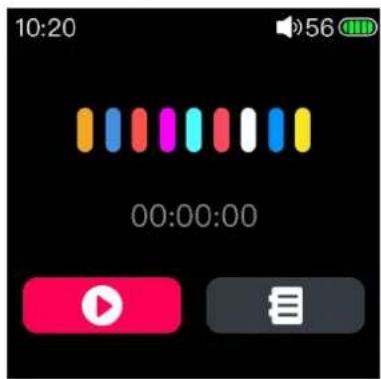
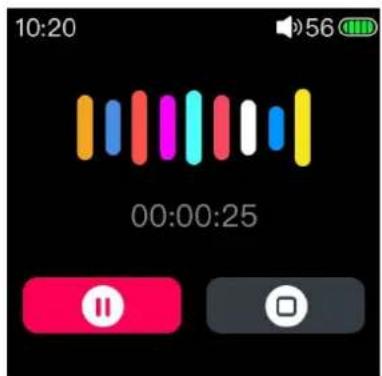
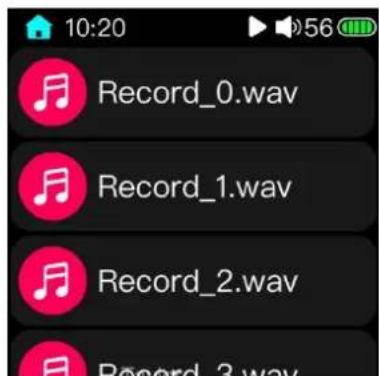
After clicking the 'Recording' icon from main page, the first picture above is displayed. Click the red icon in lower left corner to start record. (As shown in the second picture above.)
During recording, you can pause the record by clicking the lower left corner icon. Or stop the record by clicking the lower right corner icon. You could choose whether saving the record at that time as needed.(After saving the record, the page is shown as the first picture above) Click the lower right corner icon to enter the record file page and select the file to play. If you don't need to read the record files, you could exit this page by sliding from left edge to right.
The recording file will be saved in the Record folder in the root directory of the Micro SD card.
(Note: 1. please inserts the Micro SD card before recording, and make sure that the Micro SD card has enough free space to save the recording file. If the MICRO SD card is not inserted, the recording cannot be started.
- during the recording process, the song cannot be played at the same time, and the recording interface cannot be exited. When you need to play the song, please exit the recording and play it again; if you play the song first and then enter the recording, the recording will stop automatically after the recording is started.
3.7 Step counter
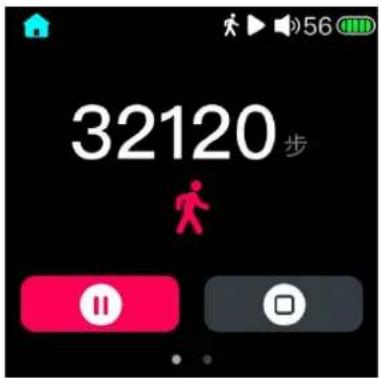
After entering the step counter page, click the red icon in lower left corner will start to step. The mete icon will display in the status bar. Click the lower right corner icon to stop step. Pedometer interface sv from right to left in step counter page will enter the step counter history data record page, as shown i right picture above. Swipe from the right to the left sliding can enable the pop-up delete operation mer in this page. You can delete the record data according your need.
3.8 Classification play
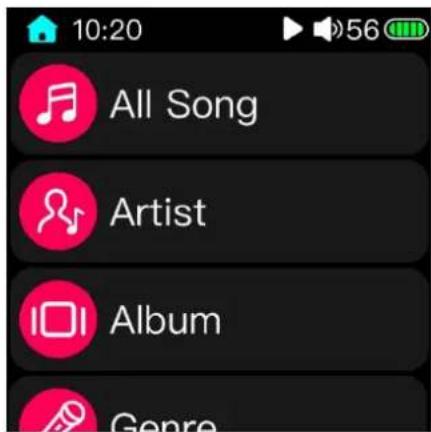
(Note: Before using the classified play function, please update the song library in "Settings - Update Song Library". After updating the music library, the system will classify the song according to the ID3 information of the song itself.)
3.8.1 All songs
All songs: All songs are summarized in this list, through which you can see all the songs that can be recognized.
3.8.2 Artist
The songs will be categorized according to the artists marked in ID3, and the artists will be classified as follows according to the album; songs without an artist will be classified as "unknown artists".
3.8.3 Album
The songs will be sorted according to the album information marked in ID3, and songs without album information will be classified into "unknown albums".
3.8.4 Genre
The songs will be sorted according to the genre information marked in ID3, and songs without the genre information will be classified into "Unknown genre".
3.8.5 Favorites
Users can choose to add their favorite songs to the list. For the method of adding songs, please refer to the subsequent introduction of this document.
3.8.6 Playlist
Users can create multiple lists and add their favorite songs to the list. Please refer to the subsequent introduction this document for how to add a list of songs.
3.9 Now playing
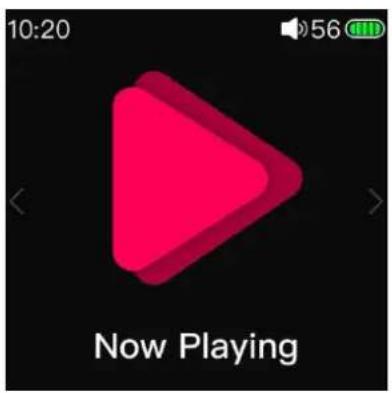
When clicking the 'Now playing' icon in main menu while playing music, the display will jump to now playing page. When clicking the 'Now playing' icon in main menu while not playing music, the display will jump to all music playlist in order to select the music faster.
3.10 Browse files
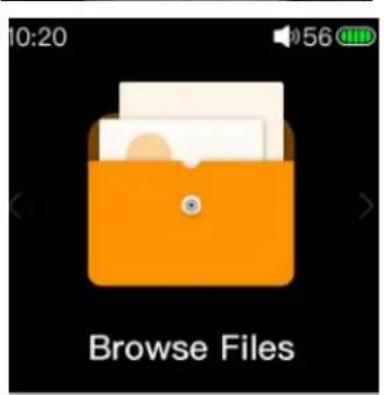
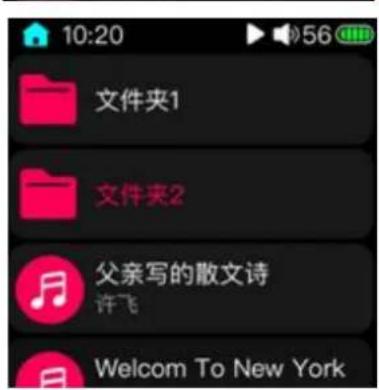
Click the "Browse Files" icon in the main page (you need to insert the Micro SD card) and you can view and play the files in the Micro SD card directly. In folder or files list, slide up and down to view the music. Click to play a music file and the name of the currently played song is shown in red in the list, as shown in the right picture above. In default setting, the songs will be played through folder order.
(note: under the file browsing list, swiping from the right edge of the display to the left will bring up the operation menu,
which supports adding songs to my favorite in batches, adding songs to playlist in batches, deleting songs in batches and other operations. Please refer to the following sections for details.)
3.11 Bluetooth receiving
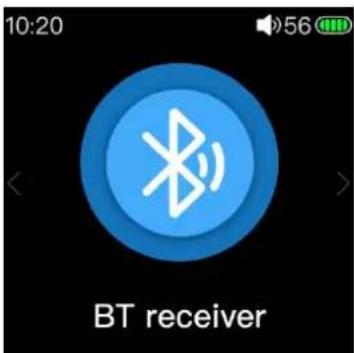
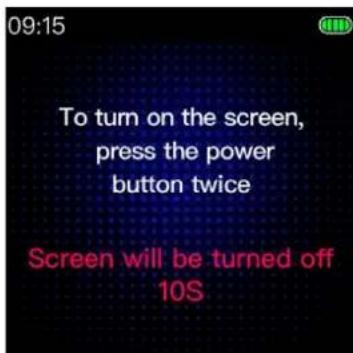
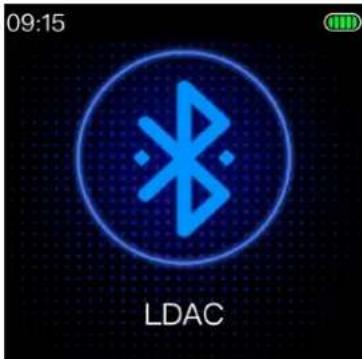
Choose BT receiver at the main menu and click "Yes" on the pop-up dialogue to enter Bluetooth receiving mode (Click 'No' will not turn on Bluetooth). After entering Bluetooth receiving mode, the indicator light will be on (you could refer to the previous section for status indicator light). The page will automatically switch to the countdown page after a few seconds (as shown in second picture above).
During the time, you can swipe right from the left edge of the screen to exit from the countdown page and swipe more time to exit from the Bluetooth receiving mode; if no operation is made during the time, the device will enter standby mode with the screen turned off after the time is up. At this time, you can double click the" Power/Lock" button to wake up the screen. When the M5 is at Bluetooth receiving mode, press the "Vol +/-" button briefly to adjust the volume of the transmitter; press the "Power" button briefly to play/pause; hold the "Vol+" button to switch to next track and hold the "Vol-" button to switch to previous track; double click the "Power" button to turn off or wake up the screen; hold the "Vol+" and "Vol -" buttons at the same time for 3s until the red and blue lights flash alternately, M5 will clear current pairing and enter pairing mode.
When the M5 is at Bluetooth receiving mode, play the music and the current Bluetooth codec will be shown in current page.
You could refer to the previous section for status indicator light when the M5 is at Bluetooth receiving mode.
3.12 Settings

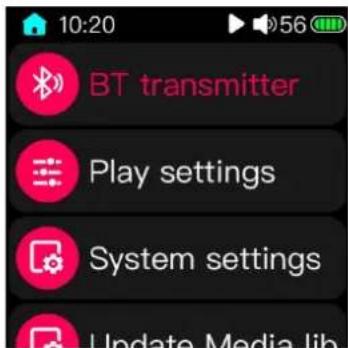
Choose Setting at the main menu and enter setting page. The setting page includes 4 options: BT transmitter, Play settings, System settings and Update Media lib. The following is a detailed introduction of these four options.
3.13 Bluetooth transmitter
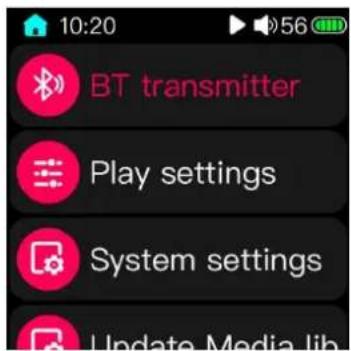
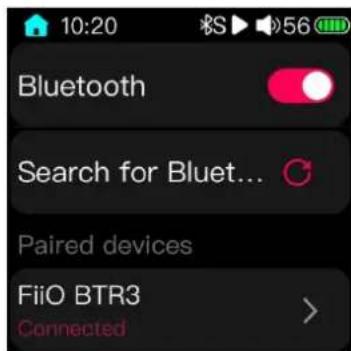
In the Bluetooth transmitter page shown above, click the switch in the upper right corner to turn on the Bluetooth function. The status bar will display the Bluetooth icon after turning on the Bluetooth function. Click "search for Bluetooth device" on the page, and the M5 will start to search for surrounding devices. The found devices' name will be displayed in the "paired devices" column. Click the device name to connect the Bluetooth device. After the device is connected, the device name will be displayed as "connected", as the picture shown above.
For the paired devices page, click the ">" icon on the right of the device name to enter the device deletion page. Click "forget device" and confirm to remove the device from the list. If you do not want to remove the device and just want to disconnect the device you are currently connecting, you can click the device name. After confirming the operation, the device will be disconnected. Click the device name again when you need to reconnect the device.
After the Bluetooth headphone is connected, the headphone inserted in the M5 will be no output. The output will the Bluetooth device instead
(Note: only the devices like Bluetooth headphone are supported in the Bluetooth transmitting mode. The other type of devices, such as mobile phones, cannot be recognized; In addition, Bluetooth transmitting mode is not supported under USB DAC)
3.14 Play settings
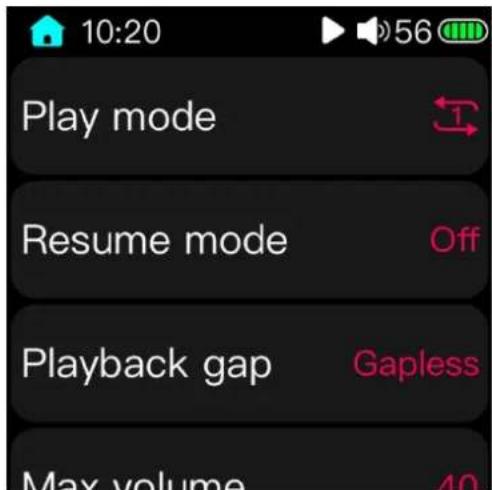
3.14.1 Play mode
The default playback mode is sequential playback. After the current list is played, the song will stop playing. (If "folder skip" is ON, it will jump to the next list to continue playing until the last list of songs is played. Short press the confirmation button to switch to:
Loop play: The song will play in the list all the time;
Single loop: The song will play the current song all the time (you can also switch other songs manually);
Single play: stop playing after the current song is played;
Shuffle: The song will play randomly in the current list.
3.14.2 Resume mode
The default is off. At this time, after the shutdown and restart in the playback state, the system will enter the main page and will not automatically play the song before shutdown.
Song: Press the power button to turn off the camera during playback. After turning it on again, it will automatically start playing the song played when the previous shutdown, and the song will start playing from the beginning;
Position: Press the power button to turn off the camera during playback. When it is turned on again, it will automatically start playing the song played when the previous shutdown, and the song will continue to play from the progress of the playback.
3.14.3 Playback gap
The default is off. At this time, the song will be switched according to the system default mode, and the song will be specially processed. Short press the confirmation button to switch to:
Seamless: In the same format, the same sampling, the same deep song, when the system automatically switches songs, the song can be specially seamlessly connected, so that the sound is consistent without interruption of song switching (some formats such as MP3 cannot be switched seamlessly).
3.14.4 Max volume
This function is to limit the maximum output volume. When this parameter is changed, the volume of the song played by this unit cannot be adjusted beyond the set value. The value can be adjusted to any value from 20 to 60.
3.14.5 Fixed volume setting
The default is off. At this time, the volume before the shutdown will be memorized every time the power is turne You could short press to turn on switch. Each time you turn it on, the volume will be the value of the “Power On Vo Customization” setting.
3.14.6 Balance
Short press to enter the channel balance adjustment page, you can adjust the balance by touch bar or press the previous/next button.
3.14.7 Equalizer
The default is off. At this time, the song output is the native output, and the system does not perform additional processing on the song sound. Click and enter the equalizer page. You can switch between different preset equalizers and listen to different effect sounds.
3.14.8 Play through folder
The default is on. Enter file browser or category list to play music and when in sequential, Loop play or Shuffle pl mode, once it has finished playing the last song in the current folder, it will begin to play the first song in the next folder. When setting to off, only the tracks in the current folder will be played and the M5 will not play songs from other folders.
3.15System settings
3.15.1Brightness
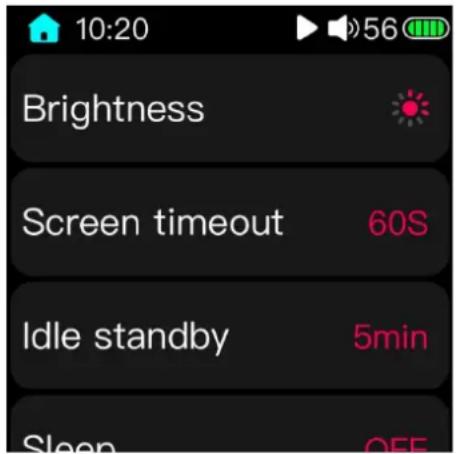
Enter the brightness adjustment page, then adjust the brightness level by sliding the touch bar or pressing the previous/next button. The brightness level can be selected between 1 and 10.
3.15.2 Backlight time
Whether in the playback state or non-playback state, the player's screen will automatically turn off when the accumulated backlight time is reached after the accumulated time has elapsed.
Enter the backlight adjustment interface, and change the value by sliding the touch bar or pressing the previous/ne button. The backlight time can be set to 30s, 40s, 50s, 60s, 90s, 120s and ON for a total of 7 files (ON means always stay on and does not automatically turn off the screen display).
3.15.3 Power saving standby
In the non-playing state (or playback pause, playback stop, etc.), the player automatically enters the deep standby state after the time when no operation is performed on the player reaches the power-saving standby setting value. The low consumption electrode can effectively save power and improve the working life of the whole machine; moreover, in this state, short press the power button (or insert USB) to activate the player immediately, the player will memorize and display the previous use status, eliminating Wait for the second boot.
Enter the power saving standby setting interface, and then adjust the different time values by sliding the touch bar or pressing the previous/next button. When set to OFF, the function is turned off.
(Note: 1 In the state of recording and computer data connection, the power saving standby is invalid;
2 In the case of USB charging, the power-saving standby time will enter the shutdown charging interface)
3.15.4 sleep standby
Whether in the playback state or non-playback state, or if the player has been operated all the time, when the function is turned on, the player will enter the deep standby state when the sleep standby set value time is reached.
Enter the sleep standby setting interface, then adjust the different time values by sliding the touch bar or pressing the previous/next button. When set to OFF, this function is disabled.
(Note: 1 Sleep standby is invalid during recording and computer data connection;
2 In the case of connecting USB charging, the sleep standby time will enter the shutdown charging interface;
3 After the sleep standby is turned on, the status bar has a corresponding icon indication;
4 Sleep standby is the same as power-saving standby. The difference is that the two conditions are different, and the sleep standby is only valid once, when the player restarts or the player enters standby (including power-saving standby and sleep standby). The sleep standby is automatically switched to the off state.
3.15.5 USB mode
Select the USB mode between the storage and DAC modes. When the storage mode is selected, the data can be connected to the computer for data transmission. When the DAC mode is selected, the M5 can be connected to the computer through the data cable to perform audio decoding as an external sound card.
(Note: windows7/8/10 32bit or 64bit system need to go to the official website to download and install the driver, the driver package has detailed installation instructions; OSX system does not need to install the driver, set to DAC mode and connect to the computer to identify; windows xp system only storage is supported, USB DAC is not supported)
3.15.6 Recording quality
This item is used to select the type of recording save file. When "Low" is selected, the recording file will be saved the Micro SD card in MP3 format. When "High" is selected, the recording will be saved in WAVE format.
3.15.7 Lock screen clock
Lock screen clock is turned on: when the machine reaches the backlight time setting value or manually press the power button to lock the screen (off the screen), and then press the power button to wake up, it will enter the lock screen clock interface first.
Lock screen clock is turned off: when the player lock screen (off screen) wakes up, it will directly enter the system interface, and the lock screen clock interface will no longer be displayed.
3.15.8 Clock face
This item is used to select and set the display effect of clock page of lock screen. There are You can choose different clock face according to your needs.
3.15.9 Slect output
Since the 3.5mm port of M5 supports three output modes, PO, LO and SPDIF, this option is to select the desired output. When selecting PO, the output mode is headphone out, and the volume adjustable; when selecting LO, the output mode lineout, the volume is not adjustable and fixed to maximum. Please do not directly connect to the headphone at that time (LO port is used for connecting amplifier or speaker). When selecting SPDIF, the output mode is coaxial out, which can be connected to other DAC that support coaxial decoding.
3.15.10 SPDIF output
This option is used to set the SPDIF output mode when playing DSD files. The default option is DOP and you could sw to D2P.
3.15.11 display direction
The direction of one side of the key is the default 0^ display direction. You can set to different display directions according to meet the needs of different use scenarios.
3.15.12 Double tap the screen
The default is "not applicable", and there is no response when tapping the screen when the screen is off. It can be set to "Turn the screen on". When the screen is off, double tap the screen to turn on the screen.
3.15.13 Raise hand to turn on the screen
The default is "off", indicating that this feature is not enabled. When the option is "on", indicating that this feature is enabled. When a M5 used with strap on hand, as long as according to watch action, lift the wrist to make the M5 in screen up and are in a horizontal interface, the M5 will automatically turn on the screen. If the lock screen clock function is on, you can read the information such as clock in lock screen clock page. The screen will automatically turn off after 3s.
(note: This function will not take effect when the system is in standby mode. When this function is needed, it is recommended to set the idle standby and sleep to the OFF.)
3.15.14 power button
This option has two options, the default is "Single press to play, double press to lock screen". At this time, while playing the music, click the power button will play/pause (This function is disable while not playing). Double click to lock/unlock the screen. When selecting "Single press to lock screen, double press to play", the function is the opposite. Click the power button to lock/unlock the screen and double-click the power button to play/pause.
3.15.15 Time setting
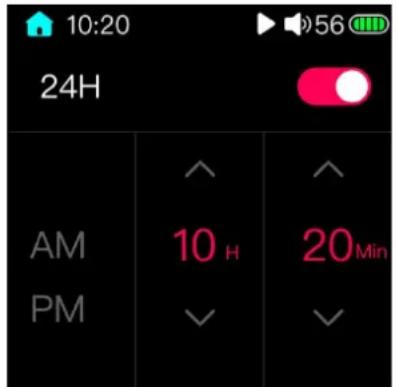
After entering the time setting page, it will display as shown in the picture above. The switch at the top is used to select the 24-hour setting, which is on by default, and the clock will be displayed in the 24-hour setting or in the 12-hour setting when it is off.
"Hour" and "minute" setting method: click the symbol "^" or "v" on the display screen, you can set it to the current time value. When holding this symbol, the time value will continuously increase/decrease, which can quickly complete the setting.
3.15.16 setting the date
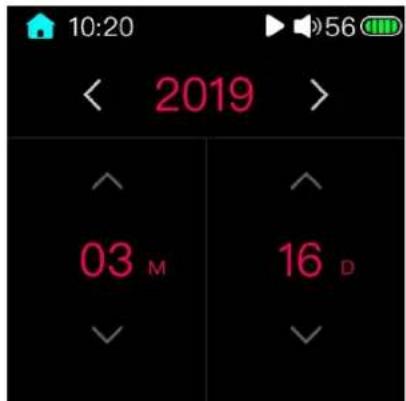
After entering the date setting page, the display will display as shown in the picture above. Click the arrow icon on the display to set it to the corresponding date.
(Note: there is no week setting for M5, and the corresponding day and date will be automatically matched according to the calendar after the date setting is completed)
3.15.17 Language
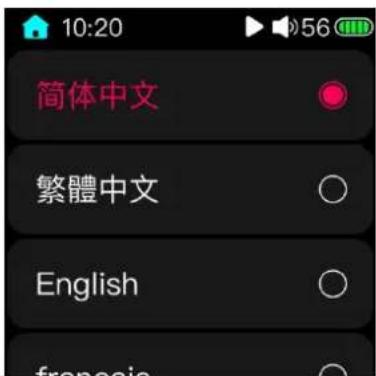
The system language display selection supports Simplified Chinese, Traditional Chinese, English, French, German, Japanese, Korean, Russian, Spanish, Thai, and Italian. After selecting the desired language and exiting this page, the system will switch to the corresponding language display.
3.15.18 Factory restore
When it is recognized that there is a Micro SD card insertion state, select format and confirm, the external Micro card will be formatted into FAT32 format, formatting will cause all files in the Micro SD card to be lost. Please choose to do backup work before formatting, careful operation.
3.15.19 Restore factory settings
When the system is abnormal or you need to restore the player to the factory default settings, you can use this item to restore the factory settings. After restoring the factory settings, the artist, album, style, and recently added songs of the classified category will be cleared. Please re-update the song library.
3.15.20 firmware upgrade
Improper operations during firmware update may cause the M5 to malfunction! Please read the following firmware update guide carefully before proceeding.
Update procedures:
- Please go to our website to download firmware. Download link: http://www.fiio.com/supports; copy the M5.zip file package to the root directory of an FAT32-formatted SD card.
- Insert the card into the slot on M5 (if not already inserted).
- Go to Settings >> System settings >> System updates and click "Yes" on the pop-up confirmation dialogue.
- The M5 will restart and enter firmware update and the following dialogues will appear:

Firmware decompression Firmware upgrade Firmware upgrade succeeded
Pay attention to the firmware upgrade:
- It is recommended to use the Micro SD card in FAT32 format. If the upgrade is not successful, please try to ch the blank Micro SD card below 32G, format it with M5 and copy the firmware to it and try again.
- Ensure that the power of the M5 is sufficient to avoid the upgrade failure (preferably at full power);
- Please do not operate the machine during the upgrade process;
- After the firmware is upgraded, please update the song library again.
3.15.22 Bluetooth firmware update
This option is used to upgrade the Bluetooth firmware, which requires to work with the computer. Please go to the official website https://www.fiio.com/supports to download the firmware and tools needed for the upgrade. You could read the instructions for detailed. If you accidentally enter this page, you can swipe from the left edge of the display to the right, and then exit the Bluetooth update mode by confirming in the prompt box.
(Note: the Bluetooth firmware and the system firmware are separate, and the Bluetooth function can be used normally only when the two versions are matched. It is recommended to update both firmware to the latest version. If cannot determine the matching version, you can contact the customer service for help.
3.15.22 About M5
Enter the About M5 page and the items displayed are the model name (M5), the firmware version, the total capacity of the Micro SD card, the available capacity of the Micro SD card, the number of (updated) tracks, the SN code, and the NB code.
Slide left and right to view the electronic quick start guide.
3.16 Update media library
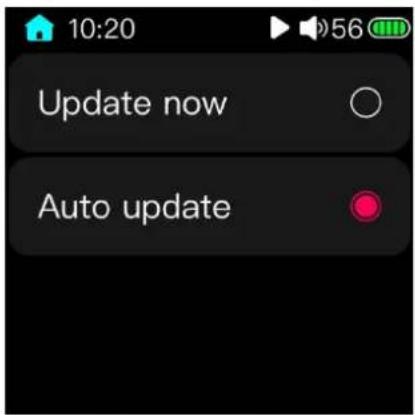
The Update media library option has update now and auto update modes. Update now means that the system will update the song library right after clicking this option and create new category list. Auto update means that as long as it is connected with the computer to copy data. The song library is automatically updated after disconnecting the computer to after inserting the Micro SD card.
Do not perform other operations such as lock screen or shutdown during the process of updating the song library, otherwise the update may fail. (Press the Back button during the update process to cancel the update.) When the song updated, the Update Complete dialog box will pop up.
4 Playback page

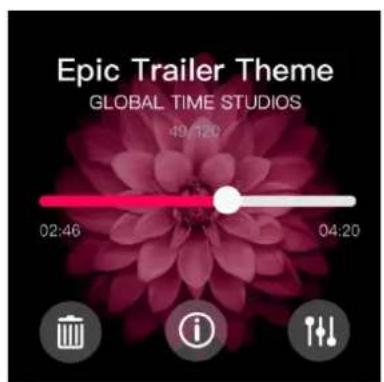

The playback page is shown in the picture above: (left) is the page of playing control. In this page, you can switch music, play/pause the music, the playing mode, and add songs to the playlist or my favorite.
Slide from right to left in the page of first picture and switch to the page to the second picture. The progress ba this page can adjust the progress of songs. The following three icons are used for deleting the song file, viewing the song information, and quickly switching the equalizer.
Slide from right to left in the picture in the page of second picture and switch to the page to the third picture .
could read the lyric of current playing music (The song lyric file need to be copied to the same directory of the song).
In the above three pages, click the blank position to enter the full-screen cover display page, as shown in the picture below.

natural_image
Close-up of a vibrant pink dahlia flower with detailed petals against a black background (no text or symbols)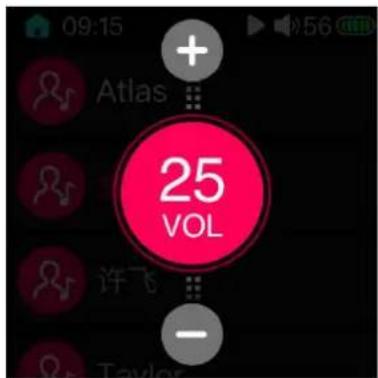
In the full-screen cover display page (as shown in the left picture above), you can switching the music by sliding left and right. Slide up and down can bring up the volume adjustment page. You could adjust the volume by sliding up and down. (As shown in the right picture above.)
5 Shortcut menu
5.1 Home

In the status bar shown above, the first icon is the Home button. Click this icon on any page, you can quickly re to the main page.
(Note: this icon will not appear on some page (such as the storage page after connecting to the computer, USB D, page, etc.). This is a normal phenomenon, not a software problem.)
5.2 Right shortcut menu
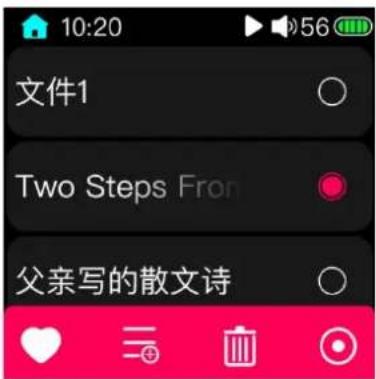
As shown in the picture above, From files browser page or all music, my favorite, playlist etc page under category, swipe from right:
1 Add songs to my favorites, short press the OK button to add songs to my favorites list, or remove songs from r favorites list.
2 Add songs to the playlist--In the shortcut menu that pops up in the playback interface by pressing the shortcut I you can choose to add the song to the playlist (for details, refer to the "Quick Menu" section).
3 Delete playlist
From the classified play-playlist to the playlist interface, as shown in Figure 1, move the cursor to the list to be deleted by sliding the touch bar, short press the shortcut key to pop up the operation menu, as shown in Figure. 2. select "Ye and confirm to delete The list file, as shown in Figure. 3. The songs added to the list after the list file is deleted will also disappear (just disappear from the list and will not affect the song file itself).
(Note: The song removes my favorite just to move the song out of the list, the song file is still there, and the song file will not be deleted.
6 notes:
★M5 in the process of use, encountering abnormally decoded tracks will automatically skip, to avoid causing "fake death" phenomenon
★ Charging with a charging adapter with a high voltage may damage the machine. Please select a suitable charger. Recommended DC 5V/1A charger.
★ During use, an automatic restart may occur when an abnormality occurs in the system. This is the automatic protection mechanism of the system. If the player crashes, try pressing the power button for 10 seconds to restart and restart.
★M5 needs to update the song library in order to use the classified play and all play functions normally.
★When the product is not used for a long time, it is recommended to charge the product regularly to ensure the battery life. It should be noted that the battery (battery pack or combination battery) should not be exposed to such conditions as sunshine, fire or similar overheating.
7 FAQs
7.1 What power sources can the M5 be used to charge?
You can use a 5V power supply such as a computer, mobile power supply, or adapter to charge. It is recommended to use the output current to achieve 1A or above for charging (other 5V power supplies with output capacity lower than : are also possible).
7.2 What is the charging current of M5?
When the M5 is charged by the computer's USB port, the player will automatically adjust the charging current according to the current that the computer can provide;
When the M5 is charged with an external adapter, the charging current is 500mA\~1A.
7.3 How long is the charging time of M5?
The adapter (DC 5V/1A and above) is turned off and charged for about 2.5 hours.
7.4 Can M5 listen to songs while charging?
Yes, but it is recommended to charge in the off state, because charging while listening to songs may cause the charging full time to prolong, and also cause slight fever in the player. Please pay attention to place the machine in a ventilated position to ensure that the player can dissipate normally.
7.5 Can M5 be charged with other Micro USB cable?
Yes, but the original data cable of the M5 is specially designed to reduce the loss during charging. If you use a non-original charging cable, it may cause the charging speed to slow down; if you use a poor quality data cable, you m not be able to charge because the voltage loss of the data cable is too large, or affect the stability of data copying.
7.6 Why can't the M5 be charged by some desktop USB sockets or the charging speed is slow?
If it is not possible to charge, first confirm that the data cable (charging cable) can be used properly and confirm that the device is connected.
In addition, the M5 connection uses a smart charging mode, which can automatically adjust the charging current according to the external power supply capability. If the charging device has poor power supply capability, the charging speed will be slow and the charging cannot be performed.
7.7 How to judge the status of M5 charging?
When the M5 is charging, the battery icon in the status bar at the upper end of the player display will scroll (if it is off, the display will show a large battery icon to indicate charging). If the battery icon stops scrolling, the machine is fully charged.
7.8 Which operating systems does M5 support for copying songs?
M5 supports data copying on Microsoft's Win xp/Win 7/Win 8/Win 10, including 32-bit/64-bit operating systems, Apple's OSX operating system, and Linux.
7.9 M5 supports USB interface standard data copy?
M5 supports standard data copy of USB2.0 and USB3.0 interface.
7.10 Does the M5 support file be directly dragged and deleted by the file manager on the computer?
Yep, it is supported.
7.11 Does the M5 online computer need to be installed with a driver?
No, the M5 is completely driven-free.
7.12 How do I know if M5 has the latest firmware?
1 Follow the official website of FIIO, www.fiio.com.
- Write an email to support@fiio.com to contact customer service for the latest firmware.
7.13 How to upgrade the M5 firmware?
The upgrade steps and precautions for M5 have been described in detail above and will not be described here.
7.14 Will the upgrade fail to become brick? What if I change the brick?
If the M5 upgrade is normal, it will not change bricks. If there is a brick change, please contact FiiO customer serv in time. We can help solve it through other methods.
7.15 What types of cards does the M5 support?
M5 supports Micro SD card (also known as Micro SD card), including SDHC, SDXC Micro SD card.
7.16 M5 pick card?
After testing, M5 can support brand Micro SD cards with quality assurance (such as Samsung, SanDisk). For other brands of cards, it is impossible to test them one by one, but the cards with guaranteed quality can be used normally. In order to avoid the slow speed of the card, the M5 becomes jam when playing a song or cannot play the high-stream lossless music on the card (such as 192K/24B APE format music), it is recommended to use CLASS10 and above Micro SD card.
7.17 What size card does the M5 support?
After testing, M5 currently supports cards up to 512G.
7.18 How to format Micro SD card into FAT32 format?
It is recommended to insert the Micro SD card into the M5 card slot and format it into FAT32 format in System Settings > Format. You can also use the card reader to load the Micro SD card to connect to the computer. After using the
Explorer to find the card, right click and press the prompt. Quick formatted to FAT32 format. Note: Micro SD cards of 64G and above cannot be formatted directly into FAT32 format under Windows system. Please format them with third-party tools. You can consult FiiO customer service for technical support.
7.19 All files on the Micro SD card cannot be displayed on M5.
1 After inserting the Micro SD card into M5, enter the system and store the information to check whether the external memory and available capacity are normal (compared with the Micro SD card display on the computer); if the Micro SD card capacity is not normal on M5, please try Format the Micro SD card and copy the song again;
2 If the Micro SD card capacity is normal, please confirm that the copied song in the Micro SD card can be used normally - copy the song from the Micro SD card to the computer, the normal playback of the computer means the M SD card track is normal; if the computer cannot play, please delete Recopy after the track;
3 If the above two methods cannot be solved, please change another Micro SD card or put the problematic Micro card on other machines for verification.
7.20 Files on the Micro SD card (FAT32) only show partial files on M5.
1 Please enter the play all, sort play and browse files to view the file display.
2If you can see all the files in" Browse Files", but "Play All" and "Classify Play" only see some files, please update the song library.
7.21 How do I reset the database files in M5 storage?
Remove the Micro SD card, update the song library when there is no card, and successfully update the database fi Or choose to restore the factory settings directly in the system settings.
7.22 What formats does the M5 support for Micro SD card recording?
M5 supports common FAT32, NTFS, exFAT format Micro SD card recording and file saving.
7.23 M5 supports APE, why my APE can't play.
APE has five different levels of compression, including Fast, Normal, High, Extra High, and Insane. The APE format is supported by M5 includes Extra High and Insane modes for all sampling rates, and APE music for Normal and High mode above 96K/24B.
7.24 Does M5 support CUE playback?
M5 supports the playback of external CUE files, which will be automatically tracked during playback.
7.25 My songs have CUE files. Why not supported?
M5 does not support CUE files embedded in song files, or the file names and song file names of CUE files are inconsistent.
7.26 Why can't I see the CUE file saved in the browse file?
Because M5 has been automatically tracked, only the individual songs contained in the CUE file can be seen.
7.27 How to play random folders across folders?
After successfully updating the song library, set the play mode to random play, enter the list of all songs, and sele the song to play.
7.28 Why can't my lyrics be displayed?
M5 only supports the external LRC format lyrics. The lyrics file name must be the same as the song file name. The embedded lyrics and KRC format lyrics are not supported.
7.29 Why is the cue playing interface displaying garbled characters?
M5 currently supports ANSI, Unicode, UTF-8 (with/without BOM) encoding formats, and other encoding formats do not.
7.30 Why did you copy the songs and press singers, genres, and albums?
Because M5 only updates the song library, it can search for relevant information and build a search library. Please the update song library to automatic, or manually update the song library to play normally.
7.31 Why is the total number of songs displayed by M5 different from the number of songs I copied
The total number of songs displayed by M5 is the total number of songs that M5 can recognize. Individual format tracks are not supported.
7.32 How to extend the endurance of the M5?
- M5 defaults to power-saving standby. If M5 does not play music and does not perform any key operation, it will enter deep standby after reaching the set time, thus reducing power consumption.
- Reduce the brightness level of the backlight, which can also effectively reduce power consumption.
- Set the backlight time. If there is no operation of M5, when reaching this time, M5 will automatically turn off to screen to save the display power consumption.


- M5 Complete user manual
- Contents
- 3.15System settings.... 15 -
- Update media library.... - 20 -
- notes:.... - 23 -
- FAQs.... - 23 -
- Introduction
- Buttons and ports introduced
- Buttons/Ports Diagram:
- Button and Interface Instructions
- Power / lock screen button
- Volume "+"
- Volume"-"
- Pickup hole
- Headphone/Coaxial output
- USB interface
- Micro card slot
- Page display introduction
- Switch machine and home page
- Indicator display
- Recording
- Step counter
- Classification play
- All songs
- Artist
- Album
- Genre
- Favorites
- Playlist
- Now playing
- Browse files
- Bluetooth receiving
- Settings
- Bluetooth transmitter
- Play settings
- Play mode
- Resume mode
- Playback gap
- Max volume
- Fixed volume setting
- Balance
- Equalizer
- Play through folder
- 3.15System settings
- 3.15.1Brightness
- Backlight time
- Power saving standby
- sleep standby
- USB mode
- Recording quality
- Lock screen clock
- Clock face
- Slect output
- SPDIF output
- display direction
- Double tap the screen
- Raise hand to turn on the screen
- power button
- Time setting
- setting the date
- Language
- Factory restore
- Restore factory settings
- firmware upgrade
- Bluetooth firmware update
- About M5
- Update media library
- Playback page
- Shortcut menu
- Home
- Right shortcut menu
- Delete playlist
- notes:
- FAQs
- What power sources can the M5 be used to charge?
- What is the charging current of M5?
- How long is the charging time of M5?
- Can M5 listen to songs while charging?
- Can M5 be charged with other Micro USB cable?
- Why can't the M5 be charged by some desktop USB sockets or the charging speed is slow?
- How to judge the status of M5 charging?
- Which operating systems does M5 support for copying songs?
- M5 supports USB interface standard data copy?
- Does the M5 support file be directly dragged and deleted by the file manager on the computer?
- Does the M5 online computer need to be installed with a driver?
- How do I know if M5 has the latest firmware?
- How to upgrade the M5 firmware?
- Will the upgrade fail to become brick? What if I change the brick?
- What types of cards does the M5 support?
- M5 pick card?
- What size card does the M5 support?
- How to format Micro SD card into FAT32 format?
- All files on the Micro SD card cannot be displayed on M5.
- Files on the Micro SD card (FAT32) only show partial files on M5.
- How do I reset the database files in M5 storage?
- What formats does the M5 support for Micro SD card recording?
- M5 supports APE, why my APE can't play.
- Does M5 support CUE playback?
- My songs have CUE files. Why not supported?
- Why can't I see the CUE file saved in the browse file?
- How to play random folders across folders?
- Why can't my lyrics be displayed?
- Why is the cue playing interface displaying garbled characters?
- Why did you copy the songs and press singers, genres, and albums?
- Why is the total number of songs displayed by M5 different from the number of songs I copied
- How to extend the endurance of the M5?
Brand : FiiO
Model : M5
Category : Media player