
10031996 - Range hood Klarstein - Free user manual and instructions
Find the device manual for free 10031996 Klarstein in PDF.


User questions about 10031996 Klarstein
0 question about this device. Answer the ones you know or ask your own.
Ask a new question about this device
Download the instructions for your Range hood in PDF format for free! Find your manual 10031996 - Klarstein and take your electronic device back in hand. On this page are published all the documents necessary for the use of your device. 10031996 by Klarstein.
USER MANUAL 10031996 Klarstein
text_image
QR code image containing encoded data, no visible human-readable text10032864

text_image
QR code image containing encoded data, no visible human-readable text
Hersteller:
natural_image
Diagram of a remote control panel with four rotary buttons and a central fan-like device (no text or labels)text_image
Min.320 65~150cmSchritt 1:
natural_image
Line drawing of a room with two simple furniture items and a wall-mounted fixture (no text or symbols)Schritt 4:
natural_image
Symbol of a trash bin crossed with a diagonal line, no text or numbers presentCongratulations on purchasing this equipment. Please read this manual carefully and take care of the following hints to avoid damages. Any failure caused by ignoring the mentioned items and cautions mentioned in the instruction manual are not covered by our warranty and any liability.
CONTENT
Safety Instructions 16
Dimensions 17
Overview and Key Functions 18
Preparation before installing 19
Installation 23
Filter Change 25
Hints on Disposal 26
TECHNICAL DATA
| Item number 10031996, 10032864 | |
| Power supply 220-240 V ~ 50-60 Hz |
DECLARATION OF CONFORMITY
10031996

text_image
QR code image containing encoded data, no visible human-readable text10032864

text_image
QR code image containing encoded data, no visible human-readable text
Producer:
Chal-Tec GmbH, Wallstraße 16, 10179 Berlin, Germany.
This product is conform to the following European Directives:
2014/30/EU (EMC)
2014/35/EU (LVD)
2011/65/EU (RoHS)
2009/125/EG (ErP)
SAFETYINSTRUCTIONS
Important notes about the extraction mode

Risk of poisoning from exhaust gases sucked back. Never operate the device in extraction mode simultaneously with an open flue appliance when there is not adequate airflow guaranteed.
Open fl ue combustion equipment (for example, gas, oil, wood or coal-fi red heaters, tankless water heaters, water heaters) pulls combustion air from the room and runs it through an exhaust pipe or chimney to the outside. In the extraction mode, indoor air is removed from the kitchen and the adjacent rooms - without sufficient air intake this creates a vacuum. Toxic gases from the chimney or extraction fl ue can thereby be sucked back into the living spaces.
- Always ensure that a sufficient supply of fresh air is guaranteed and that the air can circulate.
- An air supply / extractor box alone does not ensure compliance with the limit value.
Safe operation is only possible when the negative pressure in the room where the appliance is located does not exceed 4 Pa (0.04 mbar). This can be achieved when the air required for combustion can flow through openings that are not closable, for example in doors, windows, in conjunction with an air supply/ extractor box or through other technical measures. In any case, consult a qualified chimney sweep who can assess the entire ventilation of your house and propose appropriate measures for adequate ventilation.
If the hood is used exclusively in the recirculation mode, unrestricted operation is possible.

Fire hazard from flying sparks. Only install equipment on a fi replace for solid fuels (for example, wood or coal), if a closed, non-removable cover is available.
DIMENSIONS
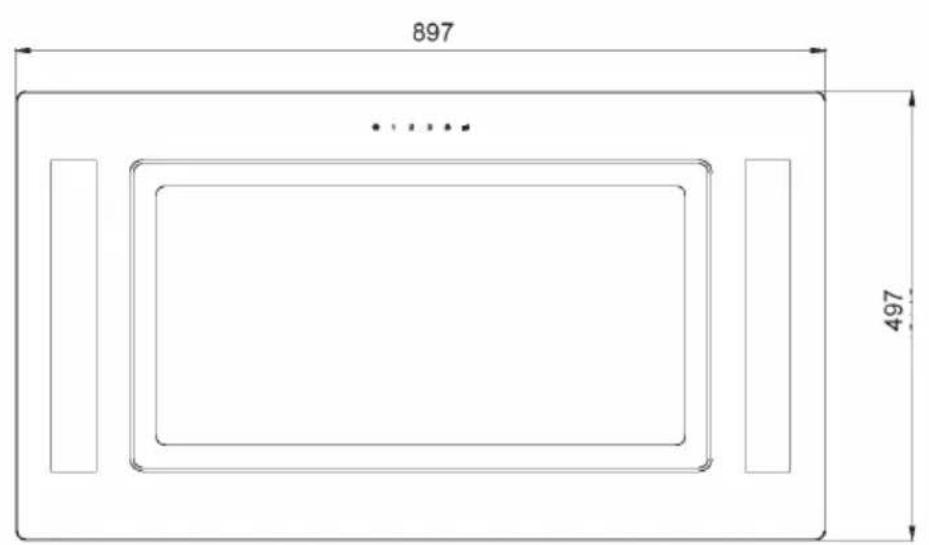
text_image
897 497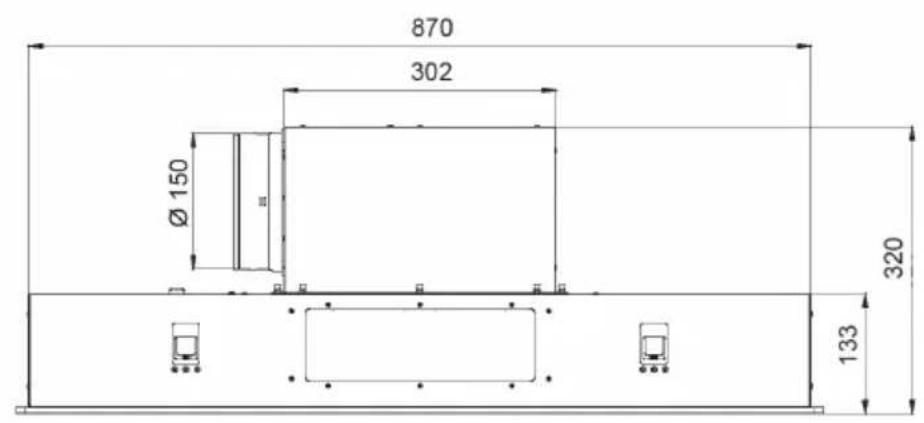
text_image
870 302 Ø 150 320 133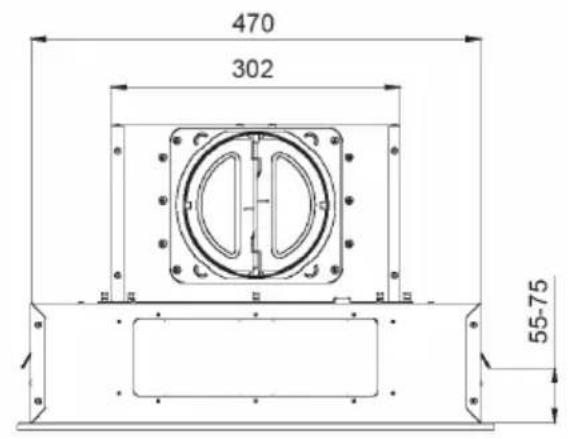
text_image
470 302 55-75OVERVIEW AND KEY FUNCTIONS

1
2
3


Key Functions

ON/OFF: Touch this button to turn the hood on/off. This button can turn off the motor but not the light. All surfaces for cleaning, while motor is not working. Touch and hold for 3 seconds to open/close damper (completely open), Thus you can reach Red light in standby mode. White light with power on.
1
LOW SPEED

MEDIUM SPEED

HIGH SPEED

LIGHT

REMOTE CONTROL
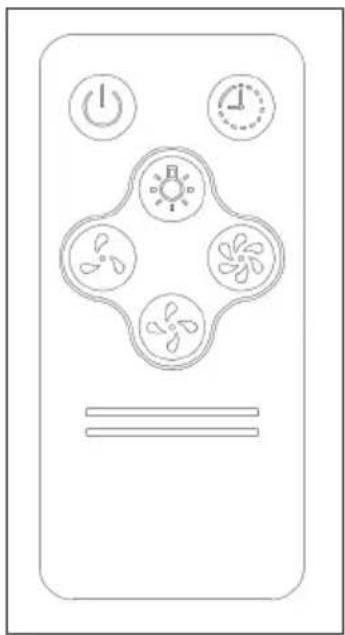
natural_image
Diagram of a remote control panel with four rotary buttons and a central fan-like device (no text or labels)PREPARATION BEFORE INSTALLING
Required Tools: gloves, cross head screw, desk, ladder, saw, ruler, electric drill.
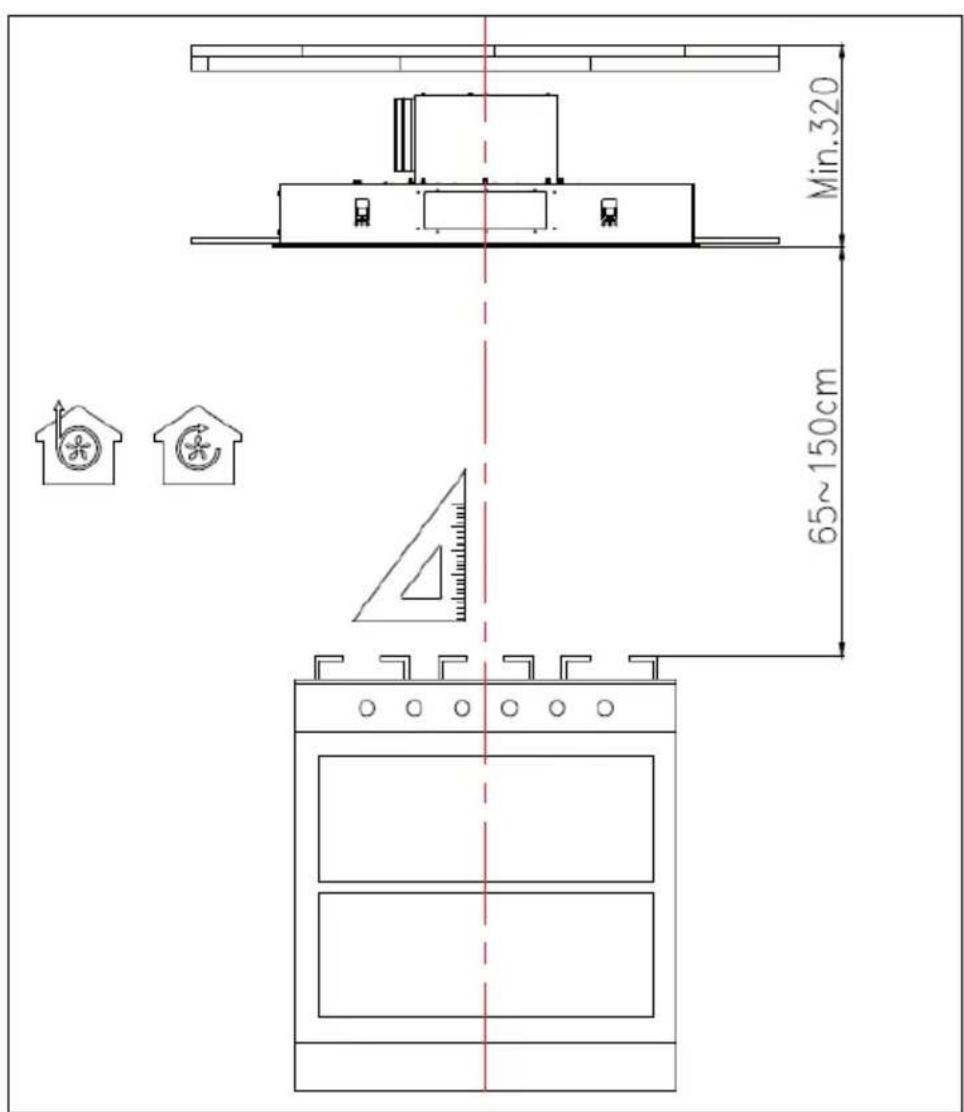
text_image
Min.320 65~150cmStep 1:
Confirm the height of hood hung on the ceiling above the gas cooker according to the distance required on user manual.
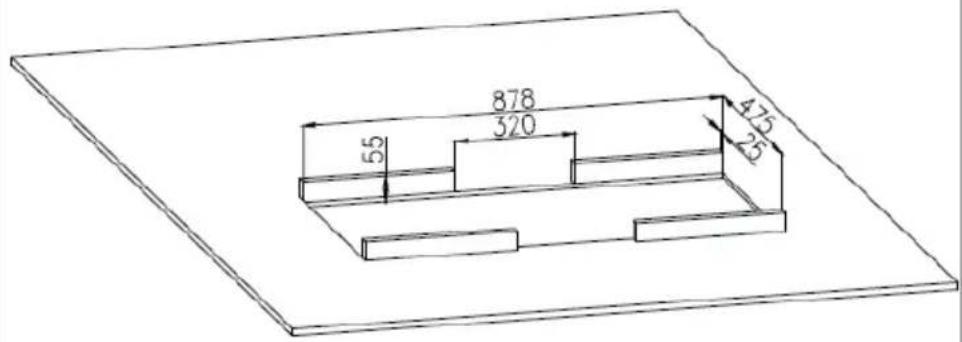
text_image
55 878 320 475 25
Step 2:
Open the hole above the gas cooker according to the size required in user manual and reinforce inside of ceiling by batten or stainless steel plate according to size shown in picture
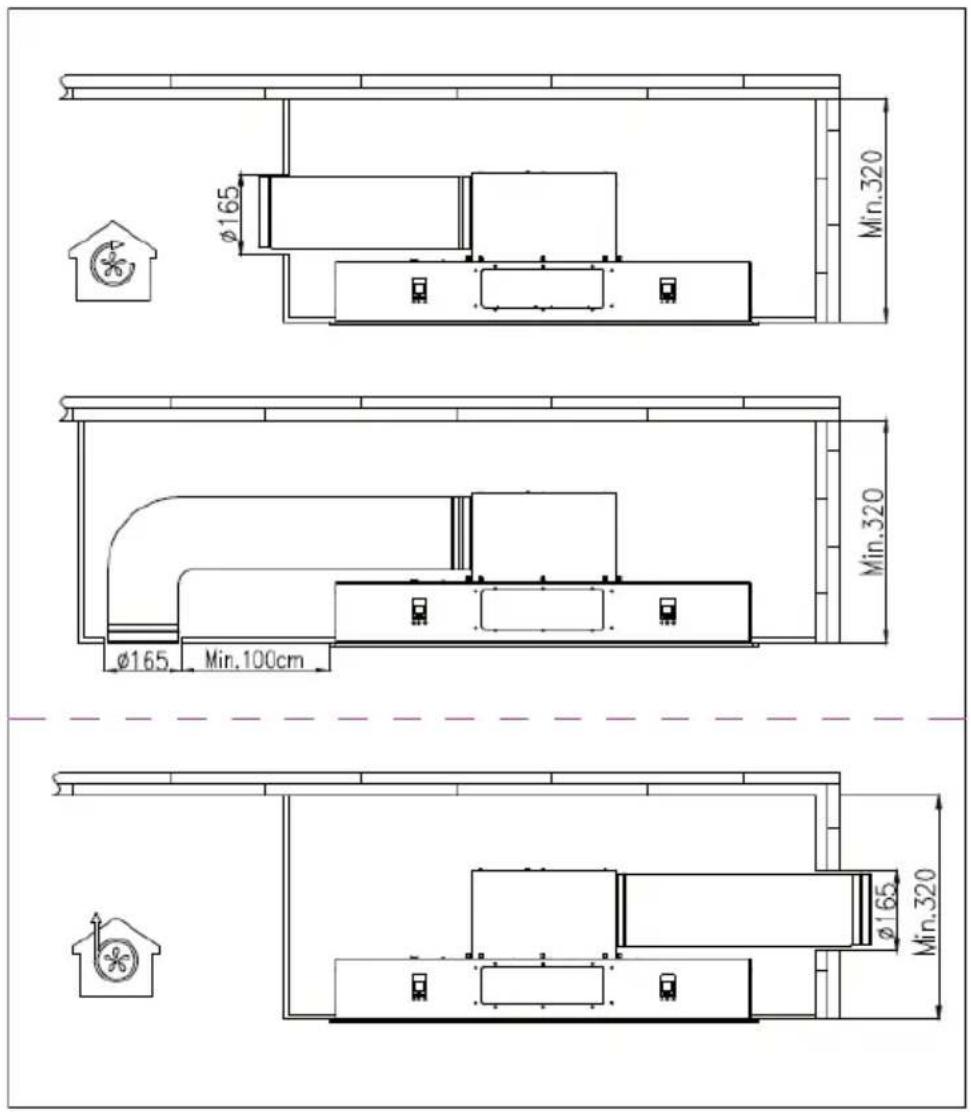
Step 3:
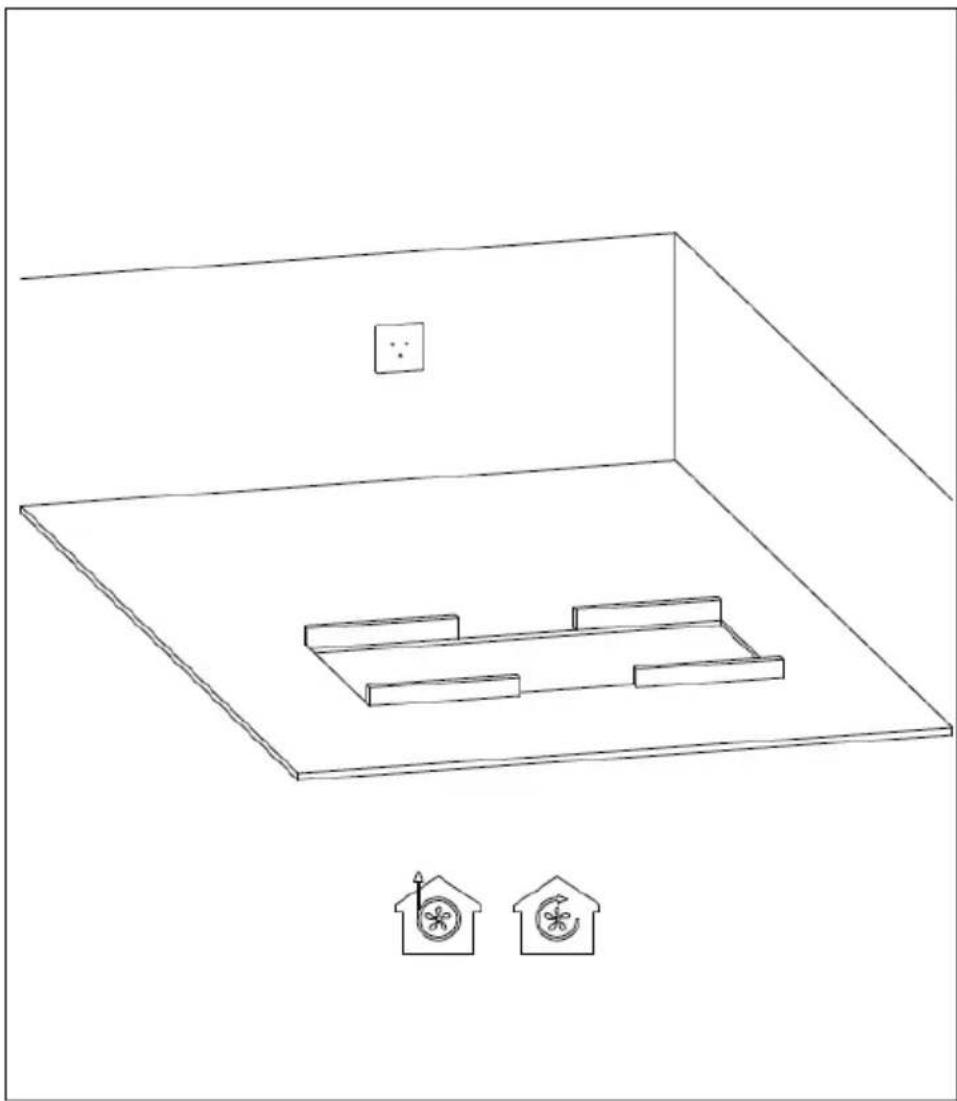
According to actual layout of kitchen to choose range hood function of internal recycle or outside, to confirm the direction of exhaust pipe, the open the hole in ceiling or the wall.
natural_image
Line drawing of a room with two simple furniture items and a wall-mounted fixture (no text or symbols)Step 4: Install the power socket, and fix it on the ceiling and wall, position of power socket may connect with power plug.
INSTALLATION
| Step 1 Step 2 | |
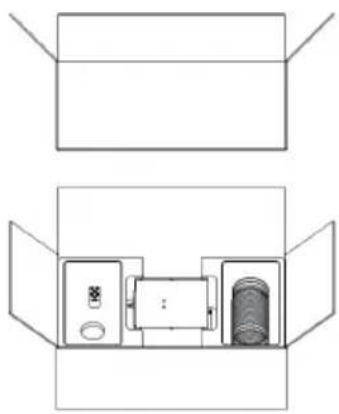 | 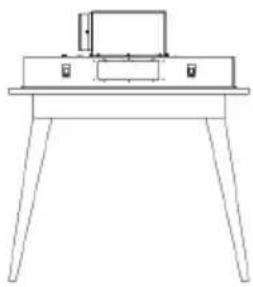 |
| Please check if the carton of hood is OK,then open the carton to confirm if the spare parts is complete. | Take out spare parts and foam,then take out the hood to put on the flat desk to avoid fallen. |
| Step 3 Step 4 | |
  |  |
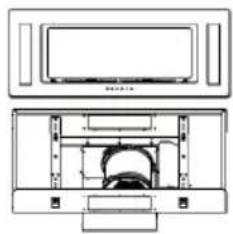 | |
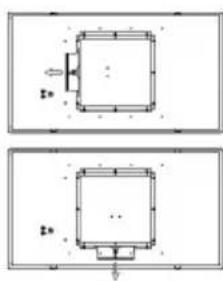
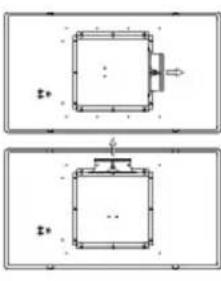
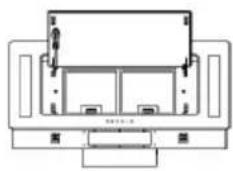
| Adjust the direction of hood outlet according to the kitchen requirement,then install the exhaust pipe. | Open the guide plate,take out the filter net and take off 6 pcs screws,take out guide plate and pluck and wire connected with switch and LED light. |
| Step 5 Step 6 | |
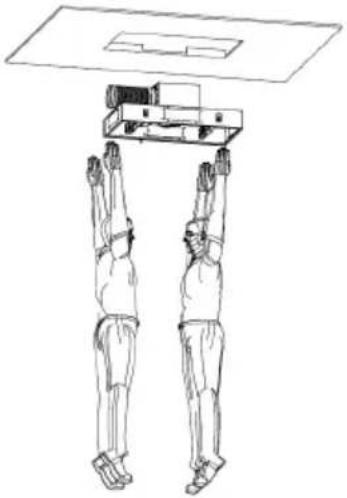 | 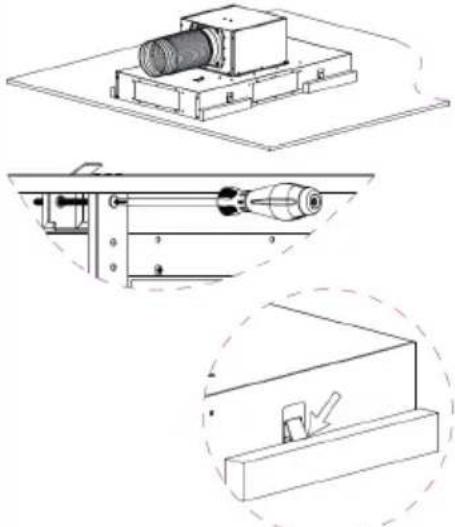 |
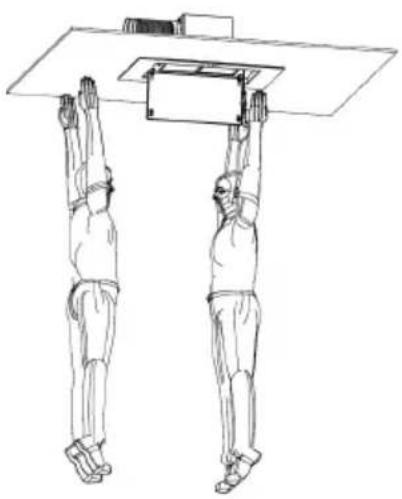
| To lift and hood body by 2 persons to near the opened hole in the ceiling, the third person insert power plug into the power socket which is prepared firstly. | Lift the hood into the hole opened before, then adjust the screw of 4 bayonets until the hood body is aligned with the ceiling, make sure 4 bayonets to get stuck the wood frame installed inside of ceiling at same time, and make sure not loose from all sides. |
| Step 7 Step 8 | |
 |  |
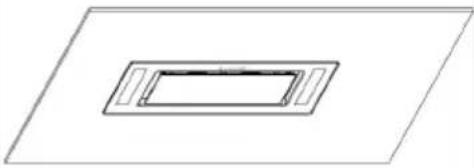 | |
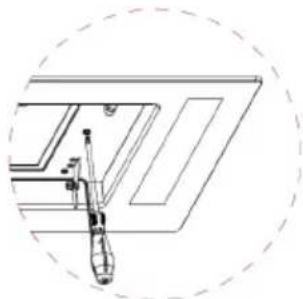
| Lift the guide panel to the body of hood by 2 persons, connect wire of switch and LED light, then adjust the screw holes in guide panel to be aligned with the nuts on range hood body, then fix 6 screws tightly. | Close the guide panel then installation is finished, turn on switch by remote control as instruction on the user manual. |
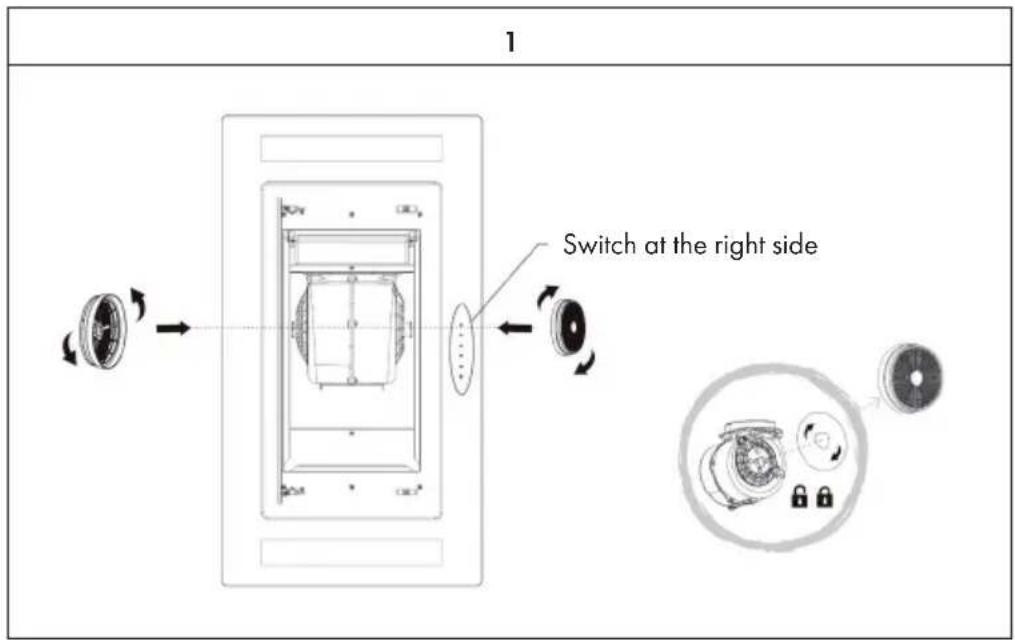
FILTER CHANGE
text_image
1 Switch at the right sideHINTS ON DISPOSAL
natural_image
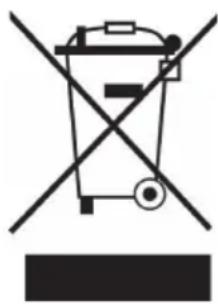
Symbol of a trash bin crossed with a diagonal line, no text or numbers presentAccording to the European waste regulation 2012/19/EU this symbol on the product or on its packaging indicates that this product may not be treated as household waste. Instead it should be taken to the appropriate collection point for the recycling of electrical and electronic equipment. By ensuring this product is disposed of correctly, you will help prevent potential negative consequences for the environment and human health, which could otherwise be caused by inappropriate waste handling of this product. For more detailed information about recycling of this product, please contact your local council or your household waste disposal service.
Your product contains batteries covered by the European Directive. 2006/66/EC, which cannot be disposed of with normal household waste. Please check local rules on separate collection of batteries. The correct disposal of batteries helps prevent potentially negative consequences on the environment and human health.
Estimado cliente:
text_image
QR code image containing encoded data, no visible human-readable text10032864

text_image
QR code image containing encoded data, no visible human-readable text
text_image
CEFabricante:
Chal-Tec GmbH, Wallstraße 16, 10179 Berlin (Alemania).
natural_image
Diagram of a remote control panel with four rotary buttons and a central fan-like device (no text or labels)text_image
Min.320 65~150cmPaso 1:
natural_image
Line drawing of a room with two simple furniture items and a wall-mounted fixture (no text or symbols)natural_image
Symbol of a trash bin crossed with a diagonal line, no text or numbers presentDÉCLARATION DE CONFORMITÉ
10031996

text_image
QR code image containing encoded data, no visible human-readable text10032864

text_image
QR code image containing encoded data, no visible human-readable text
Fabricant :
Chal-Tec GmbH, Wallstraße 16, 10179 Berlin, Allemagne.
natural_image
Diagram of a remote control panel with four rotary buttons and a central fan-like device (no text or labels)PRÉPARATION AVANT L'INSTALLATION
text_image
Min.320 65~150cmnatural_image
Line drawing of a room with two simple furniture items and a wall-mounted fixture (no text or symbols)natural_image
Symbol of a trash bin crossed with a diagonal line, no text or numbers presenttext_image
QR code image containing encoded data, no visible human-readable text10032864

text_image
QR code image containing encoded data, no visible human-readable text
Produttore:
Chal-Tec GmbH, Wallstraße 16, 10179 Berlino, Germania.