ACCESSOIRE TRANCHE-BORDURE - Gardening Equipment HUSQVARNA - Free user manual and instructions
Find the device manual for free ACCESSOIRE TRANCHE-BORDURE HUSQVARNA in PDF.

| Product type | Edger attachment for Husqvarna brushcutters/trimmers |
| Brand | HUSQVARNA |
| Weight | 1.6 kg |
| Blade length | 195 mm |
| Blade center hole | 1 inch (25.4 mm) |
| Blade rotation speed | 7,140 rpm |
| Lock nut tightening torque | 35-50 Nm (3.5-5 kpm) |
| Angular gear lubrication | Husqvarna special grease, fill to 3/4 |
| Drive shaft lubrication | Every 30 hours of service, grease along entire length |
| Safety distance | 15 m around the user |
| Required protections | Helmet (if risk of falling), ear protection, approved safety glasses, gloves, non-slip boots |
| Components supplied | Blade, angular gear, blade guard, shaft, lock nut, stop flange, locking screw, manual |
| Cutting depth adjustment | By moving the locking screw on the blade guard |
| Daily maintenance | Check blade, blade guard, lock nut, and that the blade stops at idle |
| Weekly maintenance | Check grease level in angular gear |
| Compliance | Applicable EC directives |
| Intended use | Grass edge trimming |
| Spare parts | Use exclusively original Husqvarna parts |
Frequently Asked Questions - ACCESSOIRE TRANCHE-BORDURE HUSQVARNA
User questions about ACCESSOIRE TRANCHE-BORDURE HUSQVARNA
0 question about this device. Answer the ones you know or ask your own.
Ask a new question about this device
Download the instructions for your Gardening Equipment in PDF format for free! Find your manual ACCESSOIRE TRANCHE-BORDURE - HUSQVARNA and take your electronic device back in hand. On this page are published all the documents necessary for the use of your device. ACCESSOIRE TRANCHE-BORDURE by HUSQVARNA.
USER MANUAL ACCESSOIRE TRANCHE-BORDURE HUSQVARNA
GB Operator's manual
ACCESSIONE TRANCHES-BORDURE
SUPPLEMENTO CORTABORDES
Symbols

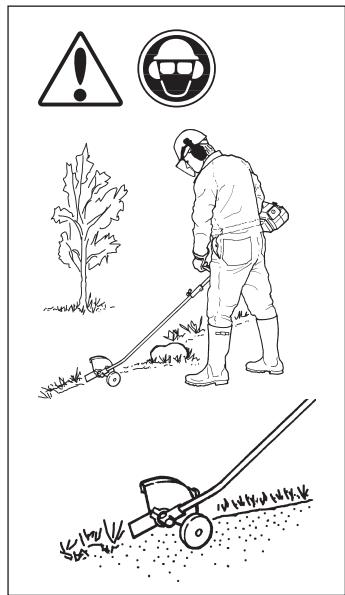
WARNING! The edger can be dangerous!
Careless or incorrect use can result in serious or fatal injury to the operator or others.

Read through the Operator's Manual carefully and understand the content before using the machine.

Always use:
- A protective helmet where there is a risk of falling objects.
- Ear protection
Approved eye protection

Max. speed of output axle, rpm

This product is in accordance with applicable CE directives.
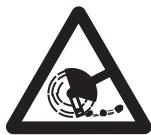
Beware of thrown objects and ricochets.
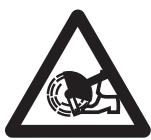
Warning for rotating blade. Keep hands and feet clear.
Warning! The blade continues to rotate even after the engine has stopped.
When the engine has stopped, stop the blade from rotating by letting the blade come in contact with the ground.
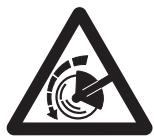
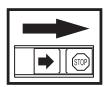
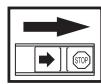
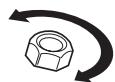
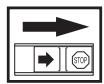
Indicates the direction of rotation.
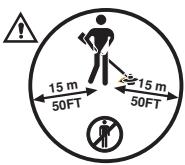
The operator of the machine must ensure that no persons or animals comes within a 15 metre radius while working.


Arrows which show limits for handle mounting.

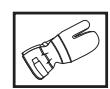
Always wear approved protective gloves.

Use anti-slip and stable boots.
Other symbols/decals on the machine refer to special certification requirements for certain markets.

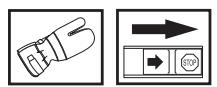
Checks and/or maintenance should be carried out with the engine switched off, with the stop switch in the STOP position.
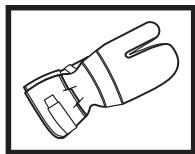
Always wear approved protective gloves.
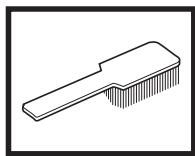
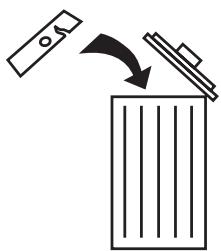
Regular cleaning required.

Ocular control.

Approved eye protection must always be used.
Husqvarna AB has a policy of continuous product development and therefore reserves the right to modify the design and appearance of products without prior notice.

Read through the Operator's manual carefully and understand the content before using the machine.
These instructions supplement the instructions that were included with the machine. For other procedures, please refer to the opertaining instructions forhte machine.

WARNING!
Under no circumstances may the design of the machine be modified without the permission of the manufacturer. Always use genuine accessories. Non authorised modifications and/or accessories can result in serious personal injury or the death of the operator or others.

WARNING!
This accessory may only be used together with the intended clearing saw/trimmer, see under heading "Approved accessories" in chapter Technical data in the machine's Operator's Manual.
The machine is only designed for cutting the edges of lawns.
List of Contents
EXPLANATION OF SYMBOLS
Symbols 2
CONTENTS
List of Contents 3
SAFETY INSTRUCTIONS
Personal protective equipment 4
The machine's safety equipment 4
General safety instructions 5
General working instructions 5
Basic working techniques 6
WHAT IS WHAT?
What is what on the edger attachment? 7
ASSEMBLY
Assembling the angle gear 8
Assembling the blade 8
START AND STOP
Control before starting 8
MAINTENANCE
Angle gear 9
Lubricating the flexible drive axle 9
Adjusting the edge's cutting depth 9
Maintenance schedule 9
TECHNICAL DATA
Technical data 9
Personal protective equipment
IMPORTANT INFORMATION
- When using an edger, personal protective equipment must be used. Personal protective equipment does not eliminate the risk of accidents, however, it can reduce the effects of an injury in the event of an accident. Ask your dealer for help when choosing protective equipment.
The machine's safety equipment
This section describes the machine's safety equipment, its function and how checks and maintenance are carried out to ensure that it operates correctly. (See the chapter "What is what" to locate where this equipment is positioned on your machine.)

WARNING!
Never use a machine with defective safety equipment. Follow the control, maintenance and service instructions described in this section.
Cutting attachment guard
This guard is intended to prevent objects from being thrown towards the operator and to protect the operator from unintentional contact with the cutting attachment.
- Ensure that the guard is undamaged and is not cracked.
- Replace the guard if it has been exposed to impact or is cracked.
Always use the prescribed blade and guard combination, see chapter "Technical data" in the machine's Operator's Manual.
Cutting equipment
The blade is designed and processed to withstand loads that edging of a lawn involves.
Locking nut
The locking nut secures the cutting equipment on the output shaft.

Cutting equipment
The two basic rules:
- Only use the cutting equipment we recommend! See chapter "Technical data" in the machine's Operator's Manual.
- Check the cutting equipment with regard to damage and crack formation. Damaged cutting equipment should always be replaced.

WARNING!
Always stop the engine before starting work on any part of the cutting equipment. This continues to rotate even after the throttle has been released. Ensure that the cutting equipment has stopped completely and remove the cable from the spark plug before you start to work on it.
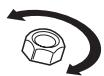
Locking nut
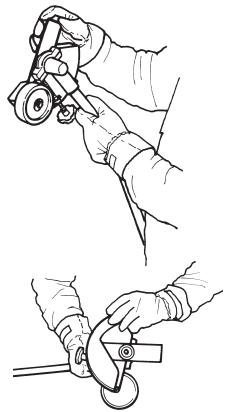
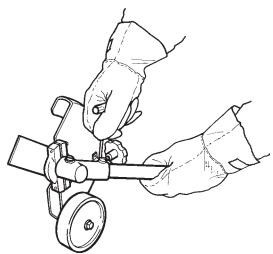
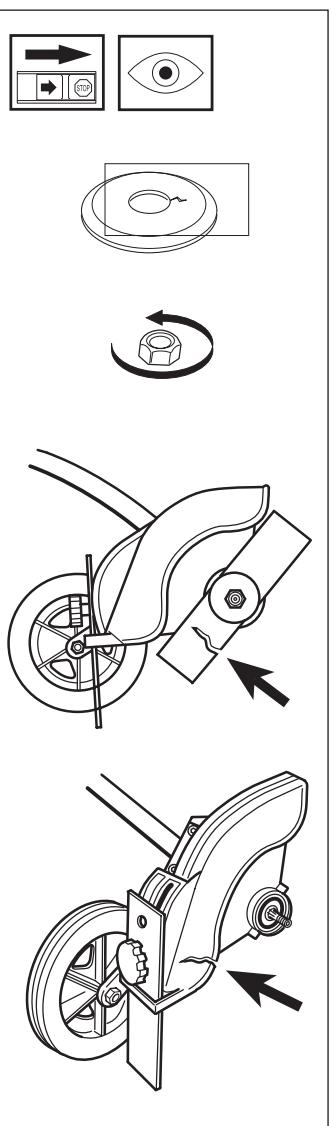
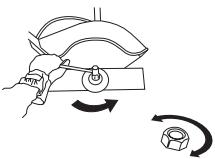
- Protect your hand from injury when assembling, use the blade guard as protection when tightening with a socket spanner. Tighten the nut by turning against the direction of rotation. Loosen the nut by turning in the direction of rotation. (NOTE! the nut has a left-hand thread).
- Tighten the nut using a socket spanner, 35 - 50 Nm (3.5 - 5 km).

NOTE!
The locking nut's nylon lock must not be so worn that it can be turned by hand. The lock shall hold at least 1.5Nm . The nut should be replaced after it has been put on approx. 10 times.

WARNING!
Never use a machine with defective safety equipment. The safety equipment should be maintained as described in this section. If your machine does not meet any of these controls you should contact your service workshop.
General safety instructions

WARNING! Faulty cutting equipment increases the risk of accidents.
Personal protection
- Always wear boots and other equipment described in the section "Personal protective equipment" in the machine's Operator's Manual.
Always wear working clothes and heavy-duty long trousers. - Never wear loose sitting clothes or jewellery.
- Persons with long hair should, for personal safety, put their hair up.


Safety instructions regarding the surroundings
- Never allow children to use the machine.
- Ensure no one comes closer than 15 metres when working.
- Never allow anyone else to use the machine without first ensuring that they have understood the contents of the Operator's Manual.
Safety instructions before starting work
- Inspect the working area. Remove any objects, such as stones, broken glass, nails, steel wire, string, etc. that can be thrown or can wrap around the blade or blade guard.
- Keep others at a safe distance. Children, animals, onlookers and helpers should stand outside of the safety zone of 15m (50 feet). Stop the machine immediately if any one should approach.
- Check the entire machine before starting work. Replace damaged parts. Check for fuel leakage and that all safety guards and covers are complete and fastened securely. Check all nuts and bolts
- Check the blade for cracks or any other damage.
- Ensure the blade guard is mounted and not damaged.
- Check that the blade and blade guard are correctly secured.
- When adjusting the carburettor make sure the blade is held against the ground and that no one is in the immediate vicinity.
- Make sure the blade does not rotate when idling.
- Make sure the handle and safety features are in order. Never use a machine that has parts missing or has been changed in relation to the specification.
- Only use the machine for the purpose it was intended for.
General working instructions
IMPORTANT INFORMATION
- This section takes up the basic safety precautions for working with the edger.
- If you encounter a situation where you are uncertain how to proceed you should ask an expert. Contact your dealer or your service workshop.
- Avoid all usage which you consider to be beyond your capability.
Basic safety precautions
- Observe your surroundings:
- To ensure that people, animals or other things cannot affect your control of the machine.
-
To ensure that the above mentioned do not come into contact with the cutting equipment or objects that can be thrown by the cutting equipment.
NOTE! Never use a machine without the possibility of calling for help in the event of an accident. -
Avoid usage in unfavourable weather conditions. For example, thick fog, heavy rain, strong winds or extreme cold, etc. To work in bad weather conditions is tiring and can create dangerous circumstances, e.g. slippery surfaces.
- Make sure you can walk and stand safely. Look out for any obstacles with unexpected movement (roots, stones, branches, pits, ditches, etc.). Take great care when working on sloping ground.
- The engine should be switched off before moving.
- Never put the machine down with the engine running unless you have good sight of it.
Basic working techniques
Safety instructions while working
- Always ensure you have a safe and firm foothold.
- Always hold the machine with both hands. Hold the machine of the right-hand side your the body.
- Make sure your hands and feet do not come into contact with the blade when the engine is running.
- When the engine is switched off, keep your hands and feet away from the blade until it has stopped.
- Always cut edges at full throttle.
- Always keep the blade close to the ground.
- Always drop to idling speed after each working operation. Longer periods running at full throttle without loading the engine (that is without resistance, which the engine feels from the cutting equipment when trimming) can lead to serious engine damage.
- Be especially careful when pulling the edger towards you during work.
- If heavy vibrations occur, stop the engine. Remove the spark plug cable from the spark plug. Check that the machine is not damaged. Repair any damage.

WARNING!
Sometimes grass and stones can collect in the blade guard and blade. Always stop the engine when cleaning.

WARNING!
Beware of thrown objects. Always wear eye protection. Never lean over the blade guard. Stones rubbish etc. can be thrown up into the eyes resulting in blindness or other serious injury.
- Keep unauthorised persons at a distance. Children, animals, onlookers and helpers should be outside the safety zone of 15 meters (50 feet). Stop the machine immediately if anyone approaches.
- The bevel gear unit can get hot during use and may remain so for a while afterwards.
- There is a risk of slight burns if you touch it
Safety instructions after completing work
- Ensure the blade has stopped before cleaning, carrying out repairs or an inspection. Remove the spark plug cable from the spark plug.
- Wear heavy-duty gloves when carrying out repairs on the edge.
- Store the machine out of reach of children.
- Only use original spare parts with repair.
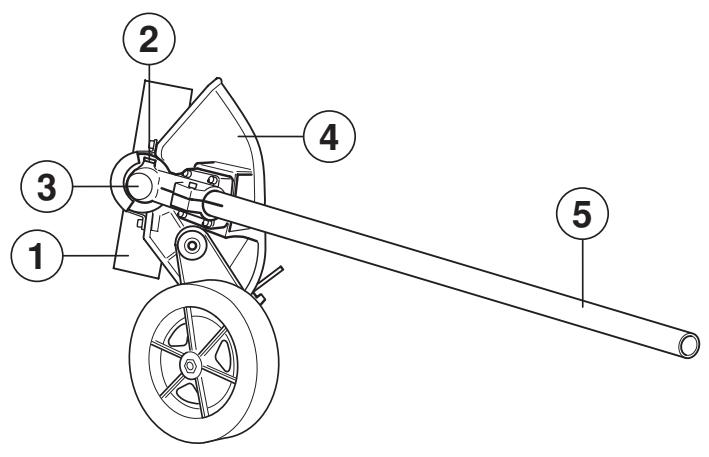
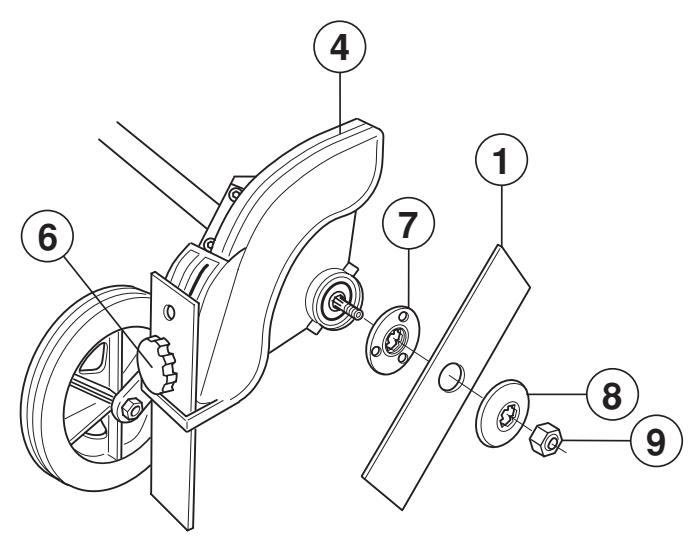

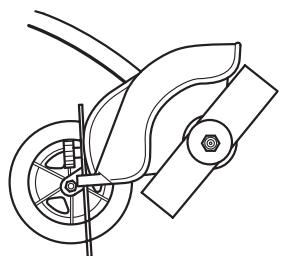
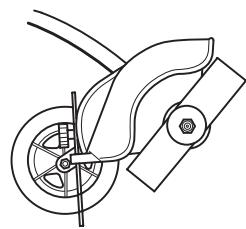
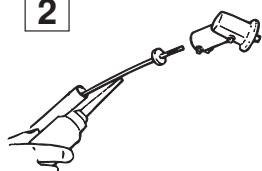
What is what on the edger attachment?
- Blade
- Grease filler cap
- Angle gear
- Blade guard
-
Shaft
-
Locking nut
- Support flange
- Drive disc
- Locking handle
- Operator's Manual
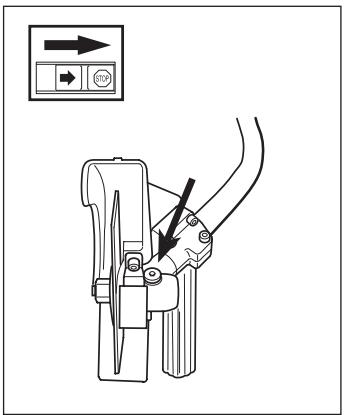
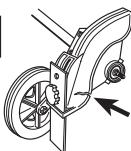
Assembling the angle gear
- Assemble the angle gear back on the supporting tube.
Turn the blade so that the drive shaft engages in the angle gear. - Position the angle gear so that its slot is aligned with the line on the supporting tube.
- Firmly tighten the screw.

Assembling the blade
Fit the blade as follows:
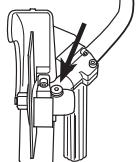
- Fit the drive disc (A) on the outgoing shaft. Make sure that the edge that fits in the hole of the blade is facing outward.
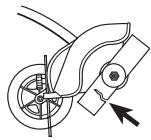
- Block the blade rotation by inserting locking pin in the hole behind the blade guard engaging it in the corresponding hole in the drive disc.
- Fit the blade (B) on the drive disc.
- Fit the support flange (C). The support flange must be fitted with its outer edge hard up against the blade.
- Fit the locknut (D). NOTE! The locknut has left-hand threads. The tightening torque of the locknut is 35 - 50 Nm .
- Remove the locking pin.
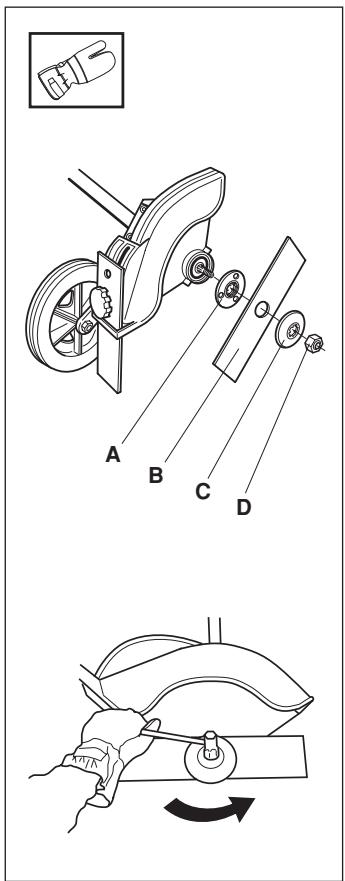
NOTE! Do not forget to remove the locking pin before using the machine.

WARNING!
Under no circumstances may the edge cutter blade be used without the blade guard fitted.
Control before starting
For reasons of safety follow these recommendations!
- Check that the support flange is not cracked due to fatigue or due to being tightened too much. Discard the support flange if it is cracked.
- Ensure that the nut has not lost its tightening capacity. The nut lock shall have a locking torque of at least 1.5 Nm. The nut's tightening torque shall be 35-50 Nm.
- Check that the blade and blade guard are not damaged or cracked. Replace the blade or blade guard if it has been exposed to impact or if it is cracked.
Angle gear
The angle gear is filled a sufficient quantity of grease at the factory. However, before using the machine you should check that the angle gear is filled to 3/4 with grease. Use HUSQVARNA special grease.
Normally, the grease does not need to be changed except when repairs are carried out.
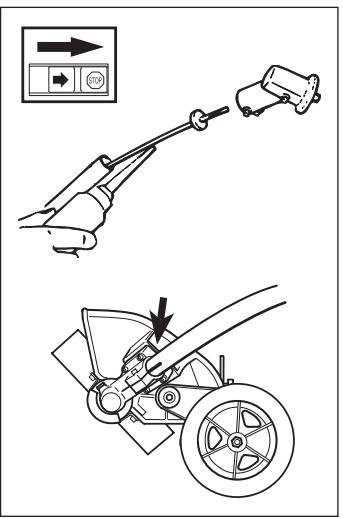
Lubricating the flexible drive axle
Inside the edger's drive shaft is a flexible drive axle. The flexible drive axle should be regularly lubricated after 30 hours of operation. Loosen the two screws on the angle gear and remove it. The flexible drive axle is easily removed from the shaft by taking a firm grip on the axle end. Lubricate the flexible drive axle over its entire length and reinsert it in the shaft. Turn the axle while inserting it so that it correctly engages in the clutch.
Replace the angle gear on the drive axle shaft and tighten the two screws.
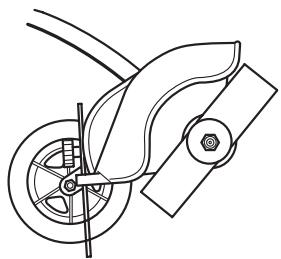
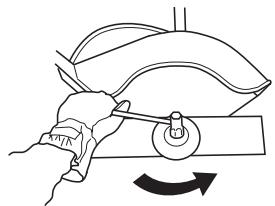
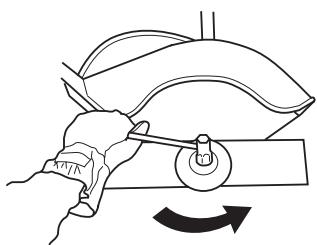
Adjusting the edge's cutting depth
The cutting depth should be adjusted before starting work.
- Loosen the locking handle (A) and rotate the guard by moving the locking knob forwards or backwards. If the locking handle is moved forwards (from the machine) the cutting depth is increased. If the locking handle is moved backwards (towards the machine) the cutting depth is reduced.
- Adjust the cutting depth.
- Lock the locking handle.
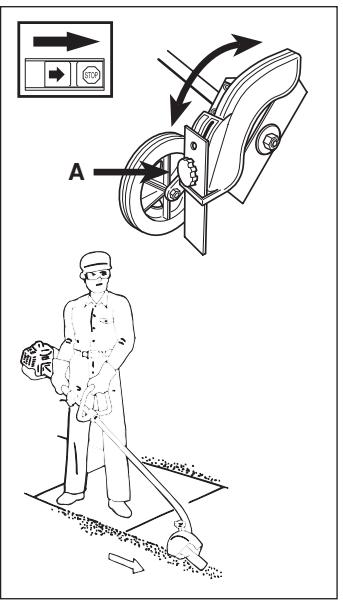

WARNING!
Always bear the machine on the right side of the body. Always wear protective glasses, long trousers and heavy-duty shoes when using the machine. Observe your surroundings, ensure people and animals do not come in the immediate vicinity or can be hit by thrown objects. Apply full throttle before the blade starts to work on the soil.
Maintenance schedule
Below follows some general maintenance instructions. If you need further information please contact your service workshop.
Daily maintenance
- Check that the blade does not rotate while idling.
- Check the guard for damage and ensure that it is not cracked. Replace the guard if it has been exposed to impact or is cracked.
- Check that the blade is undamaged and not cracked. Replace the blade if necessary.
- Check that the locking nut is tight.


3

Weekly maintenance
- Check that the angle gear is 3/4 filled with grease. Fill if necessary using special grease.
- The flexible drive shaft must be lubricated after every 30 hours in operation or more often.

[
TECHNICAL DATA
Technical data
Weight, Lbs/kg 1,6
Blade length 195 mm
Centre hole,blade 1^ = 25,4mm
Speed,blade 7140 r/min
Symboles