CTT3801V - Tumble drier Elvita - Free user manual and instructions
Find the device manual for free CTT3801V Elvita in PDF.


| Product Type | Condensing Tumble Dryer |
| Brand | Elvita |
| Model | CTT3801V |
| Drying Capacity | 8.0 kg |
| Energy Class | A++ |
| Annual Energy Consumption | 236 kWh (based on 160 standard cotton cycles) |
| Dimensions (L x W x H) | 622 x 595 x 845 mm |
| Net Weight | 52 kg |
| Power Supply | 220–240 V ~ 50 Hz |
| Rated Power | 650 W |
| Refrigerant | R134a |
| Noise Level (Sound Power) | 69 dB (standard cotton programme, full load) |
| Ambient Temperature Range | 5–35°C |
| Programs | Cotton, Delicates, Synthetics, Wool, Jeans, Mixed Fabrics, Sportswear, Shirts, My Cycle, Time (Warm/Cool), Refresh |
| Key Functions | Delay, Time, Intensity, My Cycle, Drum Light, Signal, Anti-Crease, Child Lock |
| Drying Levels (Intensity) | 4 levels (e.g., Extra Dry, Normal Dry, Iron Dry) |
| External Drain | Yes (hose and support included) |
| Filter System | Door filter, bottom filter, heat exchanger cleaning |
| Water Tank | Removable; must be emptied after each use |
| Child Lock | Yes (activate by pressing two buttons simultaneously) |
| Anti-Crease Function | Yes (cool-down phase after program end) |
| Standby Power Consumption | 0.8 W |
| Power Off Consumption | 0.01 W |
Frequently Asked Questions - CTT3801V Elvita
User questions about CTT3801V Elvita
0 question about this device. Answer the ones you know or ask your own.
Ask a new question about this device
Download the instructions for your Tumble drier in PDF format for free! Find your manual CTT3801V - Elvita and take your electronic device back in hand. On this page are published all the documents necessary for the use of your device. CTT3801V by Elvita.
USER MANUAL CTT3801V Elvita
Before using this product, please read the user manual carefully. Save the user manual for future reference.
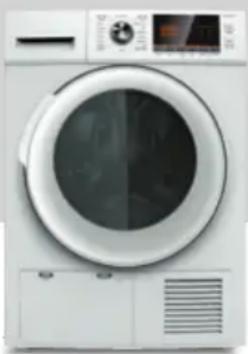
natural_image
Front view of a white washing machine with circular dial and control panel (no visible text or symbols)Innehåll
Säkerhetsinformation 3
Torksymboler 3
natural_image
Symbol of a trash bin crossed with no visible text or labelsInstallation
Transport
natural_image
Simple line drawing of a mechanical setup with a circular component and cross mark, no text or symbols present.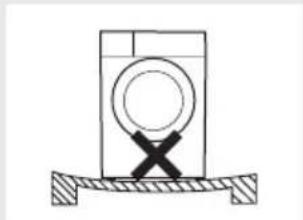
natural_image
Simple line drawing of a washing machine with a circular valve and cross symbol, resting on a base (no text or labels)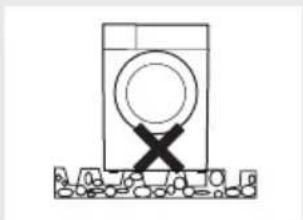
natural_image
Simple line drawing of a washing machine with a circular component and cross symbol (no text or labels)Nivåinställning
natural_image
Diagram of a washing machine with a tool emitting a red seal mark (no text or symbols)Strömförsörjning
natural_image
Diagram of a hand using a U-shaped tool to lift a cylindrical object into a rectangular device (no text or symbols present)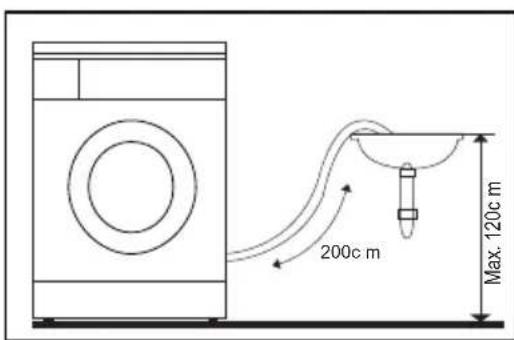
natural_image
Line drawing of a stainless steel sink with faucet and handle (no text or symbols)Använda
Kontrollpanelen
- Programväljare
- Display
- Funktionsknappar (Fördröjd start, Tid, Intensitet, Mitt val, Belysning, Signal, Strykfritt, Barnlås)
- Start/Paus-knapp
- På/Av-knapp
natural_image
Two technical line drawings showing hands installing or adjusting a door panel and opening a kitchen appliance into a sink (no text or symbols present)WARNING!
natural_image
Technical line drawing of a mechanical assembly with curved components and mounting brackets (no text or symbols)natural_image
Technical line drawing of a computer monitor with ventilation slots and wiring (no text or symbols)OBS!
natural_image
Illustration of a hand pressing down on a grid-patterned device (no text or symbols)Felsökning
natural_image
Symbol of a trash bin crossed with no text or numbers, representing waste sorting or disposal (no text present)Installing
Transport
natural_image
Three technical diagrams showing a washing machine on a surface, with no visible text or symbols.Nivåinnstilling
natural_image
Diagram of a washing machine with a tool inserted, showing no text or symbols on the main components.Strømforsyning
natural_image
Diagram of a hand holding a U-shaped pipe fitting into a container with a test tube, showing mechanical assembly (no text or symbols)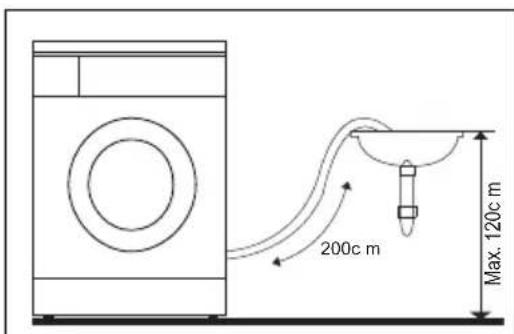
natural_image
Line drawing of a kitchen sink with faucet and plate (no text or symbols)Bruke
Betjeningspanelet
- Programvelger
- Display
- Funksjonsknapper (Utsatt start, Tid, Intensitet, Mitt valg, Belysning, Signal, Strykefritt, Barnesperre)
- Start/Pause-knapp
- På/Av-knapp
 | Utsatt start |
 | Barnesperre |
 | Tid |
 | Mitt valg |
 | Rent filter |
 | Tom vandbeholder |
 | Torking grad |
 | Trommel lys |
 | Signal |
 | Rynkefritt |
Bruke
Programvelgeren
natural_image
Two technical line drawings showing hands installing or adjusting a door panel and opening a kitchen appliance into a sink (no text or symbols present)ADVARSEL!
natural_image
Technical line drawing of a mechanical component with curved and straight lines, no visible text or symbolsnatural_image
Technical line drawing of a computer monitor with ventilation slots and a keyboard base (no text or symbols)OBS!
natural_image
Hand using a tool to interact with a digital display (no text or symbols visible)Risk of electric shock 37
Risk of personal injury 37
Risk of property damage 37
Disposing of your appliance 37
Installation 38
Transport 38
Placement 38
Levelling the dryer 38
Power supply 38
Instructions and advice 39
Overview 40
Description of parts 40
External drain for water 40
Fitting the external drain hose: 40
Using 41
Control panel 41
Programme selector 42
Function buttons 43
Programme table weight/features 44
Cleaning and regular maintenance 45
Emptying the water tank 45
Cleaning the door filter 45
Cleaning the bottom filter 45
Cleaning the heat exchanger (behind the bottom filter) 45
Troubleshooting 46
Technical specifications 47
Technical data 48
Safety information
Care labels
Before you use the tumble dryer, check that garments are made of fabrics that can be tumble dried, and look out for the following labels:
 Drying Instructions Drying Instructions |  Tumble Dry Tumble Dry |  Do Not Tumble Dry Do Not Tumble Dry |  Do Not Dry Do Not Dry |
 Line Dry Line Dry |  Drip Dry Drip Dry |  Dry Flat Dry Flat |  Dry In Shade Dry In Shade |
 Dryclean Dryclean |  Do Not Dryclean Do Not Dryclean |  Dryclean, Any Solvent Dryclean, Any Solvent |  Dryclean, No Solvent Stronger Than Perchlorethylene Dryclean, No Solvent Stronger Than Perchlorethylene |

You must follow the safety precautions to avoid injuries to yourself and others, and damage to property.
- This product belongs to the category of electrical appliances and should only be used for drying textiles that have been washed with water in household applications. Take the necessary electrical safety precautions during use!
- Only connect to a properly grounded wall socket. Fuse for a 10 amp load.
- Do not exceed the maximum capacity of this dryer.
- Do not dry dirty clothing in the tumble dryer.
- Clothing that is stained with cooking oil, acetone, alcohol, petrol, paraffin, stain remover, turpentine, wax or wax remover should be washed in hot water with extra detergent before it is dried in the dryer.
Safety information
- The last phase of the drying programme takes place without heat (cool-down phase), so that the laundry is left at a temperature that will not damage it.
- Make sure there is adequate ventilation in the room.
- The exhaust air must not be vented through an extractor that is used for appliances that burn gas or other fuels.
- Keep pets away from the appliance.
- Do NOT tumble dry garments that are stained with oil.
- The appliance must stand upright during normal use or maintenance.
- Remove all items from garment pockets, such as lighters and matches.
- This appliance can be used by children from the age of 8 and by individuals with reduced physical, sensory or mental capacities, or who lack experience, provided they are supervised by a responsible person or instructed in the safe use of the appliance and understand the risks involved in its use. Do not let children play with the appliance. Children may only carry out cleaning and maintenance if they are supervised by an adult.
- If the power cable is damaged it must be replaced by the manufacturer, the manufacturer's representative or an authorised person, to avoid danger.
- This appliance must only be used indoors.
- Children under the age of 3 should only be allowed near the appliance if they are under constant supervision.
Safety information
Risk of electric shock
- Do not unplug the appliance by pulling on the power cord.
- Do not touch the plug if you have wet hands.
- Do not damage the power cord or plug.
Risk of personal injury
- Do not dismantle the tumble dryer.
- Do not stand the dryer on top of a washing machine without the correct fittings.
- Do not lean against the open door of the dryer.
- Do not place any item on the dryer that could cause a fire, such as a candle or hotplate.
Risk of property damage
- Do not exceed the specified capacity of the tumble dryer.
- Do not use the dryer without the filter cover or bottom filter in place.
- Do not dry clothing that has not been spin-dried first.
- Do not install the dryer in a damp or wet area where it could be exposed to water spray.
- Unplug the appliance from the wall socket before cleaning or maintaining it, and avoid spraying water directly at the appliance.
Disposing of your appliance
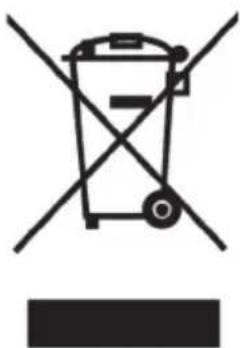
All electrical and electronic appliances must by law be disposed of at a recycling station (and some parts must be recycled). Electrical and electronic appliances that are marked with the recycling symbol must be taken to a recycling station for disposal.
natural_image
Symbol of a trash bin crossed with diagonal lines, no text or numbers presentInstallation
Transport
Take care when transporting the dryer. Do not lift the appliance by any of its projecting parts. Do not use the door of the appliance as a handle. If the dryer cannot be transported upright it must not be tilted more than 30^ to the right.
Placement
For the sake of convenience we recommend that the dryer is placed near the washing machine.
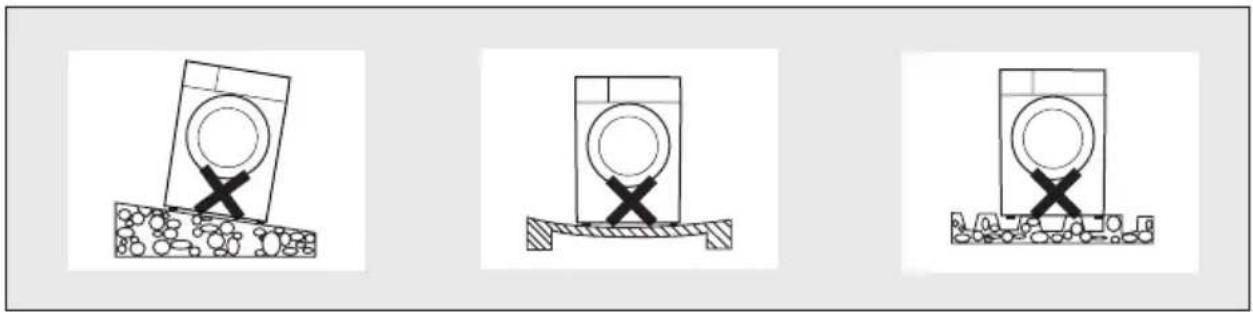
- The dryer must be installed in a clean area where dirt does not gather. Air must be able to circulate freely around the appliance. Do not cover the air inlet at the front, or the air vent at the rear of the appliance.
- Stand the dryer on a hard, flat surface to minimize vibration and noise when it is running.
- Never remove the feet from the dryer. Do not stand the dryer on thick carpet, strips of wood or the like that could reduce the clearance between the dryer and the floor. This could cause overheating and impair the operation of the appliance.
natural_image
Three technical diagrams showing a washing machine on a surface with no text or symbolsLevelling the dryer
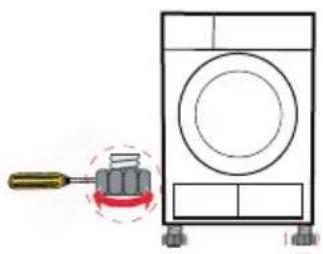
When the tumble dryer is in its correct position, use a spirit level to check that it is level. If not, adjust the feet to level the dryer.
natural_image
Diagram of a washing machine with a tool inserted, showing no text or symbols on the main components.Power supply
- Check that the supply voltage matches the voltage on the rating plate on the dryer.
- Do not use an extension lead or adapter to connect the dryer.
Instructions and advice
Instructions
Let the dryer stand for 2 hours after transport. Before using the dryer for the first time, clean the inside of the drum with a soft cloth.
- Place a few clean cloths in the drum.
- Turn on the power and press
. -
Select the
programme and press . -
When the programme has finished, follow the instructions in the "Cleaning and Maintenance" chapter to clean the filter cover.
During drying you may hear sounds from compressor and water pump, which is perfectly normal.
Advice
- Spin-dry laundry before tumble drying. This reduces the drying time and saves energy.
- Sort the laundry by fabric and drying programme to get the best drying results.
- Close zips and fasten buttons and belts before tumble drying.
- Do not over-dry laundry as this leads to more creasing.
- Do not dry garments that contain rubber or similar elastic materials, such as rainwear, saddle covers and the like.
- Only open the door when the drying programme has finished. Do not open the door early, as you could be scalded by steam or heat from the dryer.
- Clean the lint filters and empty the water tank after each use, to save energy and avoid prolonged drying time.
- By using the special wool programme to dry woollen garments you can preserve the softness and fluffiness of the garments.
- Approximate garment weights:
 | Jacket, mixed fabric(around800 g) | 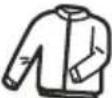 | Jacket, cotton(around 800 g) | 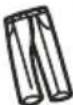 | Jeans(around800 g) | 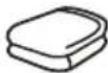 | Towel,cotton(around900 g) |
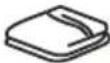 | Sheets, cotton(around600 g) |  | Work clothing,cotton, top/bottom(around 1120 g) | 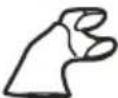 | Pyjamas(around200 g) | 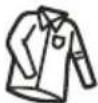 | Shirt, cotton(around300 g) |
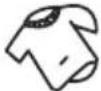 | T-shirt, cotton(around180 g) |  | Underpants,cotton(around 70g) |  | Socks, mixedfabric(around 30 g) |
Overview
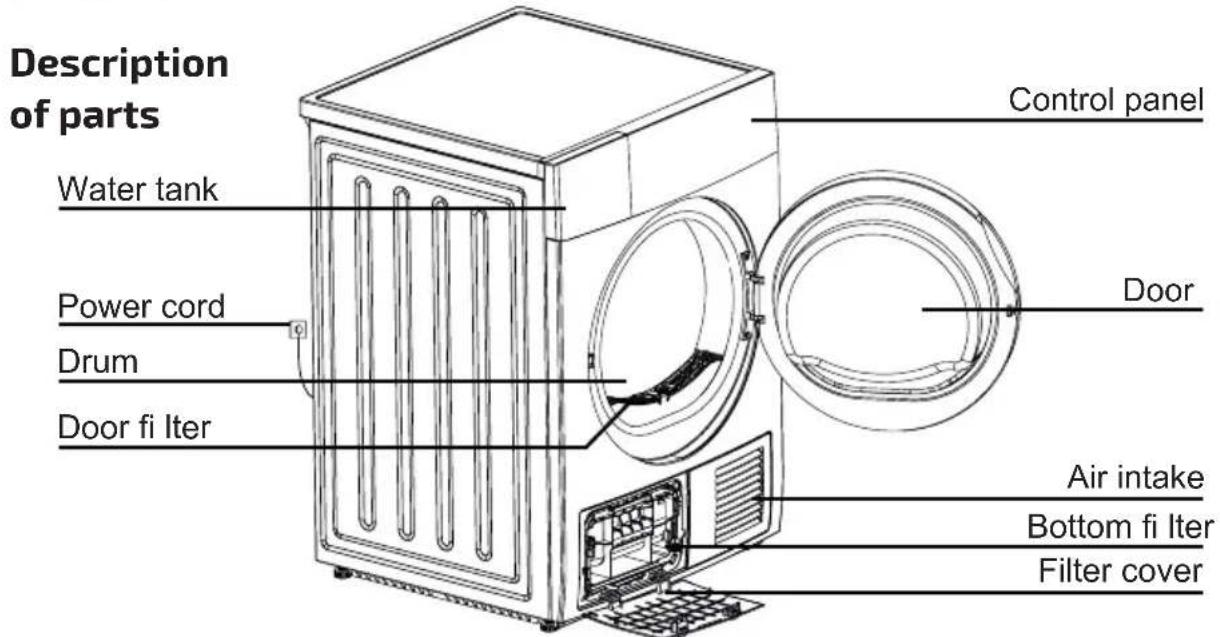
External drain for water
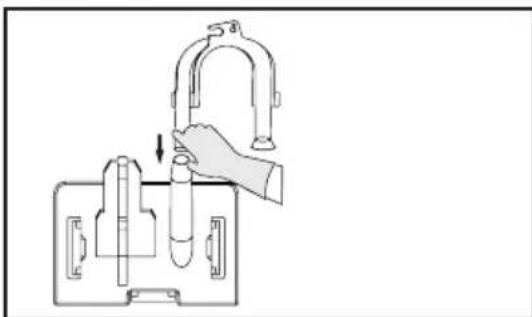
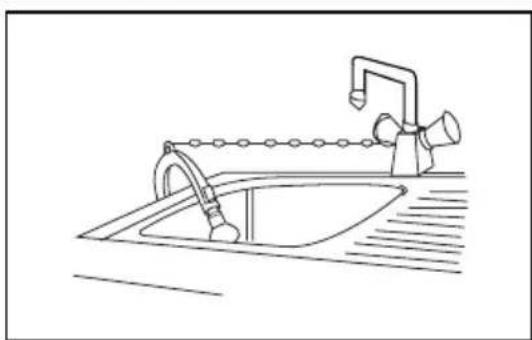
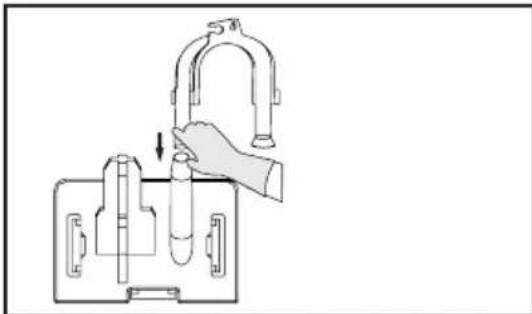
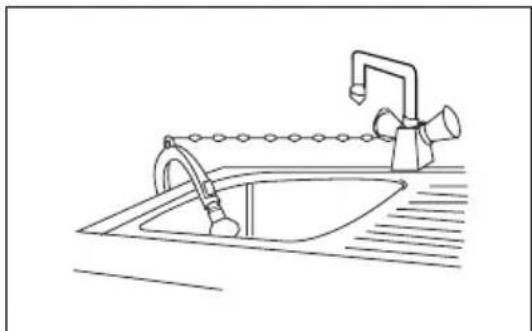
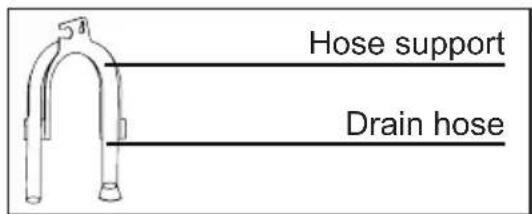
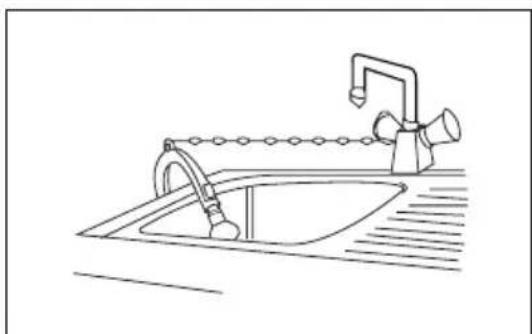
An external drain hose and hose support are supplied with this product. These parts are useful when there is an external drain near the dryer.
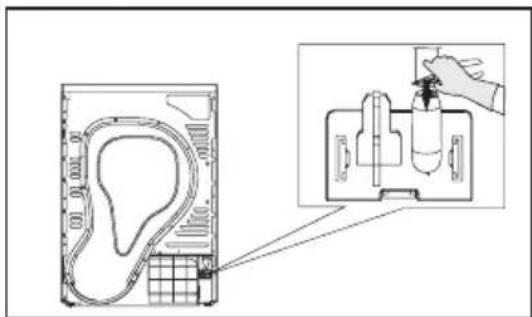
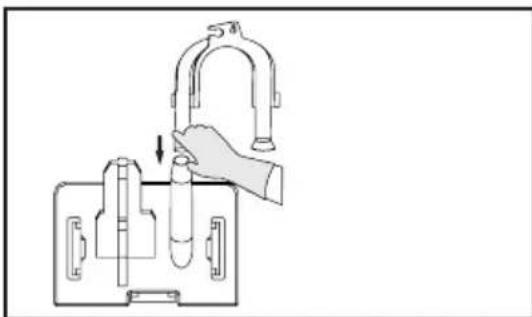
Fitting the external drain hose:
- Remove the existing drain hose from the hose connector using pliers.
- Fit the external drain hose.
- Attach the hose support to a basin or sink.
natural_image
Diagram of a hand operating a valve mechanism inside a device case (no text or symbols)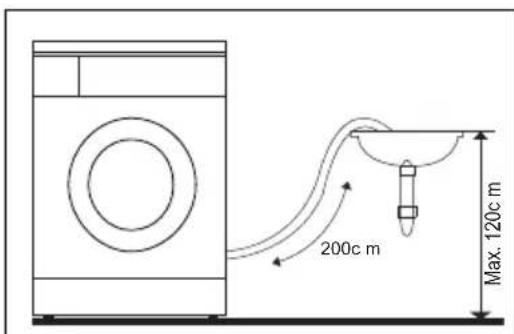
natural_image
Line drawing of a kitchen sink with faucet and faucet (no text or symbols)Using the appliance
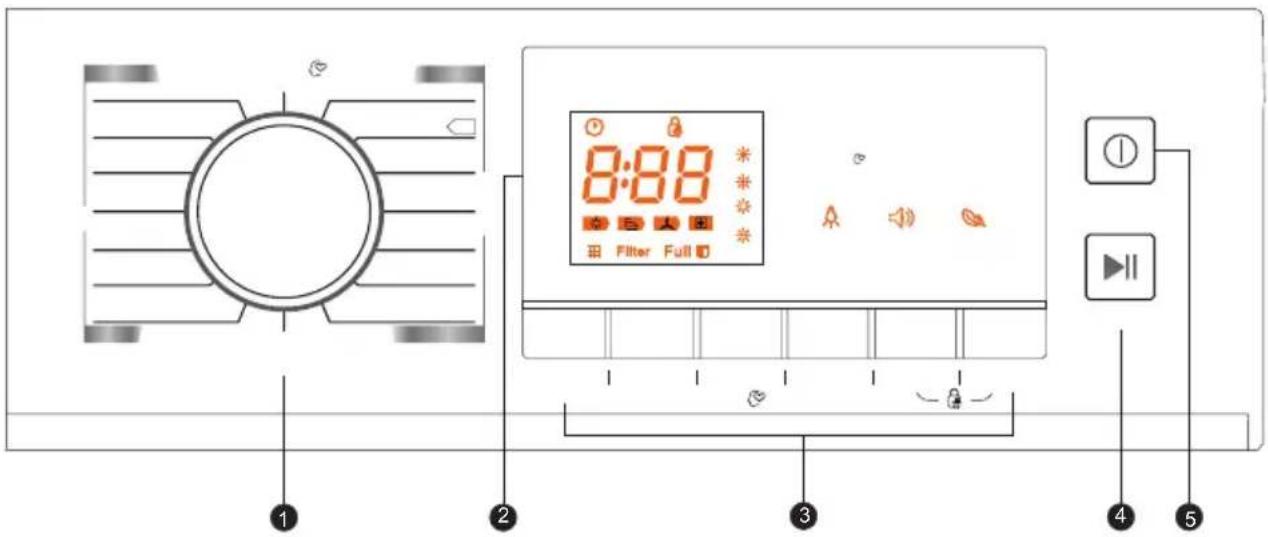
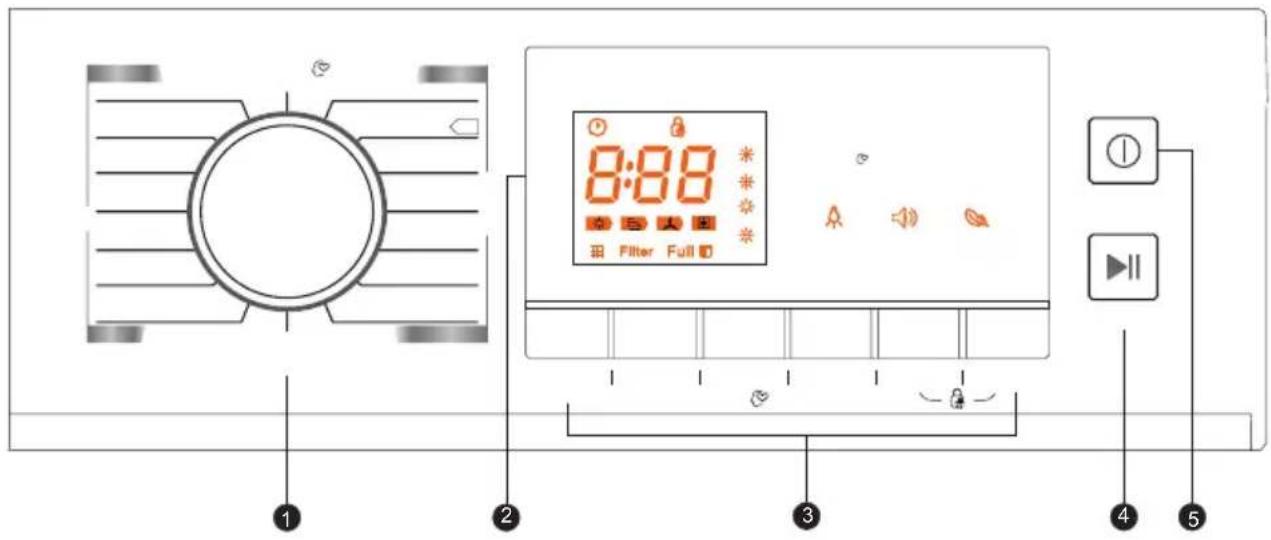
Control panel
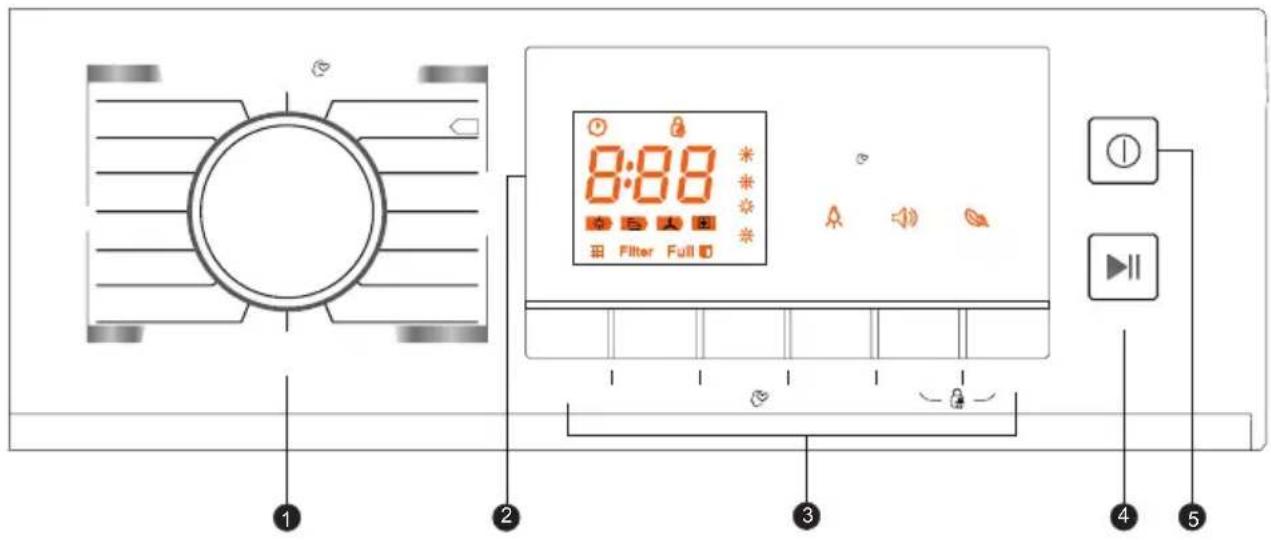
- Programme selector
- Display
- Function buttons (Delay, Time, Intensity, My Cycle, Lamp, Signal, Anti-Crease, Child Lock)
- Start/Pause button
- On/Off button
 | Delay |
 | Child Lock |
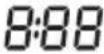 | Time |
 | My Cycle |
 | Clean filter |
 | Full water tank |
| [SAHZ] | Drying degree |
 | Drum light |
 | Signal |
 | Anti-Crease |
Using the appliance
Programme selector
- Press the
button when the display lights up and turn the programme selector to the desired programme. - Select any additional functions you require
, - Press the
button.
At start of programme
- When the programme starts, the drum will begin to rotate and the status light on the display will flash. The remaining time will be counted down automatically.
NOTE!
Occasionally the drum will stop for 40 seconds during drying, but the display will not change. The dryer uses this time to readjust the load, and the programme resumes automatically.
At end of programme
- The drum stops when the programme is complete. The displays shows “0:00” and the status light will flash for the last phase of the cycle. The dryer will enter the
The audible signal can be turned on or off. It is normally turned on. Press the button if you want to change the setting. When the audible signal is turned on:
(1) You hear the signal when you press any of the buttons for additional functions.
(2) If you turn the programme selector while a programme is already running, the audible signal will remind you that you cannot select another programme.
(3) The signal will sound when the drying programme is complete.

This phase is intended to prevent garments from creasing. You can remove laundry from the dryer during this phase. All the programmes except

- The dryer has a built-in child lock to prevent children from accidentally changing the dryer settings by pressing the buttons.
- To turn on the child lock, press the
and buttons simultaneously for at least 3 seconds while the dryer is running. When the child lock is active the “icon is lit on the display and the only control that can be used is the button. To turn off the child lock, press the and buttons simultaneously for at least 3 seconds.
Using the appliance
Function buttons
- This is used to delay the start of the drying programme for up to 24 hours. The indicated delay time means that the programme will start after x hours. The time will begin to count down when you start the programme, and the display will flash:
Phases in detail
- Place the washing in the drum and make sure the door is closed.
- Press the
button and turn the programme selector to the desired programme. - You can also select
if you require. - Press the
button. - Hold the button in to set the delay time.
- The dryer is ready to start when you press the
button. The drying programme will start automatically when the delay time has elapsed. - If you press the
button again the delay time will be paused. - If you want to cancel the delay, press the
button.
- By pressing the
This is used to set the dryness level of the laundry. There are four levels The drying time increases by 3 minutes with each level.
- You can only adjust the intensity before the programme starts.
- Press the
button repeatedly to select the drying time. - The intensity function can be used with all programmes except
, , , and
This lets you create and save your own favourite programme.
- Turn the programme selector to choose the programme and any additional drying functions you require.
- To save this programme, press and hold the
button for 3 seconds until you hear a beep. - Turn the programme selector to
to start your favourite programme. To change your settings, repeat steps (1) and (2).
- The light inside the drum comes on for around 3 minutes when you press this button, or for 1 minute when you open the door.
Programme table weight/
| features Programme | Weight (max.) | Application/Properties Delay Time | |||
| Cotton | For white and coloured cotton or linen. | ||||
| Extra dry For cotton garments. Dryness: extra dry | Y | N | |||
| Normal dry 8.0 kg For cotton garments. Dryness: wardrobe dry. | |||||
| Iron dry For cotton garments. Dryness: iron dry. Y N | |||||
| Delicates | Delicates | 1.0 kg | For thick/multilayer synthetics. Dryness: extra dry | Y | N |
| For synthetics, mixed fabrics and cotton that does not require ironing. | |||||
| Extra dry | 3.5 kg | For thick/multilayer synthetics. Dryness: extra dry | Y NSynthetics | ||
| Normal dry | For thin synthetics that do not require ironing, e.g. non-iron shirts, tablecloths, baby clothes and socks. | ||||
| Iron dry | For thin synthetics that require ironing, e.g. knitted garments and shirts. | ||||
| Wool Wool 1 | 1.0 kg | For soft and fluffy wool garments. Remove immediately at end of programme and allow to air dry. | Y | N | |
| Special | Jeans 8.0 kg | For jeans and leisure wear that has been spin-dried. | Y | N | |
| Mixed fabrics | 3.5 kg | If you are unsure what garments are made of you can select Mix. | |||
| Sports-wear | 3.0 kg | For sportswear and thin polyester fabric that do not require ironing. | |||
| Shirts | For shirts and blouses in easy-care fabrics that require little ironing. Do not dry too many garments at a time. Hang up garments on hangers when they are dry. | ||||
| My Cycle | My Cycle | - | Create and save your own drying programme. | - | - |
| Time | Warm | - | To warm clothes for 10–120 minutes (in 10-minute steps). | Y | Y |
| Cool | - | To air clothes for 10–30 minutes (in 10-minute steps). | |||
| Refresh 1.0 kg | To freshen up clothes that have been in the wardrobe for a long time, for 20–150 minutes (in 10-minute steps). | ||||
NOTE! 1. This symbol indicates the “standard programme for cotton”, which is the most energy-efficient for tumble drying regular cotton garments at the stated load capacity.
2. The programmes above are just recommendations. Users can choose whichever programme suits their preferences. Thick fabrics and multilayer materials, such as bedding, jeans, jackets and the like are not easy to dry. Use the jeans programme and the longest drying time.
Cleaning and regular maintenance
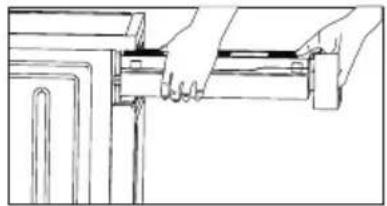
Emptying the water tank
- Grasp the water tank with both hands and slide it out.
- Empty the water into a basin or sink.
- Replace the tank.
natural_image
Line drawing of hands installing or adjusting a mechanical component (no text or symbols)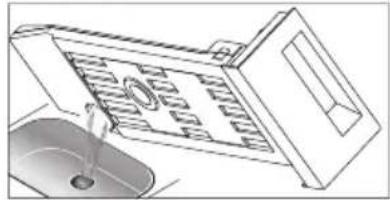
natural_image
Line drawing of a kitchen sink with a lid and drain, showing no text or symbolsWARNING!
- Empty the water tank after each use. If the water tank is full, the programme will stop and the “☐” icon on the display will flash. After emptying, press the
button to resume the programme. - Do not drink the water from the tank.
- Do not use the dryer without the water tank in place.
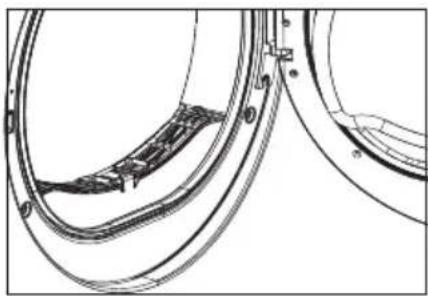
Cleaning the door filter
- Open the door.
- Lift up the lint filter.
- Clean the filter by removing lint that has gathered on it.
- Refit the filter.
natural_image
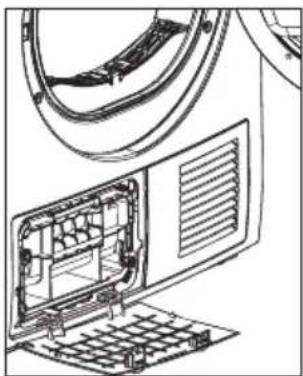
Technical line drawing of a mechanical component with curved and straight lines, no visible text or symbolsCleaning the bottom filter
- Open the filter cover.
- Turn both levers so that they point towards each other.
- Clean the lint filter thoroughly.
- Refit the filter.
- Turn the levers back to their original position.
- Close the filter door so that it clicks shut.
natural_image
Technical line drawing of a computer monitor with ventilation slots and wiring (no text or symbols)NOTE!
- The lint that gathers on the filters obstructs the circulation of air, which leads to longer drying times and higher energy consumption.
- Unplug the dryer at the socket before cleaning!
- Do not use the dryer without the filters in place!
- Clean the filter each time you use the dryer to prevent lint from gathering inside the drum.
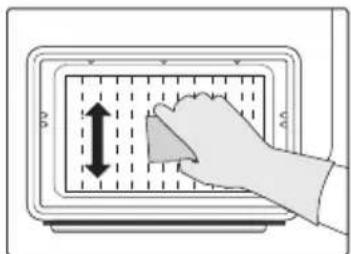
Cleaning the heat exchanger (behind the bottom filter)
Clean the heat exchanger as required, around every two months, by removing lint with a sponge or soft brush. Wear gloves.
NOTE! It is easier to remove lint if you moisten it first, for example by using a spray bottle filled with water.
Troubleshooting
| Display Cause Action | ||
| “flashing” | Water tank is full Empty | the water tank |
| Fault in water pump or water level sensor | Contact your local service centre if the problem persists | |
| “E32” Fault in humidity sensor | ||
| “E33” Fault in temperature sensor | ||
| “flashing” | Filter is blocked or ambient temperature is too high | Clean the filter and check the ambient temperature |
| Contact your local service centre if the problem persists | ||
Troubleshooting

Only authorised technicians can carry out repairs.
Before you call customer service, please check if you can solve the fault yourself by following the instructions below.
| Problem Action | |
| Display does not light up | Check that dryer is plugged inCheck that the power is turned on |
| Dryer does not start | Check that you have pressed the start buttonCheck that the door is properly closed |
| Door opens by itself | Push the door until it closes with a “click”Check that the dryer is not overloaded with clothing |
| Clothing does not dry completely or drying time is too long | Clean both the lint filtersChange the programme setting. |
If you cannot solve the problem yourself and need help:
-
Press the
button. -
Unplug the appliance and call the service centre.
Technical specifications
| Power supply 220–240 V ~50 Hz | |
| Rated power 650 W | |
| Refrigerant R134a | |
| Ambient temperature range 5–35°C | |
| Dimensions (LxWxH) 622 x 595 x 845 (mm) | |
| Drying capacity 8.0 kg | |
| Net weight 52 kg |
Contains fluorinated greenhouse gases that are covered by the Kyoto Protocol. Hermetically sealed system
NOTE!
- The rated drying capacity is the maximum capacity of the dryer and must not be exceeded.
- Do not install the tumble dryer in a room where there is a risk of frost. At temperatures around freezing point the tumble dryer may not operate correctly.
- There is a risk of damage if the condensed water is allowed to freeze in the pump, hoses and/or water tank.
Technical data
Brand: Elvita
Model: CTT3801V
Capacity: 8 kg
Dryer type: Condensing
Energy class: A++
Energy consumption 236 kWh per year, based on 160 drying cycles using standard cotton programme with a full or partial load, and use of energy-saving feature. Actual energy consumption per cycle will depend on how the appliance is used.
Automatic or non-automatic: Automatic
EU ecolabel: No information
Energy consumption using standard cotton programme at full load: 1.98 kWh
Energy consumption using standard cotton programme at partial load: 1.08 kWh
Power consumption with power off (Po): 0.01 W
Power consumption on standby (PI): 0.8 W Duration of standby: 10 min
The “standard cotton programme” is the standard drying programme used at full and partial load, which according to the garment label and specifications is suitable for drying normal wet cotton laundry and is the most energy-efficient programme for cotton.
Weighted programme time for standard cotton programme at full and partial load: 150 min Cycle time for standard cotton programme at full load: 198 min Cycle time for standard cotton programme at partial load: 115 min
Condensation efficiency class B, on a scale from G (least efficient) to A (most efficient).
Average condensation efficiency for standard cotton programme at full load: 80.1% Average condensation efficiency for standard cotton programme at partial load: 80.1% Weighted condensation efficiency for standard cotton programme at full and partial load: 80.1%
Sound power level for standard cotton programme at full load: 69 dB
GB

natural_image
Gray circular icon with three white gears, no text or symbols presentGARANTI WARRANTY
Quality warranty applies to consumer
- Innehåll
- Säkerhetsinformation 3
- Installation
- Transport
- Nivåinställning
- Strömförsörjning
- Använda
- Kontrollpanelen
- WARNING!
- OBS!
- Installing
- Nivåinnstilling
- Strømforsyning
- Bruke
- Programvelgeren
- ADVARSEL!
- Installation 38
- Instructions and advice 39
- Overview 40
- Using 41
- Cleaning and regular maintenance 45
- Troubleshooting 46
- Technical specifications 47
- Technical data 48
- Safety information
- Care labels
- Risk of electric shock
- Risk of personal injury
- Risk of property damage
- Disposing of your appliance
- Placement
- Levelling the dryer
- Power supply
- Instructions and advice
- Instructions
- Advice
- Overview
- External drain for water
- Fitting the external drain hose:
- Using the appliance
- Programme selector
- At start of programme
- NOTE!
- At end of programme
- Function buttons
- Phases in detail
- Cleaning and regular maintenance
- Emptying the water tank
- Cleaning the door filter
- Cleaning the bottom filter
- Cleaning the heat exchanger (behind the bottom filter)
- Troubleshooting
- Technical specifications
- Technical data
- GARANTI WARRANTY
Brand : Elvita
Model : CTT3801V
Category : Tumble drier