
Magic Steam Vac - Steam cleaner FAKIR - Free user manual and instructions
Find the device manual for free Magic Steam Vac FAKIR in PDF.


| Product Type | Steam-Vacuum Cleaner (Buharlı Süpürge) |
| Brand | Fakir |
| Model | Magic Steam Vac |
| Power Supply | 220-240 V, 1~50 Hz |
| Boiler Power | 1250 W |
| Turbine Power | 1050 W |
| Max Steam Pressure | 5 bar |
| Max Steam Output | 110 g/min |
| Heating Time (per liter) | 10 min |
| Water Tank Capacity (Steam Boiler) | 1.2 L |
| Water Reservoir Capacity | 0.5 L |
| Water Filter Container Capacity | 1.2 L (max fill 0.6 L) |
| Dimensions (W x D x H) | 330 x 500 x 330 mm |
| Weight (without accessories) | 10.5 kg |
| Max Performance Level | 4 levels for vacuum, 5 levels for steam |
| HEPA Filter | Yes, washable (clean every 4 months) |
| Water Filter | Yes, with foam stop liquid required |
| Child Safety Lock | On handle (A2) to prevent accidental steam release |
| Optional Iron | Yes (Steam Iron K, not included) |
| Accessories Included | Handle, steam suction hose/pipe, multi-floor nozzle, detail nozzle, hand nozzle, upholstery nozzle, crevice nozzle, suction brush, measuring cup, cleaning brush, spare washers |
| Warranty | As per national distributor; proof of purchase required |
| Usage Life | 10 years |
Frequently Asked Questions - Magic Steam Vac FAKIR
User questions about Magic Steam Vac FAKIR
0 question about this device. Answer the ones you know or ask your own.
Ask a new question about this device
Download the instructions for your Steam cleaner in PDF format for free! Find your manual Magic Steam Vac - FAKIR and take your electronic device back in hand. On this page are published all the documents necessary for the use of your device. Magic Steam Vac by FAKIR.
USER MANUAL Magic Steam Vac FAKIR
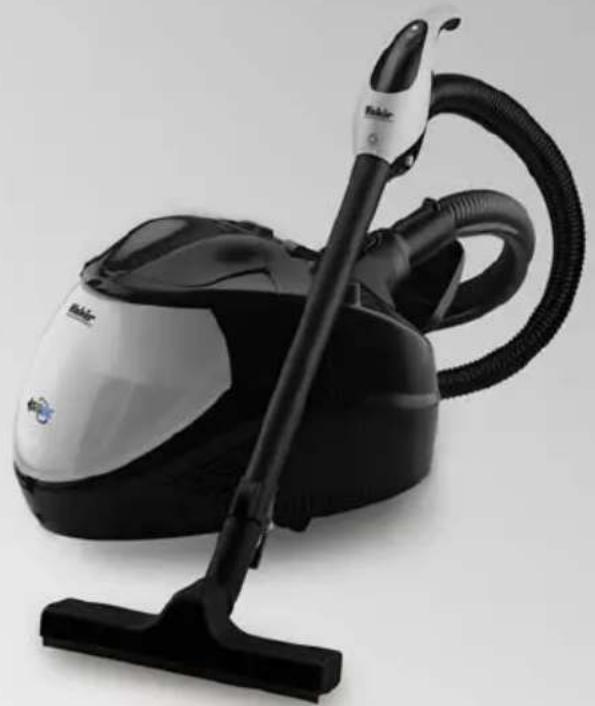
Steam-Vacuum Cleaner
Buharlı Süpürge
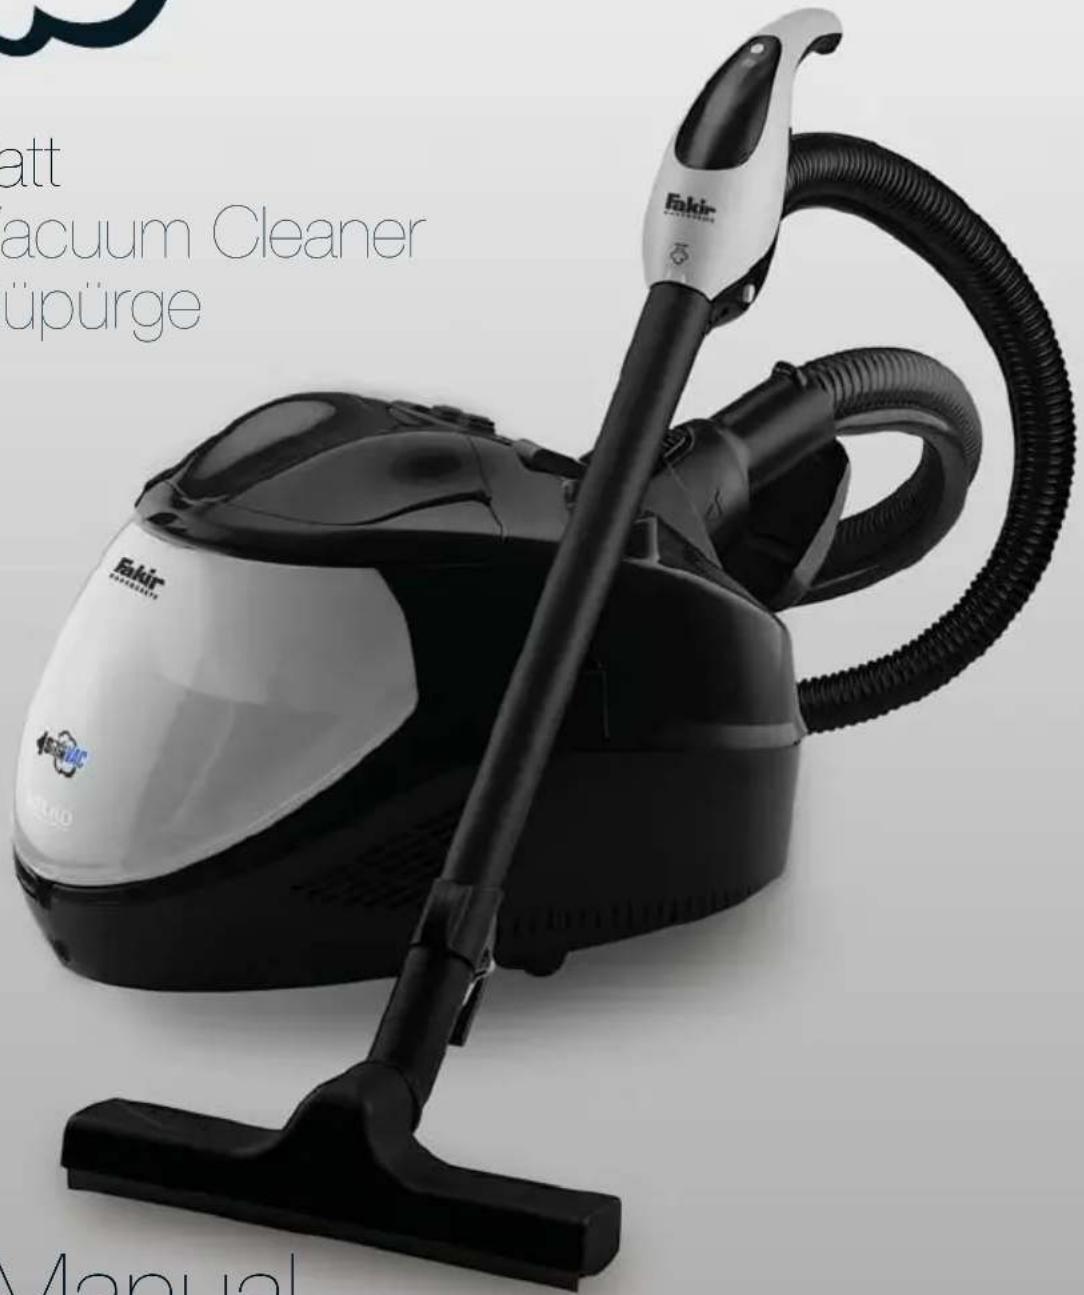
User Manual
Kullanım Kılavuzu
natural_image
Close-up of a smooth, glossy sphere with a curved arrow indicating rotational motion (no text or symbols)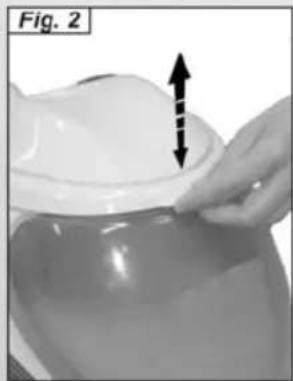
natural_image
Close-up of a hand pressing down on a white plastic object, with an arrow indicating upward motion (no text or symbols)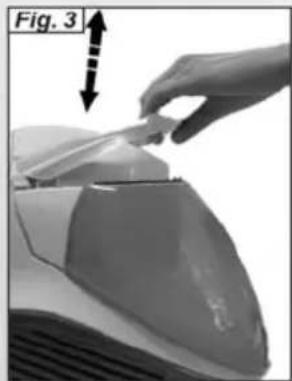
natural_image
Close-up of a hand holding a small object on a mechanical component, labeled 'Fig. 3' with an arrow indicating direction (no text or symbols on the object itself)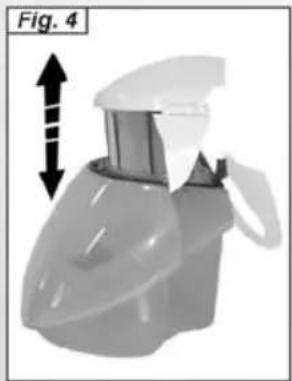
natural_image
3D rendered mechanical component with a downward arrow indicator (no text or symbols)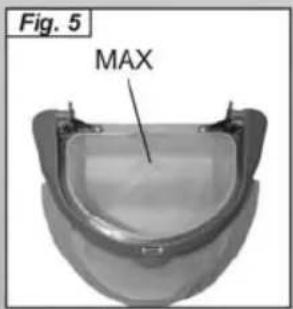
natural_image
Close-up of a hand using a handheld device to interact with a mechanical component (no visible text or symbols)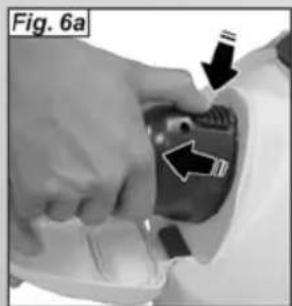
natural_image
Close-up of a dark, glossy, round object with a flared top, possibly a mechanical or electronic component (no visible text or symbols)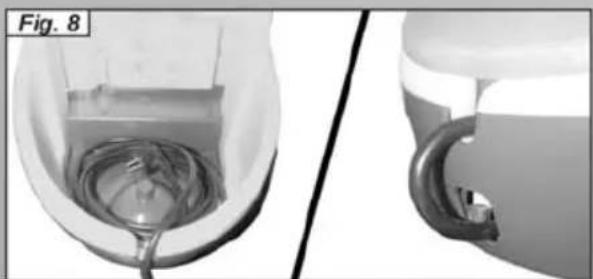
natural_image
Close-up of a toilet with visible internal tubing and a separate close-up view (no text or symbols)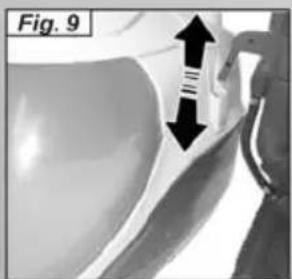
natural_image
Close-up of a mechanical component with a black arrow indicating upward motion (no text or symbols)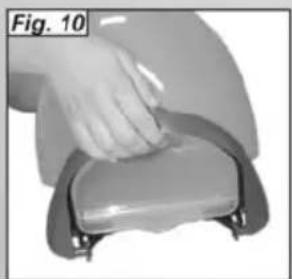
natural_image
Hand pressing a button on a mechanical device (no text or symbols visible)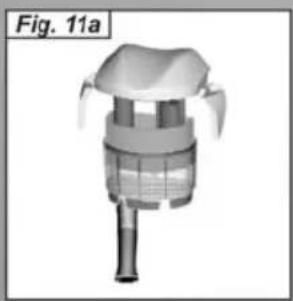
natural_image
3D rendered mechanical component labeled Fig. 11a, showing a cylindrical assembly with internal components and a protruding shaft (no text or symbols on the object itself)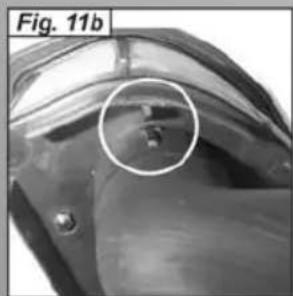
natural_image
Close-up of a mechanical component with a circled area highlighting a small feature, labeled 'Fig. 11b' (no readable text or symbols beyond label)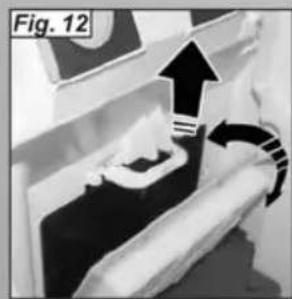
natural_image
Close-up of a mechanical component with an arrow indicating motion, labeled 'Fig. 12' (no readable text or symbols)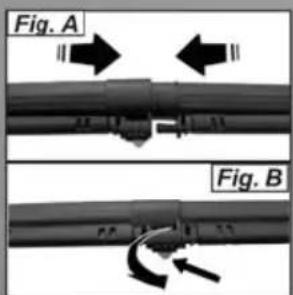
natural_image
Close-up of hands operating a mechanical device with directional arrows indicating motion (no text or symbols)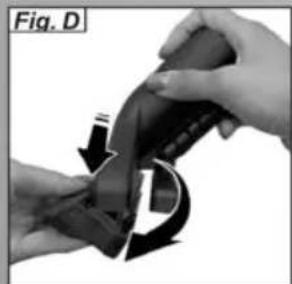
natural_image
Close-up of hands holding a mechanical component with a curved arrow indicating rotation (no text or symbols)Dear Customer,

Please read and comply with these instructions prior to the initial operation
of your appliance. Retain these operating instructions for future reference or for subsequent possessors.
Proper Use
This appliance is designed for domestic use only. The machine is designed for generating steam and vacuum cleaning liquids and solid substances according to the description in this Operating Instructions Manual.
The manufacturer is not responsible for any damages that may occur on account of improper use or wrong operations.
Contents
Description of the Appliance 01
Safety instructions 04
Preparing the Appliance 05
Operation 06
How to Use the Accessories 08
Maintenance and Care 09
Troubleshooting 10
Specifications 10
Description of the Appliance
1 Main switch
2 Steam boiler switch
3 "Low water" - indicator lamp
4 Indicator lamp - Pressure level
5 Indicator lamps - vacuum performance
6 Transport handle, retractable
7 Filling nozzles for water tank
8 Steam regulation
9 Machine socket with flap
10 Air exit grid
11 Rollers
12 Power cord
13 Power cord casing
14 Parking holder
15 H.E.P.A. filter
16 Lever for unhooking the HEPA filter
17 Water filter container
18 Handle for Water filter container
19 Water filter inlay
20 Water filter lid
21 Formed foam filter
22 Filter with micro-perforations
23 Pipe bender
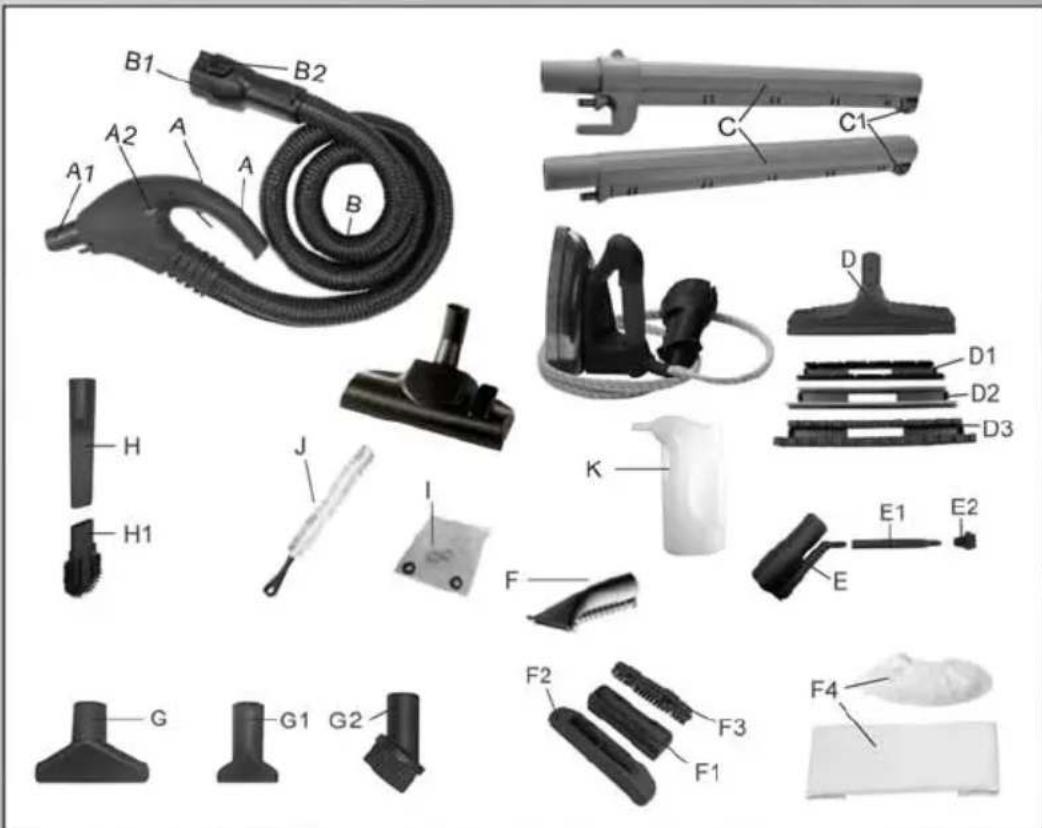
Accessories
A Handle
A1 - inlay bushing for accessories
A2 - Child safety
A3 - Vacuum switch
A4 - Steaming switch
B Steam suction hose
B1 - Steam plug
B2 - Steam plug lock
C Steam suction pipe
C1 - accessories lock
D Multi floor nozzle
D1 - brush lamellas
D2 - hard rubber lamellas
D3 - rubber lamellas
E Steam suction - detail nozzle
E1 - extension
E2 - round brush
F Steam suction - hand nozzle
F1 - small detachable flap (130 mm)
F2 - large detachable flap (200 mm)
F3 - brush crown
F4 - terry towelling cover
G Upholstery nozzle
G1- small upholstery nozzle
G2- furniture brush
H Crevice nozzle
H1- crevice nozzle brush
I Spare washers (O-ring set)
J Suction brush
K Steam Iron, optional
L Cleaning brush for water tank and pipes
M Measuring cup
natural_image
Close-up of two white objects with black bands, one labeled '1' in a speech bubble (no other text or symbols)Cleaning terra cotta and parquet floors
natural_image
Close-up of a hand pressing down on a surface, no visible text or symbolsCleaning furniture
natural_image
Black and white photo of a person in motion, possibly running or falling, with no visible text or symbols.Cleaning sofas and mattresses
natural_image
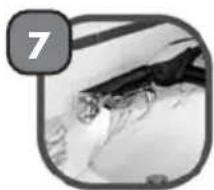
Close-up of an insect with visible legs and antennae, enclosed in a rounded square frame (no text or symbols)Clening bathroom
natural_image
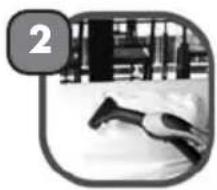
Close-up of a black pen on a tiled surface, no visible text or symbolsCleaning floors and tiles
natural_image
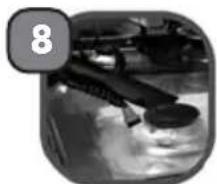
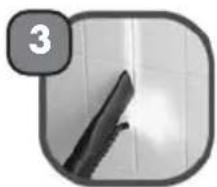
Close-up of a mechanical component with no visible text or symbolsCleaning the kitchen
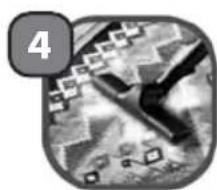
natural_image
Black-and-white game icon showing a sword cutting through a grid of squares, with no readable text or symbols.Cleaning carpets and moquette
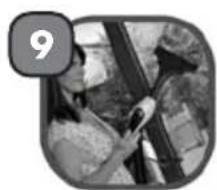
natural_image
Black and white photo of a person wearing a car, no visible text or symbolsCleaning glass and mirrors
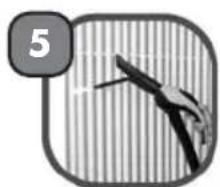
natural_image
Illustration of a bird perched on a branch, enclosed in a rounded square frame with a number 5 in the top-left corner (no text or symbols on the diagram itself)Ceaning radiators
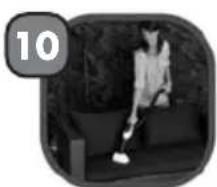
natural_image
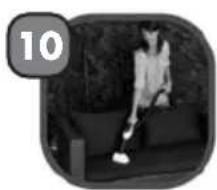
Black-and-white photo of a person sitting on a sofa, no visible text or symbolsCleaning garden furniture

=Steam cleaning
natural_image
Black-and-white photo of a person reading a book, no visible text or symbolsIroning
natural_image
Close-up of a textured, abstract object with no visible text or symbolsCleaning plants
natural_image
Silhouette of a handgun with a glowing light, enclosed in a rounded square frame (no text or symbols)Spraying curtains with steam to freshen them up
natural_image
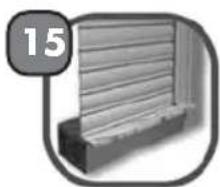
Illustration of a rolled-up door frame with a circular badge showing the number 15 (no text or symbols on the frame itself)Cleaning roller shutters
natural_image
Close-up of a mechanical component with a label '13' in the top-left corner (no other text or symbols visible)Purlflying the air
natural_image
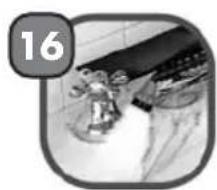
Close-up of a kitchen sink with a bag and cloth, no visible text or symbolsCleaning chrome fixtures and taps
Suction =

natural_image
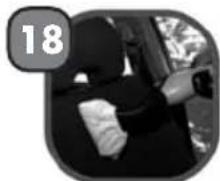
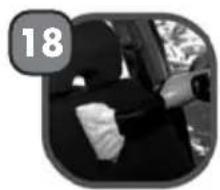
Interior view of a car showing a seatbelt and dashboard (no visible text or symbols)Cleaning the car
natural_image
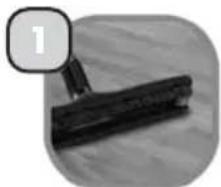
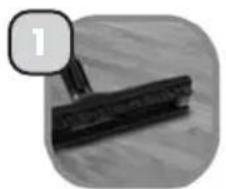
Close-up of a dark mechanical component with a label '1' in the corner (no readable text or symbols on the object itself)Vacuuming wooden floors
natural_image
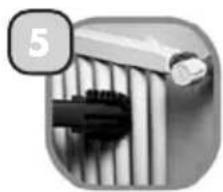
Close-up of a mechanical component with ribbed structure and connector (no visible text or symbols)Vacuuming radiators
natural_image
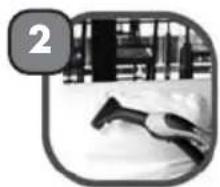
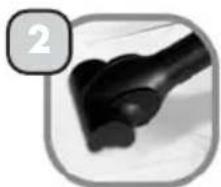
Close-up of a black mechanical component with a numbered label '2' in the top-left corner (no other text or symbols)Vacuuming sofas and mattresses
natural_image
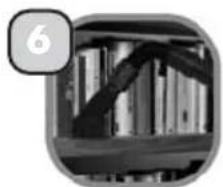
Black-and-white photo of a bookshelf with a bookmark, no visible text or symbolsDusting furniture
natural_image
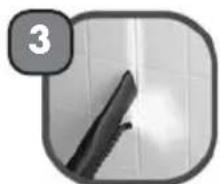
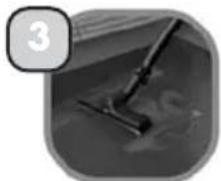
Close-up of a mechanical component with a numbered label '3' in the top-left corner (no readable text or symbols on the object itself)Vacuuming floors
natural_image
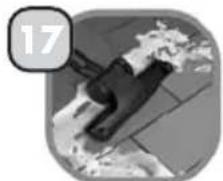
Illustration of a hand gripping a device over a surface, with no visible text or symbols.Suction of solids and liquids
natural_image
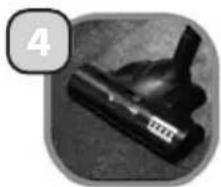
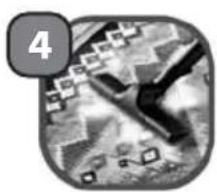
Close-up of a black mechanical component with a white label '4' in the top-left corner (no other text or symbols)Vacuuming carpets and wall-to-wall carpeting
natural_image
Close-up of a car seatbelt with hands adjusting the seat (no visible text or symbols)Vacuuming the car
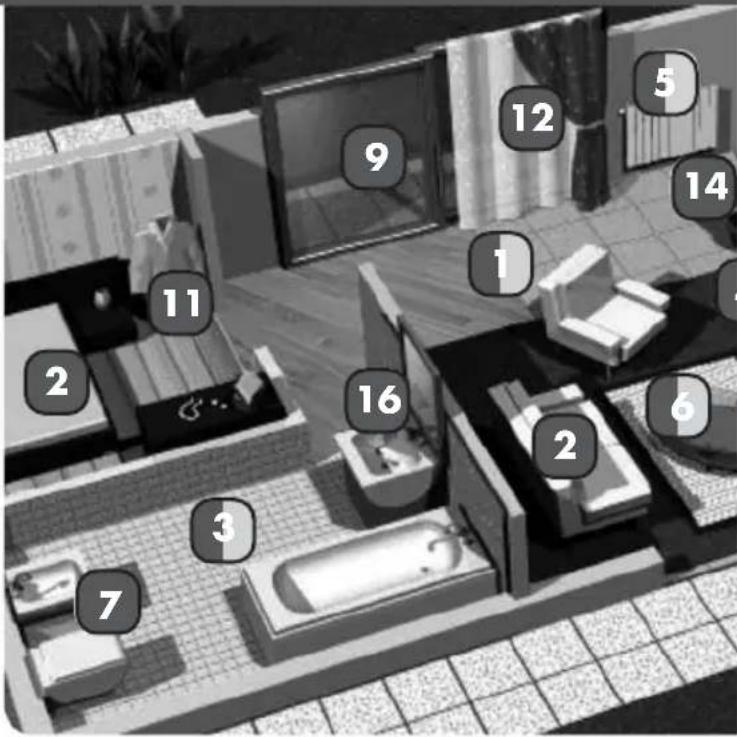
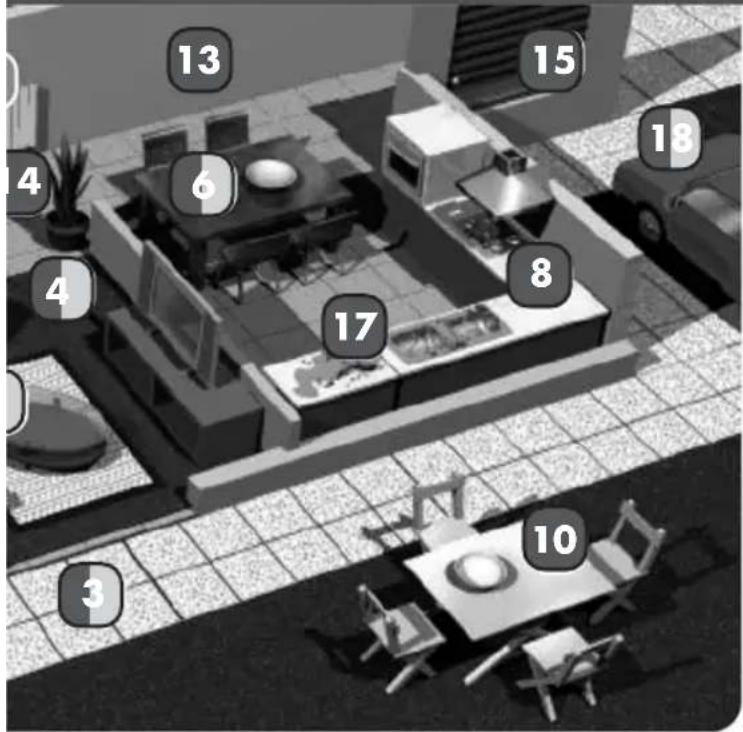
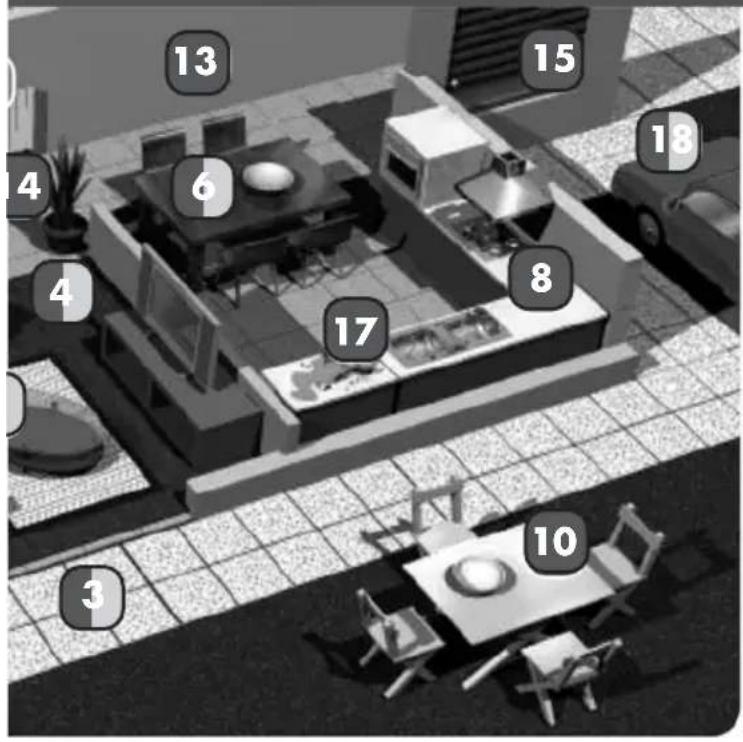
Fakir Magic Steam Vac is the only appliance you can use for all these functions for cleaning, vacuuming and sanitising your home.
Safety instructions
Apart from the notes contained herein the general safety provisions and rules for the prevention of accidents of the legislator must be observed.
Any use of the machine in contravention with the following instructions will lead to warranty claims being rendered void.
Electrical connection
- Only connect the appliance to properly earthed sockets.
- The voltage indicated on the type plate must correspond to the voltage of the socket.
- In wet rooms, e.g. bathrooms, connect the appliance to sockets with a series connected RCD adapter. If you are not sure, please contact an electrician.
- Never touch the mains plug and the socket with wet hands.
- Only use a splashproof extension cable with a minimum section of 3x1 mm2.
- Never use a damaged power cord or extension cable! If the power cord is damaged it must be replaced with a special power cord available from the manufacturer or his customer service.
- Make sure that the power cord or extension cables are not damaged by running over, pinching, dragging or similar. Protect the power cord from heat, oil, and sharp edges.
- If couplings of the power cord or extension cable are replace the splash protection and the mechanical tightness must be ensured.
- Please switch off the machine first using the main switch before disconnecting the machine from the mains.
- To separate the machine from the mains, pull the plug and not the power cord.
Application
- The operator must use the appliance properly. He must consider the local conditions and must pay attention to third parties, in particular children, when working with the appliance.
- Check the faultless condition of the appliance and the accessories before using it. Otherwise, the appliance must not be used. Please check in particular the power cord, the steam boiler seal, and the steam hose.
-
The steam hose must not be damaged (risk of scalds). A damaged steam hose must be replaced immediately. You may only use a steam hose that is recommended by the manufacturer (see spare parts list for the order number).
-
Never operate the machine bare-foot.
- Do not touch the machine with wet hands or feet when the mains plug is inserted in the socket.
- Never use the machine in direct vicinity of bath-tubs, showers and containers filled with water.
- Never dip the machine, the cable or the plugs in water or other liquids.
- It is not allowed to use the appliance in hazardous locations. If the appliance is used in hazardous areas the corresponding safety provisions must be observed.
- Do not use the machine in the presence of toxic substances.
- Do not place the machine on heat-sensitive surfaces.
- Do not place the machine in the vicinity of switch-on stoves, electrical ovens or other sources of heat.
- Protect the appliance against external weather, humidity and heat sources.
- Protect the unit from rain. Do not store outside.
- The appliance must not be operated by children, young persons or persons who have not been instructed accordingly.
- Press the switches lightly and avoid using sharp objects such as pins, pens/pencils and similar objects.
- The appliance must provide of a stable ground.
- If the machine falls down, first get it checked by an authorised FAKIR Service agent because there can be internal damages that hamper the safety of the product.
- Never wind the main cable around the machine, definitely not till the machine is still hot.
- Do not use the machine to vacuum clean acids or other solutions as they can damage the machine. Also do not suck in explosive powders or liquids as this can lead to explosion when these substances come in contact with the internal parts of the machine.
- Do not suck in toxic substances.
- Do not suck in burning or glowing objects such as cigarette buds, ash or other burning or glowing materials.
- Do not use the machine to vacuum clean plaster of Paris, cement, etc. that can harden on coming into contact with water and can thus hamper the functioning of the machine.
- Always switch off the machine and remove the plug while filling the machine with water.
• Always place the machine in a horizontal position during operation. - Do not direct the steam jet on household appliances that contain electrical parts.
- Never touch the steam jet from a short distance with your hands and never direct the steam jet to persons or animals (risk of scalds).
-
Never use the appliance to clean objects containing hazardous substances (e.g. asbestos).
-
Never fill solvents, solvent-containing liquids or undiluted acids (e.g. detergents, benzene, paint thinner, and acetone)
into the water reservoir or the water filter container as these substances affect the materials used on the appliance. - Ensure that the machine has cooled down completely before stowing it away or cleaning it.
- Never leave the appliance unattended as long as it is in operation.
△ Maintenance
- Turn off the appliance and remove the mains plug prior to any care and maintenance works.
- To avoid risks, all repairs and replacement of spare parts in the machine may only be carried out by the authorised FAKIR service personnel.
- Always use original spare parts and accessories permitted by the manufacturer so that the safety of the machine remains intact.
⚠ Storage
- Caution: Never operate or store the appliance in a horizontal position!
- Protect the unit from rain. Do not store outside.
Symbols on the machine

Steam
CAUTION - Danger of scalding
Unpacking the appliance
When you unpack the system, check that everything is complete (see page 3). If there are any missing parts or you detect any transport damage when unpacking, please inform your dealer immediately.
Environmental protection

The packaging material can be recycled.
Please do not place the packaging into the ordinary refuse for disposal, but arrange
for the proper recycling.
Old appliances contain valuable materials that can be recycled. Please arrange for the proper recycling of old appliances. Please dispose of your old appliances using
appropriate collection systems.
Warranty
The terms of the guarantee applicable in each country have been published by our respective national distributors. We will repair possible faults on your unit free of charge within the warranty period, insofar as the faults are caused by material defects or defective workmanship. Guarantee claims should be addressed to your dealer or the nearest FAKIR customer service centre, and supported by documentary evidence of purchase.
Usage life: 10 years
Preparing the appliance
Filling the water reservoir
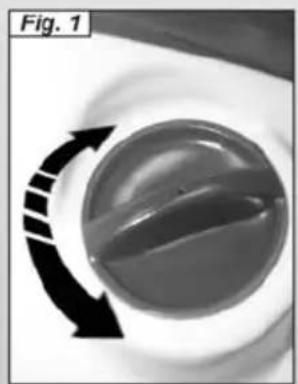
- Open the filling nozzle (7) of the water tank (Fig. 1).
- Fill approx. 0.5 litre water into the water tank. You can use the measuring cup (Fig. K).
Note: You can use normal tap water. As water naturally contains calcium that can lead to the formation of deposits in the boiler, we recommend the use of a mixture consisting of 50% tap water and 50% distilled water. - Close the filling nozzle of the water reservoir (7).
Note: Water is automatically supplied from the water reservoir to the steam boiler. The water reservoir must be filled up twice before commissioning the machine for the first time.
Filling the water filter container
- Lift the handle (18) of the water filter container (Fig. 2) and remove the water filter container (17) (Fig. 3).
- Turn the handle (18) of the water filter container and remove the water filter inlay (19) (Fig. 4).
- Fill the water filter container (17) with tap water till the water level marking MAX H2O is covered (Fig. 5).
- Add a cap full of foam stop to the water filter container.
Note: The functioning of the vacuum cleaner is based on the whirling of the suction air in the water filter. In the process, sucked-in materials and deposits of cleaning agents from floors get collected in the water bath. This can sometimes lead to the formation of foam. It is necessary to add the foam stop liquid to the water filter bath to avoid this situation. The foam stop liquid is environment friendly and fully bio-degradable. Slight foam formation is normal and does not hamper the functioning of the machine.
- Insert the water filter inlay (19) back into the water container (17).
- Lift the handle (18) of the water filter container and insert the water filter container (17) back into the machine.
- Bring the handle (18) back to its initial position on the water filter container.
Operation
Caution:
The water filter container must always be filled up when the machine is running.
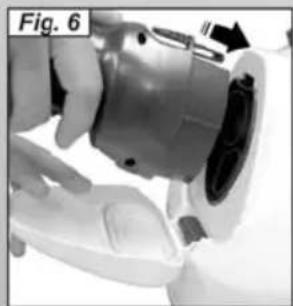
- Open the flap of the machine socket (9); insert the steam plug (B1) into the socket till you hear it lock. (Fig.6).
- Connect the mains plug to a suitable socket.
Connecting the accessories
All accessories can be installed directly at the handle (A) or at the steam suction tubes (c) in the following manner.
Note: Handle (A) has a child safety lock (A2) that prevents accidental steam release. It is recommended that you activate the child safety lock (press it towards the left) while leaving the steam suction hose unattended for a short time during operation. Deactivate the child safety lock (turn it to the right) to restart steam release.
Accessories for steam and vacuum cleaning (D, E, F):
- Connect the handle or the extension pipe to the desired accessory till the accessory lock snaps (Fig. A).
- Check that the accessory if properly connected before starting to use it.
- To remove the accessory: Keep the switch (C1) depressed and remove the accessory parts (Fig. B).
- Connect the handle or the extension pipe to the desired accessory without locking the accessory lock.
Accessories for vacuum cleaning (G, H, J):
Vacuum cleaning operation
You can use this machine to vacuum clean dust as well as liquids.
Caution!
Please activate the child safety lock (A2) to avoid accidental exit of steam.
- Press the main switch (1).
The first stage of the indicator lamps Vacuum cleaning (5) starts to blink. - Briefly press the Vacuum cleaning (A3) switch on the main handle (A). Vacuum cleaning starts at the minimum performance level. The first stage of the indicator lamps Vacuum cleaning (5) glows continuously.
- To stop vacuum cleaning operation, press the Vacuum cleaning switch (A3) again.
Note! When you restart vacuum cleaning function, the machine starts at the previous vacuum cleaning setting.
Setting the vacuum cleaning performance You can set the vacuum cleaning performance based on the surface to be cleaned.
-
Press the vacuum cleaning switch (A3) and keep it depressed.
The vacuum cleaning performance first increases gradually and decreases gradually on reaching the maximum performance level. This is displayed on the indicator lamps vacuum cleaning (5). -
Level 1: For curtains
– Level 2: For upholstered furniture and cushions - Level 3: For carpets
- Level 4: For hard floors and sucking in liquids Note: The numbers indicating the levels correspond to the display of the indicator lamps for vacuum cleaning. If the dirt water level in the water filter container (17) has reached the maximum level, then the vacuum cleaning function is automatically blocked (you can then hear a higher speed of the motor).
Caution!
Switch off the machine. The air exit filter can get damaged if you immediately restart the machine.
- To resume cleaning operations, follow the procedure described in the chapter "Emptying and cleaning the water filter container"; then refill water till the required water level is reached.
Steam operations
- Press the main switch (1).
The first stage of the indicator lamps Vacuum cleaning (5) starts to blink. - Press the steam boiler switch (2); it then glows.
- Wait till the indicator lamp Pressure level (4) glows.
The machine is now ready for steam operations. - Press the Steam switch (A4) on the handle. Steam will be let out so long as you press they switch (A4).
- Press the steam boiler switch (2) to stop steam operations.
Setting the steam outflow
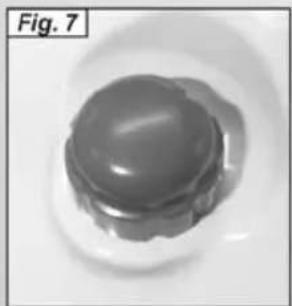
You can optimize the steam outflow by pressing the steam switch for steam regulation (8) (Fig. 7).
- To increase the steam outflow: Turn the rotary knob clockwise.
- To decrease the steam outflow: Turn the rotary knob anti-clockwise.
- Mild steam: (Setting 1-2)
To sprinkle water on plants, clean fabrics, tapestries, upholstered furniture, etc.
- Normal steam: (Setting 3)
For carpeted floors, carpets, window panes, floors.
- Heavy steam: (Setting 4-5)
To remove hard dirt, stains and grease.
Filling the water reservoir
The water reservoir may be refilled at any time. Note: If there is not enough water in the steam boiler the pump automatically supplies water from the water reservoir into the steam boiler. If the water reservoir is empty, the pump is not able to fill the steam boiler and the steam tapping is blocked.
- When there is water deficit in the water reservoir, the indicator lamp water deficit (3) glows and is indicated through a sound.
- To continue, follow the description in section "Filling the water reservoir".
\*Using the iron, optional
1) Temperature regulation control
2) "Iron heating" indicator light
3) Steam request button
4) Continuous steam jet button
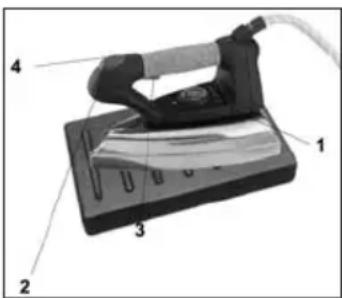
1- When steam ironing, ALWAYS have the iron temperature set to the "COTTON-LINEN" position, by turning the knob (1). When DRY ironing (without
2- steam) set the knob to the required temperature for the fabric. When dry ironing be careful NOT TO PRESS THE STEAM RELEASE BUTTON on top of the iron, otherwise water may leak from the
3- soleplate of the iron.
Always wait for the heat indicator light (2) to go out, before starting to iron.
4- Press the steam request button on the iron (3) to allow the steam to exit. Releasing this button stops the steam flow. At first you may find that the steam contains some water globules and we recommend that the first jet of steam is therefore played onto an old cloth, and is not directed onto the garment to be ironed. For dry ironing do not press the steam request button (3).
5- To obtain a continuous steam burst (in Pro. model only) move the button forward (4). The steam jet will continue even if you release the button. To STOP the steam burst just move the button backwards (4).
6- The iron can also be used in a vertical position e.g. for removing creases from curtain, clothing etc.
Steam and vacuum cleaning operation
- Press the main switch (1).
The first stage of the indicator lamps Vacuum cleaning (5) starts to blink. - Press the steam boiler switch (2); it then glows.
- Wait till the indicator lamp Pressure level (4) glows. The machine is now ready for steam operations.
- Press the switches Steam (A4) and the Vacuum cleaning switch (A3) briefly at the same time on the handle (A). The vacuum cleaning operation starts at minimum performance level and steam is let out simultaneously.
For proper use of steam and vacuum cleaning function refer chapter Steam operations" and „Vacuum cleaning operation".
Putting down the accessories
During short breaks in work, the steam suction pipe can be parked in the parking holder (14) (Fig. 9).
Finish operation
- Press the main switch (1).
- Disconnect the mains plug from the socket.
- Remove the steam plug (B1) from the machine. Keep the steam lock (B2) depressed and pull out the steam plug from the machine socket (Fig. 6a).
Storing the appliance
Note: Always clean all the accessories that you use and the water filter container (17) before you put the machine away.
- Remove all accessories.
- Rinse all the accessories with clean water and then let them dry.
Emptying and cleaning the water filter container
- Lift the water filter container (19) and pull it out of its seat at the handle (Fig. 3).
- Turn the handle as shown in Fig. 4 and remove the water filter unit (21).
- Empty the water filter container by tilting it in the direction of the pouring device (Fig. 10).
- Remove the pipe benders (25) from the filter casing with the micro-perforation grid (24) till it is fully detached (Fig. 11a).
- Remove all components and wash them under flowing water. (Replace the filter if it is damaged. Please contact an FAKIR Service Agent to procure a new filter).
- Insert the water filter inlay (21) back into the water container (19).

Caution!
Ensure that the arrow on the pipe bender (25) matches the marking on the filter with microperforation (24) (Fig.11b).
- Roll the mains cable carefully and place it in the cable casing (13) (Fig. 8).
- Place the water filter container (17) back into its position and ensure that it is positioned correctly.
How to use the accessories

Caution!
1- Please read the cleaning instructions of the manufacturer before treating leather, special fabrics and wooden surfaces and always do a trial on a sample or some hidden part.
2- Let the steam-treated surface dry and then check whether there are any changes to the colour or form on account as reaction to the steam.
3-We recommend that you be very careful while cleaning wooden surfaces (furniture, doors, etc.) because long exposure to steam can damage the wax coating, the finish or the surface colours.
4-Hence we recommend that you use steam only for short intervals or first clean the surface with a cloth that has been steam-moistened.
For highly sensitive surfaces (for e.g. synthetic materials, painted surfaces, etc.) we recommend that you use the steam function at the minimum performance level.
Multi Floor nozzle (D)
We recommend that you use the multi floor nozzle on large surfaces, ceramic floors, marble floors, parquet (only at maximum vacuum cleaning level and minimum steam level), carpets, etc. by using the following attachments.
- Bursh lamellas (D1) for dry vacuum cleaning. By using the cloth on the multi floor nozzle you could clean the surfaces with steam.
- Hard rubber lamellas (D2) for cleaning and brushing carpeted floors.
- Rubber lamellas (D3) for sucking in liquids on smooth surfaces.
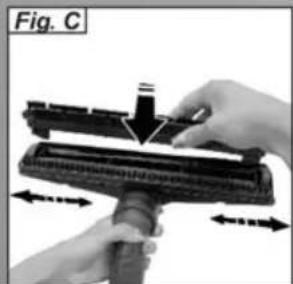
- Remove existing attachments from the side.
- Insert the desired attachments from the side (Fig. C). Note: Push the brush lamella with crevices in the front, the second one at the rear of the nozzle.
While inserting rubber lamella (D3) make sure that the smooth surface is on the inner side.
Steam suction - detail nozzle (E)
We recommend the use of detail nozzle to access difficult-to reach areas.
The detail nozzle can be used for the following:
- Treating stains on carpeted floors or car pets before using the brush.
- Cleaning steel surfaces, window panes, mirrors and enamelled surfaces.
- Cleaning corners on staircases, window frames, doorposts and aluminium profiles.
- Cleaning fixtures.
-
Cleaning window shutters, room heaters, interiors of vehicles.
-
Sprinkling indoor plants from a distance. The detail nozzle can be combined with the following accessories:
- Round brush (E2) suitable for hardened dirt on very small surfaces such as cooking ranges, rolling shutter, tile joints, sanitary units, etc..
- Extension (E1): This is an accessory that can be used for optimal cleaning of areas that are very difficult to access. Ideal for cleaning room heaters, doorposts, windows, rolling shutter, sanitary units.
Steam suction - hand nozzle (F)
The use of hand-suction nozzle is used for glass and mirror surfaces, smooth surfaces in general or for cleaning fabric areas such as sofas, mattresses, etc. The hand nozzle can be combined with the following accessories. As shown in Figure D, the accessories are attached to the hand nozzle. The upper sides of the detachable lips are marked as "Upper Part".
- Small detachable lip (F1): For smaller surfaces such as muntin windows and mirrors.
- Large detachable lip (F2): For window panes and larger surfaces such as wall tiles.
- Crown brush (F3): For carpets, staircases, car interiors, fabric surfaces in general (after carrying out a test a a hidden area).
A terry towel cover (F4) can also be put on the brush.
Cleaning windows
Use the following procedure to use the machine properly for cleaning windows:
- To loosen the dirt, apply steam uniformly on the surface to be treated.
- Press the detachable lip against the surface to be cleaned and move it from the top to the bottom and keep the vacuum cleaning function on.
Caution!
In seasons when the temperatures are particularly low, pre-heat the window panes by letting out steam from a distance of approx. 50 cm from the surface to be cleaned.
Maintenance and care
Danger
Always disconnect the mains plug and allow the machine to cool down before performing any maintenance work.
Care
Allow the accessory parts to dry completely before storing them.
- Do not place the brushes onto the bristles during the cooling and drying process to avoid a deformation of the bristles.
- Only use a moist cloth for externally cleaning the casing. Avoid using any solutions or cleaning agents as they can damage the plastic surface.
- For cleaning the water filter casing and for cleaning or replacing the foam filter, follow the procedure in the section "Storing the Appliance".
Maintenance
- Check the washers in the steam plug (B1) at regular intervals. Replace them if necessary. Carry out the same checks for the connecting washers of the steam suction pipe (C) and the handle (A).
H.E.P.A. filter
The machine is equipped with a HEPA filter (1.5) that you can clean under flowing water. Proceed as follows to clean the filter.
- Remove the water filter container (17) according to the instructions in the chapter "Filling the water filter container".
- Lift the unhooking lever (16) of the H.E.P.A. filter and remove the filter from its position (Fig. 12).
- Rinse the H.E.P.A. filter under cold flowing water. Shake the H.E.P.A. filter carefully after cleaning so that any residual dirt or excess water is removed.
Note! Let the HEPA filter dry but keep it away from any sources of light or heat. Insert only the dry H.E.P.A. filter back into the machine.
- Replace the H.E.P.A. filter if found to be damaged.
- Clean the H.E.P.A. filter regularly at intervals of 4 months.
- Ensure that the H.E.P.A. filter (15) is positioned correctly in the holders. Then block the lever (16). (Fig. 12).
Caution!
- Do not clean the H.E.P.A. filter using a brush as it can get damaged and its filtering capacity can get reduced.
- Do not use any cleaning agents, do not rub the H.E.P.A. filter and do not clean it in the dishwasher.
- H.E.P.A. filters are available with the FAKIR Service agents.
Troubleshooting
Often, failures have simple causes and you can do the troubleshooting yourself using the following overview. If you are in doubt or if the failure is not listed here please contact the FAKIR customer service.
Vacuum cleaner does not start
There is no mains supply.
Check the mains plug and mains socket.
Poor vacuum cleaning
Nozzle, suction hose or suction pipe may be blocked.
- Clean the water filter inlay. Remove blocks, if any, from the tubes and accessories.
- Change the water in the water filter container.
- Replace the H.E.P.A. filter.
H.E.P.A. filter worn out.
Poor cleaning performance
Water in the water filter container is very dirty
- Change the water in the water filter container.
Water leaks out while sucking in fluids
The float switch is blocked.
- Clean the lid of the water filter container.
The vacuum cleaner does not suck
Float switch is blocking.
- Switch off the vacuum cleaner, ensure that the water level in the reservoir is correct and switch on the machine again.
Dispatch
Send the appliance in the original package or a similar, well-padded package to prevent damage to the appliance.
Specifications
Power connection
Voltage 220-240V Current type 1\~50Hz Life time 10 years
Performance data
Boiler capacity 1250W Rated power turbine 1050W Max. steam pressure 5bar Heating time per litre of water 10min Max. steam quantity 110g/min
Filling quantity
Steam boiler 1,2l Water reservoir 0,5l Water filter container 1,2l Water volume 0,6l
Dimensions
Width 330mm Length 500mm Height 330mm Weight 10,5kg (without accessories)
Disposal
If the service life of the device has ended, in particular if functional disturbances occur, make the worn-out device unusable by cutting through the power cable.
Dispose of the device according to the environmental regulations applicable in your country.
Electrical waste must not be disposed of together with household waste. Bring the worn-out device to a collection center. The packaging of the device consists of recycling-capable materials. Place these, sorted out according to material, in the collectors provided, so that recycling can be carried out on them.

For advice on recycling, refer to your local authority or your dealer.
This appliance is compatible with 2002/96/EC WEEE directive.
This product is produced by Polti SpA Via Ferloni 83, 22070 Bulgarograsso (Como), Italy on behalf of Fakir Elektrikli Ev Aletleri Dış Ticaret A.Ş.
Sayın müşterimiz,

natural_image
Close-up of two white cable clips on a wooden surface, one with a magnified view (no text or symbols visible)natural_image
Close-up of a person's hand pressing down on a car dashboard (no visible text or symbols)Mobilya temizliği
natural_image
Black and white photo of a person in motion, possibly running or falling, with no visible text or symbols.natural_image
Close-up of a small insect with wings and legs, enclosed in a rounded square frame (no text or symbols visible)Banyo temizliği
natural_image
Close-up of a dark, textured object on a grid background, possibly a tool or device (no visible text or symbols)natural_image
Close-up of a mechanical device with gears and a handle, possibly a tool or component (no visible text or symbols)Mutfak temizliği
natural_image
Black-and-white game scene with a character holding a sword, no visible text or symbolsnatural_image
Black and white photo of a person holding a bicycle, no visible text or symbolsnatural_image
Illustration of a pair of scissors cutting through a striped pattern, enclosed in a rounded square frame (no text or symbols)Radyotör temizliği
natural_image
Black-and-white photo of a person sitting on a sofa, no visible text or symbols
=Buharlı Temizleme
natural_image
Black-and-white photo of a person holding an object, no visible text or symbolsÜtüleme
natural_image
Close-up of a textured, abstract object with no visible text or symbolsBitki temizliği
natural_image
Silhouette of a handgun with a light source, enclosed in a rounded square frame (no text or symbols)natural_image
Illustration of a rolled-up door with a circular badge showing the number 15 (no text or symbols on the door itself)Stor temzliği
natural_image
Abstract grayscale image with a dark, flame-like shape and a numbered label '13' in the top-left corner (no readable text or symbols)Hava temizleme
natural_image
Black and white photo of a kitchen sink with a bag, no visible text or symbolsDemirbaş temizliği
Süpürme =
natural_image
Interior view of a car showing a seatbelt and dashboard (no visible text or symbols)Araba temizliği
natural_image
Close-up of a dark mechanical component with a small circular badge labeled '1' (no text or symbols on the object itself)natural_image
Close-up of a computer monitor with ventilation slots and a cable (no visible text or symbols)Radyatör süpürme
natural_image
Close-up of a black mechanical component with a numbered label '2' in the top-left corner (no other text or symbols)natural_image
Black-and-white photo of a bookshelf with visible shelves and a bookmark (no text or symbols)Mobilya tozu alma
natural_image
Close-up of a surface with a brush and a numbered label '3' in the corner (no readable text or symbols)Zemin süpürme
natural_image
Close-up of a mechanical component with a numbered label '17' in the top-left corner (no readable text or symbols on the component itself)Su vakumlama
natural_image
Close-up of a black mechanical component with a white label '4' in the top-left corner (no other text or symbols visible)Perde temizleme
natural_image
Interior view of a car showing a person seated in a seatbelt, no visible text or symbolsAraba süpürme
Fakir
HAUSGERÄTE

2300 Watt
Steam-Vacuum Cleaner Buharlı Süpürge
natural_image
Black and white photo of a vacuum cleaner with black handle and blue gauze (no visible text or symbols)








- Dear Customer,
- Proper Use
- Contents
- Description of the Appliance
- Accessories
- Safety instructions
- Electrical connection
- Application
- △ Maintenance
- ⚠ Storage
- Symbols on the machine
- Steam
- Unpacking the appliance
- Environmental protection
- Warranty
- Usage life: 10 years
- Preparing the appliance
- Filling the water reservoir
- Filling the water filter container
- Operation
- Caution:
- The water filter container must always be filled up when the machine is running.
- Connecting the accessories
- Accessories for steam and vacuum cleaning (D, E, F):
- Accessories for vacuum cleaning (G, H, J):
- Vacuum cleaning operation
- Caution!
- Setting the vacuum cleaning performance You can set the vacuum cleaning performance based on the surface to be cleaned.
- Steam operations
- Setting the steam outflow
- \*Using the iron, optional
- Steam and vacuum cleaning operation
- Putting down the accessories
- Finish operation
- Storing the appliance
- Emptying and cleaning the water filter container
- How to use the accessories
- Multi Floor nozzle (D)
- Steam suction - detail nozzle (E)
- Steam suction - hand nozzle (F)
- Cleaning windows
- Maintenance and care
- Danger
- Care
- Maintenance
- H.E.P.A. filter
- Troubleshooting
- Vacuum cleaner does not start
- There is no mains supply.
- Poor vacuum cleaning
- Nozzle, suction hose or suction pipe may be blocked.
- H.E.P.A. filter worn out.
- Poor cleaning performance
- Water in the water filter container is very dirty
- Water leaks out while sucking in fluids
- The float switch is blocked.
- The vacuum cleaner does not suck
- Float switch is blocking.
- Dispatch
- Specifications
- Power connection
- Performance data
- Filling quantity
- Dimensions
- Disposal
- Sayın müşterimiz,
- Fakir
- HAUSGERÄTE
- Watt
- Steam-Vacuum Cleaner Buharlı Süpürge
Brand : FAKIR
Model : Magic Steam Vac
Category : Steam cleaner