
I.Beat cube - Mp3 player TrekStor - Free user manual and instructions
Find the device manual for free I.Beat cube TrekStor in PDF.


User questions about I.Beat cube TrekStor
0 question about this device. Answer the ones you know or ask your own.
Ask a new question about this device
Download the instructions for your Mp3 player in PDF format for free! Find your manual I.Beat cube - TrekStor and take your electronic device back in hand. On this page are published all the documents necessary for the use of your device. I.Beat cube by TrekStor.
USER MANUAL I.Beat cube TrekStor
text_image
MOKEAT CUBE stylish MP3 Player TREKSTOR™ www.trekstor.deContents
Safety Precaution 4
Product Features....6
Package Contents......7
In the package....7
Name of each part....8
Replacing the battery....9
Connecting To A PC....10
Installing i.Beat cube Software....11
Using USB....15
Removing i.Beat cube from a PC....17
Using Windows Media Player ....17
To format i.Beat cube....23
Using i.Beat cube....24
Preparations....24
LCD Window....25
Button Operation....28
Basic Operation....31
To play music....33
To change to VOICE Mode....36
To change to FM Mode....38
To change to Line-In Mode....42
To configure Menu....43
Firmware Upgrade....55
Product Specification....58
Troubleshooting Checklist ....59
Cautions 60
Safety Precaution
- Avoid the following
places and
conditions;
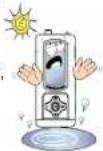
Dusty of contaminated air
contaminated air, and very humid
conditions.
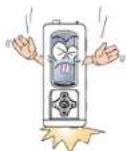
- Do not drop or impact the
unit.
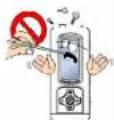
- Don't do the following;
disassembly.
repair, and
reconstruction
of the product.
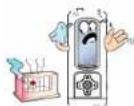
- Avoid the hot or cold or high
humid places.
- Do not press on two buttons at the same or do not press too hard.

- Do not use solvent, benzyl, or paint thinner on the unit.
Product Features
- USB2.0
- SRS WOW
- Automatic Folder Search
- Playback Settings
- FM Auto Scan
- Seven-color Backlight
- Lyric Display and ID3 Tag Support
- Windows Media Player Plugin Support
- All Frequency Band Support for MP3/WMA
- Sleep, Repeat Section
- User EQ
- Menu in English and other multiple languages
- Firmware Upgarde
For more product information, visit our website below;
Homepages: http://www.trekstor.de
Package Contents
■ In the package
i. Beat cube Body Earphone
Installation CD
Necklace-type Strap
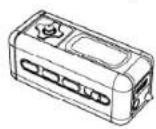
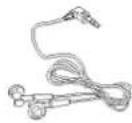
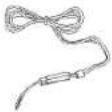
Manual
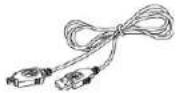
USBCable One Type AAA Battery
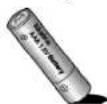
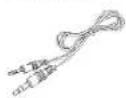
line-in cable
■ Name of Each Part
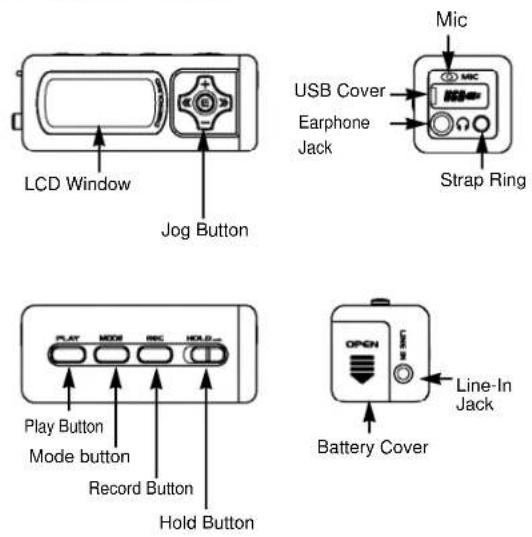
USB Cover
Earphone
Jack
■ Replacing the Battery
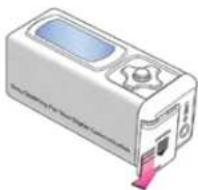
1 Pull open the battery cover of i.Beat cube
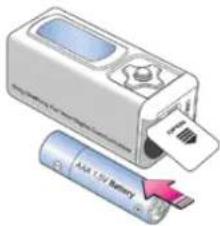
2 Check if + and - poles of the battery are positioned correctly when replacing the battery.
text_image
Illustration showing a battery labeled 'AIA 1.5V Battery' with an attached card and a paper, likely illustrating a battery model or technology concept.■ Connecting to a PC
□ Minimum PC requirements
□ Pentium 133MHz or better
□ Windows 98/ME/2000/XP
□ 20MB or more storage space
□ A CD-Rom drive
□ A USB port
Tip
- For the Windows 98 users, install the provided software for a USB connection.
- When USB is not working for any of Windows 98/ME/2000/XP systems, try to fix the problem by updating your Windows.
- Windows Update: Select [Start] -> [Windows Update]
■ Installing i.Beat cube software
1 Insert the installation CD. The TrekStor menu will open.

text_image
iBeat uive TirekSton UFFA2 Select "Driver / Tools" to begin the installation.
text_image
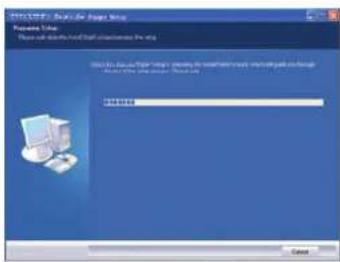
文件名(N): A012345 Projet Setup Prepared Style: This will also select the Web Design software in this tool. Use to access Web Design or other settings for web design, or use Web Design or other settings for this tool. Windows 9.0 (Windows 9.0) Cancel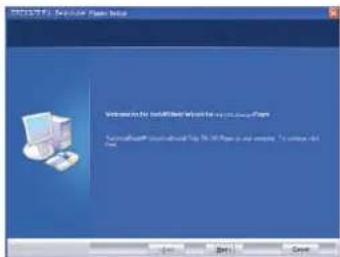
text_image
Microsoft Windows Player Welcome to the installed Web for your own version. Microsoft Windows installed with the 100% version as your version. This version is closed.3 Press "Next" and the license agreement is displayed.
text_image
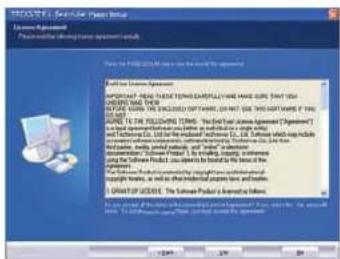
TROCCOLI S. 2014 (Hyper-Intel) System AppWizard Pensionware (Windows) Application Manual There is the Windows 2014 system to use the system to expand the applications. System AppWizard Application: All the existing Windows platforms have used, that you are currently available. The installed OSOS will not use any other OSOS. This is also available for all the OSOS. It is also available for all the OSOS. This is also available for all the OSOS. This is also available for all the OSOS. This is also available for all the OSOS. This is also available for all the OSOS. This is also available for all the OSOS. This is also available for all the OSOS. This is also available for all the OSOS. This is also available for all the OSOS. This is also available for all the OSOS. This is also available for all the OSOS.4 Choose "Yes" if you agree with the terms of the license.
text_image
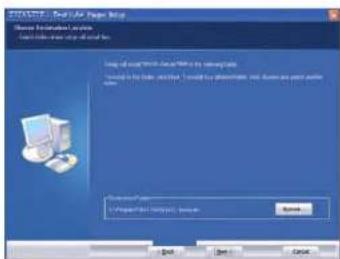
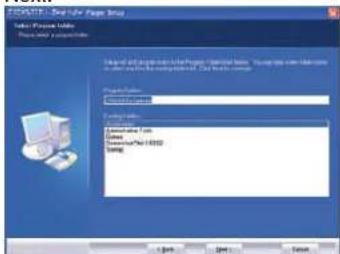
STOCKELE: Solid-FLA Paper Setup Choose Installation System Start Existing System will install it. Design: 3D Core Film (Cable Film) New: 1000000000000000000000000000000000000000000000000000000000000000000000000000000000000 OK Cancel Cancel5 Choose the location of destination folder for the installation, and click "Next."
text_image
PROCATY - New Paper Panel Select Paper Table Please use a placeholder File Edit View Help Tools Help Tools Help Tools Help Tools Help Tools Help Tools Help Tools Help Tools Help Tools Help Tools Help Tools Help Tools Help Tools Help Tools Help Tools Help Tools Help Tools Help Tools Help Tools Help Tools Help Tools Help Tools Help Tools Help Tools Help Tools Help Tools Help Tools Help Tools Help Tools Help Tools Help Tools Help Tools Help Tools Help Tools Help Tools Help Tools Help Tools Help Tools Help Tools Help Tools Help Tools Help Tools Help Tools Help Tools Help Tools Help Tools Help Tools Help Tools Help Tools Help Tools Help Tots Help Tools Help Tools Help Tools Help Tools Help Tools Help Tools Help Tools Help Tools Help Tools Help Tools Help Tools Help Tools Help Tools Help Tools Help Tools Help Tools Help Tools Help Tools Help Tools Help Tools Help Tools Help Tools Help Tools Help Tools Help Tools Help Tools Help Tools Help Tools Help Tools Help Tools Help Tools Help Tools Help Tools Help Tools Help Tools Help Tools Help Tools Help Tools Help Tools Help Tools Help Tools Help Tools Help Tools Help Tools Help Tools Help Tools Help Tools Help Tools Help Tools Help Tools help Help Tools Help Tools Help Tools Help Tools Help Tools Help Tools Help Tools Help Tools Help Tools Help Tools Help Tools Help Tools Help Tools Help Tools Help Tools Help Tools Help Tools Help Tools Help Tools Help Tools Help Tools Help Tools Help Tools Help Tools Help Tools Help Tools Help Tools Help Tools Help Tools Help Tools Help Tools Help Tools Help Tools Help Tools Help Tools Help Tools Help Tools Help Tools Help Tools Help Tools Help Tools Help Tools Help Tools Help Tools Help Tots Help Tots Help Tots Help Tots Help Tots Help Tots Help Tots Help Tots Help Tots Help Tots Help Tots Help Tots Help Tots Help Tots Help Tots Help Tots Help Tots Help Tots Help Tots Help Tots Help Tots Help Tots Help Tots Help Tots Help Tots Help Tots Expenses Expenses Expenses Expenses Expenses Expenses Expenses Expenses Expenses Expenses Expenses Expenses Expenses Expenses Expenses Expenses Expenses Expenses Expenses Expenses Expenses Expenses Expenses Expenses Expenses Expenses Expenses Expenses Expenses Expenses Expenses Expenses Expenses Expenses6 Click "Next" after you type the name for the installed software.
text_image
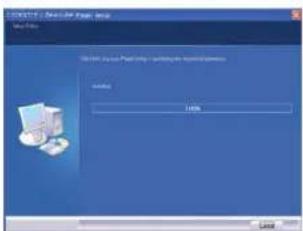
Microsoft Windows 9.0.1.0 (Windows) File Path: Microsoft Windows 9.0.1.0 (Windows) - Microsoft Windows Name: Windows Access: 123457868888888888888888888888888888888888888888888888888888888888888888888888888888888888888888888887 It would take a moment while the installation is progressing.
text_image
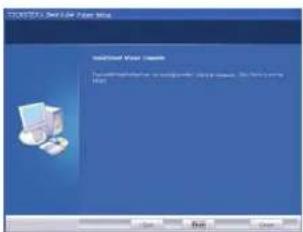
Microsoft Excel Forer Status Add Existing System Microsoft Excel Forer Status (Windows Not Applicable) Windows Not Applicable8 Click on "Confirm" to finish when the installation is complete.
Tip :
- Restart your computer when the software installation is for Windows 98/ME.
■ Using USB
text_image
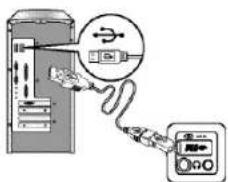
Diagram showing a device connected to an electronic device with a plug, highlighting the plug's internal structure.1 Insert the provided cable end to the USB port after pulling open the cover of the port.
text_image
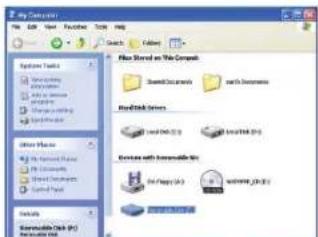
My Documents File Edit View Favorites Tools Help Search Edit Options Help Save As... Save As... Save As... Save As... Save As... Save As... Save As... Save As... Save As... Save As... Save As... Save As... Save As... Save As... Save As... Save As... Save As... Save As... Save As... Save As... Save As... Save As... Save As... Save As... Save As... Save As... Save As... Save As... Save As... Save As... Save As... Save As... Save As... Save As... Load (1) Load (2) Load (3) Load (4) Load (5) Load (6) Load (7) Load (8) Load (9) Load (10) Load (11) Load (12) Load (13) Load (14) Load (15) Load (16) Load (17) Load (18) Load (19) Load (20) Load (21) Load (22) Load (23) Load (24) Load (25) Load (26) Load (27) Load (28) Load (29) Load (30) Load (31) Load (32) Load (33) Load (34) Load (35) Load (36) Load (37) Load (38) Load (39) Load (40) Load (41) Load (42) Load (43) Load (44) Load (45) Load (46) Load (47) Load (48) Load (49) Load (50) Load (51) Load (52) Load (53) Load (54) Load (55) Load (56) Load (57) Load (58) Load (59) Load (60) Load (61) Load (62) Load (63) Load (64) Load (65) Load (66) Load (67) Load (68) Load (69) Load (70) Load (71) Load (72) Load (73) Load (74) Load (75) Load (76) Load (77) Load (78) Load (79) Load (80) Load (81) Load (82) Load (83) Load (84) Load (85) Load (86) Load (87) Load (88) Load (89) Load (90) Load (91) Load (92) Load (93) Load (94) Load (95) Load (96) Load (97) Load (98) Load (99) Load (100)2 The product works same as a removable disk when connected to a PC.
text_image
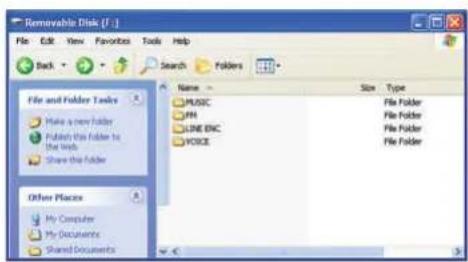
Removable Disk (F:) File Edit View Favorites Tools Help Back Search Folders File and Folder Tasks Make a new folder Publish this folder to the Web Share this folder Other Places My Computer My Documents Shared Documents Name Size Type MUSIC File Folder PHP File Folder LINE ENC File Folder VOICE File Folder☐ Removable disks operate the same way as floppy drives do. As demonstrated in the picture above, create as many folders as you like to carry music in them and enjoy the product's folder function. Its booting speed will increase when you create "Data" folder and store files other than music files in the data folder.
□ Recorded files from FM, Line-In, and VOICE folders are automatically created by the product's system, and FM, Line-In, and VOICE are stored in each respective folder.
■ Removing i.Beat cube from a PC
For users of Windows ME/2000/XP
- To remove the product from a PC, click on "Unplug/eject" icon on the taskbar and wait until a message confirming your action appears.

For users of Windows 98
- Close all open i.Beat cube windows.
- When buffer on the display, data transfer is in progress.
- Remove the product from your PC after the working stops
■ Using Windows Media Player
The product supports Windows Media Player plugins. You can download to and change music formats for i.Beat cube. (As for the Media Player 9)
To configure options
- To edit media information for WMA and MP3, set the Options as described below.
text_image
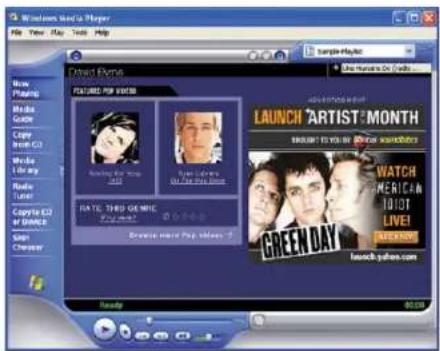
Windows Next is Player File View Play Tools Help Sample Music New Playing Media Guide Coping CD Winds Library Radio Tunes Copyright CD & DISC Gain Creator David Evans FOUCED FOR VICKERS Ranging the song 2017 Ryan Gadsery My Live Music RATE: THIRD GEMAIC PAP PAP Search more Pop Videos 7 LAUNCH ARTIST MONTH LOOKOUT TO YOU ARE BETA SCOTIONS WATCH AMERICAN JOINT LIVE! GREEN DAY LAUNCH GAMES.COM Ready 90.001 Activate Media Player of Windows after i.Beat cube and a PC link is established.
text_image
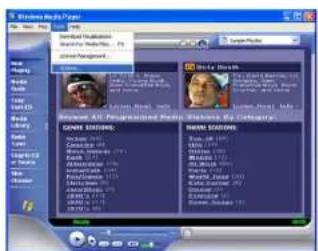
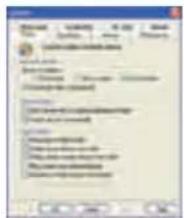
Windows Notepad File Edit View Help Untitled Bookmarks Audio Player/Video Audio Player/Video Audio Player/Video Audio Player/Video Audio Player/Video Audio Player/Video Audio Player/Video Audio Player/Video Audio Player/Video Audio Player/Video Audio Player/Video Audio Player/Video Audio Player/Video Audio Player/Video Audio Player/Video Audio Player/Video Audio Player/Video Audio Player/Video Audio Player/Video Audio Player/Video Audio Player/ Video Audio Player/ Video Audio Player/ Video Audio Player/ Video Audio Player/ Video Audio Player/ Video Audio Player/ Video Audio Player/ Video Audio Player/ Video Audio Player/ Video Audio Player/ Video Audio Player/ Video Audio Player/ Video Audio Player/ Video Audio Player/ Video Audio Player/ Video Audio Player/ Video Audio Player/ Video Audio Player/ Video Audio Player/ Video Audio Player/ Audio Audio Player/ Audio Audio Player/ Audio Audio Player/ Audio Audio Player/ Audio Audio Player/ Audio Audio Player/ Audio Audio Player/ Audio Audio Player/ Audio Audio Player/ Audio Audio Player/ Audio Audio Player/ Audio Audio Player/ Audio Audio Player/ Audio Audio Player/ Audio Audio Player/ Audio Audio Player/ Audio Audio Player/ Audio Audio Player/ Audio Audio Player/ Audio Audio Player/ Auto Audio Player/ Auto Audio Player/ Auto Audio Player/ Auto Audio Player/ Auto Audio Player/ Auto Audio Player/ Auto Audio Player/ Auto Audio Player/ Auto Audio Player/ Auto Audio Player/ Auto Audio Player/ Auto Audio Player/ Auto Audio Player/ Auto Audio Player/ Auto Audio Player/ Auto Audio Player/ Auto Audio Player/ Auto Audio Player/ Auto Audio Player/ Auto Audio Player/ Audio2 Go to Options of the Tools menu.
text_image
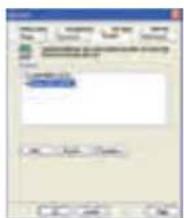
File Edit View Tools Help Name: C:\Users\My Documents\My Documents\My Documents\My Documents\My Documents\My Documents\My Documents\My Documents\My Documents\My Documents\My Documents\My Documents\My Documents\My Documents\My Documents\My Documents\My Documents\My Documents\My Documents\My Documents\My Documents\My Documents\My Documents\My Documents\My Documents\My Documents\My Documents\My Documents\My Documents\My Documents\My Documents\My Documents\My Documents\My Documents\nName: C:\Users\My Documents\My Documents\My Documents\My Documents\My Documents\My Documents\My Documents\My Documents\My Documents\My Documents\My Documents\My Documents\My Documents\My Documents\My Documents\My Documents\My Documents\My Documents\My Documents\My Documents\My Documents\My Documents\My Documents\My Documents\My Documents\My Documents\My Documents\My Documents\My Documents\My Documents\My Documents\my Documents\my Documents\my Documents\my Documents\my Documents\my Documents\my Documents\my Documents\my Documents\my Documents\my Documents\my Documents\my Documents\my Documents\my Documents\my Documents\my Documents\my Documents\my Documents\my Documents\my Documents\my Documents\my Documents\my Documents\my Documents\my Documents\my Documents\my Documents\my Documents\my Documents\my Documents\my Documents\my Documents\my Mountains\my Mountains\my Mountains\my Mountains\my Mountains\my Mountains\my Mountains\my Mountains\my Mountains\my Mountains\my Mountains\my Mountains\my Mountains\my Mountains\my Mountains\my Mountains\my Mountains\my Mountains\nName: C:\Users\My Documents\My Documents\My Documents\My Documents\My Documents\My Documents\My Documents\My Documents\My Documents\my Mountains\my Mountains\my Mountains\my Mountains\my Mountains\my Mountains\my Mountains\my Mountains\nName: C:\Users\My Mountains\my Mountains\my Mountains\my Mountains\my Mountains\my Mountains\my Mountains\my Mountains\my Mountains\nName: C:\Users\My Mountains\nName: C:\Users\nName: C:\Users\nName: C:\Users\nName: C:\Users\nName: C:\Users\nName: C:\Users\nName: C:\Users\nName: C:\Users\nName: C:\Users\nName: C:\Users\nName: C:\Users\nName: C:\Users\nName: C:\Users\nName: C:\Users\nName: C:\Users\nName: C:\Users\nName: C:\Users\nName: 12345678900000000000000000000000000000000000000000000000000000000000000000000000000000000000000000000000000003 Select the Device.
text_image
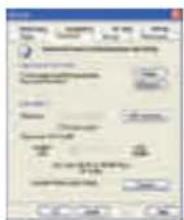
Scanned screenshot of a legacy Windows application dialog box with Chinese text and buttons4 Select a Removable Disk(i.Beat cube) and click on the Property button.
text_image
Scanned screenshot of a legacy software interface with menu options and buttons, showing text fields and icons.5 Move the slide to make a choice of appropriate audio quality, and click on "OK."
To convert and save music files.
1 Link i.Beat cube to a PC.
text_image
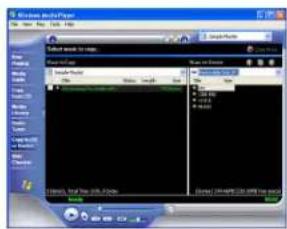
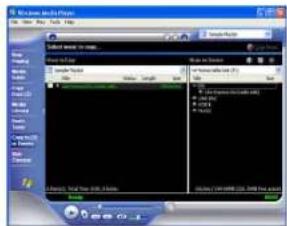
Windows Audio Player File Edit View Help Audio Player Audio Player Audio Player Audio Player Audio Player Audio Player Audio Player Audio Player Audio Player Audio Player Audio Player Audio Player Audio Player Audio Player Audio Player Audio Player Audio Player Audio Player Audio Player Audio Player Audio Player Audio Player Audio Player Audio Player Audio Player Audio Player Audio Player Audio Player Audio Player Audio Player Audio Player Audio Player Audio Player Audio Player2 Choose Copy To CD or Device, and choose i.Beat cube from the driver pull-down menu on the right pane.
text_image
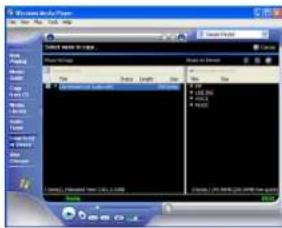
Windows Help Files File Edit View Tools Help Select menu to copy [ ] [ ] [ ] [ ] [ ] [ ] [ ] [ ] [ ] [ ] [ ] [ ] [ ] [ ] [ ] [ ] [ ] [ ] [ ] [ ] [ ] [ ] [ ] [ ] [ ] [ ] [ ] [ ] [ ] [ ] [ ] [ ] [ ] [ ] [ ] [ ] [ ] [ ] [ ] [ ] [ ] [ ] [ ] [ ] [ ] [ ] [ ] [ ] [ ] [ ] [ ] (1) [1] 2000-2005 [1] 2006-2009 [1] 2007-2010 [1] 2008-2013 [1] 2009-2014 [1] 2010-2015 [1] 2011-2016 [1] 2012-2019 [1] 2013-2024 [1] 2014-2025 [1] 2015-2026 [1] 2016-2027 [1] 2017-2028 [1] 2018-2029 [1] 2019-2030 [1] 2020-2031 [1] 2021-2032 [1] 2022-2033 [1] 2023-2034 [1] 2024-2035 [1] 2025-2036 [1] 2026-2037 [1] 2027-2038 [1] 2028-2039 [1] 2029-2040 [1] 2030-2041 [1] 2031-2042 [1] 2032-2043 [1] 2033-2044 [1] 2034-2045 [1] 2035-2046 [1] 2036-2047 [1] 2037-2048 [1] 2038-2049 [1] 2039-2050 [1] 2040-2051 [1] 2041-2052 [1] 2042-2053 [1] 2043-2054 [1] 2044-2055 [1] 2045-2056 [1] 2046-2057 [1] 2047-2058 [1] 2048-2059 [1] 2049-2060 [1] 2050-2061 [1] 2051-2062 [1] 2052-2063 [1] 2053-2064 [1] 2054-2065 [1] 2055-2066 [1] 2056-2067 [1] 2057-2068 [1] 2058-2069 [1] 2059-2070 [1] 2060-2071 [1] 2061-2072 [1] 2062-2073 [1] 2063-2074 [1] 2064-2075 [1] 2065-2076 [1] 2066-2077 [1] 2067-2078 [1] 2068-2079 [1] 2069-2080 [1] 2070-2081 [1] 2071-2082 [1] 2072-2083 [1] 2073-2084 [1] 2074-2085 [1] 2075-2086 [1] 2076-2087 [1] 2077-2088 [1] 2078-2089 [1] 2079-2090 [1] 2080-2091 [1] 2081-2092 [1] 2082-2093 [1] 2083-2094 [1] 2084-2095 [1] 2085-2096 [1] 2086-2097 [1] 2087-2098 [1] 2088-2099 [1] 2089-33 Make the source files available to Items To Copy and then click on the "Copy" button on the top right to download them to the product.
text_image
Windows Notepad File Edit View Help Select menu to copy New Save As... Delete Help Help Help Help Help Help Help Help Help Help Help Help Help Help Help Help Help Help Help Help Help Help Help Help Help Help Help Help Help Help Help Help Help Help Help Help Help Help Help Help Help Help Help Help Help Help Help Help Help Help HKEY_LOCAL_MACHINE\HKEY_CURRENT_USER\HKEY_CURRENT_USER\HKEY_CURRENT_USER\HKEY_CURRENT_USER\HKEY_CURRENT_USER\HKEY_CURRENT_USER\HKEY_CURRENT_USER\HKEY_CURRENT_USER\HKEY_CURRENT_USER\HKEY_CURRENT_USER\HKEY_CURRENT_USER\HKEY_CURRENT_USER\HKEY_CURRENT_USER\HKEY_CURRENT_USER\HKEY_CURRENT_USER\HKEY_CURRENT_USER\HKEY_CURRENT_USER\HKEY_CURRENT_USER\HKEY_CURRENT_USER\HKEY_CURRENT_USER\HKEY_CURRENT_MACHINE\HKEY_CURRENT_USER\HKEY_CURRENT_USER\HKEY_CURRENT_USER\HKEY_CURRENT_USER\HKEY_CURRENT_USER\HKEY_CURRENT_USER\HKEY_CURRENT_USER\HKEY_CURRENT_USER\HKEY_CURRENT_USER\HKEY_CURRENT_USER\HKEY_CURRENT_USER\HKEY_CURRENT_USER\HKEY_CURRENT_USER\HKEY_CURRENT_USER\HKEY_CURRENT_USER\HKEY_CURRENT_USER\HKEY_CURRENT_USER\HKEY_CURRENT_USER\HKEY_CURRENT_USER\HKEY_HKEY_CURRENT_USER\HKEY_HKEY_CURRENT_USER\HKEY_HKEY_CURRENT_USER\HKEY_HKEY_CURRENT_USER\HKEY_HKEY_CURRENT_USER\HKEY_HKEY_CURRENT_USER\HKEY_HKEY_CURRENT_USER\HKEY_HKEY_CURRENT_USER\HKEY_HKEY_CURRENT_USER\HKEY_HKEY_CURRENT_USER\HKEY_HKEY_CURRENT_USER\HKEY_HKEY_CURRENT_USER\HKEY_HKEY_CURRENT_USER\HKEY_HKEY_CURRENT_USER\HKEY_HKEY_HKEY_CURRENT_USER\HKEY_HKEY_HKEY_CURRENT_USER\HKEY_HKEY_HKEY_CURRENT_USER\HKEY_HKEY_HKEY_CURRENT_USER\HKEY_HKEY_HKEY_CURRENT_USER\HKEY_HKEY_HKEY_CURRENT_USER\HKEY_HKEY_HKEY_CURRENT_USER\HKEY_HKEY_HKEY_CURRENT_USER\HKEY_HKEY_HKEY_CURRENT_USER\HKEY_HKEY_HKEY_CURRENT_USER\HKEY_HKEY_HKEY_CURRENT_USER\HKEY_HKey HKEY_HKey HKey HKey HKey HKey HKey HKey HKey HKey HKey HKey HKey HKey HKey HKey HKey HKey HKey HKey HKey HKey HKey HKey HKey HKey HKey HKey HKey HKey HKey HKey HKey HKey HKey HKey HKey HKey HKey HKey HKey HKey HKey HKey HKey HKey HKey HKey HKey HKey HKey HKey L100000000000000000000000000000000000000000000000000000000000000000000000000000000000000000000000000004 Disconnect the product from the PC when copying is complete.
■ To format i.Beat cube
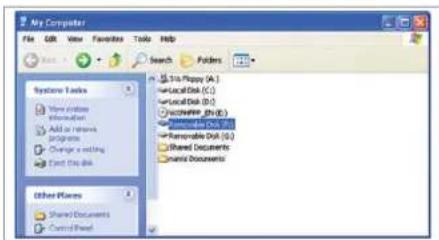
To delete all the contents in i.Beat cube, refer to the following guide.
text_image
My Computer File Edit View Favorites Tools Help System Tools View similar Manufacturer Add or Remove Properties Change existing Direct this disk Other Files Shared Documents Control Sheet Search Patterns Local Disk (A:) Local Disk (C:) Local Disk (D:) Available Web (V:\ Available Web (W:) Shareholder Web (S:) Shareholder Web (E:) Shared Documents Shared Documents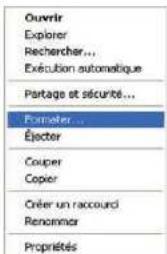
text_image
Format Removable Disk (F.1) Capacity: 120 MB Re-synthes: P432 Allocation unit size Default allocation size Volume Label Format settings: □ Quick Format □ Quick Format □ Select to MIR/MSM drive bits Start Close1 Click on "Start" to begin formatting.
Tip :
- Please be sure not to use the NTFS format, which may result in malfunction of the product.
- In Windows 98, no particular setting is necessary to format the product.
Using i.Beat cube
■ Preparations
To optimize the performance of the product, following precautions should be considered.
- Data other than music files should be kept in the Data folder.
When i.Beat cube is powered on, every folder other than Data are searched for file information. Therefore, larger the number of files Search is carried out for, slower the booting will be.
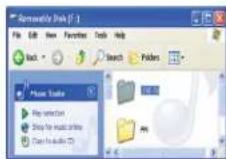
- Place a numerical prefix to the file name in the order of playback is preferred.
▶ Place numerical prefixes to music files in the order of playback, and managing the lyrics would be easier.
- To format i.Beat cube, use only the program included in the Installation CD. i.Beat cube functions will not work properly if other format software including Windows Explorer is used.
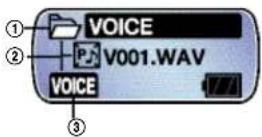
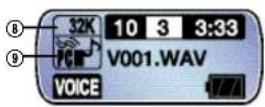
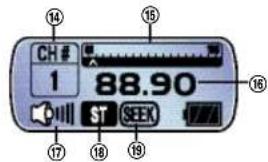
LCD Window
text_image
128K 10 3 4:33 your train.mp3 TOTAL WOW A B ⑧ ⑨ ⑩VOICE PAUSE VOICE PLAYBACK
FM SEEK FM PRESET
text_image
CH # 1 88.90 ST SEEK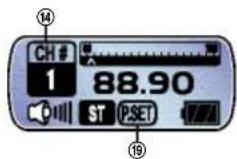
text_image
32K V001.WAV 00:10:45 04:30:58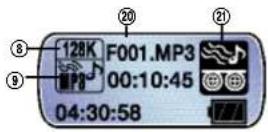
| No Description No Description | |||
| 1 Folder 2 File Display | |||
| 3 Mode/Playback Options 4 EQ/SR SWOW | |||
| 5 | Repeat Options | 6 Hold | |
| 7 Battery Level 8 Bit Rate | |||
| 9 | Mp3./WMA/WAV | 10 | Repeat Section |
| 11 | Number of Music Files 12 | Selected | File |
| 13 | Elapsed Playback Time 14 | Selected Station | |
| 15 | Channel Gauge | 16 | Frequency of Selected Station |
| 17 | Volume Level | 18 | MONO/STEREO |
| 19 | SEEK/PRESET | 20 | Recorded File Number |
| 21 | FM/MIC/Line-In RECORD | 22 | Remaining Recording Time |
| 23 | Elapsed Recording Time | ||
■ Button Operation
In i.Beat cube, there are PAUSE, PLAYBACK, RECORD and FM modes. For each mode, the following table explains how to operate the buttons.
Music Pause
| Voice\Playback | Brief Press Hold Down | |
| PLAYBACK To play To power off | ||
| CENTER JOG To open/close folders Menu Options | ||
| RIGHT JOG Next File (Where applicable) | ||
| LEFT JOG Previous File (Where applicable) | ||
| UP JOG Previous File (Where applicable) | ||
| DOWN JOG Next File (Where applicable) | ||
| MODE BUTTON | Option for 2 or 3 Line LCDWindow | Mode |
| RECORD To mark a folder/file | ||
Music Playback
| Voice\Playback | Brief Press Hold Down | |
| PLAYBACK To pause To power off | ||
| CENTER JOG Menu Options | ||
| RIGHT JOG Next File Speed Search | ||
| LEFT JOG Previous File Speed Search | ||
| UPPER JOG To increase volume | ||
| LOWER JOG To decrease volume | ||
| MODE BUTTON | To set/release Repeat Section | Mode |
| RECORD EQ / SRS | ||
▷ Voice Pause
| Voice\Playback | Brief Press Hold Down | |
| PLAYBACK | To play To power off | |
| CENTER JOG | To open/close folders Menu Options | |
| RIGHT JOG Next | File (Where applicable) | |
| LEFT JOG | Previous File (Where applicable) | |
| UP JOG | Previous File (Where applicable) | |
| DOWN JOG Next | File (Where applicable) | |
| MODE BUTTON | Option for 2 or 3 Line LCD | Mode |
| RECORD | To mark a folder/file | |
▷ Voice Playback
| Voice\Playback | Brief Press Hold Down | |
| PLAYBACK To pause To power off | ||
| CENTER JOG | Menu Options | |
| RIGHT JOG Next File Speed Search | ||
| LEFT JOG Previous File Speed Search | ||
| UP JOG | To increase volume | |
| DOWN JOG | To decrease volume | |
| MODE BUTTON | To set/release Repeat Section | Mode |
| RECORD | N/A | To start/stop recording |
▶ FM Seek Mode ("Seek" is displayed on the LCD window)
| Voice\Playback | Brief Press Hold Down | |
| PLAYBACK Preset Mode To power off | ||
| CENTER JOG Next Preset Menu Options | ||
| RIGHT JOG To change frequency | To seek next available frequency | |
| LEFT JOG To change frequency | To seek next available frequency | |
| UPPER JOG To increase volume | ||
| LOWER JOG To decrease volume | ||
| MODE BUTTON To save on the preset Mode | ||
| RECORD N/A To start/stop recording | ||
▶ FM Preset ("P-set" is displayed on the LCD window)
| Voice\Playback | Brief Press Hold Down | |
| PLAYBACK Seek | Mode To power off | |
| CENTER JOG | N/A | Menu Options |
| RIGHT JOG | To move up on the preset channel | |
| LEFT JOG | To move down on the preset channel | |
| UP JOG | To increase volume | |
| DOWN JOG | To decrease volume | |
| MODE BUTTON | Automatic scanning Mode | |
| RECORD N/A | To start/stop recording | |
Line-In MODE
| Voice\Playback | Brief Press Hold Down | |
| PLAYBACK | N/A | To power off |
| CENTER JOG | Menu Options | |
| RIGHT JOG | N/A | |
| LEFT JOG | ||
| UPPER JOG | To increase volume | |
| LOWER JOG | To decrease volume | |
| MODE BUTTON | N/A | Mode |
| RECORD N/A To start/slop recording | ||
■ Basic Operation
To turn on the power.
- Press on the playback button.
To turn off the power
- Hold down on the Playback button 3 seconds or longer.
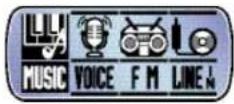
▶ Mode Change (Music/Voice/FM/Line-In)
1 Hold down on the MODE button.
2 In Mode options, use the left/right jog to move to your choice of mode and press on the Menu/Mode button to select.
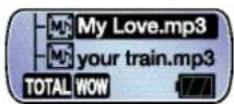
Music Mode Voice Mode

FM Mode Line-In Mode
To adjust volume
- Press on the Up/Down button.
Hold Function
- To prevent users from mistakenly pressing buttons.
- When Hold is set, can is displayed and no buttons will work.
■ To play music
▷ Navigating folders.
- In Search mode, use the volume button to navigate folders.
Tip :
- When there's no folders to navigate, the same control will move up and down on the existing files.
1 To play/pause – press on the Playback button of i.Beat cube.

text_image
My Love.mp3 your train.mp3 TOTAL WOW 128K 10 3 5:33 MP3 your train.mp3 TOTAL WOW2 To open/close a folder – Press on the JOG button after a folder is selected.

text_image
POP01 JAZZ02 TOTAL WOW POP01 MY your train.mp3 TOTAL WOW3 To select either two or three line display

text_image
POP01 MY your train.mp3 TOTAL WOW POP01 MY your train.mp3 MY Love.mp34 Press on the Mode button briefly to make the changes.
To navigate within the playing track
- Move and hold the left/right jog to navigate within the track.
- The search speed will increase when the hold on the jog control maintained.
To change the playing tracks
- Press briefly on the left/right jog and the following occurs.
| Control Point Function | |
| Left Jog | Within 5 sec. of playing To play the previous file |
| Over 5 sec. of playing To play the currently selected file | |
| Right Jog Always To play the next file | |
▷ Repeat Section
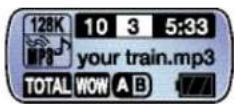
- Press on the Mode button of i.Beat cube ( )
- Press on the Mode button of i.Beat cube (AB)
- Press again on the Mode button to release the Repeat Section.

text_image
128K 10 3 5:33 your train.mp3 TOTAL WOW 128K 10 3 5:33 your train.mp3 TOTAL WOW A
Tip :
* Repeat Section requires 3 seconds or more of a loop to repeat.
■ To change to VOICE Mode

1 Press and hold down on the Mode button until the Mode window appears.
2 Select VOICE.
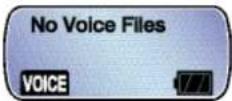

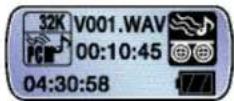
3 In VOICE mode, press and hold down on the Record button.
Tip
* To finish recording, press on the Record button again.
To play a recorded file in Voice mode.
1 In VOICE mode, press on the Repeat Section button to open the folder.
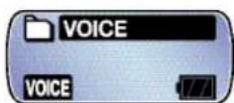

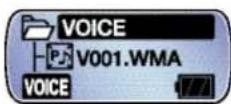
2 Select the file to play and press on the Playback button.
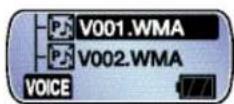


Tip
- In VOICE mode, SRS function and Playback methods are not available.
■ To change to FM Mode

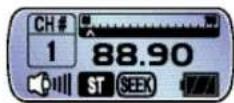
To tune in to a station, press on the Mode button and select FM.
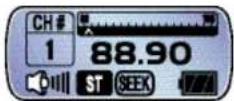
In SEEK mode, seek) Icon appears on the bottom of the LCD
Band Scanning
- Press Left/Right Jog briefly to navigate the band on a preset increment of 100Hz.
- Hold down and release the Left/Right button, and the next available channel appear.
* Reception in the area will determine MONO/STEREO automatically.
To save the band frequency

text_image
CH # 1 88.90 ST SEEK → CH # 2 95.90 ST SEEK- Press briefly on the Central Jog to move up or down on the preset channels.
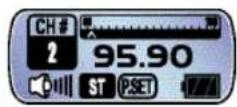
- Select the frequency to be saved, and press briefly on the Mode button.
* When the channel store is complete, P-SET mode is automatically selected.
To change to P-SET
- In SEEK mode, press on the Playback button to change to P-SET Mode.

text_image
CH # 2 95.90 ST SEEK → CH # 2 95.90 ST P.SET* In P-SET mode, you can tune in to one of the preset bands.
To move between the preset channels.
- Press on the Left/Right button to move between the channels.
Auto Scan
- Auto Scan will allow the user to save up to 16 stations.

text_image
CH # 1 88.90 ST SEEK → CH # 1 88.90 ST PSET- Change to P-SET(icon will be displayed) mode.

text_image
CH # 1 88.90 ST PSET- Press on the Mode button and 16 stations that would be scanned will be saved.
* Be sure to have the earphone connected to the set.
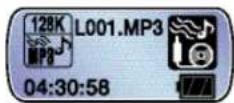
To record FM stations

text_image
CH # 1 88.90 ST SEEK 128K L001.MP3 00:10:45 04:30:58- In FM mode, hold down on the Record button.
* Input volume cannot be adjusted while recording is in progress.
To play a recorded file

- Hold down on the Mode button to change to VOICE.
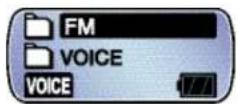

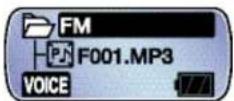
- Select a file that has been previously saved in the FM folder.
■ To change to Line-In Mode

1 Hold on the Mode button to change to Line-In.
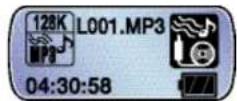

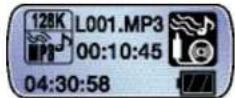
Record Ready Line-In Recording
2 In Line-In mode, hold down on the Record button.
3 Files are saved in the Line-In folder of MUSIC.
■ To configure Menu
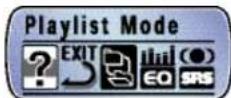
1 Press on the Menu button.
2 Move between the menus to select.
3 To move up on a directory, press and hold down on the Menu button or choose EXIT.
Tip :
- In Menu mode, doing nothing longer than 7 seconds will exit the menu mode.
- MUSIC/VOICE/FM/Line-In modes have different sets of sub-menus.
▷ Summary of Menu functions
| Menu | Function |
| Playing Methods | To play music files programmed into a play list |
| Equalizer To configure the equalizer settings | |
| SRS Labs WOW SRS WOW Configuration | |
| Repeat To set Repeat Section options | |
| Brightness To adjust the brightness of LCD | |
| Light Time | To adjust the duration Backlight is remained on |
| Backlight Color To select light source of backlight | |
| Record | To adjust Audio Quality/Sensitivity/ASD |
| Scroll Speed To adjust the scroll speed of LCD | |
| Power Save | To set the time when to activate Power Save |
| Sleep | To set the time when to activate Sleep Mode |
| File Delete | To delete a file (to be used in Pause mode) |
| Lyrics Options Whether to display lyrics | |
| Track Information | Whether to display ID3 tag and Meta data |
| Language Selection | To select the language of menu and messages |
| Registration Product Information | |
| Exit To exit menu | |
To choose from Play settings
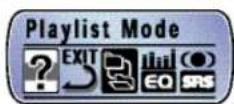

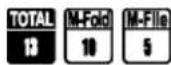
- To play from the play list.
| Methods Description Window | ||
 _ _ | To play all tracks contained in i.Beat cube. | 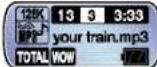 _ _ |
 _ _ | To play all marked folder. | 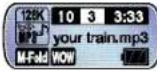 _ _ |
 _ _ | To play all marked files | 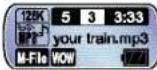 _ _ |
* The number inside the box indicates the number of files to be played.
Note :
- When there is no file to play for the M-Fold or M-File, "No Marked Files/Folder" message is displayed.
- When the marked file or folder is erased or more files are added, bookmark will be released.
To set Bookmark for files and folders
- To bookmark a file or a folder, press on the Record button after selecting the file or the folder.
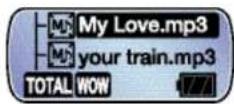

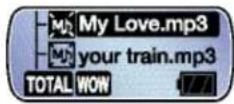
Bookmark released Bookmark activated
WOW SRS Setting (WOW SRS is selected)
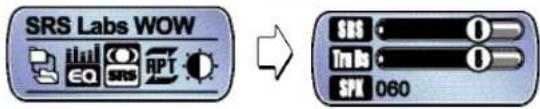
- When SRS, Tru Bas, or WOW is displayed on the LCD window of i.Beat cube, main menu will appear.
text_image
SRS Labs WOW 060- Make the appropriate settings by adjusting SRS, Tru Bas, and SPK slides.
- SRS – To create 3D sound effects.
- Tru Bas – To enhance the bass for thrilling sound experience.
- WOW – To produce SRS and Tru Bas effects at the same time for outstanding audio fidelity.
- SPK – To adjust the sound effects for the speakers used.
| Values for audio output device | |
| 40 Small earphone | |
| 60 Standard earphone | |
| 100 Small speaker | |
| Over 100 Speaker | |
Tip :
• SRS is the trade mark of SRS Labs. Inc.
- WOW technology is licensed by SRS Labs. Inc.
- When SRS is activated, EQ doesn't work and the adjustment for the setting can't be made.
- To make SRS settings, SRS should be selected in Music mode.
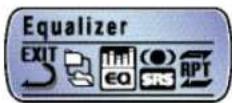
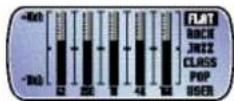
▶ EQ settings (WOW SRS is not activated)
- To customize the tone settings by the user.

▷User EQ settings
- User EQ can be customized and output of a frequency bandwidth can also be adjusted for the appropriate tone settings.
- User EQ of i.Beat cube includes 5 frequency bands, and each band can be adjusted between +10dB \~ -10dB.
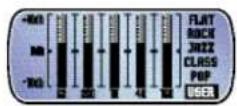

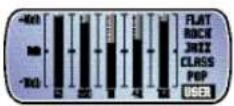
- Use the menu and the left/right button to make the adjustment.
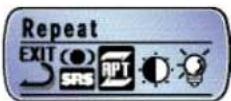
▷ Repeat Section
- Repeat Section includes Single File Repeat/Repeat All/Random Playback/Random Repeat All/Repeat Off.

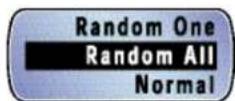
| Description | |
| Single Track Repeat | To repeat the current selected file |
| Repeat All To make a sequential repeat | |
| Random Playback | To make one random playback of all tracks |
| Random Repeat All | To make a random repeat of all track |
| Repeat Off To make one sequential repeat of all tracks | |
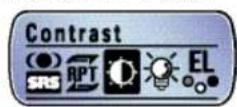
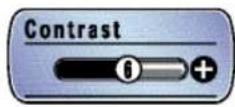
▷ LCD Contrast
- To adjust LCD contrast.

Light Time
- The duration that the backlight is remained turned on can be adjusted.
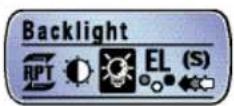

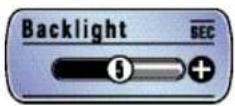
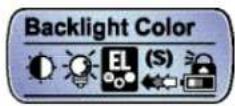
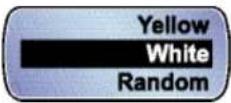
To select the source of backlight.
- Select the color of light source. Seven colors are available.

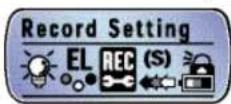
Record Settings
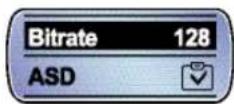
- To select the recording quality.

Tip :
• The ASD setting applies to Line-In.
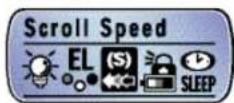
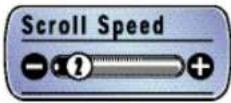
▶ Scroll Speed
- Scroll speed sets the speed of text scrolled on the LCD window.


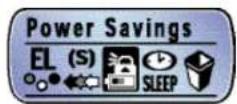
Power Save
- Power Save is to turn the power off when no input is made.

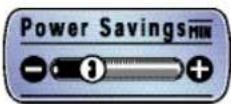
* Power is automatically turned off when there's no playback for a certain time period.
▷ Sleep
- Sleep will turn off the power when the user-set period elapses. Use this when you are going to listen to radio or music for an extended period of time.
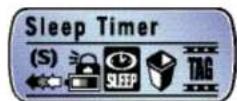

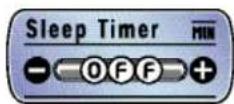
* The power goes off after a certain pre-determined period has passed.

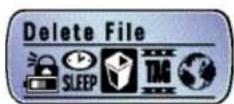
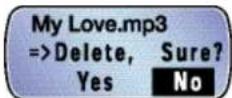
To delete a file
- Choose a file and press on the Menu button to delete the file.


Track Information
- Setting Track Information will display the information (including artist and the song title) for the MP3/WMA files.

text_image
Tag - Info SLEEP Time Location Question Tag - Info On Off▷ Language Setting
- To display the language of Menu and massages.

flowchart
graph LR
    A["Language"] --> B["Trd. Chinese English Japanese"]
▶ Registration Information
- Registration Information will display the product's model name, firmware ver.

text_image
About TAG EXIT → TM-330/3.520 256MB USED 12.0 USED 12.0▷ Exit
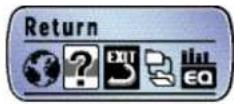
- To exit the menu, choose the EXIT icon or hold down on the Menu button.
Firmware Upgrade
Choose Firmware Upgrade when there's a new firmware upgrade released or i.Beat cube doesn't work properly.
Notice :
- Disconnecting i.Beat cube from a PC may result in a damage to the set.
* Check our website for the new release of Firmware Upgarde.
1 Link the product to a PC using the provided USB cable.
text_image
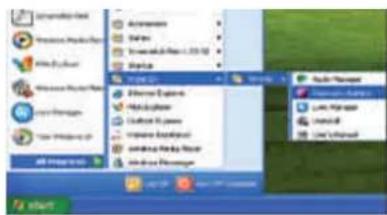
Start Menu Start Menu Options Enter New Page Enter New Page Enter New Page Enter New Page Enter New Page Enter New Page Enter New Page Enter New Page Enter New Page Enter New Page Enter New Page Enter New Page Enter New Page Enter New Page Enter New Page Enter New Page Enter New Page Enter New Page Enter New Page Enter New Page Enter New Page Enter New Page Enter New Page Enter New Page Enter New Page Enter New Package Enter New Package Enter New Package Enter New Package Enter New Package Enter New Package Enter New Package Enter New Package Enter New Package Enter New Package Enter New Package Enter New Package Enter New Package Enter New Package Enter New Package Enter New Package Enter New Package Enter New Package Enter New Package Enter New Package Enter New Package Enter New Package Enter New Package Enter New Package Enter New Package Enter New Page Enter New Page Enter New Page Enter New Page Enter New Page Enter New Page Enter New Page Enter New Page Enter New Page Enter New Page Enter New Page Enter New Page Enter New Page Enter New Page Enter New Page Enter New Page Enter New Page Enter New Page Enter New Page Enter New Page Enter New Page Enter New Page Enter New Page Enter New Page Enter New Pads Enter New Pads Enter New Pads Enter New Pads Enter New Pads Enter New Pads Enter New Pads Enter New Pads Enter New Pads Enter New Pads Enter New Pads Enter New Pads Enter New Pads Enter New Pads Enter New Pads Enter New Pads Enter New Pads Enter New Pads Enter New Pads Enter New Pads Enter New Paps Enter New Paps Enter New Paps Enter New Paps Enter New Paps Enter New Paps Enter New Paps Enter New Paps Enter New Paps Enter New Paps Enter New Paps Enter New Paps Enter New Paps Enter New Paps Enter New Paps Enter New Paps Enter New Paps Enter New Paps Enter New Paps Enter New Paps Enter New Peps Enter New Peps Enter New Peps Enter New Peps Enter New Peps Enter New Peps Enter New Peps Enter New Peps Enter New Peps Enter New Peps Enter New Peps Enter New Peps Enter New Peps Enter New Peps Enter New Peps Enter New Peps Enter New Peps Enter New Peps Enter New Peps Enter New Peps Enter New Pps100000000000000000000000000000000000000000000000000000000000000000000000000000000000000000000000000002 Choose [Start] Programs [TrackStor]
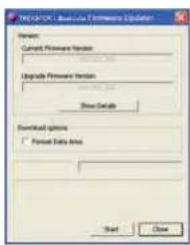
[i.Beat cube] Firmware Update
text_image
DOS-PCB Linux Infrastructure Explorer Version: Current Professional Version Upgrade Professional Version Show Details Download options: Forward Data Area Start Close4 When the driver installation is complete, the following window will appear.
5 When the upgrade is complete, disconnect the set from the PC. Refer to the "i.Beat cube Safe Unplug/eject."
Notice :
- Do not disconnect the product from the PC while upgrade is in progress.
- Save all the data on the product before initiating the firmware upgrade.
- To check the Firmware information, choose Registration Information on the menu. Also the information is displayed during the boot process.
Product Specification
| Model i.Beat cube | |
| Memory 128MB/256MB/512MB/1024MB | |
| File Support | MPEG 1/2/2.5 Layer 3(8~ 320kbps, VBR) |
| WMA (5~192kbps) support | |
| Battery One AAA (1.5V) | |
| USB USB2.0 | |
| Playing Time About 16 hours | |
| LCD 128 X 48 (3Line) / EL Backlight | |
| Size 22 x 53 x 20mm | |
| Weight 22.4g | |
| S/N Ratio 90dB | |
| Earphone Output | 10mW + 10mW (16Ω) |
| FM Frequency | 87.5~108MHz |
| Recording VOICE / FM /Line-In Recording | |
| Language | Multiple language support (Unicode 2.0 Standard) |
| OS Windows 98SE / ME / 2000 / XP / MAC* | |
* Installation software for Mac users is not provided.
Troubleshooting Checklist
• Power cannot be turned on.
- Check if the battery is properly aligned to the correct polarity.
• In case of no sound
- Check if the volume is set to '0.'
- Check if the connection of the earphone has failed.
- Buttons don't work
- Check if the Hold switch is on.
- In case of "No Marked Files" or "No Marked Folder"
- Choose the "Total" mode of [Playing Methods]
- For more details, refer to the Playing Methods of this guide.
• In case of no FM reception
- For a fringe area where reception is poor, some radio signals are hard to pick up.
- Check if the connection of the earphone has failed. (The earphone doubles as the antenna for the product.)
• The system seems sluggish - Booting speed will be slow when there are too many files in i.Beat cube.
- Refer to the page 30, "Preparations."
Cautions
- Refrain from using the earphone when you are biking or driving or walking (especially when crossing the street). Not doing so can result in a car accident.
- Listening for too long at a loud volume can cause serious hearing problems.
- Using a headphone/earphone while you are on the street can result in a car accident.
- Do not drop or impact the unit. It may cause malfunctions.
- Exposure to water or high humidity can cause malfunctions. When this happens, do not turn on the power. Remove the battery as soon as possible and request for service repair.
- Exposure to direct sunlight, heat source for too long can cause malfunctions.
- Keep the battery separately from the unit when not in use for a long time. Leakage from the battery may damage the product.