
I.Beat 500 - Mp3 player TrekStor - Free user manual and instructions
Find the device manual for free I.Beat 500 TrekStor in PDF.


User questions about I.Beat 500 TrekStor
0 question about this device. Answer the ones you know or ask your own.
Ask a new question about this device
Download the instructions for your Mp3 player in PDF format for free! Find your manual I.Beat 500 - TrekStor and take your electronic device back in hand. On this page are published all the documents necessary for the use of your device. I.Beat 500 by TrekStor.
USER MANUAL I.Beat 500 TrekStor
natural_image
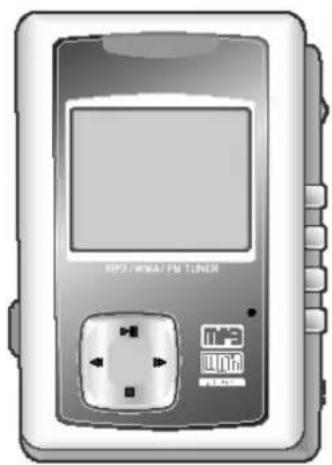
Illustration of a MP3/WM4/PM tuner device with control buttons and playback controls (no text or symbols on the device body)☆☆☆☆☆♣☆☆☆
Thank you for purchasing our
product. This product is a mass storage device that solves the capacity limitation problem of most existing MP3 players and provides features such as Playback, Encoding, and Tuning. The playback feature not only supports MP3 format, WMA, OGG and WAV files, but also allows you to enjoy various music files. This product can be connected to your PC through a USB cable. Once connected to your PC, it is automatically recognized by your PC as a
natural_image
Illustration of a MP3/MPA/PM TUNER audio recording device (no text or symbols on the device body)mass storage device. In addition, you can continue to enjoy the benefits of the improved product performance through firmware upgrades. You can obtain information about our company and our products on our website. Visit our Website at www.xclef.com if you have any questions on our products.
Notice
- This manual is protected by copyright law and all rights are reserved.
- No part of this manual may be reproduced or translated into other languages without written permission from the publisher.
- The content of this manual is provided as it is and the manufacturer is not under any obligation to notify users of revisions or modifications.
- Other than the implied guarantee, there are no guarantees on the productivity or appropriateness of this manual.
- The content of this manual can be changed without prior notice according to specifications or improvement of the capacity.
- Programs included with the device are under copyright protection.
No part of these programs may be played or reproduced without written permission from the manufacturer. - All product names used in this document and device are the trademarks of their corresponding owner's trademark, service mark, or registered brand.
- Specifications can be changed without prior notice.
Product Features
This product is a portable HDD Type MP3 Player that can be well compatible with your PC's file system. It features not only a portable storage device but also 160x105 full graphic LCD screen. This product supports various languages, making it convenient to use anywhere you go. The Product Features of this device are as follows.
[1] Mass Storage
This product uses mass storage that exceeds the capacity of most existing MP3 players and allows you to use it as a removable drive.
[2] Playback MP3, WMA, OGG and WAV files
You can play MPEG1-Layer3 (MP3) files as well as Windows Media Audio (WMA) files. (If the device doesn't support OGG or WAV files, you must download firmware file.)
[3] Up to 16 hours of Battery Life
You can enjoy up to 16 hours of music with just one battery charge.
[4] Direct MP3 Encoding without a PC
You can encode music from audio CD player or music cassette player to MP3 player by connecting directly line-in cable of this device to earphone jack of CD player or cassette player without a PC.
[5] FM Tuner and Voice Recording
You can listen to FM radio by using Auto Scan or Preset function. It also enables you to record voice memos using its Voice Recording feature.
[6] Searching Files by Alphabet
You can search the music file easily while you're listening to music by Search Function.
[7] Text Viewer
You can view text files which is stored in this device anytime, anywhere.
[8] LED Button Effect
This product provides various LED Button Effect depending on its function.
[9] Store or Transfer files Easily
You can create new folders by connecting the device to your PC. The new folders and files are downloaded automatically to your device without any other program.
Contents
Introduction....1
Notice....1
Product Features 2
Safety & Check Points 4
CHAPTER 1: Getting Started
Checking Package Contents ....5
Name of Each Part....6
Functional Description of Each Part ..... 7
Indicators on the LCD 8
· Basic Indicators ....8
·Playback Indicators ..... 9
CHAPTER 2: Preparation
Charging the Battery....11
- Connecting the Battery Charger ..... 11
· Battery Remaining Indicator .....12
Connecting Devices....13
- Earphones Connection ....13
- Remote Control Connection .....13
· Line-in Connection .....13
Connecting to Your PC....14
Installing the USB Driver....15
· Automatic Installation .....15
- Manual Installation .....15
- Checking the Installation .....17
- Removing the Device ....18
CHAPTER 3 : Basic Operations
Powering On/Off....20
· Powering On ....20
· Powering Off ....20
Various Folders....21
Using Browser Mode .....22
·Playback 22
· Pause .....24
· Fast Forward .....24
·Rewind....24
- Viewing Popup Menu during Playback . .25
·Adjusting the Volume .....25
Using Tuner Mode .....26
- Listening to Radio ....26
- Presetting Stations .....26
· Viewing Popup Menu During Playback . .27
- Recording during listening Radio .....27
Using Encoding Mode .....28
·Encoding....28
- Viewing Popup Menu in Encoding ....29
- Voice Recording ....30
· Viewing Popup Menu in Voice Recording . .31
Using PlayList Mode ....32
· How to make Bookmark .....32
- Playback the stored BMK files .....33
Using Text Mode ....34
- Reading the Text File ....34
Using Setup Mode ....35
- Setting up Mode ....35
· Tree View .... 36
- Search View....36
Using Exit Mode ....37
Contents
CHAPTER 4 : Advanced Operation
Using Options....39
· DISPLAY....39
· SYSTEM....40
· MUSIC-OPTION .....40
- OTHER-OPTION ....42
A B Repeat Play....43
Managing Files ....44
Upgrading Firmware....45
Specification 46
Troubleshooting....47
Product Guarantee....48
FCC Notice 49
Safety & Check Points
Read this manual carefully before using the device.
WARNING
- DO NOT alter this device in any way. It may cause fire, injury, electric shock, or serious damage to this device or to the user.
- DO NOT leave this device in a car or other places where there is the possibly of high temperature. Keep it away from the direct rays of the sun or drastic temperature changes. Being exposed to high temperature may be harmful to the components in this device or possibly cause fire.
- Use only the recommended battery charger. Other chargers may cause fire or product malfunction.
- Keep this device away from water. Water may cause fire, electric shock, or mechanical or electrical breakdown.
CAUTION
- The life of the charging battery can be changed depending on the operating time or its environment. Use always the provided charging battery and adapter. When they are not used, separate the adapter from the device.
- DO NOT clean this device with alcohol or volatile detergent. It may cause fading of device surfaces.
- Avoid dropping it from high places. It may cause malfunction or serious damage to the device.
- DO NOT disassemble this device. In case of problems, contact the After Service (A/S) center.
- DO NOT use any accessories other than the ones recommended by the manufacturer. The manufacturer IS NOT responsible for any malfunction or breakdown caused by the use of accessories.
- Avoid using this device in high or low temperature or high humidity locations. It may cause serious damage to the device.
- If you press more than 2 buttons at the same time, the device can be operated abnormally.
- This product supports only FAT 32 format.
- Please access our website to have your firmware upgraded if OGG and WAV are not fully supported.
Chapter

Getting Started
This device consists of the main unit and 8 accessories. This chapter shows you the contents to check.
This chapter describes the main features of the product and the names and functions of the parts of the product. With the information in this chapter, you will be able to use the product easily and effectively.
The topics of this chapter are as follows:
- Checking Package Contents
• Name of Each Part
• Functional Description of Each Part
Checking Package Contents
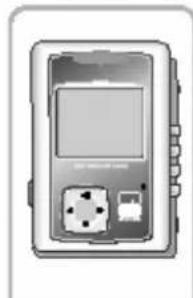
Check your package to make sure it has the following items:
natural_image
Illustration of a handheld electronic device with a screen, socket, and power button (no text or symbols)Main Unit
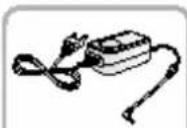
AC-Adapter

Line-in Cable
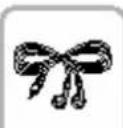
Earphones
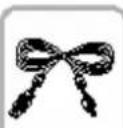
USB Cable
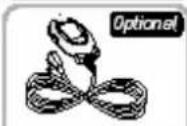
Remote Control
Carry Case

User's Guide
98SE and MAC
natural_image
Illustration of a handheld electronic device with a screen, buttons, and a socket (no text or symbols visible)
AC-Adapter
Line-in Cable
Earphones
Name of Each Part
The following illustration indicates the names and locations of each part of the product.
View of the Main Unit
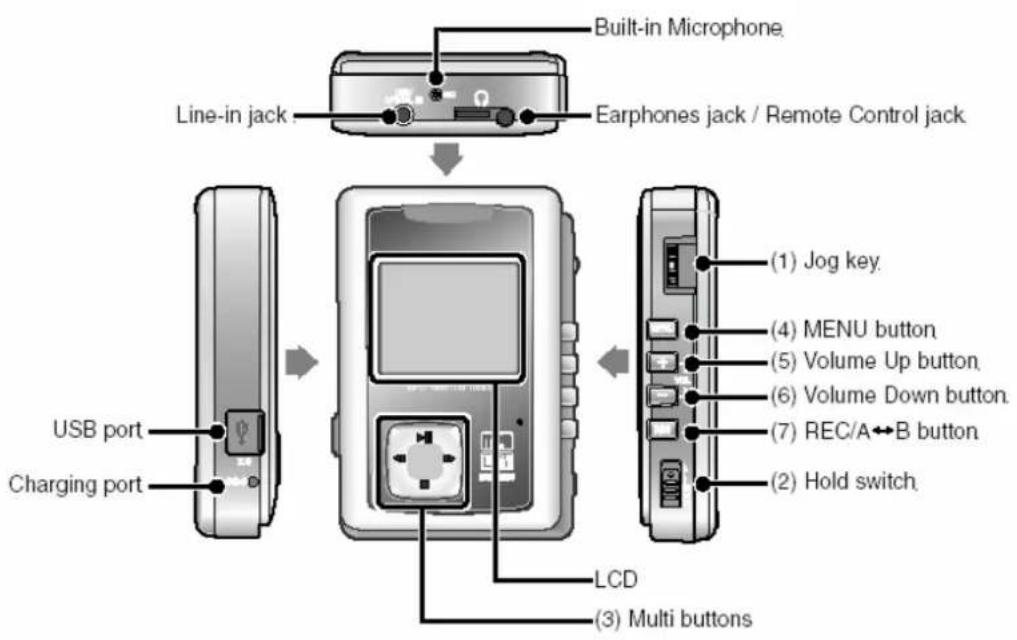
text_image
Line-in jack Built-in Microphone Earphones jack / Remote Control jack USB port Charging port LCD (3) Multi buttons (1) Jog key. (4) MENU button (5) Volume Up button (6) Volume Down button (7) REC/A↔B button (2) Hold switchRemote Control – Button & Display
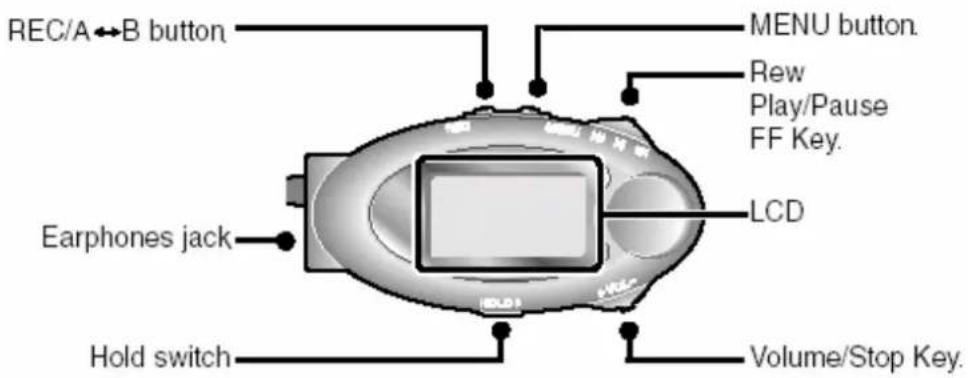
text_image
REC/A←B button MENU button. Rew Play/Pause FF Key. LCD Earphones jack Hold switch Volume/Stop Key.Functional Description of Each Part
(1)Jog Key :
- When pushed up or down: Selects a file or folder.
- When pressed: Runs the selected file. Takes you to the selected folder.
(2)Hold Switch
- Locks all buttons to prevent accidental activation. Slide the switch up to activate the Hold function and slide it
(3)Multi-Buttons
- PLAY/PAUSE(?|):
Selects a file, starts playback or, if playback is already started, pauses playback. It also functions as the power switch.
- STOP( ) :
- When pressed briefly:
- Stops playback and enters Browser mode.
- Takes you back to the higher-level folder when in a subfolder of the higher-level folder.
- When held down:
- The unit will automatically power off when this button is held for about 3 seconds.
? The unit will force power off when this button is held for longer than 10 seconds. (In case of "RESET")
- REW(??):
Selects the previous file from the folder list. During playback, hold it down the button to rewind the current song, or briefly press it to play the previous song.
- FF(:10)
Selects the next file from the folder list. During playback, hold it down to fast forward the current song, or briefly press it to play the next song.
Functional Description of Each Part
(4)Menu Button :
- Hold it down to switch modes, or briefly press it to return to Browser mode. If Tree View and Search View of the Display section are set to "Enable" in the Setup, briefly pressing the MENU button will toggle between Tree View and Search View.
(5)Volume Up Button : • Turns the volume up on this unit.
(6)Volume Down Button : · Turns the volume down on this unit.
(7)REC/A-B Repeat Button :
- FM/Line-In/Encoding function/A-B Repeat function Button
Indicators on the LCD
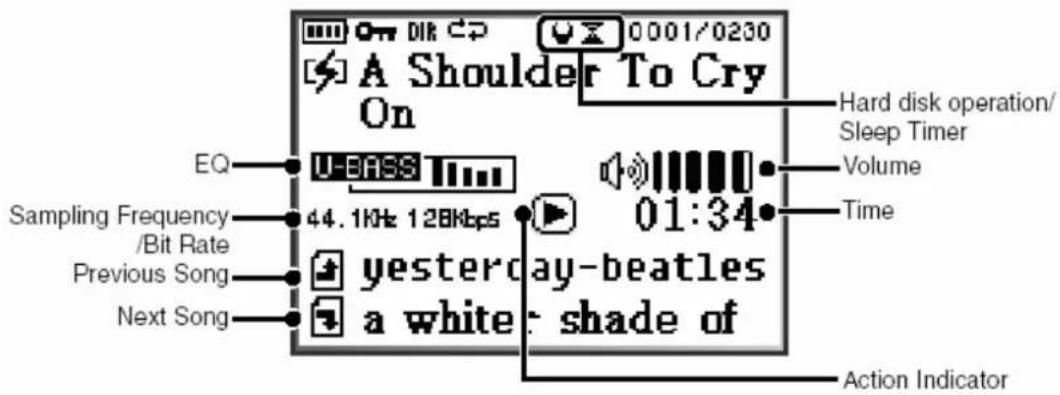
Various icons are used to indicate the settings and status of the device. The following illustration and table describes the meaning of each icon:
Basic Indicators
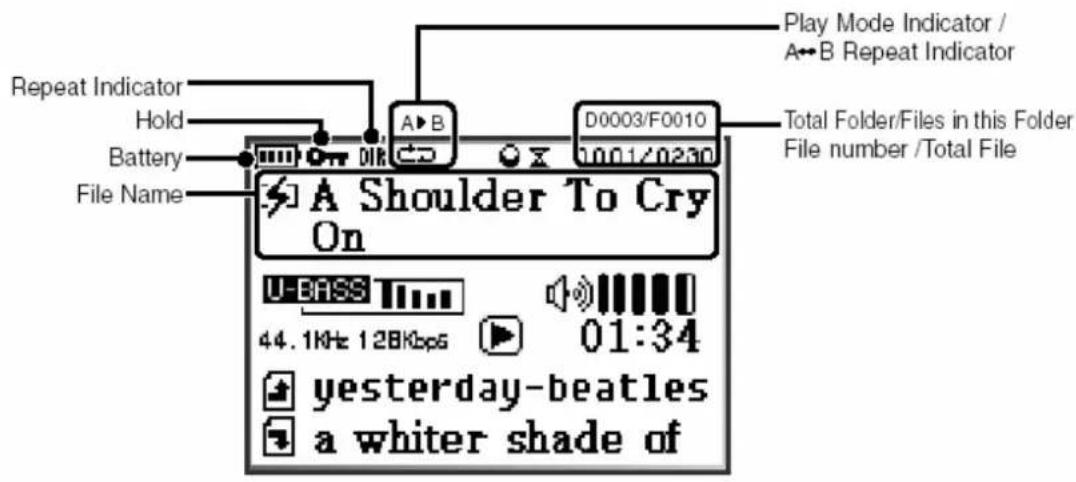
text_image
Play Mode Indicator / A←B Repeat Indicator Repeat Indicator Hold Battery File Name D0003/F0010 1001/0230 Total Folder/Files in this Folder File number /Total File A Shoulder To Cry On U-BASS 44.1KHz 128Kbps 01:34 yesterday-beatles a whiter shade of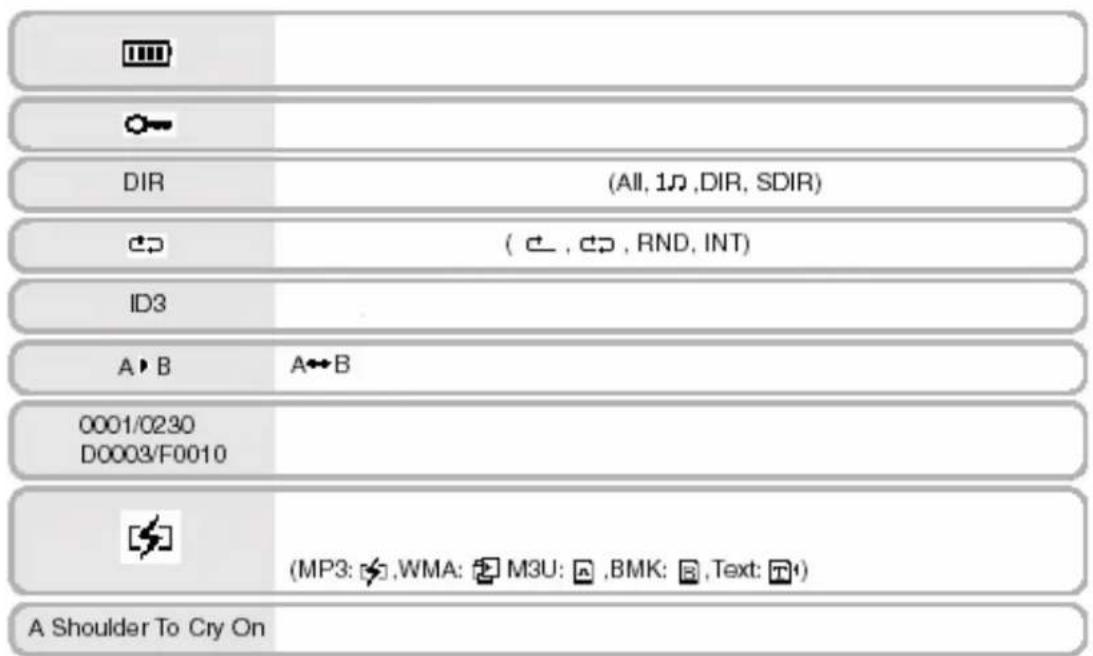
text_image
DIR (All, 10, DIR, SDIR) ID3 A→B 0001/0230 D0003/F0010 (MP3: ,WMA: M3U: ,BMK: Text: A Shoulder To Cry OnIndicators on the LCD
Playback Indicators
text_image
A Shoulder To Cry On Hard disk operation/ Sleep Timer Volume Time EQ U-BASS Sampling Frequency /Bit Rate Previous Song Next Song 44.1KHz 128Kbps 01:34 yesterday-beatles a white shade of Action Indicator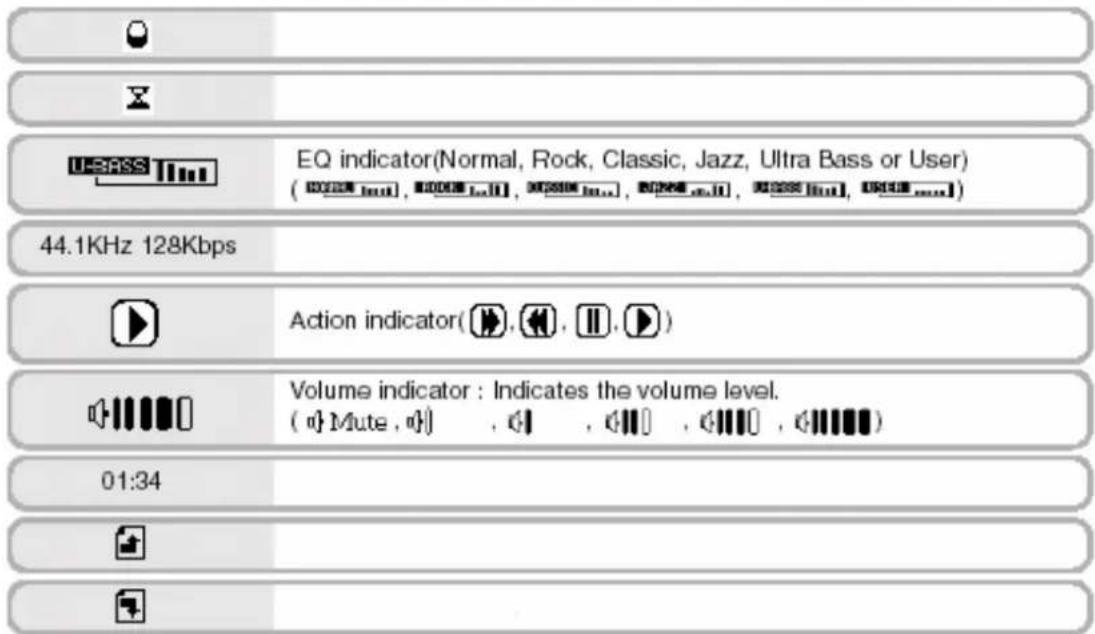
text_image
EQ indicator(Normal, Rock, Classic, Jazz, Ultra Bass or User) ( 10000 Hz, 10000 Hz, 10000 Hz, 10000 Hz, 10000 Hz, 10000 Hz, 10000 Hz, 10000 Hz, 10000 Hz, 10000 Hz, 10000 Hz, 10000 Hz, 10000 Hz, 10 44.1KHz 128Kbps Action indicator( ), ( ), ( ), ( ) Volume indicator : Indicates the volume level. ( Mute , ) , , , , , , , , , , , , , , , , , , , , , , , , , , , , , , , , , , , , , , , , , , , , , , , , , , , , , , , , , , , , , | 01:34Chapter

Preparation
This product uses an AC-Adapter adapter for battery charging. The battery must be charged first before using the device after purchasing. The device comes with earphones. You can use the earphones to listen to various music and voice recording files. Also, an optional remote control is available for greater convenience.
This device supports multiple OS platforms, including Windows 98SE, ME, 2000, XP, 2003 and Mac OS. You can install a USB driver on your PC according to the OS you are using and connect this device to your PC.
The topics of this chapter are as follows:
- Charging the Battery
- Connecting Devices
- Connecting to Your PC
• Installing the USB Driver
Charging the Battery
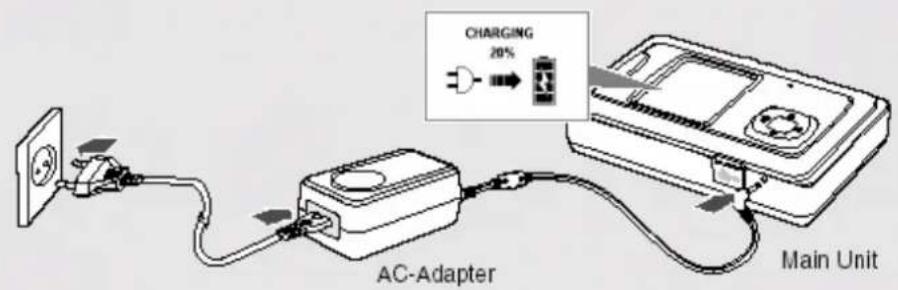
- When charging the battery - after plugging the AC-Adapter's barrel plug into the charger jack - you must press the PLAY/PAUSE button.
- Press the PLAY/PAUSE button one more time to operate the MP3 Player during charging.
text_image
CHARGING 20% AC-Adapter Main UnitConnecting the Battery Charger
- Plug the AC-Adapter into a wall power outlet.
- Plug the AC-Adapter's barrel plug into the Charging port on the left side of the device.
Charging the Battery
It is convenient to check the battery life at anytime.
Battery Remaining Indicator
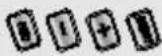 | When the battery level is 100%The LED of the Rec, Vol-, Vol+ and the Menu button light on. |
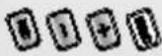 | When the battery level is 80 - below 100%The LED of the Rec, Vol- and the Vol+ button light on. The LED of the Menu button is blinking. (Cycle : 1 second) |
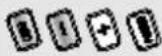 | When the battery level is 60 - below 80%The LED of the Rec, Vol- button light on. The LED of the Vol+ button is blinking. (Cycle : 1 second) |
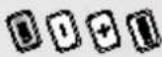 | When the battery level is 40 - below 60%The LED of the Rec button lights on. The LED of the Vol- button is blinking. (Cycle : 1 second) |
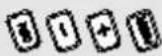 | When the battery level is 0 - below 40%The LED of the Rec button is blinking. The indicator flashes at 1 second interval. (Cycle : 1 second) |
Connecting Device
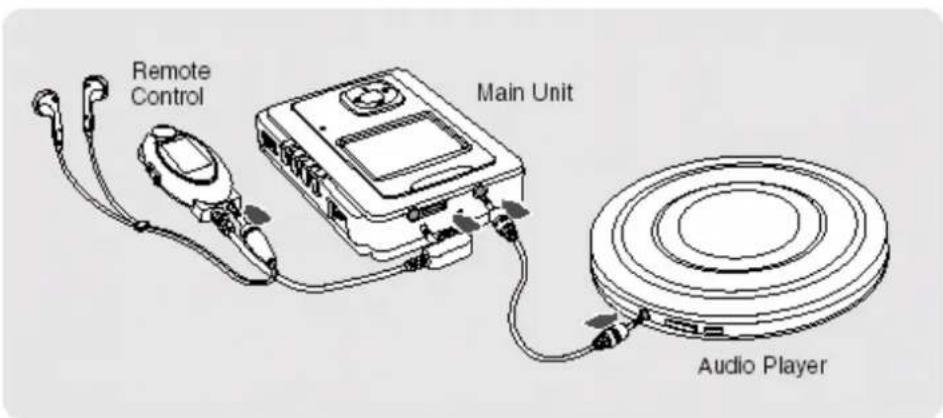
You can use the earphones to listen to music files or voice recordings. You can use the line-in cable to connect an external audio player to the line-jack of this device for MP3 encoding. The following illustration shows the earphones and line-in connections.
text_image
Remote Control Main Unit Audio PlayerEarphones Connection
- Plug the earphones into the earphone jack on this device.
- Make sure the earphones connector is completely inserted in the jack.
- Play a music file to check for proper connection.
Remote Control Connection
- Plug the earphones into the earphones jack on the remote control.
- Plug the remote control into the remote control jack on the device.
Line-In Connection
- Plug one end of the line-in cable into the output terminal or the earphones jack of an external audio player.
- Plug the other end into the line-in jack on this device.
☆☆☆
Refer to the section on Encoding mode(Page 28) for MP3 format encoding using the line-in connection.
Connecting to Your PC
You can use a USB cable to connect this device to your PC as a mass storage device and easily use its various features.
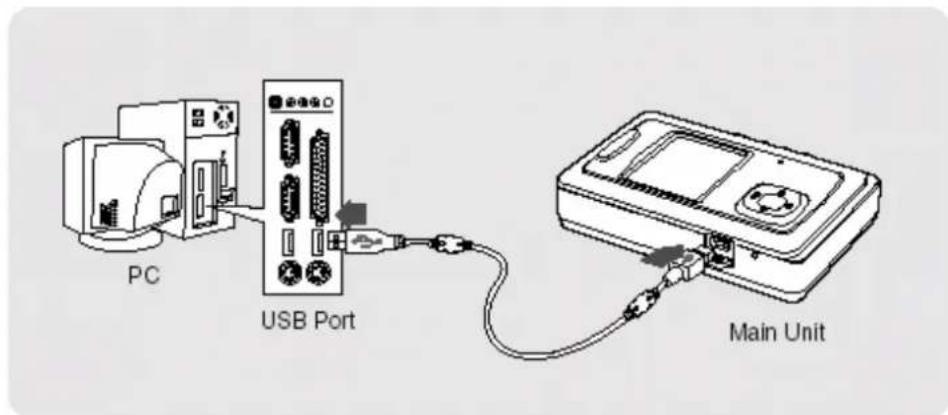
text_image
PC USB Port Main Unit- Connect one end of the USB cable to the USB port on the back of your PC.
- Turn on the power to this device and connect the other end of the cable to the USB port of this device.
CAUTION
If you connect the USB cable to this device during playback, an error may occur. Be sure to connect the USB cable when the device is not playing.
NOTE
- You can upload or download files to and from your PC. For file uploading or downloading, this device must be connected to your PC via a USB cable.(However, you should not upload MP3 or WMA files that infringe on copyright law).
- Please refer to removing the Device (Page 18) when removing the USB cable. The device turns off automatically when you disconnect the USB cable.
- The capacity of the device and the capacity shown on the PC can be different according to the storage of the system.
Installing the USB Driver
If you are running Windows ME, 2000, 2003, or XP on your PC, the installation will be performed automatically when you connect this device to your PC. However, on a PC running Windows 98SE, you will need to install the required USB driver manually. The installation procedure is as follows:
Automatic Installation
- Connect one end of the USB cable to your PC.
- Turn on power to this device and connect the other end of the cable to the USB port of this device.
- Your PC automatically recognizes this device and the required USB driver is installed automatically.
NOTE
If the installation does not start automatically, restart your PC and repeat the procedure above.
Manual Installation
If your PC is running Windows 98SE, you will need to install the USB driver manually.
- Connect the device to your PC.
The Add New Hardware Wizard will appear. - Follow the on-screen instructions selecting 'Specify a location'.
- Browse to the Driver_v_5.16 file on the CD-ROM.
- If the Add New Hardware Wizard is not opened automatically, find the CD-Rom drive manually in 'My Computer'.
- For details about manual installation, refer to page 16.
Installing the USB Driver(Continued)
Installation Procedure on a PC running Windows 98 SE
The manual installation procedure is as follows:
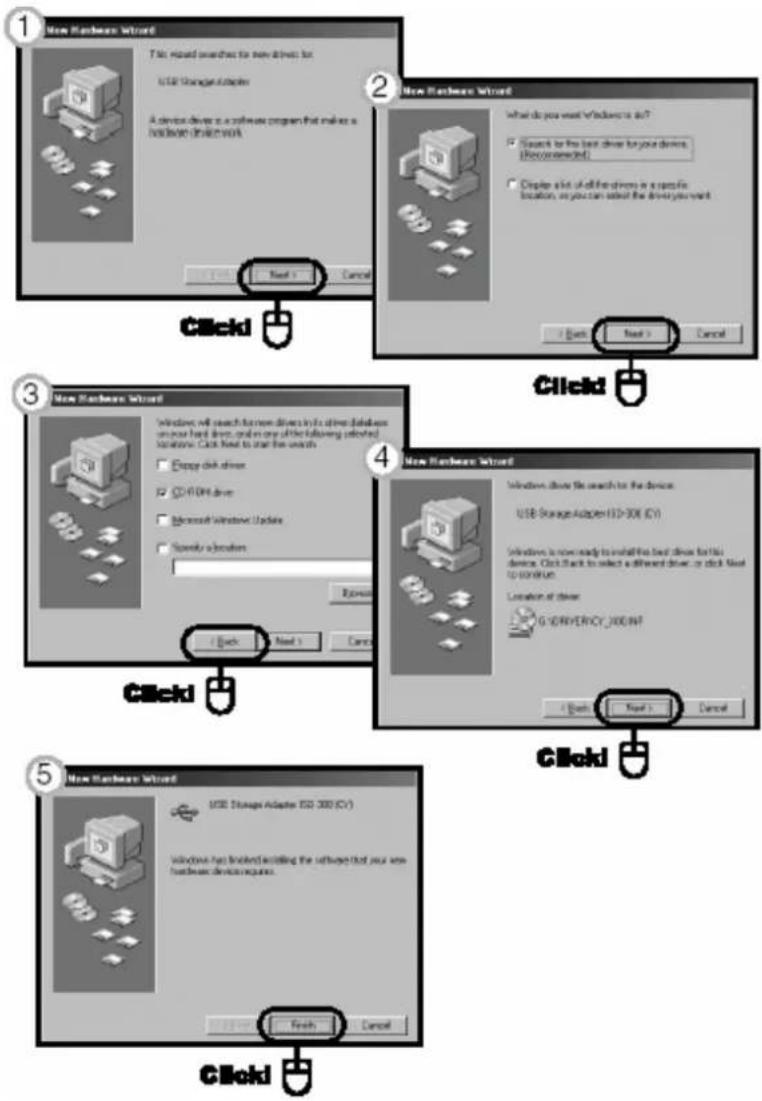
text_image
New Hardware Wizard This preview searches for new drive for USB Storage Adapter A device driver is a software program that makes a button (driver work) Next > Cancel Clickl New Hardware Wizard What do you want Windows to do? Search for the best driver for your device. (Recommended) Display disk of the drive in a specific location, or you can select the drive you want Next > Cancel Clickl New Hardware Wizard Windows will search for new drivers in its other databases on your hard drive, and on one of the following selected to Belize. Click Next to select the search Enable Open disk driver CD-ROM drive Microsoft Windows Update Specify a location Back Next > Cancel Clickl New Hardware Wizard Windows drive file search for the device USB Storage Adapter ISO-300 (CY) Windows is now ready to install the best drive for this device. Click Next to select a different driver or disk Next to Belize. Location at driver G S/C/ER/ency 2000/NT Next > Next > Cancel Clickl New Hardware Wizard USB Storage Adapter ISO 300 (CY) Windows have finished installing the software that your own hardware device requires. Next > Cancel ClicklInstalling the USB Driver(Continued)
Checking the Installation
. 1. Right-click on My Computer and click Properties.
- On Windows 2000, select the Hardware tab and click the Device Manager button.
- On Windows 98SE, select the Device Manager tab.
2. The Device Manager dialog box will open.
3. If the required USB driver is installed correctly, it will be indicated as shown below.
And a new icon( ) appears in the system tray.
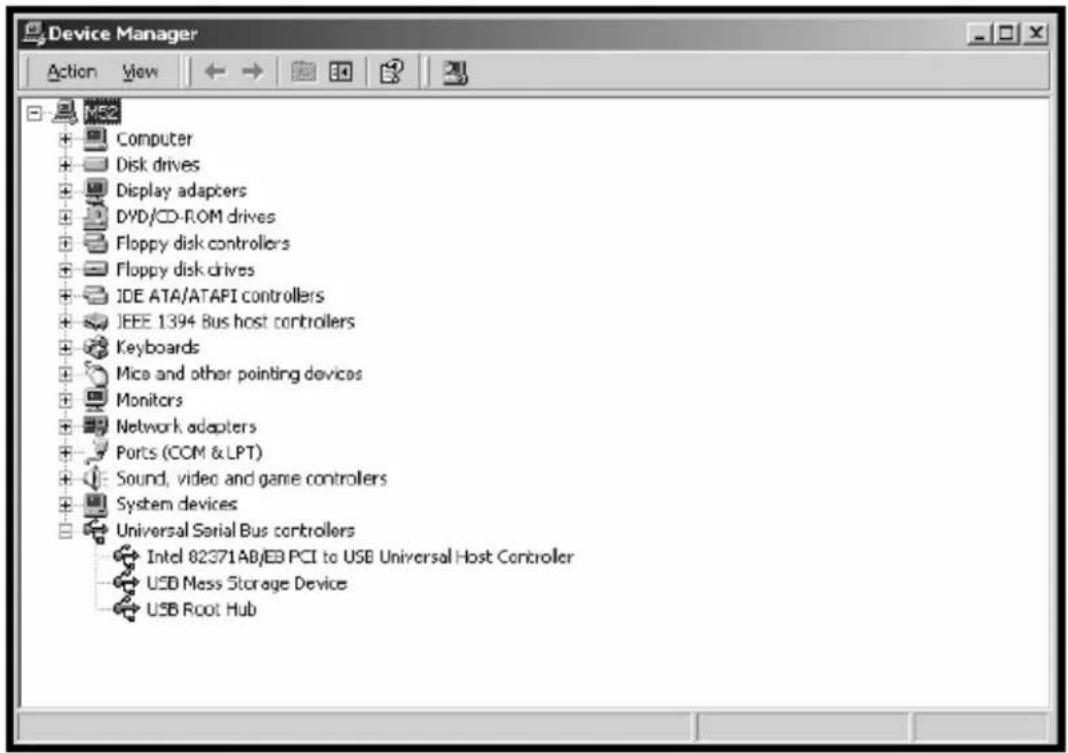
text_image
Device Manager Action View ME2 + Computer + Disk drives + Display adapters + DVD/CD-ROM drives + Floppy disk controllers + Floppy disk drives + IDE ATA/ATAPI controllers + IEEE 1394 Bus host controllers + Keyboards + Mica and other pointing devices + Monitors + Network adapters + Ports (COM & LPT) + Sound, video and game controllers + System devices + Universal Serial Bus controllers Intel 82371AB/EB PCI to USB Universal Host Controller USB Mass Storage Device USB Root HubInstalling the USB Driver(Continued)
Removing the Device
- Double-click on in the System Tray to bring up the following window.
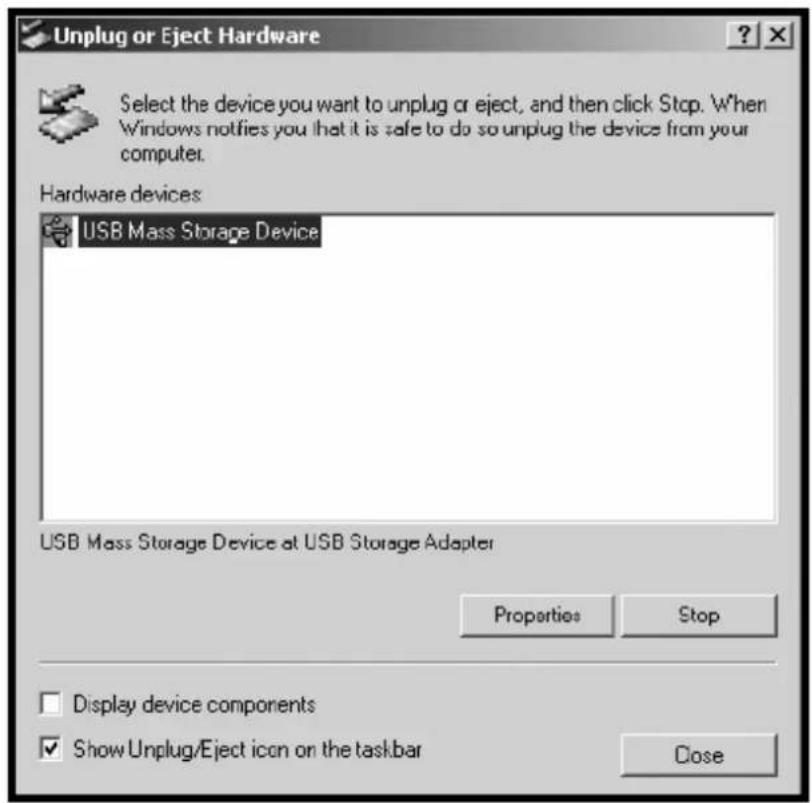
text_image
Unplug or Eject Hardware Select the device you want to unplug or eject, and then click Stop. When Windows notifies you that it is safe to do so unplug the device from your computer. Hardware devices: USB Mass Storage Device USB Mass Storage Device at USB Storage Adapter Properties Stop Display device components Show Unplug/Eject icon on the taskbar Close- Click 'Stop'.
- Click 'OK', when the 'Safe to Remove Hardware' dialog box appears.
Be sure to remove the USB cable only after you have cleared the dialog box by clicking "OK".
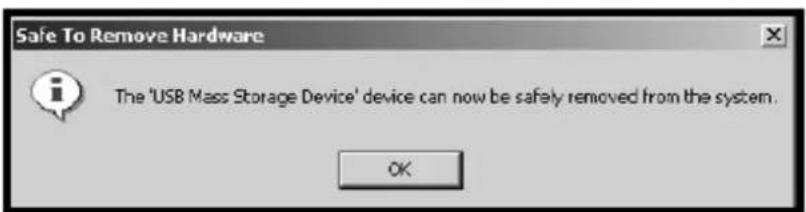
text_image
Safe To Remove Hardware The 'USB Mass Storage Device' device can now be safely removed from the system. OKChapter

Basic Operation
This device provides various features. This is a mass storage device that allows you to listen to various music files in MP3, WMA, OGG, or WAV format as well as your favorite radio programs. In addition, it shows information about the operational status of this device on the large LCD for easy operation. This chapter describes the basic operation of the device.
The topics of this chapter are as follows:
- Powering On/Off
- Various Folders
- Using Browser Mode
- Using Tuner Mode
- Using Encoding Mode
- Using PlayList Mode
- Using Text Mode
- Using Setup Mode
- Using Exit Mode
Powering On/Off
Powering On
- Press the Play/Pause button for 2 seconds. Power turns on and the initial screen appears on the LCD.
- Then, the device enters Browser mode and the root folder appears on the LCD.
NOTE
When using the device for the first time, there are no subfolders under the root folder. Connect the device to your PC and create new folders from your PC.
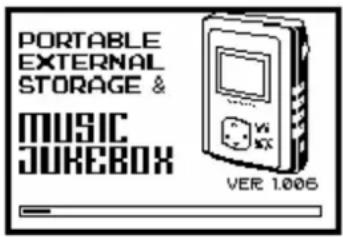
text_image
PORTABLE EXTERNAL STORAGE & MUSIC JUREBOX VER 1.005Powering On
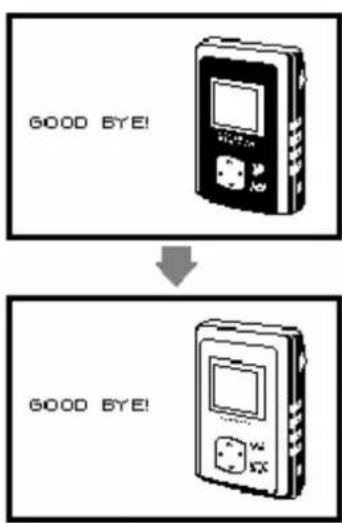
- Hold the Stop button for 2-3 seconds.
- The following message appears on the LCD and power turns off.
NOTE
If you need to reset the device(in case of system freezing or system lock), press the STOP button more than 10 seconds.
Powering On/Off
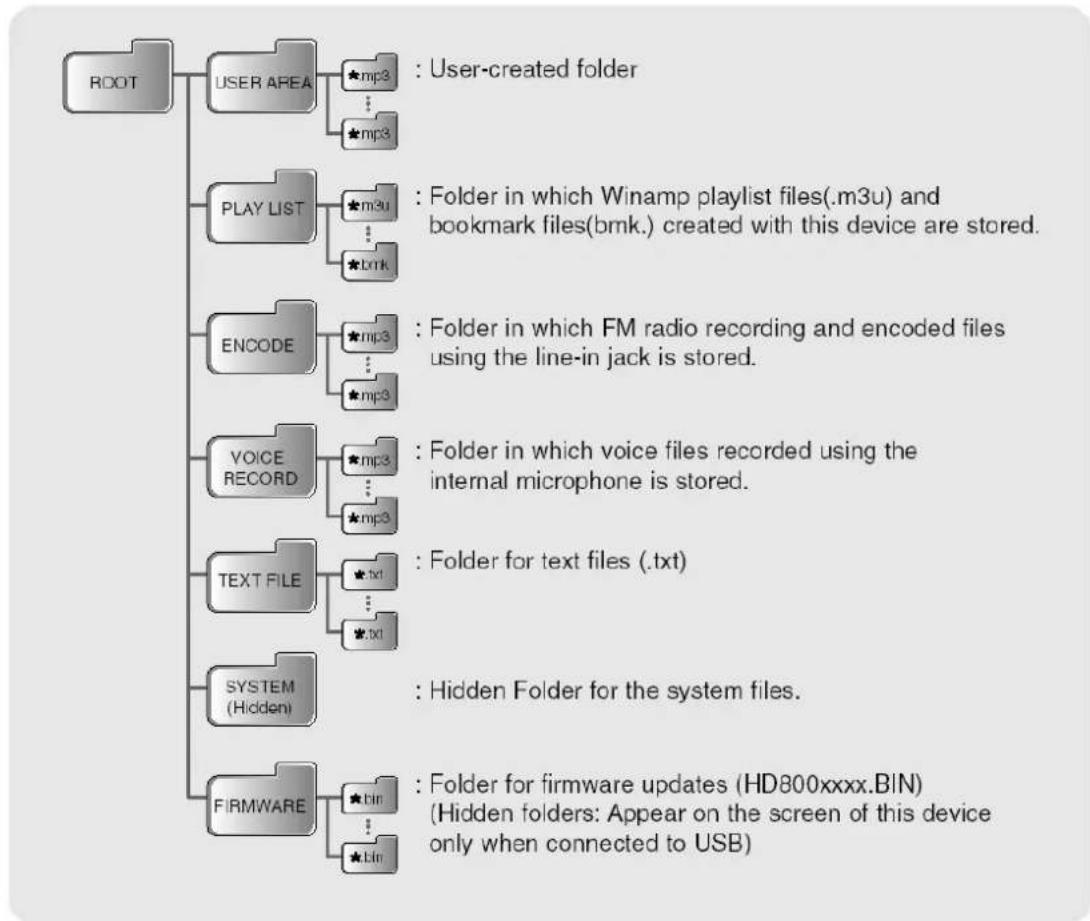
There are a few folders provided by default. Each of these folders is used for a different purpose.
flowchart
graph TD
    A["ROOT"] --> B["USER AREA"]
    B --> C["User-created folder"]
    B --> D["★mp3"]
    B --> E["★mp3"]
    B --> F["★m3u"]
    F --> G["PLAYER in which Winamp playlist files(.m3u) and bookmark files(bmk.) created with this device are stored."]
    F --> H["★bmk"]
    B --> I["ENCODE"]
    I --> J["Folder in which FM radio recording and encoded files using the line-in jack is stored."]
    I --> K["★mp3"]
    K --> L["VOICE RECORD"]
    L --> M["Folder in which voice files recorded using the internal microphone is stored."]
    L --> N["★mp3"]
    L --> O["★txt"]
    O --> P["TEXT FILE"]
    P --> Q["Folder for text files (.txt)"]
    P --> R["★txt"]
    P --> S["FIRMWARE"]
    S --> T["Folder for firmware updates (HD800xxxx.BIN)<br>Hidden folders: Appear on the screen of this device only when connected to USB"]
    S --> U["★bin"]
    U --> V["★bin"]
Using Browser Mode
text_image
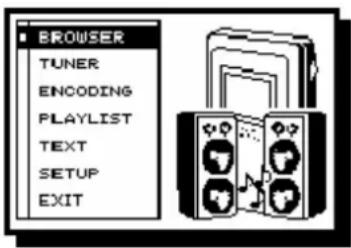
BROWSER TUNER ENCODING PLAYLIST TEXT SETUP EXITThis mode is for playing MP3, WMA, OGG or WMA files. It shows the music files stored on the device.

When using the device for the first time, there are no folders. You can create new folders by connecting the device to your PC. Create new folders in the same way you would normally create them on a PC. (Right-click a blank area of your desktop-Click 'New'-Click 'Folder')
Playback
- Press and hold the MENU button. Next, search Browser mode with the Forward button, Rewind button and select the 'Browser' pressing the Play/Pause button.
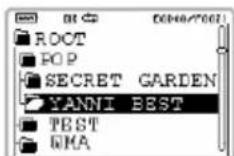
You can also select the mode with the Jog key. You can see here all folders generally as a Tree View.
Using Browser Mode
-
Search the folder with the Forward, Rewind button and select it pressing the Play/Pause button.
-
You can also select the folder with the Jog key.
• A list of all music file folders appears on the LCD.
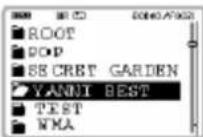
-
Search the file with the Forward, Rewind button and select it pressing the Play/Pause button.
-
You can also select the file with the Jog key.
- A list of MP3 files contained in the folder appears.
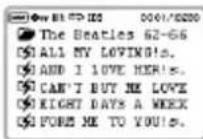
-
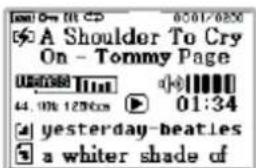
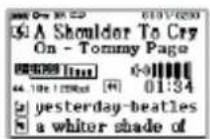
The selected file is played.
-
The various icons appear on the LCD to indicate the operational status of the device.
- The current file, previous file, and the next file are displayed also.
text_image
A Shoulder To Cry On - Tommy Page 44.00h 1250cm 01:34 yesterday-beatles a whiter shade ofUsing Browser Mode
NOTE
To stop playback and to move to an upper-level folder, press the Stop button.
Playback with MENU Button
- Press and hold the MENU button. Next, search Browser mode with the Forward, Rewind button and select the 'Browser' pressing the Play/Pause button.
- Press the MENU button once to enter MP3 folder and select the desired file. You can see here all folders generally as a Tree View
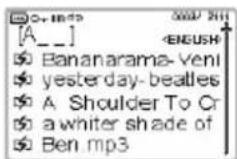
- Press the MENU button one more time to search the desired file by alphabet or characters.

Using Browser Mode
PAUSE
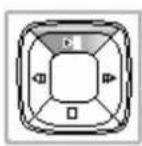
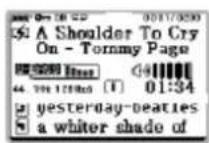
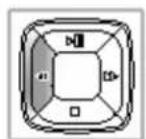
- During playback, briefly press the Play/Pause button to pause playback. Briefly press the Play/Pause button again to resume playback.
Fast Forward
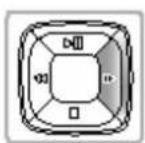
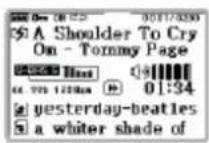
- During playback, press and hold the Forward button to fast forward through the current song.
- Release the button to resume playback.
- During playback or pause, briefly press the Forward button to play the next song.
• Each time the button is pressed, the next song is played.
Rewind
- During playback, press and hold the Rewind button to rewind through the current song.
- Release the button to resume playback.
- During playback or pause, briefly press the Rewind button to play the previous song.
• Each time the button is pressed, the previous song is played.
Using Browser Mode
NOTE
- If you briefly press the Rewind button in the first 5 seconds of playback, the previous song is played. Otherwise, the beginning of the current song is played. After 5 seconds into playback, to listen to the previous song, briefly press the Rewind button twice.
- If the folder or file's name has a special character, they can't be read or the device operates abnormally.
- All files except the MP3, WMA files are not played and indicated.
Viewing Popup Menu during Playback
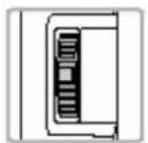
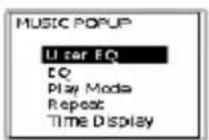
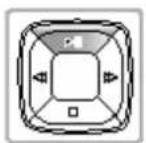
1. During playback, press and hold the Jog key.
You can see the MUSIC Popup menu window in the center of the screen.
2. Navigate the menus with the Forward,
You can also use the Jog Key.
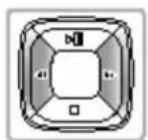
3. Press the Play/Pause button after selecting a menu.
- You can also use the Jog key.
• Each menu has sub-menus. You can use the popup menu to configure the settings related to music. - To make the popup menu window disappear, briefly press the MENU button or select Exit from the popup menu and press the Jog key.
Using Browser Mode
NOTE
Refer to page 39\~41 in Chapter 4 for details on how to set the MUSIC Popup menu.
Adjusting the Volume
Use the Volume buttons to adjust the volume level.
- Press the Volume Down (-) button to decrease the volume level and press the Volume Up (+) button to increase the volume level.
- The volume level can be adjusted between 0 and 20.
- Pressing and holding either button will continuously increase or decrease the volume level.
- Different icons will appear depending on the volume level.
Using Tuner Mode
text_image
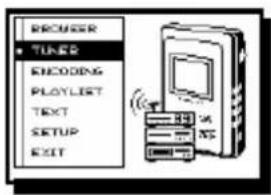
PRODUCER TURER SHEDGING PLAYLIST TEXT SETUP EXITThis mode is for listening to radio. You can tune in the FM station as your choice.
Listening to Radio
- Press and hold the MENU button. Next, search Tuner mode with the Forward button, Rewind button and select the 'Tuner' pressing the Play/Pause button.
You can also select the mode with the Jog key.
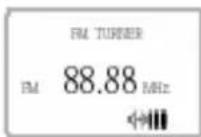
- You can select the desired station with the Forward or Rewind button.
For automatic tuning, press and hold the Forward or Rewind button to select the stations automatically.

Presetting Stations
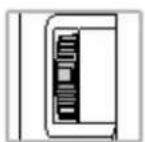
- Press and hold the Jog key during listening theradio.
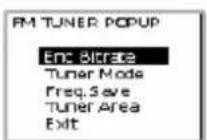
The FM TUNER popup menu window appears
- Search the Freq. Save menu with the Forward, Rewind button and select it pressing the Play/Pause button.
You can also use the Jog key to navigate and select the menus.
Using Tuner Mode
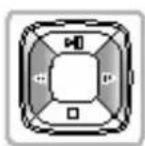
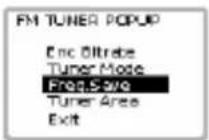
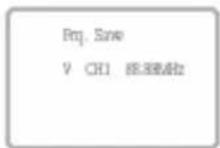
- Select the station and press the Play/Pause button.
You can set up to 20 stations.
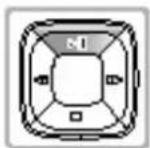
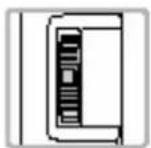
- In order to listen preset frequency, use the Jog key.
Viewing Popup Menu during Playback
In Tuner mode, press and hold the Jog key to display the FM TUNER Popup menu window.
NOTE
Refer to page 42 in Chapter 4 for setting the TUNER Popup menu.
Recording during listening to Radio
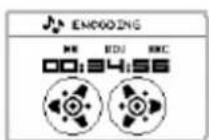
- Press and hold the Rec button during listening radio in TUNER mode.
Using Tuner Mode
- Press the Rec button once to pause recording. Press the PLAY/PAUSE button to record again.
- To stop recording, press the Stop button.
• The device will be set to Wait.
- Press the Stop button again to save the file.
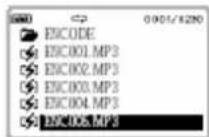
- You can find the recorded file in the ENCODE folder in Encoding mode.
NOTE
- When using the remote control, the device may tune in low level of radio frequency.
- The device may have low level of radio frequency depending on the places.
Using Encoding Mode
text_image
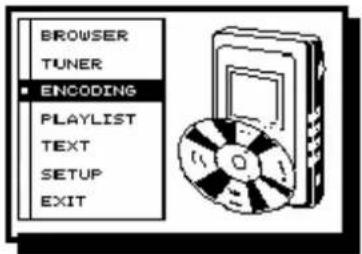
BROWSER TUNER ■ ENCODING PLAYLIST TEXT SETUP EXITThis mode allows you to receive audio signals from an external audio player in MP3 format. You can also make voice recordings.
Encoding
- Press and hold the MENU button. Next, search the Encoding mode with the Forward button, Rewind button and select the 'Encoding' pressing the Play/Pause button.
You can also select the mode with the Jog key.
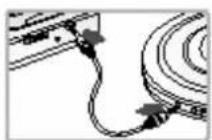
- Connect one end of the line -in cable to the earphone jack or output terminal of your audio player and connect the other end to the line -in jack on this device.
-
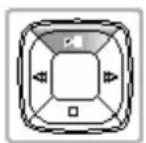
While the track is played, press the Rec button.
-
You can convert the music into an MP3 file from your audio player,
- If the Rec button is pressed again, recording will pause.
- You can hear the music during encoding.
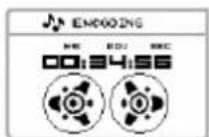
- To stop recording, press the Stop button.
- The device will be set to Wait. Press the stop button again to save the file in the ENCODING folder.
Using Encoding Mode
- The screen will now show the contents of the folder.
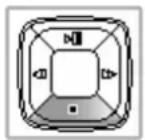
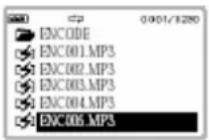
- Press the Play/Pause button to play the file.
Viewing Popup Menu in Encoding
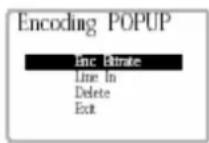
- In the ENCODE folder, press and hold the Jog key to display the Encoding Popup menu window.
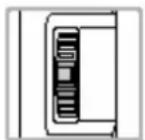
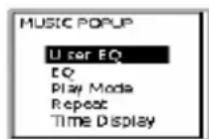
- During playback, press and hold the Jog key to display the MUSIC Popup menu window.
NOTE
Refer to page 40\~42 in Chapter 4 for setting the popup menu.
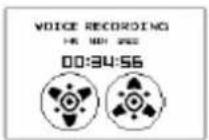
Voice Recording
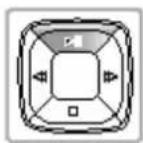
- Press and hold the Rec button to start the voice recording.
You can record voice while the device is not playing.
Using Encoding Mode
- Press the Rec button once to pause recording. Press the PLAY/PAUSE button to record again.
-
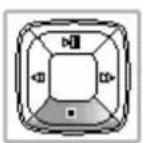
To stop recording, press the Stop button.
-
The device will be set to Wait. Press the Stop button again to save the file to the VOICE RECORD folder.
• The screen shows inside of VOICE RECORD folder.
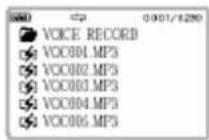
- Press the Play/Pause button to play the file.
NOTE
- You can find the voice record file in the VOICE RECORD folder in Encoding mode.
- To stop playback and to move to an upper-level folder, press the Stop button.
- When recording voice too close or far, the recording quality can be low.
Viewing Popup Menu in Voice Recording
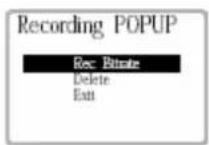
- In the VOICE RECORD folder, press and hold the Jog key to display the Recording Popup menu window.
Using Encoding Mode
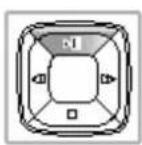
- During playback, press and hold the Jog key to display the MUSIC Popup menu window.

NOTE
Refer to page 42 in Chapter 4 for setting the Recording popup menu.
Using PlayList Mode
text_image
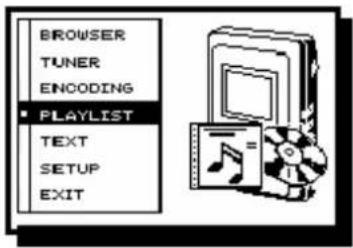
BROWSER TUNER ENCODING ■ PLAYLIST TEXT SETUP EXITThis mode displays albums containing M3U and BMK files and allows you to run them. You can use this mode after setting Bookmark.
How to Make Bookmark
The device provides 10 Bookmark albums by default. The number of maximum files in one album is 99.
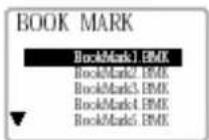
? Bookmark during Playback
- Press and hold the Jog key during playing the music.
- The MUSIC Popup menu window appears.

- Select the 'Bookmark' to store the file in an album.
- You can store the selected music in 1 album of the 10 pressing Play/Pause button.
? Bookmark during Searching
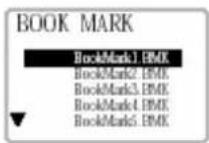
- Press and hold the Jog key during searching the file.
- The Book Mark window appears.
- You can store the selected music in 1 album of the 10 pressing Play/Pause button.
Using PlayList Mode
NOTE
You can't see the Bookmark album on the PC. You can store and erase the files only on the device.
Playback the Stored BMK Files
-
Press and hold the MENU button. Next, search the PlayList mode with the Forward button, Rewind button and select the 'PlayList' pressing the Play/Pause button.
-
You can also select the mode with the Jog key.
- The PlayList folder appears together with the albums contained in it.
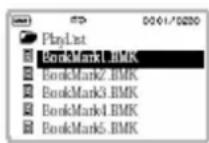
-
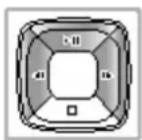
Select the BMK file with the Forward, Rewind button and press Play/Pause button.
-
Press and hold the Jog key to display the popup menu. You can erase the files.
- You can erase files on the PlayList Popup menu. The erased files are not actually deleted, but only removed from the album.
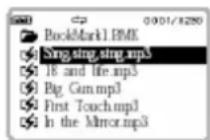
-
Playback the music file with Play/Pause button.
-
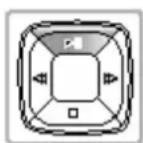
Press and hold the Jog key to display the MUSIC popup menu.
- For about the MUSIC Popup menu, refer to Browser mode or page 39\~41 in Chapter 4.
NOTE
- The erase process of the album list will be applied only to BMK albums and M3U albums cannot be erased. A folder containing the albums of M3U and BMK files appears on screen. You can store MP3 and WMA files in an album for BMK files. You can use M3U or BMK albums to place the selected songs into an album.
Using Text Mode
text_image
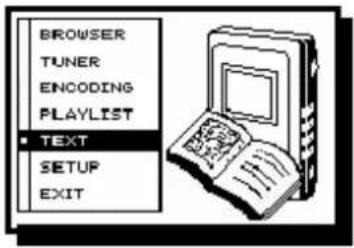
BROWSER TUNER ENCODING PLAYLIST ■ TEXT SETUP EXITThis mode displays the folder containing text files and allows you to read the content of a text file. You can listen to the music and read the text file at the same time.
In order to store a text file on the device, use the USB cable to connect the device to your PC. Store the text file in the TEXT FILE folder.
Reading the Text File
-
Press and hold the MENU button. Next, search Text mode with the Forward button, Rewind button and select the 'Text' pressing the Play/Pause button.
-
You can also select the mode with the Jog key.
• The Text folder including text files appears.
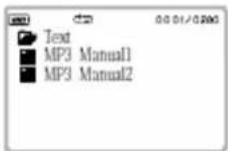
- Search the text folder with the Forward, Rewind button and select it pressing the Play/Pause button.
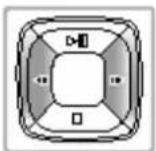
-
Search the text file with the Forward, Rewind button and select it pressing the Play/Pause button.
-
If many contents display on a screen, a scroll bar will appear. Scroll the text with the Jog key.
- You can also scroll the text with the Vol +/- buttons. In text mode, you can't adjust the volume.
Using Text Mode
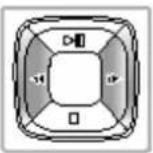
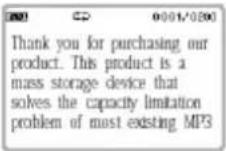
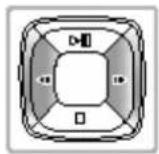
- Press the Forward/Rewind button to move to the previous or next text file.
Using Setup Mode
text_image
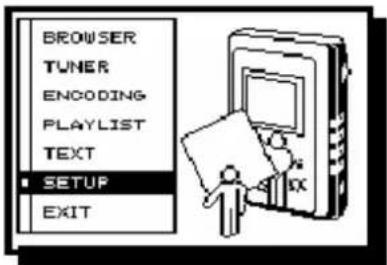
BROWSER TUNER ENCODING PLAYLIST TEXT ■ SETUP EXITThis mode changes the configuration to the device.
Setting up Modes
-
Press and hold the MENU button. Next, search Setup mode with the Forward button, Rewind button and select the 'Setup' pressing the Play/Pause button.
-
You can also select the mode with the Jog key.
- Setup mode tabs and options will be displayed.
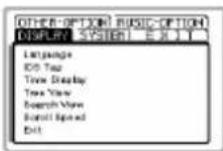
- Search the tab menu with the Forward, Rewind button.
You can also select the tab with the Jog key.
- Select a tab and press the Play/Pause button to change the settings.
- Press the Play/Pause button again to change the settings.
You can change the settings for each menu.
Using Setup Mode
NOTE
The Setup mode consists of 5 tabs and each tab provides options for configuring the device. For details, refer to pages 39\~42 in Chapter 4.
Tree View
- Press and hold the MENU button. Next, search Setup mode with the Forward button, Rewind button and select the 'Setup' pressing the Play/Pause button.
You can also select the mode with the Jog key.

- Navigate through Tab menu with the Forward/Rewind button.
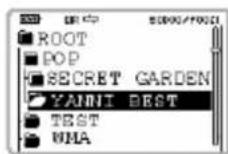
- Press briefly the PLAY/PAUSE button to enter the Display menu. You can set Tree view to 'Enable'.
You can see a tree view of the directories in root.
Using Setup Mode
Search View
- Press and hold the MENU button. Next, search Setup mode with the Forward button, Rewind button and select the 'Setup' pressing the Play/Pause button.
You can also select the mode with the Jog key.
- Navigate through Tab menu with the Forward/Rewind button.
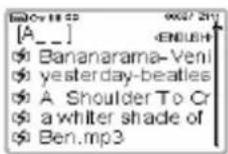
- Press briefly the PLAY/PAUSE button to enter the Display menu. You can set Search view to 'Enable'. You can search the desired file inputting up to 3 characters.
NOTE
- You can select and operate each option with the Play/Pause button, Rewind/Forward button or Jog key. Refer to page 39\~42 in Chapter 4 for setting the popup menu.
Using Exit Mode
text_image
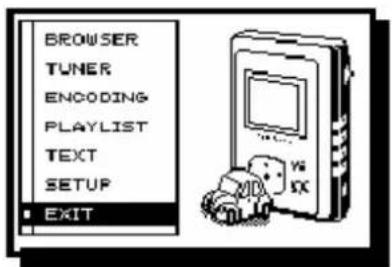
BROWSER TUNER ENCODING PLAYLIST TEXT SETUP EXIT. Back to Browser mode.
- Press and hold the MENU button. Next, search the Exit mode with the Forward button, Rewind button and select the 'Exit' pressing the Play/Pause button.
You can also select the mode with the Jog key.
- You will exit the setting mode. Once you have exited, the screen switches to Browser mode and folders will appear.
Chapter

Advanced Operation
This device provides various options, such as Repeat, Play Mode Control, and EL Mode Control; EQ settings for different types of music; and A-B Repeat function. File management can be done from this device or from your PC, which is a great convenience. You use a USB cable to connect this device to your PC and use the device as an external hard disk drive. These options and its file management and expansion capabilities enable you to use the device to suit your personal taste.
The topics of this chapter are as follows:
- Using Options
• A B Repeat Play - Managing Files
- Upgrading Firmware
Using Options
DISPLAY
| Language | English, Korean, Japanese, Chinese | English, Korean, Japanese, Chinese, Russian, Spanish, French, German, Portuguese (Plans to support more languages by Firmware upgrade later on.) |
| Exit | Exits from the Language menu. | |
| ID3 Tag | ON/OFF | If set to ON, the ID3 information such as album and name of the artist(s) will be displayed.If set to OFF, they will not be displayed. Instead, the current, previous, and next file name will be displayed. |
| Time Display | Normal | Displays the play time in normal order. |
| Reverse | Displays the play time in reverse order. | |
| Exit | Exits from the Time Display menu. | |
| Tree View | Disable | Disables the display of Tree View Browser. |
| Enable | Displays Tree View Browser as Menu Key. | |
| Exit | Exits from the Tree View menu. | |
| Search View | Disable | Disables the display of Search View Browser. |
| Enable | Displays Search View Browser as Menu Key. | |
| Exit | Exits from the Search View menu. | |
| Scroll Speed | 1, 2, 4, 8, 16 Pixel | Sets the pixel of the scroll speed to 1, 2, 4, 8, or 16. |
| Exit | Exits from the Scroll Speed menu. | |
| Exit | Exits from the Display menu. |
Using Options
SYSTEM
| Contrast | Contrast | Adjusts the LCD's contrast level (between 0 and 10) |
| Exit | Exits from the Contrast menu. | |
| EL | Off(1, 3, 5, 10 Sec) | Turns the backlight off, except for the time set here. |
| On | Turns the backlight on at all times. | |
| System Info. | Displays the system information of this unit. | |
| Sleep Timer | Off | Sleep Timer is not set. |
| 10, 30, 60, 90, 120 Min | Sets the unit to shut itself off after the designated time has elapsed. Sleep Timer can be set to 10, 30, 60, 90, or 120 minutes. | |
| Exit | Exits from the Sleep Timer menu. | |
| Auto Power Off | Off | Sets Auto Power off menu off. |
| 10, 30, 60, 100 Sec | Sets the unit to shut itself off if the unit is not in use for 10, 30, 60, or 100 seconds. | |
| Exit | Exits from the Auto Power Off menu. | |
| System Initial | OK | Initializes the unit. |
| Exit | Exits from the System initial menu. | |
| LED | Off | Conitnously set LED off. |
| On | Conitnously set LED on. | |
| Effect on | Sets LED lights on when charging or operating. | |
| Exit | Exits from the LED menu. | |
| Exit | Exits from the System menu. |
MUSIC-OPTION
| User EQ | 60Hz, 250Hz, 1KHz, 4KHz, 12KHz | Allows user to customize the EQ setting. Can be set between 0 to 15 dB for each frequency. |
| Exit | Exits from the User EQ menu. | |
| EQ | Normal | For Standard mode. |
| Rock | For Rock mode. | |
| Classic | For Classical mode. | |
| Jazz | For Jazz mode. | |
| Ultra Bass | For Ultra Bass mode. | |
| User | User-customized mode. |
Using Options
MUSIC-OPTION
| Auto Play | Off | Disables the Auto Play mode. The unit directly enters the Browser mode when it is powered on. |
| On | The last position within the last song is played according to the Resume setting when the unit is powered on. | |
| Exit | Exits from the Auto Play menu. | |
| Resume | Song | During Auto Play (On), the first part of the song that was played the last time is played. |
| Real | During Auto Play (On), the exact position of the song that was played the last time is played. | |
| Exit | Exits from the Resume menu. | |
| Play Mode | Normal | Sequentially plays songs on this device and stops after the last song. |
| Shuffle | Randomly plays songs and stops after all songs have been played once. | |
| Auto Rewind | Sequentially plays songs and when the last song is played the process is started again from the first song. | |
| Exit | Exits from the Play Mode menu. | |
| Repeat | All | Repeatedly plays all songs on this device. |
| Single | Repeatedly plays a single song. | |
| Directory | Repeatedly plays all songs in the folder to which the current song belongs. | |
| Sub Directory | Repeatedly plays all songs in the folder to which the current song belongs as well as all the songs in all the subfolders under that folder. | |
| Exit | Exits from the Repeat menu. | |
| Intro Position | Normal | Plays first 10 seconds of a song. |
| 10/30/50 Sec | Plays a song at the 10 second, 30 second, and 50 second position for 10 seconds. | |
| Exit | Exits from the Intro Position menu. | |
| Exit | Exits from the Music-Option menu. |
Using Options
OTHER OPTIONS
| Tuner Mode | Stereo | Receives FM broadcast in Stereo Mode. |
| Mono | Receives FM broadcast in Mono Mode. | |
| Exit | Exits from the Tuner Mode menu. | |
| Tuner Area | Default | Listen to the radio in the default frequency area. |
| Japan | Listen to the radio in Japan. | |
| Exit | Exits from the Tuner Area menu. | |
| Line In | Analog | Sets line input signal type to Analog. |
| Digital(Optical) | Sets line input signal type to Digital. | |
| Exit | Exits from the Line In menu. | |
| Enc Bitrate | 32, 40, 48, 56, 64, 80, 96, 112, 128, 160, 192, 224, 256, 320 Kbps | Sets bit rate to 32, 64, 128, 256, 320 Kbps for encoding. |
| Exit | Exits from the Enc Bitrate menu. | |
| Rec Bitrate | 32, 40, 48, 56, 64, 80, 96, 112, 128 Kbps | Sets bit rate to 32, 48, 56, 64, 80, 96, 112,128 Kbps for voice recording. |
| Exit | Exits from the Rec Bitrate menu. | |
| Fade In | Off | Plays according to the specific volume level during Auto Play (On). |
| On | Gradually increases the volume level of the first song during Auto Play (On). | |
| Exit | Exits from the Fade menu. | |
| Synchronization | Off | Separates each file by pressing Stop button directly. |
| 1, 2, 3 sec | Selects the interval of the files. | |
| Enc. Timer | Set the timer to stop encoding. | |
| Exit | Exits from the Synchronization menu. | |
| Exit | Exits from the Other-Option menu. |
A <->B Repeat Play
This feature allows you to repeatedly play a specific section of a file, making the device an effective tool for language learning.
- During playback, briefly press the Rec button at the start point of the A<->B section you want to repeat.
-
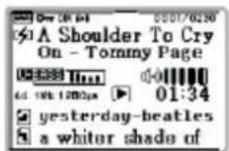
"A" is displayed on the LCD screen.
-
Press the Rec button again at the point you want to stop.
-
"A> B" appears on the LCD screen.
- The A<->B section starts to repeat continuously.
- To cancel A<-> B Repeat, press the Rec button again.
"A<->B" disappears from the LCD screen.
NOTE
Set the end point (B) after 3 seconds from setting the start point (A).
Managing Files
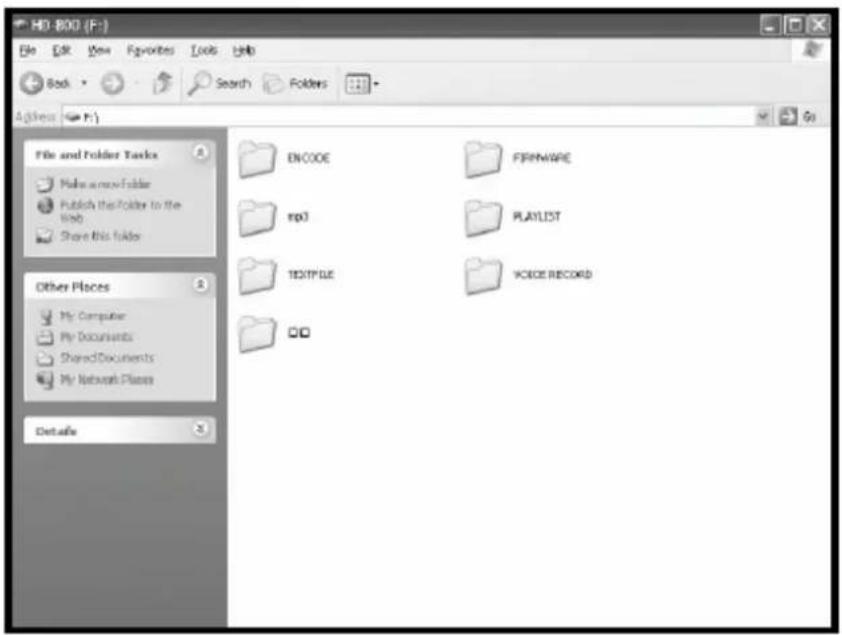
You can perform file management by connecting the device to your PC using a USB cable. In order to manage files from your PC, the device must be connected to your PC. Once the device is connected to your PC, the PC recognizes the device as a new drive after approximately 10 seconds. This device will be indicated as a local hard disk as shown below:
text_image
HD-800 (F:) File Edit View Favorites Tools Help Back Search Folders Address File and Folder Tracks Make a new Folder Publish the Folder to the Web Share this folder ENCODE SOFTWARE rpl PLAYLIST TEXTFILE VERSION RECORD Other Places My Computer My Documents Shared Documents My Network Places DetailsYou can listen to music files or view text files if you copy music files or text files to this device using Explorer. However, note that when you save files to this device, the folders to which the files will be stored may vary depending on the file format. You can create a new folder and store music files to the folders or directly store them to this device, but text files must be stored in the TEXT FILE folder. Store albums such as M3U in the PLAYLIST folder.
Upgrading Firmware
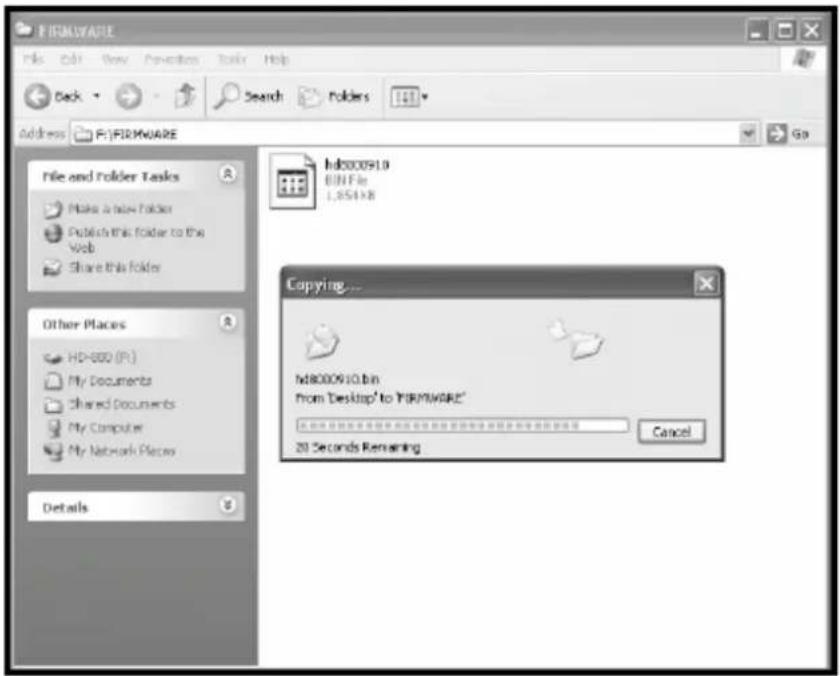
You can continue to enjoy the benefits of improved product performance through firmware upgrades. Firmware is a program that runs inside the device and controls its operations. The process of transferring new firmware from the computer to the device is called uploading. The process of updating firmware is called upgrading.
text_image
FIRMWARE File Edit View Favorites Tools Help Back Search Folders Address F:\FIRMWARE File and Folder Tasks Make a new Folder Publish this folder to the Web Share this folder Other Places HD-800 (R:) My Documents Shared Documents My Computer My Network Places Details Hd8000910 BIN File 1,8541x8 Copying... M8000910.bin from "Desktop" to "FIRMWARE" 20 Seconds Remaining Cancel- Download new firmware file (.bin) from our Website and store it in PC.
- Use the USB cable to connect the device to your PC.
- Drag the new firmware file(.bin) to the FIRMWARE folder in USB drive.
- Disconnect the USB cable and turn the device on.
The message ‘Firmware Upgrade’ appears automatically and starts upgrading.
Specifications
| File System | FAT 32 |
| Hard Disk Capacity | 6G, 10G, 15G, 20G, 30G, (Up to 137GB) |
| Hard Disk Type | 1.8", Low Power HDD, ATA I/F |
| Supported OS Platforms | Windows 98SE, ME, 2000, 2003 XP, MAC (9.xx, 10.xx or later) |
| PC Interface | USB 1.0/1.1/2.0, Mass Storage Device |
| Supported Format | MPEG 1/2/2.5 LAYER 3 Playback, WMA, OGG, WAV |
| MP3 Support Bit Rate | 8Kbps ~ 320Kbps & VBR (Variable Bit Rate) |
| Sampling Frequency | 8~48KHz |
| WMA Support | WMA Playback (5Kbps~192Kbps) |
| FM | FM Tuner (20 Preset) |
| Recording Format | MP3 Encoding : 320/256/224/192/160/128/112/96/80/64/56/48/40/32KbpsVoice Recording : 128/112/96/80/64/56/48/40/32Kbps |
| EQ | Basic: Normal, Rock, Classic, Jazz and Ultra-BassUser Defined EQ: 5 Bands |
| ID3 TAG | ID3 Tag support (Ver 1.0/1.1/2.0 support) |
| Supported Languages | Korean, Japanese, Chinese, Russian, English, Spanish,French, German, Portuguese |
| Firmware Upgrade | Firmware Upgradeable via USB |
| Playback Mode | Single, Directory, All, AB Repeat, Shuffle, Intro |
| Music Management | Play List (M3U), Bookmark, Search, Tree View |
| User Interface | Text View, User's Logo Display (Logo.BMP) |
| Playback Time | Up to 16 hours |
| User Interface | Text View, User's Logo Display (Logo.BMP) |
| Multi-Line Graphic LCD | 160 x 105, W/B LCD, EL Backlight |
| S/N Ratio | >90dB |
| THD | <0.01% |
| Audio Input | Line-In, Built-In microphone |
| Audio Output | Headphone Out |
| Earphone Out | 10mW + 10mW |
| Dimension | 66.5(H) * 99.5(W) * 22(D) (mm) |
| Power | Battery: 3.7V, 1550mAh, Lithium-Ion Rechargeable 1EAAAdapter: 100~240 AC to 5V DC (SMPS) |
| Operating Temperature | 5°C~50°C |
| Accessories | Earphones, USB-PC Cable, CD for windows 98SE, Manual,AC-Adapter, Line-in cable, Carry caseOptional: Remote Control |
Troubleshooting
| Problem | Solution |
| Power cannot be turned on. | Check the charge of the battery.The battery may not be capable of operating at temperatures below freezing. The temperature needs to be brought above freezing for charging. |
| Buttons do not work. | Check whether the Hold function is activated.Deactivate the Hold function. |
| No sound or poor sound quality. | Check whether the device is working properly.Check that the music files on this device are in the correct format and are not corrupt.Incorrectly converted or corrupt MP3 files may produce low-frequency noise or may not play normally. |
| Problems in the connection between the PC and the device, or the files are not transferred. | Check whether the power to the Player is turned on.Check whether the USB cable is connected correctly.After file copy, remove the USB cable.If the PC does not respond for several seconds, wait until file copying is finished.You can not copy the audio files if copying is limited due to copyright protection.Check whether the USB driver works correctly from the Device Manager. |
| The operating time is noticeably shorter than normal. | Replace the battery with a new one.The battery can be charged hundreds of times, but it will eventually wear out.If you use the battery for more than 6 months, the life of the battery may be reduced. |
Product Guarantee
- The device is manufactured under strict quality control and test.
- If there is any malfunction caused by defects in manufacturing the device, we will repair it free of charge within 1 year of purchase.
- If the service we provide is not applicable to the free of charge service, we will bill you at the prescribed service fare.
- When you request repair, you must keep this guarantee.
- We will not re-issue this guarantee so you must keep this guarantee.
-
The followings are cost-based repair cases.
-
Poor performance or disorder occurs after the guarantee period
- Malfunction or damage caused by user's carelessness
(When you use it in a way other than described in the User manual) - When the malfunction is caused by other than the device itself
- If the device is modified or damaged by repairs occurring at other than the designated service center.
• Damage by natural disaster
FCC Notice
THIS DEVICE COMPLIES WITH PART 15 OF THE FCC RULES.
OPERATION IS SUBJECT TO THE FOLLOWING TWO CONDITIONS:
• THIS DEVICE MAY NOT CAUSE HARMFUL INTERFERENCE.
• THIS DEVICE MUST ACCEPT ANY INTERFERENCE RECEIVED
INCLUDING INTERFERENCE THAT MAY CAUSE UNWANTED OPERATION.
This equipment has been tested and found to comply with the limits for a Class B digital device, pursuant to part 15 of the FCC Rules. These limits are designed to provide reasonable protection against harmful interference in a residential installation. This equipment generates, uses and can radiate radio frequency energy and, if not installed and used in accordance with the instructions, may cause harmful interference to radio communication. However, there is no guarantee that interference will not occur in a particular installation. If this equipment does cause harmful interference to radio or television reception, which can be determined by turning the equipment off and on, the user is encouraged to try to correct the interference by one or more of the following measures:
- Reorient or relocate the receiving antenna.
- Increase the separation between the equipment and receiver.
- Connect the equipment into an outlet on a circuit difference from that to which the receiver is connected.
- Consult the dealer of an experienced radio/TV technician for help.
NOTE : The manufacturer is not responsible for any radio or TV interference caused by unauthorized modifications to this equipment. Such modifications could void the user's authority to operate the equipment.