M-40 Turbo Plus - Solarium Soltron - Free user manual and instructions
Find the device manual for free M-40 Turbo Plus Soltron in PDF.


User questions about M-40 Turbo Plus Soltron
0 question about this device. Answer the ones you know or ask your own.
Ask a new question about this device
Download the instructions for your Solarium in PDF format for free! Find your manual M-40 Turbo Plus - Soltron and take your electronic device back in hand. On this page are published all the documents necessary for the use of your device. M-40 Turbo Plus by Soltron.
USER MANUAL M-40 Turbo Plus Soltron
natural_image
Illustration of a green cylindrical device with a blue handle and a purple flag, set against a bright green background (no text or symbols)
natural_image
Close-up of a stylized purple and green object with a glowing eye-like symbol (no text or symbols visible)soltron
THE SUNMAKER
Soltron
800930 / Index _d" / de / en / 02.2006
natural_image
3D rendering of a white industrial air purifier with fan and cooling unit (no text or symbols visible)
How to use the operating instructions ... 27

Vorwort

text_image
VorwortThe Soltron device you have purchased is a technically advanced and powerful microcomputer control system. Your device was manufactured with the greatest care and precision. It went through numerous quality and safety checks in order to guarantee trouble-free, safe operation. But you too may make a significant contribution to your long-term satisfaction with your device. Following the tips and instructions in the instruction manual will ensure you enjoyment and pleasure with your device.
In case of any questions, we are always at your disposition. ^1)
Your sincerely
JK-Sales GmbH
- Read and observe the information in this instruction manual. This will enable you to prevent accidents and provide you with a reliable device ready for use.
• Always observe the generally valid legal and further regulations and legal requirements as well as the valid environmental protection regulations, including those of the country in which the system is operated. - The locally valid regulations of professional associations and other regulatory authorities must always be complied with!
Table Of Contents
How to use the instruction manual. 27
Meaning of symbols 28
Guidelines 32
Intended use 32
Safety 33
Export 33
Equipment 34
Accessories 34
Maintenance and care 34
Faults 35
Deenergise device and secure against being switched on again . . . 36
Cleaning 37
Product information 38
Environmental protection information 39
General tanning instructions 40
General safety information 41
Recommended tanning times 42
Manufacturer's guarantee 42
Tanning Table 43
Description/Operation 46
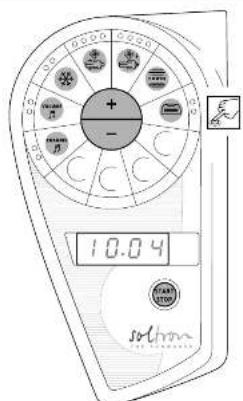
Operating table ...... Fold-out page 45
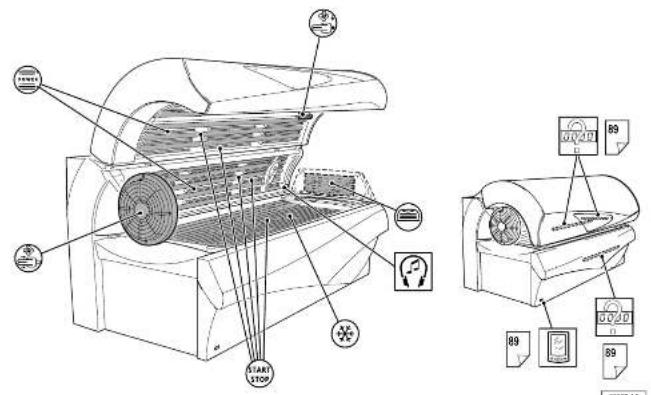
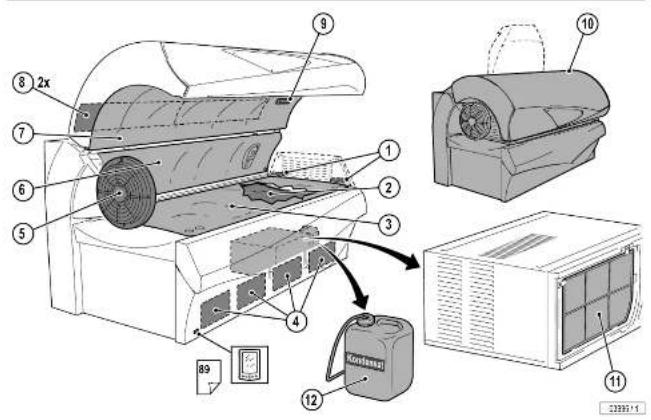
Overview.... 46
Accessories 47
Starting device/Functions during start-up 48
Switching UV lamps on and off during tanning 49
Running time of accent lighting 50
Selecting power stage for UV lamps (power control) 51
Switching shoulder tanner off and on 53
Switching air conditioning off and on ^1) 54
Regulating body cooling 55
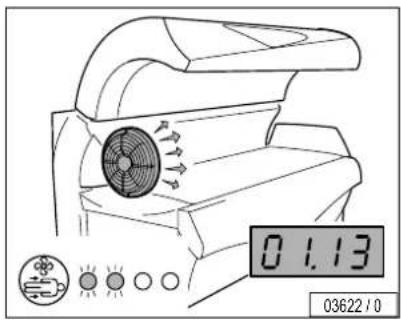
Regulating facial cooling.... 56
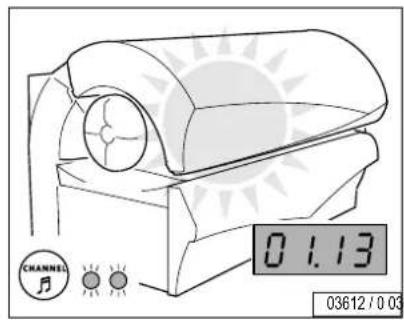
Selecting music channel ^1) 57
Adjusting volume ^1) 58
Technical Data 59
Maintenance ....Fold-out page 61
Maintenance, overview. 62
Maintenance intervals, installed lamps and order numbers ..... 62
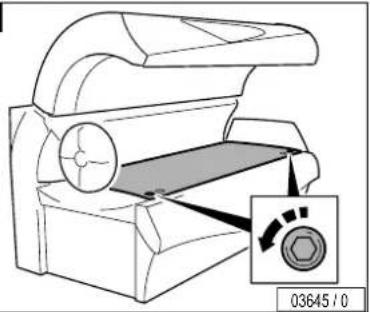
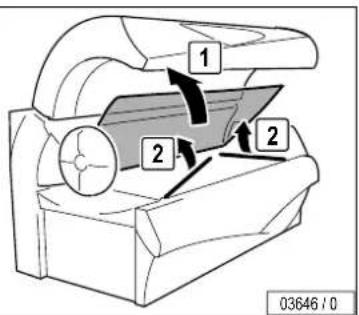
Cleaning/replacing UV low-pressure lamps in sunbed base ..... 68

Table Of Contents
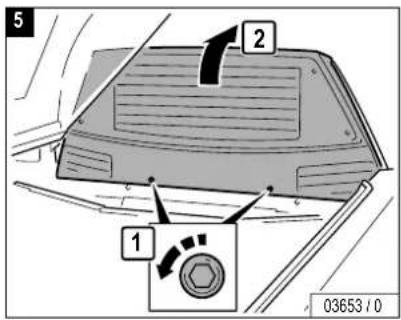
Cleaning/replacing UV low-pressure lamps in shoulder tanner 70
Cleaning/replacing UV low-pressure lamps in side section ..... 72
Cleaning/replacing UV low-pressure lamps in canopy 74
Cleaning/replacing interior lighting. 76
Cleaning/replacing accent lighting in canopy....78
Cleaning/replacing accent lighting in front panel 80
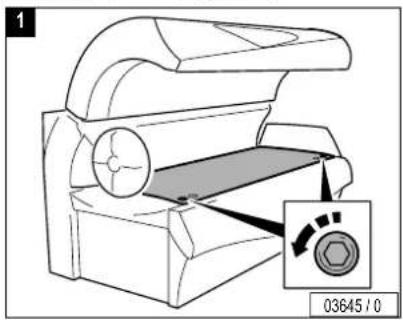
Cleaning filter in sunbed base 81
Cleaning/replacing filter mats in canopy 83
Cleaning/replacing filter mats in shoulder tanner 84
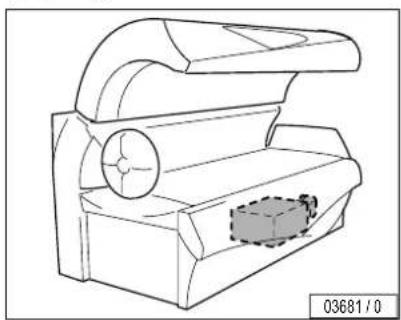
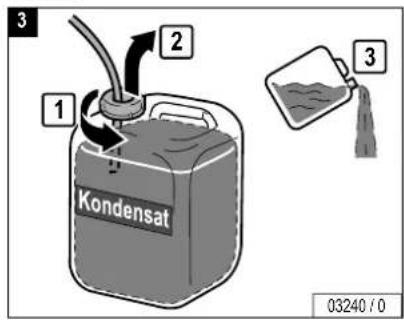
Air conditioner: cleaning/replacing filter mats, emptying condensate container 86
Presettings ....89
Changing presettings with the control panel 93
Changing presettings with a hand-held unit 95
Index 101
Troubleshooting ..... see separate manual

Note:
Technical changes are reserved with respect to the illustrations and specifications in this instruction manual. Reprinting and reproduction, in whole or in part, of this manual is only permitted with our previous written approval and with specification of the source.
How to use the instruction manual ...
The chapters "Description/Operation", "Technical Data" and
"Maintenance" in this instruction manual primarily contain graphics and symbols, but only very little text. Important general information and safety precautions are provided here in the first chapter.
There are several types of symbols:
- Chapter symbols (1) (e.g. Operation, Maintenance). These symbols have a black background and are positioned on the outer edge of the page. This chapter symbol can also be used as the page heading (2).
There are two additional symbol groups on the maintenance pages that differ in their positioning:
- Symbols in the top line (3) apply to the entire page. These may be headings or important information.
- Symbols directly over a graphic (4) refer to the work step shown in the graphic.
The meaning of the symbols is explained beginning on Page 28 in this chapter.
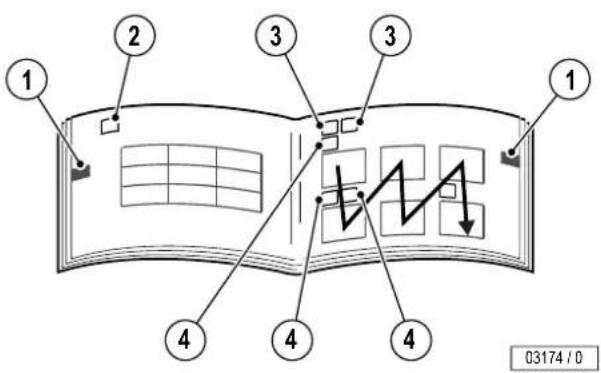
text_image
1 2 3 3 1 4 4 4 03174 / 0

Please read and observe ...
Meaning of symbols
Danger notes:

Danger!
This safety note – warning triangle with the word "Danger" – points out that danger for persons can be expected here (danger to life and limb). Example:

Extreme danger!
Warning! High voltage!

Caution!
This safety note – warning triangle with the word "Caution" – points out that danger for devices, materials and the environment can be expected here.
Important information:

Note:
This symbol does not identify safety notes, but states information for a better understanding of the processes.
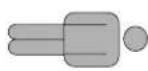
Symbols of tanning table – see Page 43
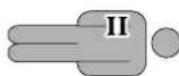
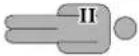
Skin type II:
- Frequent sunburn.
- Can take approx. 10-20 min. of natural sun.
– Max. 60 tanning sessions per year.
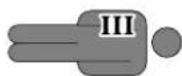
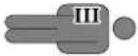
Skin type III:
– Seldom gets a sunburn.
- Can take approx. 20-30 min. of natural sun.
– Max. 43 tanning sessions per year.
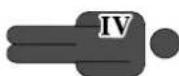
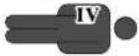
Skin type IV:
– Seldom gets a sunburn.
- Can take approx. 40 min. of natural sun.
– Max. 33 tanning sessions per year.

UV type
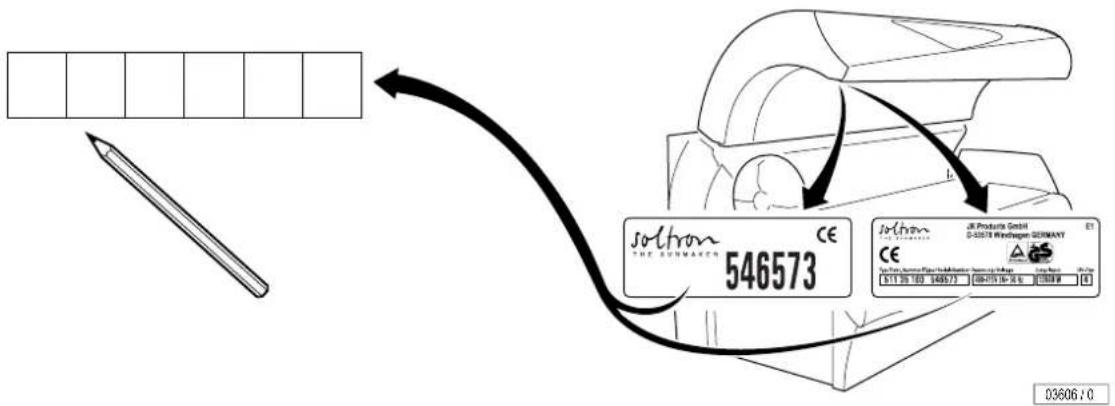
The UV type is specified on the device information plate – see Page 2.
Symbols for Description, Operation and Maintenance
General Symbols

Customer service

Danger!
Deenergise device – disconnect from power supply

Danger of burns!
Do not touch, hot surface

Low-pressure lamp(s)

UV low-pressure lamp(s)

Starter for low-pressure lamp(s)
General Symbols

Cleaning and disinfectant agents

Part/article number (for orders)
Tanning Table
Operation
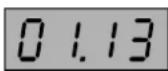
Display of tanning time
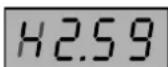
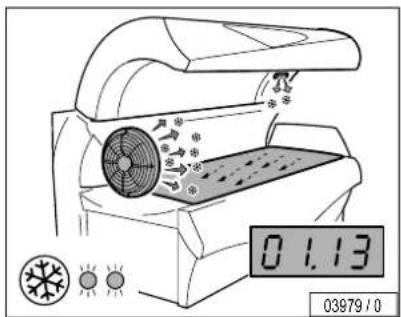
Display of run-on time (fan run-on)
Please read and observe ...
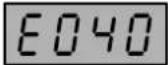
Fault display (example), see separate manual
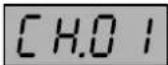
Display of Music Channel 1 (Channel 1) Factory setting: 1 channel Customer service can set up to 7 channels
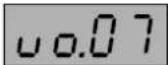
Display when adjusting volume
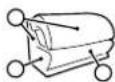
Description
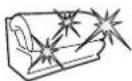
Accent lighting

Press button

e.g.
Press button for 2 seconds
0-3 min
Duration: 3 minutes

Headphone connection
Technical data
Maintenance

UV type
The UV type is specified on the device information plate – see Page 2.

Caution, safety switch!



Please read and observe ...

Tighten/lock screw

Cleaning

Replacing


Clean or replace depending on soiling

Draining

Visual inspection

Air conditioner

Filter/filter mat

Troubleshooting – see separate manual

Continuation of work steps on next page

End of work step
Presettings


Please read and observe ...
Guidelines
This device was built according to the following guidelines:
- EC directive "Electromagnetic Compatibility" 89/336/EEC (according to the currently valid version).
- Low-Voltage Directives 72/23/EEC (according to the currently valid version).

Note:
Depending on the local utility company, the devices can transmit interference to the power system of the house that impair the audio-frequency remote control system used by the utility company. This can, for example, interfere with the function of night-storage heaters.

Note:
If faults occur due to the operation of the devices, then the operator is responsible for the installation of an audio frequency blocking device in the building electrical installation. Please contact your electrician. The electrician is familiar with the technical connection conditions of your local utility company so that the audio-frequency blocking device can be matched to the power system of your utility company.
Intended use
This device is used for tanning one adult person at a time.
Nursing infants and small children through age 7 years may not use this device.
The following applies for children and teenagers between the ages of 8 and 17 years: Only use tanning devices in agreement with a parent or guardian, or after consulting a physician.
Any other use shall be considered improper. The manufacturer cannot be held liable for damage or injuries resulting from this. The operator bears the sole risk for this.
The proper use also includes compliance with the manufacturer's instructions, operating and maintenance conditions. The device may only be operated, maintained and repaired by persons familiar with these tasks and that have been informed of the dangers involved.
For the maximum permissible load on the acrylic glass panel, please see the Technical Data on Page 60.
Safety

Danger!
Assembly and electrical connection must comply with the national ^1) regulations.
Assembly, installation, upgrading or repair of the device may only be carried out by specially trained and instructed personnel.
- All danger and safety notes attached to the device must be observed!
- No safety equipment (e.g. panel switch) or safety notes may be removed or deactivated which can impair the safe operation of the device!
- The device may only be operated in proper condition!
- The device operating time must be controlled with a timing device in accordance with the standards EN 60335-2-27 and A1 2000 Section 22.108 and 22.109. This timing device must be designed so that the device is automatically switched off at the latest after < 110% of the selected operating time even when the controller fails.
- Do not change, obstruct or block the air inflow and outflow area to the device or make any unauthorised changes to the device. The manufacturer shall bear no liability for damage or injuries resulting from such actions.
- The appliance must not be installed and operated on the shipping pallet! There is a danger of overheating due to the airflow being obstructed.

Caution!
The code for access via the infrared interface is preset in the software of the hand-held unit, and can therefore be used with any unit. Anyone, who downloads the software from the Internet can access the unit date with a hand-held unit. Please note that Customer Service changes the preset access code during initial start-up – see page 95. Please note the new code for future use!
This code is independent of the access code for the preset- tings via the control panel.
Export
We emphasise that these devices are intended for the European market and must not be exported to nor operated in the USA or Canada! The manufacturer shall assume no liability whatsoever in case of non-observance! We explicitly emphasise that high liability risks may occur for the exporter an/or the operator in case of non-observance.

Please read and observe ...
Equipment
The equipment of the devices differs depending on the model.
In this instruction manual all standard and optional components/functions are taken into account which must be observed during operation and/or when performing maintenance.
The control panel is also affected by the differing equipment: Only those buttons are visible that can be operated, i.e. the corresponding function must be part of the equipment of the device.
Accessories
Some accessory parts are taken into account in the maintenance schedule beginning on Page 62, however this does not automatically mean that your device is provided with this equipment.
An overview of the possible accessories is provided in the sales documentation.
Maintenance and care

Extreme danger!
The device must be deenergised when performing maintenance work requiring the opening of the device. See Page 36.
Maintenance and care play a major role in deciding whether the device meets the requirements placed on it in a satisfactory manner. The compliance with the specified maintenance intervals and the careful conducting of the maintenance and care work are therefore absolutely necessary – see Page 62 ff.
The current operating hours of the parts requiring maintenance can be displayed in the Presetting mode – see Page 93 ff.
Remount any protective devices (e.g. filter panels) after completing work.
We point out that the device must be subject to repetitive inspections by our customer service or an approved specialised company every 12 months (from commissioning) to maintain its proper condition!

Caution!
Only use genuine spare parts of the same type! The use of other parts voids the CE conformity! Any liability is excluded in case of damage or injury proven to be the result of the use of non-genuine spare parts.
Please read and observe ...
Faults
In the case of a fault, error codes ^1) appear on the display to simplify localising of the fault cause (see separate manual):
- If a fault occurs, the fault code flashes in the display.
- If several faults occur, the fault messages are displayed alternately.
- The fault remedy is acknowledged by pressing the button.
- If the fault cannot be eliminated, inform Customer Service.

Please read and observe ...
Deenergise device and secure against being switched on again

Extreme danger!
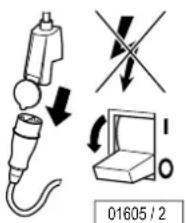
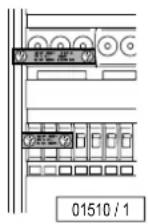
If work is to be performed on the devices, they must be deenergised. That means that all live lines must be switched off. Switching off the device alone is insufficient, as certain points may remain energised. Therefore, switch off fuses before performing any work and – if possible –
text_image
01605 / 2
Extreme danger!
Severe accidents can occur if the device is mistakenly switched on again. Immediately after deenergising, secure all switches or fuses used for deenergising against being switched on again.
- Lock the fuse box with a padlock.
- In case of circuit breakers which cannot be screwed out, a strip of adhesive tape may be applied over the actuation lever with the wording "Do not switch, danger!".
A prohibition sign with the text:
- "Work in progress!"
- "Place: ......"
- "Sign may only be removed by: ......" must always be securely mounted immediately.

Extreme danger!
Prohibition signs must not be hung on or touch live parts.

Cleaning
Acrylic glass surfaces

Caution!
Do not rub with a dry cloth – danger of scratching! For fast, hygienic proper cleaning of acrylic glass surfaces, use exclusively the specially developed fast disinfectant cleaner Antifect®.
Other cleaning agents, especially concentrated disinfectants or solvents (e.g. Lysoform, ethyl alcohol or other liquids containing alcohol), may not be used for cleaning.
Failure to observe this voids all guarantee claims.
Antifect ^® fast disinfectant cleaner
Antifect concentrate, 250 ml Order No.: ▲ 800 1813
Spray bottle, 1 ltr. (empty) Order No.: ▲ 800 1513
Spray head Order No.: ▲ 800 1613
Mixing container, 5 ltr. (empty) Order No.: ▲ 800 1713

Note:
Follow the manufacturer's instructions for use.
Lamps

UV low-pressure lamps: Clean with plain water (damp cloth).
Please read and observe ...
text_image
Cleaning / Product informationPlastic surfaces
For cleaning the other plastic surfaces, it is best to use warm water and a leather cloth. Never use aggressive cleaning agents containing alcohol, e.g. the commercially available Sagrotan, or essential oils. These may lead, in the long run, to damages not covered by the guarantee.
During cleaning a slight discolouration of the leather cloth by the rubber seals must be expected for production-related reasons.

Note:
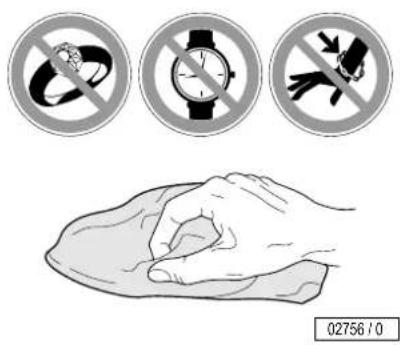
Prevent damage to the acrylic glass and plastic surfaces. Remove rings, watches, bracelets etc. before the start of cleaning work.
text_image
02756 / 0Product information
Acrylic glass panels
The acrylic glass panels for the tanning devices are produced of acrylic glass developed especially for this application. The acrylics used are characterised by a particularly high UV permeability and resistance, as well as an easy-care, hygienic surface that is gentle to the skin.
The acrylic glass panels are formed to their shapes for the specific devices in a technically complex production process. Despite state-of-the-art production know-how, the presence of minor spots, air bubbles or streaks in the acrylic panels is unavoidable. In addition, hairline cracks can occur on the bed surface during operation.
These occurrences are material-dependent and are unavoidable in processing, however have no significant effect on the utility value and can therefore not be recognised as defects.

Caution!
Cosmetics or sun screen products must be removed prior to tanning as they can cause damage (e.g. cracks on the surface) when used continuously.
Environmental protection information
Environmental Declaration – The JK Corporate Group

EMAS
GEPRÜFTES
UMWELTMANAGEMENT D-141-00000
The JK corporate group is subject to the strict regulations of EC Directive 761/2001 and the standard DIN ISO 14001, and undergoes regular internal and external environment audits performed by trained auditors.
Environmental regulations – disposal of lamps and batteries
UV low-pressure lamps contain fluorescent materials and other waste containing mercury. Batteries contain heavy metal compounds.
According to the national waste disposal laws and in accordance with the municipal waste regulations, proof must be provided of the proper disposal of UV lamps and batteries.
Your local sales agency will be happy to assist you with the disposal ^1) of UV lamps and batteries.
- Report the number of UV lamps and batteries to your local agency by telephone or in writing.
• Together with a disposal company, the agency then sees to the collection of the lamps and their proper disposal.
Packaging
All packaging consists of 100 % recyclable materials. Packaging brought into circulation by the JK Corporate Group that is no longer required can be returned to the JK Corporate Group. Your agency partner or dealer will be happy to advise you.
Disposal of recyclable materials
The device has been produced of recyclable materials. When being scrapped later, the device must be disposed of properly. The JK Corporate Group will provide you with information on the content or potential hazards of the materials used.

Please read and observe ...
General tanning instructions
Who can get a tan?
Anyone who also gets a tan in natural sunlight. Persons with sensitive skin even tan more pleasantly and with fewer worries, as the radiation dosage can be exactly defined with sunbeds.
Which tanning times are recommended?
Although there is virtually no reason to worry about sunburn with the UV tanning method, some consideration should initially be given to individual skin sensitivity.

Danger of skin injuries and skin diseases!
Comply with the recommended tanning times, see Page 43.
How many tanning sessions are required?
Here as well, it is naturally dependent on the tanning ability of the skin – as in the sun outdoors. Generally, skin with a normal tanning ability achieves a beautiful, even colour after 3 to 5 tanning sessions of 4 to 10 minutes. The tanning sessions should be scheduled at intervals of every two day. Once you have a tan, 1 to 2 tanning sessions per week are usually sufficient to maintain it.
Should you use sun creme?
No! Cosmetic sun cremes with a sun protection factor (SPF) are intended to filter out the sun's aggressive rays. However, the light of our sunbeds only contains extremely small quantities of comparable rays, making this kind of protection unnecessary. On the contrary, the skin should be thoroughly cleaned and dried before each sunbath.
It is especially recommended that you treat your skin with certain care products. Before tanning (pre sun) and after tanning (après sun). These care products contain a special combination of selected ingredients: Aloe vera extract, jojoba oil, D-panthenol and elastin. They clean the skin, help slow the ageing process and provide moisture. The skin becomes smooth, soft and supple. The lotions can be pleasantly massaged in, and are absorbed quickly and deeply into the skin without leaving behind residues.
Please ask your dealer about the care products.
Heat erythema
In isolated cases, a heat erythema can result with sensitive skin, i.e. the skin becomes quite red due to the remaining infrared radiation (thermal radiation). This reddening is not a sunburn and presents absolutely no health danger. The tanning times should be reduced to achieve gradual adaptation.
General safety information

Read the tips for proper tanning carefully.
• Particular caution is advisable for individuals who are especially sensitive to UV radiation, and when certain medications or cosmetics are used.
- Remove cosmetics before tanning and do not use sun screen products.
• See a physician if stubborn swelling, sores or pigmented moles form on the skin.
- UV radiation from the sun or UV devices can cause injuries to the skin or eyes. This biological effect is dependent on the skin sensitivity of the individual.
- The skin can become sunburned when exposed to excessive radiation. Excessive, frequently repeated exposure to UV radiation with sunlight or UV devices can result in premature ageing of the skin and an increased risk of skin tumours.

Danger of skin and eye injuries or skin diseases!
- Some medications for internal or external use can considerably increase the skin's sensitivity to UV radiation. For example: Antibiotics, Sulphonamides, psoralenes such as melanin, vitamin A acid and derivatives. Sunbaths – including those in the sun – should not be taken during and shortly after using preparations of this kind! If in doubt, ask your physician beforehand!
- The unprotected eye can become inflamed on the surface, and in certain cases the retina can be damaged by excessive radiation. Cataracts can form after frequently repeated exposure to radiation. Close your eyes during tanning and use the included protective goggles that block UV (Order No. ▲ 84592).

Please read and observe ...

- The sunbed may never be used when a filter panel is missing or damaged, or the timer is defective!
- The time between two tanning sessions must be at least 48 hours! Do not take an additional sunbath on the same day.
- Increasing tanning also requires an extension of the exposure time (= radiation time) or after a certain degree of tanning has been achieved, a further intensification is not possible. However, the radiation time may not be extended as desired within the scope of the permissible radiation doses! Therefore, only a certain degree of final tanning dependent on the skin type can be achieved without endangering your health.
Recommended tanning times
See the table on Page 43.
Manufacturer's guarantee
Soltron accepts liability for any tanning system defects that arise in accordance with the following regulations on behalf of customers who have purchased an Soltron tanning system for private or commercial utilisation from one of Soltron's sales partners; consumable parts such as UV-high pressure lamps (burner), UV-low pressure lamps (tubes) and starters as well as the acrylic-glass tanning bed itself are not covered by the warranty.
The warranty stipulates that Soltron will eliminate any defects within a time period predetermined by Soltron by repairing or exchanging the defective part.
Claims made in accordance with this warranty can be lodged with Soltron or the Soltron sales partner from whom the product was purchased on presentation of the warranty card or invoice; this warranty is valid for a period of 24 months from the date of purchase.
This does not affect the rights of the customer under the existing guarantee with regard to any claims that the customer might have in accordance with the contract of purchase.
Soltron M-40/50 ND Turbo Plus
 | MaxTan Turbo Power 160 W / 180 W 4 | |||
 |  |  | ||
 | 1.4 | 4 | 4 | |
| 2.4 | 4 | 5 | ||
| 3.5 | 5 | 6 | ||
| 4.5 | 6 | 7 | ||
| 5.6 | 7 | 9 | ||
| 6.6 | 8 | 1 | 0 | |
| 7.7 | 9 | 1 | 1 | |
| 8.7 | 1 | 0 | 1 | |
| 9.8 | 1 | 1 | 1 | |
| 10.8 | 1 | 2 | 1 | |
| 11.9 | 1 | 3 | 1 | |
| 12.10 | 14 18 | |||
2 4 5 6

Please open this fold-out page.
[Non-Text]
text_image
+ - 10.04 SOLV PAN STOP s187910
sochron
图
text_image
Technical diagram of a washing machine with labeled components and parts, including fan, buttons, and control panel.46
soichron
Zubehör
Accessories
natural_image
Line drawing of a mechanical device with a fan and base mount (no text or symbols)03609/0

START
natural_image
Technical line drawing of a mechanical fan or fan device with no visible text or symbols
natural_image
Technical line drawing of an air conditioner unit with fan and ventilation duct (no text or symbols)
A

[Non-Text]

c.c. c.c. c.c. c.c.

#

The image contains four identical gray circular shapes with radiating lines, each containing a small circle and the label 'A' at the bottom. There is no text or mathematical content to extract.

natural_image
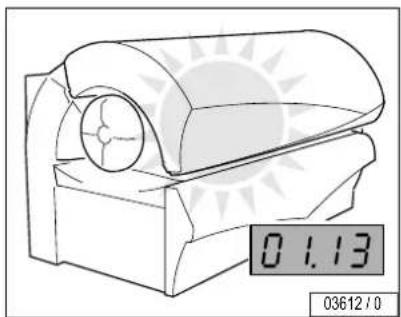
Line drawing of a mechanical device with a circular component and a digital display showing 0.13 (no text or symbols on the device itself)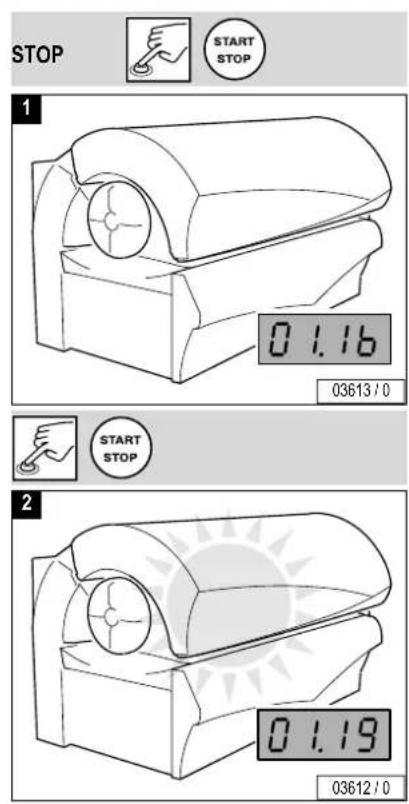
text_image
STOP START STOP 1 0.1.16 03613/0 START STOP 2 0.1.19 03612/0


If the UV lamps are switched off during tanning, the tanning time runs on.

Bedienung Operation


Stand-by
natural_image
Technical line drawing of a mechanical device with no visible text or symbols
natural_image
Line drawing of a mechanical device with a cylindrical component and mounting base (no text or symbols)
89
text_image
IR Function 04008 / 0

text_image
POWER 0 1.13 04054 / 0
text_image
POWER POWER 1 P 05 04054 / 0 1 POWER 2 + - 2 P 04 04053 / 0
text_image
1 2 + - 3 P 03 04052 / 0 1 2 + - 4 P 02 04051 / 0
Bedienung Operation
...

text_image
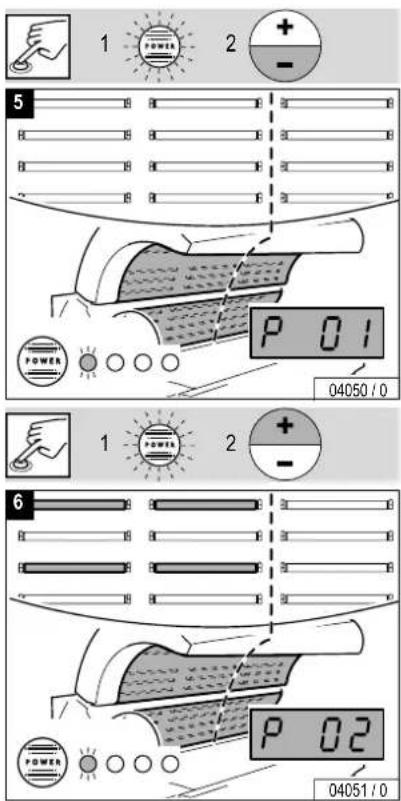
1 POWER 2 + - 5 P 01 04050 / 0 1 POWER 2 + - 6 P 02 04051 / 0
text_image
1 2 + - 7 P 03 04052 / 0 1 2 + - 8 P 04 04053 / 0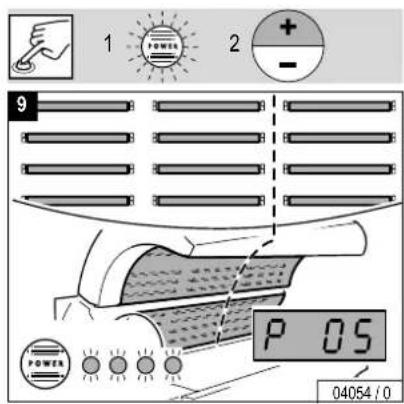
text_image
1 2 + - 9 P 05 04054 / 0

text_image
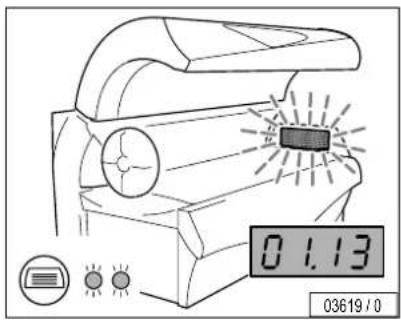
0 1.13 03619 / 0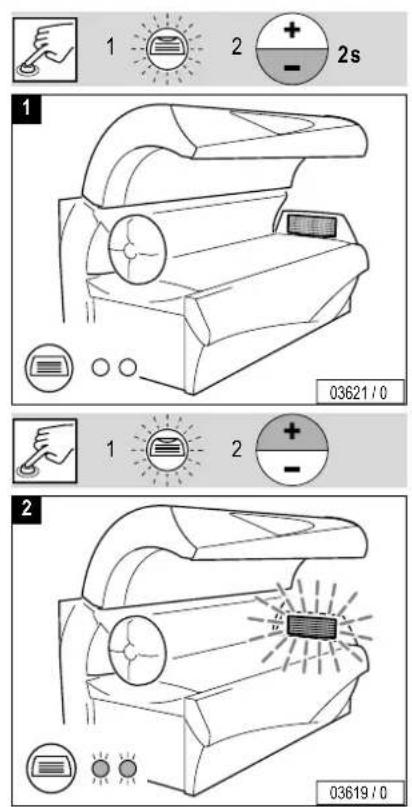
text_image
1 2 + - 2s 03621 / 0 1 2 + - 2 03619 / 0


text_image
01.13 03979 / 0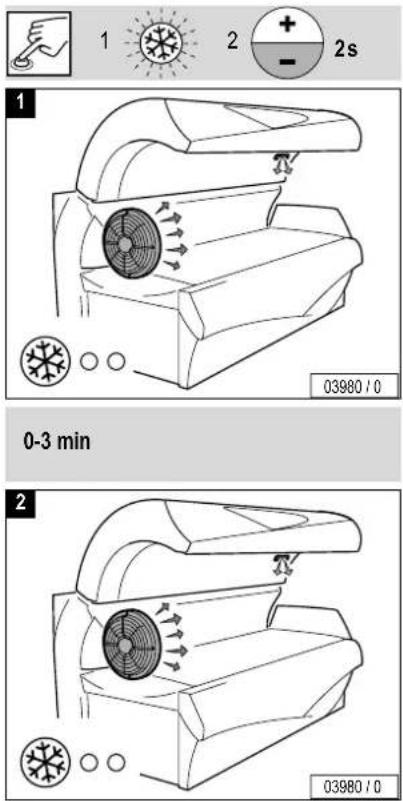
text_image
1 2 + - 2s 03980/0 0-3 min 2 03980/0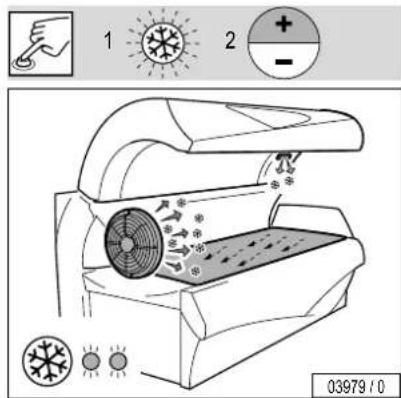
text_image
1 2 - 03979 / 0

natural_image
Technical diagram of a mechanical component with fan and control buttons, no readable text or symbols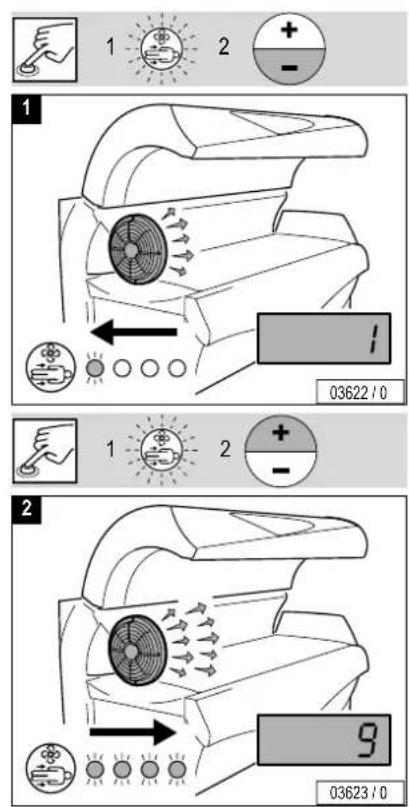
text_image
1 2 + - 1 03622 / 0 1 2 + - 2 9 03623 / 0


natural_image
Technical line drawing of a mechanical component with no visible text or symbols
text_image
1 2 + - 1 03937 / 0 1 2 + - 2 9 03938 / 0

natural_image
Line drawing of a portable electronic device with a digital display showing 0.13, no text or symbols present.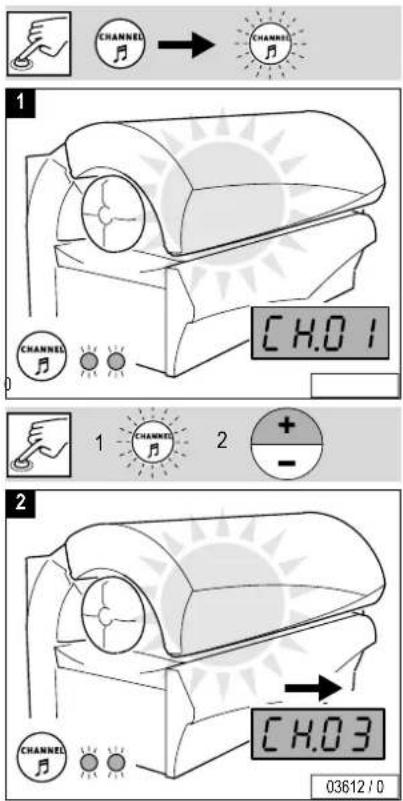
text_image
CHANNEL CHANNEL CHANNEL CHANNEL CHANNEL CHANNEL CHANNEL CHANNEL CHANNEL CHANNEL CHANNEL CHANNEL CHANNEL CHANNEL CHANNEL CHANNEL CHANNEL CHANNEL CHANNEL CHANNEL CHANNEL CHANNEL CHANNEL CHANNEL CHANNEL CHANNEL CHANNEL CHANNEL CHANNEL CHANNEL CHANNEL CHANNEL CHANNEL CHANNEL CHANNEL CHANNEL CHANNEL CHANNEL CHANNEL CHANNEL CHANNEL CHANNEL CHANNEL CHANNEL CHANNEL CHANNEL CHANNEL CHANNEL CHANNEL CHANNEL CHANNEL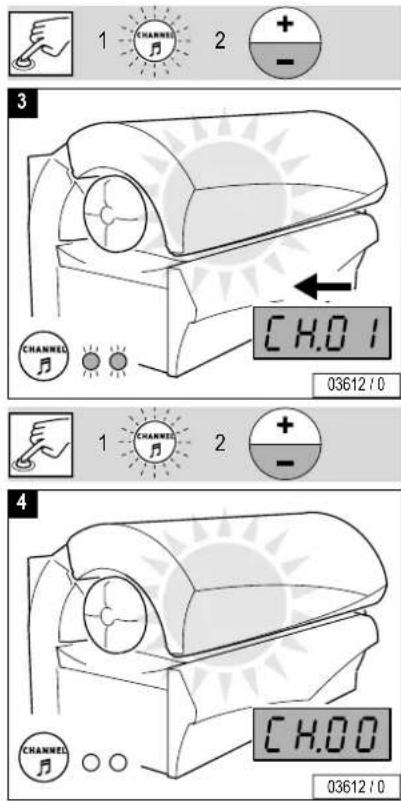
text_image
CHANNEL CHANNEL CHANNEL CHANNEL CHANNEL CHANNEL CHANNEL CHANNEL CHANNEL CHANNEL CHANNEL CHANNEL CHANNEL CHANNEL CHANNEL CHANNEL CHANNEL CHANNEL CHANNEL CHANNEL CHANNEL CHANNEL CHANNEL CHANNEL CHANNEL CHANNEL CHANNEL CHANNEL CHANNEL CHANNEL CHANNEL CHANNEL CHANNEL CHANNEL CHANNEL CHANNEL CHANNEL CHANNEL CHANNEL CHANNEL CHANNEL CHANNEL CHANNEL CHANNEL CHANNEL CHANNEL CHANNEL CHANNEL CHANNEL CHANNEL CHANNEL
Bedienung Operation


natural_image
Line drawing of a portable electronic device with a digital display showing 0.13, no text or symbols on the device itself.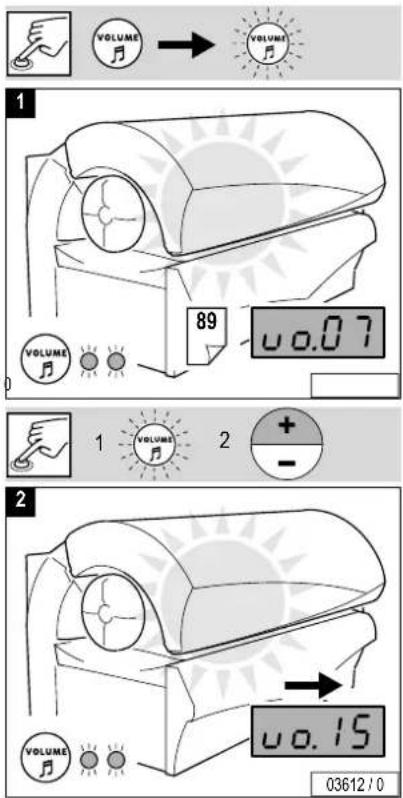
text_image
VOLUME VOLUME 89 0.07 1 VOLUME 2 + - 2 VOLUME VOLUME 03612/0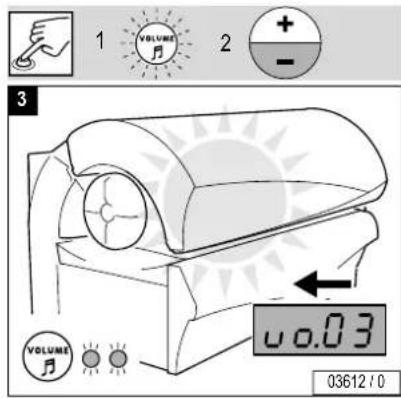
text_image
1 VOLUME 2 + - 3 VOLUME 0.03 03612 / 0

Please open this fold-out page.

text_image
Technical diagram of an air conditioner unit with numbered components and labeled partssochon
62
sochron


 |  |  |  | |||||
 | /50 h | 4 4 x |  |  |  | ▲ 51 937 81 |  | |
| 8 2 x |  | ▲ 800 601 83 |  | |||||
| 11 1 x |  | ▲ 51 975 86 |  | |||||
| 1 2 x |  | ▲ 800 278 84 |  | |||||
51 937 81
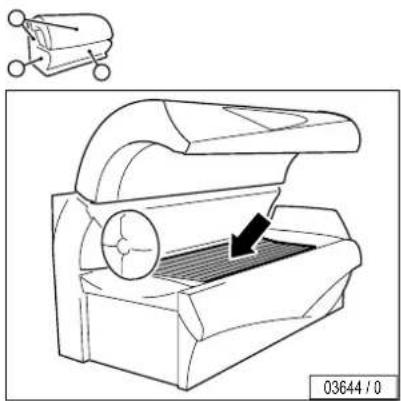
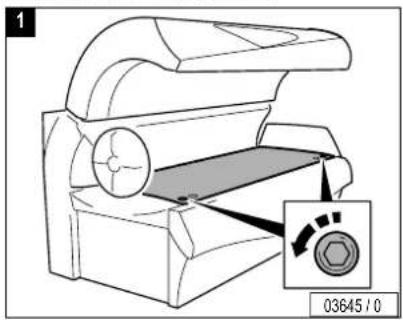
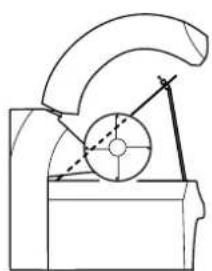
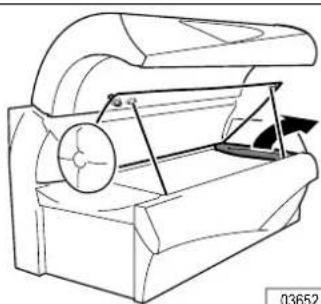
GB Lower section, UV low-pressure lamps
natural_image
Technical line drawing of a mechanical device with a circular component and a black arrow indicating motion (no text or symbols)
text_image
1 03645 / 0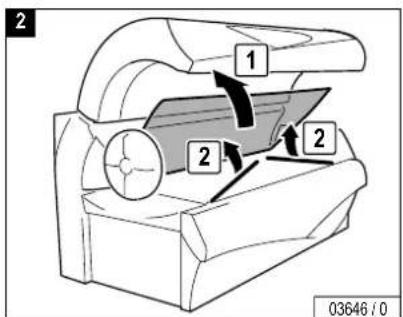
text_image
2 1 2 2 03646 / 0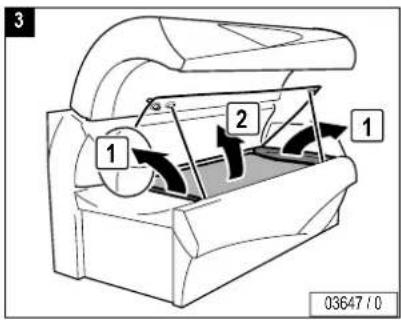
text_image
3 1 2 1 03647 / 0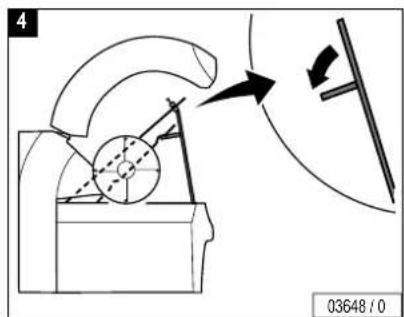
text_image
4 03648 / 0


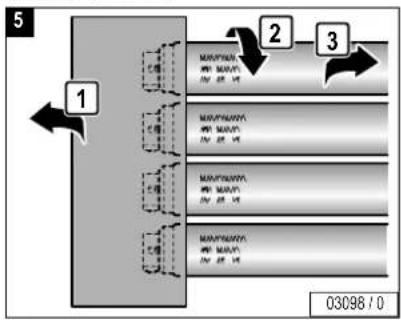
flowchart
graph TD
    A["Step 1"] --> B["Step 2"]
    B --> C["Step 3"]
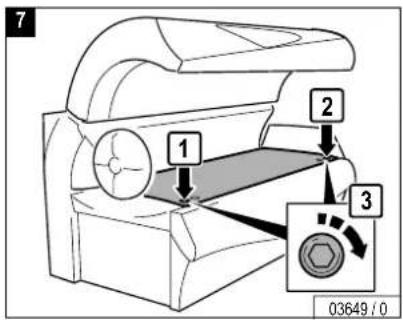
text_image
7 1 2 3 03649:0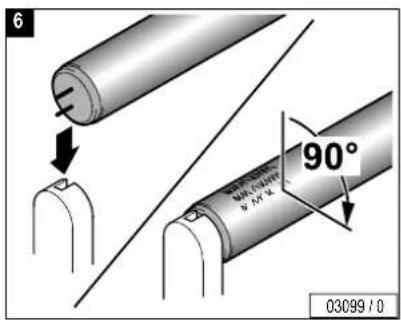
text_image
6 90° 03099 / 0



Schulterbräuner
UV low-pressure lamps
natural_image
Line drawing of a mechanical device with a circular component and curved top (no text or symbols)


1
natural_image
Technical line drawing of a mechanical device with a magnified inset showing a hexagonal nut (no text or symbols)2
text_image
1 2 2 03646 / 03
natural_image
Pure mechanical diagram showing a gear and cam mechanism without any text or symbols03651/0
4
natural_image
Technical line drawing of a mechanical device with internal components and directional arrows (no text or symbols)...

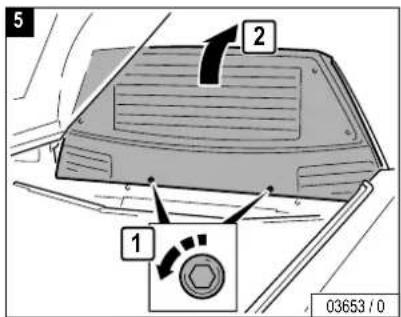
text_image
5 2 1 03653 / 0
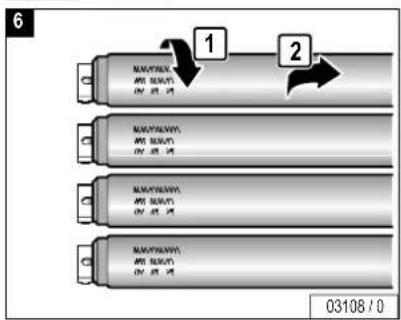
text_image
6 1 2 03108 / 0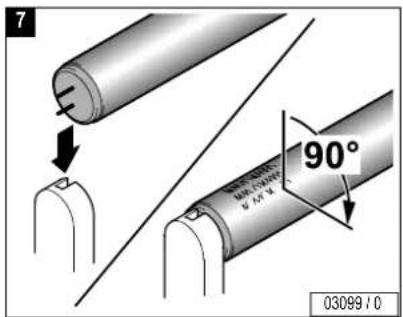
text_image
7 90° 03099 / 0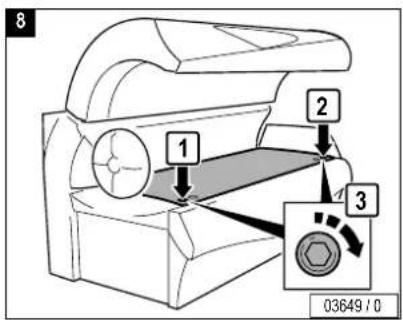
text_image
8 1 2 3 03649 / 0

GB Side section, UV low-pressure lamps
natural_image
Line drawing of a mechanical device with an arrow pointing to a circular component (no text or symbols)
text_image
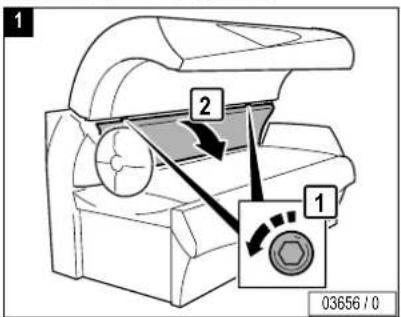
1 2 1 03656 / 0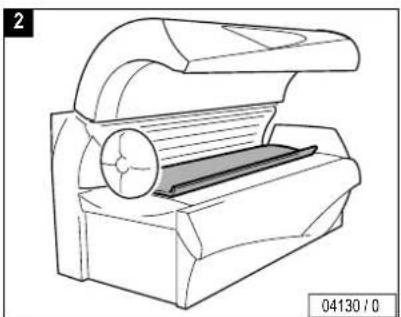
natural_image
Technical line drawing of a mechanical device with a circular component and layered structure (no text or symbols)
text_image
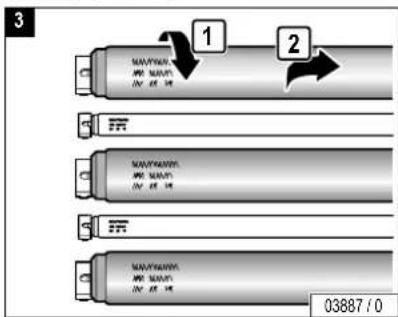
3 1 2 03887 / 0
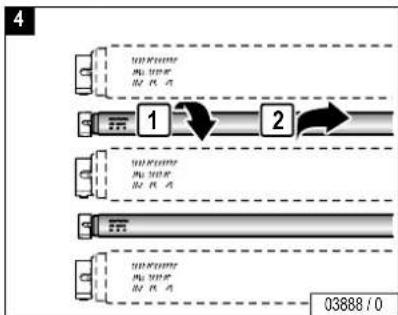
flowchart
graph TD
    A["Step 1: Initial component"] --> B["Step 2: Intermediate component"]
    B --> C["Final step"]

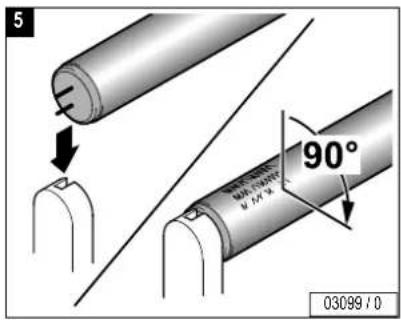
text_image
5 90° 03099 / 0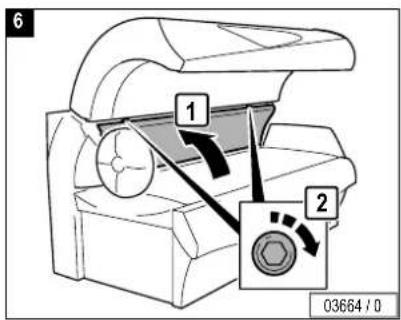
text_image
6 1 2 03664 / 0


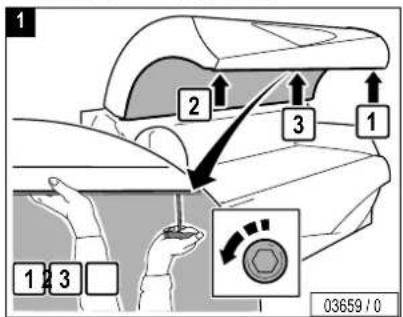
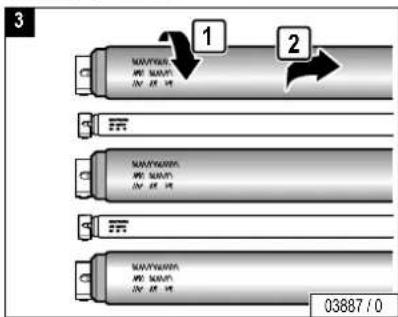
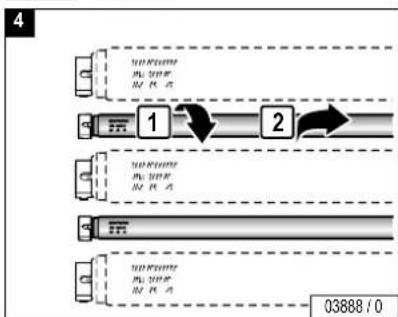
GB Canopy, UV low-pressure lamps
natural_image
Line drawing of a car air conditioner unit with airflow direction arrow (no text or symbols)
text_image
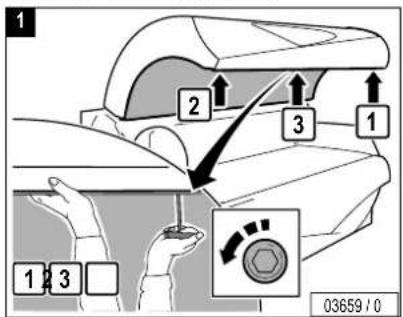
1 2 3 1 1 2 3 03659 / 0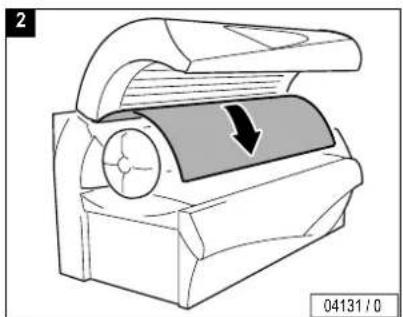
natural_image
Mechanical device with a circular component and arrow indicating downward motion (no text or symbols)
text_image
3 1 2 03887 / 0
flowchart
graph TD
    A["1"] --> B["2"]
    B --> C["3"]
    C --> D["4"]
    style A fill:#f9f,stroke:#333
    style B fill:#bbf,stroke:#333
    style C fill:#dfd,stroke:#333
    style D fill:#dfd,stroke:#333

text_image
5 90° 03099 / 0
text_image
6 3 1 2 1 3 03661 / 0


natural_image
Technical line drawing of a mechanical device with no visible text or symbols
text_image
1 2 3 1 1 2 3 03659 / 0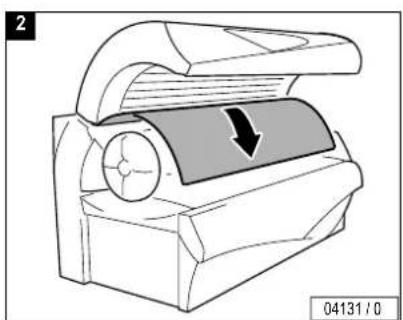
natural_image
Technical line drawing of a mechanical device with a circular component and an arrow indicating direction (no text or symbols)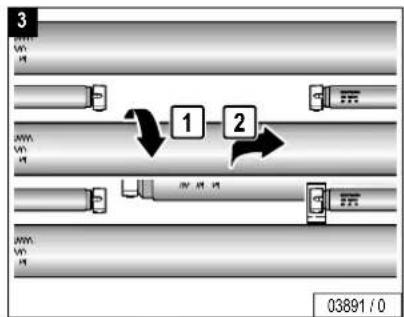
flowchart
graph TD
    A["Left Side"] --> B["Path 1"]
    B --> C["Path 2"]
    C --> D["Device 1"]
    D --> E["Device 2"]
    E --> F["Bottom Right"]
    style A fill:#f9f,stroke:#333
    style C fill:#bbf,stroke:#333
    style D fill:#dfd,stroke:#333
    style E fill:#dfd,stroke:#333
    note right of A: "03891 / 0"

text_image
4 1 2 03892 / 0
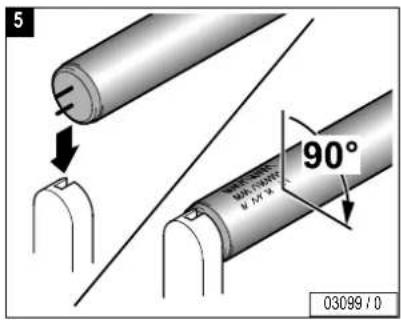
text_image
5 90° 03099 / 0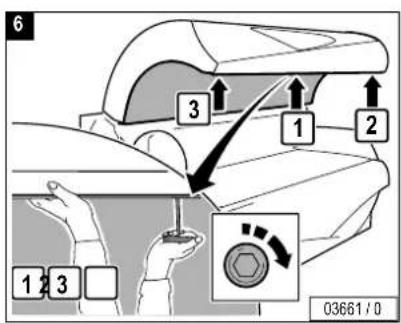
text_image
6 3 1 2 1 3 03661 / 0


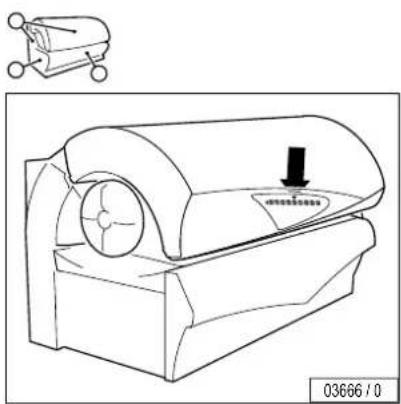
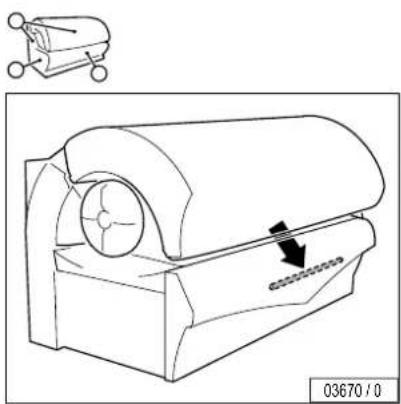
GB Accent lighting canopy
text_image
03666 / 0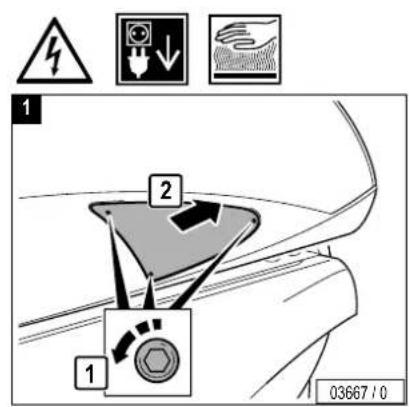
text_image
1 2 1 03667 / 0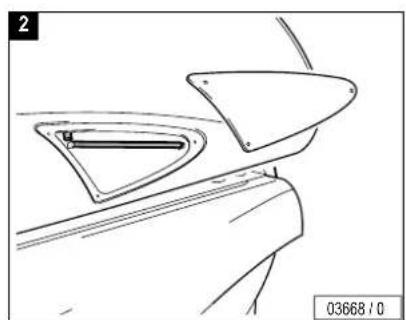
natural_image
Technical line drawing of a mechanical component with triangular features and a base (no text or symbols)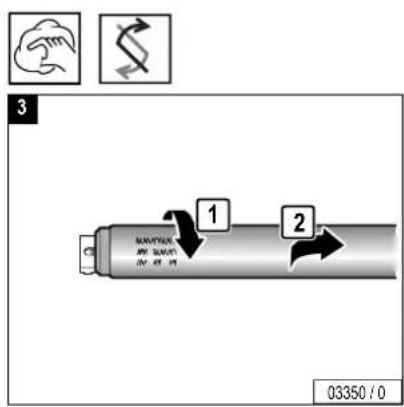
text_image
3 1 2 03350 / 0
text_image
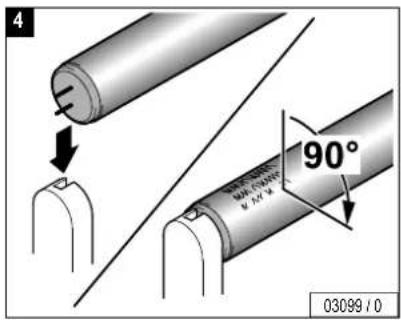
4 90° 03099 / 0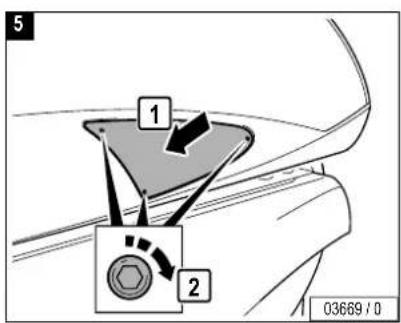
text_image
5 1 2 03669 / 0


GB Accent lighting front panel
natural_image
Technical line drawing of a mechanical device with a circular component and directional arrow (no text or symbols)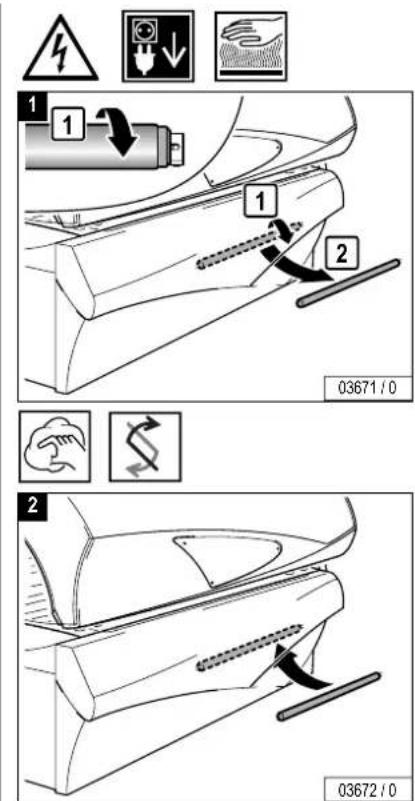
text_image
1 1 1 2 03671 / 0 2 03672 / 0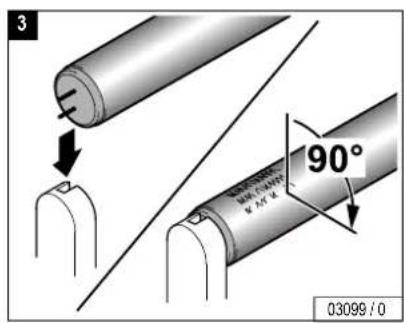
text_image
3 90° 03099 / 0


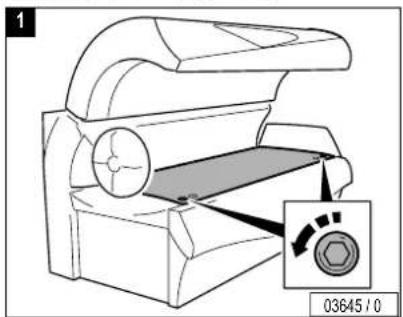
Unterteil, Filter

Lower section, filter

natural_image
Line drawing of a mechanical device with a circular component and ventilation slots (no text or symbols)


text_image
1 03645 / 0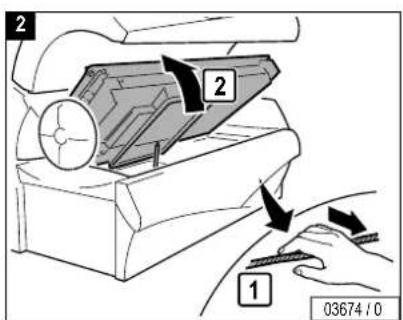
text_image
2 2 1 03674 / 0
text_image
3 2 1 2 03675 / 1
natural_image
Patterned grid pattern with no text or symbols, featuring a central wavy line and a label '03319 / 0' in the corner (no readable text or symbols within the pattern itself)

text_image
5 2 1 2 03676 / 1
text_image
7 1 2 3 03649 / 0
text_image
6 CLICK! 03677 / 0


natural_image
Technical line drawing of a mechanical component with no visible text or symbols
text_image
1 2 1 03679 / 0
natural_image
Simple 3D rectangular block diagram with no text or symbols on the object itself
natural_image
Technical line drawing of a mechanical device with no visible text or symbols


natural_image
Technical line drawing of a mechanical device with a circular component and housing (no text or symbols)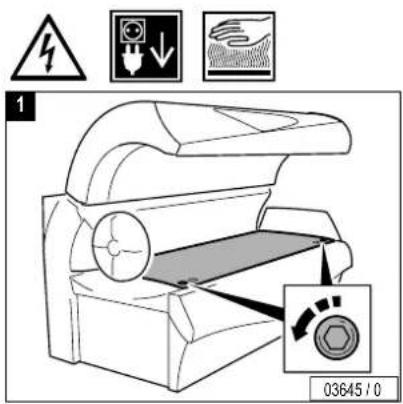
text_image
1 03645 / 0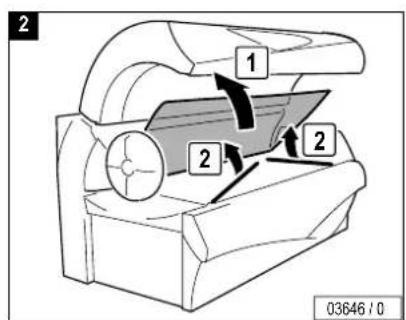
text_image
2 1 2 2 03646 10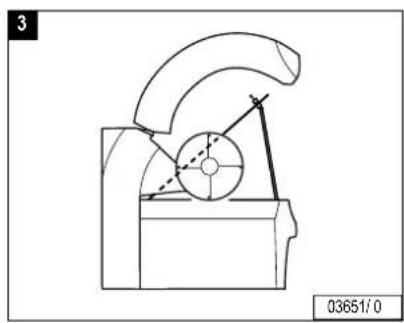
natural_image
Technical line drawing of a mechanical component with no visible text or symbols
natural_image
Technical line drawing of a mechanical device with no visible text or symbols
text_image
5 2 1 03653 / 0
natural_image
Simple 3D rectangular block diagram with no text or symbols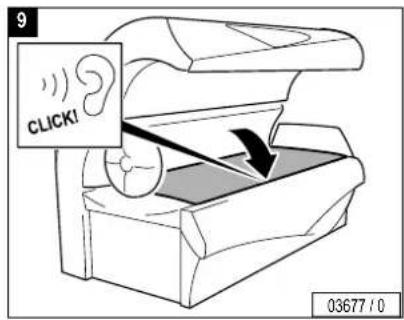
text_image
9 CLICK! 03677 / 0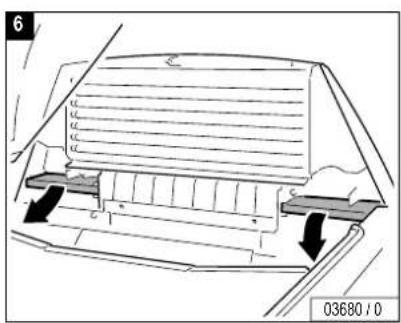
natural_image
Technical diagram of a mechanical component with arrows indicating force or movement (no text or symbols present)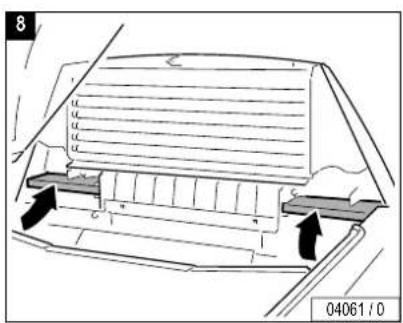
text_image
8 04061 / 0



Air condition, condensate and filter mat
natural_image
Technical line drawing of a mechanical component with a circular feature and a dashed box (no text or symbols)


text_image
1 03645/0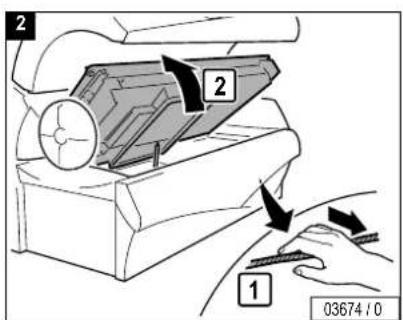
text_image
2 2 1 03674 / 0
text_image
3 1 2 Kondensat 3 03240 / 0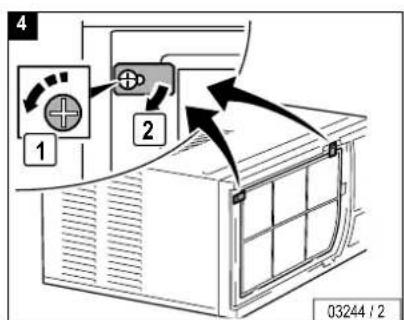
text_image
4 1 2 03244 / 2


5
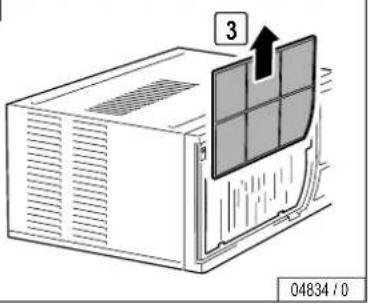
text_image
3 04834 / 07
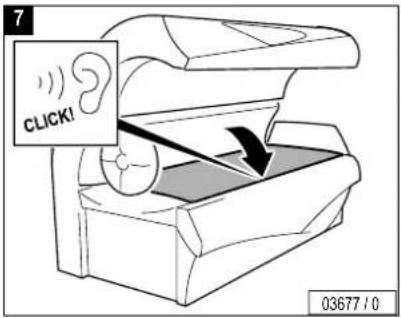
text_image
7 CLICK! 03677 / 06
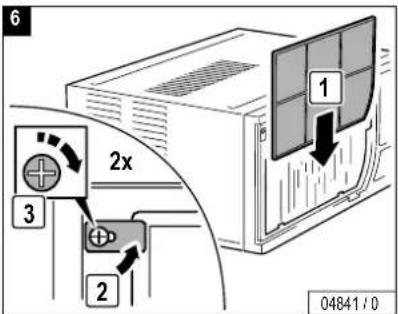
text_image
6 2x 3 2 1 04841 / 0
text_image
8 1 2 3 03649 / 0

Changing presettings with the control panel
The setting mode enables you to call up operating states and make alterations to current settings.
Changing to Presetting mode
- Press the buttons – and + simultaneously for at least five seconds outside a tanning process.
- appears in the display.
- Enter the code (see Page 94).
- Press the START/STOP button four times when you run the Presetting mode for the first time.
- briefly appears in the display, then (Function 1)01- and the presetting value are displayed alternately (see column "On delivery").
- By pressing the + button you scroll up to the next function (from -01-to -19-).
- By pressing the – button you scroll down to the next function (from -19- to -01-).
Changing presettings
Increase the preset value:
- Press and hold the START/STOP button while simultaneously pressing the + button.
Decrease the preset value:
- Press and hold the START/STOP button while simultaneously pressing the – button.
Reset to the last value set:
- Press the START/STOP button.
Reset to the delivered state:
- See function . - 10 -

Note:
The sunbed will automatically return to 'idle' mode 30 seconds after the last button was pressed.
The presettings are listed beginning on Page 96.


Defining a code
- Select Function .
- Press the START/STOP button for 3 seconds until appears_
- Press the desired buttons consecutively:
- Press the buttons in the same sequence when appears again.
- appears in the display. The set code has been saved.
- Please note the code for Customer Service.
If you know the old code, you can define a new code at any time. We recommend that you already set a new access code during the initial start-up.

Changing presettings with a hand-held unit
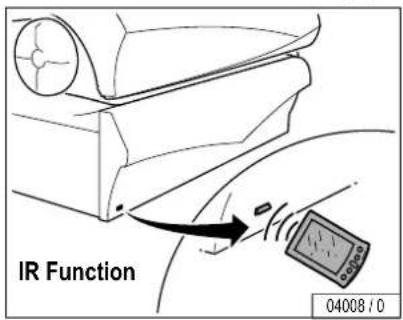
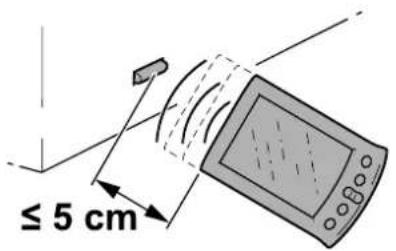
Some data can also be displayed and changed with a commercially available hand-held unit (e.g. from Palm). For this purpose you require special software (available in German and English), which you can download at www.soltron.de. The operating manual for this software is also available at the same website.

Caution!
The code for access via the infrared interface is preset in the software of the hand-held unit, and can therefore be used with any unit. Anyone, who downloads the software from the Internet can access the unit date with a hand-held unit. Please note that Customer Service changes the preset access code during initial start-up – see software operating manual. Please note the new code for future use!
This code is independent of the access code for the preset- tings via the control panel.

Note:
Please read the operating manual for the Soltron software for instructions on how to display or change data with a hand-held unit.
Information on operating the hand-held unit is contained in the manufacturer's documentation.
text_image
≤ 5 cmIR Function
04002/0

Accent lighting front panel, replacing..... 80
Accent lighting in canopy, replacing ..... 78
Accent lighting, maintenance intervals ..... 64
Accessories 34, 47
Acrylic glass panels, product information ... 38
Air conditioner.... 31
maintenance 86
operation.... 54
Ambient temperature 60
B
Body cooling 55
C
Care.... 34
Changing presettings.... 93
Cleaning.... 37
Cleaning intervals 62
Code, defining, presettings.... 93
Condensate container, emptying.... 86
Conformity mark 59
Control panel 46
D
Danger of burns 29
Device operating time 33
Dimensions 60
Disinfection.... 37
Disposal 39
Draining.... 31
E
Environmental protection 39
Equipment.... 34
F
Face cooling....56
Faults 35
Filter in sunbed base, cleaning 81
Filter mats in canopy, cleaning/replacing.... 83
Filter mats in shoulder tanner, cleaning/ replacing.... 84
Frequency 59
Functions on start-up 48
Functions/Operating keys 46
Fuse....59
G
Guidelines 32
H
Hand-held unit, changing presettings......95
Headphone....30
Humidity 60
|
Installed lamps 64
Intended use....32
Interior lighting, replacing 76
J
Loading of acrylic glass panel ....32
Low-pressure lamp(s)....29
M
Maintenance and care....34
Maintenance intervals 63
UV lamps....64
Maintenance table 62

Index
Manufacturer's guarantee.... 42
Maximum load, acrylic glass panel.... 32
Medications.... 41
0
Operation
Channel....57
Volume....58
Order numbers.... 63
P
Packaging.... 39
Plastic surfaces.... 38
Power Consumption 59
Power Control....51
Presettings.... 93
Press button.... 30
Product information.... 38
Protective measures.... 36
R
Replacing lamps
canopy 74
shoulder tanner....70
side section....72
sunbed base 68
Running time, effect lighting 50
s
Safety.... 33
Safety instructions.... 41
Safety switch.... 30
Shoulder tanner, operation.... 51, 53
Skin sensitivity.... 40
Skin type 28
Small children.... 32
Spare parts.... 34
Stand-by....50
Starter 29
Sun creme.... 40
Sun screen products 41
Symbols 29
T
Tanning instructions.... 40
Tanning times.... 43
Technical data.... 59
Teenagers.... 32
U
UV lamps
select power stage 51
UV low-pressure lamp(s).... 29
UV low-pressure lamps, replacing
canopy....74
shoulder tanner....70
side section....72
sunbed base 68
UV type....28
V
Visual inspection ....31
Voltage 59
W
Waste Disposal Act 39
JK-SALES GMBH