KPC-150 - Pan KeMar - Free user manual and instructions
Find the device manual for free KPC-150 KeMar in PDF.


User questions about KPC-150 KeMar
0 question about this device. Answer the ones you know or ask your own.
Ask a new question about this device
Download the instructions for your Pan in PDF format for free! Find your manual KPC-150 - KeMar and take your electronic device back in hand. On this page are published all the documents necessary for the use of your device. KPC-150 by KeMar.
USER MANUAL KPC-150 KeMar
natural_image
Three food dishes: a bowl of asparagus soup with green sprouts, a golden-brown fried dessert, and a plated dish featuring steamed pork ribs garnished with chopped green onions.text_image
Warning symbols including red triangular warning triangle, yellow triangular hazard symbol, and black wavy line indicating shock or hazard.natural_image
Metallic cylindrical container with a reflective interior (no text or symbols visible)Edelstahl- innentopf
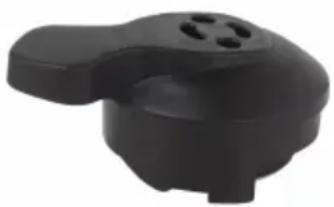
Dampfauslassventil
natural_image
Black plastic push-button button with four vent slots (no text or symbols visible)natural_image
Close-up of a metallic mechanical knob or dial component (no visible text or symbols)natural_image
Close-up of a metallic kitchen appliance with a glass door and lid, showing interior space (no visible text or symbols)natural_image
Three-step assembly process showing a circular component being processed into a plastic lid, then to form a ring (no text or symbols visible)-DECKEL VERSCHLIESSEN
text_image
CLOSE OPEN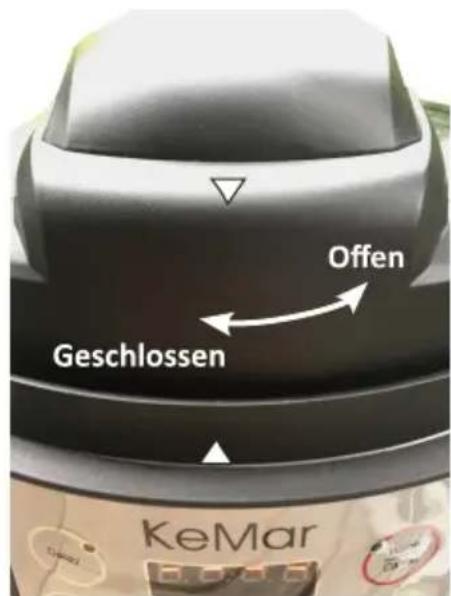
text_image
Offen Geschlossen KeMarnatural_image
Close-up of a metallic switch handle with three circular ports and a circular base (no visible text or symbols)natural_image
Two-step cooking process showing a metal steamer with lid and base, resulting in a separate empty oven (no text or symbols)Dämpfeinsatzgitter
natural_image
Simple line drawing of a circular object with three legs and a central horizontal line (no text or symbols)natural_image
Circular stainless steel steamer with perforated inner tray (no text or symbols visible)text_image
KeMar 8:08:08 Delay Rice Buckwheat Pomidge Milk Pomidge Meat Fish Cake Yoghurt Warm Cancel Chicken Steam Soup Slow Cook Beans Stewtext_image
eMar 9:8.8. Warm Cancel Chicken Steam- Rice / Buckwheat
- Porridge/Milk Porridge
- Meat/Fish
- Beans/Stew
- Soup/Slow Cook
- Chicken/Steam
text_image
Two types of waste sorting symbols: a left box with a 'X' indicating no waste, and a right box with a cross symbol indicating no waste.Table of Contents: Page
- Important safety advice....43
- Power cord advice/electrical requirements....49
- Before first using your product .... 50
- Description and function of parts....57
- Short introduction – perfect preparation in just a few steps ..... 63
- Cleaning and maintenance 71
- Frequently Asked Questions .... 73
- Customer service/warranty....75
Health and wellbeing through innovation
Cooking with a pressure cooker is different from conventional methods of food preparation.
Rice and vegetables are cooked more quickly, acquiring a more intense flavour. The steaming function also enables chicken and fish to be even more vitamin-rich after cooking.
It preserves the nutrients and natural flavours of the food to be conserved, and prevents the build up of harmful compounds.
In order to keep a healthy, balanced diet it is best to use the freshest ingredients.
Dear customer,
You can cook delicious dishes in no time at all with your new pressure cooker. It is easy to use and simple to clean.
This device is fitted with safety controls.
However, please read the safety advice carefully and only use the device as per the manual's instructions in order to avoid accidents or damage.
Please keep this guide for future reference.
If the product is transferred to another user, please include this guide.

This sign warns you of the risk of injuries.

This sign warns you of the risk of injuries due to electricity.
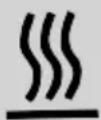
This signs warns you of the risk of burns or scalding.

This symbol indicates further information.
1. Important safety advice
Intended Use

The pressure cooker is intended for purposes of preparing many different kinds of foods. It creates pressure during the cooking process. Food prepared in the pressure cooker cooks more quickly and preserves its natural tastes and nutrients.
The pressure cooker is exclusively intended for private household use and not intended for commercial purposes. The producer holds no responsibility for incorrect usage brought about by the failure to follow these instructions. In order to avoid danger, the device should only be repaired by an authorised customer service agent.
Always take care to follow the safety measures provided in this list. They are intended to protect you against risk of burning, injury, electric shock and damage to property:


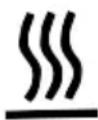
- Read through all instructions carefully.
-
Do not touch any hot surfaces.
Take care to hold on to the handles and knobs.
Use oven gloves to take out the inner bowl, baking dish or steam tray. There is a risk of burning when touching hot surfaces, water, steam or food! -
Do not put cables, plugs or devices in water or other liquids. This could cause risk of burning, electric shock or injury.
- Supervise children carefully when they are near any devices. Ensure that children do not play with the device. Take care to ensure that the power cord is out of the reach of children.
- When the device is not being used, or being cleaned, pull out the mains cable.
Leave the device to cool before cleaning, assembling or dismantling parts.
- Do not use devices if the cable or power plug are damaged, or if malfunction or any damage has occurred. Take the device to an authorised repair agent if it needs to be serviced, repaired or adjusted.
- Keep foreign objects such as needles and wires away from the device to avoid risk of electric shock.
- Only use equipment which is recommended by the manufacturer to avoid the risk of burns, electric shock or injury.
- Do not use the device outdoors.
- Do not leave the cable on the side of the object. Keep it away from hot surfaces.
- Do not keep the device near hot gas or electrical cookers, or in a hot oven.
- Take special care whilst transporting a device containing hot oil or other hot liquids.
-
Do not clean the device with a cleaning product which scratches or scrapes its surface.
-
First, connect the cable to the device and then to an electricity socket. To disconnect it from the power supply, turn off the power switch and then remove the plug from the socket.
- Only use the device for itS intended purpose. It is only intended for use in domestic conditions.
- Only connect the device to a power source with the appropriate voltage.
- Always keep the plug clean.
- Plug the device into its own socket, separate from other devices.
- Always connect the power plug firmly to the socket.
- Do not insert the plug with wet hands.
- Do not touch the steam nozzle or the lid.
- Be careful when handling the power cord.
- When pulling out the power cord, hold the plug.
- Do not touch the plastic parts of the lid, or the inner lid during or shortly after usage.
This has a risk of causing burns.
-
Do not use the device near open flames or wet areas.
-
Only use the device on stable and heat-proof surfaces.
-
Only use the accessories provided.
-
Given that the cooker releases very hot steam during use, keep it at least 30cm away from walls and other furniture. Never use it near flammable materials such as dishcloths, paper towels, curtains or paper plates.
-
Protect the device from direct sunlight and keep hot cooking oil away from it.
-
Do not leave dishcloths or items of clothing on the device during usage.
- Take off all foreign objects before using the device.
- Always ensure that before usage, the steam valve is placed correctly in the lid. If it is assembled incorrectly, the pressure cooker cannot build up pressure and steam will leak from the opening in the lid.
- The device cooks by way of pressure.
Incorrect usage can lead to burns and injuries.
Ensure that the lid is closed correctly before starting.
- Never fill the device above the maximum line (MAX LINE) of the inner bowl. When using food that swells up during the cooking process, such as rice or beans, ensure that the inner bowl is only filled between half and maximum.
As a general rule, do not fill the device above the 'middle' point.
When the inner bowl is overfilled, the steam nozzle can clog up and steam can no longer be released.
Therefore, ensure that steam can always be released.
-
Please be aware that certain foods which release foam, such as apple puree, cranberries, barley, oats or other cereals, peas, pasta, macaroni, rhubarb and spaghetti can block the steam nozzle. To avoid any problems of this kind, follow the instructions and advice carefully for the aforementioned foods.
-
Before each use, check that the steam nozzle is not blocked, and that it is placed in the lid correctly.
-
The lid can not be opened until the device has cooled and all internal pressure is released from the steam valve. When the device is difficult to open, this shows that the cooker still has internal pressure – do not open it by force.
EVERY KIND OF PRESSURE IN THE COOKER CAN BE DANGEROUS.
- Do not use the bowl to fry food in any type of oil.
- The bowl releases extreme heat and steam whilst it is in use. Take all necessary precautions in order to avoid fires, burns and other injuries during usage.
-
Any user who has not fully read the usage and safety precautions in this manual may neither use nor clean this device.
-
NEVER OPEN THE LID OF THE PRESSURE COOKER BY FORCE!
If you would like to open the bowl, first press the 'WARM/CANCEL' button on the front of the device. Turn the steam valve to the open position in order to completely release the internal pressure in the device.
Ensure that all the steam is released from the pressure cooker and that the steam valve is completely open.
To open the lid, turn the handle anti-clockwise. Always hold the lid far from your body in order to avoid skin contact with the remaining steam and heat.
- CAUTION: TO AVOID RISK OF ELECTRIC SHOCK, ONLY USE THE REMOVABLE INNER BOWL TO PREPARE FOOD!
Do not put the device or the base unit in water.
Clean the bottom of the inner bowl and the hotplate before each usage. Ensure that the inner bowl is correctly placed on the hotplate.
You can ensure this by lightly turning it clockwise and anti-clockwise. If not, improper usage could ensue, leading to damage to the device.
- CAUTION Hot surfaces.
This device generates intense heat and releases hot steam during usage.
Follow the instructions given in order to avoid risk of injury, fire and property damage.
2. Power cord advice
A The power cord is short in order to avoid entanglement or tripping.
B An extension cord can be added if used properly.
C If an extension cord is used:
(1) Its power capacity must at least be the same as that of the device's power consumption.
(2) The extension cord must not hang over the edge of the device.
Ensure that children cannot pull it and that the risk of tripping is low.
Warnung!


Risk of electric shock!
Only use earthed electrical outlets!
Do not remove any of the earth wires!
Do not use an electrical adaptor!
Do not use an extension cord!
If these instructions are not followed, there is a risk of fatal injury, fire or electric shock!
3. Before first using your product

CAUTION, THE DEVICE RELEASES VERY HOT STEAM!
Remove the device from its packaging.
DANGER TO CHILDREN
Risk of death from swallowing or choking on packaging material.
Keep the packaging material away from children.
Dispose of it immediately.
Before using the pressure cooker for the first time, wash the inner bowl, the removable inner lid and the rubber seal of the inner lid with warm, soapy water. The rubber seal of the inner lid should be removed by pressing the metal button on the surface.
Rinse using clear water and dry thoroughly.
Do not immerse electrical parts in water!
Ensure that the rubber seal is correctly re-positioned in the inner lid. Fill 2/3 of the inner bowl with water and put the lid on the pressure cooker.
Close the lid in a clockwise direction and then to the right, until you hear it snap into place. Then put the steam valve on the opening of the steam nozzle on the lid. Start the 'RICE' cooking mode and run the program for 15 minutes. Wait another 15 minutes after the program ends and then exert pressure on the steam nozzle in order for the steam to be released slowly.
Leave the device to cool down to room temperature.
Pour out the water. Clean and dry the inner bowl and inner lid. The pressure cooker is now ready for use.
SAFETY MEASURES

text_image
Three warning symbols: red triangle with exclamation mark, yellow triangle with lightning bolt, and black wavy line indicating shock.Never use the device without the lid.
Ensure that the steam nozzle is never sealed or covered, in order to avoid a dangerous degree of pressure building up in the device.
Given that the steam released from the nozzle is very hot, ensure to keep parts of the body such as the hands and face away from the nozzle, as this can cause scalding.
If you remove the lid whilst the device is preparing food, a huge amount of hot steam will be released.
Make sure to stand an appropriate distance from the device and protect parts of the body, for example with oven gloves or similar.
Hot water can build up in the lid.
To avoid scalding, never put your hands under the lid.
After usage, the bowls and lid will be very hot. Wait until all components have cooled down before moving the device or dismantling parts for the purpose of cleaning.
Never steam frozen meat, poultry or seafood. Before steaming frozen products, ensure they are fully defrosted.
Never use the pressure cooker without the lid, as hot water can spray out from the device. Only use the components included and the baking dish provided.
Place the pressure cooker on a stable surface.
To avoid overheating, ensure that the device is at least 30cm away from other objects.
Always take off the lid carefully using the handles, and if possible use oven gloves or similar in order to avoiding scalding.
Do not move or shift the pressure cooker during usage.
Avoid holding the steam cooker with your hands whilst it is in use.
Always use oven gloves or similar when assembling or dismantling hot parts of the device.
Do not put the pressure cooker underneath cupboards or near walls or objects, so that the hot steam does not cause damage.
Do not use the device near explosives or flammable vapours.
The steam outlet is in the lid.
If you remove it, ensure that it is kept out of the reach of children to avoid risk of suffocation.
BEFORE EACH USE
Before each use, check that the rubber seal is placed correctly inside the steam outlet.
Check that all parts are in the right position and that no foreign objects are blocking the steam valve either in the top or underside of the valve.
Also check the underside of the lid to check that the valve cover is clean and that no foreign objects are located there.
GENERAL TERMS OF USE
- Never fill the inner bowl to above maximum capacity (FULL). Turn the inner bowl to the right and left to ensure it is correctly placed on the hotplate.
- Always ensure that the steam outlet moves freely and cannot be blocked.
- Fix the power cable to the underside of the device. Plug the cable into an appropriate 240V socket.
- Steam and pressure must subside completely from the pressure cooker before the lid is opened.
To release all the steam and pressure, put the steam nozzle to one side until all of the steam and pressure have been released.
CAUTION: During this process, protect your skin from direct contact with the hot steam.
- Carefully press on the lid and turn it clockwise until feeling a light resistance. Then carefully lift up the lid and put it to one side. Take care to avoid injuries from hot surfaces or leaking liquids.
Advice: The cooking times shown do not include the additional time needed to build up steam. It can take up to 17 minutes for sufficient steam to build up.
Surge Protector
The pressure cooker has a safety function which prevents a malfunction in case of voltage surge.
If a voltage surge occurs, the system will shut down. Remove the plug from the socket and wait for one hour before reconnecting the device and using it again.
SPECIAL FEATURES
-
The varied menu of the pressure cooker offers you a wide range of methods of food preparation including gentle cooking, steaming and stewing. You can also prepare cakes, yoghurt and soups quickly and easily.
-
You can change the cooking time and pressure level according to your individual taste, or use the preset menu options. At the end of the cooking process, the device automatically goes into Keeping Warm Mode.
- Electronic pressure cooking saves time and energy. For example, you can cook rice dishes 20% more quickly and save 25% more energy. Most other dishes save, on average, 40% time and at least 60% energy.
- Digital pressure cooking devices use temperatures of up to 120C. Therefore, they cook in a more healthy and hygienic fashion compared to conventional cooking methods.
- The pressure cooker uses ,sealed preparation', so taste, vitamins and nutrients are preserved.
- Dirty and messy cooking stoves with pots boiling over and overflowing are a thing of the past.
- Through the steam vent, you can release the pressure rapidly and completely.
CAUTION: During this process, protect your skin in order to avoid contact with the hot steam being released.
-
The STEAM mode makes liquid build up in the inner bowl in a matter of minutes.
-
The automatic Keeping Warm Mode keeps cooked food warm for up to 24 hours. Food that has been kept warm for longer than 4-6 hours can lose its taste and consistency.
-
With its modern design and restrained colours, the pressure cooker fits into every household.
Built-In Safety Features
1. Cover Guard:
Stops pressure building up if the cover is not correctly closed.
2. Control through pressure and temperature-sensors:
Activates and de-activates the pressure and temperature, and electricity flow is automatically turned off.
3. „Back-up“ Safety Vent:
If the temperature sensor/pressure sensor detects a malfunction caused by exceeding the maximum pressure, the 'Back-up' safety vent is activated and the excess pressure is released.
4. Valve Cover (Blockage protection):
Stops the food from blocking the steam vent.
5. Spring-assisted back up pressure relief:
If all the above-mentioned safety functions fail, the spring--assisted back up pressure relief steps in. This is located below the heater and makes sure that the inner bowl is lowered.
The pressure and steam can be released from the side of the lid if the inner bowl is no longer placed on the rubber seal on the inner lid.
6. Maximum Temperature Shutdown
If the device causes a malfunction and the inner temperature exceeds the maximum limit, the device will automatically shut down.
4. Description and function of parts
It is very easy to use.
In the following, please familiarise yourself with the device and the control panel.
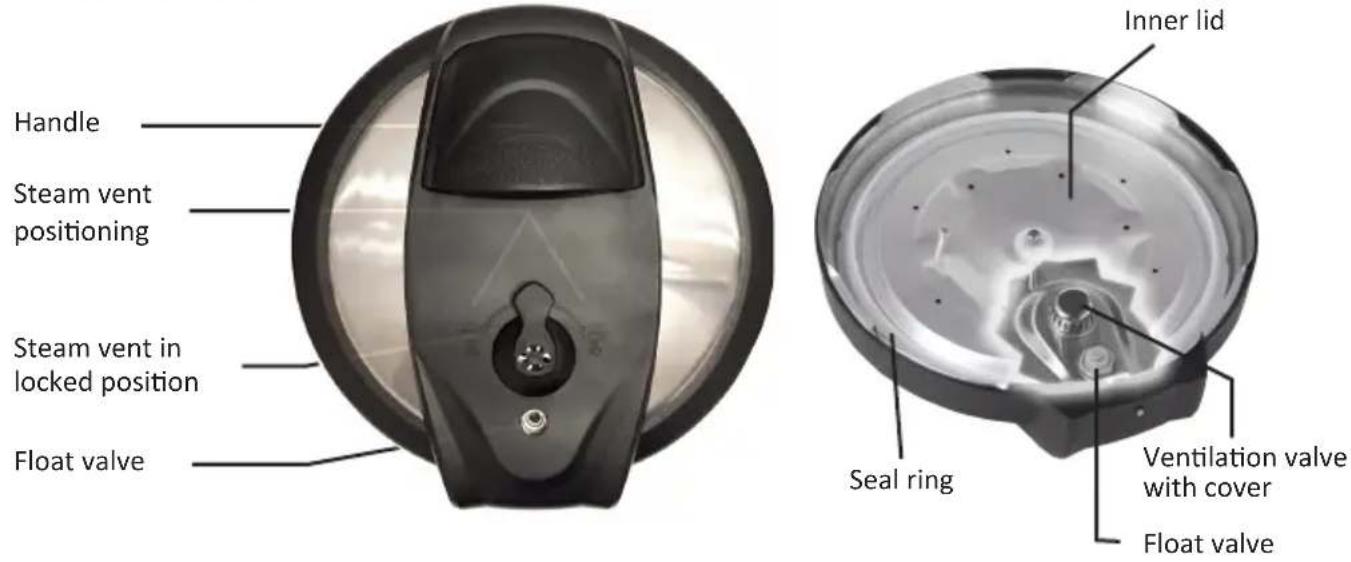
text_image
Handle Steam vent positioning Steam vent in locked position Float valve Inner lid Seal ring Ventilation valve with cover Float valve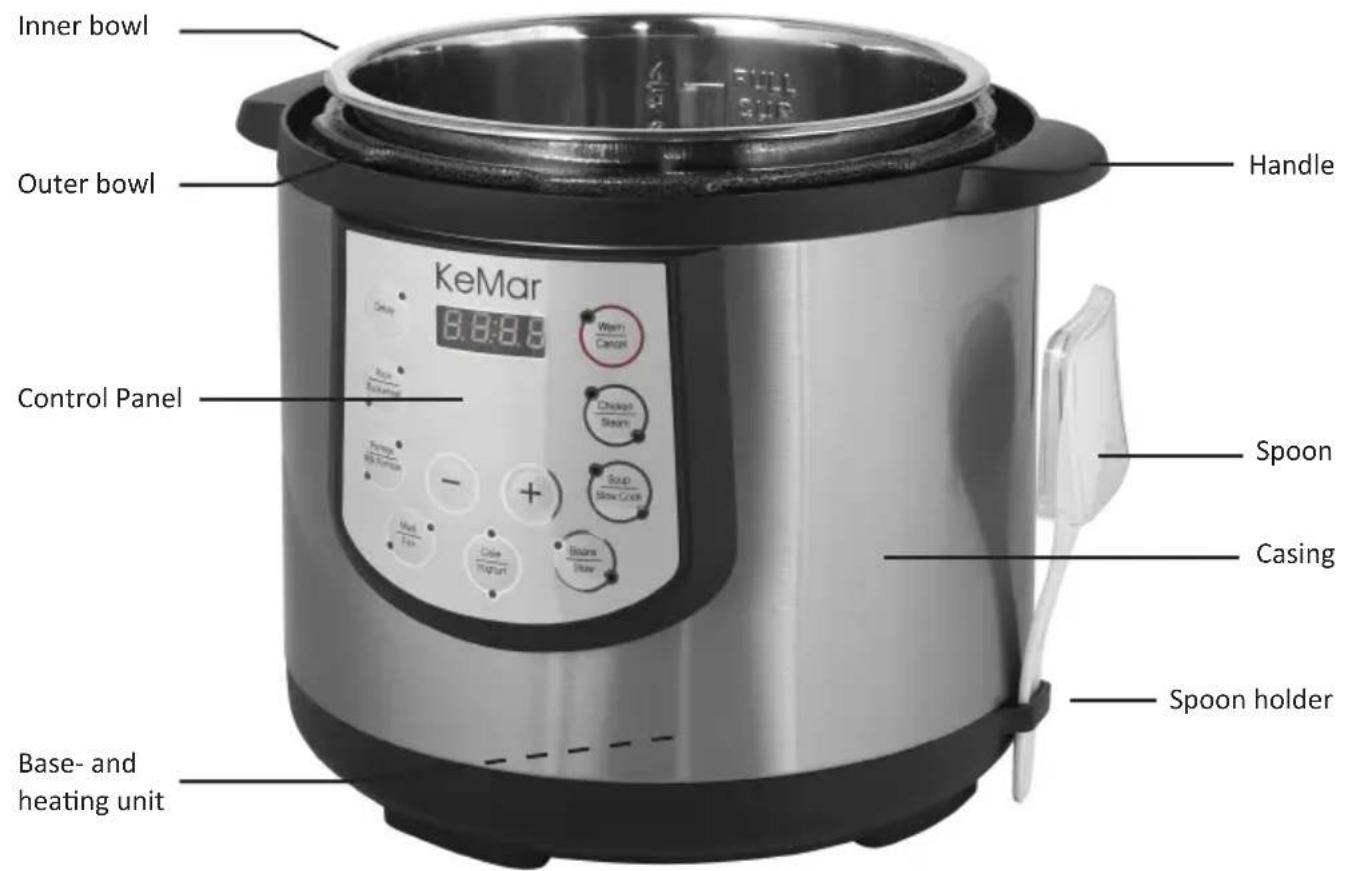
text_image
Inner bowl Outer bowl Control Panel KeMar Handle 8:38:6 Spoon Casing Spoon holder Base- and heating unitAccessories:
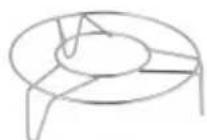
Steamer inset rack
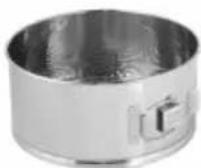
Springform tin Spoon & measuring cup
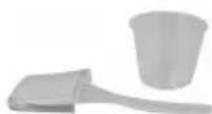
natural_image
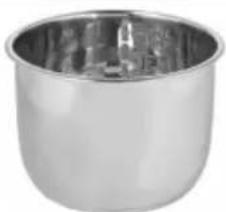
Metallic cylindrical container with a reflective interior (no text or symbols visible)inner bowl
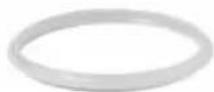
Sealing ringStainless
Steam vent
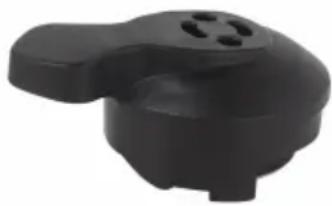
natural_image
Black plastic door handle with four vent slots (no text or symbols visible)The steam vent must be placed in the steam valve on the lid during every cooking process. Only then is it guaranteed that pressure can build up in the lid.
The steam vent must be placed in the ,0 COOK' starting position. In order to release the pressure after the
end of the cooking process, the steam vent must carefully be turned left and right to the ,STEAM OUT' position. Carefully make sure that steam and water droplets can escape quickly. Always keep your face and other body parts away from the steam vent in order to avoid scalding.
Valve cover (clogging protection)
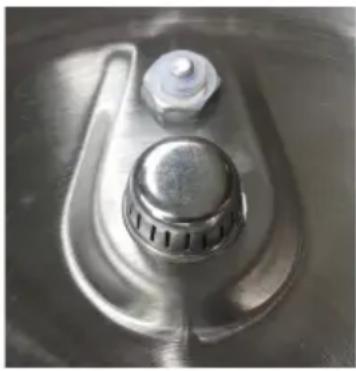
natural_image
Close-up of a metallic mechanical knob with a flanged handle and a small top component (no text or symbols visible)The valve cover is under the inner lid.
First, remove the inner lid from the outer lid.
Press the cover on the side in order to remove it and then bring it upwards. In order to put it back on, press it from underneath.
Make sure that the valve cover is always clean and that no foreign objects are placed there.
Attach the condensation collecting vessel
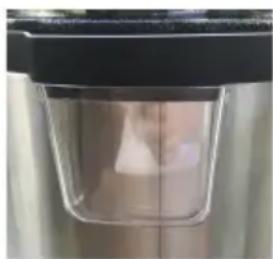
natural_image
Close-up of a glass container with a small white object inside, mounted on a metal shelf (no visible text or symbols)Take the collecting vessel for condensation out of the device. Push on the slots under the black hind side of the device. Do this in reverse when you would like to take the vessel out for cleaning.
Opening and closing the lid
Before opening the lid latch, make sure that the cooking process is finished, or press the Warm/Cancel button to finish the programme.
There are two ways to release the pressure from the bowl:
- FAST STEAM PRESSURE RELEASE:
Move the steam vent left and right in the ,STEAM OUT' position and wait for the steam to be released until the float valve goes down.
Caution: During fast steam pressure release, keep your face, hands and other body parts away from the steam vent. The steam is very hot and can cause scalding. Never pull the steam vent out whilst the steam is still being released.
Please note that the fast steam pressure release is not suitable for dishes that are cooked in a lot of liquid or contain a lot of starch (such as soup, porridge or broth), as the liquid can spray out with the steam. Leave the food to evaporate slowly.
- SLOW STEAM PRESSURE RELEASE:
Leave the device in Keeping Warm Mode until the float valve goes under. This takes 10 to 15 minutes. This process will become quicker if a wet dishcloth is placed over the lid.
-OPENING THE LID:
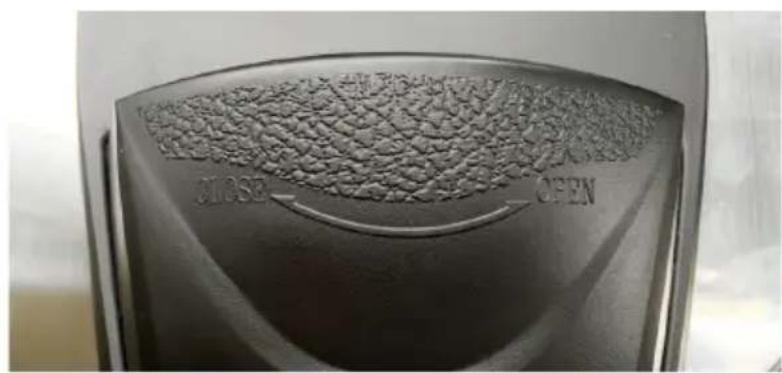
Hold the lid firmly by the handle and turn the lid about 30 degrees anti-clockwise to the left, until the mark on the lid and the mark on the casing are no linger aligned. Then pick up the lid in order to open it. In order to prevent a vacuum building up under the lid and causing suction, turn the steam vent in the 'STEAM OUT' direction. Taking off the lid will release air back into the bowl.
Caution: Only open the lid when there is no more pressure in the bowl and when the steam vent is in the 'STEAM OUT' position.
Whilst the float valve is elevated, the lid is locked for safety reasons and cannot be opened. Check that the steam vent and the air vent on the valve cover are not blocked. Make sure that the sealing ring is securely located inside the inner lid, that the valve cover is correctly fitted and the float valve is able to move up and down easily. If the float valve is stuck in food waste or other foreign objects, it can be removed by pressing a pen or other sharp object in there.
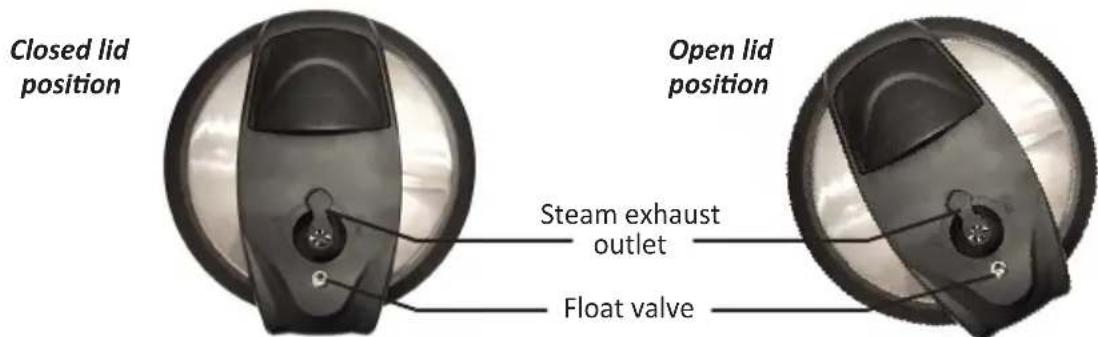
text_image
Closed lid position Open lid position Steam exhaust outlet Float valveInserting the inner bowl into the device
No foreign object should be located on the outside of the inner bowl or the hotplate. Dry wipe it before use. Put the inner bowl into the device and turn it back and forth. This will ensure that the inner bowl is securely placed and is in good contact with the hotplate.
Filling the device with food and liquids
Food and liquids should never exceed the maximum fullness point marked on the inner bowl. The device should never be filled more than two thirds. When preparing food that will expand in volume such as rice, beans or porridge, the device should never be filled over halfway point. If the maximum capacity is exceeded, the vent can become blocked and too much pressure can build up. The food being prepared can also escape out of the side and damage the device.
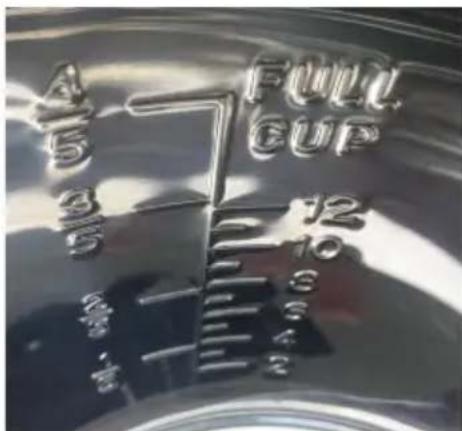
text_image
FULL CUP 12 10 6 3 4 2 1/5 3/5 4/5 1/1Removing and inserting the inner lid and rubber seal
Before each cooking process, please remove the inner lid and clean it from food waste and condensation. Also remove the rubber seal and clean it thoroughly. Ensure that the rubber seal is correctly placed on the inner lid after being cleaned. After cleaning, place the inner lid in reverse order back in the middle of the lid.

natural_image
Sequence of mechanical components showing a circular component being processed into a ring (no text or symbols visible)- CLOSING THE LID
Hold the lid by its handle and put it on the cooker. Turn the lid 30 degrees clockwise to the right, or until the mark on the lid and on the casing are aligned with each other. The lid will then be closed.
text_image
CLOSE OPEN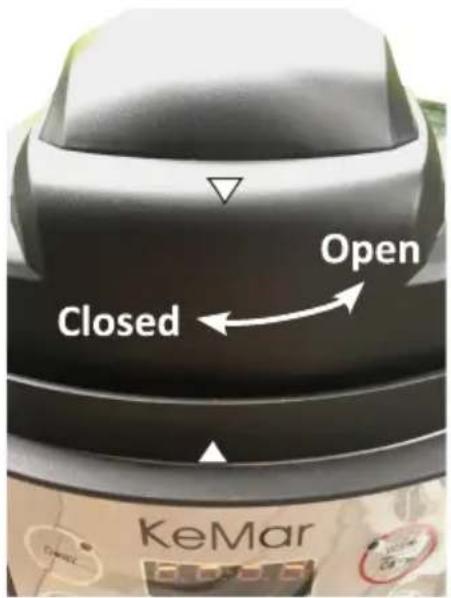
text_image
Open Closed KeMar- TURNING THE STEAM VENT IN THE RIGHT DIRECTION
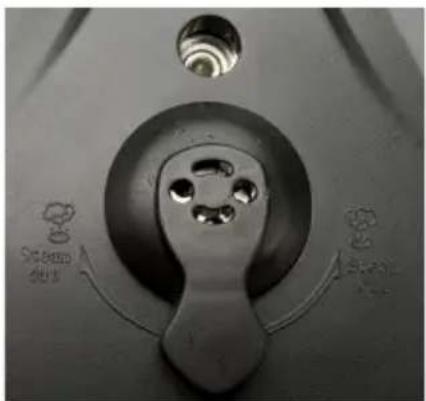
The steam vent should be loosely placed in the steam outlet opening. This is normal and should be in this position. The regulator works on the principle of gravity and should only be placed on the steam outlet opening. It can be removed for cleaning. In order to do this, pull the steam vent up. To lock it, move it to the ,0 COOK' position.
To release the steam, move the steam vent left or right to the ,STEAM OUT' position.
natural_image
Close-up of a mechanical knob with a circular dial and textured grip, no visible text or symbols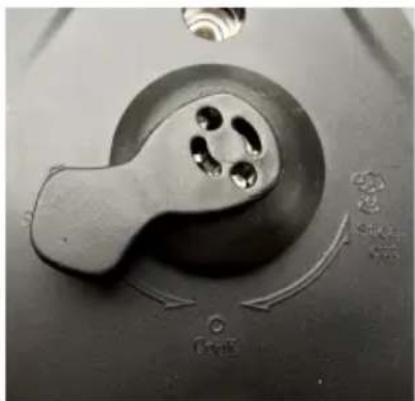
natural_image
Close-up of a mechanical switch handle with three circular holes and engraved markings (no readable text or symbols)Locked Steam out
Before assembling the cake tin
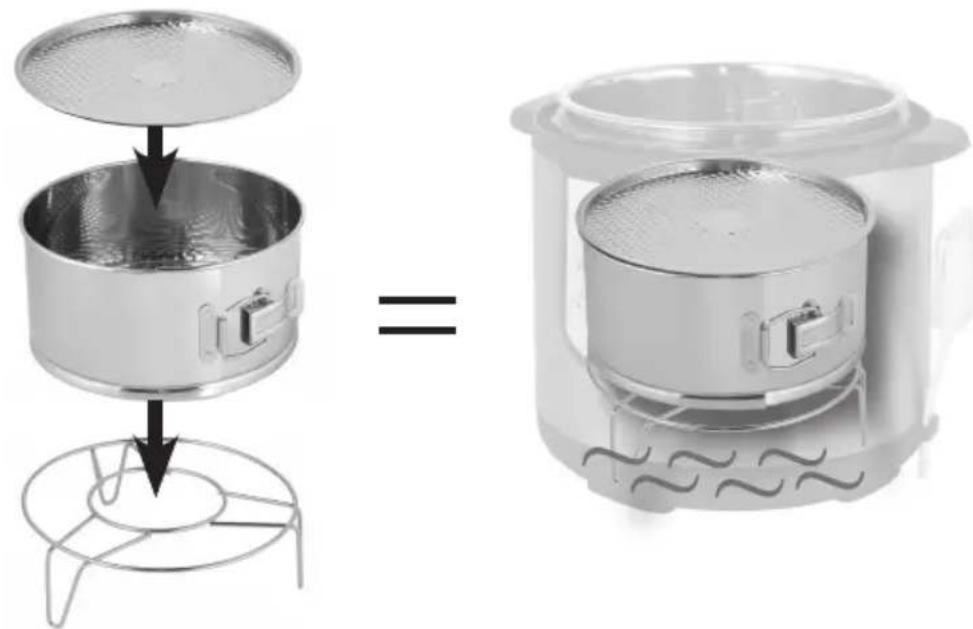
The cake tin included can be opened and closed by the side locks. Put the underpart on an even surface. Position the cake ring on the lower part and close it with the side locks. Then put the lid on the baking tin. When using the baking tin, put it on the steamer grid.
natural_image
Two-step cooking process showing a metal steamer being added to a gas stove, with no text or symbols present.Steamer inlet rack
natural_image
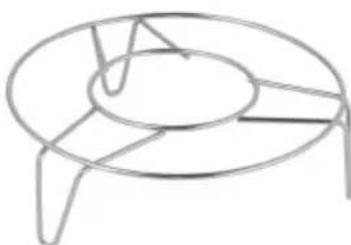
Simple line drawing of a circular object with three legs and a central hole, resembling a stand or tray (no text or symbols)The included stainless steel steamer inlet rack should only be used for larger dishes to be steamed, as smaller ones could fall through the grid. Other stainless steel steam inserts not included in the packaging can be used and placed on the steamer grid. When using a cake tin, place it on the steamer grid.
Steam insert (optional)
natural_image
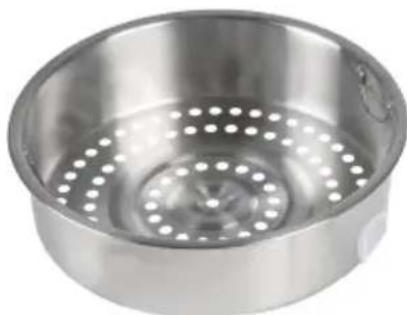
Metal steamer with circular perforations and a small handle (no text or symbols visible)The stainless steel steam insert is not included in the delivery and can be purchased in our online shop www.kemar.de.
5. Short introduction
Perfect preparation in just a few steps
FOOD PREPARATION
Always follow the food preparation instructions. Always ensure that the food being prepared is fresh and high in quality. Ensure that meat, fish, seafood and poultry is stored under 5°C before being consumed. Only prepare food on clean surfaces.
Wash your hands thoroughly before cooking.
Prepare the food to the correct amount and temperature.
Cooking with the pressure cooker
The cooker includes over 15 different operating modes which can be used alone, or in combination with each other.
Through manual time and pressure settings, you have even more choice of cooking options. When the cooker is turned on, a beep will sound and the LED light will turn on.
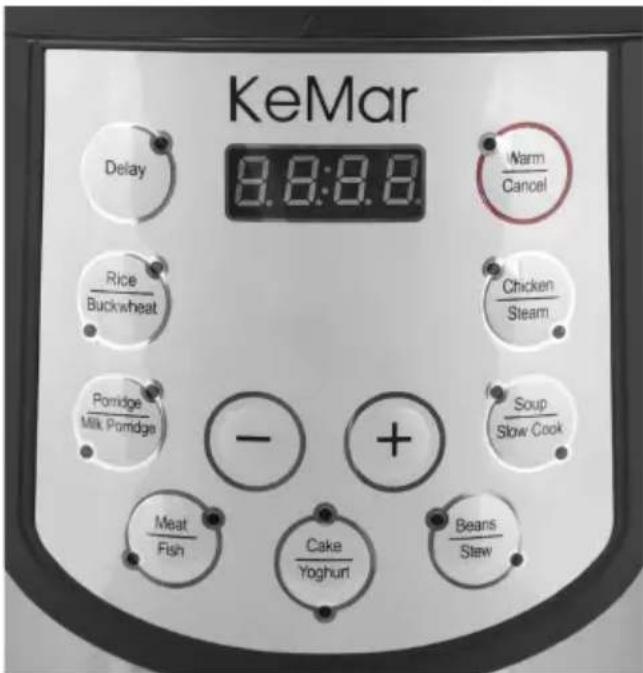
The programme buttons have a dual programming function.
When you turn on a button the LED light above the chosen programme will turn red.
If you press the same button again, the light beneath it will turn red.
When you turn on one of the buttons below, the display will blink (for around 5 seconds) and to the left of the display the LED light will turn on until the required pressure has been built up. Then the timer will display the preset time period for the programme.
At the end a signal will beep and the pressure cooker will automatically switch to Keeping Warm Mode.
To turn the device off completely, press ,Cancel'.
Press on it until you hear a beep three times.
On the display ,bb' will show. Pull the power cord out of the socket.
Description of Programmes:
On the display there are many preset programmes. Their cooking times can be changed manually with the +/- button.
text_image
KeMar 3.8:8.8 Delay Rice Buckwheat Pomidge Milk Pomidge Meat Fish Cake Yoghurt Narm Cancel Chicken Steam Soup Slow Cook Beans StewWarm – up to 24 hours:
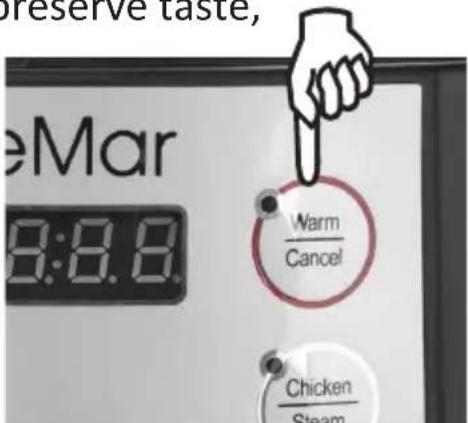
When the cooker is in Standby mode, turn it on with the 'Warm' button. ,bb' will appear on the display. If you would like to cancel Keeping Warm mode, press the 'Cancel' button. In order to preserve taste,
food should not be kept warm for more than 6 hours.
Cancel:
With the Cancel button, you can cancel the currently running programme at any time and put the cooker in Standby mode. ----' will show on the display.
text_image
eMar 8:8.8. Warm Cancel Chicken SteamDelay – from 30 minutes to 24 hours
Choose a menu, such as Rice. While the display is blinking, press ,Delay' (Timer). Then you can either delay the timer in 30 minute steps, or press -/+ to change it manually. After around 5 seconds the display will stop blinking. The set time will display on the screen.
The pressure cooker will begin cooking after the time delay has passed.
Rice – 12 minutes
For the rice menu, the time is preset to 12 minutes. It is suitable for white rice and parboiled rice. You can change the time with the +/- button. The time can be increased between 5 minutes and 1 hour maximum. The minimum amount is one cup of rice and 2 cups of water.
Buckwheat – 15 minutes
On the Buckwheat programme, the time is preset to 15 minutes. It is also suitable for brown rice, wild rice, grains, mung beans, quinoa, amaranth as well as buckwheat.
The time can be increased between 5 minutes and 1 hour maximum.
Milk Porridge – 15 minutes
With the milk porridge programme, you can cook various pulses with milk. This is also suitable for baby food. You can cook milk with grains, rice, semolina, spelt, cereals or oatmeal. The preset time is 15 minutes. You can change the time with the +/- button. The time can be increased between 5 minutes and 1 hour maximum.
Meat – 15 minutes
On the meat programme, you can prepare different kinds of meat.
The preset time is 15 minutes. It is suitable for beef, lamb and pork. You can change the time with the +/- button. The time can be increased between 5 minutes and 1 hour maximum.
Fish - 5 minutes
The fish programme is suitable for different kinds of fish.
You can change the time with the +/- button. The time can be increased between 5 minutes and 30 minutes maximum.
Cake - 45 minutes
With the cake menu, different types of cakes can be baked with the provided cake tin. The preset time is 45 minutes. You can change the time with the +/- button. The time can be increased between 45 minutes and 2 hours maximum. Only use the provided cake tin and stainless steel inlet rack in the baking process. Ensure that the cake rises and fill up to half of the cake tin with dough.
Yoghurt - 8 hours
With the yoghurt programme, you can make your own yoghurt.
The preset time is 8 hours. You can change the time with the +/- button.
The time can be increased between 30 minutes and 9 1/2 hours maximum.
Beans - 40 minutes
With the Beans programme, beans or chilli can be prepared.
The preset time is 40 minutes. You can change the time with the +/- button.
The time can be increased between 5 minutes and 1 hour maximum.
Stew - 30 minutes
Stews or sauces can be prepared with the Stew programme.
The preset time is 30 minutes. You can change the time with the +/- button.
The time can be increased between 5 minutes and 2 hours maximum.
Soup - 25 minutes
With the Soup programme, different soups and broths can be prepared.
The preset time is 25 minutes. You can change the time with the +/- button.
The time can be increased between 30 minutes and 9 1/2 hours maximum.
Stew - 30 minutes
Stews or sauces can be prepared with the Stew programme.
The preset time is 30 minutes. You can change the time with the +/- button.
The time can be increased between 5 minutes and 2 hours maximum.
Soup - 25 minutes
With the Soup programme, different soups and broths can be prepared. The preset time is 25 minutes. You can change the time with the +/- button. The time can be increased between 30 minutes and 9 1/2 hours maximum.
Slow Cook – 2 hours
With the slow cook programme, you can prepare gently meals.
The preset time is 2 hours. You can change the time with the +/- button. The time can be increased between 30 minutes and 9 1/2 hours maximum.
Chicken - 15 minutes
The Chicken programme is suitable for different kinds of poultry. The preset time is 15 minutes. You can change the time with the +/- button. The time can be increased between 5 minutes and 30 minutes maximum.
Steam - 10 minutes
With the Steam programme you can steam food with the provided steamer inlet rack. The preset time is 10 minutes. Y
ou can change the time with the +/- button. The time can be increased between 1 minute and 1 hour maximum.
Only use the provided steam grid for large food items, as smaller items can fall through the grid. A stainless steel insert tray (not included, can be purchased separately) can also be used. Use the grid in the inner bowl and fill it with 2 cups of water.
Put the optional steam insert tray on the grid.
ADVICE: All cooking programmes require the use of liquids in some form (water, broth etc.). Never fill the inner bowl above the FULL sign. Use the steam vent to release the steam pressure quickly.
Table of manual time settings:
| Programme Time Minimum Maximum | |||
| Warm - - 24 hours | |||
| Delay 30 minutes 30 minutes 24 hours | |||
| Rice 12 minutes 5 minutes 1 hour | |||
| Buckwheat 15 minutes 5 minutes 1 hour | |||
| Porridge | 15 minutes 5 minutes 1 hour | ||
| Milk Porridge 15 minutes 5 minutes 1 hour | |||
| Meat | 15 minutes 5 minutes 1 hour | ||
| Fish | 5 minutes | 5 minutes | 30 minutes |
| Cake | 45 minutes 45 minutes | 2 hours | |
| Yoghurt | 8 hours | 30 minutes | 9.5 hours |
| Beans | 40 minutes 5 minutes 1 hour | ||
| Stew | 30 minutes 5 minutes | 2 hours | |
| Soup 25 minutes 5 minutes 1 hour | |||
| Slow Cook | 2 hours 30 minutes | 9.5 hours | |
| Chicken | 15 minutes 5 minutes | 30 minutes | |
| Steam | 10 minutes 1 minute | 1 hour | |
Steaming
The following instructions are for these programmes:
- Rice / Buckwheat
- Porridge/Milk Porridge
- Meat/Fish
- Beans/Stew
- Soup/Slow Cook
- Chicken/Steam
Follow the instructions in chapter 3, Before the first use'.
Plug in the power cable. The LED-display will turn red. The cooker will be in standby-mode. Choose a cooking programme, such as Rice.
After pressing an option button, the indicator light will turn on.
You have 5 seconds after pressing the button to press other option buttons and to change the cooking time. You can change the cooking time with the +/- button. Press and hold the + or - button to switch between the options more quickly. The expected time is shown on the display.
The preset cooking times are for standard dishes.
Determine your cooking times for different foods, quantities and consistencies according to your recipes. The cooking will automatically begin after 5 seconds, after a button is pressed. On the LED display, the preset time will be shown.
The device will then preheat. Advice: Depending on food, quantity and temperature (whether frozen or not), preheating can last up to 17 minutes.
It is normal that, due to the increasing pressure in the device, some steam will be released from the steam outlet until the outlet rises up.
As soon as the cooker has built up enough steam, the cooking time shown on the display will end. The remaining time will be displayed in minutes. When it has built up pressure, the lid should not at any point release steam. However, it is possible that some light vapour or small splashes will be released from the steam regulator. This is normal.
During the cooking time, the cooker will make quiet clicking noises.
This is normal and is caused by the hotplate turning on and off during usage.
You can cancel the current cooking programme at any point and put it in Standby mode. Press the Warm/Cancel button.
At the end of the pressure cooking programme an acoustic signal will be heard and the cooker will automatically switch to Keeping Warm mode.
After remaining in this mode for 24 hours, the pressure cooker will automatically switch to Standby mode.
It is not recommended to keep cooked food warm for more than 6 hours, as this can ruin the taste and consistency of the food.
To take out the food, press the Warm/Cancel button and open the lid, as described in the ,opening the lid' section.
When opening the lid, it is possible that the inner bowl seems to stick to the lid due to suction. This is due to air contracting whilst cooking.
Turn the air regulator to the Steam Out position, so that air flows in the bowl and the vacuum is released.
Cake
Fill up the water to the minimum level (2) in the inner bowl.
Put the cake tin on the included stainless steal grid in the inner bowl.
Then close the lid of the pressure cooker as described before.
Please note that the cake expands, so fill up to half of the cake tin with dough. Use fat and flour so that the dough does not stick in the tin.
The baking insert is not completely sealed, so that excess heat can be released during the cooking process.
Choose the ,Cake' menu. The standard time is set to 45 minutes, but can be extended to up to 2 hours with the +/- button.
When the preset time is over, do not let the pressure cooker evaporate but leave it to cool slowly.
Carefully open the lid and take out the cake tin with an oven cloth or oven gloves, as the tin becomes very hot.
Yoghurt
To prepare yoghurt, we recommend using UHT milk at a temperature of 38^ C. Fresh, soya, raw, certified or lactose free milk should be heated to near boiling point and then cooled to 38^ C. According to manu-facturer's instructions, carefully stir a packet of yoghurt powder or cultures into the milk. With lactose free milk, use 1 tbsp of cane sugar.
Put this mixture in a glass holder or yoghurt container (not included in packaging). Milk and cultures can, however, also go directly into the inner bowl.
Put a cup of water into the inner bowl and put the yoghurt mixture holder in the inner bowl. Close the lid and turn on the yoghurt programme.
Change the time with the + and - buttons (according to the instructions given for the cultures).
The completed yoghurt should be left to mature in the fridge.
A few spoonfuls of the ready yoghurt can be preserved and kept for making new yoghurt later on.
6. Cleaning and maintenance
- Keep the plug away from the mains!
- Before cleaning the device: leave to cool after use!
- Only pour out the water after it has cooled down in order to avoid scalding!
- Never put the device in water, as it can be damaged!
- The inner bowl, removable inner lid, steamer function and cake tin are dishwasher-proof!
- Dry parts thoroughly before using them again!
- Do not use scourers or aggressive liquids such as benzene or acetone to clean the device!
CLEANING THE SAFETY DEVICES:
As well as the seal, the safety devices must also be cleaned after every use.
SAFETY VENT:

To take out the safety vent, it must be pulled up, so that the spring-assisted back up pressure relief can be released.
Wash the vent with a mild washing-up liquid and warm water.
After cleaning, check that the spring-assisted back up pressure relief can move freely. Put the safety vent back on the opening.
The pressure cooker does not require much maintenance. It does include any parts which need waiting for. Please do not attempt to repair the device yourself. Contact customer service for advice from qualified professionals.
CLEANING:

Unplug the power cable from the socket after use.
Wait until the device has completely cooled down before cleaning.
The pressure cooker must be thoroughly cleaned after each use in order to avoid staining through food build-up or cooking residue.
NEVER FILL A HOT COOKER WITH COLD WATER!
Advice: To guarantee that the pressure cooker will be used safely, follow the cleaning and maintenance advice carefully.
If a small piece of food is left inside the unit, this can mean that a safety function may not work in the future.
IMPORTANT:
Always take off the steam vent and clean the opening thoroughly in order to avoid blockage or clogging.
This must be followed after every use!
The cooking bowl and lid must be cleaned after every use.
The inner lid is removable.
Clean the cooking bowl, lid and inner lid under hot flowing water.
Use a mild liquid washing up liquid and a gentle cloth or sponge to clean.
Do not use abrasives, soda or bleach. Do not use scourers.
Wipe the base unit of the pressure cooker after every use with a gentle, damp cloth or sponge to remove food leftovers. Never place the base unit in water!
Whilst cleaning the inner lid, the rubber seal must be removed and cleaned separately with a sponge or gentle cloth and warm soapy water.
Pull out the plug and let the pressure cooker cool to room temperature before cleaning.
Wash the removable bowl with warm soapy water and a gentle cloth or sponge. Wash it with clean water and dry it.
Take out the rubber seal from the underside of the inner lid.
Wash all parts with warm soapy water and with a gentle cloth or sponge.
The rubber seal must always be firmly fixed on the underside of the lid. Check it frequently in order to ensure that it is clean, flexible and not damaged. If the rubber seal is broken, do not use the device.
Wipe the outer casing with a gentle, damp cloth or sponge (glass cleaner makes it shine).
Never use aggressive chemical cleaning products, scourers or abrasives on any parts.
Check that the steam vent and the opening are in good condition and not dirty.
Check that the valve cover (blockage protection) is not blocked or dirty.
Advice: The rubber seal must be replaced every year (or whenever necessary). The rubber seal also needs to be changed if the pressure cooker is not used for a long time.
When not used, the rubber seal can harden, and this means that an air-tight seal for the cooker is not guaranteed. The rubber seal can only be replaced by another suitable one. Only use original parts to replace it.
This can be found on our website www.kemar.de.
7. Frequently Asked Questions
-
Does the pressure cooker include lead in any form? No!
-
What material is the inner bowl made from?
It is made from stainless steel, with no coating.
- Is it normal for steam to come out of the sides?
If steam comes out of the sides of the lid and/or the steam outlet comes out of the top of the lid, the lid has not correctly been placed. Check that the rubber seal for the inner lid is properly positioned and lock the lid until you hear it click. The steam outlet should always be correctly placed in the steam vent opening.
- What is the standard time?
Every cooking programme has a preset standard time that is shown when the button for the chosen mode is pressed. Before the standard time starts, the device must build up the right pressure and temperature for the chosen mode.
- How long does it take until the device builds up enough pressure to start the the countdown to the standard time?
Up to 17 minutes.
- Can the cooking time or pressure for the preset times be changed?
Yes! Follow the instructions in chapter 5.
- Can the device be left unattended while leaving the house?
Yes! After the cooking programme finishes, the device will automatically switch to Keeping Warm mode.
- Can frozen food be used without being defrosted?
Yes! However, please remember to add 10 minutes cooking time for frozen meat.
SPECIFICATIONS
| Model No. KPC-150 | |
| Voltage 220-240 V 50 Hz | |
| Power Consumption 1000W | |
| Dimension 340 mm x 310 mm x 320 mm | |
| Weight (Approx.) 4,6 kg | |
| Accessories Power cable, ladle, measuring cup, steam grid, baking tin | |
| Cord Lenght Approx. 0,95 m | |
Declaration of Conformity:
This device complies with the following European regulations:
EN 60335-2-15:2002 + A1: 2005 + A2: 2008 + A11: 2012
EN 60335-1:2012 + A11:2014 + AC:2014
EN 62233:2008
2006/95/EG (low voltage)
8. Service
This model in the KeMar range of Product is recommended for DOMESTIC USE ONLY.
Its use in a commercial capacity will render this guarantee inoperative.
To obtain service, you are advised to contact either the dealer from whom the product was purchased. Should this not be possible, please find your nearest dealer agent on internet at www.kemar.de and follow the link SERVICE & SUPPORT.
KeMar GmbH
Service Department
Rohlfsstr.5
D-81929 Munich / Germany
Telephone: +49 (89) 28857266
service@kemar.de
Your KeMar product is designed and manufactured with high quality materials and components which can be recycled and reused.
This symbol means that electrical and electronic equipment,
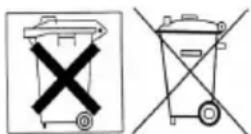
at their end-of-life, should be disposed of separately from your household waste.
Please dispose of this equipment at your local community waste collection/recycling centre.
In the European Union there are separate collection systems for used electrical and electronic products. Please help us to conserve the environment we live in!
CAUTION - This appliance is not intended for use by persons (including children) with reduced physical, sensory or mental capabilities, or lack of experience and knowledge, unless they have been given supervision or instruction concerning use of the appliance by a person responsible for their safety. Children should be supervised to ensure that they do not play with the appliance.
Seller's Guarantee - Terms of Guarantee
Dear customer,
Our products are subject to strict quality control.
If, however, a product purchased from us does not function properly, we deeply regret this and ask you to contact Customer Service given below. We will be happy to help you by phone via the service hotline mentioned above.
In addition to the legal warranty, we grant a guarantee on all multifunctional cookers/rice cookers purchased from us, according to the provisions mentioned below
This represents no limitation of your legal rights.
1) The guarantee period is one year from date of purchase. The guarantee is valid within the European Union and Switzerland.
2) During the guarantee period, devices showing defects due to material or manufacturing defaults will be repaired or replaced at our choice.
Exchanged devices or parts of devices shall become our property. Neither shall guarantee services prolong the guarantee period nor put a new guarantee into effect.
3) Guarantee claims have to be asserted immediately after becoming aware of the defect, within the guarantee period.
4) In order to assert claims under the guarantee, the following steps are necessary: Please contact Customer Service by email, fax or phone, so that we can email you a franked shipping label in a pdf file. Use this shipping label to send the faulty device, free of postage, to the given service address, enclosing the guarantee card below as well as your original proof of purchase. If the defect is covered by our guarantee services, you will receive back a repaired or a new device. The return shipment costs will be paid by us.
5) Claims under the guarantee are excluded in cases of damage due to:
- Abusive or incorrect use
- Environmental exposure (humidity, heat, overvoltage, dust, etc.)
- Failure to follow the safety precautions applicable to the device
- Failure to follow the instruction manual
- Use of force (e. g. strike, kick, drop)
- Interference by a service address not authorized by us
- Arbitrary attempts at repair
- Shipment in packaging which is not transport-proof
6) We also offer you to repair defects or damages to the device, which are not (or no longer) covered by the guarantee, against reimbursement of costs.
Please contact Customer Support for an individual offer.
In this case, shipping costs are at your charge.
KeMar GmbH
Rohlfsstr. 5
81929 München
Germany
In the case of a guarantee claim, please contact Customer Service mentioned here. Detach this card, complete it clearly and legibly and send it back, together with the faulty device and the original proof of purchase, to the following service address:
KeMar GmbH
Rohlfsstr. 5
81929 München
Germany
Tel.: +49 (0) 89 28857266
Fax: +49 (0) 89 28857265
Email: service@kemar.de
Device/ Item Name:
Date of Purchase: ____ (Proof of Purchase included)
Description of the defect:
Name:
Street: Postal Code/ Place
Phone: ____ Fax: ____
Date: ____ Signature: ____
KeMar GmbH accepts no liability for incidental or consequential damages.
Technical data are subject to change without notice.
KeMar www.kemar.de