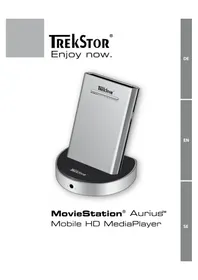
MovieStation Aurius - Media player TrekStor - Free user manual and instructions
Find the device manual for free MovieStation Aurius TrekStor in PDF.


| Product Type | Mobile HD MediaPlayer |
| Model | MovieStation Aurius |
| Dimensions (MovieStation) | 87 mm x 132 mm x 23 mm |
| Dimensions (DockingStation) | 114 mm x 96 mm x 22 mm |
| Weight (incl. DockingStation) | ca. 0.5 kg |
| Power Supply Input | 100 V - 240 V AC, 0.4 A, 50/60 Hz |
| Power Supply Output | 5 V DC, 2 A |
| Supported Video Containers | .AVI, .MKV*, .MPEG, .MP4, .MJPEG, .VOB, .IFO, .ISO (DVD) |
| Supported Video Codecs | MPEG-1, MPEG-2 up to MP@HL, MPEG-4.2 SP/ASP (e.g. Xvid up to 1080p) |
| Subtitle Formats | .SRT, .SUB, .SSA, .SMI, .SUB + .IDX |
| Picture File Formats | .JPEG, .BMP |
| Audio File Formats | .MP3, .WMA, .OGG, .WAV, .MP4, MultiChannel Surround (Bitstream Output) |
| TV System | PAL, NTSC, HD (max. 1080i) |
| Upscaling | To HD (720p/1080i) |
| Screen Format | 4:3, 16:9 |
| Supported File Systems | FAT32, NTFS |
| Connections (DockingStation) | HDMI, Composite video, Stereo cinch audio, S/PDIF coaxial audio |
| Connections (MovieStation) | USB 2.0 host, Composite video, Stereo cinch audio, USB 2.0 slave |
| System Requirements | Windows 2000/XP/Vista/7, Mac OS X 10.3+, Linux Kernel 2.6+ |
| Cleaning | Use soft dry cloth; no solvents or chemicals |
| Spare Parts / Repairability | No user-serviceable parts; contact support for issues |
| Safety | Avoid moisture, extreme temperatures, and direct sunlight; ensure ventilation |
| General Information | Includes docking station, remote control, AV cables, power supply, USB cable, SCART adapter, operating instructions |
Frequently Asked Questions - MovieStation Aurius TrekStor
User questions about MovieStation Aurius TrekStor
0 question about this device. Answer the ones you know or ask your own.
Ask a new question about this device
Download the instructions for your Media player in PDF format for free! Find your manual MovieStation Aurius - TrekStor and take your electronic device back in hand. On this page are published all the documents necessary for the use of your device. MovieStation Aurius by TrekStor.
USER MANUAL MovieStation Aurius TrekStor
Included in the delivery 36
System requirements 37
1) Controls and connections 37
1.1) Controls on the front and side of the TrekStor MovieStation 37
1.2) Controls on the back of the TrekStor MovieStation 38
1.3) Connections and controls on the DockingStation 38
1.4) The remote control of the TrekStor MovieStation 39
2) Connecting the TrekStor MovieStation to the computer 40
3) Data exchange with the TrekStor MovieStation 41
4) Logging off and disconnecting the TrekStor MovieStation from the computer ... 41
5) Connecting the TrekStor MovieStation to the home entertainment system ... 42
5.1) Connecting the MovieStation to your television with the DockingStation ..... 43
5.2) Connecting the MovieStation to your television without the DockingStation ..... 45
6) Using external data storage devices on the TrekStor MovieStation ..... 45
7) Using the TrekStor MovieStation 46
7.1) General Operation 46
7.2) Browser 48
If you have problems with this product, you can quickly get assistance. Only in extremely rare cases will you need to return this product to your dealer. You can find answers to the most frequently asked questions at our website, www.trekstor.de, under "SERVICE" → "SUPPORT". You can of course also contact our award-winning support team by filling out the support form on our website, or by e-mail or telephone (see the back of these instructions). You will be surprised at how quickly we can help you.
Thank you for buying the TrekStor MovieStation. We are confident that this product will be the source of much enjoyment. Please read the following chapters carefully so that you can become acquainted with the advantages of this product and its use.
The MovieStation is a modern media center right in your own living room! Backup your data with dependable TrekStor® hard disk technology and conveniently enjoy movies, images and music directly on your TV. Whether in the included docking station with HDMI port on the television at home or in ultra-portable mode when on the go - the mobile High-Performance Multimedia-Center always shows its best side.
You can find a list of the file formats supported by the MovieStation and other technical data at the end of this manual. Current product information and other technical data can be found at the TrekStor website (www.trekstor.de).
The MovieStation supports a multitude of different video and audio formats. Due to the very large number of different video formats, TrekStor cannot guarantee the compatibility of the MovieStation with every available video format.
If you encounter problems while playing your video files, please check the utilized audio and video formats. You may, for example, use the free software Medialinfo (http://mediainfo.sourceforge.net/).
If you have difficulties with this product or its operation, please read the section "FAQ". There you will find answers to the most frequently asked questions.
Since we are continuously improving the MovieStation firmware for you, we recommend that you check our website www.trekstor.de on a regular basis for new updates.
Included in the delivery
TrekStor MovieStation® Aurius™ – Mobile HD MediaPlayer•
Power supply (Input: 100 V - 240 V AC, 0.4 A, 50/60 Hz; Output: 5 V DC, 2 A; •
Model number: KSAS0100500200 serie)
AV adapter cable (2.5 jack on 3 x cinch)•
Adapter cable for S/PDIF coaxial (2.5 mm jack on 1 x cinch)•
SCART adapter•
USB cable (USB-A (male) to mini USB (male))•
USB host adapter cable (USB-A (female) to mini USB (male))•
Remote control•
• 1 button cell (type: CR2025)
- Operating instructions
CD
System requirements
Computer:
Windows® 2000/XP/Vista™/7, Mac® OS X from 10.3, Linux® from Kernel 2.6•
Television/HiFi system:
Operation in the DockingStation:
Cinch input or SCART input (in case the SCART adapter included in delivery is used) • for audio/video + optional coaxial digital audio input (S/PDIF)
or
HDMI input for audio/video + optional coaxial digital audio input (S/PDIF)
Operation without the DockingStation:
Cinch input or SCART input (in case the SCART adapter included in delivery is used) • for audio/video
1) Controls and connections
1.1) Controls on the front and side of the TrekStor MovieStation

A) Status display
When the status displays of the MovieStation light up blue, the MovieStation is ready for operation.
If the status displays of the MovieStation light up red, the MovieStation is in standby mode.
B) Infrared receiver
C) ⏻ button: Switches the device on or to standby mode.
1.2) Controls on the back of the TrekStor MovieStation

A) USB port: for connection to the computer
USB host port using the USB host adapter cable: used for connecting USB data storage devices (e.g. USB stick, USB hard disk).
B) Analog audio/video output (2.5 mm jack socket)
C) DockingStation port
D) "DC IN" port: connection for the power supply
1.3) Connections and controls on the DockingStation


A) Status display
When the status display of the DockingStation lights up blue, the MovieStation is ready for operation.
If the status display of the DockingStation lights up red, the MovieStation is in standby mode.
B) Infrared receiver
C) Connection for the MovieStation
D) On/Off switch (OFF / ON) switch)
E) "DC IN" port: connection for the power supply
F) HDMI TM output
G) Analog audio/video output (2.5 mm jack socket)
H) Digital coaxial audio output (S/PDIF) (2.5 mm jack socket)
1.4) The remote control of the TrekStor MovieStation

The remote control comes with a pre-installed battery. In order to prevent the battery discharging, there is a battery protection foil between the battery and the a contact inside the remote control. Please remove this protection foil before you use the remote control.

A) button: Switches the device on or off. "B) AUDIO" button: Changes the audio track during movies. "C) SUBTITLE" button: Used to select the subtitles of films. "D) ZOOM" button: Enlarges the picture in the modes "PICTURE" and "VIDEO".
E) ☒ button: Turns the mute function on and off. "F) REPEAT" button: Switches between the repeat settings for media files if one of the media filters "MUSIC", "VIDEO", or "PICTURE" is selected. "G) SELECT" button: Selects a file for copying or for the playback list. "H) CONFIRM" button: Adds the selected tracks to the playback list. "I) MEDIA TYPE" button: Switches between the media filters "ALL", "PICTURE", "MUSIC" and "VIDEO".
J) ☑ button: Stops the playback of media files and returns to folder navigation, or switches to the next-highest folder for active folder navigation.
K) ▲ button: Switches to the main menu. L) Navigation keys: The buttons ▲ ◀ ▼ and ▶ are used for navigation and control various functions depending on the selected mode and the current media type being played back. The OK button confirms a selection and starts the playback of a media file.
M) ◀ button / ▶ button: Rewinds or fast-forwards a music or video title.
N) ▶ button: Starts or pauses the playback of a media file.
O) + button / - button: Increases or decreases the volume.
P) ☐ button: Ends the playback of a media file.
Q) button / button: Control various functions depending on the current media type being played back.
"R) INFO" button: You can use this button to display information on the movie or picture file currently being played.
"S) COPY" button: Opens the copy mode.
"T) OPTION" button: Opens the options menu in the browser.
U) button / button: Rotates a picture clockwise or counterclockwise.
"V) GOTO" button: Starts the jump function when playing back movies.
W) button / "TIMESHIFT" button: These buttons have no function for this MovieStation.
Numeric keypad: The number keys 0 - 9 are X) used to input numbers, e.g. when entering a destination for the jump function.
"Y) SETUP" button: Opens the settings menu.
"Z) TV-OUT" button: Switches the video output signal.
2) Connecting the TrekStor MovieStation to the computer
If you have connected your MovieStation to your home entertainment system, you must disconnect it from the power supply and remove the AV adapter cable before you can connect it to your computer!
When you connect your MovieStation to a PC, it is advisable to use the USB connections at the back of the PC rather than any USB connections at the front of the PC. The connectors at the back of a PC usually provide the highest and most constant data transfer rates.
In some rare cases the detection of the MovieStation by a computer may take up to 2 minutes. If your MovieStation is not detected instantly, please do not disconnect it from the computer before 2 minutes have passed. Disconnecting it prematurely may lead to problems with the automatic loading of the driver by your operating system.

a) First connect connect the USB port of the MovieStation to a USB port on your computer.
Only use the provided USB connection cable to connect the device to a USB port on your computer.
b) Next, connect the power supply included in delivery to the "DC IN" port of the MovieStation. Then plug the power supply into a socket.
c) Once the MovieStation is provided with power, your operating system automatically recognizes the MovieStation and adds the MovieStation as a "LOCAL DISK" (or "LOCAL DRIVE") to "MY COMPUTER"/"COMPUTER" (Microsoft® Windows) or "DESKTOP" (Mac® OS X and Linux®).
Due to the huge number of different hardware configurations used in computers, it is possible that in some rare cases the aforementioned method does not succeed and the MovieStation is not detected. In this case, please try to connect the MovieStation to your computer via the following method:
1) First, connect the power supply to the MovieStation.
2) Next, within 10 seconds of connecting the power supply, connect the MovieStation to your computer with the USB cable.
3) Data exchange with the TrekStor MovieStation
After successful startup of the device, a local disk called "TREKSTOR" appears under "MY COMPUTER"/"COMPUTER" (Windows®) or on your "DESKTOP" (Mac® OS X and Linux®). You can also access the MovieStation like a normal hard disk.
Windows® Vista/XP/2000
a) Select the desired files or folders with your mouse.
b) Position the mouse pointer over the selected files or folders, and press the right mouse button. Select "Co" from the context menu that appears.
c) Under "M Y COMPUTER"/"COMPUTER," select the desired target (such as the "TREKSTOR" drive).
d) Click it with your right mouse button, and select "P AE" to start copying. After copying is over, the data will be available on the MovieStation.
Mac ® OS X from 10.3
Select the desired files with your mouse. Drag and drop the files in the "FINDER" to the drive symbol of your MovieStation.
4) Logging off and disconnecting the TrekStor MovieStation from the computer
Caution: Please follow the recommended logoff procedure to prevent damage to the device or data loss!
If you want to turn off the MovieStation after logging off, please first detach the power supply from the "DC IN" port of the MovieStation and then the USB connection cable.
Windows® Vista/XP/2000
At the bottom right on the task bar, click the left mouse button on the symbol "SAFELY REMOVE HARDWARE". In the context menu that appears, click the left mouse button on "SAFELY REMOVE MASS STORAGE DEVICE - DRIVE" to select it. This removes the MovieStation from the operating system of your computer. You can now disconnect the MovieStation from your PC.
Mac ® OS X
You need to remove the drive from the Desktop before you disconnect it. Click the relevant drive icon and drag it to the Trash icon.
5) Connecting the TrekStor MovieStation to the home entertainment system
⚠️ Place your MovieStation on an even, stable foundation. To prevent damage to the device, do not place any objects on the MovieStation.
⚠️ Make sure it is sufficiently ventilated. Leave a sufficient distance to other devices.
You can use the MovieStation in two possible ways: you can use it either in the DockingStation included in delivery or portably, connected to your home entertainment system without the DockingStation. If the MovieStation is operated with the DockingStation, the HDMI port and digital audio output are available in addition to the analog outputs for stereo audio and composite video.
a) Connect the MovieStation or DockingStation to your television and HiFi system using one of the connection variants described in the following section.
b) If you want to operate the MovieStation together with the DockingStation, insert it into the DockingStation carefully as shown in the illustration.

When carefully placing the MovieStation into the DockingStation, make sure that the MovieStation engages firmly.
c) Please switch on your television set and select the input you have connected the MovieStation to.
d) Connect the power supply included in delivery with the "DC IN" port of the MovieStation or DockingStation. Then connect the power supply to a socket.
The MovieStation switches on automatically when you connect it to the power mains.
If the OFF/ON switch of the DockingStation is at "OFF", the MovieStation remains switched off until the switch is set to "ON".
e) If you would like to switch off the MovieStation, proceed as described in these operating instructions.
Only when the status display of the MovieStation or DockingStation lights up red, the MovieStation is in standby mode and may be turned off completely using the OFF / ON switch on the back of the DockingStation or by disconnecting it from the power supply.
Note: For the MovieStation, a video output signal not supported by your television might be set. This will result in picture and color interference on your television, even though the MovieStation was correctly connected. Please change the video output signal as described in these operating instructions.
5.1) Connecting the MovieStation to your television with the DockingStation
Connection to a composite input on your television•

Use the AV cable included in delivery to connect the audio/video output ("AV OUT") of the DockingStation to the audio/video input of your television to transmit the picture and sound. To do so, first connect the audio cinch plugs (red and white cinch plug) of the AV cable included in delivery to the audio cinch inputs of your television. Next, connect the yellow cinch plug to the yellow composite video input of your television.
You can also use the SCART adapter included in delivery to connect your MovieStation to the SCART port of your television.
Connection to an HDMI input on your television•

With the HDMI port, audio and video data is transferred digitally and thus without losses. Use a high-quality HDMI cable (commercially available as a separate item) to connect the HDMI output of the DockingStation to the HDMI input of your television.
Connection of the MovieStation to a digital coaxial audio input of your HiFi • system
If your HiFi system has a digital coaxial audio input, you can use the digital audio output of the DockingStation for the sound transmission as an alternative to the above-mentioned transmission paths. For this purpose, connect the coaxial audio output of the DockingStation to the coaxial audio input of your HiFi system with the coaxial audio cable included in delivery.
i Please observe that the appropriate digital audio output and audio format must be selected in case of digital sound output via HDMI or via the coaxial audio output under "DIGITAL AUDIO OUTPUT" in the audio settings menu. This is described in the "Configuration of the TrekStor MovieStation" in these operating instructions.
5.2) Connecting the MovieStation to your television without the DockingStation
Connection to a composite input on your television•

Use the AV cable included in delivery to connect the audio/video output ("AV OUT") of the MovieStation to the audio/video input of your television to transmit the picture and sound. To do so, first connect the audio cinch plugs (red and white cinch plug) of the AV cable included in delivery to the audio cinch inputs of your television. Next, connect the yellow cinch plug to the yellow composite video input of your television.
You can also use the SCART adapter included in delivery to connect your MovieStation to the SCART port of your television.
6) Using external data storage devices on the TrekStor MovieStation
The MovieStation has a USB port that acts as a USB host port when the USB host adapter cable included in delivery is used. When the MovieStation is connected to a television without the DockingStation, you can use additional external data storage devices via your MovieStation. Using your MovieStation, you can thus access USB data storage devices like USB sticks, USB hard disks, MP3 players, card readers with USB ports, or digital cameras insofar as they are recognized as a USB data storage device. You can then playback files located on the external data storage device on your MovieStation, copy them to the MovieStation, or copy data from the MovieStation to the external data storage device.
External data storage devices can only be used on the MovieStation if the MovieStation is not connected to the DockingStation.
USB data storage devices and/or the partitions located on it must be formatted with either the FAT, FAT32 or NTFS file systems, so that you can use the USB data storage device on the MovieStation.
Always put the MovieStation in standby mode by pressing the ⏻ button (wait until the status display lights up red) before you remove the MovieStation from the DockingStation.

a) Remove the MovieStation from the DockingStation if you use it in DockingStation mode.
b) Connect the USB host adapter cable included in delivery to the USB port of the MovieStation.
c) Connect the MovieStation to your home entertainment system as described in the "Connecting the MovieStation to your television without the DockingStation" section.
d) To use a USB data storage device on your MovieStation, connect the USB port of the USB data storage device to the end of the USB host adapter cable.
Note: External data storage devices can be disconnected from the MovieStation without a previous logout. To prevent data loss or damage, wait to disconnect the USB data storage device until no more data is being transferred (e.g. through copying or playback).
When connecting an external hard disk to your MovieStation, an additional power supply is required. If you would like to operate an external 2.5 inch hard disk without its own power supply on the MovieStation, use a USB-Y connecting cable and connect it to an additional power source if required (e.g. a USB charger).
7) Using the TrekStor MovieStation
7.1) General Operation
Switching the MovieStation on/off
The loading or saving of the current system settings takes about 15 seconds while the MovieStation is being switched on and off. Do not disconnect the MovieStation from the power supply during this procedure.
When the status display of the MovieStation or DockingStation lights up blue, the MovieStation is ready for operation. During the saving and loading of the system settings, the status display of the MovieStation also lights up blue.
If the status display of the MovieStation or DockingStation lights up red, the MovieStation is in standby mode and may be turned off completely using the OFF/ON switch on the back of the DockingStation or by disconnecting it from the power supply.
Switch on the MovieStation by pressing the ⏻ button on the MovieStation or the remote control.
If you are running the MovieStation together with the DockingStation, set the OFF / ON switch on the back of the DockingStation to "ON" to turn on the MovieStation.
To put the MovieStation in standby mode after use, press the ⏻ button on the MovieStation or on the remote control. If you use the MovieStation in the DockingStation, you can then turn off the MovieStation entirely by setting the OFF / ON switch on the back of the DockingStation to "OFF".
Put the MovieStation in standby mode by pressing the ⏻ button before you remove the MovieStation from the DockingStation.
i Please observe that the MovieStation generates heat during the playback of media files. This heat is dissipated out of the device through the grooved aluminum surface. After operation for a long period of time, we thus recommend that you put the MovieStation in standby mode and wait a few minutes before removing it from the DockingStation or transporting it.
Adjusting the volume
You can adjust the volume during music and movie playback, during a slide show accompanied by music, and in the settings menu. Briefly press the v+ or v- button to raise or lower the volume.
i If you hold down the v+ or v- button, the volume changes gradually.
When you press the Ⓧ button, you can turn the mute function of your MovieStation on and off.
Changing the video output signal
A different video output signal can be set up for the MovieStation, even though it was correctly connected. This can distort the picture and color on your television. To change the output signal, please proceed as follows:
a) Briefly press the "TV-OUT" button on the remote control for the MovieStation to change the video output signal. Wait a few seconds until the MovieStation and your television have implemented the change.
b) Repeat this process until the picture on your television is displayed correctly. The last selected setting is automatically saved.
Main menu
The main menu is an overview, from which you can access the different functions of your MovieStation. The main menu is displayed automatically when the MovieStation is turned on.
Press the ▲ or ▼ button to mark a menu item. To select the marked menu item, press the OK button. You can return to the main menu at any time by pressing the ▲ button.
Pressing the ⏻ button takes you back one step at a time in the menu structure until you have arrived back in the main menu.
You can open the settings menu at any time by pressing the "SETUP" button. If you press the ↕ or the "SETUP" button in the settings menu, you go back to the place you were before opening the settings menu.
You can select from among the following menu items in the main menu:
- Browser: In "B" you can access the media source from which you would like to play the media files.
• Copying: You can use this menu item for copying your media files. - Settings: You can configure the MovieStation under "SETTINGS".
Text input function
You can use this function to input the required text. Use the navigation keys (▼/▲ button or ◀/▶ button) to mark a desired character or input field and select it by pressing the OK button of your remote control. The following input fields have special functions:
"• OK" field: Confirms the entry.
• "CAPS" field: Switches between capital and small letters.
In some menus, it is necessary to enter special characters. Special characters are only displayed when capital letters are active in the text input screen.
- "<-": Deletes the last character in the input field.
• "->": Adds a space in the input field.
7.2) Browser
When selecting the "BROWSER" menu item, you can first select the media source from which you would like to play media files. Press the ▲ or ▼ button to select the desired source, and confirm the selection by briefly pressing the OK or ▶ button.
You can select from the following media sources:
• Internal HDD: Shows the memory contents of the MovieStation.
• USB device: Shows the data storage device connected to the USB port.
- Playback list: Access to the created media playback lists.
If you select a USB device that is currently not connected to the MovieStation, this media source will be shown as empty. As soon as a device is connected, the content appears in the corresponding path.
Folder navigation
If you have selected a media source in the "B", you can select a file to be played back via folder navigation. The following functions are available in folder navigation.
Handling folders•
Select a folder by pressing the ▼ or ▲ button. To switch to the selected subfolder, press the OK button. To return to a higher directory level, press the ◀ or ⏻ button. If you press the ▶ or ◀ button, you go forward or backward in the list of folders and files page by page.
Selecting and playing files•
Depending on the type of media you open with the MovieStation, various functions are at your disposal. Please read the respective paragraph in the "Media playback" chapter to obtain more information about operation in the different modes.
Press the ▼ or ▲ button to select the next or previous file. To play the selected file, press the OK button. If you press the ▶ or ◀ button, you go forward or backward in the list of folders and files page by page.
Folder and file administration•
You can rename and delete files and folders in folder navigation. Press the "OPTION" button to carry out one of the actions for the selected file or folder. To exit the context menu, press the ⏻ button.
Changing the media filter
If the "ALL" filter is selected, all of the supported movie, picture and music files in the existing folder structure are displayed in the folder navigation. This filter mode serves primarily as an overview of the available media files. The basic functions for the individual media files can be found in the "ALL" filter mode.
Your MovieStation supports a great variety of media file formats, a detailed list can be found at the end of these instructions. If you try to play a file that is in an unsupported file format, a message will be displayed.
We recommend switching to the respective filter mode for playing back movies, pictures and music in order to utilize full functionality in the various modes. For example, the various repeat settings are only available in the special filter modes.
To change the media filter, press the "MEDIA TYPE" button.
The currently selected media filter will be shown in the upper left corner of the browser.

"ALL"

"VIDEO"

"Music"

"PICTURE"
Alternating between the media filters occurs in the sequence "ALL" → "VIDEO" → "MUSIC" → "PICTURE".
By selecting a different filter, only files that correspond to the filter just selected are displayed in the folder navigation (i.e. if you select the "Mus" filter, only music files are displayed). The existing folder structure remains unchanged when a media filter is active.
Playback list
The MovieStation lets you create four playback lists. Each of the media filters has one playback list in which you can store links to the media files saved on the MovieStation. In the process, the currently active media filter is decisive; that is, when the "Mu" media filter is active, only the playback list for music will appear and you can add files only to this playback list.
The playback list contains links to the media files; that is, the MovieStation stores the memory locations of the selected media files in a list. You can thus save your favorite songs, for example, in an easy-to-use list.
You can only add media files that are saved on the MovieStation itself to a playback list. Media files located on a USB device cannot be added to a playback list.
Adding media files to a playback list•
a) Select the file you would like to add to a playback list by pressing the ▼ or ▲ button. Select the file by pressing the "SELECT" button. A checkmark appears next to the file. To remove the marking of a previously selected file, press the "SELECT" button again.
b) If you wish, select additional files for the playback list from the current folder.
c) If you have selected all files you would like to add to the playback list in the current folder, press the "CONFIRM" button.
If you would like to add files to the playback list in a certain order that differs from the order shown in the browser, select them individually using the "SELECT" and "CONFIRM" buttons.
Playing a playback list•
In the browser, select the "PLAMSI" item. The playback list for the currently selected media filter is displayed. The functions of the respective playback mode are available.
Deleting media files from a playback list•
a) In the browser, select the "P LAMST" item and switch to the playback list from which you want to remove media files using the "MEDIA TYPE" button.
b) Select the file you would like to remove from the playback list by pressing the ▼ or ▲ button. Select the file by pressing the "SELECT" button. A checkmark appears next to the file. To remove the marking of a previously selected file, press the "SELECT" button again.
c) If desired, select further files for deletion from the playback list.
d) If you have selected all files you would like to delete from the playback list, press the "CONFIRM" button.
The media files deleted from the playback list in this way are only removed from the playback list. The actual files are not influenced by this operation.
7.3) Media playback
7.3.1) Playing movies
When you start a movie file, you go to the video playback mode. Here, various functions are available to you:
Playback
Select the movie that you want to play using folder navigation. Press the OK button to start the playback. You can control the playback with the following buttons:
- OK button: Starts the playback or confirms a selection, e.g. in a DVD menu.
- button: Pauses and continues the playback.
- or button: Ends the playback and returns to folder navigation.
- button: Switch to the next section or to the next movie located in the same folder.
- button: Switch to the previous section or to the previous movie located in the same folder.
- or ◀ button: Fast-forwards or rewinds the current movie.
If you press the ▶ or ◀ button several times in succession, the fast-forwarding or rewinding speed increases.
- "INFO" button: Displays additional information on the played movie file. To hide this, press the "INFO" button again.
Activating/deactivating subtitles
Press the "SUBTITLE" button to activate or deactivate the display of subtitles, provided a sub-title is stored for the played movie file. If different subtitles are available, you can browse through them by pressing the "SUBTITLE" button repeatedly.
The following external subtitle formats are supported by the MovieStation: SRT (partially), SUB, SSA, SMI, SUB + IDX.
Changing the audio channel
Press the "AUDIO" button to switch between the existing audio channels (e.g. sound tracks for different languages) for the movie file being played.
Magnifying a part of the movie
Press the "ZOOM" button in order to enlarge the displayed picture. Several magnification stages are available. Press the navigation keys (▼/▲) button or ◀/▶ button) to move the enlarged image section. Press the "ZOOM" button again to go back to a display of the entire picture.
Repeat settings
Press the "REPEAT" button during playback to change the repeat settings. You can select between the following repeat settings:
Repeat off: All movies are played back one time according to how they are sorted.
Repeat - Title: The current movie is repeated an unlimited number of times.
Repeat - All: All movies in the current folder are repeated an unlimited number of times.
The repeat settings are only available if the "VIDEO" media filter is selected.
For DVD files you can also select the repeat setting "REPEAT - CHAPTER".
Jump to a specific playback time
Press the "GOTO" button to go to a menu from which you can jump to a specific time in the movie file. When playing a DVD file, you can switch to another chapter using this menu.
Use the ▲ or ▼ button to switch to the desired setting option and make your selection by pressing the OK button. To enter the time or chapter number, use the number keys 0 - 9 on the remote control or use the ▲ or ▼ button. Press the OK button again to confirm the entry.
7.3.2) Playing music
Select a music file using folder navigation to go to the music playback mode. You can obtain information about the currently marked song in the information display in the upper right area. If additional information on a music file is stored in the ID3 tag, it will be displayed here.
Various functions are available to you in the music playback mode:
Playback
Select the music file that you want to play using folder navigation. Press the OK button to start the playback. Operation in the music playback mode is the same as in folder navigation; playback can additionally be controlled using the following buttons:
- button: Pauses or continues the playback.
- button: Ends the playback.
To go to the next song, mark the next song in folder navigation by pressing the button and start it by pressing the OK button.
To go to the previous song, mark the previous song in folder navigation by pressing the ▲ button and start it by pressing the OK button.
- or ◀ button: Fast-forwards or rewinds the current title.
If you press the ▶ or ◀ button several times in succession, the fast-forwarding or rewinding speed increases.
Repeat settings
Press the "REPEAT" button to change the repeat settings. You can select between the following repeat settings:
Repeat off: All songs are played back one time according to how they are sorted.
Repeat - Title: The current song is repeated an unlimited number of times.
Repeat - All: All songs of the current folder are repeated an unlimited number of times.
The repeat settings are only available if the "Music" media filter is selected.
7.3.3) Viewing pictures
Select a picture file using folder navigation to go to the picture viewing mode. You can manually switch to the next picture or play a slide show.
Picture change
Press the ▶ button or ◀ button to open the next or previous picture. You can also change the picture during a slide slow by pressing these buttons.
Rotating the picture
Press the 🔒 or ⬇ button to rotate the picture 90° clockwise or counterclockwise.
Magnifying a part of the picture
Press the "ZOOM" button to enlarge the current picture. Several magnification stages are available. Press the navigation keys (▼/▲) button or ◀/▶ button) to move the enlarged image section vertically or horizontally. To simplify navigation, the currently visible area of the picture is displayed in a small overview of the picture. Press the "ZOOM" button again to go back to a display of the entire picture.
Displaying additional information
Press the "INFO" button to show additional information on the displayed picture. To hide this, press the "INFO" button again.
Slide show
Starting the slideshow•
In the settings menu of the "PICTURE" menu, please indicate a slide show interval for the menu item "SLIDE SHOW INTERVAL" if you want to start a slide slow. If the "OFF" setting is selected as the slide show interval, a slide show will not start automatically.
A slide show starts automatically when you select a picture for display by pressing the OK button. Press the ▶ button to pause or continue the slide slow. To end the slide show and return to folder navigation, press the ■ or ↗ button.
Repeat settings•
Press the "REPEAT" button to change the repeat settings. You can select between the following repeat settings:
Repeat off: All pictures are shown once.
Repeat all: All pictures in the currently selected folder are repeated an unlimited number of times.
Music playback•
During the slide show, music can be played in the background. If you would like to play music in the background, first switch to the settings menu and then select the "BACKGROUND MUSIC" item from the "PHOTO" menu. Here, you can select between the "OFF", "FOLDER", and "PLAYLIST" options. If you select the "FOLDER" option, the music located in the same folder as the pictures for the slide show will be played. In the case of the "PLAYLIST" option, the music saved in the music playback list is played. The music playback ends automatically when the slide show is finished.
8) Copy function
With the copying function of your MovieStation, you can copy files and folders from a connected data storage device to the MovieStation or from the MovieStation to the connected data storage device.
To access the copy function of your MovieStation, select the "Co" menu item in the main menu. Alternatively, you can press the "COPY" button on your remote control while you are in folder navigation or in a playback mode.
The screen is divided in two in the copying mode:
- In the left area of the screen you can select the source drive (designation "SoRE") from which you would like to copy.
- In the right area, you can select the target drive (designation "DESTINATION"), to which you want to copy the selected folder or file.
To switch back and forth between the two areas, press the ◀ or ▶ button.
i Please note that in order to be able to copy files and folders, the source and target drives must be different.
The time required for copying varies depending on the number and size of the files/folders to be copied.
In the copying mode, all files are displayed, even those whose playback is not supported by the MovieStation and which otherwise would be hidden.
a) Switch to the copying mode.
b) Select the desired media source from which you would like to copy by pressing the ▼ or ▲ button in the "SOURCE" area and confirm your selection by pressing the OK button.
After selecting the media source, the right "D ESTINATION" area will automatically be activated for selecting the target drive.
c) Next, select the desired target drive to which you would like to copy by pressing the ▼ or ▲ button in the "DESTINATION" area and confirm your selection by pressing the OK button.
After you have confirmed the target drive, you can select folders for "S 0E" and "DESTINATION" from which and to which the copying is to be carried out.
d) Use the ▼ or ▲ button to specify the folder or file that you wish to copy. Press the "SELECT" button to mark the files and folders to be copied. To cancel the marking on an already marked file or folder, press the "SELECT" button again.
To open a folder and thereby go one level deeper, press the OK button. To go back to a higher level, select "/../".
You can mark a maximum of 8 files or folders for one copying process.
e) Press the ▶ button to switch to the "DESTINATION" area. Use the ▼ or ▲ button to specify the folder into which the files are to be copied. To open a folder and thereby go one level deeper, press the OK button.
To create a new folder for the content to be copied on the target drive, select "NEW-DIRECTORY". You can assign a name for the folder using the text input function.
f) Press the ▶ button if the target folder into which the selected files or folders are to be copied is marked.
g) Confirm the inquiry at the start of the copying process with "Y ES". If you select "CANCEL", you return to the selection screen.
h) A status display will inform you of the current progress during the copy procedure. To cancel the copy procedure, press the ☐ button. Only the files and folders that have already been completely copied can be found on the target drive.
i No other action can be performed during the copying process.
When the copying process has been completed, you can start another copying process or open the "B"
9) Firmware update
The firmware is the program that is responsible for controlling your MovieStation. A firmware update is used to transfer firmware improvements to your MovieStation. In case of problems with your MovieStation, please make sure that the most up-to-date version of the firmware is installed.
i In case of a firmware update, the user settings are deleted.
For a firmware update via the USB host port, you must remove the MovieStation from the DockingStation, connect the MovieStation to your television via the composite video jack, and then select the corresponding video input of your television.
For the firmware update, please observe the update instructions included with the downloaded firmware.
a) Download the firmware (*.zip file) from the TrekStor website www.trekstor.de and unzip it in the folder of your choice.
b) Copy the unzipped software (this might consist of several files) from your computer into the main directory of a USB stick formatted with the FAT32 file system. Alternatively, the unzipped software can be copied onto another USB data storage device formatted with the FAT32 file system insofar as it is recognized by the MovieStation.
c) Properly disconnect the USB stick or USB data storage device from your computer.
d) Connect the USB host adapter cable included in delivery to the USB port of the MovieStation.
e) Connect the MovieStation to your television using the composite video jack as described in the "Connecting the MovieStation to your television without the DockingStation" section.
f) Then connect the USB port of the USB data storage device to the end of the USB host adapter cable. In the process, please observe the information found in the "Using external data storage devices on the TrekStor MovieStation" section in these instructions.
g) Switch on the MovieStation and make sure that the USB stick or USB data storage device was correctly recognized before you proceed.
h) Press the "SETUP" button or select "S ETINGS" in the main menu to access the settings menu. Under the "SYSTEM" menu, select the "SYSTEM INFO" menu item and press the OK button.
i) To start the firmware update, select "U" and press the OK button.
j) The firmware update may take some time. Please wait until the firmware update is completed and do not switch off our MovieStation while it is in progress. As soon as the firmware update is completed, the MovieStation restarts automatically.
k) Your MovieStation is now ready for operation and can also be connected to your television via HDMI when you use your MovieStation with the DockingStation.
10) Formatting the TrekStor MovieStation
Caution: During formatting, ALL data on the hard disk are deleted! Make backup copies of all data stored on the MovieStation before formatting!
This section contains information on how to format your MovieStation using the "System" settings menu. This function formats the MovieStation using the NTFS file system.
If you want to copy data to the MovieStation using Mac® computer, this data must be formatted with the FAT32 file system. In this case, do not use the method for formatting the MovieStation described in the following section. Instead, follow the detailed formatting instructions that you can download from our website.
If you want to format your MovieStation with your computer, you will find instructions for formatting your MovieStation under Windows® 2000/XP/Vista and Mac® OS X from 10.3 on our website www.trekstor.de under "Service" → "Downloads".
a) Press the "SETUP" button or select "S ETINGS" in the main menu to access the settings menu. Under the "SYSTEM" menu, select the "INT. HDD FORMAT." menu item and press the OK button.
b) To format the MovieStation, select "I NT. HDD FORMAT." and press the OK button.
c) A warning appears. If you want to proceed, select "Y E" and press the OK button.
d) To start the formatting procedure, which irretrievably deletes all data on your MovieStation, select "FORMAT" and press the OK button.
e) Your MovieStation is now being formatted. This may take some time depending on the size of the hard disk. Do not switch off your MovieStation during formatting under any circumstances!
f) After formatting has been completed successfully, a message appears. Press the OK button so that your MovieStation can be restarted. After the restart, your MovieStation is ready for use again.
11) Configuration of the TrekStor MovieStation
To open the configuration mode of the MovieStation, select the "SETTINGS" menu item in the main menu or press the "SETUP" button if you are in another mode.
You can switch between the different menus found at the top of the screen by pressing the ◀ or ▶ button. The available menus include the "PICTURE", "AUDIO", "VIDEO" and "SYSTEM" menus.
You can switch between the menu items available for the selected menu by pressing the ▼ or ▲ button. Press the OK button to select the marked menu item. To exit the submenu, press the ⏻ button. To exit the settings menu and return to the last active mode, press the "SETUP" button.
To select one of the available options for a setting, press the OK button when the respective option is marked.
Pictures
- Slide show interval: Under the menu item "SLIDE SHOW INTERVAL", you can set the display duration of a picture during a slide show.
• Transition effect: Here you can select from a number of cross-fade effects when switching between pictures. - Background music: Here you can choose if you want to play music during a slide show. You can use either the music files that are saved in the same folder as the pictures or those on the music playback list as background music.
audio
- Night mode: This menu item is used to limit the volume of the MovieStation. Select "ON" if you want to lower the volume overall, and "COMFORT" if you want to limit the volume only during loud sections.
- Digital audio output: Under the "DIGITAL AUDIO OUTPUT" menu item, you can set whether you want the digital sound output to be via the HDMI port ("HDMI") or via the optical audio output ("SPIDF") and whether this should be in 2-channel sound ("LPCM") or as a digital bitstream in RAW format ("RAW").
video
- Aspect ratio: Under this menu item, you can adjust the aspect ratio of the picture to the aspect ratio of your television. You can select between the following presentation modes: "PAN & SCAN 4:3", "LETTERBOX 4:3", "16:9".
- Brightness: This menu item is used to set the brightness.
- Contrast: This menu item is used to set the contrast.
- TV system: Under the menu item "TV SYSTEM", you can set the video output signal of the MovieStation. If you select "AUTO" at this point, the MovieStation will attempt to automatically determine the appropriate video output signal.
System
- Menu language: Under the menu item "M ENU LANGUAGE", you can select the language of the MovieStation user interface.
- Text coding: Here you can select the text coding. The "UNDE(UTF8)" setting is recommended in most instances here.
- Preview: Here you can select whether a preview of a picture, a video, and the ID3 tag of an MP3 file should be displayed in folder navigation ("ON") or not ("OFF").
- System Info: Under the "SYSTEM INFO" menu item, you can obtain information about the firmware version and you can update the firmware as described in these instructions.
- Format internal HDD: Under the menu item "FORMAT INT. HDD", you can format the hard drive inside your MovieStation, as described in these instructions, with the file system NTFS. All data stored on the MovieStation is erased when you format the hard drive.
- Load defaults: Under the menu item "LOAD DEFAULTS", you can reset the MovieStation to its factory defaults. The user settings are deleted.
12) FAQ
This chapter gives you information on how to solve some problems that may occur with your MovieStation.
My MovieStation is connected correctly to my television. I can no longer see my media files in the browser or they are only partially listed in the "Browser".
i A special media filter is active.
Only media files that correspond to the active media filter are displayed on your television. If you select e.g. the media filter "Mu", no picture files are shown in the browser. Press the "MEDIA TYPE" button on your remote control to change the media filter. If you want to see all supported media files, please choose the media filter "ALL".
i Unsupported format.
Your MovieStation supports a great variety of media file formats, a detailed list can be found at the end of these instructions. If you try to play a file that uses an unsupported file format, a message will be displayed. If you want to check the utilized audio and video format for a media file, you can use the free software MedialInfo (http://mediainfo.sourceforge.net/).
The chosen media source is not connected to the MovieStation.
If you select a media source that is not currently connected to the MovieStation, such as a USB stick, this source will be displayed as empty. As soon as a device is connected, the content appears in the respective path.
I want to perform a firmware update for my MovieStation but my television goes blank.
In some cases, the display via HDMI is not correct during a firmware update.
Please make sure that your MovieStation is also connected to your television via the composite video connection during the firmware update, not only via HDMI.
I have connected the MovieStation to my television or my HiFi system. Why is no picture showing on my television or no sound coming from my HiFi system?
This problem may have several causes. Please check the following items:
1) Please ensure that you have selected the correct AV source on your television set.
2) Please check that you have connected the correct cable for the output of the video and audio signals. Information on the correct connection of the MovieStation to your home entertainment system can be found in the "Connecting the TrekStor MovieStation to the Home Entertainment System" chapter in these operating instructions.
3) Even if you have correctly connected the MovieStation, it is possible that it may be in the incorrect video output mode. To select a different mode, press the "TV-OUT" button. Wait a few seconds until the MovieStation and your television have implemented the change. Repeat this procedure until the picture is correctly displayed on your television.
Why mustn't I disconnect the MovieStation from the mains supply without having switched if off beforehand?
The loading or saving of the current system settings takes approx. 15 seconds when the MovieStation is turned on or off. If the MoveStation is disconnected from the mains supply without having been switched off beforehand, settings and data may be lost. Please always switch off the MovieStation by pressing the ⏻ button on the device or on the remote control and wait until the status display on the MovieStation lights up red. Now it can turned off completely using the OFF/ON switch on the back of the DockingStation or by disconnecting it from the power supply.
Why is the status display still lit in blue even though I have switched it off?
The loading or saving of the current system settings takes approx. 15 seconds. The illumination of the status display changes to red only after all settings have been saved and the MovieStation has entered the standby mode. Now the MovieStation may be turned off completely using the OFF/ON switch on the back of the DockingStation or by disconnecting it from the power supply.
The language of the user interface has been changed. How do I change the language?
In order to change the selected language, enter the "SETTINGS" menu by pressing the "SETUP" button on your remote control. Select the right menu ("SYSTEM") and press the OK button on your remote control. The available languages are displayed. Please mark the desired language and confirm your choice by pressing the OK button.
While using the MovieStation, it no longer responds to my commands.
This problem may have several causes. Please check the following items:
1) The remote control comes with a pre-installed battery. In order to prevent the battery discharging, there is a battery protection foil between the battery and the a contact inside the remote control. Please remove this protection foil before you use the remote control.
2) Please aim the remote control in the direction of the MovieStation so that direct visual contact between these two devices exists and ensure that the infrared receiver of the remote control and the MovieStation are not covered.
3) Check the battery in the remote control and, if necessary, replace it with a new one.
Why can't I hear any sound on my television when I connect it via HDMI?
i An audio output format that is not supported by your television is selected.
Please go to the audio settings menu and select the menu entry "DIGITAL-AUDIO-OUT" and choose the option "HDMI LPCM" if your television set does not support real surround sound.
My MovieStation does not play any sound.
The volume is to low / Mute is active.
Please check if the volume for your MovieStation and your television or your home entertainment system are set to an adequate volume and that the sound is not switched off via the "Mute" button.
I have adjusted the settings of the MovieStation under "Settings" and would like to restore the factory defaults.
As described in the "Configuration of the TrekStor MovieStation" chapter, execute the menu item "LOAD DEFAULTS". The MovieStation will be reset to the factory defaults. The saved files are not deleted when you do this.
I have connected the MovieStation to my television via HDMI but I don't get an image.
i Some television sets don't detect the MovieStation correctly if it is switched on before the television is.
Please first switch on your television set and select the input you have connected the MovieStation to and then switch on the MovieStation.
Can I connect an external 2.5" hard drive to the USB host port of the MovieStation Aurius without using a dedicated power supply for the hard drive?
No. Please always use a dedicated power supply (e.g. the TrekStor USB-Charger e.f) when you connect an external 2.5" hard drive to the MovieStation Aurius. Please proceed as follows:
1) First, connect the USB power connector of a USB-Y-cable to the external power supply.
2) Next, connect the USB plug for data transfer to the MovieStation Aurius.
3) Now you can connect the mini-USB plug to the external hard drive.
My computer does not recognize the MovieStation when I connect it via USB.
If you connect the MovieStation to the power supply first and connect the USB cable more than 10 seconds later, then the MovieStation is in its media playback mode and cannot be recognized by a computer!
Please observe the correct sequence, as detailed in the operating instructions, when connecting your MovieStation to a computer.
Can the MovieStation Aurius play all MKV files?
No. MKV is a container format, which can be used to store video data in different video formats (encodings).
The MovieStation Aurius supports MKV files that contain video data in the followin video formats:
MPEG-1 (VCD)•
MPEG-2 up to MP@HL (SVCD, KVCD, DVD)•
MPEG-4.2 SP/ASP (e.g. Xvid up to 1080p)•
Can I connect the USB host adapter cable to my MovieStation when I use it in the DockingStation?
No. It is only possible to use the USB host adapter cable when the MovieStation is connected to the television with the AV adapter cable.
Can I also connect my MovieStation to a television via HDMI without using the DockingStation?
No. If you want to connect to a television via HDMI, you have to use the DockingStation that you got with your MovieStation.
Instructions for safety and use:

Only qualified persons may perform technical work on the product. The product may not be opened or changed. The components cannot be serviced by the user.

Never expose the device to moisture, condensation and liquids.

Protect the device from extremely high and low temperatures and temperature fluctuations. Use the device within an ambient temperature of 10° C to 40° C.

Never place the device close to a source of heat, and protect it from direct sunlight.

Make sure that the surroundings are as dust-free as possible when you use and store the device.

Never clean the surface of the device with solvents, paint thinners, cleansers or other chemical products. Instead, use a soft, dry cloth or soft brush.

Do not use USB cables longer than 3 meters.

In certain circumstances, exposing the device to an electrostatic discharge may interrupt the data transfer between the device and the computer and impair the functions of the device. If this occurs, the device should be unplugged from the USB port and then plugged in again.

The capacity indicated by your operating system can be different than the actual capacity of your external hard drive. Like most manufacturers of computer hardware, TrekStor uses the prefixes for units (e.g. 1 GB = 1.000.000.000 bytes) as prescribed by the International System of Units (SI). Unfortunately, many operating systems do not comply with this norm and display a lower capacity because they base their calculations on the assumption that 1 GB = 230 bytes = 1.073.741.824 bytes.

Batteries/rechargeable batteries contain chemical substances and must be disposed of properly. Batteries/rechargeable batteries should not be thrown away in household garbage. They can be brought to the public collection points of your community or wherever batteries/rechargeable batteries are sold.
The manufacturer retains the right to continually improve the product. These changes may be made without being directly described in these operating instructions. For this reason, the information provided in these operating instructions may not reflect the current state of the art.
The manufacturer only guarantees suitability for the product's intended purpose. In addition, the manufacturer is not responsible for damages or loss of data and subsequent consequences.
Copyright © 2009 TrekStor GmbH & Co. KG. All rights reserved. Other cited product or company names may be trademarks or brand names of the respective owner.
Current product information and other technical data can be found at the TrekStor website (www.trekstor.de).
Connectors DockingStation
| Audio output | Stereo cinch (analog), HDMITM (digital), S/PDIF coaxial (digital) |
| Video output | Composite (analog), HDMITM (digital) |
| Power | For provided power supply |
| Connectors MovieStation | |
| Audio output | Stereo cinch (analog) |
| Video output | Composite (analog) |
| Power | For provided power supply |
| USB host | Hi-Speed USB 2.0 |
| Media support | |
| Video containers | .AVI, .MKV*, .MPEG, .MP4, .MJPEG, .VOB, .IFO, .ISO (DVD) |
| Standards / Codecs | MPEG-1, MPEG-2 up to MP@HL, MPEG-4.2 SP/ASP (e.g. Xvid up to 1080p) |
| Subtitle formats | .SRT, .SUB, .SSA, .SMI, .SUB + .IDX |
| Picture file formats | .JPEG, .BMP |
| Audio file formats | .MP3, .WMA, .OGG, .WAV, .MP4, MultiChannel Surround (Bitstream Output) |
| General | |
| TV Mode | PAL, NTSC, HD (max. 1080i) |
| Upscaling | To HD (720p/1080i) |
| Screen format | 4:3, 16:9 |
| Supported file system | FAT32, NTFS |
| Dimensions | MovieStation: 87 mm x 132 mm x 23 mmDockingStation: 114 mm x 96 mm x 22 mm |
| Weight | ca. 0.5 kg (incl. DockingStation) |
| Power | Power supply (100 V - 240 V AC, 0.4 A, 50/60 Hz) |
| System requirements | Windows® 2000/XP/VistaTM/7 , Mac® OS X from version 10.3 , Linux® from Kernel 2.6 |
* No support of MPEG-4.10 (H.264/AVC)
HDMI, the HDMI Logo and High-Definition Multimedia Interface are trademarks or registered trademarks of HDMI Licensing LLC.
Instructions for removing the batteries for safe disposal

Batteries/rechargeable batteries contain chemical substances and must be disposed of properly. Batteries/rechargeable batteries should not be thrown away in household garbage. They can be brought to the public collection points of your community or wherever batteries/rechargeable batteries are sold.

EC DECLARATION OF CONFOR
As manufacturer and importer respectively:
D-64653 Lorsch, Germany
herewith declares that the products
Product: MovieStation Aurius – Mobile HD MediaPlayer
Type: Multimedia hard disk drive
comply with the following directive(s):
• 2004/108/EC EMC Directive: Electromagnetic Compatibility
• 2006/95/EC Low Voltage Directive
The following norms were consulted to assess conformity:
- EN 55013:2001 + A1:2003
Sound and television broadcast receivers and associated equipment – Radio disturbance characteristics – Limits and methods of measurement
• EN 55020:2002 + Corrigendum 2005-02 + A1:2003 + A2:2005
Sound and television broadcast receivers and associated equipment – Immunity characteristics – Limits and methods of measurement
- EN 55022:2006 + A1:2000 + A2:2003
EMC: Information technology equipment – Radio disturbance characteristics – Limits and methods of measurement
• EN 55024:1998 + A1:2001 + A2:2003
EMC: Information technology equipment – Immunity characteristics – Limits and methods of measurement
• EN 60065:2002 + A1:2006 + Corrigendum:2006
Audio, video and similar electronic apparatus – Safety requirements
• EN 61000-3-2:2006
EMC: Part 3-2: Limits – Limits for harmonic current emissions (equipment input current 16 A per phase)
- EN 61000-3-3:1995 + A1:2001 + A2:2005
EMC: Part 3-3: Limits – Limitation of voltage changes, voltage fluctuations and flicker in public low-voltage supply systems, for equipment with rated current 16 A per phase and not subjected to conditional connection
The CE symbol confirms that this product conforms with the above mentioned norms and regulations.
The manufacturer also declares the conformity of the product according to the following directives:
• 2001/95/EC General Product Safety
• 2002/95/EC RoHS: Hazardous substances in electrical and electronic equipment
Lorsch, 08.06.2009

Aaron Taylor, SPM
Support
| Hotline E-Mail Language | |||
| AT | +49 431 - 24 89 45 70** | support.at@trekstor.de German | |
| BE | +49 431 - 24 89 45 80** | support.en@trekstor.de English | |
| CH | +49 431 - 24 89 45 73** | support.ch@trekstor.de German | |
| DE | 01805 - TREKSTOR* | ||
| 01805 - 87 35 78 67* | support.de@trekstor.de German | ||
| ES | +49 431 - 24 89 45 76** | support.es@trekstor.de Spanish | |
| FR | +49 431 - 24 89 45 74** | support.fr@trekstor.de French | |
| HU | +49 431 - 24 89 45 79** | support.en@trekstor.de English | |
| IT | +49 431 - 24 89 45 75** | support.it@trekstor.de Italian | |
| LU | +49 431 - 24 89 45 72** | support.lu@trekstor.de German, French | |
| NL | +49 431 - 24 89 45 81** | support.en@trekstor.de English | |
| PL | +49 431 - 24 89 45 77** | support.pl@trekstor.de Polish | |
| PT | +49 431 - 24 89 45 78** | support.en@trekstor.de English | |
| UK | +49 431 - 24 89 45 71** | support.uk@trekstor.de English | |
| GR | +49 431 - 24 89 45 82** | support.en@trekstor.de English | |
| TR | +49 431 - 24 89 45 83** | support.en@trekstor.de English | |
| RU | +49 431 - 24 89 45 84** | support.en@trekstor.de English | |
| SE | +49 431 - 24 89 45 92** | support.en@trekstor.de English | |
| UA | +49 431 - 24 89 45 93** | support.en@trekstor.de English | |
| SI | +49 431 - 24 89 45 94** | support.en@trekstor.de | English |
| CA | +49 431 - 24 89 45 95** | support.en@trekstor.de English | |
| +49 431 - 24 89 45 96** | support.fr@trekstor.de French | ||
| Other Countries | +49 431 - 24 89 45 99** | support.en@trekstor.de English | |


- INCLUDED IN THE DELIVERY
- SYSTEM REQUIREMENTS
- COMPUTER
- TELEVISION/HIFI SYSTEM
- CONTROLS AND CONNECTIONS
- CONTROLS ON THE BACK OF THE TREKSTOR MOVIESTATION
- CONNECTIONS AND CONTROLS ON THE DOCKINGSTATION
- THE REMOTE CONTROL OF THE TREKSTOR MOVIESTATION
- CONNECTING THE TREKSTOR MOVIESTATION TO THE COMPUTER
- DATA EXCHANGE WITH THE TREKSTOR MOVIESTATION
- WINDOWS® VISTA/XP/2000
- MAC ® OS X FROM 10.3
- LOGGING OFF AND DISCONNECTING THE TREKSTOR MOVIESTATION FROM THE COMPUTER
- MAC ® OS X
- CONNECTING THE TREKSTOR MOVIESTATION TO THE HOME ENTERTAINMENT SYSTEM
- CONNECTION TO AN HDMI INPUT ON YOUR TELEVISION
- CONNECTION OF THE MOVIESTATION TO A DIGITAL COAXIAL AUDIO INPUT OF YOUR HIFI • SYSTEM
- CONNECTING THE MOVIESTATION TO YOUR TELEVISION WITHOUT THE DOCKINGSTATION
- USING EXTERNAL DATA STORAGE DEVICES ON THE TREKSTOR MOVIESTATION
- USING THE TREKSTOR MOVIESTATION
- GENERAL OPERATION
- SWITCHING THE MOVIESTATION ON/OFF
- ADJUSTING THE VOLUME
- CHANGING THE VIDEO OUTPUT SIGNAL
- MAIN MENU
- TEXT INPUT FUNCTION
- BROWSER
- FOLDER NAVIGATION
- HANDLING FOLDERS
- SELECTING AND PLAYING FILES
- FOLDER AND FILE ADMINISTRATION
- CHANGING THE MEDIA FILTER
- PLAYBACK LIST
- ADDING MEDIA FILES TO A PLAYBACK LIST
- PLAYING A PLAYBACK LIST
- DELETING MEDIA FILES FROM A PLAYBACK LIST
- MEDIA PLAYBACK
- PLAYING MOVIES
- PLAYBACK
- ACTIVATING/DEACTIVATING SUBTITLES
- CHANGING THE AUDIO CHANNEL
- MAGNIFYING A PART OF THE MOVIE
- REPEAT SETTINGS
- JUMP TO A SPECIFIC PLAYBACK TIME
- PLAYING MUSIC
- VIEWING PICTURES
- PICTURE CHANGE
- ROTATING THE PICTURE
- MAGNIFYING A PART OF THE PICTURE
- DISPLAYING ADDITIONAL INFORMATION
- SLIDE SHOW
- STARTING THE SLIDESHOW
- MUSIC PLAYBACK
- COPY FUNCTION
- FIRMWARE UPDATE
- FORMATTING THE TREKSTOR MOVIESTATION
- CONFIGURATION OF THE TREKSTOR MOVIESTATION
- PICTURES
- AUDIO
- VIDEO
- SYSTEM
- FAQ
- MY MOVIESTATION IS CONNECTED CORRECTLY TO MY TELEVISION. I CAN NO LONGER SEE MY MEDIA FILES IN THE BROWSER OR THEY ARE ONLY PARTIALLY LISTED IN THE "BROWSER
- I WANT TO PERFORM A FIRMWARE UPDATE FOR MY MOVIESTATION BUT MY TELEVISION GOES BLANK
- I HAVE CONNECTED THE MOVIESTATION TO MY TELEVISION OR MY HIFI SYSTEM. WHY IS NO PICTURE SHOWING ON MY TELEVISION OR NO SOUND COMING FROM MY HIFI SYSTEM
- WHY MUSTN'T I DISCONNECT THE MOVIESTATION FROM THE MAINS SUPPLY WITHOUT HAVING SWITCHED IF OFF BEFOREHAND
- WHY IS THE STATUS DISPLAY STILL LIT IN BLUE EVEN THOUGH I HAVE SWITCHED IT OFF
- THE LANGUAGE OF THE USER INTERFACE HAS BEEN CHANGED. HOW DO I CHANGE THE LANGUAGE
- WHILE USING THE MOVIESTATION, IT NO LONGER RESPONDS TO MY COMMANDS
- WHY CAN'T I HEAR ANY SOUND ON MY TELEVISION WHEN I CONNECT IT VIA HDMI
- MY MOVIESTATION DOES NOT PLAY ANY SOUND
- I HAVE ADJUSTED THE SETTINGS OF THE MOVIESTATION UNDER "SETTINGS" AND WOULD LIKE TO RESTORE THE FACTORY DEFAULTS
- I HAVE CONNECTED THE MOVIESTATION TO MY TELEVISION VIA HDMI BUT I DON'T GET AN IMAGE
- CAN I CONNECT AN EXTERNAL 2.5" HARD DRIVE TO THE USB HOST PORT OF THE MOVIESTATION AURIUS WITHOUT USING A DEDICATED POWER SUPPLY FOR THE HARD DRIVE
- MY COMPUTER DOES NOT RECOGNIZE THE MOVIESTATION WHEN I CONNECT IT VIA USB
- CAN THE MOVIESTATION AURIUS PLAY ALL MKV FILES
- CAN I CONNECT THE USB HOST ADAPTER CABLE TO MY MOVIESTATION WHEN I USE IT IN THE DOCKINGSTATION
- CAN I ALSO CONNECT MY MOVIESTATION TO A TELEVISION VIA HDMI WITHOUT USING THE DOCKINGSTATION
- INSTRUCTIONS FOR REMOVING THE BATTERIES FOR SAFE DISPOSAL
- EC DECLARATION OF CONFOR
Brand : TrekStor
Model : MovieStation Aurius
Category : Media player