
BSS-3500-St - Vacuum Cleaner Bort - Free user manual and instructions
Find the device manual for free BSS-3500-St Bort in PDF.


| Product Type | Steam & Vacuum Cleaner |
| Brand | Bort |
| Model | BSS-3500-St |
| Voltage | 220-240 V ~ 50 Hz |
| Steam Power | 1600 W |
| Vacuum Power | 1000 W |
| Iron Power | 800 W |
| Heating Time | 7 minutes |
| Water Tank Capacity | 2.0 L |
| Steam Volume | 30 ± 5 g/min |
| Continuous Steam Time | 60 minutes |
| Max Vacuum Pressure | ≥ 19 kPa |
| Noise Level | ≤ 85 dB(A) |
| Dustbin Capacity | 3.0 L |
| Cord Length | 4 m |
| Functions | Steam cleaning, vacuuming, steam ironing; kills germs and dust mites; degreases ovens, grills, and surfaces; cleans floors, windows, upholstery, bathrooms, cars |
| Accessories Included | Extension handles (2), floor brush, squeegee, suction nozzle, steam nozzle with brushes, funnel, measuring cup, steam iron |
| Safety Features | Do not use on explosive substances; do not direct steam at people/animals; unplug before maintenance; do not immerse hose; risk of scalding |
| Warranty | 3 years |
| Service Life | 5 years |
Frequently Asked Questions - BSS-3500-St Bort
User questions about BSS-3500-St Bort
0 question about this device. Answer the ones you know or ask your own.
Ask a new question about this device
Download the instructions for your Vacuum Cleaner in PDF format for free! Find your manual BSS-3500-St - Bort and take your electronic device back in hand. On this page are published all the documents necessary for the use of your device. BSS-3500-St by Bort.
USER MANUAL BSS-3500-St Bort
natural_image
Silhouette of a syringe with a pointed tip against a gray circular background (no text or symbols)Bort®
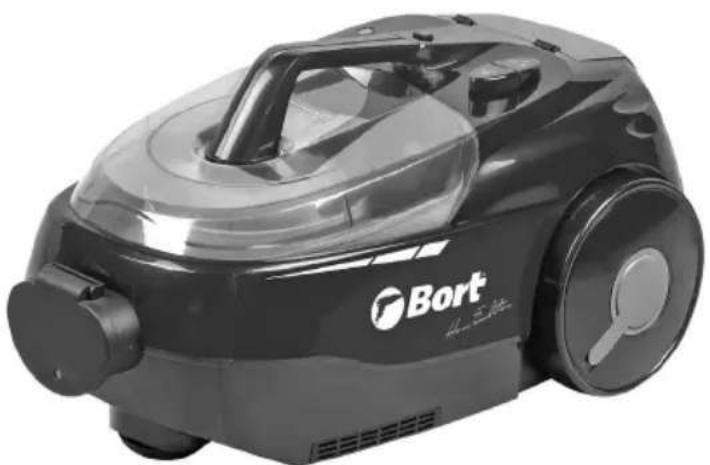
natural_image
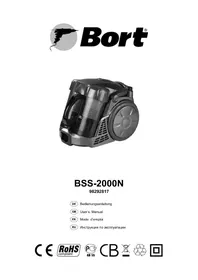
Black and white photo of a Bort vacuum cleaner (no visible text or symbols on body)BSS-3500-St
98292497
DE Deutsch
DAMPFSAUGER
natural_image
Close-up of a gas stove burner with a tool in use, no visible text or symbols on the main subject.REINIGT UND ENTFETTET
natural_image
Person using a vacuum cleaner on tiled floor in a kitchen (no visible text or symbols)natural_image
Black and white photo of a hand washing a washing machine into a kitchen appliance (no visible text or symbols)REINIGT ÖFEN UND GRILLS
natural_image
Close-up of a hand holding a black tool with a serrated edge, partially obscured by a blurred background (no text or symbols visible)REINIGT ARMATUREN IN BAD UND KUCHE
natural_image
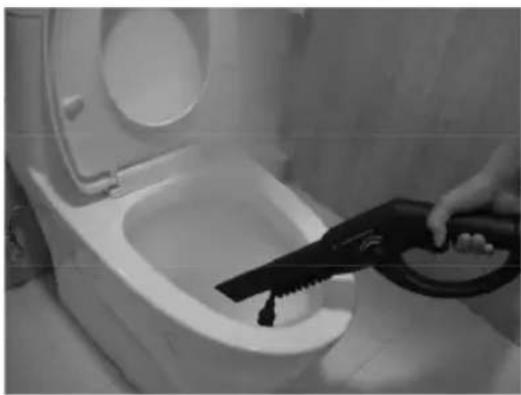
Person using a saw to clean or wash the toilet sink (no text or symbols visible)TÖTET KEIME
natural_image
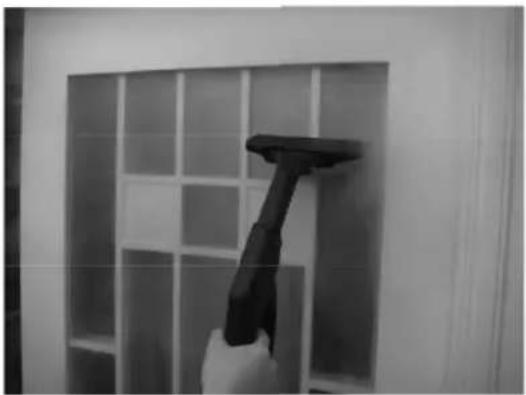
Hand cleaning a wall-mounted cleaning tool against a grid-patterned wall (no text or symbols visible)REINIGT FENSTER
natural_image
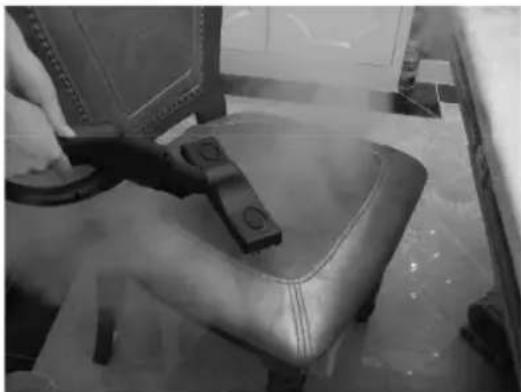
Close-up of a person using a mechanical device on a leather chair, no visible text or symbolsREINIGT MÖBEL
natural_image
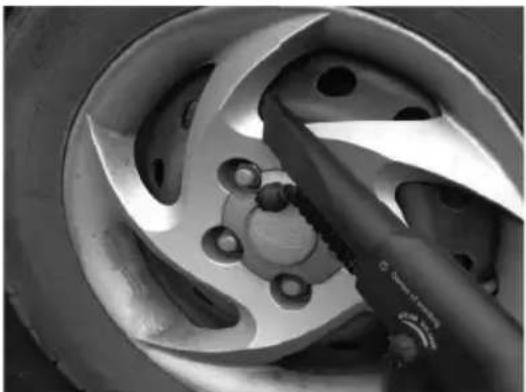
Close-up of a car wheel rim with visible tire and screw holes (no text or symbols)natural_image
Two black cylindrical objects with textured surfaces, possibly mechanical or electronic components (no visible text or symbols)BODENBÜRSTE
natural_image
Black plastic mechanical component with two circular ports and a threaded base (no text or symbols visible)WISCHGUMMI
natural_image
3D rendered image of a black mechanical lever handle (no text or symbols visible)SAUG- & DAMPFDÜSE
natural_image
Collection of industrial mechanical components including a cylindrical component and four circular flanges (no text or symbols visible)natural_image
Two laboratory containers: a measuring cup with measurement markings and a black funnel-shaped container (no text or symbols visible)DAMPFBÜGELEISEN
natural_image
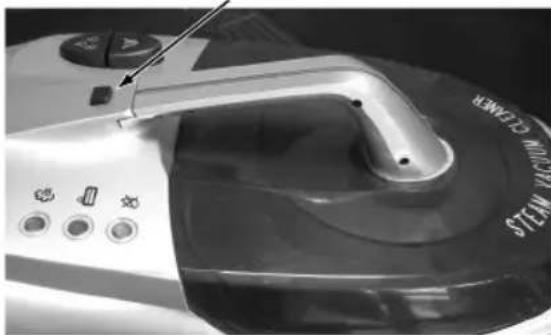
Electric iron with coiled cord and connector, no visible text or symbols on the device itselfMETHODE ZUM ÖFFNEN DES BEHÄLTERS:
Drücken
natural_image
Close-up of a steam grater with control buttons and a handle (no visible text or symbols)natural_image
Close-up of a kitchen appliance with control panel and handle (no visible text or symbols)natural_image
Close-up of a hand using a tool to clean or store the STEM VACQUIN appliance on a stove (no visible text or symbols)natural_image
Close-up of a stainless steel kitchen appliance with a circular lid and control panel (no visible text or symbols)natural_image
Close-up of a hand holding a cable inserted into a cylindrical device (no visible text or symbols)natural_image
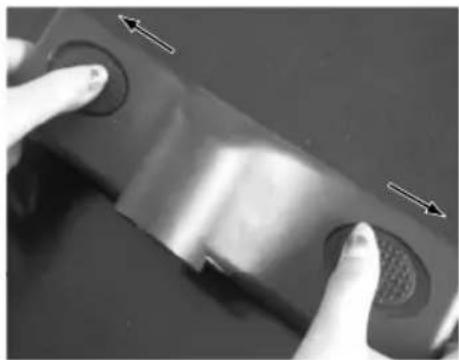
Four views of a metal mechanical component with threaded and threaded features, shown from different angles (no text or symbols visible)BODENBÜRSTE - MONTAGEVERFAHREN
natural_image
Close-up of hands pressing a button on a device (no visible text or symbols)natural_image
Close-up of hands holding a small electronic device component (no visible text or symbols)natural_image
Close-up of two hand-painted plastic components on a dark surface, no visible text or symbols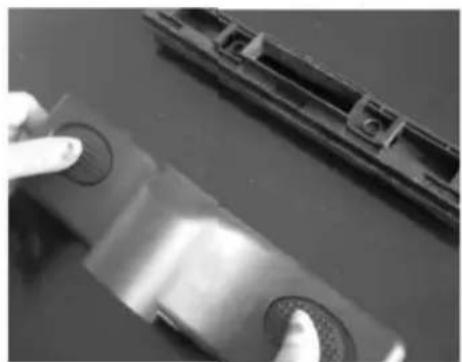
natural_image
Close-up of a hand pointing at a button on a black plastic component, with no visible text or symbols.natural_image
Top-down view of a black vacuum cleaner with control panel and buttons (no visible text or symbols)WARNING: For proper use, the user must read and understand the operator's manual before using this product.
SAVE THIS MANUAL FOR FUTURE REFERENCE
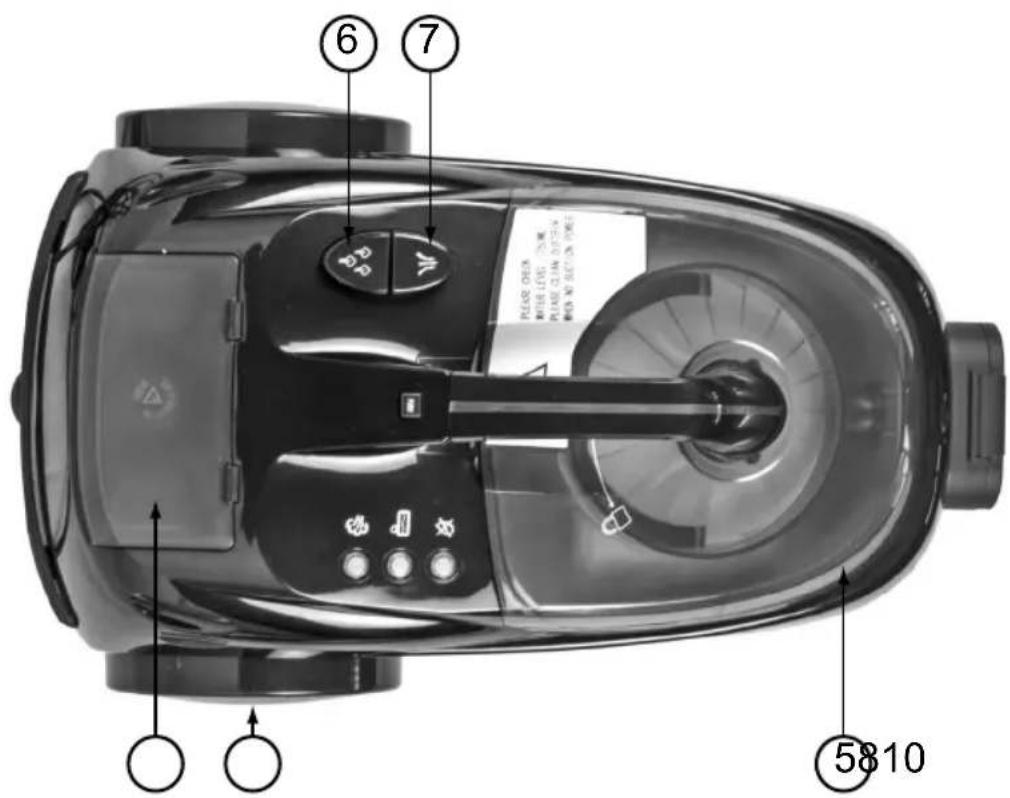
PRODUCT ELEMENTS 1
-
Steam Outlet
-
Steam Volume adjustment
-
Steam On/Off switch
-
Hose
-
Vacuum tank
-
On/Off switch of Steam
-
On/Off switch of Vacuum
-
Steam Tank Lid
-
Body
-
Wheel
SPECIFICATIONS
Voltage: 220-240 V,50 Hz
Steam power: 1600 W
Vacuum power: 1000 W
Iron: 800
Heating time: 7 min.
Tank capacity: 2.0 L
Steam volume: 30±5 g/min
Steam continuous using time: 60 min
Max vacuum: ≥19 kPa
Noise: ≤ 85 dB (A)
Dustbin capacity: 3.0 L
Cord length: 4 m
FUNCTIONS
Clean and sanitize & freezers.
Clean and sanitize curtains windows and mirrors.
Clean and sanitize diffi cult to reach areas.
Clean and sanitize upholstery blinds and curtains.
Clean and sanitize bathrooms.
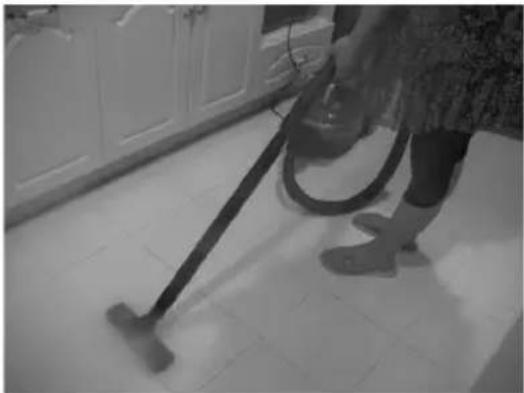
Steam and vacuum all floor surfaces.
Kill germs and dust mites.
Leave surfaces clean and dry.
Cleans and degreases.
Various possible applications.
Cleans ovens and grills.
Cleans upholstery and carpets.
Remove dirt from grout.
Cleans taps in bathroom and kitchen.
Kills germs.
Professional steam iron.
Please ensure you read the operating instructions thoroughly before operating this unit.
Failure to fully understand the operation of this machine and the safety precautions could be dangerous to you and others or could damage the unit.
SAFETY NOTICE:
-
Pleas check all the accessories & equipment list carefully.
-
Do not use this to vacuum any explosive substances, acids or alkaline substances like gasoline, oil paint, etc, which are corrosive.
-
Do not use this unit to vacuum any hot substances as this may cause damage to the unit.
-
Do not point the steam gun towards any person or animal when it is working.
-
This unit is suitable for household use only.
-
The user must unplug the unit when cleaning or maintain the unit.
-
The user must not leave the iron unattended while connected to the supply
-
The user must unplug the unit when filling the water into water tank.
-
Don't open the steam pressure release cap when using the steam cleaner and Steam iron.
-
The iron must be rested on a stable surface.
-
When placing the iron on its stand, ensure that the surface on which the stand is placed is stable.
-
The iron is not to be used if it has been dropped, or if there are visible signs of damage, or if it is leaking.
-
Don't use in swimming pools containing water.
-
If the power supply cord is damaged, it must be replaced by the manufacturer or its service agent or similarly qualified persons in order to avoid hazard.
-
This appliance is not intended for use by persons (including children) with reduced physical, sensory or mental capabilities, or lack of experience and knowledge, unless they have been given supervision or instruction concerning use of the appliance by a person responsible for their safety.
-
Children should be supervised to ensure that they do not play with the appliance.
-
the liquid or steam must not be directed towards equipment, containing electrical components, such as the interior of ovens.
-
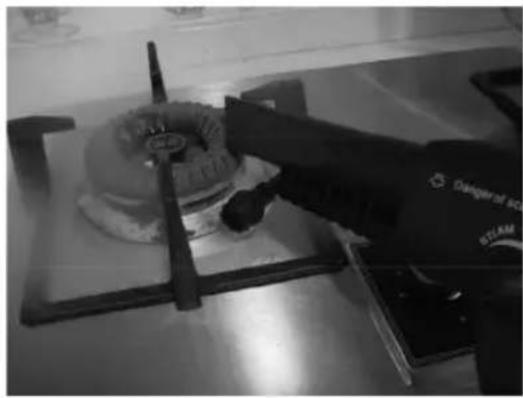
WARNING: Danger of scalding.
natural_image
Black-and-white photo of a gas stove burner with a cooking tool in use, no visible text or symbols on the main subject.CLEANS AND DEGREASES
natural_image
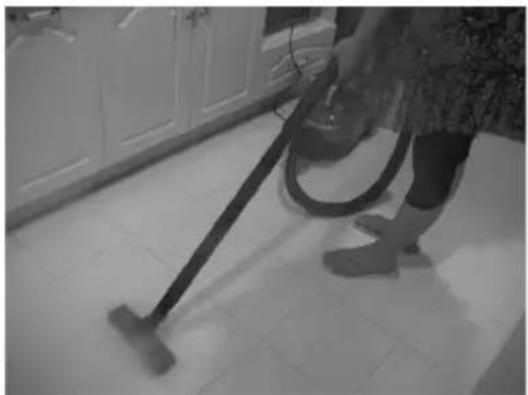
Person using a vacuum cleaner on tiled floor in a kitchen (no visible text or symbols)CLEANS AND VACUUM FLOOR
natural_image
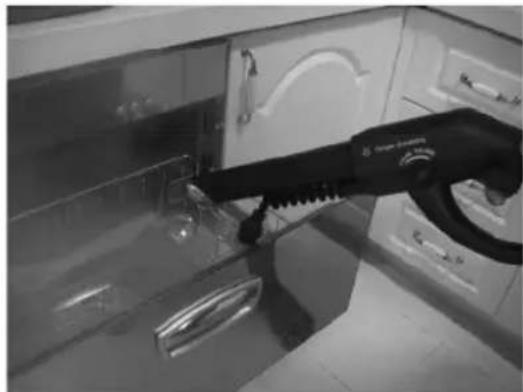
Close-up of a hand washing a shower in a kitchen appliance (no visible text or symbols)CLEANS OVENS AND GRILLS
natural_image
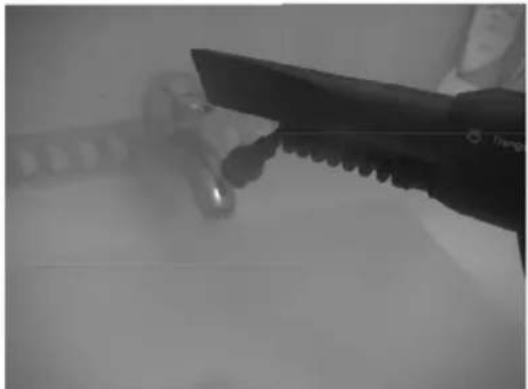
Close-up of a hand holding a black tool near a surface, with no visible text or symbolsCLEANS TAPS IN BATHROOM AND KITCHEN
natural_image
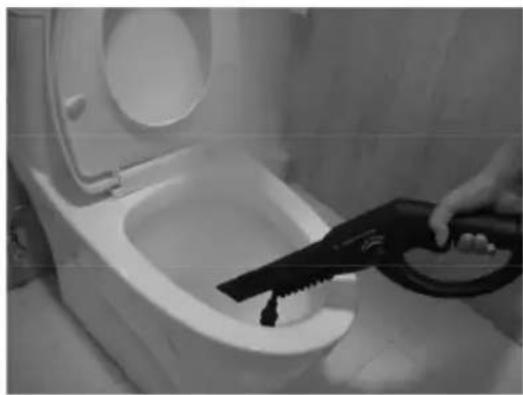
Person using a power tool to clean or wash the interior sink of a toilet (no text or symbols visible)KILLS GERMS
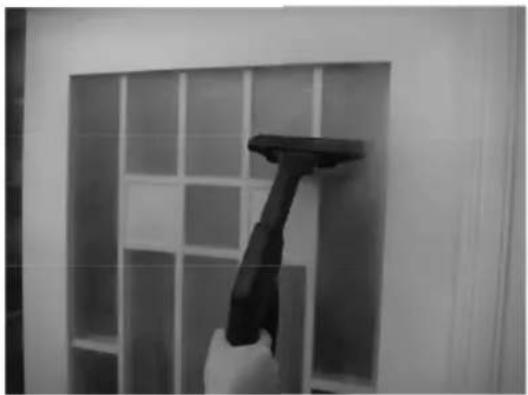
natural_image
Hand cleaning a wall-mounted spray gun against a grid-patterned shelf (no text or symbols visible)CLEANS WINDOW

natural_image
Close-up of a person using a mechanical device on a leather seat, no visible text or symbolsCLEANS FURNITURE
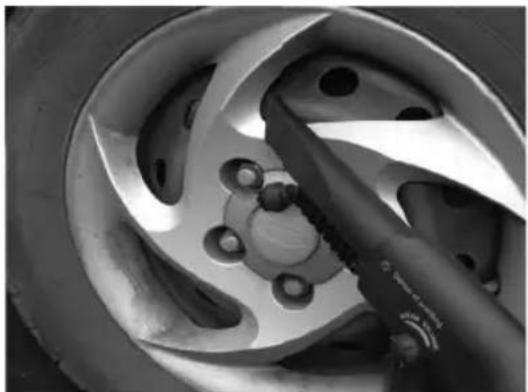
natural_image
Close-up of a car wheel rim with visible tire and screw holes (no text or symbols)CAR DETAILING
ACCESSORIES
EXTENSION HANDLE
There are two extension handles with this steam vacuum Cleaner which are suitable to adjust the length in order to reach various areas as required.
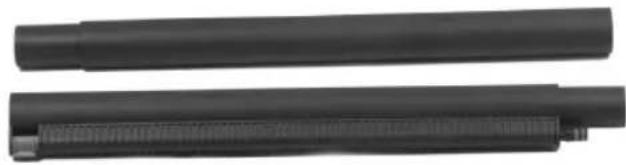
natural_image
Two black cylindrical objects with textured surfaces, possibly mechanical or electronic components (no visible text or symbols)FLOOR BRUSH
There are two floor brush attachments which are suitable for hard floors and carpet, both brushes can be used with the steam or vacuum function. It can also be used on upholstery wrapping a towel around it or by using the steam and vacuum function.
SQUEEGEE
There is a squeegee which can clean smooth surfaces such as carpets, sofas, glass, tables, bench tops, etc, this Can be used with the steam or vacuum function. If cleaning windows, use the vacuum with the steam to avoid dripping.
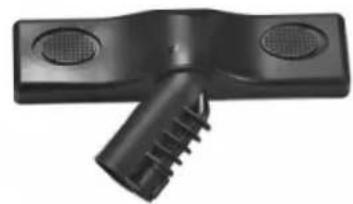
natural_image
Black plastic showerhead with two circular vented ports and a textured handle (no text or symbols visible)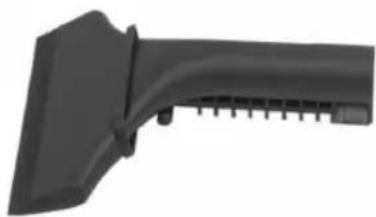
natural_image
Close-up of a black mechanical lever handle with a curved blade and textured grip (no text or symbols visible)SUCTION NOZZLE & STEAM NOZZLE
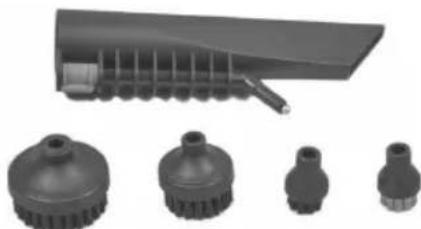
There is a suction nozzle & steam detail nozzle with four brushes. The Suction nozzle can be used with vacuum function only to vac dust particles from small areas. The steam nozzle with the brushes can be used with steam to clean, grease, oil, grime from detail areas.
natural_image
Collection of industrial pipe fittings and mechanical components (no text or symbols visible)FUNNEL AND MEASURING CUP
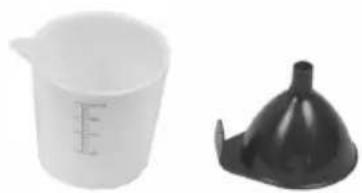
Use the funnel and measuring cup to fill water or drain out excessive water from the machine. Never fill the machine with more than 250ml of water. If the boiler is overfull the boiler may over pressurize and hot water may blow out from the cap.
natural_image
Two laboratory containers: a measuring cup with measurement markings and a black funnel-shaped container (no text or symbols visible)STEAM IRON
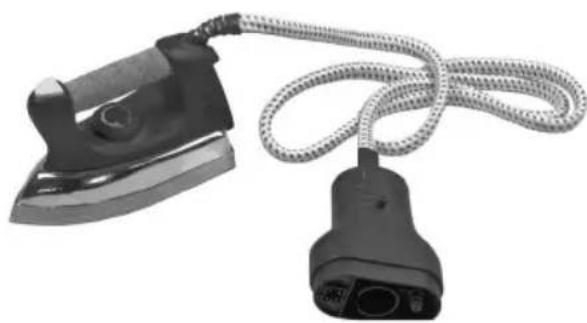
There is a steam iron which can be used with the unit. First make sure the power source is disconnected. Disconnect the hose from the main unit by pressing the release buttons and then insert the iron into the unit. Then put on the steam switch and wait for a few minutes To make there is enough water in the boiler, Wait for the indicator lamp on the iron to go OFF and then the iron is READY to use. Use the knob on top of the iron to turn on/off steam. Use the temperature control knob to control the temperature according to what you want to iron.
natural_image
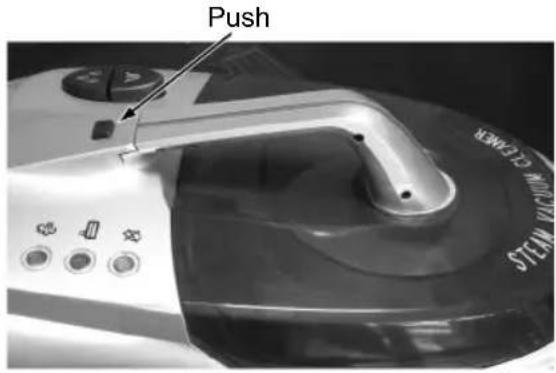
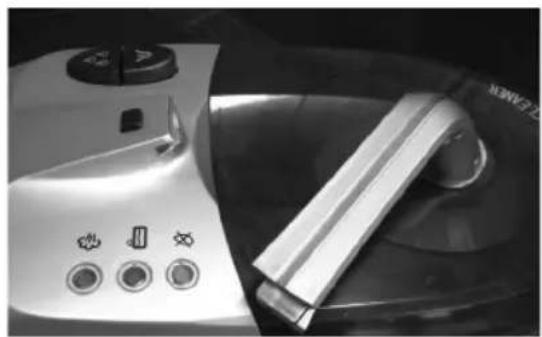
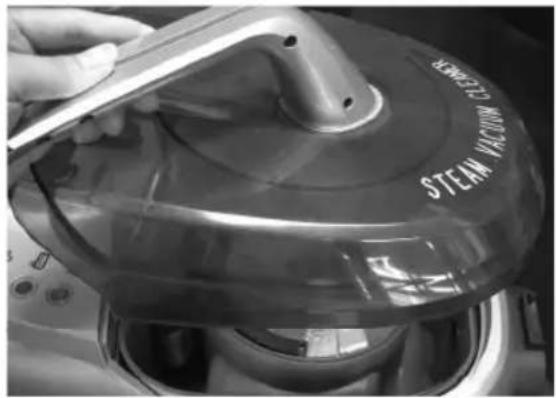
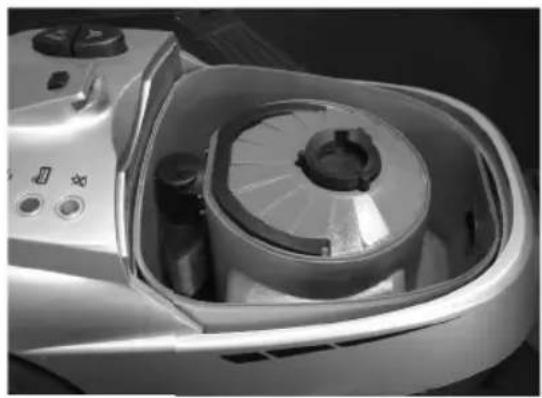
Black iron (£) with coiled cord and connector (no text or symbols visible)THE METHOD OF TANK OPEN:
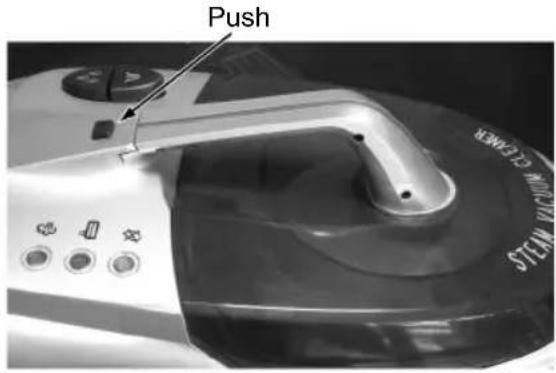
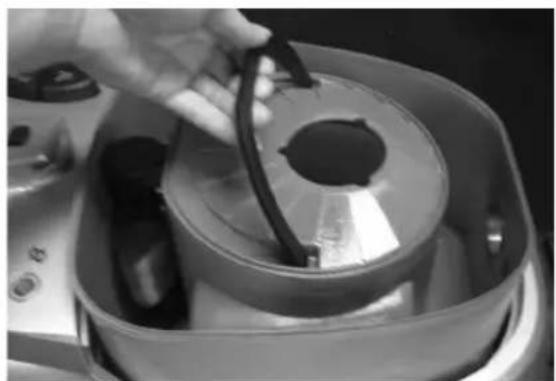
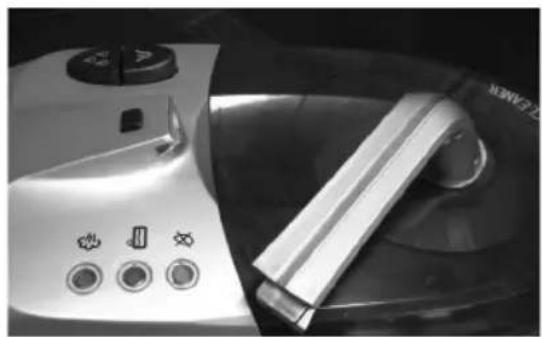
1 Push the button
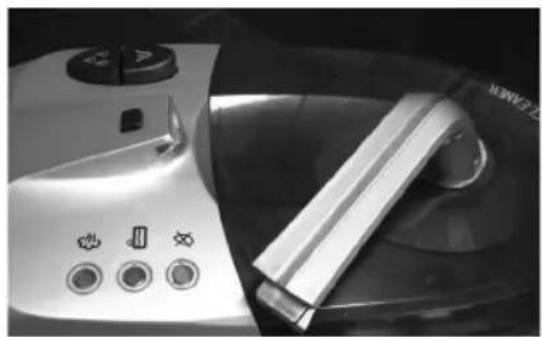
natural_image
Close-up of a kitchen appliance with control buttons and a tray, no visible text or symbols- The handle rotation 45 angle
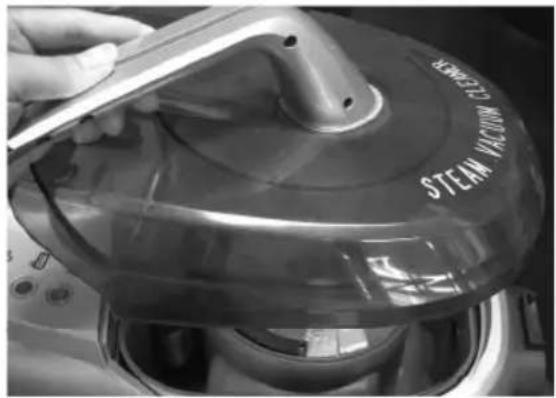
natural_image
Close-up of a hand using a tool to clean or inspect the steam turbine (no visible text or symbols)- Remove the lid
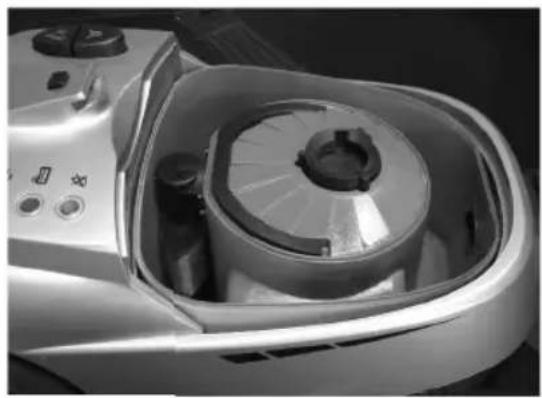
natural_image
Close-up of a stainless steel kitchen appliance with a circular lid and control buttons (no visible text or symbols)- After remove the lic
natural_image
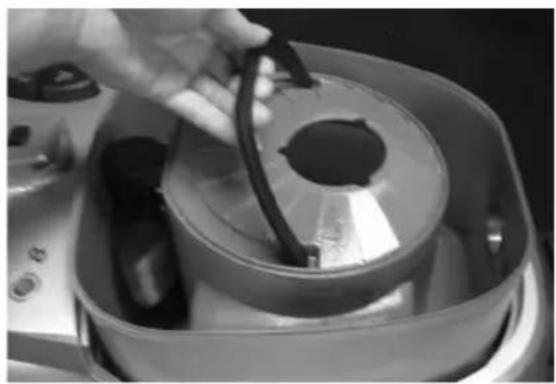
Close-up of a hand holding a cable inside a cylindrical appliance (no visible text or symbols)- Remove tank
natural_image
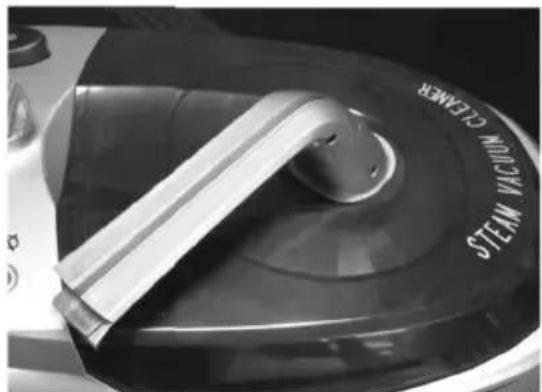
Close-up of a steam vacuum cleaner blade with a metallic handle (no text or symbols visible)- Confirm the handle is 45 angle, close the lid, and then lock
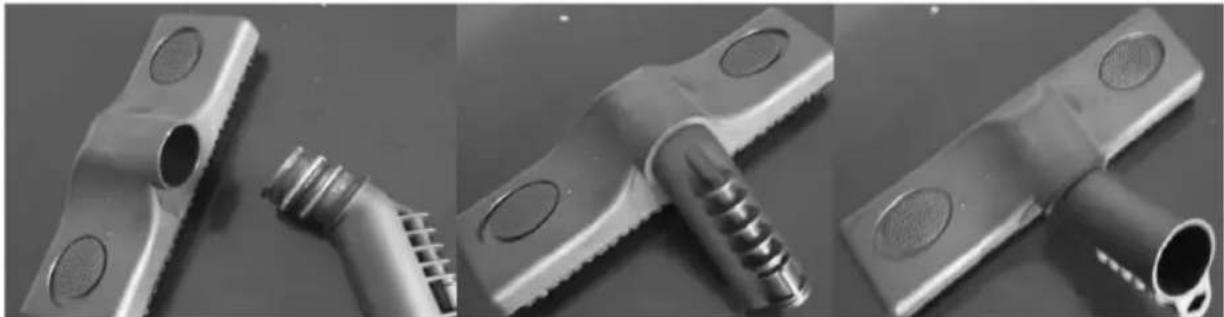
BRUSH - JOINT ASSEMBLY METHOD
natural_image
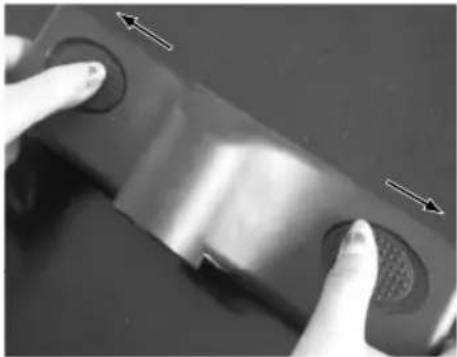
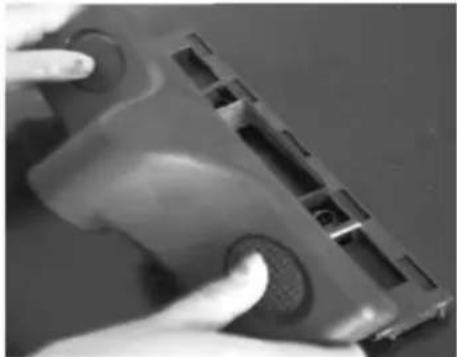
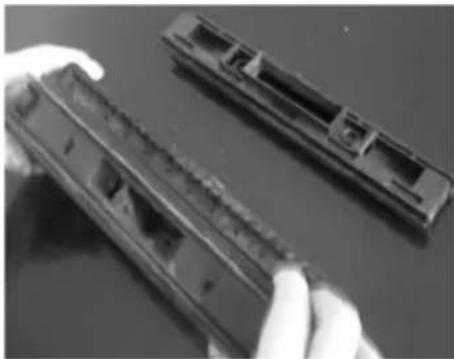
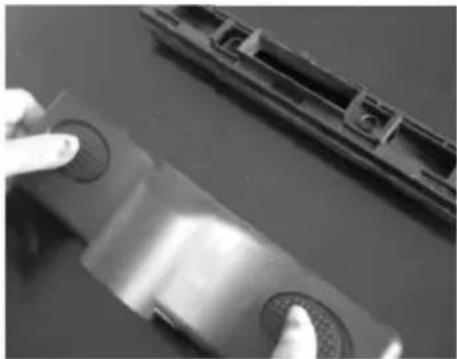
Three views of a metal mechanical component with threaded and threaded features, shown from different angles (no text or symbols visible)FLOOR BRUSH ASSEMBLY METHOD
natural_image
Close-up of hands pressing a button on a device component (no visible text or symbols)- Move the button and open
natural_image
Close-up of hands holding a small electronic device component (no visible text or symbols)- Floor brush scraping pop-up
natural_image
Close-up of two hand-painted plastic components on a dark surface, no visible text or symbolsOPERATING THE UNIT
- Connect the required accessory to the gun handle.
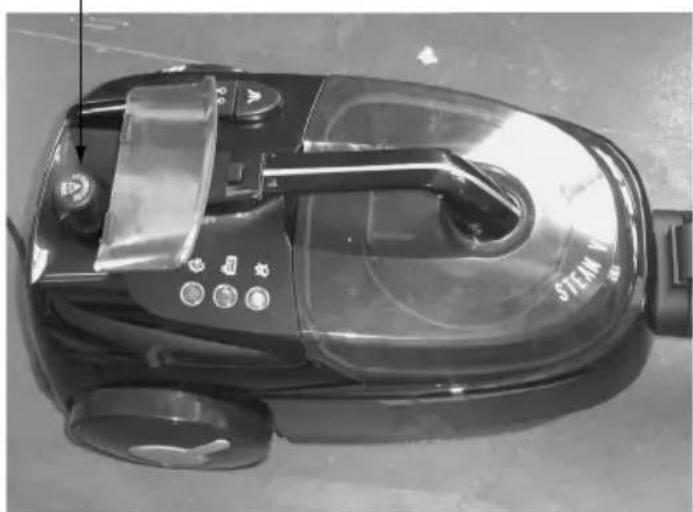
- Open the body cover, push down to unscrew the Steam pressure release cap in anti-clockwise direction as shown in the diagram (1)
- Use the funnel and measuring cup provided to pour about 1700ml of water into the tank. The capacity of the tank is 2000ml. However, do not put too much water into the tank to avoid water from over pressurizing and leaking out from the cap.
natural_image
Close-up of a hand pressing a button on a black plastic component, with a partially visible mechanical part in the background (no text or symbols)- Checking the seat of scraping3. Change and p
natural_image
Top-down view of a black vacuum cleaner with control panel and buttons (no visible text or symbols)- After filling the water into the water tank, push down and screw the steam pressure release device in clockwise direction until the cap is screwed on tight.
After the cap appears to be on tight, double check it is on properly by pressing the cap down and turn until the cap is tight and cannot turn tighter.
Once the water starts heating, if you hear steam pressurizing out of the cap, then you need turn off the power, and take a towel, place it over the cap, press down the cap and tighten until it won't move anymore.
When refi lling water, the unit must be disconnected from power supply, and the steam pressure cap shall not be opened until the water tank cools down.
Note: Even if don't recommend it, but if you require to refi ll the tank immediately, use a towel to carefully unscrew the cap as the cap will still be very hot.
If you do refi ll the tank immediately. Be very careful as the boiling water may splash out of the boiler and cause potential burns to your skin.
- Please check the water level in the dustbin, when you want using the vacuum cleaner, and then close the dustbin cover.
When the dustbin inhaled plenty of water or dust, protect the device will start, at this time, you will feel no suction power, we only need to clean up dustbin, and then to fi II (500 ml – 750 ml) minimum 500 ml water (2 Measuring cups), close the dustbin cover, and you can to use again.
-
Plug into a power outlet (220–240 v) and switch on the steam or vacuum button, to use the function as required by you.
-
To use the steam function, press the steam button to on position and then wait for the "steam ready" light to go on. About 8 minutes. The steam is now ready to use. After joining the steaming (cleaning) head to the plug of the tube, switch on the "LOCK" button (turning it on right) to ensure the head not to be separated from the tube during the using.
Press the trigger on the gun and use the steam volume adjustment knob to operate steam function as required. Use the steam lock if continuous steam is required.
When first using the steam, hold the steam outlet over a sink or into a bucket as it may produce excessive water for the for 10–20 seconds or until the steam becomes dry. If your job requires more moisture then it will be ok to use immediately after heating up.
-
After using the steam function for a while, the steam pressure may weaken. If you require the steam pressure to build up again, let go off the steam until the ready light goes off.
-
To use the vacuum function, press the vacuum button to on position and vacuum with the accessory required.
-
To empty the vacuum waste tank, fi rst switch off the steam and vacuum buttons and unplug the unit. Open the cover and pull out the dustbin b by using the handle. Empty and clean the dustbin, push back into place and close the cover.
-
Before attaching any accessory to the unit or the steam gun, make sure the steam is off.
MAINTENANCE
Empty the water from the water tank and dry body after using the unit. Please cleaner the filter cotton in the dustbin, cover of dustbin and under of machine, after you are using the machine.
TROUBLE SHOOTING

If the unit does not turn on, check to see that it is connected properly to the power source If steam stops coming out, check to see that
there is enough water in the water tank If the vacuum function does not work properly, check to see that the dustbin has been cleaned and is empty and is attached properly back into the unit.
If there is and damage to the power cord, plug or not attempt to fix the unit by yourself. Consult a qualified electrician to get problem fixed before using the unit again.

CAUTION: To reduce the risk of electric shock, do not remove the hose while machine is on.
This hose contains electrical connections:
- Do not immerse in water for cleaning;
- The hose should be checked and must not be used if damaged.
WARNING: To prevent fi re or electric shock, do not expose this equipment to rain or moisture.
USING TOUR APPLIANCE
HOW TO CLEAN WITH STEAM-STEAM-USEFUL TIPS
To make the most of your steam cleaner the following tips will be helpful in making cleaning tasks easier, safer and more productive.
There are on set rules on how to clean with steam, however the key to using your steam cleaner successfully is to use right tool and set your body in the best possible position to comfortably do each job.
There are many areas where steam can be used to clean. Do not be afraid of trying something new or attempting to clean something that you have not tried to clean before.
If you are unsure if seam may cause damage to a particular surface, always test a small surface first before attempting to clean the whole area.
WHICH ACCESSORY TO USE
Use the Nylon Brush for upholstery, spot cleaning carpets, detailing comers of floors, walls, etc.
Detail Nozzle with suction for directing vapor at a surface or blowing loose debris out of cracks and crevices. Use the suction to avoid scratching surface.
Stainless steel Brush on most metal surfaces, it is also ideal for cleaning chrome, brass and glass. Use with caution to avoid scratching surface.
Nylon detail Brush for surfaces sensitive to scratching.
Wire brush is ideal for baked on grease. It is perfect for cleaning the BBQ and kitchen grills.
FLOOR
Grout-Select one of the detail brushes and gently rub along the grout lines.
Clean a few square meters at a time, then vacuum up the moisture by using the detail vacuum nozzle or change over to the floor brush.
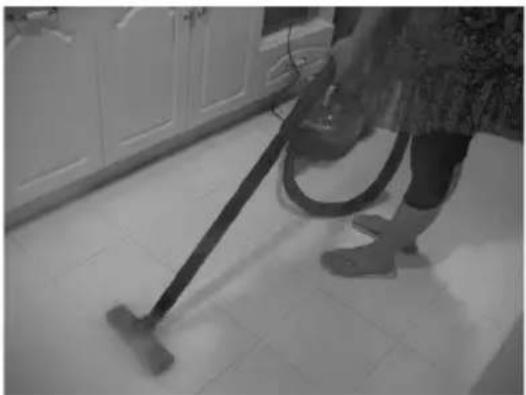
For general floor cleaning use floor brush to steam and vac the floor area.
To steam mop place a dry towel under the floor brush and mop the area.
BENCH TOPS
Bench tops can be cleaned using several different methods.
Spray and wipe method. Hold detail nozzle about 10-20cm from surface. Direct steam onto surface and wipe with a clean dry cloth. Use detail nozzle in cracks and seams.
Use the squeegee tool. Apply steam and squeegee along the bench top systematically working your way along the surface.
FRIDGE SEALS
Use the detail nozzle with nylon brush.
Hold a rag or tea towel in your left hand about 25 cm away from nozzle (Or opposite if you're left handed) Spray the steam along the fridge seal and blast the steam into the towel. The purpose of the towel is to avoid blasting the dirt all over the room and yourself.
OVENS GRILLS
To remove baked-on grease: No need to pre-heat the oven or gill. In fact, it works better if the surfaces are cool. To clean stoves ovens and hotplates of baked on food, use wire brush or place stainless steel scourer over brush and rub over greasy surface until build up is gone. Always take care when cleaning any surface which may be scratched by the abrasive brush. If in doubt use nylon brush. Clean up with towels or vacuum as you go before the cleaned area dries.
WINDOWS AND MIRRORS
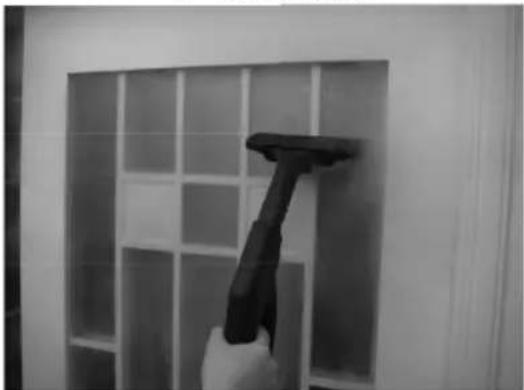
If cleaning glass with vapor for the first time, clean with vapor squeegee two times –low. Pressure steam and vac .if window is very dirty use steam only with squeegee and rub surface in circular motion. Finish job with steam and vac in straight lines. Try to keep blade fl at to avoid streaks on surface.
BATHROOMS
Toilet
Use the detail nozzle and run under the toilet and hinges. Spray the steam. Over the whole toilet inside and out. Wipe down the toilet seat with a clean cloth or Paper towel.
TAPS AND SINKS
Use the detail nozzle spray around the base of the taps or all nooks and cranny's. Where grid is built up. The dirt will be easily blasted out. Use the nylon or Stainless steel to scrub the tap handles, squeegee tool to steam and vac the vanity top. Or simply wipe up with a clean towel.
WALL GROUT
Be careful on wall grout as it is quite soft and can be removed if you rub too aggressively into the grout. Only use the nylon brush.
PAINTED WALLS
First, look carefully at the condition of the paint itself, if is thin or was a very cheap Grade of paint originally, cleaning it with anything may cause the paint to dissolve and Wipe off Caution: water based paint of any kind could be removed with a vapor cleaning system Just by applying higher heat and moving slowly. The paint will absorb into the towel.
BBQ
Use wire brush or place stainless steel scourer over brush and rub over greasy surface until build up is gone. If cleaning a stainless steel cover, be careful brush or scourer doesn't scratch surface.
UPHOLSTERY
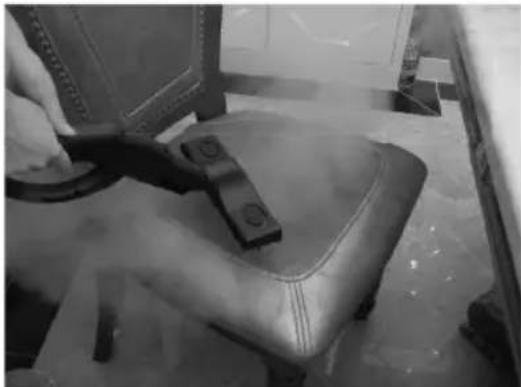
Always test a small section or the fabric before cleaning whole area to see if the steam will cause any damage. Do not apply steam to velvet as the heat can damage the fabric. Use detail nozzle without brush and lay on angle to blow the dirt off the surface. Use the Floor brush with clean all-white towels wrapped around it. Or steam and vacuum with the floor brush or window squeegee. Make sure the brushes ate clean before using it on any fabric.
Only use low pressure when cleaning any kind of fabric.
Use fast, light strokes, and avoid getting the fabric wet.
CARPET
A vapor steam cleaner is not a carpet shampoo. It can however remove.
Certain stains and can also be used to kill dust and also freshen the pile.
Regular use will reduce the need for professional carpet treatments.
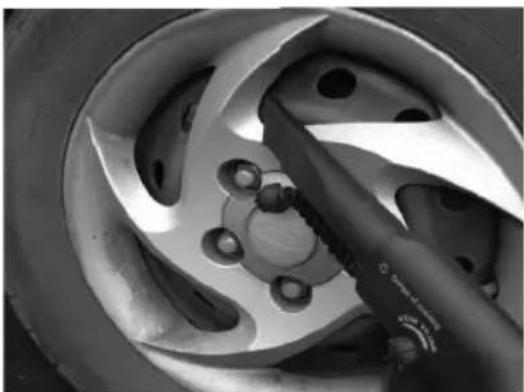
AUTO DETAILING
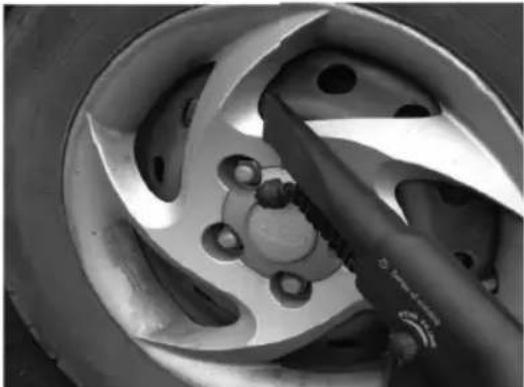
Instrument panel: Use nozzle – medium pressure – to blow dust and dirt from all vents.
Ashtrays, and other parts of instrument panel. Reduce vapor to low to clean around the Radio. Wipe clean with towel.
Removing Wax Tar Etc. many stains are only stuck on the surface of materials and can be quickly removed by "blowing" excess material away from the surface from the side. This prevents driving the particles deeper into the fi bers. This applies to things as copier toner gum, crayons, dirt, makeup, tar, etc, always try to vacuum any loose Residue off the surface before you apply vapor to it!
WOOD SURFACES-GENERAL
Avoid getting natural wood too wet or hot, Also, if the wood surface is waxed, use only cool moist towels to wipe down surface.
Do not use the brushes or floor tool bristles on wood floors.
To clean fine wood floor surfaces, use the appropriate brush for size and texture of the surface – low pressure – with a clean towel over the brush. Heat up the towel away form the surface and turn off the vapor before applying the brush to the surface to do the cleaning adding Chemicals to the Tank never put anything in the water tank or boiler but water. Distilled water is better than local tap water.
Using Distilled Water
If you are in a hard-water area, use dematerialized or distilled water to eliminate the possibility of creating hard water stains while you are cleaning fabrics and to prevent build up of mineral deposits around the valves in the system.
Important: Your Steam machine will work hard water, but minerals will build up on the heating element and around the valves if you don't take the time (once a month) to run a mixture of white vinegar and water through it, these mineral deposits can eventually cause the valves to stop working.
BG Български
natural_image
Close-up of a gas stove burner with a hand operating the lid, no visible text or symbols on the main subject.ПОЧИСТВАНЕ И ОБЕЗМАСЛЯВАНЕ
natural_image
Person using a vacuum cleaner on tiled floor in kitchen (no visible text or symbols)natural_image
Close-up of a hand washing a washing machine into a kitchen appliance (no visible text or symbols)natural_image
Close-up of a black-handled knife cutting through a misty surface, with no visible text or symbolsnatural_image
Person cleaning a toilet with a hand using a tool (no visible text or symbols)УБИВА МИКРОБИ
natural_image
Hand cleaning a wall-mounted cleaning tool with a black-handled tool, no visible text or symbolsПОЧИСТВА ПРОЗОРЦИ
natural_image
Close-up of a hand using a tool to cut a leather seat (no visible text or symbols)ПОЧИСТВА МЕБЕЛИ
natural_image
Close-up of a car wheel rim with a hand holding a tool, showing mechanical components (no visible text or symbols)ПОЧИСТВА КОЛА
АКСЕСОАРИ
ТЕЛЕСКОПИЧНА ТРЪБА
natural_image
Two black cylindrical objects with textured surfaces, possibly mechanical or electronic components (no visible text or symbols)ЧЕТКА ЗА ПОДА
natural_image
Black plastic showerhead with two circular cutouts and a textured handle (no text or symbols visible)ГУМЕН НАКРАЙНИК
natural_image
3D rendered image of a black mechanical lever handle (no text or symbols visible)natural_image
Four black plastic mechanical components with no visible text or symbolsnatural_image
Two laboratory containers: a measuring cup with measurement markings and a black funnel-shaped container (no text or symbols visible)ПАРНА ЮТИЯ
natural_image
Electric iron with coiled cord and connector (no visible text or symbols)РЕЗЕРВОАР – НАЧИН НА ОТВАРЯНЕ:
- НАТИСНЕТЕ БУТОНА.
natural_image
Close-up of a kitchen appliance with control buttons and a glass door (no visible text or symbols)- ЗАВЪРТЕТЕ РЪЧКАТА ПОДЪГЪЛ45°
natural_image
Close-up of a hand using a tool to clean or inspect the steam turbine (no visible text or symbols)- СВАЛЕТЕ КАПАКА
natural_image
Close-up of a kitchen appliance with a circular lid and control buttons (no visible text or symbols)- СЛЕД СВАЛЯНЕ НА КАПАКА

natural_image
Close-up of a hand holding a cable inside a cylindrical device (no visible text or symbols)- ИЗВАДЕТЕ РЕЗЕРВОАРА
natural_image
Close-up of a gas stove burner with a metal tool inserted, no visible text or symbols on the main subject.ОЧИЩАЕТ И ОБЕЗЖИРИВАЕТ
natural_image
Black-and-white photo of a hairdryer in a kitchen appliance, handling a glass door with open doors (no visible text or symbols)natural_image
Person using a saw to clean or wash the toilet sink (no text or symbols visible)УБИВАЕТ МИКРОБЫ
natural_image
Close-up of a hand using a tool to adjust or install a leather seat component on a workbench (no visible text or symbols)ЧИСТИТ МЕБЕЛЬ
natural_image
Person using a vacuum cleaner on tiled floor in a kitchen (no visible text or symbols)ОЧИЩАЕТ И ПЫЛЕСОСИТ ПОЛЫ
natural_image
Close-up of a hand holding a black tool with a droplet, partially obscured by a blurred background (no text or symbols visible)natural_image
Hand cleaning a tiled wall with a spray gun (no text or symbols visible)ЧИСТИТ ОКНА
natural_image
Close-up of a car wheel rim with visible tire and screw holes (no text or symbols)ЧИСТИТ АВТОМОБИЛЬ
АКСЕССУАРЫ
РАЗДВИЖНАЯ РУЧКА
natural_image
Two black cylindrical objects with textured surfaces, no visible text or symbolsЩЕТКА ДЛЯ ПОЛА
natural_image
Black plastic showerhead with textured handle and circular cutouts (no text or symbols)РЕЗИНОВАЯ НАСАДКА
natural_image
Close-up of a black mechanical lever handle (no text or symbols visible)natural_image
Collection of industrial mechanical components including a flat blade, flanged cylindrical parts, and four separate flange-like parts (no text or symbols visible)natural_image
Two laboratory containers: a measuring cup with measurement markings and a black funnel-shaped container (no text or symbols visible)ПАРОВОЙ УТЮГ
natural_image
Black iron (£) with coiled cord and connector (no text or symbols visible)- Нажмите кнопку
natural_image
Close-up of a kitchen appliance with control buttons and a tray, no visible text or symbolsnatural_image
Close-up of a hand using a tool to clean or inspect the steam turbine (no visible text or symbols)- Снимите крышку

natural_image
Close-up of a stainless steel kitchen appliance with a circular lid and control buttons (no visible text or symbols)- После снятия крышки
natural_image
Close-up of a hand holding a cable inside a cylindrical device (no visible text or symbols)- Снимите резервуар
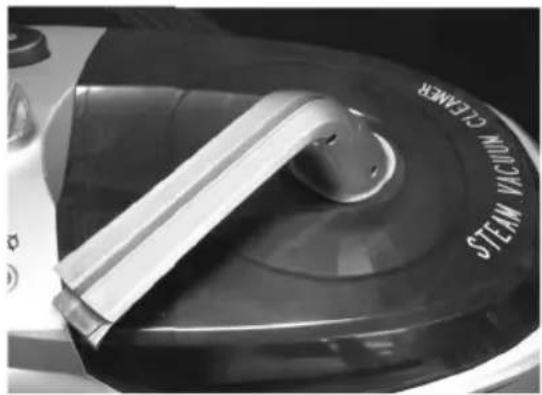
natural_image
Three views of a metal mechanical component with threaded and threaded features, shown from different angles (no text or symbols visible)natural_image
Close-up of hands pressing a button on a device (no visible text or symbols)natural_image
Close-up of hands holding a small electronic device component (no visible text or symbols)natural_image
Close-up of two hand-painted plastic components on a dark surface, no visible text or symbolsnatural_image
Close-up of a hand pointing at a button on a black plastic component, with no visible text or symbols.ПОДГОТОВКА К РАБОТЕ
Spare parts list
No. Part Name
10 Electric motor
26 Switch
50 Valve
51 Relay
77 Adjust pressure
GB DECLARATION OF CONFORMITY CE
We declare under our sole responsibility that this product is in conformity with the following standards or standardized documents: EN 55014-1:2006; EN 55014-2:1997/+A1:2001; EN 61000-3-2:2006; EN 61000-3-3:1995/+A1:2001/+A2:2005 in accordance with the regulations 2006/42/EEC, 2006/95/EEC, 2004/108/EEC.
NOISE/VIBRATION Measured in accordance with EN 60745 the sound pressure level of this tool is <85 dB(A).
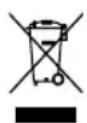
Discarded electric appliances are recyclable and should not be discarded in the domestic waste! Please actively support us in conserving resources and protecting the environment by returning this appliance to the collection centres (if available).
10719 Berlin, Germany
natural_image
Silhouette of a hammer inside a circle, no text or symbols presentBort®
DE Garantiebedingungen
GB Warranty terms
RU Условия гарантии
DE
This document does not restrict statutory rights of consumers; it clarifies the obligations stipulated by law, this document binds the proposed agreement between the parties in the contract.
Carefully read the warranty and make sure it is completed correctly and has the stamp of the Seller.
In the absence of the stamp and the date of sale (or sales receipt with the date of sale) this warranty period will begin from the date of production.
Carefully check the condition of the product and its components, all claims about condition of the product and its components present it to the Seller before purchasing.
Warranty service of the device will be purchased through the Seller, specialized service centers and field technicians who installed the device (if the device needed a special installation, connection or assembly).
For all matters relating to the product maintenance, please contact a qualified service center. Details of the service centers, authorized to carry out repairs and maintenance of the product is available at http://www.sbm-group.com. For more information, please contact the Seller.
In case of malfunction caused by the manufacturer's assembly line the solution of the problem lies with the organization designated by the manufacturer. In this case, the buyer has the right to appeal to the Seller. Responsibility for the malfunction caused by the field technicians that conducted the installation of the device lies on the field technicians. In this case, please refer to the organization that conducted the installation of the device.
For installation (connection) of the product (if the product requires special installation, connection or assembly) we recommend you contact a qualified service center. You can use the services of any qualified technicians, in this case the Seller, the Organization designated by the manufacturer, Importer, Manufacturer is not liable for product defects arising from improper installation (connection).
In order to improve the design, constructions, or manufacturing techniques with its technical characteristics, we may do so without prior notice to the Buyer and shall not entail obligation to update / improve the previously released products. In order for proper installation and operation of the product, we urge you to carefully examine the operating instructions to avoid any problems. Do not make any changes to the warranty card (do not add or erase any information on this card). This warranty is valid if the warranty card contains correctly and clearly the full information (the name and the product model, serial number, date of sale, a signature of the authorized person and stamp of the Seller).
5 YEAR SERVICE LIFE 3 YEAR WARRANTY
This warranty applies to manufacturing or construction defects of the product.
For any authorized repair or replacement of defective parts will be at discretion of the service center, to determent where service will take effect (Buyer's home or service centre). With a period of not exceeding 45 days.
If for any reasons repairs require more than 45 days service center will notify the Buyer and new agreement will be drawn.
Specifi ed period covered repair applies only to products that are used for personal, family or household purposes not related to business activities.
The warranty period for the component parts (parts that can be removed from the product without any tools, like boxes, shelves, grills, baskets, tools, brushes, tubes, hoses, and other similar components) is 3 (three months). The warranty period for new components, installed on the product with warranty repair or paid repair, or purchased separately from the product is 3 (three) months from the date of delivery after the repair, or sales to the Buyer of these components.
This warranty does not cover:
- Periodic maintenance and service products (cleaning, replacing filters or device used as a filter);
- Any adaptation or any changes of use outside of manual, including with a view to improving and expanding the scope of its normal use, as instructed by the product, without prior written consent.
This warranty is also void in the following cases:
- If it is fully or partially altered, deleted or removed or illegible serial number;
- Use of the product for other than its intended use and not following the instruction manual, including use of the product or in conjunction with an overload of accessories not recommended by the Seller, the organization authorized by the manufacturer, importer, manufacturer;
- If any mechanical damage (chips, cracks, etc.), the impact on the product of excessive force, aggressive chemicals, high temperatures, high humidity / dust, concentrated vapors, was the cause of the malfunction of the product;
- repair / setup / installation / adaptation / start-up of product by non-authorized organizations / individuals;
- natural disasters (fire, flood, etc.), and other causes beyond the control of the Seller, organization authorized by the manufacturer, importer, manufacturer and Buyers;
- Improper connections for electricity or water supply, as well as failures (does not meet the operating parameters) of electricity or water supply system and other external networks;
- defects resulting from foreign objects inside product or liquids, (except those provided by the operating instructions, insects, and their metabolic products, etc.);
- Improper storage of the product;
- Replacement of the bulbs, filters, batteries, fuses, and glass / porcelain / fabric and manually operated parts and other extra wear and tear parts or product, which have their own limited life, due to the natural wear and tear, or if replacement is by construction and is not associated with the assembly of the product;
- defects caused by other system, in which the product is used as an element of the system.
BG
Terms and Conditions of the extended warranty online at www.sbm-group.com
Terms and Conditions of the extended warranty online at www.sbm-group.com
natural_image
Silhouette of a rocket launching into the sky, enclosed in a gray circle (no text or symbols)Bort®
DE Änderungen vorbehalten
GB Subject to change
BG Подлежи на промяна
RU Возможны изменения
CE RoHS IP24 CB
- Bort®
- BSS-3500-St
- DE Deutsch
- DAMPFSAUGER
- BODENBÜRSTE
- WISCHGUMMI
- SAUG- & DAMPFDÜSE
- DAMPFBÜGELEISEN
- METHODE ZUM ÖFFNEN DES BEHÄLTERS:
- PRODUCT ELEMENTS 1
- SPECIFICATIONS
- FUNCTIONS
- SAFETY NOTICE:
- ACCESSORIES
- EXTENSION HANDLE
- FLOOR BRUSH
- SQUEEGEE
- SUCTION NOZZLE & STEAM NOZZLE
- FUNNEL AND MEASURING CUP
- STEAM IRON
- THE METHOD OF TANK OPEN:
- OPERATING THE UNIT
- MAINTENANCE
- TROUBLE SHOOTING
- USING TOUR APPLIANCE
- WHICH ACCESSORY TO USE
- FLOOR
- BENCH TOPS
- FRIDGE SEALS
- OVENS GRILLS
- WINDOWS AND MIRRORS
- BATHROOMS
- TAPS AND SINKS
- WALL GROUT
- PAINTED WALLS
- BBQ
- UPHOLSTERY
- CARPET
- AUTO DETAILING
- WOOD SURFACES-GENERAL
- BG Български
- АКСЕСОАРИ
- ТЕЛЕСКОПИЧНА ТРЪБА
- ЧЕТКА ЗА ПОДА
- ГУМЕН НАКРАЙНИК
- ПАРНА ЮТИЯ
- РЕЗЕРВОАР – НАЧИН НА ОТВАРЯНЕ:
- АКСЕССУАРЫ
- РАЗДВИЖНАЯ РУЧКА
- ЩЕТКА ДЛЯ ПОЛА
- РЕЗИНОВАЯ НАСАДКА
- ПАРОВОЙ УТЮГ
- ПОДГОТОВКА К РАБОТЕ
- Spare parts list
- No. Part Name
- GB DECLARATION OF CONFORMITY CE
- DE
- YEAR SERVICE LIFE 3 YEAR WARRANTY
- BG
Brand : Bort
Model : BSS-3500-St
Category : Vacuum Cleaner