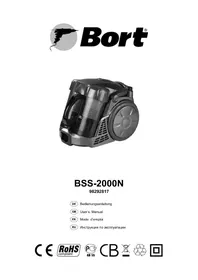
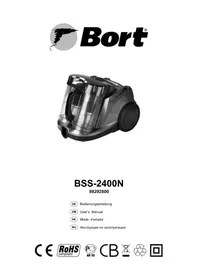
BSS-1800N-ECO - Vacuum Cleaner Bort - Free user manual and instructions
Find the device manual for free BSS-1800N-ECO Bort in PDF.

User questions about BSS-1800N-ECO Bort
0 question about this device. Answer the ones you know or ask your own.
Ask a new question about this device
Download the instructions for your Vacuum Cleaner in PDF format for free! Find your manual BSS-1800N-ECO - Bort and take your electronic device back in hand. On this page are published all the documents necessary for the use of your device. BSS-1800N-ECO by Bort.
USER MANUAL BSS-1800N-ECO Bort
natural_image
Silhouette of a rocket launching from a circular base, no text or symbols presentBort®
natural_image
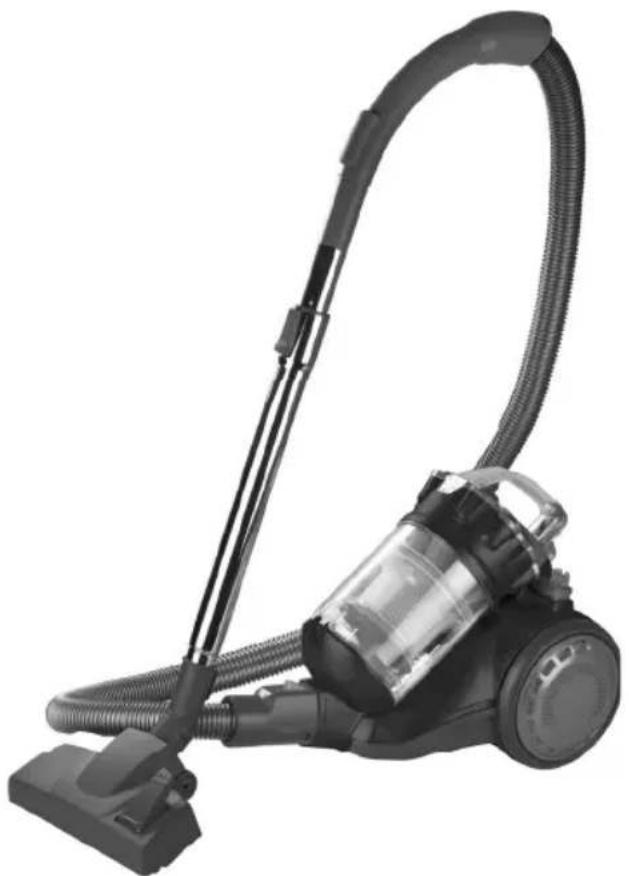
Black and white photo of a vacuum cleaner with coiled tubing and a clear glass body (no text or symbols visible)BSS-1800N-O / BSS-1800N-ECO
98292787 / 98292947
GB
User's Manual
RU
text_image
Technical diagram of a vacuum cleaner assembly with numbered parts for identification and assembly.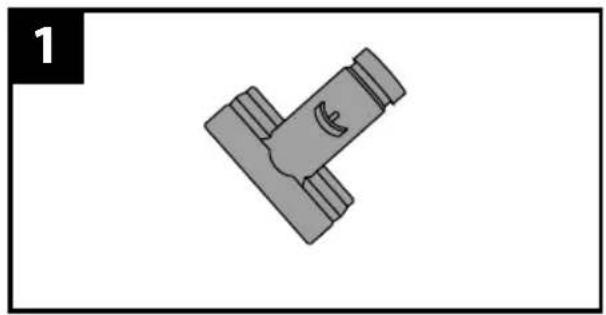
natural_image
3D mechanical component diagram with no visible text or symbols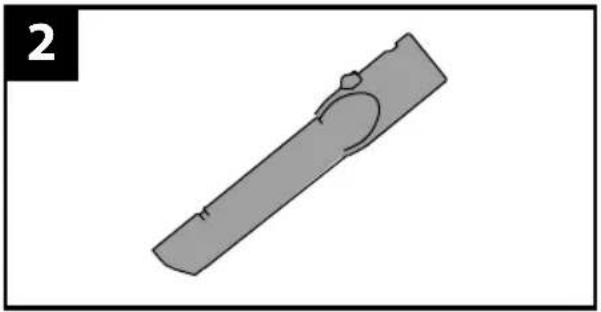
natural_image
Simple 3D diagram of a cylindrical object with a curved cutout and mounting holes, labeled with number 2 (no text or symbols on the object itself)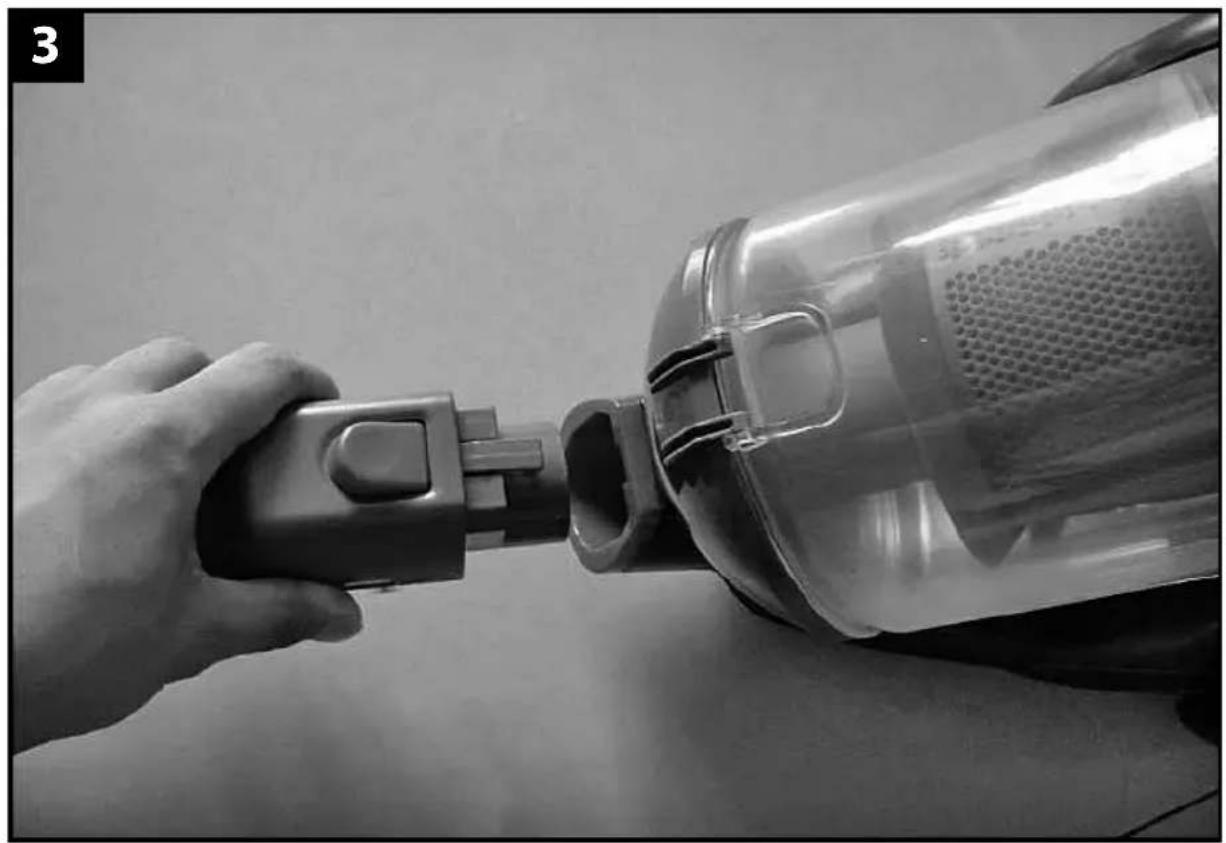
natural_image
Close-up of a hand inserting a plastic vacuum cleaner into a container (no text or symbols visible)
natural_image
Close-up of a vacuum cleaner with hand holding a bag, showing mechanical components and directional arrows (no text or symbols)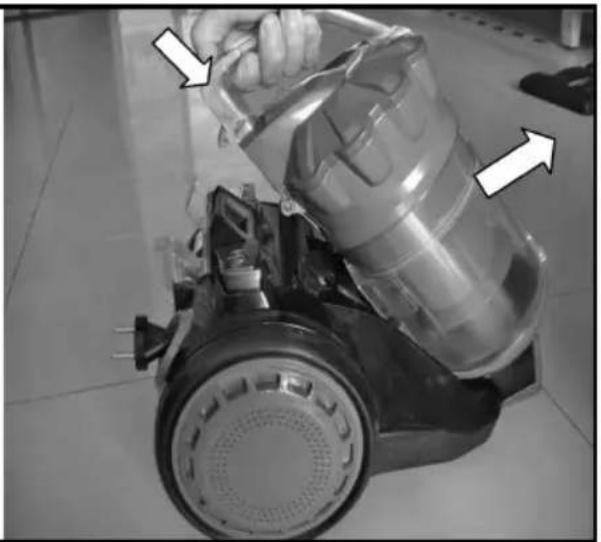
natural_image
Close-up of a hand pouring liquid into a vacuum cleaner on tiled floor (no text or symbols visible)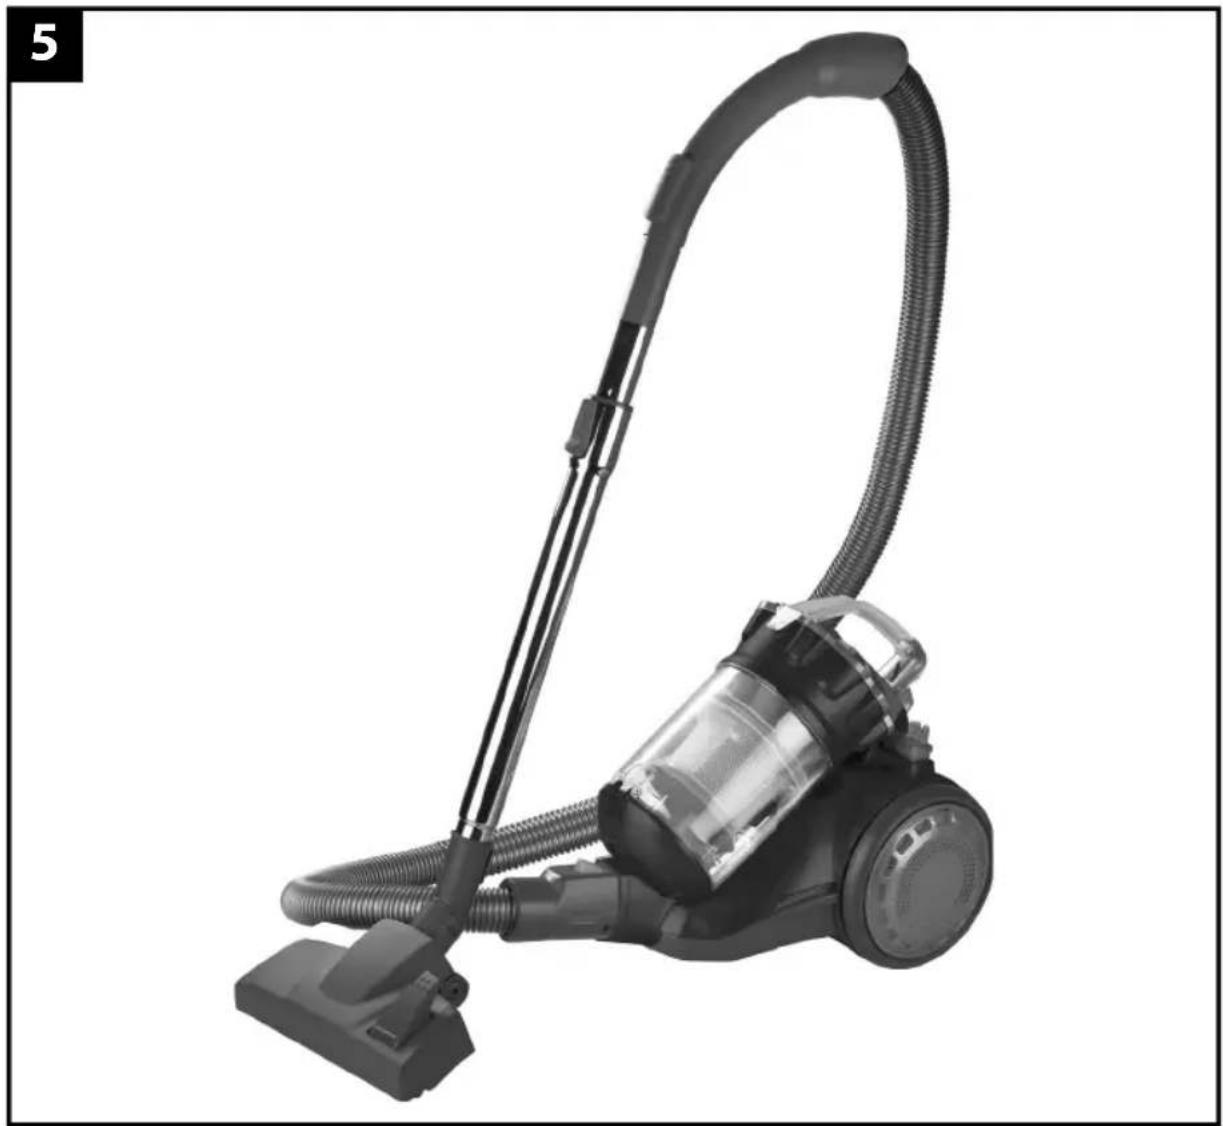
natural_image
Black and white photo of a vacuum cleaner with coiled tubing and handle (no text or symbols visible)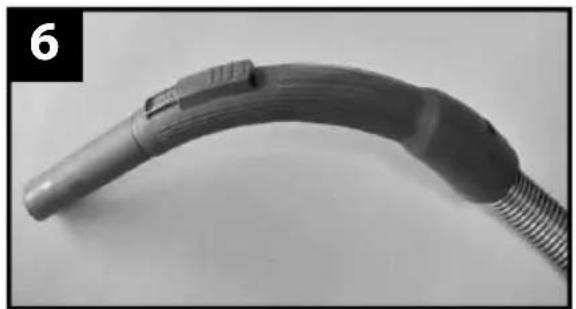
natural_image
Close-up of a handheld electric shaver with threaded end (no visible text or symbols)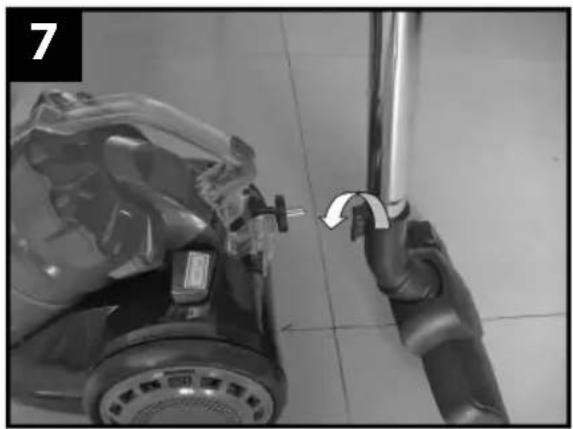
natural_image
Close-up of a hand holding a small tool near a wall-mounted device, with no visible text or symbols.
natural_image
Black-and-white photo of a plastic bag pouring liquid into a woven basket containing dark material, placed on tiled floor (no text or symbols visible)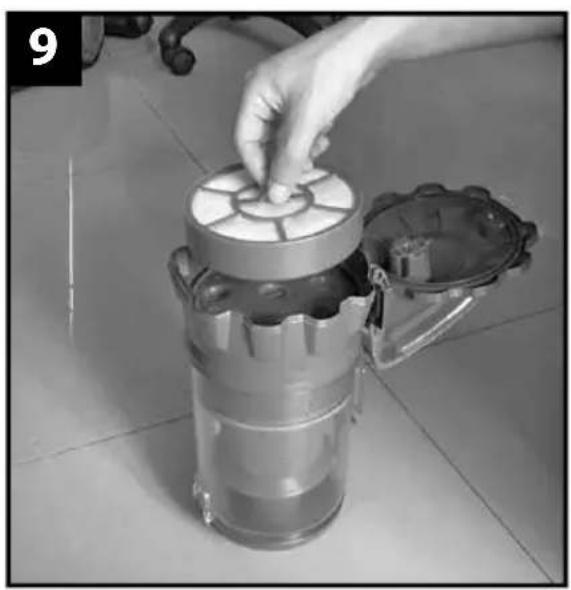
natural_image
Hand placing a component into a cylindrical device on tiled floor (no visible text or symbols)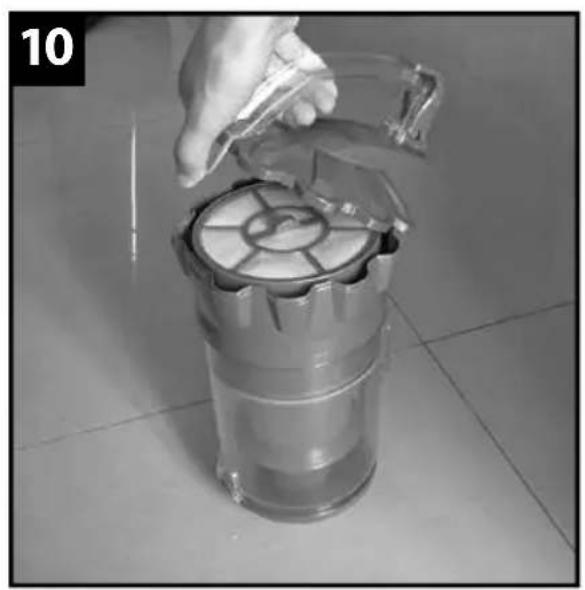
natural_image
Hand pouring liquid into a cylindrical container with internal components (no text or symbols visible)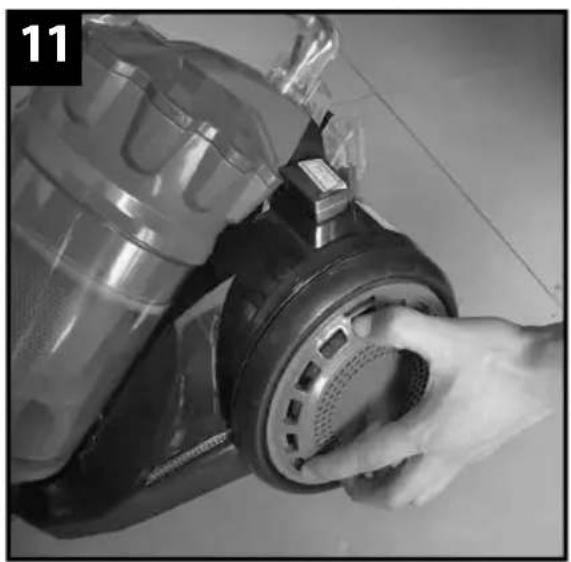
natural_image
Close-up of a hand adjusting a black vacuum cleaner's wheel (no visible text or symbols)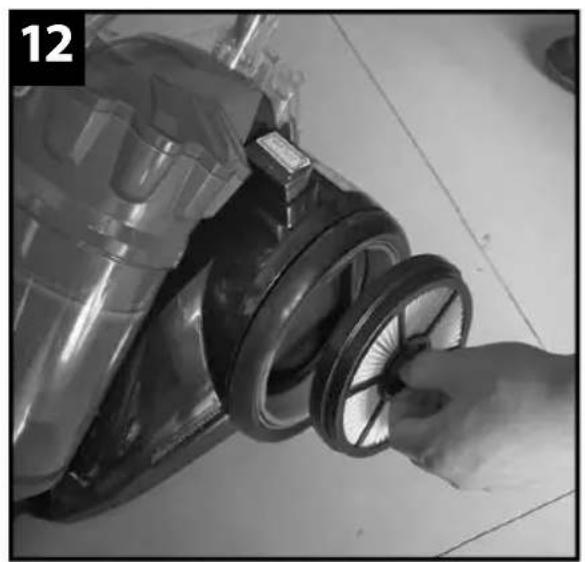
natural_image
Close-up of a hand inserting a circular component into a vacuum cleaner's air filter (no text or symbols visible)GB English
Vacuum Cleaner
DEAR CUSTOMER!
Congratulations on the purchase of BORT product, which has progressive design and high quality. We hope that our products will be your companion for many years.
For the efficient and safe use of the product, please read this manual and save it for future reference.
SPECIFICATIONS 1
MAINTENANCE INSTRUCTIONS 2
- Handle
- 2-in-1 Tool
- Air Escape Pushbutton
- crevice Tool
- Hose
- Release Button
- Telescopic Tube
- Floor brush
- Handle Of Dust
- Release Button Of Dust
- Cyclone dust container
- Switch Pedal
- Tube Support
- Power plug
- Cord reeling pedal
ATTENTION: All schematic pictures may differ from the actual product
COMPLETE SET
Standard complete set of the product includes:
Vacuum Cleaner
Hose
Telescopic tube
Crevice nozzle
Multi brush
Brush for upholstery and carpets
Owner's manual
Due to the constant improvement of the technical characteristics of the models, we reserve the right to make changes in construction and/or complete set of product.
SAFETY AND SECURITY
- Be sure to use the cleaner in compliance with the contents of this manual, and use the fittings designated by the manufacturer.
- Please do not leave the cleaner when it is powered on. Turn off the power switch and pull out the power plug when not using or before maintenance.
-
Please do not pull or carry the cleaner by the power cord, or nip it when closing a door; keep the cord free from the press of the cleaner.
-
Please do not let children take the cleaner as a toy, and close attention is necessary when the cleaner approaches children.
- Please do not use the cleaner when its power cord or plug is damaged. Send it to the appointed service center. Please do not unplug by pulling the cord or plug. To unplug, grasp the plug, not the cord.
- Never pull the power plug or use the cleaner with wet hands.
- When using the cleaner, pay attention to prevent any hair roll or other rubbish block up the air inlet (including the hose and the spill), otherwise motor failure and housing distortion may be caused. If the matters absorbed in forms a blockage, stop the cleaner by pulling out the power plug immediately to clean the blockage.
- When using the cleaner, don't plug up the air outlet by towel or other matters, otherwise the efficiency of dust absorbance will be influenced, and the motor will be at high risk of being burnt out.
- Never use the cleaner at uneven floor or ground; and be very careful when cleaning stairs to prevent the cleaner from falling down.
- Never absorb live stumps with the cleaner, otherwise the motor may be damaged.
- The cleaner should be kept far away from heat sources (such as central heating, oven, etc) to avoid the distortion of plastic parts as well as the influence caused by such distortion.
- Before using the cleaner, please remove big and sharp matters on the floor to avoid damaging the plastic parts, filter gauzes and motor.
- Never absorb water or other liquid with this cleaner, otherwise, the motor will be damaged.
- This appliance is not intended for use by persons (including children), with reduced physical, sensory or mental capabilities, or lack of experience and knowledge, unless they have been given supervision or instruction concerning use of the appliance by a person responsible for their safety.
ASSEMBLY INSTRUCTIONS
- Before assembling the cleaner, please confirm all parts and components for the cleaner are received by referring to Parts and Components List.
- Please remember to cut off the power supply before assembly.
ASSEMBLY OF HOSE
- As is shown in Figure (3), insert the hose into the duct inlet of the machine body in horizontal direction. Please pay attention to the alignment of two projecting parts. Turn the hose right when it is pushed into the bottom, a click of inserting sound may be heard, i.e. the hose is assembled into the machine body completely.
2. ASSEMBLY AND REMOVAL OF DUST BARREL
As is shown in Figure (4), place the bottom of the dust barrel on the projecting part at the front end of the machine body, and press down the dust barrel. When the front-end hook is entered into the corresponding part of the machine body completely, and a click of inserting sound is heard, which indicate that the dust barrel is assembled in place. To remove the dust barrel, press down the handle of the dust barrel; when the
handle is pressed down to the bottom, the dust barrel can be lifted to remove.
ASSEMBLY OF METAL EXTENSION PIPE AND FLOOR BRUSH
Insert the front end of the hose handle into the metal extension pipe according to Figure (5); then insert the other end of the metal extension pipe into the rounded inlet of the floor brush, and adjust to the proper direction. At this time, the assembly of the whole machine is completed.
OPERATION INSTRUCTIONS
HOW TO START
-
First of all, pull out the power cord from the cord reel to the needed length; insert the power cord plug into the power socket, and press down the power switch button with fi nger or step on it with foot; then you can control the start and stop of the cleaner.
-
The yellow mark on the power cord indicates its desired length. Never pull out the power cord to the length exceeding the red mark.
CONTROL OF SUCTION FORCE
When the suction inlet is jammed by some cloth due to the over-large suction force, you can adjust the air escape pushbutton on the hose handle to control the suction force at the suction inlet, as is shown in Figure (6).
PROTECTIVE DEVICES OF MOTOR
-
There is a temperature controller designed in the body of cleaner motor, which can automatically cut off the power supply of motor to prevent overheating. When the air-inlet or air-outlet pipe is overloaded or blocked, the temperature of motor rises, then the temperature controller cuts off the power supply of motor automatically to make the motor cool, preventing the cleaner from being damaged.
-
If the temperature controller is cut off, stop the cleaner immediately and pull out the power plug to make the cleaner cool, and check and remove the hair roll or other roll-like rubbish blocking the air inlet (including the hose and the spill), and replace the fi liter HEPA or fi liter gauze when necessary.
-
After cooling the motor for 30mins, plug in the power plug and check whether the temperature controller has been reset. If the power supply of the cleaner hasn't been cut off, the temperature controller of the motor won't be reset even when the motor has become cool.
MAINTENANCE OF THE CLEANER
All the day-to-day maintenance and repair jobs should be done after the power plug has been pulled out.
-
Frequently remove the rubbish from the dust barrel, so as to avoid the failure of the cleaner.
-
Never wipe the surface of the cleaner with gasoline or oily liquid. Wipe it with water or neutral detergent. Caution: be sure to wring out the wiping cloth dry for wiping, it is prohibited for water to infiltrate into electrical elements of the cleaner.
-
When the cleaner is placed idle not in use, it should not be put directly in the sun or in a damp place.
STORAGE OF THE CLEANER
-
Upon the completion of the operation of the cleaner, turn off its power supply, and pull the power plug out of the power socket, then step on the cord reeling button to reel in the power cord fully. Hang the floor brush onto the floor brush hook, as is shown in Figure (7).
-
Place the cleaner in the dry indoor environment.
CLEANING OF THE DUST BARREL
Remove the rubbish in the dust barrel frequently to avoid the failure of the cleaner.
-
Clean the dust barrel only after the power plug of the cleaner has been pulled out;
-
Put the dust barrel over the rubbish bin (bag), press down the releasing button of the dust barrel, the bottom cover of the dust barrel will automatically fall down, and clear and empty the dust barrel, as is shown in Figure (8).
Cleaning of front filter for motor:
Warning: please make sure the power supply of the cleaner has been cut off before carrying out the following steps:
-
Pull out the power cord plug of the cleaner from the power socket.
-
Press down the handle of the dust barrel to remove the dust barrel, and remove the cover of the front filter for motor, and then use the brush to clean the filter (sponge and filter gauze with composite coating) or place it under the cock to clean, as is shown in Figure (9/10).
Caution:
It is normal that the white central filter in the dust barrel may change color, which cannot affect its filtration performance. If the hose and the central filter are difficult to clean, we recommend that you use water to flush them; however, please be sure to place them in the dry air for at least 24 hours after they are flushed by water.
Key Points:
Please note: when the dust collecting barrel or the filter cover is not installed in place, the operation status will be invalid, and the cleaner will have no dust absorption capacity. At this time, you need to check carefully whether the dust collecting barrel and the filter cover have been installed in place.
Caution: please keep the suction passage unobstructed, otherwise the motor may become overheating or even be damaged.
REPLACEMENT OF REAR FILTER FOR MOTOR
The rear fi Iter for motor is installed behind the air outlet grid, which can be washed due to the materials used. When the surface is jammed seriously by dust, the fi Iter should be replaced by a new one or washed by water to maintain enough suction force. (Figure 11/12)
It is usually necessary to clean and replace the fi Iters for motor only after they have been used for 6 months to 12 months. Please remember to confi rm that all fi Iters have been correctly installed into the machine before turning on the cleaner to use.
Key Points:
The power supply of the cleaner must be cut off before replacing any filter!
FAULTS AND REPAIR
In case of abnormality with this product, please treat it in the way as stated hereinafter; if the cleaner still refuses to work normally, please contact the stop from where this product was bought or with the appointed service point.
| Fault Treatment | |
| The cleaner cannot operate. 1. Check | whether the power plug is inserted securely; pull out the plug and then reinsert it in the power socket;2. Check whether the power socket is electrified;3. Check whether the switch of the cleaner is in “ON” position. |
| The suction force is reduced. 1. Check whether the floor brush, the hose and the spill are jammed, and remove any blockage immediately;2. Check whether the air-inlet filter gauze is dusty; frequently clean rubbish or replace air-inlet and air-outlet HEPA; | |
| There is abnormal sound when the motor is under operation. | 1. Stop the cleaner immediately;Check whether the floor brush, the hose and the spill are jammed, and remove any blockage immediately. |
RU Русский
Пылесос
text_image
Exploded view diagram of a mechanical device with numbered parts for identificationSpare parts list
No. Part Name
37 Electric motor
40 Switch
GB DECLARATION OF CONFORMITY CE
We declare under our sole responsibility that this product is in conformity with the following standards or standardized documents: EN 55011:2009, EN 55014-2:1997+A1:2001+A2:2008, EN 61000-3-2:2006+A2:2009, EN 61000-3-3:2008 in accordance with the regulations 2006/42/EEC, 2006/95/EEC, 2004/108/EEC.
natural_image
Silhouette of a jet engine inside a gray circle (no text or symbols)Bort®
GB Warranty terms
RU Условия гарантии
GB
This document does not restrict statutory rights of consumers; it clarifies the obligations stipulated by law, this document binds the proposed agreement between the parties in the contract.
Carefully read the warranty and make sure it is completed correctly and has the stamp of the Seller.
In the absence of the stamp and the date of sale (or sales receipt with the date of sale) this warranty period will begin from the date of production.
Carefully check the condition of the product and its components, all claims about condition of the product and its components present it to the Seller before purchasing.
Warranty service of the device will be purchased through the Seller, specialized service centers and fi eld technicians who installed the device (if the device needed a special installation, connection or assembly).
For all matters relating to the product maintenance, please contact a qualified service center. Details of the service centers, authorized to carry out repairs and maintenance of the product is available at http://www.sbm-group.com. For more information, please contact the Seller.
In case of malfunction caused by the manufacturer's assembly line the solution of the problem lies with the organization designated by the manufacturer. In this case, the buyer has the right to appeal to the Seller. Responsibility for the malfunction caused by the fi eld technicians that conducted the installation of the device lies on the fi eld technicians. In this case, please refer to the organization that conducted the installation of the device.
For installation (connection) of the product (if the product requires special installation, connection or assembly) we recommend you contact a qualified service center. You can use the services of any qualified technicians, in this case the Seller, the Organization designated by the manufacturer, Importer, Manufacturer is not liable for product defects arising from improper installation (connection).
In order to improve the design, constructions, or manufacturing techniques with its technical characteristics, we may do so without prior notice to the Buyer and shall not entail obligation to update / improve the previously released products. In order for proper installation and operation of the product, we urge you to carefully examine the operating instructions to avoid any problems. Do not make any changes to the warranty card (do not add or erase any information on this card). This warranty is valid if the warranty card contains correctly and clearly the full information (the name and the product model, serial number, date of sale, a signature of the authorized person and stamp of the Seller).
- Service life of air conditioners, dehumidifiers and electric heaters (convectors) is 10 (ten) years.
- Service life of electric heat guns and thermal veils is 7 (seven) years, infrared heaters 8 (eight) years.
-
Service life of other products is 5 (five) years.
-
The warranty period for air-conditioners, electric fan heaters, infrared heaters, electric and water thermal veils is 3 (three) years.
- The warranty period for other products is 5 (five) years from the date of sale of the product to the Buyer.
This warranty applies to manufacturing or construction defects of the product.
For any authorized repair or replacement of defective parts will be at discretion of the service center, to determent where service will take effect (Buyer's home or service centre). With a period of not exceeding 45 days.
If for any reasons repairs require more than 45 days service center will notify the Buyer and new agreement will be drawn.
Specifi ed period covered repair applies only to products that are used for personal, family or household purposes not related to business activities.
- The warranty period for the component parts (parts that can be removed from the product without any tools, like boxes, shelves, grills, baskets, tools, brushes, tubes, hoses, and other similar components) is 3 (three months).
- The warranty period for new components, installed on the product with warranty repair or paid repair, or purchased separately from the product is 3 (three) months from the date of delivery after the repair, or sales to the Buyer of these components.
This warranty does not give right to compensation and coverage for damage that occurred as a result of alteration or adjustment of product, without the prior written consent of the manufacturer, in order to bring it into compliance with local or national technical standards and safety regulations in force in any country.
This warranty does not cover:
- Periodic maintenance and service products (cleaning, replacing filters or device used as a filter);
- Any adaptation or any changes of use outside of manual, including with a view to improving and expanding the scope of its normal use, as instructed by the product, without prior written consent.
This warranty is also void in the following cases:
- If it is fully or partially altered, deleted or removed or illegible serial number;
- Use of the product for other than its intended use and not following the instruction manual, including use of the product or in conjunction with an overload of accessories not recommended by the Seller, the organization authorized by the manufacturer, importer, manufacturer;
- If any mechanical damage (chips, cracks, etc.), the impact on the product of excessive force, aggressive chemicals, high temperatures, high humidity / dust, concentrated vapors, was the cause of the malfunction of the product;
- repair / setup / installation / adaptation / start-up of product by non-authorized organizations / individuals;
-
natural disasters (fire, flood, etc.), and other causes beyond the control of the Seller, organization authorized by the manufacturer, importer, manufacturer and Buyers;
-
Improper connections for electricity or water supply, as well as failures (does not meet the operating parameters) of electricity or water supply system and other external networks;
- defects resulting from foreign objects inside product or liquids, (except those provided by the operating instructions, insects, and their metabolic products, etc.);
- Improper storage of the product;
- Replacement of the bulbs, filters, batteries, fuses, and glass / porcelain / fabric and manually operated parts and other extra wear and tear parts or product, which have their own limited life, due to the natural wear and tear, or if replacement is by construction and is not associated with the assembly of the product;
- defects caused by other system, in which the product is used as an element of the system.
- defects resulting from failure by not following the Buyer's Manual as follows.
Operation features humidifiers, air purifiers and de-humidifi ers
- It is mandatory for operation of ultrasonic humidifiers use the original (brand) filter cartridge for water softening if applicable by construction. With the filter cartridge it is recommended to use tap water without treatment or purification. Life of the filter cartridge depends on the hardness of the water and can be unpredictable decrease, resulting in a white precipitate around the humidifi er and on the membrane of the humidifi er. To reduce the likelihood of occurrence of such sediment fi lter cartridge requires periodic timely replacement. Service life of filters in humidifi ers can decrease performance out moisture in time, which requires regular periodic replacement of filters according to the instructions. For any and all listed in this paragraph and above faults which caused defects, damage by the Buyer or a third party, the Seller, organization designated by the manufacturer, importer, manufacturer are not liable and the real guarantee for such problems humidifi ers are not covered.
For operating the product is recommended to use only the original (branded) accessories of manufacturer.
If a humidifier does not have a filter cartridge, it is recommended to use distilled or softened water. This will reduce calcium build-up on the membrane. Calcium build-up on the membrane can lead to lower efficiency and product malfunction and is not covered by warranty.
- Before to start use the air cleaner, take out filter from the bag. For a normal distribution of purified air in the room do not install an air cleaner in the air flow (in the draft, the fan, etc.). Any damage of the filter may reduce the effectiveness of air purification. Accumulated on the filter dust can be carefully removed with a vacuum cleaner. Water wash of the air cleaner filter is not allowed.
- To prevent water leaks and excessive noise, it is recommended to install the dehumidifier on a flat surface. To ensure efficient drainage, close windows and doors of the room where is dehumidifier working. When moved particularly careful: do not hit the unit, do not tilt or allow it to fall. Before switching on, make sure that the condensate tank is installed correctly.
Guide to care for an air conditioning:
- At least once in 2 weeks, and if necessary, more frequently, clean the air fi Iters inside the unit (check the Manual). The protective properties of the fi Iters based on electrostatic effect, so even with a slight contamination, the fi Iter does not operate as well.
- At least once a year, clean the heat exchanger inside the unit. To do this: Open the front framework, take out the air fi Iter and by using a vacuum cleaner or a brush with long bristles gently clean the ribs of the heat exchanger (note: crushed ribs reduce the effi ciency of the air conditioner.)
When you do this, be careful not to hurt your hands by the sharp edges of the ribs!
- Once a year (better in spring), when necessary, clean the heat exchanger of the outdoor unit and check the air conditioner how it works in all modes. This will ensure reliable operation of your air conditioner.
- Please remember that the operation of the air conditioner in the winter time has a number of features. At first, at very low temperatures: -10^ C or below for non-inverter air conditioners and -15^ C and below, for inverter air conditioners, it is recommended to use the air conditioning only in the ventilation mode. To use the air conditioner for cooling or heating can be a reason of malfunction of the air conditioner and compressor failure. Second, if the outside temperature is negative, and the condensate (water from the indoor unit) is output outside, it may freeze drain pipe and water, having no outlet, will flow from the indoor unit to the room.
Buyer-Consumer is warned that, by paragraph 11 "List of non-food products of good quality, are not subject to return or exchange for a similar product of a different size, shape, size, style, color or configuration" Post. Government of the Russian Federation of 19.01.1998. № 55, he has no right to require the exchange of products purchased in the order of art. 25 of the Law "On Protection of Consumer Rights" ist. 502 of the Civil Code.
Since the signing by the Buyer of the warranty card is considered that:
- All information about the product and its consumer properties provided to Buyer fully, in accordance with Article 10 of the Law “On Protection of Consumer Rights”;
- The Buyer has read and agrees to the terms of the warranty service and features operation of the product;
- The buyer does not have claims to the appearance and completeness of the product.
RU
Terms and Conditions of the extended warranty online at
www.sbm-group.com
Allgemeine
After having read the warranty terms and pre-purchase inspection I certify that I've got no complaints in respect of the appearance and performance of the tool.
Kurfürstendamm 21, 10719 Berlin, Germany
www.sbm-group.com
GUARANTEE CERTIFICATE
GUARANTEE CERTIFICATE
GARANTIESCHEIN
CERTIFICAT DE GARANTIE
ГАРАНТИЙНЫЙ ТАЛОН.
Terms and Conditions of the extended warranty online at www.sbm-group.com