
IP 240 - Pregnant BLAUPUNKT - Free user manual and instructions
Find the device manual for free IP 240 BLAUPUNKT in PDF.

| Product Type | Portable Bluetooth Speaker |
| Brand | Blaupunkt |
| Model | IP 240 |
| Dimensions (W x H x D) | 200 x 100 x 100 mm |
| Weight | 0.5 kg |
| Power Supply | Built-in rechargeable battery, USB charging (5V/1A) |
| Battery Life | Up to 8 hours |
| Bluetooth Version | 5.0 |
| Bluetooth Range | 10 meters |
| Frequency Response | 80 Hz – 20 kHz |
| Speaker Driver | 1 x 40 mm full-range |
| Total Power Output | 5 W RMS |
| Audio Inputs | Bluetooth, 3.5mm AUX, USB (for playback) |
| Supported Audio Formats | MP3, WMA, WAV |
| FM Radio | Yes, with built-in antenna |
| Hands-free Function | Yes, built-in microphone |
| Waterproof Rating | Not specified (assumed none) |
| Package Contents | Speaker, USB charging cable, 3.5mm audio cable, user manual |
| Warranty | 1 year |
| Cleaning Instructions | Wipe with a soft, dry cloth. Do not use water or solvents. |
| Safety Precautions | Do not expose to extreme temperatures, keep away from moisture |
| Repairability | Battery and speaker driver replaceable by qualified technician |
Frequently Asked Questions - IP 240 BLAUPUNKT
User questions about IP 240 BLAUPUNKT
0 question about this device. Answer the ones you know or ask your own.
Ask a new question about this device
Download the instructions for your Pregnant in PDF format for free! Find your manual IP 240 - BLAUPUNKT and take your electronic device back in hand. On this page are published all the documents necessary for the use of your device. IP 240 by BLAUPUNKT.
USER MANUAL IP 240 BLAUPUNKT
natural_image
Black electronic device with a smartphone on top and a digital clock showing 00:20, no visible text or symbols on the device body.IP 240

www.blaupunkt.com


COMPONENT VIDEO: Komponenten-Ausgang (Pr, Y, Pb)
Systembedienung
We would like to take this opportunity to thank you for purchasing this player. We strongly recommend that you carefully study the User Manual before attempting to operate the unit and that you note the listed precautions.
- Ensure that there is a minimum distance of 5 cm around the apparatus for sufficient ventilation.
- The ventilation openings should not be obstructed by any type of covering. For example, newspaper, table-clothes, curtains, etc.
- No source with a naked flame, such as a lighted candle should be placed on or near the device.
- The apparatus should not be exposed to dripping or splashing and no objects filled with liquids, such as vases, should be placed on or near the device.
- The batteries should not be exposed to excessive heat such as sunshine, fire or similar heat sources.
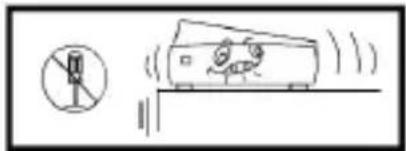
- This unit is controlled by a micro-computer, therefore a display error may occur when there is a thunder storm, static interruption or other interference. In this case, please turn off the power for 10 seconds and the unit will reset to normal once it is switched on.
- Where the mains plug is used as the disconnect device, the disconnect device shall remain readily operable. The main plug shall remain readily operable.
- Do not place the battery pack under direct sunlight, in a fire or in excessively hot places. Remove the batteries if consumed or if product is to be left unused for a long time.
CONTENT
FOREWORD....39
CONTENT....39
WARNING....40
ACCESSORIES....41
INSTALL THE REMOTE CONTROL BATTERY....43
PANELS 44
REMOTE CONTROL....45
SYSTEM CONNECTION....46
CONNECTION....47
BASIC OPERATION....48
RADIO OPERATION....51
COMPATIBILITY INFORMATION....52
TROUBLESHOOTING....53
SPECIFICATION....54
WARNING
IMPORTANT SAFETY INSTRUCTION
- Read these Instructions - All the safety and operating instructions should be read before this product is operated.
- Keep these Instructions - The safety and operating instructions should be retained for future reference.
- Heed all Warnings - All warnings on the appliance and in the operating instructions should be adhered to.
- Follow all instructions - All operating and use instructions should be followed.
- Do not use this apparatus near water- The appliance should not be used near water or moisture - for example, in a wet basement or near a swimming pool, and the like.
- Clean only with a damp cloth.
- Do not block any of the ventilation openings. Install in accordance with the manufacturers instructions
- Do not install near any heat sources such as radiators, heat Registers, stoves, or other apparatus (including amplifiers) that produce heat.
- Do not defeat the safety purpose of the polarized or grounding -type plug. A polarized plug has two blades with one wider than the other. A grounding prong. The wide blade or the third prong are provided for your safety. When the provided plug does not fit into your outlet, consult an electrician for replacement of the obsolete outlet.
- Protect the power cord from being walked on or pinched particularly at plugs, convenience receptacles, and the point where they exit from the apparatus.
- Only use attachments/accessories specified by the manufacturer.
- Use only with a cart, stand, tripod, bracket, or table specified by the manufacturer, or sold with the apparatus. When a cart is used, use caution when moving the cart/apparatus combination to avoid injury from tip-over.

Portable Gear Warning
-
Unplug the apparatus during lightning storms or when unused for a long time.
-
Refer all serving to qualified service personnel. Servicing is required when the apparatus has been damaged in any way, such as power-supply cord or plug is damaged, liquid has been spilled or objects have fallen into the apparatus, the apparatus has been exposed to rain or moisture.
-
Please keep the unit in a good ventilation environment.
-
CAUTION: These servicing instructions are for use by qualified service personnel only. To reduce the risk of electric shock, do not perform any servicing other than that contained in the operating instructions unless you are qualified to do so.
-
WARNING: The MAINS PLUG is used as disconnect device, the disconnect device shall remain readily operable.
-
This equipment is a Class II or double insulated electrical appliance. It has been designed in such a way that it does not require a safety connection to electrical earth.
19.
- This lightning flash with arrowhead symbol within an equilateral triangle is intended to alert the user to the presence of non-insulatd "dangerous voltage" within the product 's enclosure that may be of sufficient magnitude to constitute a risk of electric shock.
- Warning: To reduce the risk of electric shock, do not remove cover (or back) as there are no user-serviceable parts inside. Refer servicing to qualified personnel.
- The exclamation point within an equilateral triangle is intended to alert the user to the presence of important operating and maintenance in the literature accompanying the appliance.
-
The batteries in remote control shall not be exposed or excessive heat such as sunshine, fire or the like.
-
The apparatus shall not be exposed to dripping or slashing and that no objects filled with liquids, such as vases, shall be placed on the apparatus.
-
Warning: To reduce the risk of fire or electric shock, do not expose this apparatus to rain or moisture.
-
WARNING: The battery (battery or batteries or battery pack) shall not be exposed to excessive heat such as sunshine, fire or the like.
-
Correct Disposal of this product. This marking indicates that this product should not be disposed with other household wastes throughout the EU. To prevent possible harm to the environment or human health from uncontrolled waste disposal, recycle it responsibly to promote the sustainable reuse of material resources. To return your used device, please use the return and collection systems or contact the retailer where the product was purchased. They can take this product for environmental safe recycling.
WARNING
Please read and understand all the following warnings and those marked on the unit. This unit has been designed and manufactured to assure personal safety.
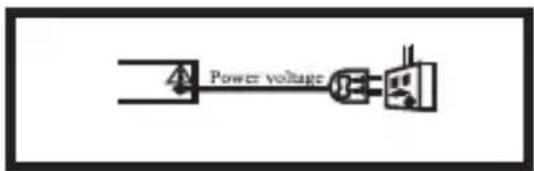
Connect only to appropriate main power as indicated on the unit or User Manual.

Keep the unit and power plug away from water.
natural_image
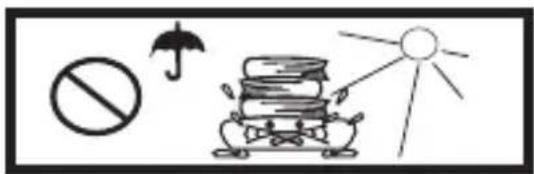
Simple line drawing of a prohibition symbol, umbrella, and sun with books (no text or labels)Avoid direct sunshine and heat source. Never open the cover, avoid dropping metal objects into the unit, such as needle, hairpin, coin etc.

Protect power cable: avoid stress and keep out of walk ways; do not pull & bend excessively.

natural_image
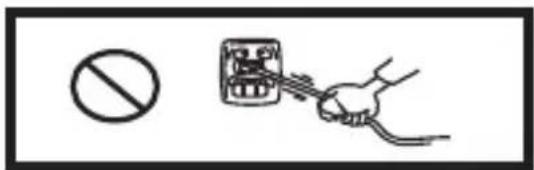
Simple line drawing of two cartoon characters pulling a box with a bird flying nearby (no text or symbols)Unplug the set from the outlet when you do not use it for a long time.
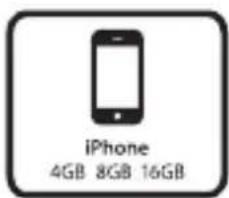
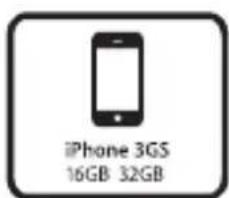
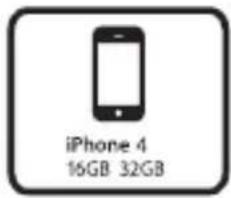
ACCESSORIES

60GB

16GB&32GB
16GB&32GB
Part 1: Plastic Adapters of iPod Docking

natural_image
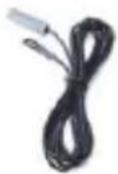
Illustration of a coiled cable with multiple connectors (no text or symbols)
natural_image
Illustration of a bundle of coiled wires or cables (no text or symbols)Part 2: Audio Wire/ Six-headed Audio & Video Lotus Wire
Part 3: FM Antenna Wire

Part 4: Remote Control
Part 5: User Manual
* No Batteries (2 x AAA) for the remote control included in the delivery.
INSTALL THE REMOTE CONTROL BATTERY
- Remove the battery cover.
- Inset the AAA batteries into the battery compartment. Make sure that you match the + and - symbols in the battery compartment.
- Replace the cover.
Note:
- Do not mix batteries of different type.
- Do not mix old and new batteries.
- Battery chemicals can cause a rash. If the batteries leak, clean the battery compartment with a cloth. If chemicals touch you skin, wash immediately.
- If the remote control is not going to be used for an extended period of time, remove the batteries.
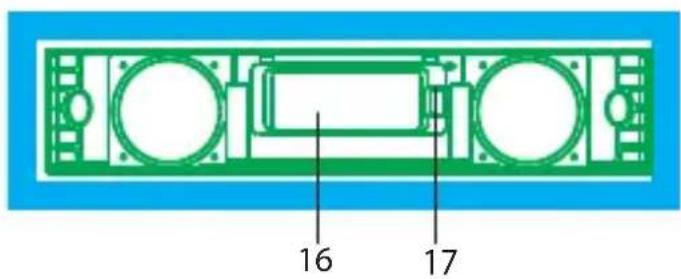
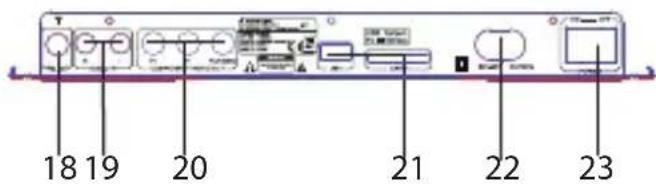
PANELS
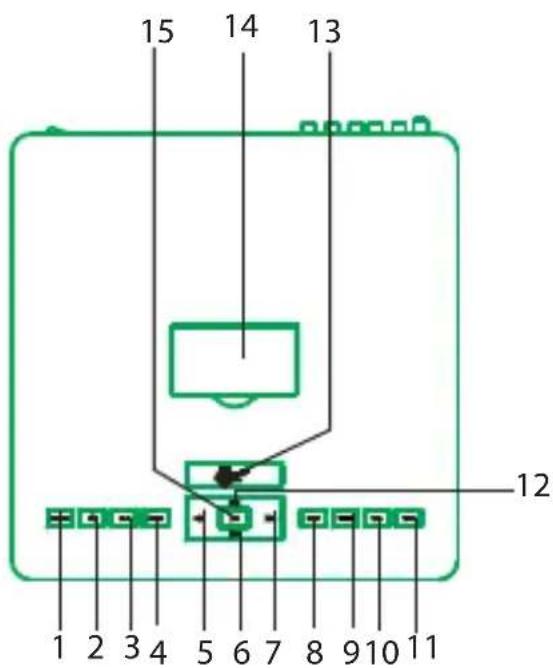
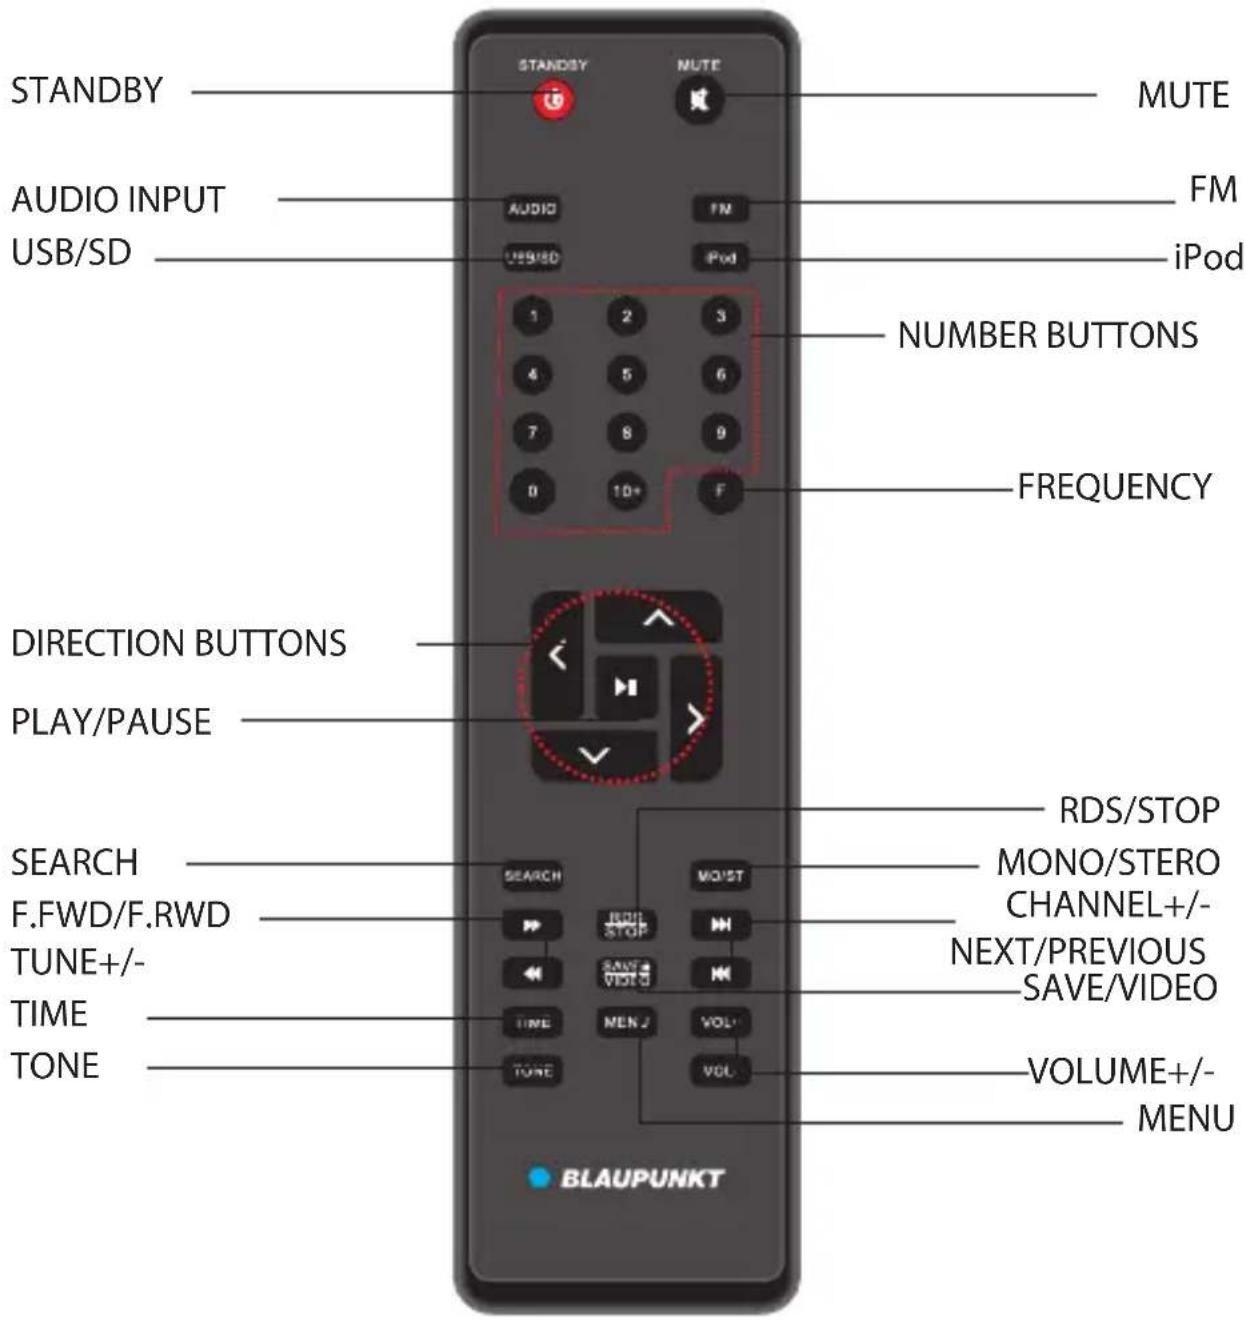
- USB/SD BUTTON
- FM BUTTON
- IPOD BUTTON
- AUDIO BUTTON
- FAST REWIND BUTTON
- NEXT BUTTON
- FAST FORWARD BUTTON
- STOP BUTTON
- TONE BUTTON
- VOLUME- BUTTON
- VOLUME+ BUTTON
- PREVIOUS BUTTON
- STANDBY/SNOOZE BUTTON
- IPOD INTERFACE
- PLAY/PAUSE BUTTON
- DISPLAY SCREEN
- REMOTE CONTROL SENSOR
- FM ANTENNA INTERFACE
- L/R AUDIO INPUT
- Y,Pr/Pb COMPONENT VIDEO OUTPUT
- USB/CARD PORT
- POWER SUPPLY INPUT
- POWER ON/OFF SWITCH
REMOTE CONTROL
NOTE:
- Align the remote control directly at the remote control sensor of the device.
- The range of the remote control depends on the charge of the battery.
- Bright light (sun or artificial light) should not fall directly at the remote control sensor. Bright light can negative influence the efficacy of the remote control.
- Make sure that there are no obstacles between the remote control and the remote control sensor.
SYSTEM CONNECTION
Before connecting acoustic equipment, pay attention to the picture below. Each connection must be safe and firm. Disconnect power cable until you have finished all the connections.

flowchart
graph TD
    A["FM antenna"] --> B["PC"]
    B --> C["Right audio input"]
    B --> D["Left audio input"]
    C --> E["Output"]
    D --> E
    E --> F["Computer"]
CONNECTION
Composite Video Output:
In iPod mode, while playing the video files, connect the blue jack on rear panel of the unit to the video input jack of TV-set. (Note: the default of this unit is composite video output.)
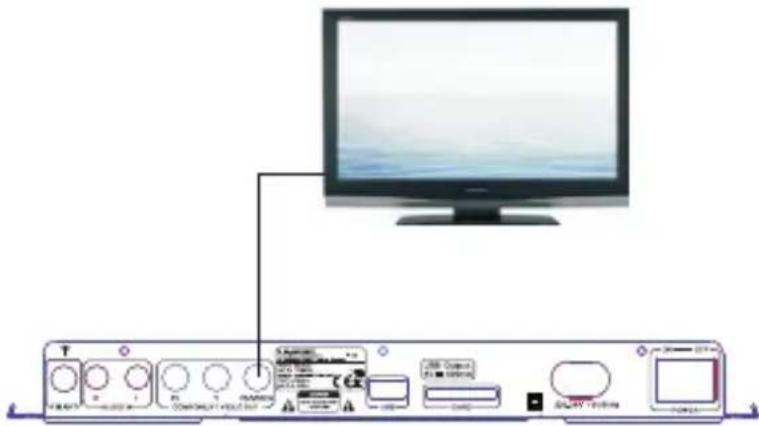
Pr, Y, Pb Component Video Output
Transfer to Pr, Y, Pb component video output from composite video output to make the picture more natural, following operations need to be performed:
- Press the SAVE/VIDEO button one time to enter to Pr, Y, Pb component video output mode. Then play the video files you like.
- Connect the Pr, Y, Pb component jacks on rear panel of this unit to the Pr, Y, Pb component jacks of TV-set.
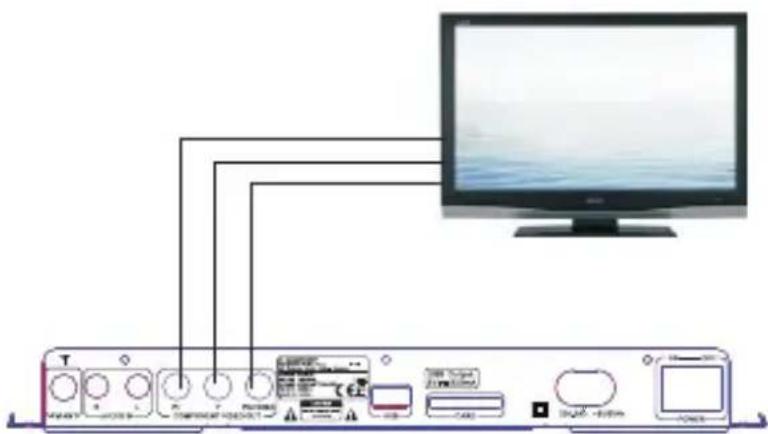
Note: Select one of the connecting ways.
BASIC OPERATION
PREPARATION
1 Before the unit is turned on, please check if all the connections are right and safe. Then connect the main power.
2 Press the POWER ON/OFF button on the back panel to turn on the main power.
STANDBY MODE AND SLEEP TIMER
Long press the ⏻ button on top panel to switch ON/OFF the Standby mode.
Note: Make sure that the unit is connected to the power source.
Short press the ⏻ button to set the sleep time, the unit must be playing (not in standby mode). In order to set the timer duration you will need to press this button repeatedly until you reach the period you require.
Note: The timer increases in increments of 10 minutes, 20 minutes, 30 minutes, 60 minutes, 90 minutes, 120 minutes, and off.
TONE FUNCTION
In play status, press TONE button on the remote control to select the Treble, Bass or Subwoofer adjusting mode; then press the VOL.+/- button to adjust the effect of Treble, Bass or Subwoofer.
DIRECTION BUTTONS
While playing the iPod, press the Direction buttons ▲▼◀▶ to move the cursor to select the item you want.
MUTE BUTTON
If you press the MUTE button while playing, the sound output will be switch off. Press the MUTE button again or the VOL+/- buttons to resume the previous volume level.
VOLUME SETTING
Press the VOL.+/- buttons to turn the volume up or down.
FAST FORWARD AND FAST REWIND
In SD mode, press the ◀◀ or ▶▶ button to fast rewind or fast forward. Press the button again to resume playing mode.
In iPod mode, long press the ◀ or ▶ button to fast rewind or fast forward.
Note: These buttons are unavailable in Audio Input mode.
PREVIOUS AND NEXT
In play status, press the button to go to the previous audio file; press the button to go to the next audio file.
Note: These buttons are unavailable in Audio Input mode.
MENU BUTTON
While playing the iPod, press the MENU button to return to the main menu status.
iPod, AUDIO, FM BUTTONS
1 Connect the iPod with this unit, then press iPod button on the remote control (or on top panel) to enter the iPod mode.
2 Correctly connect audio facility (eg. PC) with this unit, then press AUDIO button on the remote control (or top panel) to enjoy the external audio input sources function.
3 Press FM button on remote control (or top panel) to enter radio mode.
SEARCH BUTTON
In Radio mode, press the SEARCH button to search bands automatically; press again to stop searching. For more information, see RADIO OPERATION.
NUMBER BUTTONS
In Radio status, press the NUMBER buttons to input the number of the required frequency or band. For more information, see RADIO OPERATION.
PLAY/PAUSE BUTTON
In play status, press the ▶ (PLAY/PAUSE)_button to pause, press this button again to continue playing.
Note: This button is unavailable in Radio and Audio Input modes.
STOP BUTTON
In play status, press the STOP button, the player will stop playing; Press the PLAY button to resume playing mode.
Note: This button is unavailable in Radio and Audio Input modes.
TIME BUTTON
Press the TIME button successively, you can get the following time settings: Current time, Alarm time, Power off time and Power on time.


(The max time is 120 mins)
Press the NUMBER buttons (0\~9) directly to input the required time, then the unit will remember the setting automatically.
As to the Alarm setting, firstly press the NUMBER buttons directly to input the required time, then press ▼ button to skip to the Alarm on/off setting. Use Vol+ or Vol- button to select Alarm on or Alarm off.
Note:
- When Alarm time is out, the unit will sound. To silence it, press any button on top panel or remote control.
- If you do not touch any buttons for 5 seconds, the unit will exit to the station selection screen.
USB/DIGITAL CARD
It is possible to listen to audio files using the USB/CARD interface of this unit.
- Connect the USB/CARD device to this unit.
- Press the USB/SD button on the remote control to play the USB or CARD.
- Press the ◀◀ or ▶▶ button to fast rewind or fast forward; Press the ◀◀ or ▶▶ button to go to the previous or next audio files.
- To exit the USB/CARD mode: Press the iPod, AUDIO or FM button, and switch to other modes.
Note:
1 Depending on the amount of data and media speed, it may take longer for system to read the contents of media device. In some cases, reading time may be as long as 60 seconds. This is not a malfunction.
2 Even when they are in a supported format, some files may not play depending on the content.
3 Connect your USB device directly to the USB port of the unit. Using an extension cable is not recommended and may cause interference and failure of data transfer.
LISTENING TO iPod/iPhone
Connecting an iPod/iPhone to this unit
- Remove the plastic cover from the dock.
- Insert the iPod/iPhone to the dock. This unit is designed to make use of the adaptor supplied with your iPhod/iPhone.
- Press the iPod button on the remote control or on the unit, switch to iPhod mode. When activating the iPod/iPhone mode, the screen will display "Authenticating" and then "success".
Playback controls
During iPhod/iPhone playback some functions of this unit continue to operate the playback. Below is a list of each function and what it does.
PLAY/PAUSE: Press once to begin playback, press again to pause.
STOP: Stop playback.
ENTER: This button works as the select button on an iPhone.
◀◀/▶◀: Skips to previous or next track.
MENU: Press this button to return to the main menu status.
DIRECTION BUTTON: Pressing these buttons will scroll up or down through the iPod/iPhone menu.
SEARCH: When playing, work as the function of repeat the audio. Press once to repeat once, twice to repeat all, and the third time to repeat off.
NOTE: During playback when a call comes, iPhone will automatically stop playing the current files.
RADIO OPERATION
Enter FM Function
While in operating mode, press the FM button on the remote control to enter FM mode.
Select Bands
1 Directly input frequency: press the F button on the remote control, then input the frequency that you want. The range of FM frequency is from 87.50MHz to 108.00 MHz.
2 Select the band by pressing ▶▶/◀(Tune+/-) button: press these buttons to adjust the frequency up or down a step. The step of FM is 0.05 MHZ.
3 Select saved stations by pressing number buttons. For example: press 10+ button twice, 5 button once, you may select the 25th saved station. Press the ▶/◀◀ (Channel+/-) button to switch the next or previous band.
4 Automatically search bands: press the SEARCH button, this system starts to search bands from low to high frequency automatically. The searched band are saved automatically. Press this button again to stop searching.
Save Bands
Press the SAVE button to save the current frequency. For example: if you want to save 99.30 MHz in 18th memory cell, press 10+ button once and 8 button once, then press F button to input `9, 9, 3, 0`, and then press SAVE button.
Soundtrack Selection
To select Mono or Stereo while in FM mode, press MO/ST button. When you select stereo, the display shows a stereo signal. If the signal is not strong enough, you cannot select Stereo.
Exit FM Mode
1 Press the USB/SD button on the remote control to exit FM status, and switch to USB or CARD mode.
2 Press the iPod button on the remote control to exit FM status, and switch to the iPod mode.
3 Press the AUDIO button on the remote control to exit FM status, and switch to Audio input mode.
RDS Radio Function
In FM radio status, press the RDS button on the remote control to switch to RDS radio mode. If there is RDS signal surrounds, you will get the information of four items:
1 PS: Program service name.
2 PTY: Program type.
3 RT: Radio text.
4 CT: Clock time and date.
Note: In RDS radio mode, you can use the options as FM mode. Such as select bands, save bands, soundtrack selection etc.)
COMPATIBILITY INFORMATION


- “Works with iPhone” and “Made for iPod” means that an electronic accessory have been designed to connect specifically to iPhone/iPod and have been certified by the developer to meet Apple performance standards.
• Apple is not responsible for the operation of this device or its compliance with safely and regulatory standards. - iPhone and iPod are trademark of Apple Inc., registered in the U. S. and other countries.
Compatibility information


Power supply can not be turned on
Make sure that the power cord is fully inserted in the power outlet.
The remote control does not work
Battery is used up
The front end of the remote control is not aimed at the infrared reception part of the player.
No sound
Make sure that the audio cable is connected correctly and securely to the back of your unit and to the sound system.
Make sure that the sound system is set to the correct audio input.
Turn your unit off, then back on.
The unit does not work at all
The embedded microcomputer may have failed because of a lightning strike, static, or other interference.
SPECIFICATION
| Input voltage: | ~220-240V/50Hz |
| Power consumption: | 35W |
| L/R speaker power and impedance: | 2×10W +15W |
| Subwoofer power and impedance: | 30W / 6 Ohm |
| Tuner frequency range: | FM 87.50 - 108.00MHz |
| Inputs: | iPod - iPod/iPhone dockUSB - USB deviceSD - SD memory card slot(Maximum capacity: 16GB)Audio1 - Audio input connection(2×RCA)Ant - FM aerial connection |
| Outputs: | Y,Pb,Pr (Component Video) and Composite Video connection |
| Remote control batteries: | 2×AAA/LR03 |
Note: Specifications subject to change without prior notice. Weight and dimensions are approximate.
© 2010 ALL rights reserved by Blaupunkt Competence Center Audio M3 Electronic GmbH. This material may be reproduced, copied or distributed for personal use only.

BLAUPUNKT
Competence Center Audio
M3 Electronic GmbH
Gutenbergstrasse 5
D-65830 Kriftel-Germany
www.blaupunkt.com
Service Hotline:01805588664
All rights reserved. All brand names are registered
trademarks of their respective owners. Specifications are
subject to change without prior notice.
- COMPONENT VIDEO: Komponenten-Ausgang (Pr, Y, Pb)
- Systembedienung
- CONTENT
- WARNING
- IMPORTANT SAFETY INSTRUCTION
- 19.
- ACCESSORIES
- INSTALL THE REMOTE CONTROL BATTERY
- Note:
- PANELS
- REMOTE CONTROL
- SYSTEM CONNECTION
- CONNECTION
- Composite Video Output:
- Pr, Y, Pb Component Video Output
- BASIC OPERATION
- PREPARATION
- STANDBY MODE AND SLEEP TIMER
- TONE FUNCTION
- DIRECTION BUTTONS
- MUTE BUTTON
- VOLUME SETTING
- FAST FORWARD AND FAST REWIND
- PREVIOUS AND NEXT
- MENU BUTTON
- iPod, AUDIO, FM BUTTONS
- SEARCH BUTTON
- NUMBER BUTTONS
- PLAY/PAUSE BUTTON
- STOP BUTTON
- TIME BUTTON
- USB/DIGITAL CARD
- LISTENING TO iPod/iPhone
- Connecting an iPod/iPhone to this unit
- Playback controls
- RADIO OPERATION
- Enter FM Function
- Select Bands
- Save Bands
- Soundtrack Selection
- Exit FM Mode
- RDS Radio Function
- COMPATIBILITY INFORMATION
- Power supply can not be turned on
- The remote control does not work
- No sound
- The unit does not work at all
- BLAUPUNKT
Brand : BLAUPUNKT
Model : IP 240
Category : Pregnant