
IAN 93171 - Uncategorized CRIVIT - Free user manual and instructions
Find the device manual for free IAN 93171 CRIVIT in PDF.

| Brand | Crivit |
| Model | IAN 93171 |
| Product Type | Activity Tracker / Fitness Bracelet |
| Dimensions (W x H x D) | Approx. 40 x 20 x 10 mm (without strap) |
| Weight | Approx. 20 g |
| Display Type | OLED touch display |
| Battery Type | Lithium-ion rechargeable, 100 mAh |
| Charging Method | USB magnetic charging cable |
| Operating Time | Up to 7 days (typical use) |
| Water Resistance | IP68 (suitable for swimming, up to 1.5 m for 30 min) |
| Connectivity | Bluetooth 5.0 |
| Compatible Systems | iOS 10.0+ / Android 6.0+ |
| Main Functions | Step count, distance, calories, heart rate, sleep monitor, notifications |
| Additional Features | Stopwatch, sedentary reminder, alarm, find phone |
| Strap Material | Silicone, adjustable length 150-220 mm |
| Strap Width | 20 mm |
| Color Options | Black, White, Blue |
| Maintenance | Clean with soft, damp cloth; avoid chemicals; dry strap after water exposure |
| Safety | Not a medical device; consult doctor before use if you have health conditions |
| Spare Parts Available | Replacement straps, charging cables (IAN 93171) |
| Repairability | Battery not user-replaceable; other components serviceable by manufacturer |
| General Information | IAN 93171, manufactured for Crivit (Lidl); user manual available online |
Frequently Asked Questions - IAN 93171 CRIVIT
User questions about IAN 93171 CRIVIT
0 question about this device. Answer the ones you know or ask your own.
Ask a new question about this device
Download the instructions for your Uncategorized in PDF format for free! Find your manual IAN 93171 - CRIVIT and take your electronic device back in hand. On this page are published all the documents necessary for the use of your device. IAN 93171 by CRIVIT.
USER MANUAL IAN 93171 CRIVIT
Snow SHoeS
GB
Snow SHoeS
Instructions
HU
Hótalp
Használati útmutató
CZ
Sněžnice
Návod k použití
DE AT CH
ScHneeScHuHe
Gebrauchsanleitung
PL
raKiety śnieżne
Instrukcją obstugi
SI
Krplji
Navodilo za uporabo
SK
Safety Instructions 8
Important notes for snowshoeing outing 8
Putting on Snowshoes 9
Removing Snowshoes 9
Cleat Cover 9
Gear 9
Stride Techniques 10
Environment 10
Disposal Information 10
Care, Storage 10
3-year warranty 11
PL
Zakres dostawy 7
Dane techniczne 12
natural_image
Illustration of a boot being processed from a foot, showing the sole and side view (no text or symbols)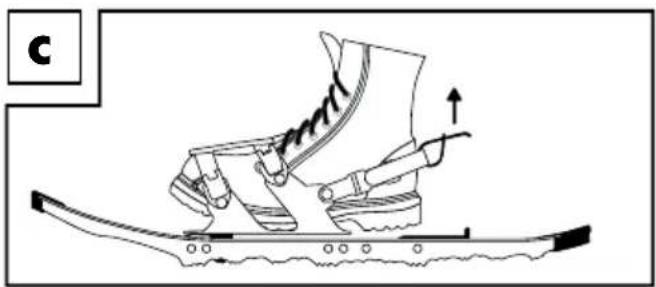
natural_image
Line drawing of a sneaker on a curved surface with motion arrows indicating movement (no text or symbols)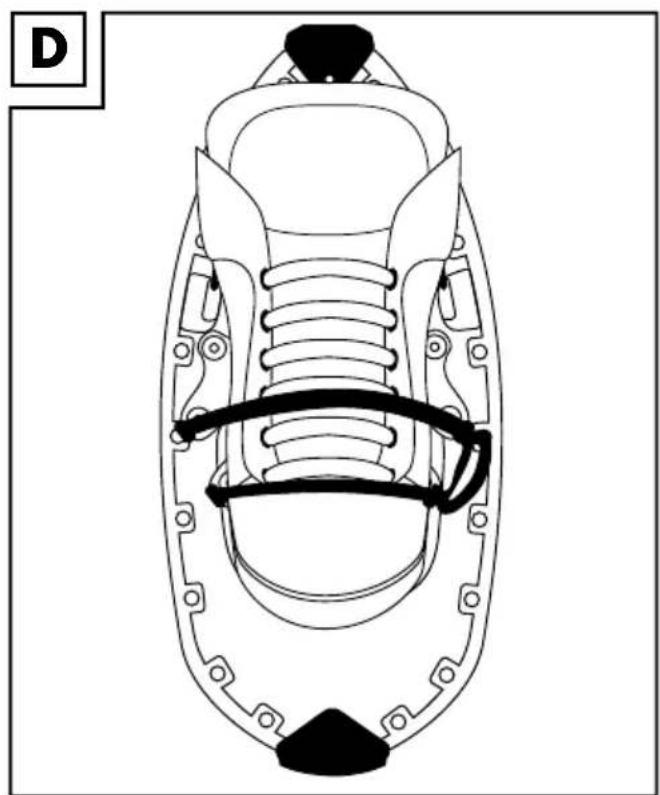
natural_image
Technical line drawing of a mechanical component with internal springs and mounting holes (no text or symbols)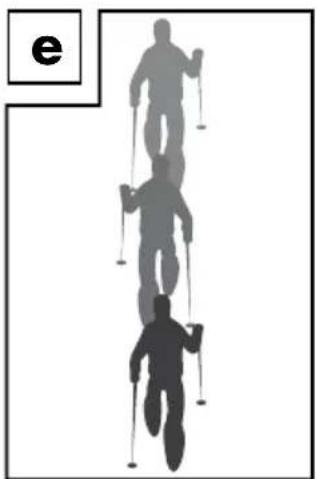
natural_image
Silhouettes of two skiers in motion, one climbing and one ascending, with no text or symbols present.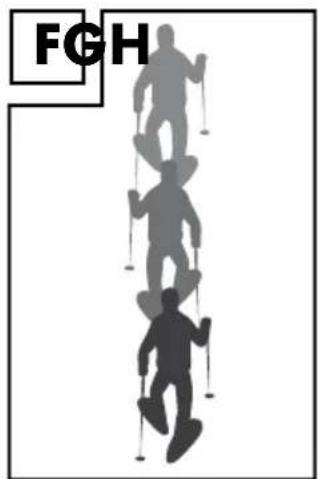
natural_image
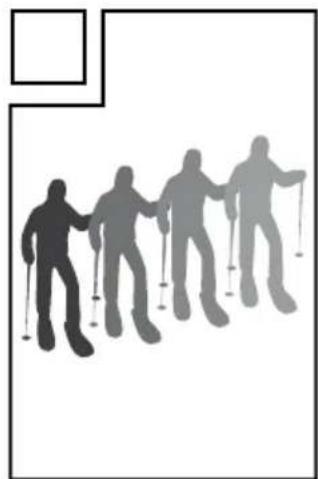
Silhouettes of four people with skis, standing in a row (no text or symbols)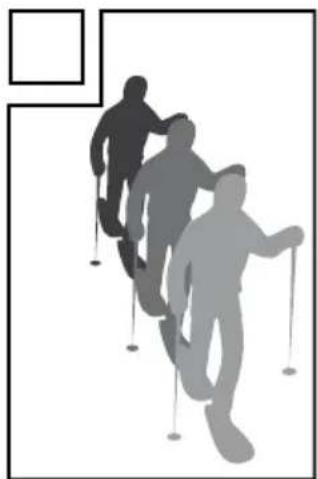
natural_image
Silhouettes of three people walking with cirs in motion, no text or symbols presentGB
- Aluminium frame
- Binding
- Heel strap
- Tension strap
- Quick release opening
- Clips for tension straps
- Heel lift
- Decking
- Crampon
- Cleat guard
HU
With your purchase you have decided on a high-quality product. Get to know the product before you start to use it. Carefully read the following instructions. Use the product only as described and only for the given areas of application. Keep these instructions safe.
When passing the product on to a third party, always make sure that the documentation is included.
Technical Data
User weight including gear: max. 100kg
Intended Use
This product assists adults in crossing heavy snowed areas. Not suitable for commercial purposes! This product is suitable for shoe sizes 36 to 47.

Safety Instructions
- Check product for possible defects before every use. This includes mounting bolts and tears or other visible damage. Discontinue use if snowshoes are defective!
- Check the condition of the anti-skid before and after every use. If severely worn (metal claws less than 50% of original condition) the product must be disposed of.
- Hiking boots must be firm and completely connected with the snowshoe binding, and the foot have a firm grip inside the hiking boot. You may otherwise twist your foot and fall.
- Do not use this product in outdoor temperatures below -20°C.
- Do not use this product:
• for mountain hikes in steep, alpine terrain or for expeditions.
• for occupational safety.
- Do not exceed the max. weight limit including gear of 100kg.
- The crampons provide grip in snow or on icy snow. However, they do not take the place of ice cleats on solid ice!
- Only use snowshoes in snow to prevent damaging the snowshoes and possibly the ground.
- Only use the snowshoes with suitable, solid hiking boots.
- Always select avalanche protected, marked and cleared routes.
- Heed winter and alpine advisories, e.g. avalanche warnings.
- When transporting snowshoes inside the rucksack carrier on your back the metal claws must always be pointed away from the back.
Important notes for snowshoeing outing
- Always select avalanche protected, marked and cleared routes.
- Check the weather forecast for your route before starting on your outing. Especially check the avalanche risk.
- Match the length and difficulty of the route to your abilities.
- Preferably hike in groups, not by yourself.
- Wear noticeable clothing.
-
Correct gear for hikes includes:
-
Rations
- Sun protection
- Correct clothing for the temperatures and activity
- First aid supplies
• Sturdy mountain or hiking boots
• If applicable, suitable eye protection
Putting on Snowshoes
Note
Before starting on your first snowshoeing outing you should practice putting the snowshoes on. Preferably outdoors to prevent scratches indoors.
Please note the right and left marking on the snowshoes.
- Adjust the heel strap (3) to your shoe size. The shoe size is marked on the heel strap.
- Place the snowshoe on a level surface with the binding open. Insert the foot into the snowshoe with your foot pointing straight forward (Fig. B). Pulling by the flap, pull the heel strap upward to ankle height.
Now firmly place your foot all the way back against the heel strap (Fig. C). - Now pull the tension strap (4) tight (Fig. D). Tighten the binding so the shoe is straight and firm.
Then secure the tension strap loop to the attached clips (6).
Note!
Verify your foot is correctly positioned by flipping the heel lift up. When flipped up the heel lift should be positioned at the centre of the heel.
Removing Snowshoes
Press the quick-release lever (5) outward to release the tension strap (4). You will now be able to slide your foot out of the binding.
Cleat Cover
When the item is not in use please cover with the included cleat guard. The elastic bands do not need to be released. Place the end of the cleat cover with the shorter elastic band over the rear pointed end of the snowshoe. Then place the sheet over the snowshoe crampons. Once the cleat cover is correctly positioned, double wrap the elastic around the front part of the snowshoe.
natural_image
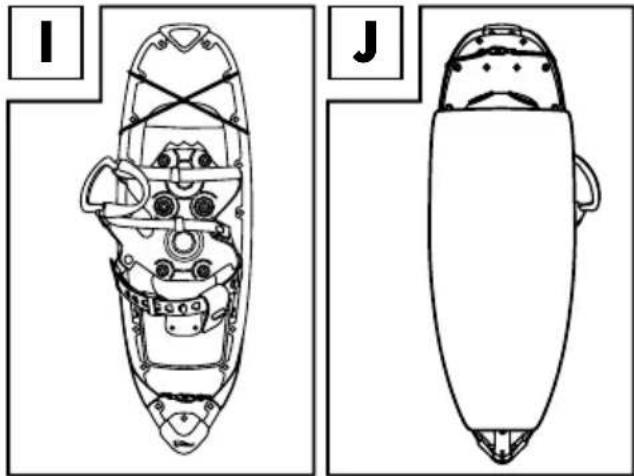
Technical line drawings of a spacecraft viewed from two different angles (labeled I and J), showing internal components without any text or symbols.Gear
Shoes
Use conventional mountain, hiking or trekking shoes.
Clothing
Adapt your clothing to weather conditions. In changing weather you may choose to wear layers of clothing. This will allow you to quickly adjust your clothing to conditions.
Poles
Ski or trekking poles will make it easier to snowshoe. They will help with balance, thus enhancing stability. Use poles with large baskets to minimise sinking in deep snow.
Stride Techniques
Note
When using the step-by-step and duck-step method the heel lift can make it easier to walk on inclines. Simply flip the heel lift up when needed. Then on level terrain flip it back down.
Step-by-Step (Normal gait) (Fig. E)
On level terrain, gentle slopes or uphills.
Simply take smooth parallel steps. The width of the step is determined by the width of the snowshoes.
Duck Step (Fig. F)
This stride technique, similar to skating step in skiing, used on inclines to prevent stepping on your own feet. Firmly plant each step to ensure the snowshoes grip securely.
Kick Step (Fig. G)
In kick-step you will be walking up steep inclines perpendicular similar to a crab. Keep your body straight. Plant each step firmly. Keep looking directly at your goal (e.g. the top of the hill).
Line Step (Fig. H)
Use this technique to climb hills switchback style. Place one foot in front of the other parallel to the hill. To conserve energy the switchbacks can be drawn out.
Environment
Especially during winter months when we humans start to enjoy winter sports animals are struggling in their search for food.
Please keep in mind:
- Avoid routes through forest reserves and game reserves.
- Stay on marked routes and trails in forests.
- Keep dogs on a leash, especially in the forest, to protect wild animals.
- Avoid the outskirts of forests and snow free areas, as this may be an area for wild animals.
Disposal Information
Please dispose of packaging and the product in an environmentally friendly, sorted fashion! Dispose of the product through an approved waste management company or your municipality. Please follow the applicable current regulations.
Care, Storage
Do not use abrasive or caustic cleaners or hard bristled brushes, etc. to clean.
After use clean snowshoes with lukewarm water. Allow to dry well before storing. Do not dry on heaters!
Keep snowshoes in a cool and dry place, inside the transport- and storage bag. Keep snowshoes out of direct sunlight. Sunlight may make the plastic brittle and fragile, or bleach it.
3-year warranty
The product was produced with great care and under constant supervision. You receive a three-year warranty for this product from the date of purchase. Please retain your receipt.
The warranty applies only to material and workmanship and does not apply to misuse or improper handling. Your statutory rights, especially the warranty rights, are not affected by this warranty.
With regard to complaints, please contact the following service hotline or contact us by e-mail.
Our service employees will advise as to the subsequent procedure as quickly as possible.
We will be personally available to discuss the situation with you.
Any repairs under the warranty, statutory guarantees or through goodwill do not extend the warranty period. This also applies to replaced and repaired parts.
Repairs after the warranty are subject to a charge.
IAN: 93171
GB Service Great Britain
Tel.: 0871 5000 720 (£ 0.10/Min.)
E-Mail: deltasport@lidl.co.uk
You can also find spare parts for your product at: www.delta-sport.com, category Service - Lidl Spare Parts Service

Gratulujemy!
natural_image
Technical line drawing of a snowboard with internal components and structural framework (no text or symbols)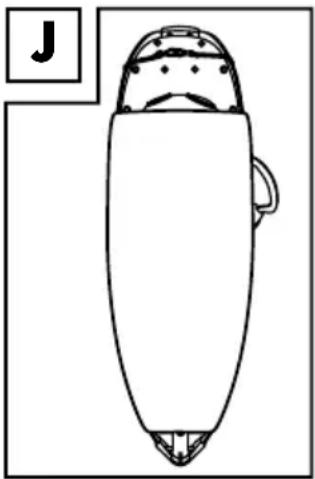
natural_image
Line drawing of a stylized object resembling a boat or container with a handle, no text or symbols presentWyposażenie
Obuwie
natural_image
Top-down schematic of a snowboard with internal components and structural beams (no text or labels)
natural_image
Line drawing of a stylized object resembling a diver or boat with a hat, viewed from the side (no text or symbols)Felszerelés
Cipó
natural_image
Technical line drawings of a spacecraft viewed from two different angles (labeled I and J), showing internal components without any text or symbols.Oprema
Čevlji
natural_image
Top-down schematic of a snowboard with internal components and structural lines (no text or labels)
natural_image
Simple line drawing of a stylized object resembling a diver or boat with a handle, no text or symbols present.Vybavení
Boty
natural_image
Top-down schematic of a snowboard with internal components and structural beams (no text or labels)
natural_image
Simple line drawing of a stylized object resembling a diver or boat with a handle, no text or symbols present.Vybavenie
Obuv
natural_image
Top-down schematic of a snowboard with internal components and structural beams (no text or labels)
natural_image
Simple line drawing of a stylized object resembling a boat or container with a handle, no text or symbols present.Ausrüstung
Schuhe


- Snow SHoeS
- Hótalp
- Sněžnice
- ScHneeScHuHe
- raKiety śnieżne
- Krplji
- PL
- GB
- HU
- Technical Data
- Intended Use
- Safety Instructions
- Important notes for snowshoeing outing
- Putting on Snowshoes
- Note
- Note!
- Removing Snowshoes
- Cleat Cover
- Gear
- Shoes
- Clothing
- Poles
- Stride Techniques
- Step-by-Step (Normal gait) (Fig. E)
- Duck Step (Fig. F)
- Kick Step (Fig. G)
- Line Step (Fig. H)
- Environment
- Please keep in mind:
- Disposal Information
- Care, Storage
- 3-year warranty
- Gratulujemy!
- Wyposażenie
- Obuwie
- Felszerelés
- Cipó
- Oprema
- Čevlji
- Vybavení
- Boty
- Vybavenie
- Obuv
- Ausrüstung
- Schuhe
Brand : CRIVIT
Model : IAN 93171
Category : Uncategorized