
SPT 5800 - Loudspeaker SENCOR - Free user manual and instructions
Find the device manual for free SPT 5800 SENCOR in PDF.


| Product Type | Boombox with CD/MP3, USB, Bluetooth, FM Radio |
| Brand | Sencor |
| Model | SPT 5800 |
| Power Source | AC 100-240V ~50/60Hz or DC 12V (8x UM-1/D batteries) |
| Power Consumption | 48 W |
| Standby Consumption | < 0.5 W |
| Dimensions (W x H x D) | 50.0 x 19.6 x 21.1 cm |
| Radio Bands | FM |
| FM Frequency Range | 87.5 – 108 MHz |
| CD Playback | CD/CD-R/CD-RW (Audio CD & MP3) |
| USB Playback | Up to 32 GB |
| Bluetooth Version | 5.0 |
| Bluetooth Range | Up to 10 m |
| Speaker Output | 12.5 W x 2 |
| Equalizer Modes | FLAT, CLASSIC, ROCK, POP, JAZZ |
| Disco Light Modes | 8 modes (including auto-changing) |
| Remote Control | Includes CR2025 battery |
| Headphone Jack | 3.5 mm |
| AUX Input | 3.5 mm |
| FM Preset Memory | 30 stations |
| Programmable Tracks (CD) | 20 tracks |
| Programmable Tracks (MP3) | 99 tracks |
| Laser Class | Class 1 |
| Warranty | 24 months |
Frequently Asked Questions - SPT 5800 SENCOR
User questions about SPT 5800 SENCOR
0 question about this device. Answer the ones you know or ask your own.
Ask a new question about this device
Download the instructions for your Loudspeaker in PDF format for free! Find your manual SPT 5800 - SENCOR and take your electronic device back in hand. On this page are published all the documents necessary for the use of your device. SPT 5800 by SENCOR.
USER MANUAL SPT 5800 SENCOR
natural_image
Black portable electronic device with two speakers and a digital display, no visible text or symbols on the device body.INSTRUCTION MANUAL
NÁVOD K OBSLUZE
NÁVOD NA OBSLUHU
FELHASZNÁLÓI KÉZIKÖNYV
INSTRUKCJA OBSŁUGI
BOOMBOX
BOOMBOX
BOOMBOX
BOOMBOX
BOOMBOX
EN CZ SK HU PL
IMPORTANT NOTES
IMPORTANT: PLEASE READ BEFORE USING AND KEEP FOR FUTURE REFERENCE.
CAUTION
USE OF CONTROLS OR ADJUSTMENT OR PERFORMANCE OF PROCEDURES OTHER THAN THOSE SPECIFIED HEREIN MAY RESULT IN HAZARDOUS RADIATION EXPOSURE. DANGER OF EXPLOSION IF BATTERY IS INCORRECTLY REPLACED REPLACE ONLY WITH THE SAME OF EQUIVALENT TYPE.
DANGER
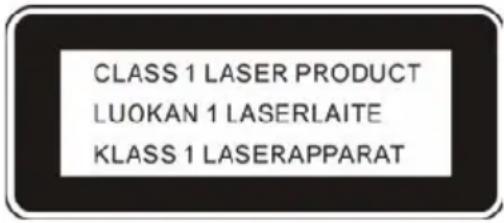
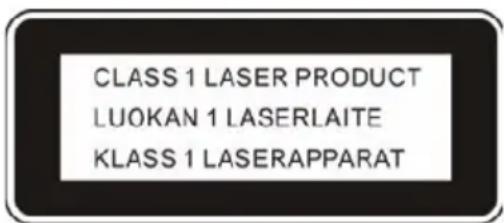
THIS COMPACT DISC PLAYER IS CLASSIFIED AS A CLASS 1 LASER PRODUCT. THE CLASS 1 LASER PRODUCT LABEL IS LOCATED ON THE REAR EXTERIOR.
NOTE: The manufacturer is not responsible for any radio or TV interference caused by unauthorized modifications.
- Avoid installing the unit in locations described below:
-
Places exposed to direct sunlight or close to heat radiating appliances such as electric heaters, or other equipments that radiate too much heat.
-
Places subjected to constant vibration.
-
Unventilated or dusty places.
-
Humid or moist places.
-
Operate buttons and switches as instructed in the manual.
- Before turning on the power for the first time, make sure that the power cord is properly installed and the voltage switch is correctly set.
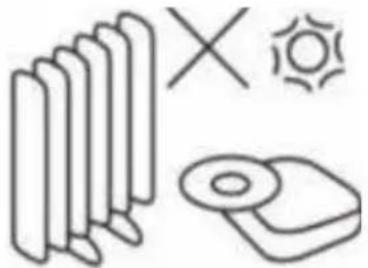
- Store your CD or other devices in a cool area to avoid damage from heat.
CAUTION
TO REDUCE THE RISK OF ELECTRIC SHOCK, DO DOT REMOVE COVER (OR BACK). DO NOT OPEN THE UNIT. ANY SERVICING PLEASE REFER TO QUALIFIED SERVICE PERSONNEL.
WARNING
- Remove batteries if exhausted or if they will not be used for a long period.
- The incorrect use of batteries can cause electrolyte leakage and will corrode the compartment or cause the batteries to burst. Therefore:
- Do not mix battery types, e.g. alkaline with zinc carbonate.
- When inserting new batteries, replace all batteries at the same time.
- Do not ingest the battery, Chemical burn hazard (the remote control supplied with). This product contains a coin/button cell battery. If the coin/button cell battery is swallowed, it can cause severe internal burns in just 2 hours and can lead to death.
- Keep new and used batteries away from children.
- If the battery compartment does not close securely, stop using the product and keep it away from children.
- If you think batteries might have been swallowed or placed inside any part of the body, seek immediate medical attention
LOCATION OF CONTROLS
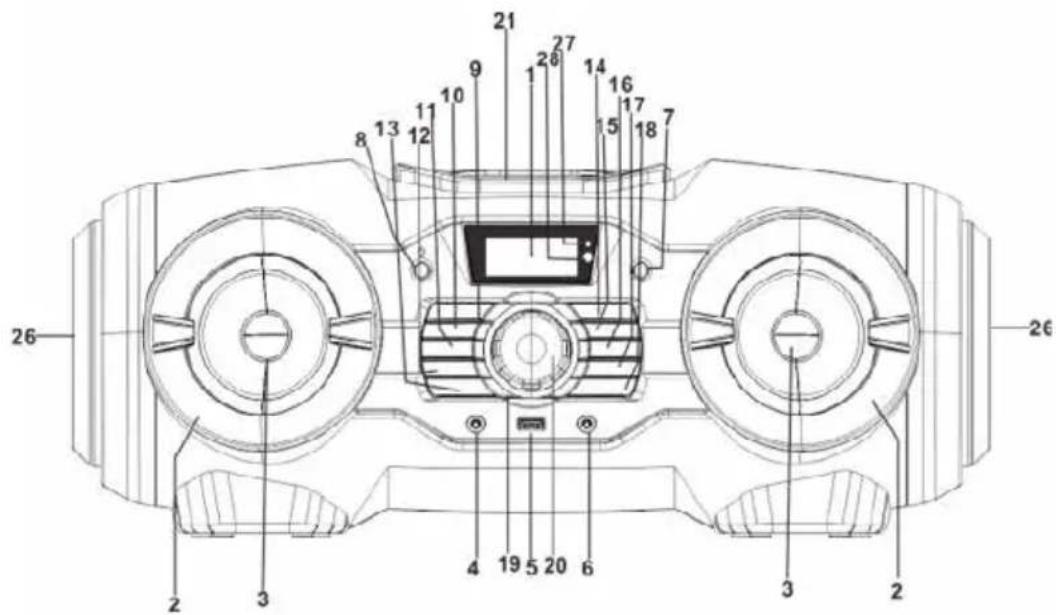
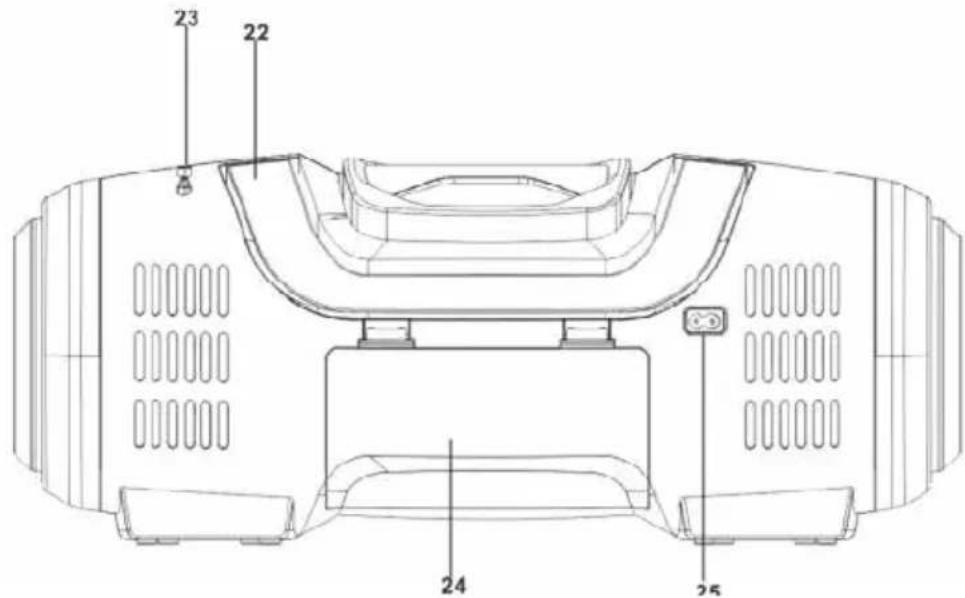
NAMES OF CONTROLS
- DISPLAY
- SPEAKER DECORATION RING
- LEFT/RIGHT SPEAKERS
- PHONES JACK
- USB PORT
- AUX IN JACK
- SOURCE BUTTON
- STANDBY BUTTON
- MEM./ ■ BUTTON
- TUN-/◀BUTTON
- 10/Fold./M-BUTTON
- LIGHT BUTTON
- Prog./P-Mode BUTTON)
-
▶Scan/PAIR BUTTON
-
TUN+/▶BUTTON
- 10/Fold./M+ BUTTON
- EQ/ID3 BUTTON
- Mute BUTTON
- KNOB DECORATION RING
- VOLUME KNOB
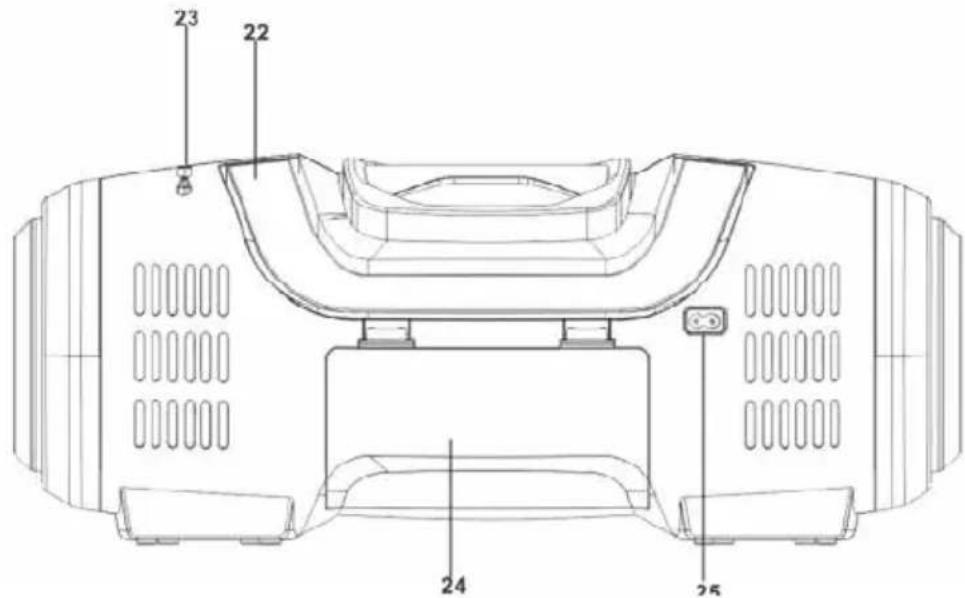
- CD DOOR
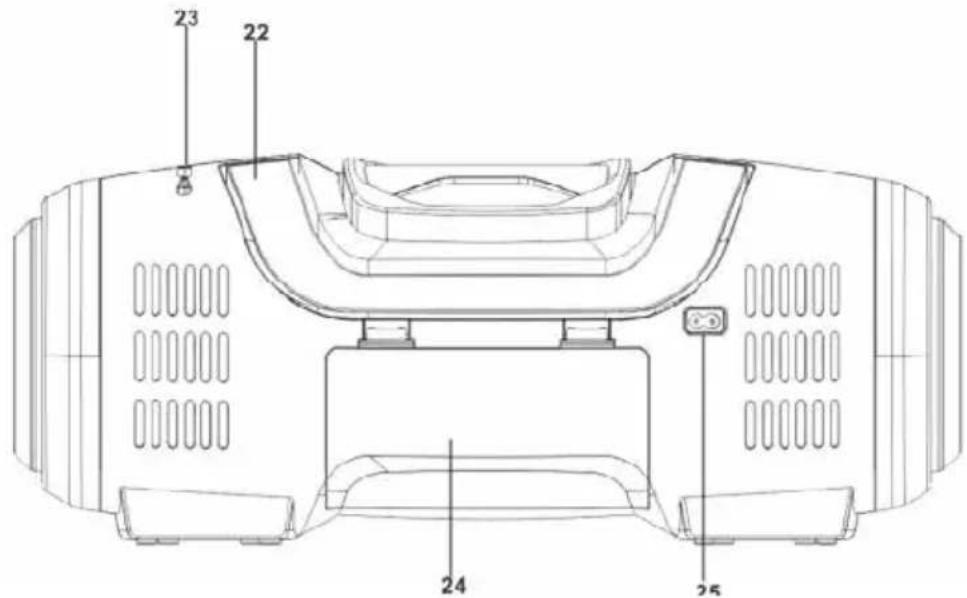
- HANDLE
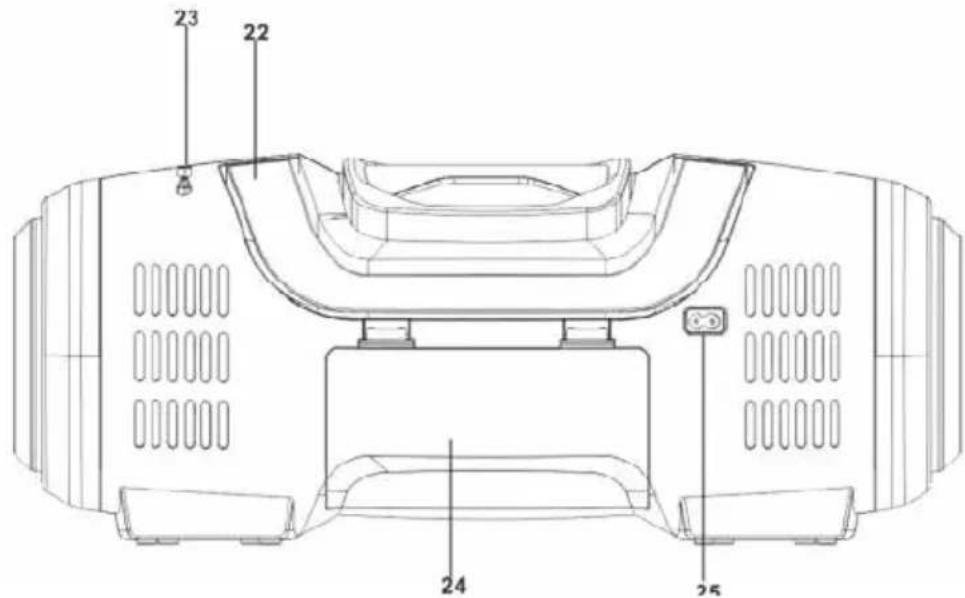
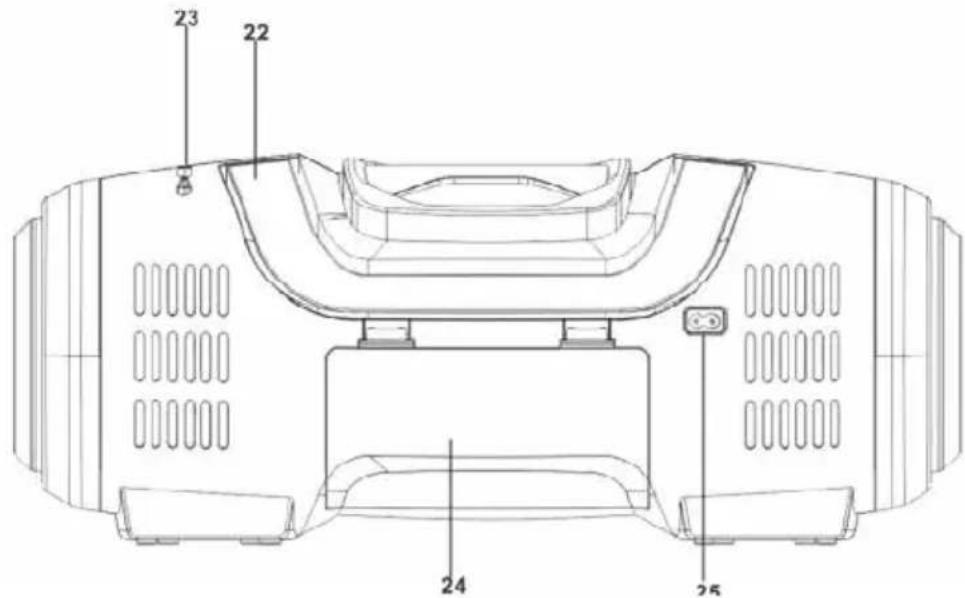
- ANTENNA
- BATTERY DOOR
- AC SOCKET
- LEFT/RIGHT PASSIVE SPEAKERS
- STANDBY/PAIR INDICATOR
- IR SENSOR
REMOTE HANDSET
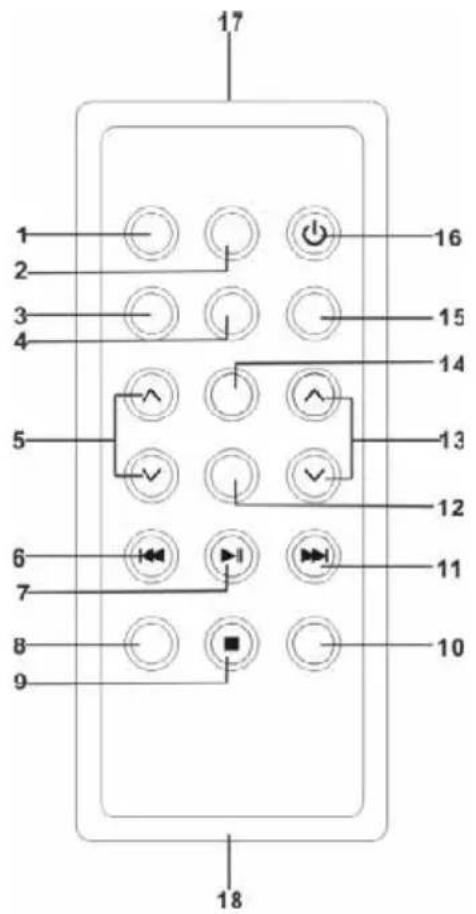
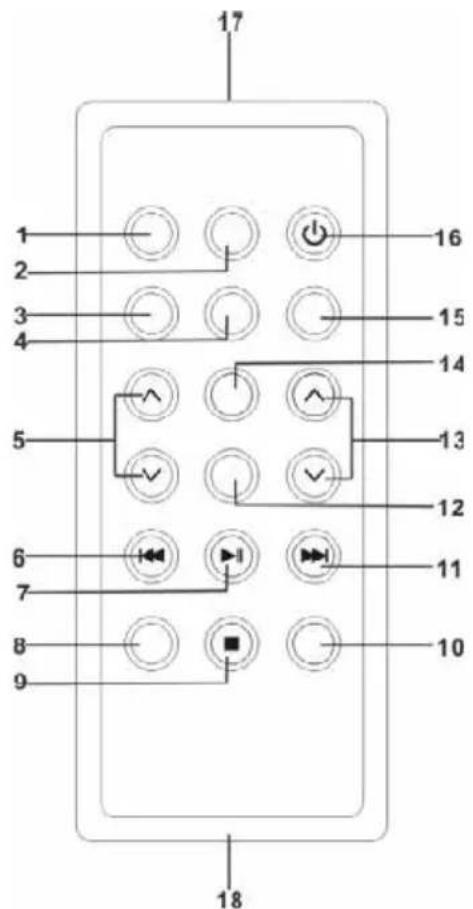
KEY FUNCTIONS:
- SOURCE KEY
- MUTE KEY
- MEMORY KEY
- EQ KEY
- FOLD./10/M. UP/DOWN KEY
- CD B-SKIP DOWN/TUN.- KEY
- CD PLAY/PAUSE KEY
- P-MODE KEY
- KEY
- PAIR KEY
- CD F-SKIP UP/TUN.+ KEY
- ID3 KEY
- VOLUME UP/DOWN KEY
- LIGHT KEY
- MO/ST KEY
- STANDBY KEY
- REMOTE SENSER
- BATTERY COMPARTMENT
NOTE: Please pull battery protector before using.
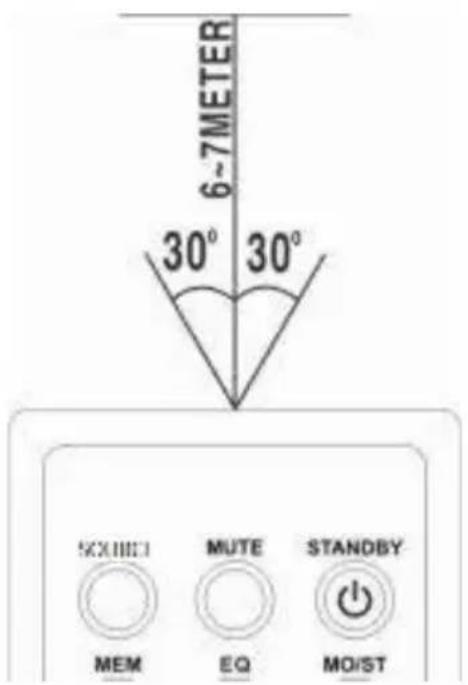
To operate the unit with the remote control, point the remote handset at the remote sensor on the front panel and press the appropriate button on the remote handset.
The remote works best within a range of 6–7 meters from the front panel and on an angle of 30 degrees. Bright sunlight or room light conditions can interfere with the remote control. If the remote operation is unsatisfactory or stops working entirely, first try replacing the remote batteries, then try reducing the room lighting conditions.
LITHIUM BATTERY INSTALLATION OF REMOTE CONTROL
• The remote control includes one CR2025 (3V) lithium battery.
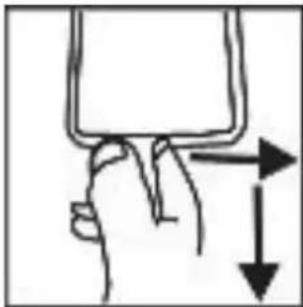
- To replace the battery, gently push the clasp to the right direction accordingly to the instruction and then pull out the battery compartment.
Take the drained battery out and install a new lithium battery (CR-2025) in the compartment with the positive polarity upwarded. Then push the compartment back to its position with a “click” sound indicating installation finished.
natural_image
Hand holding a device with directional arrows indicating movement (no text or symbols)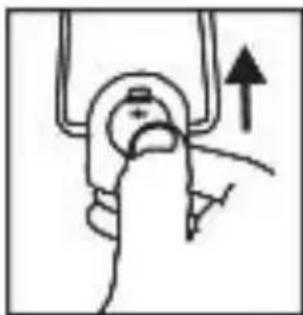
natural_image
Simple line drawing of a hand pressing down on a mechanical component with an upward arrow (no text or symbols)POWER SOURCE
This unit is designed to be operated on AC/DC.
AC OPERATION
Plug the tail of supplied AC power cord into AC socket on unit and the plug into household AC outlet. The batteries will be automatically disconnected. This unit is designed in Switched-Mode Power Source with voltage range from 100V to 240V.
DC OPERATION
Open the BATTERY COMPARTMENT DOOR. Install 8pcs UM-1/D size batteries (not included) into compartment. Please follow correct polarities as indicated.
NOTE: when using battery, take off the AC cable from unit.
CAUTION
REMOVE BATTERIES IF THEY ARE FLAT OR NOT BEING USED FOR A LONG PERIOD OF TIME.
BATTERIES CONTAIN CHEMICAL SUBSTANCES, SO THEY SHOULD BE DISPOSED OF PROPERLY.
DANGER OF EXPLOSION IF BATTERY IS INCORRECTLY REPLACED. REPLACE ONLY WITH THE SAME OR EQUIVALENT TYPE (UM-1/D).
BASIC FUNCTION
SWITCHING ON THE UNIT
After connecting the power, press STANDBY button to unit or on remote control to turn on the unit. Press the SOURCE button on unit or on remote control to choose TUNER / CD / USB / AUX or BLUETOOTH function.
NOTE: In CD/MP3/USB/AUX/BT mode when the unit is not providing the main function for 15 minutes, the unit will automatically switch into standby mode. To turn on the unit again, press „STANDBY“ button or replug the unit.
ESD hints – The product maybe reset or not reset to operation of control due to electrostatic discharge, just switch off and reconnect again.
VOLUME ADJUSTING
Rotate the VOLUME knob on unit or on remote control to increase or decrease volume.
EQ FUNCTION
This unit has a built-in equalizer system. Press EQ/ID3 button on unit or EQ key on remote control while playing to select different music style (sound tone): FLAT, CLASSIC, ROCK, POP and JAZZ.
Mute
You can quickly shut off the sound using the Mute button, press the button again to turn the sound back on.
HEADPHONE JACK
For private listening, insert a 3.5mm headphone (not included) into the HEADPHONE jack (4). The SPEAKER output would be automatically cut off.
CAUTION: : LISTENING AT A HIGH VOLUME OVER A LONG PERIOD IS NOT GOOD FOR YOUR EARS.
DISCO LIGHT
There are eight flashing modes of the disco light, press and hold the LIGHT button on unit or press the LIGHT KEY on remote control to choose the desired mode: "LIGHT 01" to "LIGHT 07", and "LIGHT 08" is auto-changing between different color. To turn off the disco light, press a the LIGHT button on unit or press the LIGHT KEY on remote control until "LIGHT OFF" shows on the display.
RADIO OPERATION
TUNING RADIO STATIONS
- Press the Source button on unit or on remote control to select the TUNER FUNCTION, this unit is designed for FM ONLY.
- Tune to desired station by pressing TUN+/▶ or TUN-/◀ key on unit or remote control, the display will show the band frequency. Example: FM 97,10 MHz. If the radio receive Stereo signal, "STEREO" will show on the display.
- Extend FM TELESCOPIC ANTENNA to its full length and gently move the unit back and forth to get the best reception, or place the unit in an open location.
- To turn off the radio, press the Source Button on unit or on remote control to switch to other functions or press STANDBY button on unit or on remote control to turn off the unit.
RADIO AUTO SCAN (SEARCH)
Press and hold the ▶|/Scan/PAIR button on unit or ▶| key on remote control, the unit will conduct auto scan and program until having found a strong signal. The unit will start to broadcast the P01 after searching finished.
Press the M.+ or M.- on unit or M. UP/DOWN key on the remote control to choose next programmed station.
You may pre-store 30 (FM) radio stations in memory for your preference, so as you can listen to your desired station directly and quickly, no need to tuning and search for again.
- Press TUN+/▶ or TUN-/◀ to select a desired station.
- Press Mem./■ button on unit or press MEM KEY on remote control, „P01“ will flash on the display.
- Press M.+ and M.- on unit or M. UP/DOWN remote control to choose the desired sequence you want to store, then press the Mem./■ button on unit or press MEM KEY on remote control again to enter.
- Search another station, repeat steps (1) & (2) until all desired stations stored. Up to 30 stations can be programmed.
- Press the 10/Fold./M- or 10/Fold./M+ on the unit or on remote to listen to the stored station directly.
CD/MP3 OPERATION
Discs for Playback
This system can playback all digital audio CD/MP3, finalized digital audio CD-Recordable (CD-R) discs, finalized digital audio CD-Rewritable (CD-RW) discs and CD-DA format digital audio CD/CD-R/CD-RW discs.
LOADING A DISC
- Press the Source button on unit or on remote control to select „CD“ mode.
- Press the PUSH OPEN button to open the CD door, „OPEN“ will be shown on the display.
- Place an audio CD/MP3 DISC into the tray with the front side facing up.
- Close the CD door.
The display will show a flashing „TOC Read“, then the total number of tracks would be shown and the playback will start from track. - To remove the CD, press Mem./■ button on unit or ■ key on remote control to stop playback, and then press the PUSH OPEN button to open the CD compartment lid. Hold the CD by its edges, and take it out carefully.
NOTE:
- Make sure the disc is stopped before opening the CD DOOR.
- To ensure good system performance; wait until the unit completely reads the disc before proceeding.
- If no disc loaded into the tray, or the disc is unreadable, the display will show "NO DISC".
PLAYING A DISC
-
The playback starts from track 1 automatically when reading the disc.
To pause playback, press ▶|/ Scan/ PAIR button on unit or ▶| key on remote control.
The current playing time will flash on the display.
To resume playback, press ▶// Scan/ PAIR button on unit or ▶| key on remote control again. -
To stop playback, press Mem./■ button on unit or ■ on remote control, the total number of tracks will show on the display.
NOTE:
The CD will play from the first title. The elapsed playing time and the current track will be shown in the display. If available, the ID3 tag Meta data will additionally alternately be shown as a continuous band with CDs in the MP3 format. When the ID3 function is shut off, the current track and the folder will be shown alternately.
SELECTING A DESIRED TRACK/PASSAGE
To select a desired track
Press the TUN+/▶ or TUN-/◀ on unit or remote control on stop mode or during playing until the desired track appears on the display. It will start play automatically.
To search for a particular passage during playback (track scanning at high speed)
Press and hold TUN+/▶▶ or TUN-/◀◀ button on unit or remote control to scan the current playing track at high speed until desired point (passage) appears, then release the button for normal playback mode. Playback will start again from this point.
To select a song which track number exceeds 10 (for MP3 disc only)
To select a song/track which number exceeds 10, press the 10/Fold./M- or 10/Fold./M+ button on unit or remote control.
To select a desired folder (for MP3 disc that contains more than one folder)
To select a desired folder during playback, press and hold the 10/Fold./M- or 10/Fold./M+ button on the unit or the remote control to next/previous folder.
PROGRAMING TRACKS
Programming tracks of disc are possible when playback is stopped. Up to 20 tracks for CD disc and 99 tracks for MP3 disc can be stored in the memory in any order.
- In stop mode, press the Prog./P-Mode button on unit or MEM. key on remote to enter program setting, the PROG logo will flash on the display and show P01.
- Press the TUN+/▶ or TUN-/◀ button on unit or remote control to select the first desired track to be programmed. (example: track 2)
- Press the Prog./P-Mode button on unit or MEM. key on remote to enter. The display would flash PROG and show P02.
- Repeat steps 2 & 3 to store other desired tracks until all tracks programmed.
- Press the ▶|/ Scan/ PAIR button on unit or ▶| key on remote control to start playback from the first programmed track.
- Press the Mem./ ■ button on unit or ■ on remote control to stop program playback. To clear the program, you may press Mem./ ■ button on unit or ■ on remote control when the disc stopped and open the CD compartment lid, the program will be erased.
REPEAT PLAY
You can play one track or all tracks on the disc repeatedly.
To Repeat a Single Track
-
Press Prog./P-Mode button on unit or press P-MODE key on remote control during play, the display will show a steady „ ⊆ “ and the current track will be played over an over again till you press the Mem./ ■ button on unit or on remote control.
-
To cancel repeat play, press Prog./P-Mode button on unit or press P-MODE key on remote control until „” disappears from the display.
To repeat all the Tracks
- Press Prog./P-Mode button on unit or press P-MODE key on remote control until the „CALL“ shows steadily on the display, all tracks on the disc will be played over and over again till you press the Mem./■button on unit or on remote control.
- To cancel repeat play, press the Prog./P-Mode button on unit or press P-MODE key on remote control until „CALL“ disappears from the display.
To repeat the folder (only for MP3 disc which contains more than one folder)
- Press the Prog./P-Mode button on unit or press P-MODE key on remote control until „DIR“ show steadily on the display, the current folder will be repeated over and over again till you press the Mem./■button on unit or on remote control.
- To cancel repeat play, press the Prog./P-Mode button on unit or press P-MODE key on remote control until „DIR“ disappear from the display.
RANDOM PLAY
Press the Prog./P-Mode button on unit or P-MODE key on remote control in play mode till the „RAN“ shows steadily on the display, the random play will start from next track automatically, until all tracks are played over and then it will stop. Press the Prog./P-Mode button on unit or P-MODE key on remote control again until the „RAN“ disappears from the display to cancel.
INTRO PLAY
Press the Prog./P-Mode button on unit or press P-MODE key on remote control in play mode till the „INTRO“ shows steadily on the display, the intro play will start and scan 10 seconds for every track. To cancel intro play, press the Prog./P-Mode button on unit or press P-MODE key on remote control until „INTRO“ disappear from the display.
LISTENING TO USB
USB OPERATION
- Press the Source button on unit or on remote control to select „USB“ mode.
- Connect the USB to the USB INPUT. The LCD will show the total number of tracks stored in the USB. The playback stars from track 1 automatically after reading the USB.
- To pause playback, press ▶// Scan/ PAIR button on unit or ▶| key on remote control. The current playing time will flash on the display.
- To resume playback, press ▶// Scan/ PAIR button on unit or ▶| key on remote control again.
- Press the Mem./ button on unit or on remote control to stop playing. The display will show total number of USB and STOP.
- Proceed program play/repeat play (repeat 1- repeat folder - repeat all)/random play/intro play operation as the same described in above "CD/MP3 OPERATION".
- It supports 32GB (USB)
CAUTION
DO NOT USE ANY USB EXTENSION CABLE FOR CONNECTING THE USB BAR WHICH MAY CAUSE HARMFUL INTERFERENCE.
DUE TO HIGH VARIABILITY OF USB DEVICES, IT IS NOT POSSIBLE TO ENSURE FOR ALL MODELS COMPATIBILITY WITH THE PRODUCT.
BLUETOOTH OPERATION
- Press the Source button on unit or on remote control to switch to BLUETOOTH function, the LCD will display „BT“ and the Pair/Standby indicator will flash at high speed.
- Turn on the Bluetooth function on the device, scan the unit "SPT5800" and connect, then input the password 0000 if required, the Pair/Standby blue light will light up to indicate connection done, and the display will show "bt". Press ▶// Scan/ PAIR button on the unit or play key on the device to start playback. If the unit can't connect the relative Bluetooth within 2 minutes, press the ▶// Scan/ PAIR button on unit or PAIR key on remote control to reconnect.
- Rotate the VOLUME knob to your desired level.
- Press TUN+/▶ or TUN-/◀ on the unit or on remote control to choose the desired track.
- To stop playback, press ▶// Scan/ PAIR button on unit or ▶| key on remote control.
NOTE: The Bluetooth works best within 10 meters.
AUX-IN OPERATION
- Press the FUNCTION button on unit or on remote control to select „AUX“ mode.
- Insert the AUX line plug into the AUX IN jack ( 3.5mm ) on the player, music from the device would be amplified and exported from the speakers.
- Adjust the volume on the unit or on the device to your desired level.
- Proceed play/pause and next/previous on the connected device.
COMPACT DISC MAINTENANCE
- Always use a compact disc bearing the mark as shown.

-
Notes on handling discs
-
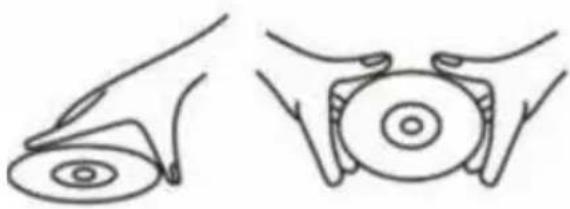
Removing the disc from its storage case and loading it.
- Do not touch the reflective recorded surface.
- Do not stick paper or write anything on the surface.
- Do not bend the disc.
natural_image
Two line drawings of hands holding circular objects, no text or symbols present-
Storage
-
Store the disc in its case.
- Do not expose discs to direct sunlight or high temperatures, high humidity or dusty places
natural_image
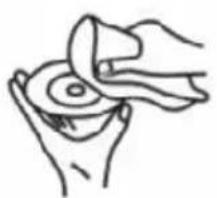
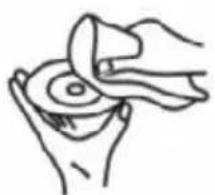
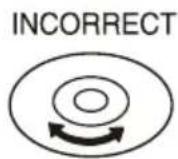
Simple line drawings of vertical bars, a cross symbol, and a circular object (no text or labels)- Should the disc become soiled, wipe off dust, dirt and fingerprints with a soft cloth.
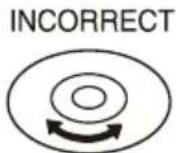
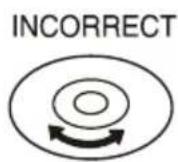
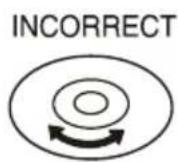
- The disc should be cleaned from the center to the edge.
natural_image
Line drawing of two hands holding a circular object, no text or symbols present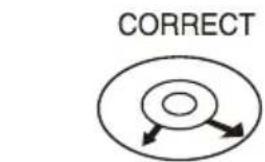
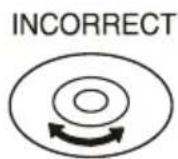
FROM THE CENTRE TO THE EDGE
- Never use benzene, thinners, record cleaner fluid or anti-static spray.
- Be sure to close the CD door, so the lens is not contaminated by dust.
- Do not touch the lens.
SPECIFICATIONS
GENERAL
Power Requirement....AC 100-240V \~ 50/60HZ
DC 12V UM-1/D x 8pcs
Power consumption 48 Watts
Standby consumption .... <0.5 Watts
Dimensions 21,1 (D) x 50,0 (W) x 19,6 (H) cm
Operation temperature....+5°C-+35°C
BLUETOOTH: V5.0
RECEIVER SECTION
Receiving Bands....FM
Frequency Range.....FM 87,5–108 MHz
COMPACT DISC SECTION
Optical Pickup 3-Beam Laser
Frequency Response....100 Hz–16 KHz
AUDIO SECTION
Power output....12,5 W x 2
ACCESSORIES
Instruction Booklet....1
AC Cord 1
Remote control....1
NOTE: Specifications are subject to change for continuous improvement without prior notice.
- The apparatus is used in moderate climates.
- The battery shall not be exposed to excessive heat such as sunshine, fire or the like.
- The apparatus shall not be exposed to dripping or splashing and that objects filled with liquids, such as vases, shall not be placed on the apparatus.
- Where the MAINS plug or an appliance coupler is used as the disconnect device, the disconnect device shall remain readily operable.
This marking indicates that this product should not be disposed with other household wastes throughout the EU. To prevent possible harm to the environment or human health from uncontrolled waste disposal, recycle it responsibly to promote the sustainable reuse of material resources. To return your used device, please use the return and collection systems or contact the retailer where the product was purchased. They can take this product for environmental safe.

The ventilation should not be impeded by covering the ventilation openings with items, such as newspapers, table-cloths, curtains, etc.; No naked flame sources, such as lighted candles, should be placed on the apparatus;
Attention should be drawn to the environmental aspects of battery disposal.
INSTRUCTIONS AND INFORMATION REGARDING THE DISPOSAL OF USED PACKAGING MATERIALS
Dispose of packaging material at a public waste disposal site.
DISPOSAL OF USED ELECTRICAL AND ELECTRONIC APPLIANCES
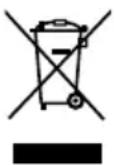
The meaning of the symbol on the product, its accessory or packaging indicates that this product shall not be treated as household waste. Please, dispose of this product at your applicable collection point for the recycling of electrical & electronic equipment waste. Alternatively in some states of the European Union or other European states you may return your products to your local retailer when buying an equivalent new product. The correct disposal of this product will help save valuable natural resources and help in preventing the potential negative impact on the environment and human health, which could be caused as a result of improper liquidation of waste. Please ask your local authorities or the nearest waste collection centre for further details. The improper disposal of this type of waste may fall subject to national regulations for fines.
For business entities in the European Union
If you wish to dispose of an electrical or electronic device, request the necessary information from your seller or supplier.
Disposal in other countries outside the European Union
If you wish to dispose of this product, request the necessary information about the correct disposal method from local government departments or from your seller.

The product meets EU requirements.
Changes to the text, design and technical specifications may occur without prior notice and we reserve the right to make these changes.
The original version is in the Czech language.
Address of the manufacturer: FAST ČR, a.s., Černokostelecká 1621, Říčany CZ-251 01
Hereby, FAST ČR, a.s. declares that the radio equipment type SPT 5800 is in compliance with Directive 2014/53/EU. The full text of the EU declaration of conformity is available at the following internet address: sencor.com
SENCOR®
EN Warranty conditions
Warranty card is not a part of the device packaging.
This product is warranted for the period of 24 months from the date of purchase to the end-user. Warranty is limited to the following conditions. Warranty is referred only to the customer goods using for common domestic use. The claim for service can be applied either at dealer's shop where the product was bought, or at below mentioned authorized service shops. The end-user is obligated to set up a claim immediately when the defects appeared but only till the end of warranty period. The end user is obligated to cooperate to certify the claiming defects. Only completed and clean (according to hygienic standards) product will be accepted. In case of eligible warranty claim the warranty period will be prolonged by the period from the date of claim application till the date of taking over the product by end-user, or the date the end-user is obligated to take it over. To obtain the service under this warranty, end-user is obligated to certify his claim with duly completed following documents: receipt, certificate of warranty, certificate of installation.
This warranty is void especially if apply as follows:
■ Defects which were put on sale.
■ Wear-out or damage caused by common use.
The product was damaged by unprofessional or wrong installation, used in contrary to the applicable instruction manual, used in contrary to legal enactment and common process of use or used for another purpose which has been designed for.
The product was damaged by uncared-for or insufficient maintenance.
The product was damaged by dirt, accident of force majeure (natural disaster, fire, and flood).
■ Defects on functionality caused by low duality of signal, electromagnetic field interference etc.
The product was mechanically damaged (e.g. broken button, fall).
■ Damage caused by use of unsuitable media, fillings, expendable supplies (batteries) or by unsuitable working conditions (e.g. high temperatures, high humidity, quakes).
■ Repair, modification or other failure action to the product by unauthorized person.
■ End-user did not prove enough his right to claim (time and place of purchase).
■ Data on presented documents differs from data on products.
■ Cases when the claiming product cannot be identified according to the presented documents (e.g. the serial number or the warranty seal has been damaged).
Authorized service centers
Visit www.sencor.eu for detailed information about authorized service centers.
DŮLEŽITÉ POZNÁMKY
DŮLEŽITÉ: PŘEČTĚTE SI PŘED POUŽITÍM A USCHOVEJTE PRO POZDĚJŠÍ POUŽITÍ.
UPOZORNĚNÍ
POUŽITÍ OVLÁDACÍCH PRVKŮ, SEŘIZOVÁNÍ PŘÍSTROJE NEBO PROVÁDĚNÍ POSTUPŮ V ROZPORU SE ZDE UVEDENÝMI POKYNY MŮŽE MÍT ZA NÁSLEDEK VYSTAVENÍ ÚČINKŮM NEBEZPEČNÉHO ZÁŘENÍ.
V PŘÍPADĚ NESPRÁVNÉ VÝMĚNY BATERIE HROZÍ NEBEZPEČÍ VÝBUCHU; NAHRAĎTE BATERII POUZE STEJNÝM NEBO EKVIVALENTNÍM TYPEM.
NEBEZPEČÍ
TENTO PŘEHRÁVAČ KOMPAKTNÍCH DISKŮ JE KLASIFIKOVÁN JAKO LASEROVÝ PRODUKT TŘÍDY 1. OZNAČENÍ CLASS 1 LASER PRODUCT (LASEROVÝ PRODUKT TŘÍDY 1) JE UMÍSTĚNO NA ZADNÍ VNĚJŠÍ STRANĚ.
NÁZVY OVLÁDACÍCH PRVKŮ
natural_image
Hand holding a device with directional arrows indicating movement (no text or symbols)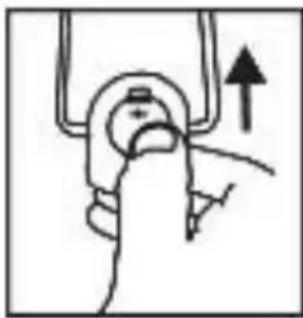
natural_image
Simple line drawing of a hand holding a tool with an upward arrow (no text or symbols)ZDROJ ENERGIE
natural_image
Two line drawings of hands holding circular objects, no text or symbols presentS DISKY ZACHÁZEJTE POUZE UVEDENÝM ZPŮSOBEM
natural_image
Simple line drawings of stacked books, a cross symbol, and a circular object (no text or labels)NESKLADUJTE DISKY V BLÍZKOSTI ZDROJŮ TEPLA
natural_image
Line drawing of two hands holding a circular object, possibly a tool or device (no text or symbols present)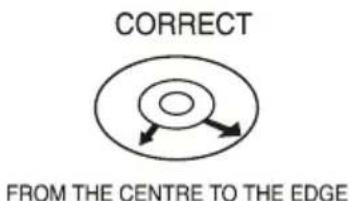
NÁZVY OVLÁDACÍCH PRVKOV
- DISPLEJ
- OZDOBNÝ KRÚŽOK REPRODUKTORA
- L'AVÝ/PRAVÝ REPRODUKTOR
- KONEKTOR PHONES (Slúchadlá)
- PORT USB
- KONEKTOR AUX IN (Externý vstup)
- TLAČIDLO SOURCE (Zdroj)
- TLAČIDLO STANDBY (Pohotovostný režim)
- TLAČIDLO MEM. (Pamät')/
- TLAČIDLO TUN- (Ladenie-)/
- TLAČIDLO 10/Fold. (Priečinok)/M- (Pamät-)
- TLAČIDLO LIGHT (Svetlo)
- TLAČIDLO Prog./P-Mode (Program/Režim P)
-
▶TLAČIDLO/Scan (Vyhl'adávanie)/PAIR (Párovanie)
-
TLAČIDLO TUN+ (Ladenie+)/
- TLAČIDLO 10/Fold. (Priečinok)/M+ (Pamät+)
- TLAČIDLO EQ/ID3 (Ekvalizér/ID3)
- TLAČIDLO MUTE (Stlmenie zvuku)
- OZDOBNÝ KRÚŽOK OVLÁDAČA
- OVLÁDAČ VOLUME (Hlasitost')
- DVIERKA CD MECHANIKY
- RUKOVÄT
- ANTÉNA
- DVIERKA BATÉRIE
- ZDIERKA AC (SIEŤOVÉ NAPÁJANIE)
- L'AVY/PRAVY PASÍVNY REPRODUKTOR
- INDIKÁTOR STANDBY/PAIR (Pohotovostný režim/Párovanie)
- SNÍMAČ INFRAČERVENÉHO DIAL'KOVÉHO OVLÁDANIA
DIAL'KOVÝ OVLÁDAČ
FUNKCIE TLAČIDIEL:
- TLAČIDLO SOURCE (Zdroj)
- TLAČIDLO MUTE (Stlmenie zvuku)
- TLAČIDLO MEMORY (Pamät')
- Tlačidlo EQ (ekvalizér)
- FOLD./10/M. (Priečinok/10/Pamät) TLAČIDLO UP/DOWN (Hore/Dole)
- TLAČIDLO CD B-SKIP DOWN/TUN.-(CD Preskočit dozadu a dole/Ladenie-)
- TLAČIDLO CD PLAY/PAUSE (CD - prehrávanie/pauza)
- TLAČIDLO P-MODE (Režim P)
- TLAČIDLO
- TLAČIDLO PAIR (Párovanie)
- TLAČIDLO CD F-SKIP UP/TUN.+ (CD Preskočit dopredu a hore/Ladenie+)
- TLAČIDLO ID3
- TLAČIDLO VOLUME UP/DOWN (Zvýšenie/Zníženie hlasitosti)
- TLAČIDLO LIGHT (Svetlo)
- TLAČIDLO MO/ST (Mono/Stereo)
- TLAČIDLO STANDBY (Pohotovostný režim)
- SNÍMAC DIAL'KOVÉHO OVLÁDANIA
- PRIESTOR NA BATÉRIU
natural_image
Two-step diagram showing hand positioning of a device with directional arrows indicating movement (no text or symbols)ZDROJ ENERGIE
natural_image
Two line drawings of hands holding circular objects, no text or symbols presentS DISKAMI ZAOBCHÁDZAJTE IBA UVEDENÝM SPÓSOBOM
natural_image
Simple line drawings of stacked books, a cross symbol, and a circular object (no text or labels)NESKLADUJTE DISKY V BLÍZKOSTI ZDROJOV TEPLA
-
Čistenie disku
-
Ak dôjde k znečisteniu disku, odstráňte prach, nečistoty a odtlačky prstov jemnou handričkou.
- Disk čistite pohybom od jeho stredu k okrajom.
natural_image
Line drawing of two hands holding a circular object, no text or symbols present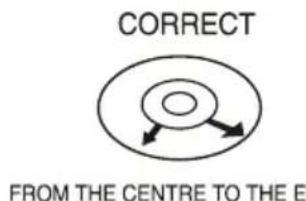
A VEZÉRLŐELEMEK ELNEVEZÉSE
natural_image
Hand holding a device with directional arrows indicating movement (no text or symbols)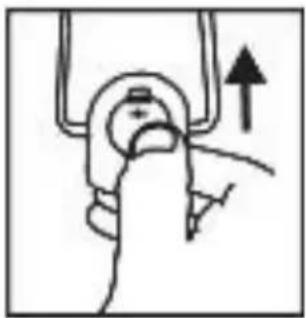
natural_image
Simple line drawing of a hand holding a device with an upward arrow (no text or symbols)ENERGIAFORRÁS
natural_image
Two line drawings of hands holding circular objects, no text or symbols presentA LEMEZEKET CSAK AZ ITT MEGADOTT MÓDON KEZELJE
- Tárolás
natural_image
Simple line drawings of stacked cylindrical objects, a cross symbol, and a circular object with a ring (no text or labels)A LEMEZT NE TÁROLJA HŐFORRÁS KÖZELÉBEN
natural_image
Line drawing of two hands holding a circular object, no text or symbols present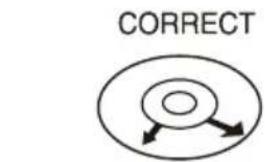
FROM THE CENTRE TO THE EDGE
NAZWY ELEMENTÓW STEROWANIA
natural_image
Hand holding a device with directional arrows indicating movement (no text or symbols)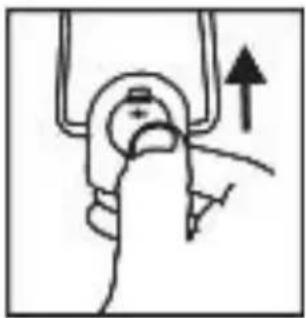
natural_image
Simple line drawing of a hand holding a device with an upward arrow (no text or symbols)ŹRÓDŁO ZASILANIA
natural_image
Two line drawings of hands holding circular objects, no text or symbols presentnatural_image
Simple line drawings of stacked vertical bars, a cross symbol, and a circular object with a ring (no text or labels)NIE PRZECHOWUJ PŁYT W POBLIŻU ŻRÓDEŁ CIEPŁA
natural_image
Line drawing of two hands holding a circular object, no text or symbols present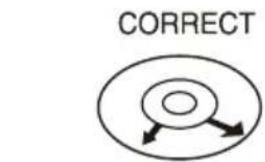
FROM THE CENTRE TO THE EDGE


- IMPORTANT NOTES
- CAUTION
- DANGER
- WARNING
- LOCATION OF CONTROLS
- NAMES OF CONTROLS
- REMOTE HANDSET
- KEY FUNCTIONS:
- LITHIUM BATTERY INSTALLATION OF REMOTE CONTROL
- POWER SOURCE
- AC OPERATION
- DC OPERATION
- BASIC FUNCTION
- SWITCHING ON THE UNIT
- VOLUME ADJUSTING
- EQ FUNCTION
- Mute
- HEADPHONE JACK
- DISCO LIGHT
- RADIO OPERATION
- TUNING RADIO STATIONS
- RADIO AUTO SCAN (SEARCH)
- CD/MP3 OPERATION
- Discs for Playback
- LOADING A DISC
- NOTE:
- PLAYING A DISC
- SELECTING A DESIRED TRACK/PASSAGE
- To select a desired track
- To search for a particular passage during playback (track scanning at high speed)
- To select a song which track number exceeds 10 (for MP3 disc only)
- To select a desired folder (for MP3 disc that contains more than one folder)
- PROGRAMING TRACKS
- REPEAT PLAY
- To Repeat a Single Track
- To repeat all the Tracks
- To repeat the folder (only for MP3 disc which contains more than one folder)
- RANDOM PLAY
- INTRO PLAY
- LISTENING TO USB
- USB OPERATION
- BLUETOOTH OPERATION
- AUX-IN OPERATION
- COMPACT DISC MAINTENANCE
- SPECIFICATIONS
- GENERAL
- BLUETOOTH: V5.0
- RECEIVER SECTION
- COMPACT DISC SECTION
- AUDIO SECTION
- ACCESSORIES
- INSTRUCTIONS AND INFORMATION REGARDING THE DISPOSAL OF USED PACKAGING MATERIALS
- DISPOSAL OF USED ELECTRICAL AND ELECTRONIC APPLIANCES
- For business entities in the European Union
- Disposal in other countries outside the European Union
- SENCOR®
- EN Warranty conditions
- This warranty is void especially if apply as follows:
- Authorized service centers
- DŮLEŽITÉ POZNÁMKY
- UPOZORNĚNÍ
- NEBEZPEČÍ
- NÁZVY OVLÁDACÍCH PRVKŮ
- ZDROJ ENERGIE
- NÁZVY OVLÁDACÍCH PRVKOV
- DIAL'KOVÝ OVLÁDAČ
- FUNKCIE TLAČIDIEL:
- A VEZÉRLŐELEMEK ELNEVEZÉSE
- ENERGIAFORRÁS
- NAZWY ELEMENTÓW STEROWANIA
- ŹRÓDŁO ZASILANIA
- NIE PRZECHOWUJ PŁYT W POBLIŻU ŻRÓDEŁ CIEPŁA
Brand : SENCOR
Model : SPT 5800
Category : Loudspeaker