
Stormy Car 1517 90000 - Vacuum Cleaner Eta - Free user manual and instructions
Find the device manual for free Stormy Car 1517 90000 Eta in PDF.


| Product Type | Bagless Vacuum Cleaner |
| Model | Stormy Car 1517 90000 |
| Dimensions (H x W x D) | 410 x 265 x 240 mm |
| Weight | 4.3 kg |
| Power Input | 800 W (approx.) |
| Voltage | 220-240 V |
| Protection Class | II |
| Noise Level | 75 dB(A) |
| Dust Collection | Bagless, transparent container |
| Filter System | HEPA output filter + foam micro-filters |
| Suction Power Control | Electronic (models ETA4517) or manual knob |
| Remote Control | Yes (on ETA4517 models) |
| Accessories Included | Floor nozzle, turbo brush, crevice nozzle, upholstery nozzle, brush, parquet nozzle, etc. |
| Cord Rewind | Automatic with button |
| Intended Use | Household only |
| Safety Features | Do not immerse in water; keep away from children; avoid rotating brush contact |
| Maintenance | Clean filters regularly; replace HEPA filter after max 3 washes |
| Reparability | Only original spare parts; service by professional |
Frequently Asked Questions - Stormy Car 1517 90000 Eta
User questions about Stormy Car 1517 90000 Eta
0 question about this device. Answer the ones you know or ask your own.
Ask a new question about this device
Download the instructions for your Vacuum Cleaner in PDF format for free! Find your manual Stormy Car 1517 90000 - Eta and take your electronic device back in hand. On this page are published all the documents necessary for the use of your device. Stormy Car 1517 90000 by Eta.
USER MANUAL Stormy Car 1517 90000 Eta
Bagless vacuum cleaner • INSTRUCTIONS FOR USE
EN 23-29
natural_image
Black and white photo of a compact vacuum cleaner with visible exhaust pipe and wheels (no text or symbols)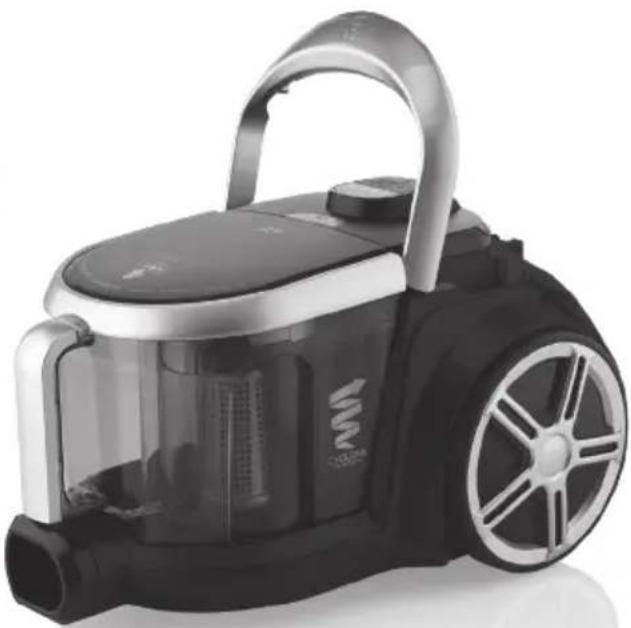
natural_image
Black and silver compact vacuum cleaner with handle and wheels (no visible text or symbols)
1
natural_image
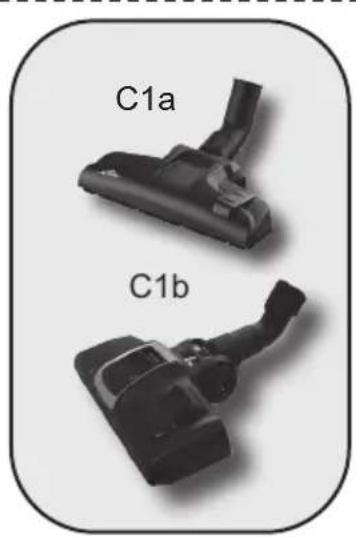
Two black mechanical components labeled C1a and C1b, shown in a rounded square frame (no additional text or symbols visible)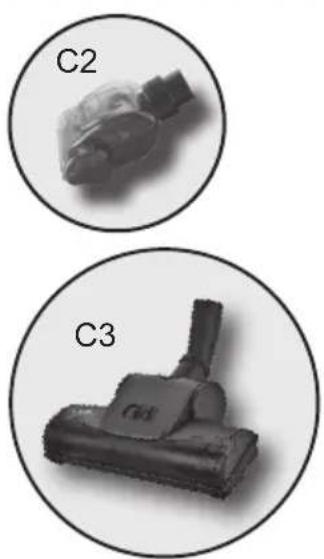
natural_image
Two circular images showing a vacuum cleaner labeled C2 and C3 (no text or symbols on the cleaner itself)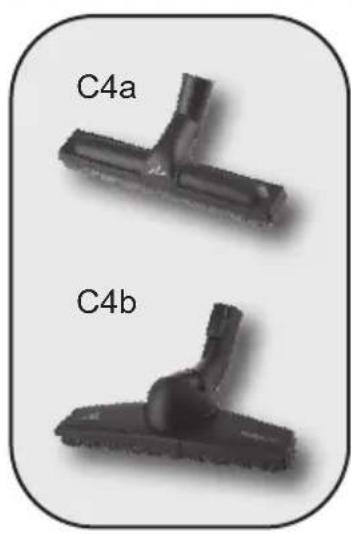
natural_image
Two black plastic spray cleaning tools labeled C4a and C4b, shown in side-by-side views (no additional text or symbols)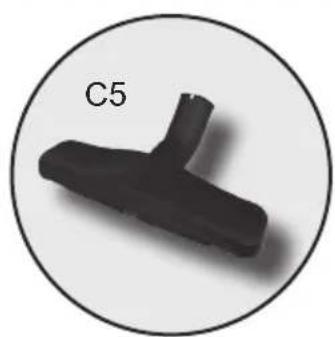
natural_image
Black 3D object resembling a T-shaped tool or bracket, enclosed in a circular frame (no text or symbols)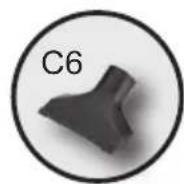
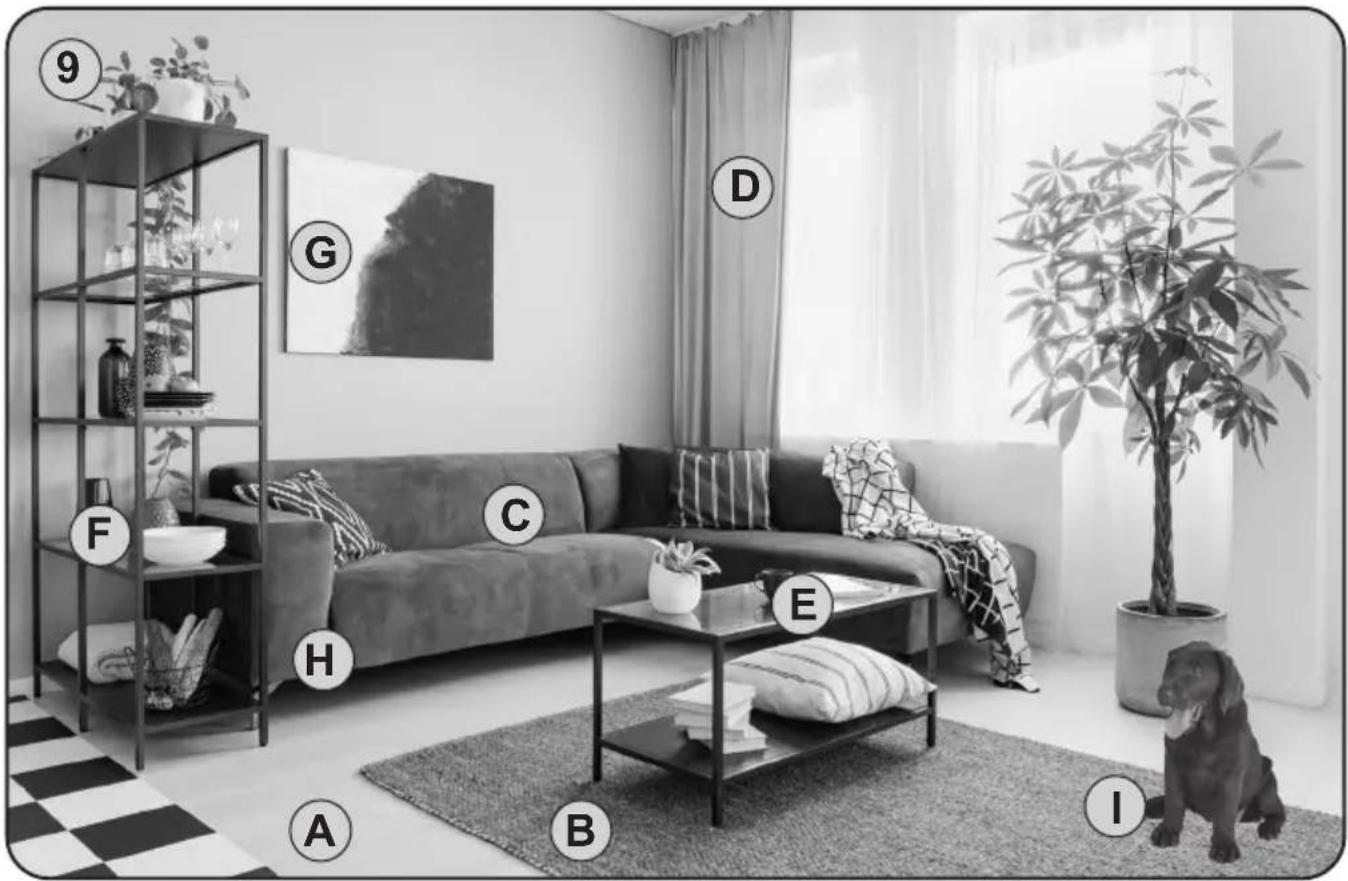
 | záclony / záclony / curtains / függönyök /zasłony / vorhänge / штори |
 | čalouněný nábytek / čalúnený nábytok / cushioned furniture / kárpitozott bútorok / meble tapicerowane / polstermöbel / м'які меблі |
 | podlaha / podlaha / floor / padló / podłoga /fußboden / підлога |
 | koberce / koberce / carpets / szőnyegek / dywany / teppiche / Килими |
natural_image
Close-up of a black plastic device with two directional arrows labeled '1' pointing left, no text or symbols present.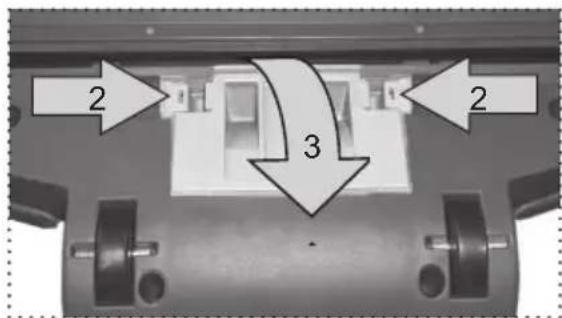
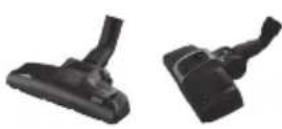 | C1aC1b |  |  | C6 |  |
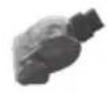 | C2 |  | 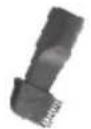 | C7 |  |
 | C3 |  |  | C8 |  |
 | C4aC4b |  |  | C9 |  |
| C5 |
EN The pictures are only illustrative, the supplied accessory and cleaner may differ.
VII. SKLADOVÁNÍ
VII. SKLADOVANIE
Bagless vacuum cleaner
eta x517
STORMY
INSTRUCTIONS FOR USE
Dear customer, thank you for purchasing our product. Please read the operating instructions carefully before putting the appliance into operation and keep these instructions including the receipt and, if possible, the box with the internal packing.
I. SAFETY WARNING

GENERAL PROVISIONS:
- Consider the instructions for use as a part of the appliance and pass them on to any other user of the appliance.
- This appliance may only be used by children aged 8 years or older, and persons with reduced physical, sensory or mental capabilities or lack of experience and knowledge if they have been given supervision or instruction concerning use of the appliance in a safe way and understand the hazards involved. Children shall not play with the appliance. Cleaning and user maintenance shall not be made by children without supervision. Children younger than 8 years must be kept out of reach of the appliance and its power cord.
- Before replacing accessories or any accessible parts, before assembly and disassembly, before cleaning or maintenance, when you let the appliance unattended or if you finish the work with the appliance, switch off the appliance and disconnect it from the mains by unplugging the power cord plug from electrical socket.
- To prevent injury, do not touch the rotating brush with your hands/fingers.
- The appliance is designated to be used indoor only.
- Never immerse the appliance in water (not even partially) and do not wash it under running water!
- When vacuuming certain types of carpets, upholstering fabric, etc., static electricity may be produced. No static electricity discharge is dangerous to health.
- Do not put fingers or other things to input and output vents of the appliance.
- In order to ensure safety and proper function of the appliance, use only original spare parts and accessories approved by the manufacturer.
- Only use this appliance for the purpose it was designed for, as specified in this manual.
- All texts in foreign languages and pictures shown on the packaging or the product itself, are translated and explained at the end of this language mutation.
- The manufacturer is not responsible for damage caused by improper use of the appliance and the accessories.
USE OF THE APPLIANCE:
- The product is only intended for home use and similar purposes (in shops, offices and similar workplaces, at hotels, motels and other residential environments, and in facilities providing bed and breakfast). It is not intended for commercial use!
-
Avoid contact with the rotating brush when handling the vacuum cleaner (e.g. with loose clothes, hair, fingers, jewellery, bracelets etc.).
-
When carrying, do not hold the vacuum cleaner using the handle of the dust container!
- The appliance must not be used in damp or wet environment and in any environment with the danger of fire or explosion.
- Remote control is ensured by signal transmission (after pressing a button) from the hose handle to the electronic system of the vacuum cleaner through radio waves.
- Do not use the appliance to vacuum water, liquids or aggressive fluids!
- Do not vacuum wet or moist floor coverings, and do not use the vacuum cleaner outdoor!
- Do not vacuum sharp objects (e.g. glass, shatter), hot, flammable, explosive items (e.g. ash, hot cigarette butts, gasoline, thinners and aerosol vapours) or greases (e.g. fats, oils), caustic agents (e.g. acids, solvents).
- Do not use the vacuum cleaner to vacuum dirt produced during/after construction such as plasterboard dust, fine sand, cement, dust from construction, parts of plaster etc.
- WARNING: There is a risk of injury in case of incorrect use (not in accordance with the manual) of the appliance.
ACCESSORIES AND ASSEMBLY OF THE APPLIANCE:
- Do not put the suction nozzle or the tube end or accessories close to eyes and ears and do not insert them into body orifices!
- Do not use the brush for treatment and cleaning animal hairs!
- Do not leave the floor nozzle with the rotation brush on in one place for too long! It could cause damage to the surface vacuumed!
BATTERIES:
- If you are not going to use the vacuum cleaner for a longer period of time, remove the batteries from the remote control.
- Should the batteries leak, remove them immediately. Otherwise they might damage the appliance.
- Do not mix old and new batteries together.
- Do not use rechargeable batteries.
- Do not use batteries of a different type.
- As soon as the batteries are flat, replace them with new ones.
- Dispose of a discharged battery in a suitable way (see par. VII. ENVIRONMENTAL)
- Keep batteries out of reach of children and incapacitated people. A person, who would swallow the batteries, must seek medical help immediately.
– Batteries not intended for this purpose must not be charged..
– The supply terminals must not be short-circuited.
POWER CORD:
- Check whether the data on the type label corresponds with the voltage in your socket. The power cord plug may only be connected to the electrical socket complying with the applicable standards.
- If the power cord of the appliance is corrupted, it has to be replaced by the manufacturer, its service technician or a similarly qualified person.
- Always disconnect the appliance from power by unplugging the power cord from the electrical socket, if the appliance is left unattended and before assembly, disassembly or cleaning.
- Never use the appliance if the power cord or power plug are damaged, if the appliance is not correctly operating or if it has fallen on the floor and been damaged, or if it has fallen into water.
- Do not apply force to unwind the cord beyond the red mark.
- Do not unplug the power plug by pulling the power cord or the vacuum cleaner unit.
-
When winding the cord, hold the plug to prevent lashing of the cord around and to prevent possible injury.
-
The power cord must not be damaged with sharp or hot objects, open fire, it must not be sunk into water or bent over sharp edges.
- Check the condition of the power cord of the appliance regularly.
ORIGINAL
VÝROBCE
For trouble-free operation of the vacuum cleaner, please use the tested micro-filters recommended by the producer.
II. EQUIPMENT AND ACCESSORIES
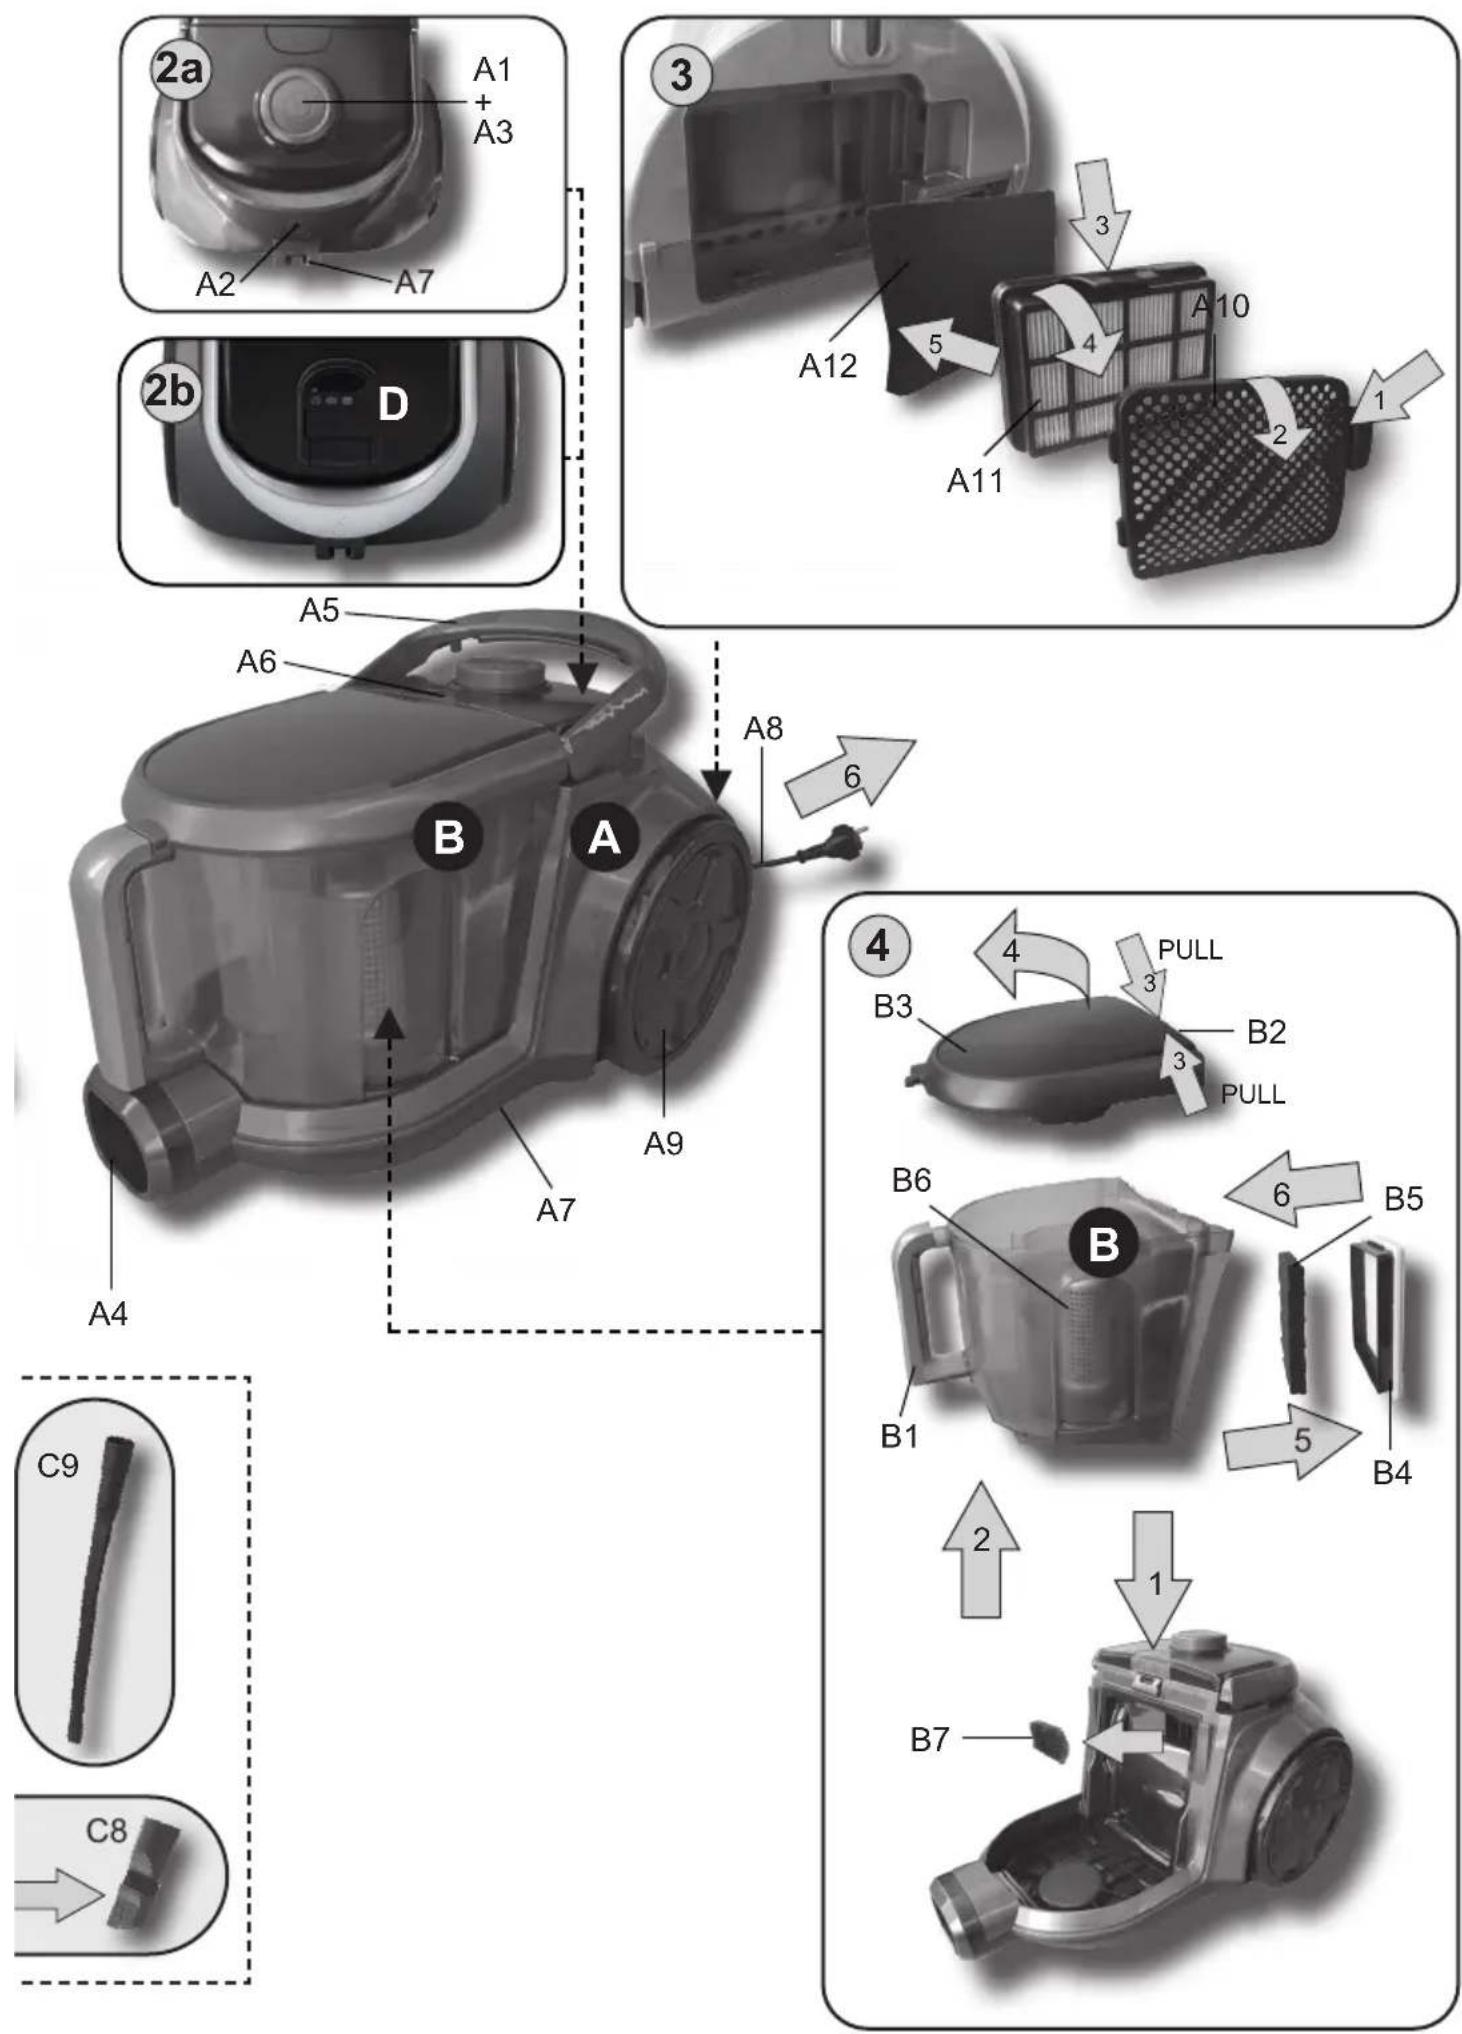
A - vacuum cleaner (Fig. 1, 2a, 3)
A1-ON/OFF( )button
A2 – power cord winding button
A3 – knob for suction power regulation
A4 – suction vent
A5 - handle
A6 – container lock button
A7 – depression for attachment of accessories
A8 - power cord
A9 - rear wheels
A10 – exhaust grid
A11 – output HEPA filter
A12 – output foam filter (only valid for ETA451790000)
B – dust container (Fig. 4)
B1 - holder
B2 - cover lock button
B3 - cover
B4 – suction filter 1
B5 – suction filter 2
B6 - separator
B7 - foam micro-filter
C - accessories (Fig. 1)
C1a - floor nozzle
C1b – floor nozzle (2 vacuum cleaning modes)
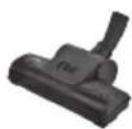
C2 – small turbo brush
C3 - turbo brush
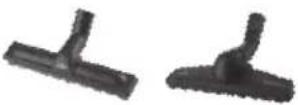
C4a – parquet nozzle
C4b – parquet nozzle (PREMIUM CARE 360°)
C5 – nozzle for vacuuming of animal hair
C6 – upholstery nozzle
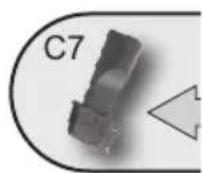
C7 - brush
C8 - crevice nozzle
C9-long crevice nozzle
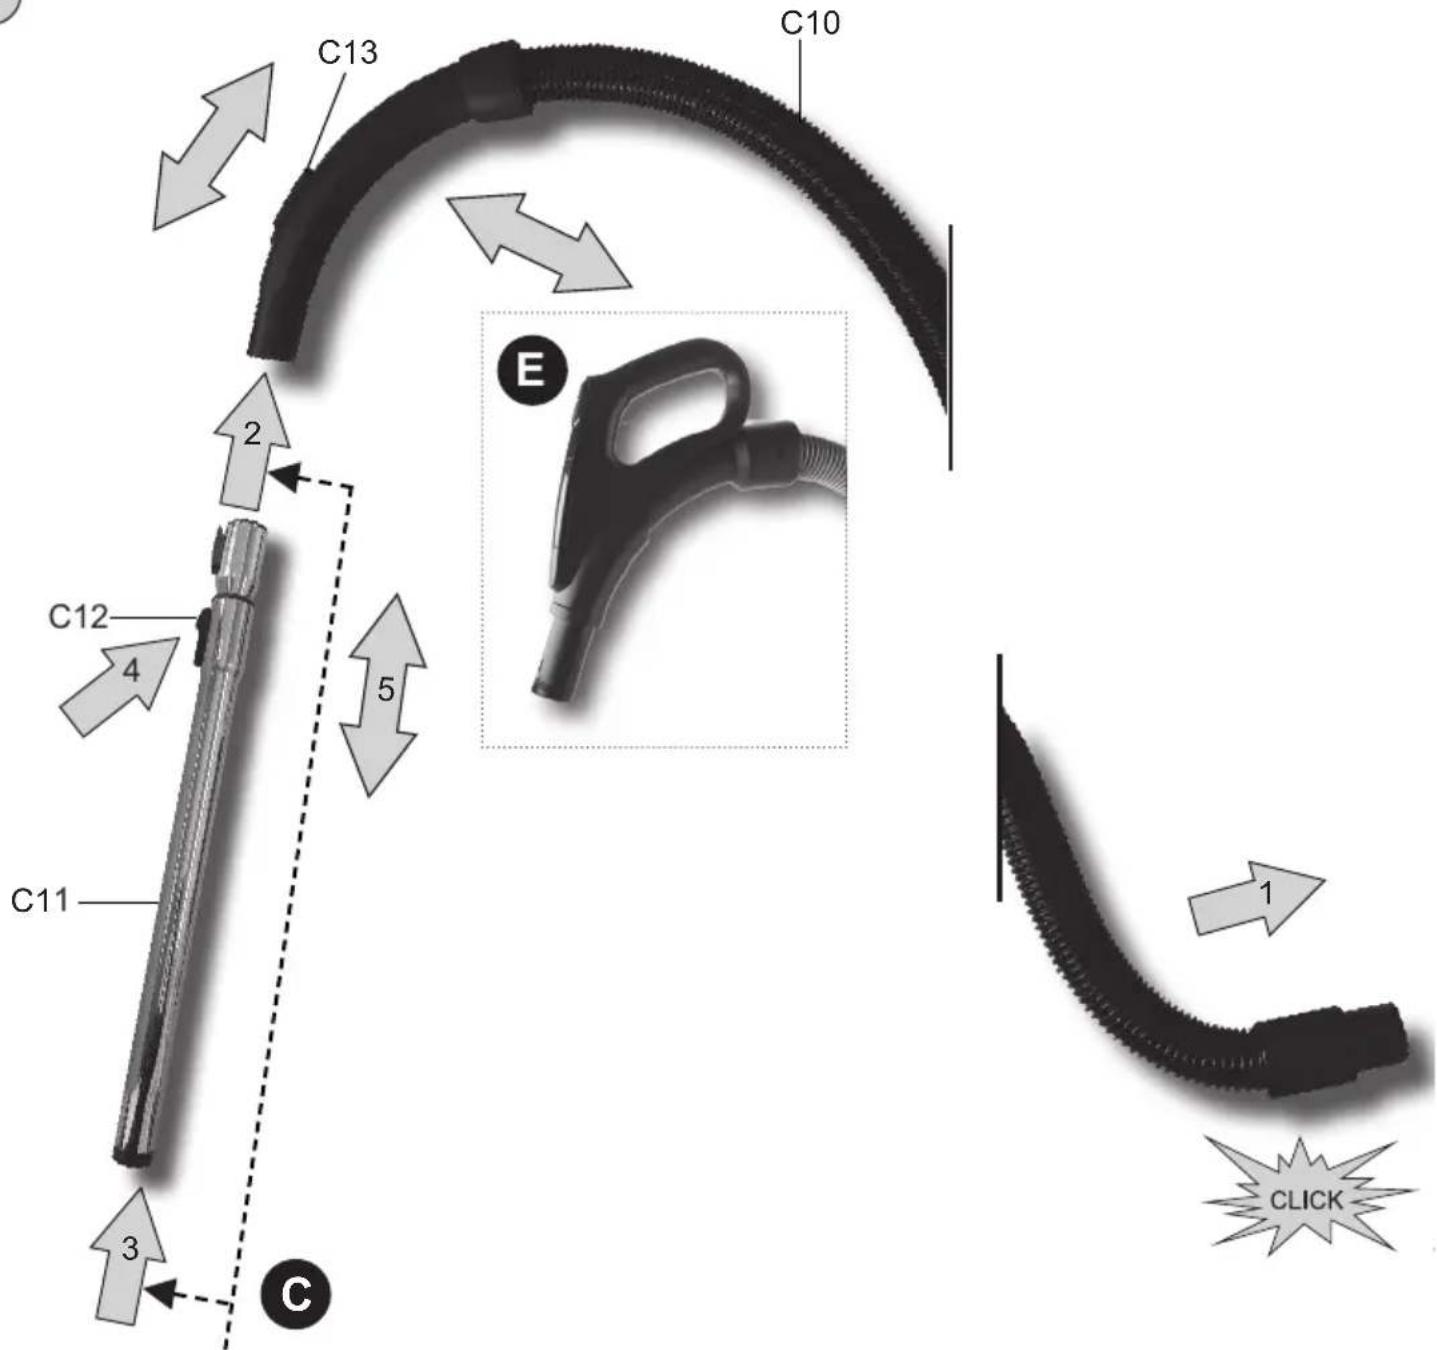
C10 – suction hose
C11 – telescopic suction tube
C12 – telescopic suction tube locking
C13 - mechanical suction power regulator
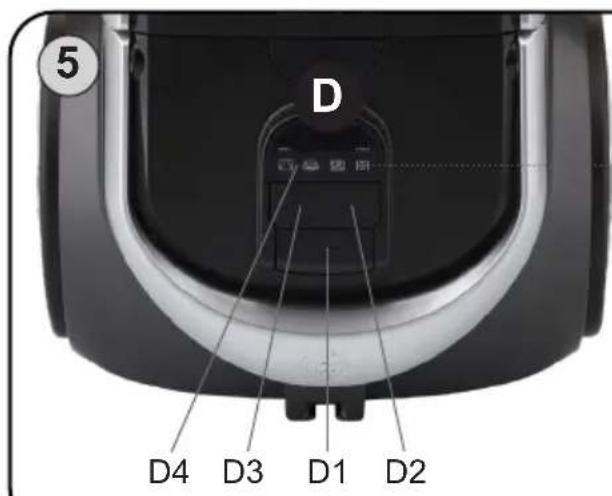
D - control panel (Fig. 2b, 5) (ETA4517)
D1 - ON/OFF () button
D2 - “+” button for suction power setting
D3 - “-” button for suction power setting
D4 – LED light panel
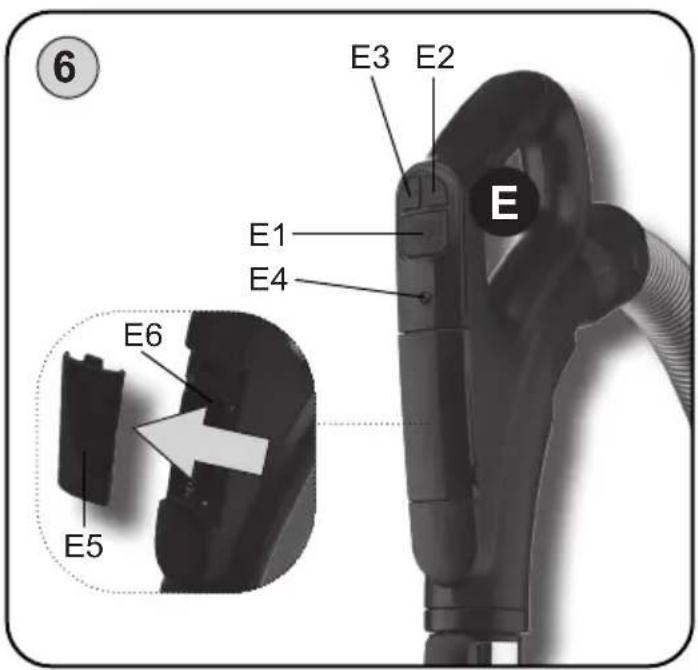
E – handle with remote control (Fig. 1, 6) (ETA4517)
E1 - ON/OFF () button
E2 - “+” button for suction power setting
E3 – “-” button for suction power setting
E4 – squeeze signal lights
E5 – battery compartment cover
E6 – battery compartment
| Accessories | C1a C1b C2 | C3 C4 | a C4b | C5 C6 | C7 C8 | C9 | |||||
| ETA051790000 | -√ | - | √ | - | √ | √ | √ | ||||
| ETA151790000 | -√ | - | -√ | - | √ | √ | √ | √ | √ | ||
| ETA151790010 | -√ | - | √ | √ | √ | √ | √ | ||||
| ETA251790000 | - | √ | - | √ | - | √ | √ | √ | √ | √ | √ |
| ETA351790000 | -√ | - | -√ | - | √ | √ | √ | √ | √ | ||
| ETA451790000 | - | √ | √ | √ | - | √ | √ | √ | √ | √ | √ |
III. VACUUM CLEANER PREPARATION
Remove all packing material, take out the vacuum cleaner and the accessories.
Remove all possible adhesion foils, stick-on labels or paper from the appliance.
VACUUM CLEANER ASSEMBLY
When assembling the vacuum cleaner, follow the procedure indicated in Fig. 1.
Choose appropriate accessories as required (C1 - C9) (Fig. 9). The accessories (C1 - C9) can be connected to the telescopic suction tube C11 or directly to the suction hose C10.
The telescopic suction tube C11 can be set to an optimum length to suit the user's height.
IV. USE OF VACUUM CLEANER
Before use, unwind (by pulling) the power cable A8 from the vacuum cleaner to a required length and plug the vacuum cleaner to the mains.
CONTROL (ETA0517, ETA1517, ETA2517, ETA3517)
A1 button - vacuum cleaner ON/OFF switch
A2 button - when pressed and held, the unwound part of the power cable rewinds back inside
Knob A3 - by turning it to the right, you increase the suction power
- by turning it to the left, you reduce the suction power
CONTROL (ETA4517)
Control panel D + handle with remote control E (Fig. 5, 6)
D1 button - vacuum cleaner ON/OFF switch
E1 button - vacuum cleaner ON/OFF switch (the button only works in standby mode)
D2/E2 button - when pressed, the suction power increases
D3/E3 button - when pressed, the suction power decreases
A2 button - when pressed and held, the unwound part of the power cable rewinds back inside
Notes
- Adjust the suction power as you feel it necessary based on the surface being cleaned.
- Before you use the remote control, fit 2 pcs of AAA batteries in it (Fig. 6). Batteries are included in the box.
- If you wish to use the remote control, you must switch ON the vacuum cleaner first by pressing the button A1.
- With the remote control you can switch the vacuum cleaner ON or OFF and regulate the suction power. The light indicator E4 comes on every time the remote control transmits a signal (when a button is pressed).
Pairing the remote control with the vacuum cleaner
If the remote control does not communicate with the vacuum cleaner, the following procedure must be applied:
- Switch on the vacuum cleaner.
- Press and hold the D2 and D3 buttons simultaneously until the suction power indicator lights start flashing consecutively.
- Then press and hold button E1 until the vacuum cleaner switches off.
- The remote control should then perform its function as usual.
V. REMOVING THE DUST CONTAINER AND FILTERS
Caution
- Maximum suction performance can be achieved when the filters are clean and the dustbag is empty.
- Every time you empty the dust container, we recommend that you also clean the filters.
- When you are vacuuming very fine dust, the filter pores might get clogged. This reduces the air flow and the suction performance deteriorates. In such a case, the filters need to be cleaned even though the container is not full yet.
DUST CONTAINER REMOVAL
When taking out the dust container B follow the procedure indicated in Fig. 4. Dispose of dirt contained in the dust container with regular household waste. An emptied and cleaned container is to be put back into the vacuum cleaner in reverse order.
INPUT FILTER REPLACEMENT
To remove the input filter, follow the procedure indicated in Fig. 4. To fit a new input filter in the vacuum cleaner, proceed in reverse order.
OUTPUT FILTERS REPLACEMENT
To remove the input filter, follow the procedure indicated in Fig. 3. To fit a new output filter in the vacuum cleaner, proceed in reverse order.
VI. CLEANING AND MAINTENANCE
Treat surface of the appliance with a soft and damp cloth, do not use coarse and aggressive detergents!
Accessories
After any vacuuming it is recommended to check visually the brushes or collectors for possible impurities. If there are some impurities, remove them.
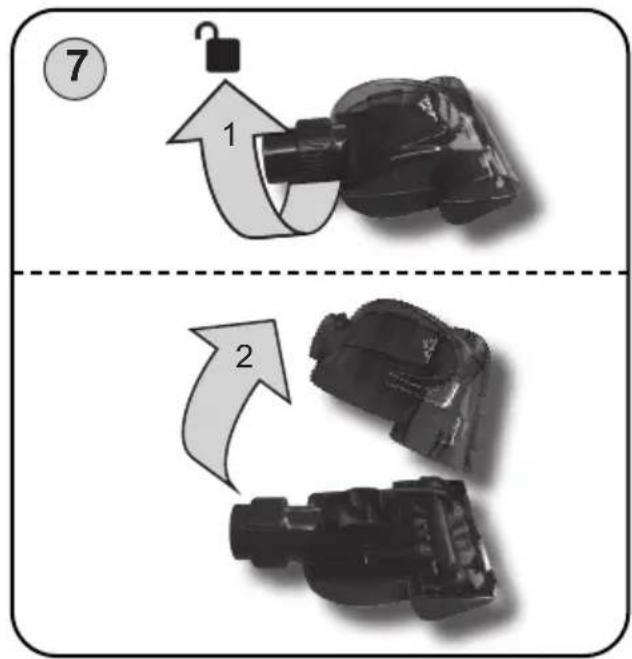
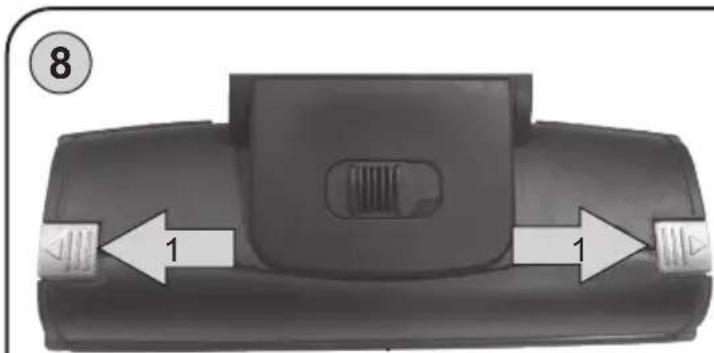
Cleaning the TURBO nozzle C3 (Fig. 8)
Cut the threads and hairs with scissors. Turn on the vacuum cleaner. The cleaner vacuums the cut hairs and threads. In case hairs or threads got tangled up around the attachment of the brush cylinder and cannot be removed with the above-mentioned steps, it is necessary to remove them with a suitable tool (e.g. tweezers). For simpler and more comfortable maintenance, remove the upper cover by releasing the locking latches on the sides. At the same time, make sure no dirt is stuck on the inner side of the nozzle (i.e. turbine). Release the two arrest latches on the bottom side of the nozzle in the direction of the arrow and remove the cover. Clean the space with a suitable tool (e.g. tweezers). Insert the covers back into the nozzle reversely and close it with by folding it up (you hear an audible click).
Dust container
Clean the dust container with a wet
cloth. Allow all the parts to dry out properly before re-use.
Input and output filters
Rinse the filter A12, B4, B5, B7 under running water. Allow them to dry out properly before their re-use. Shake out the HEPA filter A11 gently, or blow it out. If the HEPA filter is very dirty, you can rinse it under running lukewarm water. Allow it to dry out properly.
Caution
- Do not clean the HEPA filter or the other filters with any aggressive washing or cleaning detergents or hot water.
- In order to maintain the filtering parameters of the HEPA filter, we recommend that you use a dry method of cleaning.
- If you clean the HEPA filter with water, its filtration properties will deteriorate. The filter cannot be washed more than three times. After that, a new filter needs to be purchased.
- If the filters are not cleaned or replaced, it might result in damaging the vacuum cleaner!
Other parts
Clean the telescopic suction tube C11 and suction hose C10 with a wet cloth. Allow all the parts to dry out properly before re-use.
More extensive maintenance or maintenance requiring intervention in the inner parts of the appliance must be carried out by professional service!
Failure to comply with the instructions of the manufacturer will lead to expiration of the right to repair!
The information regarding warranty and product repairs you can find on the website www.eta.cz/servis-eu.

VII. ENVIRONMENTAL PROTECTION
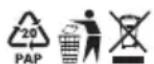
If the dimensions allow, there are labels of materials used for production of packing, components and accessories as well as their recycling on all parts. The symbols specified on the product or in the accompanying documentation mean that the used electrical or electronic products must not be disposed of together with municipal waste. For proper disposal of the product, hand it over at special collection places where it will be taken over free of charge. Suitable disposal of the product can help to maintain valuable natural resources and to prevent possible negative impacts on the environment and human health, which could be the possible consequences of improper waste disposal. Ask for more details at the local authority or at the local waste collection site. Fines can be imposed for improper disposal of this type of waste in agreement with the national regulations. If the appliance is to be put out of operation, we recommend its cutoff after disconnecting it from power supply and in this way it will not be possible to use the appliance again. Remove a discharged battery and dispose of it in a suitable and safe way through the special collection networks. Never dispose of the battery by burning!
VIII. TECHNICAL DATA
Voltage (V) / Input (W) specified on the type label of the appliance Protection class of the appliance II.
Weight (kg) approx. 4.3
Size of the product (mm) 410 x 265 x 240
Input in off mode is 0.00 W
Declared acoustic level is 75 dB(A) re 1pW.
Remote control (ETA4517): - frequency range: 433.92 MHz
- output power (max): +13 dBm
Hereby, ETA a.s. declares that the radio equipment type ETA4517 is in compliance with Directive 2014/53/EU. The full text of the EU declaration of conformity is available at the following internet address: http://eta.cz/declaration-of-conformity
The manufacturer reserves the right to change the technical specifications and accessories for the respective models.
WARNINGS AND SYMBOLS USED ON THE APPLIANCE, PACKAGING OR IN THE INSTRUCTIONS MANUAL:
HOUSEHOLD USE ONLY; DO NOT IMMERSE IN WATER OR OTHER LIQUIDS;


TO AVOID DANGER OF SUFFOCATION, KEEP THIS PLASTIC BAG AWAY FROM BABIES AND CHILDREN. DO NOT USE THIS BAG IN CRIBS, BEDS, CARRIAGES OR PLAYPENS. THIS BAG IS NOT A TOY.
The symbol indicates a WARNING. - Please read the instructions manual
VII. ÖKOLÓGIA
VII. EKOLOGIA

VII. UMWELTSCHUTZ
- SKLADOVÁNÍ
- SKLADOVANIE
- Bagless vacuum cleaner
- eta x517
- STORMY
- INSTRUCTIONS FOR USE
- SAFETY WARNING
- GENERAL PROVISIONS:
- USE OF THE APPLIANCE:
- ACCESSORIES AND ASSEMBLY OF THE APPLIANCE:
- BATTERIES:
- POWER CORD:
- EQUIPMENT AND ACCESSORIES
- A - vacuum cleaner (Fig. 1, 2a, 3)
- B – dust container (Fig. 4)
- C - accessories (Fig. 1)
- D - control panel (Fig. 2b, 5) (ETA4517)
- E – handle with remote control (Fig. 1, 6) (ETA4517)
- VACUUM CLEANER PREPARATION
- VACUUM CLEANER ASSEMBLY
- USE OF VACUUM CLEANER
- Notes
- Pairing the remote control with the vacuum cleaner
- REMOVING THE DUST CONTAINER AND FILTERS
- Caution
- DUST CONTAINER REMOVAL
- INPUT FILTER REPLACEMENT
- OUTPUT FILTERS REPLACEMENT
- CLEANING AND MAINTENANCE
- Accessories
- Cleaning the TURBO nozzle C3 (Fig. 8)
- Dust container
- Input and output filters
- Other parts
- ENVIRONMENTAL PROTECTION
- TECHNICAL DATA
- ÖKOLÓGIA
- EKOLOGIA
- UMWELTSCHUTZ
Brand : Eta
Model : Stormy Car 1517 90000
Category : Vacuum Cleaner