L714WM12E - Washing machine Logik - Free user manual and instructions
Find the device manual for free L714WM12E Logik in PDF.


| Product Type | Freestanding Washing Machine |
| Model | L714WM12E |
| Brand | Logik |
| Rated Capacity | 7 kg (cotton programmes) |
| Maximum Spin Speed | 1400 rpm |
| Energy Efficiency Class | A+ |
| Annual Energy Consumption | 222 kWh/year |
| Annual Water Consumption | 10337 L/year |
| Spin Drying Efficiency Class | B |
| Remaining Moisture Content | 53% |
| Noise Level (Spinning) | 78 dB(A) |
| Noise Level (Washing) | 62 dB(A) |
| Power Input | 2200 W |
| Voltage / Frequency | 220 – 240 V ~ 50 Hz |
| Dimensions (W x D x H) | 596 mm x 540 mm x 850 mm |
| Weight | 68.5 kg |
| Water Pressure Range | 0.05 – 1 MPa |
| Programmes | Cotton, Synthetics, Delicates, Wool, Silk, Quick Wash, Spin, Drain, etc. |
| Key Functions | Delay Timer (up to 23h), Child Lock, Half-Load Detection, Rinse Hold, Extra Rinse, Pre-wash with Soak, Easy Ironing |
| Maintenance | Clean drum, detergent drawer, drain filter, door seal; prevent frozen hose |
| Safety Features | Transit bolts removal required, child lock, door lock during operation, earthed plug |
| Included Accessories | Water supply hose, transit bolt cover caps, instruction manual |
Frequently Asked Questions - L714WM12E Logik
User questions about L714WM12E Logik
0 question about this device. Answer the ones you know or ask your own.
Ask a new question about this device
Download the instructions for your Washing machine in PDF format for free! Find your manual L714WM12E - Logik and take your electronic device back in hand. On this page are published all the documents necessary for the use of your device. L714WM12E by Logik.
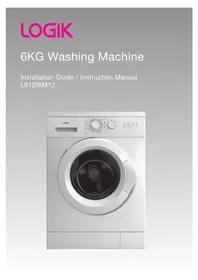
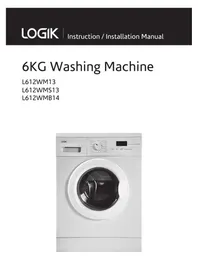
USER MANUAL L714WM12E Logik
Safety Warnings....7
Unpacking....28
Installing Your Washing Machine 29
Choosing the Right Location for Your Washing Machine 29
Moving and Installing 30
Removing the Transit Bolts 30
Moving the Washing Machine from One Location to Another 30
Hose and Cable Lengths....31
Levelling the Washing Machine 31
Water Supply Hose....31
Water Drain Hose....32
Connecting to the Mains Supply 33
Product Overview....34
The Unit....34
Control Panel 35
Preparation 36
Organising Laundry 36
Preparing Laundry....36
Adding Detergent and Softener....37
Wash Setting....38
First Washing Operation....38
Standard Washing 38
Changing the Programme 39
Manual Soaking....39
Half-Load Detection System 39
Individual Washing Functions (Process Selection) 39
Optional Functions 40
Reason for Non-Activation....40
Washing Water Temperature Selection 40
Delay Timer....41
How to Set the Child Lock 41
Cancelling Programme 41
Finishing Programme 41
Removing Laundry 41
Selecting the Programme 42
Which Detergent to Use....43
Important Information....44
Washing Delicates (Wool and Silk Programmes)....44
Adding Delicate Laundry Items to the Drum 44
Tips for Hanging Delicate Items to Dry 44
How to Use Laundry Starch....44
Maintenance – Cleaning the Washing Machine ....45
Cleaning the Drum....45
Cleaning the Exterior of your Washing Machine....45
Cleaning the Detergent Drawer 45
Cleaning the Siphon Plug
Cleaning the Drain Filter
Preventing a Frozen Water Supply Hose
Cleaning the Filter Net of the Water Supply Hose
Hints and Tips
Troubleshooting
Error Code
Specifications
Product Fiche
For your continued safety and to reduce the risk of injury or electric shock, please follow all the safety precautions listed below.
WARNING!
- If you will not be using the washing machine for a while such as when you go on holiday, disconnect the plug from the mains supply and turn off the water supply to the washing machine. This is particularly important if there is no drainage around the washing machine.
- If the water supply is left on, water pressure may build up and cause a leak.
General Use
- Transit bolts are used to transport the washing machine. You should remove these using a spanner or similar tool before you install the washing machine. If you do not, it will cause strong vibrations when the washing machine is spinning.
- Do not install your washing machine anywhere that is damp or exposed to the weather. If you do, it may cause an electric shock, fire, failure or deterioration.
- Do not pour water directly onto any part of the washing machine. It may cause a short circuit or electric shock.
- Keep burning objects such as candles or cigarettes, away from the washing machine. They may cause a fire or damage.
- Keep flammable substances well away from the washing machine – for example kerosene, gasoline, benzene, paint thinner and alcohol, or clothing soaked with these. They may cause an explosion or a fire.
- This washing machine is only suitable for washing textiles labelled ‘washing machine washable’.
- Do not connect the washing machine to hot water. The washing machine works with cold water only.
- Before you start using the washing machine, turn the tap on to check that the hose is properly connected. If it's not, there may be a water leak.
- Do not put too much laundry or detergent into the washing machine. It may cause issues with the washing machine or laundry.
- Be careful not to get your laundry caught in the door when you close it. This could cause a water leak or damage your laundry. • This washing machine is for household (domestic) use only.
Power Source and Cable
- Use an independent household dedicated mains socket, rated at 10 Amp 220V to 240V AC. If
the washing machine is plugged in with other appliances, it may overheat and cause a fire.
• Make sure the mains plug is pushed firmly into the socket. A loose connection may overheat and cause electrical shock or a fire.
- Check the mains lead and mains plug for any damage. If the mains cable is damaged, it must be replaced by the manufacturer, its service agent or similarly qualified persons in order to avoid a hazard.
• Unplug the mains lead when cleaning the washing machine.
- Do not touch the mains lead or mains plug with wet hands. It may cause an electric shock.
- Check the mains plug regularly for dirt. If dirt accumulates on the mains plug, it could cause a fire. To prevent this, unplug the cable and clean the mains plug with a dry rag.
- If you disconnect the mains plug, hold onto the mains plug not the cable. Pulling the cable may cause an electric shock or a fire.
- Do not use a mains plug adaptor or extension cable. It may overheat and cause a fire.
• Make sure your home voltage matches the voltage displayed on the washing machine. If you are not sure, contact an electrician. - The mains plug must remain accessible to allow disconnection or an all pole switch must be incorporated in the fixed wiring in accordance with the wiring regulations.
To Prevent Injury / Damage
- Do not climb on the washing machine. You may hurt yourself or damage the washing machine.
- When opening and closing the door ensure you keep fingers away from the door hinge, or this could lead to injury.
- Check your washing for objects such as nails, pins, coins, clips etc. They could damage your laundry or the washing machine.
- To prevent any large, heavy objects (e.g., buckles, large buttons, etc.) from hitting the glass door, turn your clothing inside out or remove the heavy objects. They could damage your laundry or the washing machine.
- Do not wash, rinse or spin waterproof sheets or clothing. These may cause vibration or washing machine failure during spin-drying, which could lead to injury, damage to the washing machine or damage due to water leaking.
- Be careful when draining hot water or any detergent from the drum. To prevent an injury.
- Do not dismantle, repair or modify the washing machine. The washing machine could malfunction and cause a fire or injury.
- This appliance is not intended for use by persons (including children) with reduced physical, sensory or mental capabilities, or lack of experience and knowledge, unless they have been given supervision or instruction concerning use of the appliance by a person responsible for their safety. Children should be supervised to ensure that they do not play with the appliance.
- Do not touch the laundry inside the washing machine, until the drum has completely stopped. Even if the drum is spinning at low speed it can cause an injury. Take particular care of children in this respect.
- The appliance is to be connected to the water mains using the new hose-set supplied. Old hose-sets should not be reused.
- The ventilation openings in the base of the washing machine must not be obstructed by a carpet.
WARNING

IT IS HAZARDOUS FOR ANYONE OTHER THAN AUTHORISED SERVICE PERSONNEL TO CARRY OUT SERVICING OF REPAIRS WHICH INVOLVE THE REMOVAL OF COVERS.

TO AVOID THE RISK OF AN ELECTRICAL SHOCK DO NOT ATTEMPT REPAIRS YOURSELF.
Safety Warnings
NO
Thank you for purchasing your new Logik Washing Machine.
You must spend some time reading this installation/instruction manual in order that you fully understand all the operational features it offers.
Read all the safety instructions carefully before use and keep this installation/instruction manual for future reference.

Unpacking
GB
Remove all packaging from the unit. Retain the packaging. If you dispose of it, please do so according to local regulations.
The following items are included:
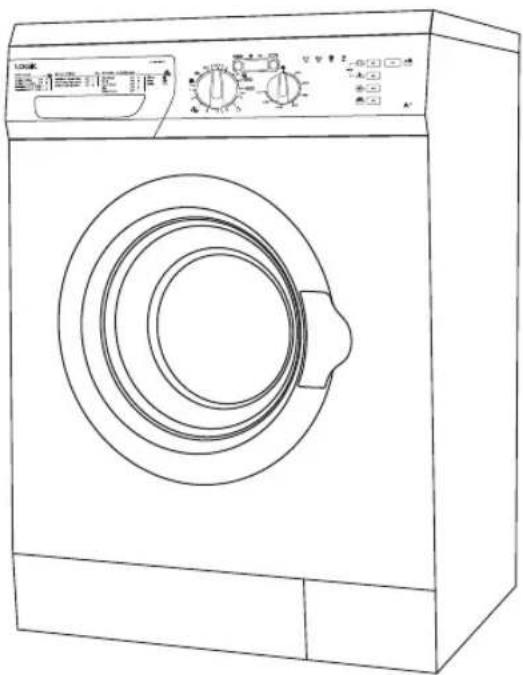
The Main Unit


Transit Bolt Cover Cap x 4
Water Supply Hose x 1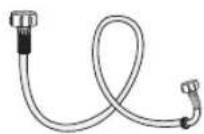
Instruction Manual x 1

Installing Your Washing Machine
Please read and follow the instructions carefully.
- In addition to the instructions mentioned here, special regulations of the relevant water and power supply companies may apply. If in doubt, have the washing machine connected by a qualified technician.
- The washing machine is heavy - caution when lifting it. Do not lift by projecting components (e.g., washing machine door).
- Warning: Frozen hoses may tear/burst. Do not install the washing machine in outdoor areas or where there is a risk of frost.
- Lay hoses and cables in such a way that there is no risk of trapping or kinking.

Additional space (approximately 120mm) is required for the rear of the washing machine. This is to allow enough space for the water hose and drain hose connections.
Choosing the Right Location for Your Washing Machine
- Make sure there's enough space for your washing machine. • Install your washing machine on a flat, stable surface to avoid excessive vibration and noise.
- Don't install your washing machine in direct sunlight or in a place where temperatures can reach freezing. • The ventilation openings in the base of the washing machine must not be obstructed by carpet.
✗ Sloping surface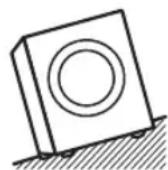
✗ Unstable Bumpy✗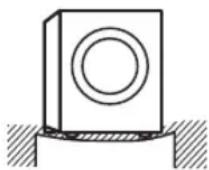
surface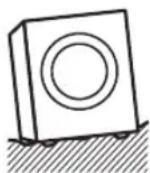

Two or more people are required to move the washing machine.
- Start by tilting the washing machine backwards.
- One person should stand behind it, holding the rear of the top panel. The other person should grip the bottom feet at the front.
- Check that you have all the required accessories for installation. • We recommend that you entrust the installation of the washing machine to a qualified technician.

Moving and Installing
Removing the Transit Bolts
Four transit bolts keep the interior of the washing machine in place while it's being moved.
They need to be removed before installation. Use a spanner (not supplied) and follow the instructions detailed below.

Don't run the washing machine without removing the transit bolts, as this can cause excessive vibrations and may damage your machine.
To remove the transit bolts:
- Use a spanner to loosen the four bolts. They are located at the rear of the washing machine.
- Pull the bolts out horizontally. Make sure the entire bolt is removed.
- Push the four cover caps (included with your accessories) into the respective bolt holes.
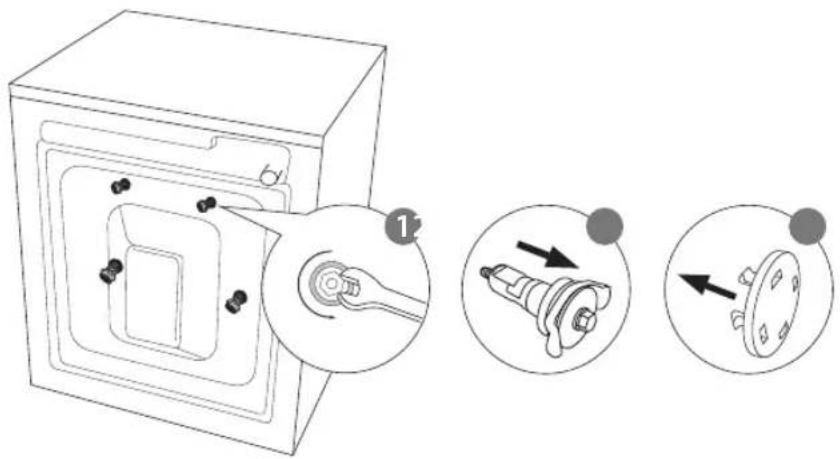

You'll need the transit bolts again if you move the washing machine, so make sure you keep them in a safe place.
Moving the Washing Machine from One Location to Another
Before you move the washing machine:
- Shut off the tap and run the washing machine to drain the water. Drain any remaining water from the pump hose. Disconnect the mains cable.
- Attach the transit bolts.

Make sure to fix the transit bolts prior to moving the washing machine.
* All images are for indication only; please refer to your individual unit for actual item.
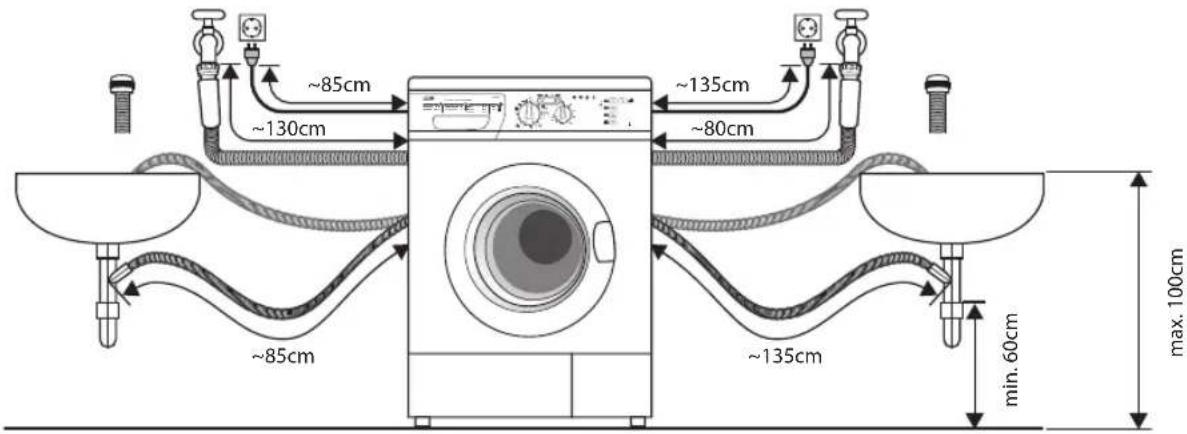
Hose and Cable Lengths
How to connect from the left side
How to connect from the right side
Levelling the Washing Machine
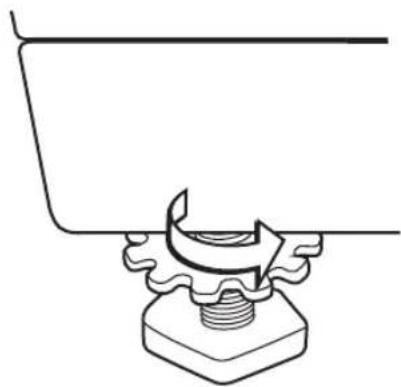
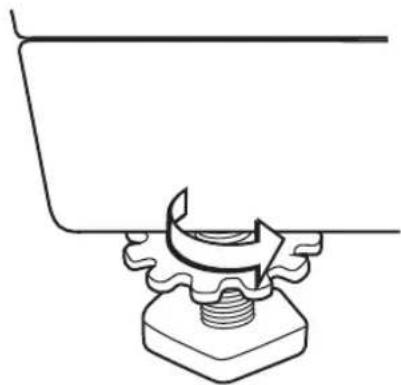
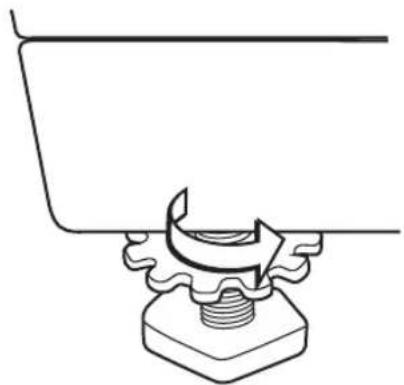
There are 4 levelling feet on the underside. They must be adjusted to make sure the washing machine is level.
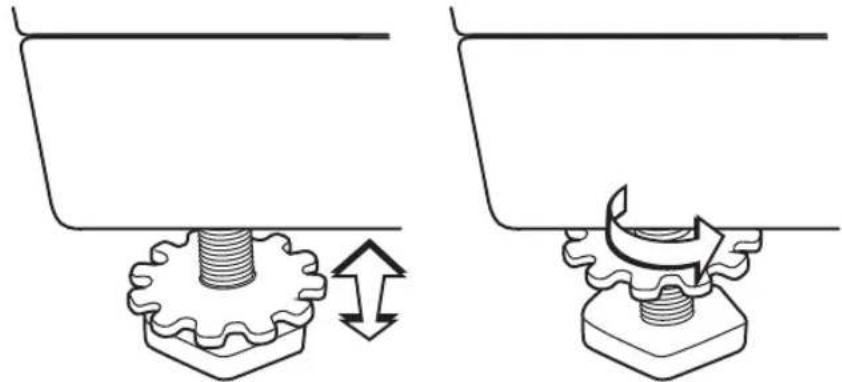
- On each foot, loosen the lock ring by turning it clockwise.
- Adjust all four feet by rotating each upwards or downwards.
- Use a spirit level to ensure the washing machine is level.
- Tighten each lock ring by turning them anti-clockwise (towards the washing machine body).

• Ensure all four lock rings are tightened securely. - Ensure the feet are not unscrewed too far, such that they become detached from the washing machine.
Water Supply Hose
Points to remember
• Follow the instructions in this section to avoid water leaks. - Don't connect the hose to a combination tap. - Don't twist, squash, modify or cut the hose. - This machine is designed to connect to the cold water supply. Do not connect to the hot water supply. • Use only the new water supply hose supplied. Old hose sets should not be reused.
* All images are for indication only; please refer to your individual unit for actual item.
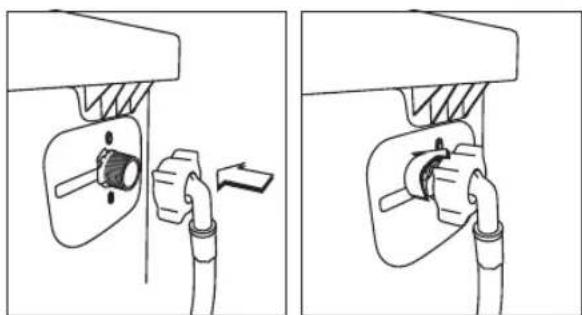
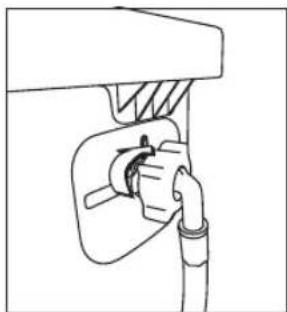
Connecting the Water Supply Hose
- To prevent leakage from the connection joints, ensure the rubber washer seals are fitted to each end of the water supply hose. Do not use without the seals in place.
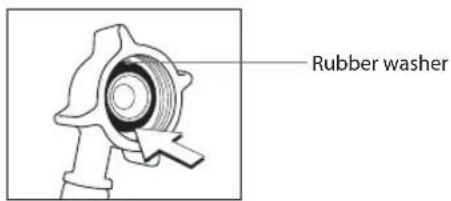
- Fit the straight end of the water supply hose to the cold water tap.
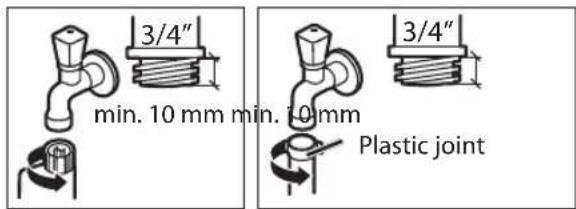
- Connect the angled end of the white headed hose to the water inlet valve on the machine. Hand tighten the plastic parts of the connections. If you are unsure, please call a qualified plumber for safer connections.
- Open the tap slowly and check that there are no leaks around the connection joints.
Water Drain Hose
Points to remember:
- Don't twist, pull out or bend the drain hose.
- Your washing machine should be no more than 85 cm from the drain outlet.
- The water drain hose should be mounted at a height of minimum 60 cm, maximum 100 cm from the ground.
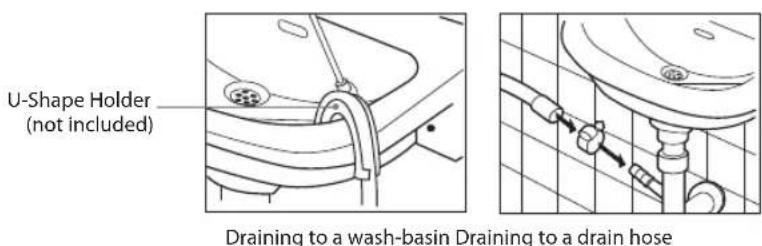
Draining to a sink or wash-basin
- Secure the drain hose in position, so it can't drop out of the basin.
- Don't block the basin's drain outlet, and make sure that the drainage through it is sufficient to prevent overflowing.
- Don't let the tip of the drain hose dip into the drained water, as this can cause the water to flow back into the washing machine.
* All images are for indication only; please refer to your individual unit for actual item.
Connecting to the Mains Supply
For your safety:
- Do not use a mains plug adapter or extension cable.
- If the mains cable or mains plug are damaged, stop using them and call a qualified technician for assistance.
- The mains cord of your washing machine is equipped with an earthed plug. This plug should always be inserted into an earthed socket capable of supplying 10 Amps. If in doubt, please call a qualified electrician.
Installation Check List
By now, you should have installed the washing machine.
Let's go through the checklist to ensure that the installation has been done correctly!
| Questions Checkbox | ||
| Transit bolts - Have you removed them and attached the cover caps properly? | ||
| 4 levelling feet | Four Adjustable Feet - Are they bolted securely to the washing machine? | |
| Four Feet Cushions - Are they standing flat? | ||
| Power supply - Is the mains socket Earthed, rated at 220V to 240V A and can supply 10 Amps? | ||
| Location - Is your washing machine on a flat, stable surface? | ||
| Water Supply Hose - Is it connected, turned on and free from leaks? | ||
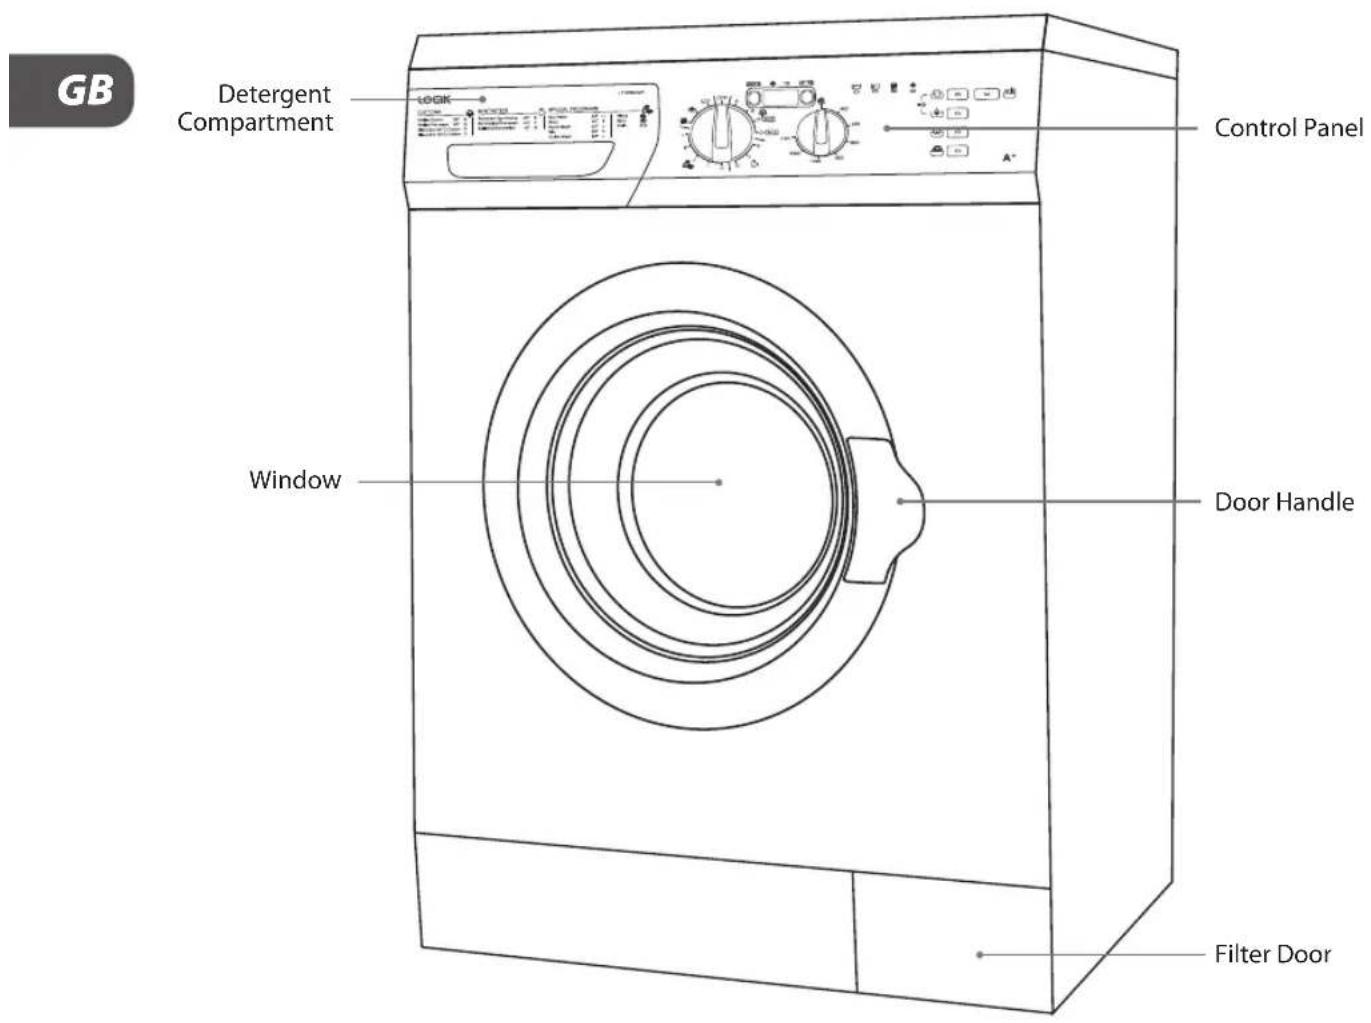
The Unit
* All images are for indication only; please refer to your individual unit for actual item.
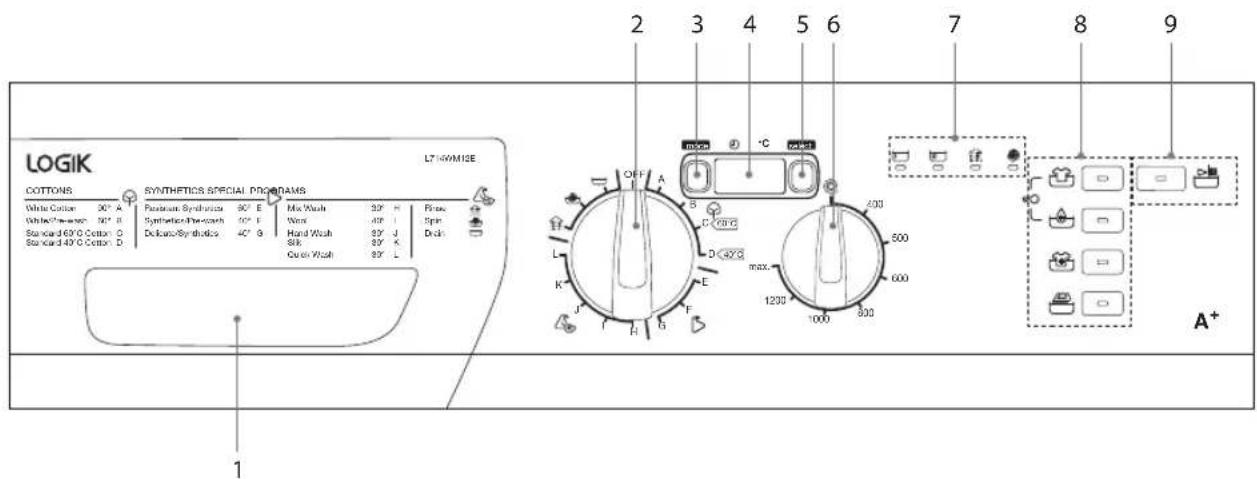
Control Panel
GB
1. The Detergent Compartment
2. Programme Selection Dial
- Different wash programmes can be selected according to your wash requirements.
3. Mode Button
- Access the functions for setting the temperature or the programme startup time.
4. Display Window
- Displays the wash programme's finishing time, temperature or speed setting messages.
5. Select Button
- Adjusts the setting of the temperature or the programme startup time.
6. Spin Speed Dial
• This dial is used to adjust the spin speed.
7. Washing Indicator
• Indicates the washing process of the selected programme.
8. Rinse Hold Button
• Stops the last rinsing water being drained.
Extra Rinse Button
• Activates additional rinse operation.
Child Lock
- This machine incorporates a special child safety lock, which can prevent children from pressing the keys and changing the setting.
Pre-wash with Soak Button
- This function adds an extra wash and soak before the main wash. It is recommended for heavily soiled laundry only.
Easy Ironing
- This function tumbles the clothes for longer after spinning. This helps to reduce creasing.
9. Start / Pause Button
- Press to start/resume your wash.
- Press while in operation to pause your wash.
- Press and hold for 4 seconds while in operation to cancel the programme.

During initial start-up and use of the unit, there may be a slight smell while the motor is settling in. This is not a fault; this is normal operation.
Read the following to understand how best to prepare your laundry for washing.
Organising Laundry
- Read the washing label on each garment to help you sort your washing into different loads.
- Sort the laundry by colour, type of fabric and by how soiled it is. This will help you choose the correct programme and temperature for each wash.
- Do not exceed maximum load! See refer to the section Selecting the Programme for the maximum load for the programme you require.
GB
Preparing Laundry
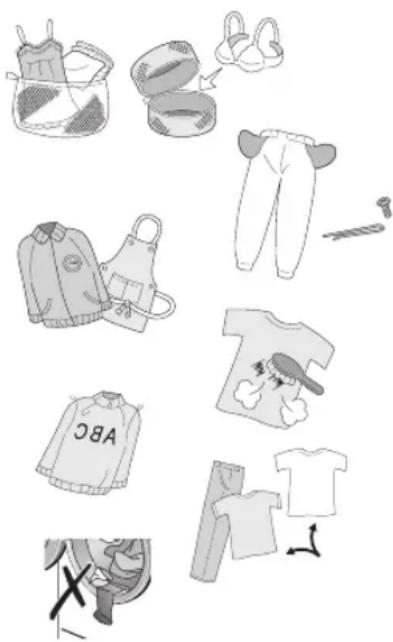
• Treat stains before washing. - Some items should be put into a cleaning net before going into the washing machine, i.e., bras with metal wires, tights and lace clothing to prevent damage. - Check that pockets do not contain any objects which may damage your clothes and the washing machine. - Tie up any loose strings on laundry, close zippers and reverse clothing with zips inside out. - To prevent any large, heavy objects (e.g., buckles, large buttons, etc.) from hitting the glass door, turn your clothing inside out, or remove the heavy objects. These could damage your laundry or the washing machine. - Remove any surplus hair, animal fur, sand, and other materials with a brush before washing. • If clothes have raised fabric turn them inside out. • Clothes that are not colour fast should be washed separately. - Insert your clothes into the washing machine. Close the washing machine door. Ensure not to trap any items of clothing between the loading door and the rubber seal.
Adding Detergent and Softener
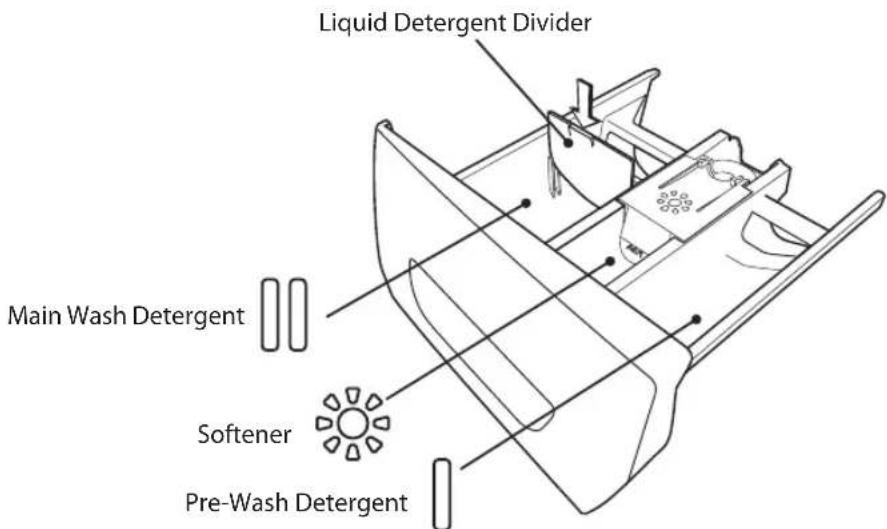
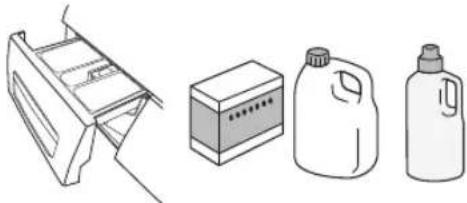
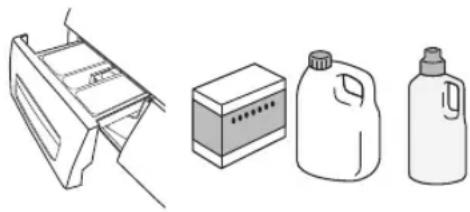
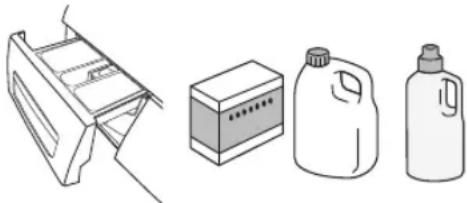
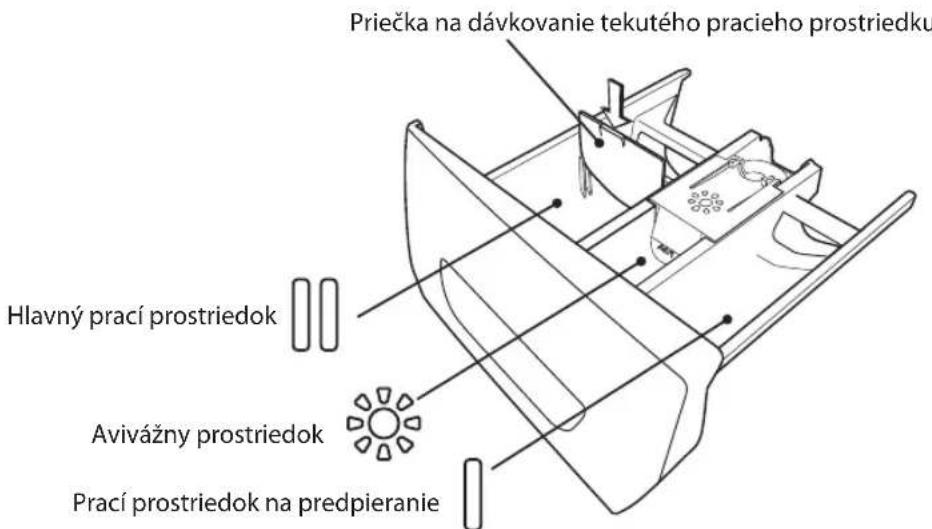
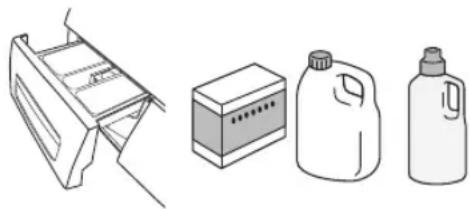
If you would like to use a liquid detergent you will need to insert the BLUE liquid detergent divider. The divider has liquid level marks, 100ml, 150ml and 200ml. If you use a powder detergent remember to remove the BLUE liquid detergent divider.
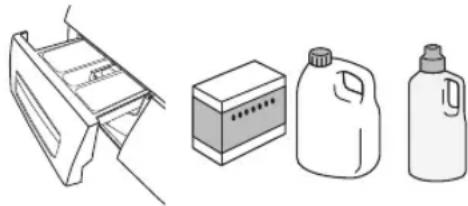
- Add detergent into the appropriate dispenser.
• Apply softener before you start washing.
- Apply detergent and softener according to the washing amount, the soiling level, the water hardness in your area and the manufacturer's instructions of these products.
- For slightly dirty clothes, do not pre-wash and put a small amount of detergent in compartment 2 (II) of the detergent drawer.
- For excessively dirty clothes, select a programme including pre-washing, use 1/4 of the detergent to be used in the detergent drawer in compartment 1 (I) of the detergent drawer and the remaining amount in compartment 2 (II). This is when using powder detergent only.

Dilute viscous fabric softener and fabric conditioner with water. Prevent blockage of the overflow. Maximum level is 40ml.
- Do not use the washing machine when the detergent drawer is removed. It may cause a water leak or it may not work normally.
- If you forget to add detergent, you can drain the washing machine by running a spin only programme. Then you can add detergent and start the programme again. Detergent only reaches the drum when water flushes through the detergent drawer.
- To prevent powdered detergent staying in the drawer, dry the inside of the drawer with a cloth. Make sure the powder isn't lumpy when you add it into the drawer.
- If the rinse cycle isn't removing all the detergent from your wash, use less detergent.
- Softener should not exceed the MAX level in the compartment.
- Wash out unused softener with a splash of water or a damp cloth after the programme has finished.
- You can use your liquid detergents in all programmes without pre-washing. To use liquid detergent, insert the BLUE liquid detergent divider as shown above. Remember to detach the BLUE liquid detergent divider when done.
First Washing Operation
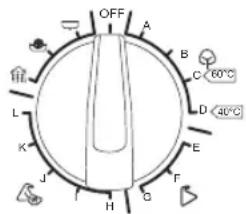
Some water may be left in your machine due to tests carried out during production. To dispose of this water, it is recommended to perform the first washing operation with the programme ((A) White Cotton) and without laundry by inserting 1/2 portion of detergent in the 2nd compartment of the detergent drawer.

During initial start-up and use of the unit, there may be a slight smell while the motor is settling in. This is not a fault; this is normal operation.
Standard Washing
- Pull the door handle and put the laundry in the drum. Make sure no laundry gets caught in the door.
- Close the door and turn the Programme Selection Dial to select your wash programme and water temperature.
- Set the spin speed to max (the wash programme will determine the maximum spin speed) or a lower speed if desired.
- Select any Optional Functions.
- Add detergent into the detergent drawer. The quantity of detergent will depend on the amount of laundry, the degree of soiling and the water hardness. Use the amount of detergent suggested on the packaging of the detergent.
- Press the Start / Pause button to start the washing.

To pause the programme you have selected, press the Start / Pause button. The electronic display will blink when the machine is in pause mode.
- The washing machine will display "End" when the programme is complete.
![graph TD A["Start"] --> B["Step 1"] B --> C["Step 2"] C --> D["Step 3"] D --> E["Step 4"] E --> F["Step 5"] F --> G["End"]](/content/2026/05/759273/images/22799da9b2efe060cbee934f0e1c232f9e3258832d4e1a1d76595c08117d419c.jpg)

- If the door is locked and you switched the washing machine off - or if there's a power cut - it will stay locked for 2 minutes. • If the machine is full of water, do not open the door.
Changing the Programme
If you have selected a programme and you do not want it to continue:
- Press the Start / Pause button. The Start / Pause button indicator will flash. Turn the programme dial to the OFF position.
- Adjust the programme dial to the programme you want.
- Press the Start / Pause button again to run your desired programme.

The Child Lock must be off, otherwise the initial programme selected will continue when the programme dial is changed.

If you want to cancel any programme running:
- Press and hold the Start / Pause button for 4 seconds.
- Your machine will stop the washing operation and the programme will be cancelled. (Ensure the Child Lock is off, otherwise the original programme will continue.)
- Your machine will perform the necessary discharge operation and cancel the programme. You can then select a new programme.
Manual Soaking
To manually soak your laundry, press the Start / Pause button after 10 minutes of the wash programme. The Start / Pause button indicator will flash. The washing machine will suspend the laundry to soak it in the water. After your desired soaking time, press the Start / Pause button, the machine will continue the previous wash.

When you start your machine, the following will be indicated.
Indication of the current wash cycle process: wash, rinse or spin. Approximate programme ending time (dependent upon unbalanced load) or programme delay time based on your selection.
Half-Load Detection System
Your machine features a half-load detection system. In case you load the machine to approximately half or less than the maximum laundry capacity, your machine will run so as to save washing time, water consumption and energy in some programmes (White cotton 95°, Colourfast cotton 60°, Non colourfast cotton 40°). When half-load function is active, the machine can complete the programme you have set in a shorter time.
Individual Washing Functions (Process Selection)
You can select from "Rinse", "Spin" or "Drain".
- Open the door and put the laundry in the drum.
- Close the door and turn the Programme Selection Dial to OFF position. Then select "Rinse" / "Spin" / "Drain" programme.
- Press the 📋 Start / Pause button to start the process.
| Function When you want to | |
| Rinse Rinse laundry. | |
| Spin Spin-dry laundry. | |
| Drain Drain water from the drum. |
Optional Functions
Depending on the programme you select, you can combine different optional functions. You may need to press the functions buttons more than once to get all the functions you want.
- Press the button of the optional function you would like to select. • If the indication of the function button remains lit it means that the function has been selected.
- If the indication of the function button flashes when pressed, it means you cannot use that additional function for the wash programme you selected.
Reason for Non-Activation
• The auxiliary function you want to use in the washing programme you have selected is not applicable. - Your machine has passed the stage, during which the optional function you want to select would be implemented. - It is not compatible with an optional function you have selected previously.
| Optional Function When you want to How it works | ||
| Rinse hold(Press the ☑ Rinse Hold button) | This function is recommended to be used when the clothes cannot be removed immediately after the end of the program. This will prevent creasing. | When this button is pressed, the last rinsing water is not drained. For the program to continue after this, press the ☑ Rinse Hold button. |
| Extra rinse(Press the ☑ Extra Rinse button) | For sensitive skin, e.g., baby clothes. | This function adds an extra rinse cycle to the selected programme. |
| Pre-wash with Soak(Press the ☑ Pre-wash with Soak button) | Wash heavily soiled clothes. This will perform a pre-wash followed by soaking (machine will agitate every 4 minutes) before starting the main wash. Will use detergent from the Pre-wash compartment (l). | |
| Easy Ironing(Press ☑ Easy Ironing button) | For clothes that are hard to iron or crease easily. | By using this function, you clothes will come out less wrinkled after washing. |
Washing Water Temperature Selection
- Press the Mode button once after selecting the programme.
- The wash temperature for the programme will appear on the display.
- Press the Select button until your desired washing water temperature is displayed. You cannot increase the temperature above the programme temperature. e.g. if the programme temperature is 60°C you can't increase it to 70°C.
- If you wish to wash your laundry in cold water, press the Select button until "Cld" is displayed.
- Press the Start / Pause button to start washing.

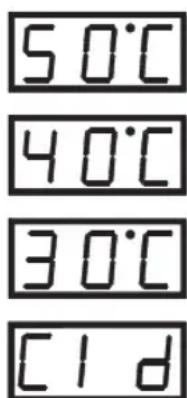
Cold
Delay Timer
By using this optional function, you can delay the start of your washing machine by up to 23 hours. This is a useful feature to switch your machine on at a cheaper energy time to save money on your energy bills.
- Press the Mode button twice after selecting the programme.
- "0h" will appear on the display for approximately 3 seconds.
- Press the Select button until your desired time delay is displayed.
- To start the delay timer, press the Start / Pause button. The countdown will start and the remaining delay time will show on the LED display based on the delay period you have selected.
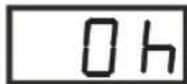
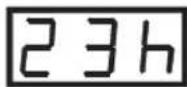
If you want to cancel the delay timer, select "0h" or turn the programme dial to 'OFF' and then back to your desired programme.
How to Set the Child Lock
The Child Lock prevents children from stopping programmes accidentally. It only locks the control buttons, not the Programme Selection Dial.
Switch the washing machine on.
- When the washing machine is operating, simultaneously press and hold the Rinse Hold button and the Extra Rinse button for 3 seconds. "0:-n" will blink in the display and the child lock light will light up.
- Press the buttons in the same way to unlock. The child lock light will turn off.

Be careful when pressing the two buttons. If you don't press them both at the same time you could accidentally activate an additional function.
![graph TD A["Setup Setup"] --> B["Lighting"] B --> C["Storage"] C --> D["Storage"] D --> E["Storage"] E --> F["Storage"] style A fill:#f9f,stroke:#333 style B fill:#ccf,stroke:#333 style C fill:#cfc,stroke:#333 style D fill:#fcc,stroke:#333 style E fill:#cff,stroke:#333 style F fill:#ffc,stroke:#333](/content/2026/05/759273/images/86e67022698813275f9b7530e81d89399ddfe9aded76ab6f5a4a4fb61f319ceb.jpg)
Cancelling Programme
If you wish a certain programme in progress to finish early.
- Press and hold the 📄 Start / Pause button for 4 seconds.
- The washing machine will carry out the drain operation necessary for the programme to finish, and then end the programme.
- "END" will be displayed on the display.

Finishing Programme
- Your machine will stop by itself as soon as the programme you have selected finishes. • "END" will be displayed on the electronic display.

Removing Laundry
- Open the washing machine door and remove your laundry.
- Remove any foreign objects to avoid risk of rusting.
- Leave the door and detergent drawer open so that residual water can evaporate.
- If you have finished using the washing machine, turn off the water and mains supplies.

Selecting the Programme Here are the available programmes, additional functions and option settings. Temperature can be selected separately for certain programmes.
| Programme Description | Max Temperature | Max Load (kg) | Default Spin (rpm) | Approximate Time (min) | Total Water Consumption (it) | Detergent Compartment | Max Energy (kwh) | ||||
| Cotton | (A) White Cotton | For dirty, boil, cotton and linen textile. No more than 3.5 kg for towels should be loaded. | 90°C 7.0 | 1400 175 90 | ✗ | √ | √ | 2.31 | |||
| (B) White / Pre-wash | For dirty or very dirty cotton and linen textile. No more than 3.5 kg for towels should be loaded. | 60°C 7.0 | 1400 148 95 | √ | √ | √ | 1.55 | ||||
| (C) Standard 60°C Cotton | For dirty, cotton coloured and linen textile. No more than 3.5 kg for towels should be loaded. | 60°C 7.0 | 1400 200 50 | ✗ | √ | √ | 1.19 | ||||
| (D) Standard 40°C Cotton | 40°C 7.0 | 1400 190 52 | ✗ | √ | √ | 0.89 | |||||
| Synthetics | (E) Resistant Synthetics | For average or lightly soiled garments for mixed cotton, linen and man-made fabrics. | 60°C 3.5 | 800 90 58 | ✗ | √ | √ | 0.86 | |||
| (F) Synthetics / Pre-wash | For dirty or very dirty garments for mixed cotton, linen and man-made fabrics. | 40°C 3.5 | 800 131 71 | √ | √ | √ | 0.76 | ||||
| (G) Delicate/ Synthetics | For average or lightly soiled garments for mixed cotton, linen and man-made fabrics. | 40°C 3.5 | 800 80 56 | ✗ | √ | √ | 0.58 | ||||
| (H) Mix Wash | For lightly soiled garments for mixed cotton, linen and man-made fabrics. | 30°C 3.5 | 800 74 55 | ✗ | √ | √ | 0.27 | ||||
| (I) Wool | For machine washable woolens and other items marked with hand wash care label. | 40°C 2.0 | 600 70 64 | ✗ | √ | √ | 0.43 | ||||
| (J) Hand Wash | Very slightly dirty, cold water, hand and machine to wash wool laundry. | 30°C 2.0 | 600 65 62 | ✗ | √ | √ | 0.26 | ||||
| (K) Silk | Very slightly dirty, cold water, hand and machine to wash wool laundry. | 30°C 2.0 | - | 55 67 | ✗ | √ | √ | 0.27 | |||
| Programme Description | Max Temperature | Max Load (kg) | Default Spin (rpm) | Approximate Time (min) | Total Water Consumption (it) | Detergent Compartment | Max Energy (kwh) | |||
| (L) Quick Wash | For lightly soiled cottons, household linens and work / play clothes. | 30°C 3.5 | 800 30 48 | × | √ | √ | 0.18 | |||
| Spin | When you need an additional rinsing to be done to your clothes after the washing process, you can use this program for all kinds of clothes. (Default spin speed is 1400 rpm.) | |||||||||
| Drain | You can use this program, when you need an additional spinning to be done to your clothes after the washing process. (Default spin speed is 1400 rpm.) | |||||||||

- For all washing programmes, please following the detergent recommendations on the garment label or on the detergent's packaging.
- Washing times depend on the programme and temperature settings selected. - Washing times will be longer if the laundry in the drum needs to be balanced.
- Depending on the programme, you may not be able to add optional functions, or change the wash temperature when the programme is running. - Energy and water consumption will vary according to wash load and type, extra functions, tap water and ambient temperatures. - The duration of 2 minutes is required before the door of your machine can be opened is not included in the washing period. - The actual water temperature may differ from the declared cycle temperature.
Which Detergent to Use
The care label is crucial to ensure correct detergent selection, temperature and laundry treatment.
| Washing and type of textile | Washing temperature | Detergent |
| Boil washable white washing made of linen or cotton | 30°C - 90°C (Max) | Standard detergent containing bleach and optical brighteners |
| Coloured washing made of linen or cotton | 30°C - 60°C (Max) | Colour detergent without bleach and optical brighteners |
| Coloured washing made of easy-care fibres, synthetic materials | 30°C - 60°C (Max) | Colour/mild detergent without optical brighteners |
| Delicate fine textiles, silk or viscose 30°C - 40°C (Max) Mild detergent | ||
| Wool | 30°C - 40°C (Max) | Detergent for woolens |
Washing Delicates (Wool and Silk Programmes)
These programmes rock the drum gently for best results on delicate laundry.
• Delicate laundry loads: 2kg or less • Tips for Wool programme:
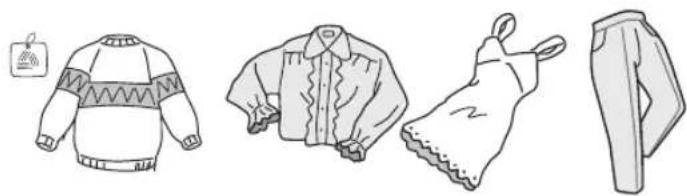
Approximate Weights:
- Wool sweater (400g)
- Silk blouse / under garment (200g)
- Trousers (400g)
GB
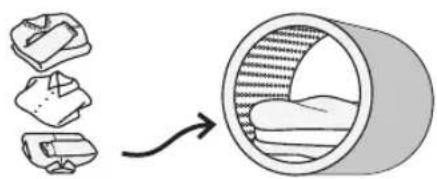
Adding Delicate Laundry Items to the Drum
- Close zips and buttons.
- Add items one by one on top of each other.
- Don't overload the drum as it may cause excessive vibrations or damage to the washing machine.
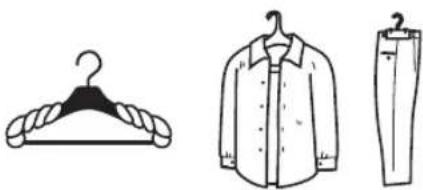
Tips for Hanging Delicate Items to Dry
- Hang white or light coloured clothes, as well as woolen and nylon clothes away from direct heat or sunlight. After washing, smooth creases and folds out of woolen and nylon clothes and return them to their normal shape before hanging in the shade.
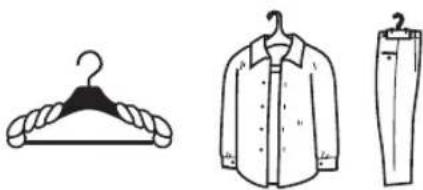
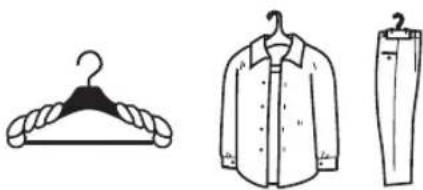
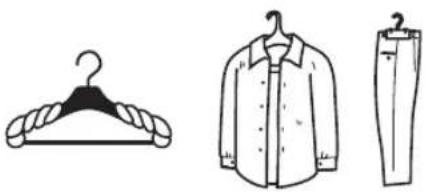
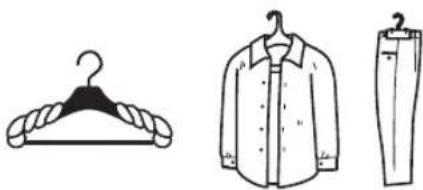
- Use a hanger for shirts, blouses and trousers. You can wrap a towel around the hanger to fit the shoulder width of your clothes, so they retain their shape as they dry.
- Spread woollen items such as sweaters out to dry.
How to Use Laundry Starch
Laundry starch makes your clothes crisp in texture.
Synthetic laundry starch is a stiffening agent. Follow the laundry starch manufacturer's instructions.

After using starch, clean the detergent drawer, especially the softener cover. Then remove any excess starch in the drum, run a "Rinse" programme without detergent.

Maintenance – Cleaning the Washing Machine

Always unplug the washing machine before cleaning.
Cleaning the Drum
Rust left inside the drum by metal articles should be removed immediately with chlorine-free detergent. Never use steel wool.

Don't put laundry in the washing machine during the drum cleaning.
Cleaning the Exterior of your Washing Machine
- Clean the outside of your washing machine with a soft cloth and mild detergent, such as kitchen detergent.
- Do not splash water on the washing machine.
- Do not use cream cleansers, thinners, or products containing alcohol or kerosene.
Cleaning the Detergent Drawer
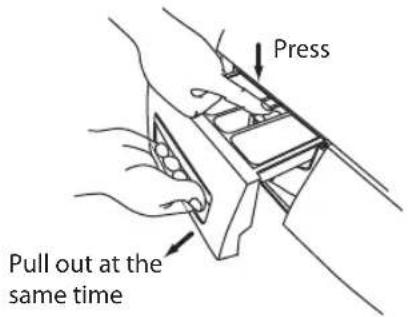
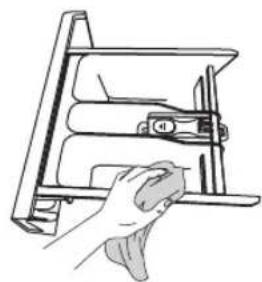
- Remove the detergent drawer by pulling it out and pressing gently on the rear center part of the softener compartment.
- Wash out old detergent from the drawer with water. (Use a cloth to clean the washing machine.) Residue detergent soon builds up if you don't clean the drawer regularly, and can develop mold.
- Return the drawer to its original position.
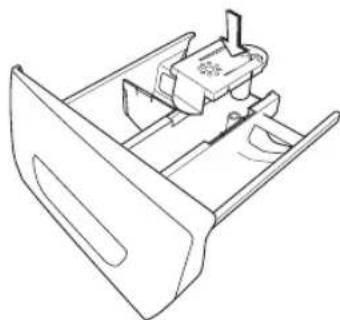
Cleaning the Siphon Plug
Remove the detergent drawer. Remove the siphon plug and wash any residual softener off the siphon. Replace the siphon and slide the drawer back into the washing machine.
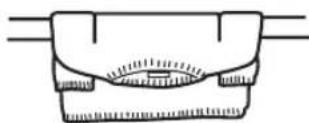
Cleaning the Door Seal and Window
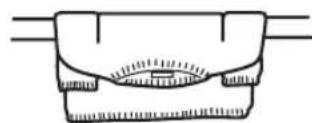
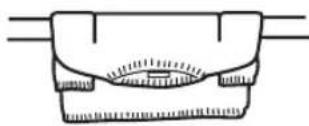
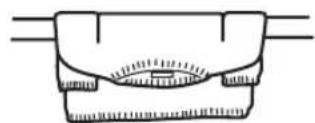
- Wipe the window and seal after each wash to remove lint and stains. If lint builds up, it can cause leaks.
- Remove any coins, buttons, and other objects from the door seal after each wash.
* All images are for indication only; please refer to your individual unit for the actual item.
Cleaning the Drain Filter

Be careful not to burn yourself, as the water in the pump may be hot after a high-temperature wash.
Before cleaning the drain filter, first start the spin programme, then switch off and unplug the washing machine.
- Open the Service Flap by pulling the handle. Place a suitable container under the service flap to catch the water.
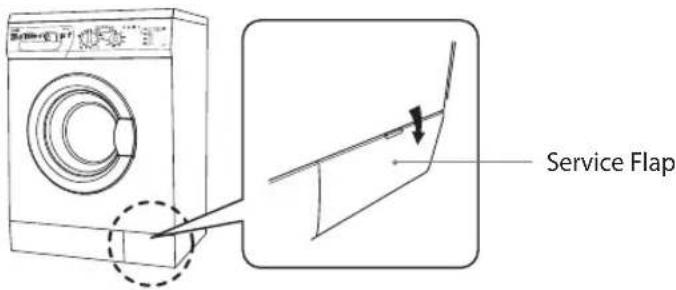
- Carefully loosen the drain filter. Turn anti-clockwise until the water gently begins to run out, this is normal.
- Remove the filter once the water has stopped.
- Remove any lint and debris before carefully replacing the filter.

- Turn the filter clockwise and screw the filter back into place.
- Close the service flap.
Preventing a Frozen Water Supply Hose
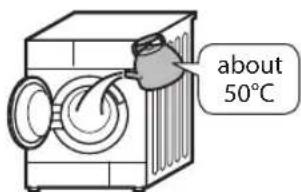
If your washing machine is delivered in freezing weather conditions, leave it at room temperature for 24 hours after you've set it up before using it. This ensures there's no ice blocking the water supply hose. If your water supply hose freezes, add 2 or 3 litres of warm water to the drum. Then run a "Drain" only programme.
Cleaning the Filter Net of the Water Supply Hose
- Turn the water supply off at the tap.
- Close the washing machine door and select "Drain" programme and press the 📄 Start / Pause button.
- When finished, turn the power off. Remove the water supply hose from the tap.
- Manually remove the filter net located on the tap side of the water supply hose and clean using a small brush (e.g. a toothbrush).
- Return the filter net to its original position.
- Re-connect the water supply hose to the washing machine and turn the tap back on, checking for leaks.
* All images are for indication only; please refer to your individual unit for actual item.
| Problems Solutions | |
| Buttons don't work • Child lock is activated. Deactivate the Child lock function.The washing machine is operating a programme.TheProgramme Selection Dialwas turned to a different programme. | |
| Door doesn't open Door lock may be active. | |
| If you start a wrong programme accidentally. | Press and holdStart / Pausebutton for 4 seconds or turn the Programme Selection Dialto "Off". Press theStart / Pausebutton to start the new programme. (Note: We suggest that you do not change the programme after the machine has been running for 3 minutes.) |
| Unusual odour • Rubber parts and the motors may give off a smell when you first start using the washing machine, but this goes away over time.You should wash the drum once a month. | |
| You can't see any water This is normal: The water level is below the window. | |
| There's no water going into the washing machine | The water tap might be turned off.The water hose or water-supply hose may be frozen.Your water supply may be disrupted.The water-supply valve filter may be clogged. |
| There's only a small amount of water | If you have paused the programme and you restart, the washing machine may drain some water.Don't pour water in through the door. |
| Water adds up during washing | This is normal: water is supplied automatically as the level lowers, and with heavy loads the water may fill up repeatedly. |
| There's no water going into the washing machine during rinse operation | Before rinsing, the washing machine spins to drain water remaining from the wash. The water will fill up after that. |
| During the spin, the drum stops and rotates several times | This is normal. The washing machine has detected an unbalanced load and is trying to correct it. |
| Foam and water remain in the door or door seal | Although foam and water may remain, it does not have any influence on the performance of a rinse. |
| Wash time too long During washing, if the laundry is unbalanced, the machine will try to correct by slowly rotating the drum. This may take several attempts. This is normal. | |
| There's not much foam • This can happen if you've put powder detergent directly into the drum – you must put it in the detergent drawer.The amount of foam can vary, depending on the temperature, level and softness of your water.You may not be using enough detergent.You may be using a reduced-foam type of detergent.Heavily soiled laundry can reduce the amount of foam.Larger loads of laundry can also reduce the amount of foam. | |
| There's a lot of foam • The amount of foam can vary depending on the temperature, level and softness of your water.You may have used too much detergent.The type of detergent you use could cause excess foam.Some laundry types (Bathrobe, Bath towel), hold the detergent and becomes agitated during washing cycle. This is normal. Do not over fill the drum. | |
| Fabric softener overflows • You may have exceeded the MAX level in the softener drawer.You may have spilt the liquid by closing the softener drawer too sharply. | |
| There's a residue of powder detergent at the end of the wash | This can happen if you've put powder detergent directly into the drum – you must put it in the detergent drawer. |
| There's an unusual noise or vibration | Check that there's nothing metal in the drum.Make sure the transit bolts used in transportation have been removed.Check that the washing machine is on a flat, stable surface. |
| There's a noise when the water drains away | This is normal, it's the pump starting and stopping. |
| The electrical supply is lost during operation. | The washing machine will stop (do not open the door if the machine is full of water). When the power comes back on, the washing machine will continue the programme. |
| Troubles Reason Solutions | ||
| Washing machine cannot start up | Check that the door is closed tightly.Check that the power is on.Check that the water supply tap is open.Check that the Start/Pause button is pressed. | |
| Water leakage | The connection between water supply hose or drain hose and tap or washing machine is not tight.Drain pipe in the room is blocked. | Check and fasten water hoses.Clean up drain hose and ask a qualified technician to repair it if necessary. |
| Water is overflowed from the bottom of the machine | The water supply hose is not connected firmly.drain hose has water leakage. | Fix the water supply hose.Replace the drain hose. |
| Indicator or display does not light | Power is disconnected or the unit is turned off. | Check that the power is switched on and the power plug is connected correctly.Check the mains plug and fuse.Check that the washing machine is turned on. |
| Washing results are not good | The clothes are too dirty.Insufficient detergent quantity. | Select an appropriate wash programme.Add the proper detergent quantity according to the instructions on your detergent packaging. |
| Excessive foam is formed in the detergent drawer. | Excessive amount of detergent used. | Manually select the Rinse programme. In the next washing operation, adjust the dose of detergent as required. |
| As soon as the machine is filled with water, water discharges. | The end of water drain hose is too low for the machine. | Set the water drain hose end at appropriate height. (*) |
| Laundries have detergent residues on them. | Non-dissolving particles of some detergents may adhere to your laundries as white spots. | Perform an extra rinse by setting your machine to the “Rinse” programme, or clean the spots using a brush after your laundry dries. |
| Grey spots appear on the laundries. | The reason for these spots may be oil, cream or ointment. | Apply the maximum amount of detergent instructed by the detergent manufacturer in the next washing operation. Or use a stain remover designed for washing machines. |
*See the "installation" selection of your machine.
Error Code
When an error occurs, the washing machine will display one of the following on the front control panel. If a fault cannot be rectified or a repair is required, then;
- Set Programme Selection Dial to STOP and pull out the mains plug. • Turn off the water supply tap and call for service.
| Error Code Possible Fault Solutions | ||
| E01 The door is | not shut properly. | Shut the door properly so that you hear the click. If the problem persists, contact the nearest authorised service agent. |
| E02 | The water level in you machine is below heater. The pressure of your water supply may be low or blocked. | Turn on the tap fully. Water may be cut, check it. If the problem continues, your machine will automatically stop after a while. Unplug your machine, turn off the tap and contact the nearest authorised service agent. |
| E03 | The pump has failed or the pump filter is obstructed. | Clean the pump filter. If the problem persists, contact the nearest authorised service agent. |
| E04 | Your machine has excessive amount of water. | Your machine will discharge water by itself. Following the discharging operation, turn off your machine and unplug it. Turn off your tap and contact the nearest authorised service agent. |
| E05 | The heater of the machine or the heat sensor has failed. | Shut down your machine and unplug. Turn off your tap and contact the nearest authorised service agent |
| E06 The motor has failed. | Shut down your machine and unplug. Turn off the tap and contact the nearest authorised service agent. | |
| E07 Electronic card has failed. | Shut down your machine and unplug. Turn off the tap and contact the nearest authorised service agent. | |
| E08 The motor has failed. | Shut down your machine and unplug. Turn off the tap and contact the nearest authorised service agent. | |
| E09 | The network voltage is too high or too low. | If the network voltage is lower than 150V or higher then 260V, your machine will automatically stop. When the network voltage is recovered, your machine will continue its operation. |
| E10 Communication error. | Shut down your machine and unplug. Turn off the tap and contact the nearest authorised service agent. | |
| Model L714WM12E | ||
| Rated Voltage 220 - 240 V~ | ||
| Rated Frequency 50 Hz | ||
| Maximum Power Input 2200 W | ||
| Dimensions of the Product | 596mm (W) x 540mm (D) (excluding controls and door) x 85mm (minimum) (H) | |
| Weight of the Product 68.5 kg | ||
| Maximum Mass of Dry Cloth 7 kg (Cotton programmes only) | ||
| Pressure of Tap Water 0.05 MPa - 1 MPa | ||
Features and specifications are subject to change without prior notice.
Model: L714WM12E
Rated capacity: 7 kg
Energy efficiency class: A+
Energy consumption is 222 kwh per year based on 220 standard washing cycles for cotton programmes set at 60°C and 40°C, with full and partial loads, and the consumption of low-power modes.
Actual energy consumption will depend on how the appliance is used.
Energy consumption of:
• Standard Cotton programme, 60°C, with a full load: 1.19 kwh • Standard Cotton programme, 60°C, with a partial load: 0.81 kwh • Standard Cotton programme, 40°C, with a partial load: 0.74 kwh
Power consumption when appliance is:
• Turned off: 0.5 W - Left on: 1.0 W
Water consumption is 10337 litres per year based on 220 standard washing cycles for cotton programmes set at 60°C and 40°C, with full and partial loads.
Actual water consumption will depend on how the appliance is used.
Spin-drying efficiency class is "B", on a scale of A (most efficient) to G (least efficient).
Maximum spin speed: 1400 rpm
Remaining moisture content: 53%
Standard washing cycle programmes are the Standard 60°C Cotton Programme and the Standard 40°C Cotton Programme. These cycles are suitable for cleaning naturally-soiled laundry and are the most efficient washing cycles in terms of combined energy and water consumption.
Time required:
• Standard Cotton programme, 60°C, with a full load: 200 mins • Standard Cotton programme, 60°C, with a partial load: 175 mins • Standard Cotton programme, 40°C: 170 mins
Airborne acoustical noise (spinning): 78 dB
Airborne acoustical noise (standard 60°C): 62 dB
Thank you for purchasing a new Logik washing machine.
Main unit
Transport bolt cover caps × 4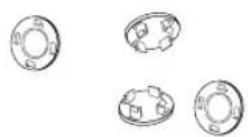
Water supply hose × 1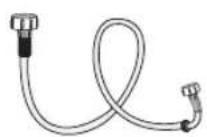
User manual × 1
Installing the washing machine

Drain hose
Points to remember:
![graph TD A["Start"] --> B["Setup"] B --> C["Check"] C --> D["Storage"] D --> E["Storage"] E --> F["Upload"] style A fill:#f9f,stroke:#333 style F fill:#bbf,stroke:#333](/content/2026/05/759273/images/38f79a4198dbcd634b881a6263ff986dc3ddfa84c1c372ff7238ecda4a157d89.jpg)
Main unit


Transport bolt covers x 4
Water hose x 1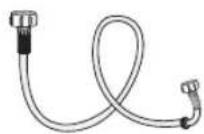
User manual x 1


Drain hose
![graph TD A["步骤1"] --> B["步骤2"] B --> C["步骤3"] C --> D["步骤4"] D --> E["步骤5"] E --> F["步骤6"] F --> G["步骤7"] G --> H["步骤8"] H --> I["步骤9"] I --> J["步骤10"] J --> K["箭头指向步骤10"]](/content/2026/05/759273/images/5d291faa9c889f89773a93d0a0a570255b6936e7678d1e461ff1279c0c65a9b8.jpg)

Device
User manual x 1


Using the iron
Acoustic noise (normal 60° C): 62 dB
Main unit


Transport bolt cap x 4

Drain hose
Main unit


Drain hose
Things to remember
CZ
![graph TD A["Start"] --> B["Step 1"] B --> C["Step 2"] C --> D["Step 3"] D --> E["Step 4"] E --> F["End"]](/content/2026/05/759273/images/f429d69c864f2ed75e554de7eb7679e11c9fcd8c905e09b34097606eb287180c.jpg)

How to use starch
Cleaning the overflow
Main unit


Adding detergent and fabric softener

Adding delicate items to the drum
Cleaning the door seal and porthole
This symbol on the product or in the instructions means that your electrical and electronic equipment should be disposed at the end of its life separately from your household waste. There are separate collection systems for recycling in the EU.
For more information, please contact the local authority or your retailer where you purchased the product.
NO

- WARNING
- GENERAL USE
- POWER SOURCE AND CABLE
- TO PREVENT INJURY / DAMAGE
- SAFETY WARNINGS
- UNPACKING
- INSTALLING YOUR WASHING MACHINE
- PLEASE READ AND FOLLOW THE INSTRUCTIONS CAREFULLY
- CHOOSING THE RIGHT LOCATION FOR YOUR WASHING MACHINE
- MOVING AND INSTALLING
- REMOVING THE TRANSIT BOLTS
- TO REMOVE THE TRANSIT BOLTS
- MOVING THE WASHING MACHINE FROM ONE LOCATION TO ANOTHER
- HOSE AND CABLE LENGTHS
- LEVELLING THE WASHING MACHINE
- WATER SUPPLY HOSE
- POINTS TO REMEMBER
- CONNECTING THE WATER SUPPLY HOSE
- WATER DRAIN HOSE
- DRAINING TO A SINK OR WASH-BASIN
- CONNECTING TO THE MAINS SUPPLY
- FOR YOUR SAFETY
- INSTALLATION CHECK LIST
- THE UNIT
- CONTROL PANEL
- THE DETERGENT COMPARTMENT
- PROGRAMME SELECTION DIAL
- MODE BUTTON
- DISPLAY WINDOW
- SELECT BUTTON
- SPIN SPEED DIAL
- WASHING INDICATOR
- RINSE HOLD BUTTON
- EXTRA RINSE BUTTON
- CHILD LOCK
- PRE-WASH WITH SOAK BUTTON
- EASY IRONING
- START / PAUSE BUTTON
- ORGANISING LAUNDRY
- GB
- PREPARING LAUNDRY
- ADDING DETERGENT AND SOFTENER
- FIRST WASHING OPERATION
- STANDARD WASHING
- CHANGING THE PROGRAMME
- MANUAL SOAKING
- HALF-LOAD DETECTION SYSTEM
- INDIVIDUAL WASHING FUNCTIONS (PROCESS SELECTION)
- OPTIONAL FUNCTIONS
- REASON FOR NON-ACTIVATION
- WASHING WATER TEMPERATURE SELECTION
- DELAY TIMER
- HOW TO SET THE CHILD LOCK
- CANCELLING PROGRAMME
- FINISHING PROGRAMME
- REMOVING LAUNDRY
- WASHING DELICATES (WOOL AND SILK PROGRAMMES)
- ADDING DELICATE LAUNDRY ITEMS TO THE DRUM
- TIPS FOR HANGING DELICATE ITEMS TO DRY
- HOW TO USE LAUNDRY STARCH
- MAINTENANCE – CLEANING THE WASHING MACHINE
- CLEANING THE DRUM
- CLEANING THE EXTERIOR OF YOUR WASHING MACHINE
- CLEANING THE DETERGENT DRAWER
- CLEANING THE SIPHON PLUG
- CLEANING THE DOOR SEAL AND WINDOW
- CLEANING THE DRAIN FILTER
- PREVENTING A FROZEN WATER SUPPLY HOSE
- CLEANING THE FILTER NET OF THE WATER SUPPLY HOSE
- ERROR CODE
- ENERGY CONSUMPTION OF
- TIME REQUIRED
- THANK YOU FOR PURCHASING A NEW LOGIK WASHING MACHINE
- INSTALLING THE WASHING MACHINE
- DRAIN HOSE
- USING THE IRON
- THINGS TO REMEMBER
- HOW TO USE STARCH
- CLEANING THE OVERFLOW
- ADDING DETERGENT AND FABRIC SOFTENER
- ADDING DELICATE ITEMS TO THE DRUM
- CLEANING THE DOOR SEAL AND PORTHOLE
- NO
Brand : Logik
Model : L714WM12E
Category : Washing machine