
MUSHROOM-2.0 - Lighting AFX - Free user manual and instructions
Find the device manual for free MUSHROOM-2.0 AFX in PDF.

| Product type | LED effect projector |
| Brand | AFX |
| Model | MUSHROOM-2.0 |
| Dimensions | 250 x 250 x 220 mm |
| Weight | 2.05 kg |
| Power supply | 100-240 V~, 50/60 Hz |
| Power consumption | 46 W |
| Fuse | BGDP ∅5 x 20 mm, 250 V~, 2 A |
| Light source | 27 x 1.5 W RGB 3-in-1 LED |
| Beam angle | 25° |
| DMX channels | 6 channels |
| Operating modes | DMX, built-in programs, master/slave, sound, auto |
| Remote control | Yes (battery included) |
| Protection class | I (grounding required) |
| Intended use | Indoor, decoration (effect lighting) |
| Minimum lighting distance | 0.5 m |
| Cooling | Natural, min. distance 50 cm from surfaces |
| Max. ambient temperature | 45 °C |
| Max. continuous operation | 8 hours |
| DMX input/output connectors | 3-pin XLR |
| Display | LED, menu navigation |
| Package contents | Projector, power cord, user manual |
Frequently Asked Questions - MUSHROOM-2.0 AFX
User questions about MUSHROOM-2.0 AFX
0 question about this device. Answer the ones you know or ask your own.
Ask a new question about this device
Download the instructions for your Lighting in PDF format for free! Find your manual MUSHROOM-2.0 - AFX and take your electronic device back in hand. On this page are published all the documents necessary for the use of your device. MUSHROOM-2.0 by AFX.
USER MANUAL MUSHROOM-2.0 AFX
DMX-CONTROLLED MULTI-LINE 'MUSHROOM' LED LIGHT EFFECT WITH REMOTE CONTROL
EFFET DE LUMIERE DMX 'MUSHROOM' MULTI-LIGNES A LED AVEC TELECOMMANDE
DMX-GESTEUERTER MULTI-LINE 'MUSHROOM' LED LICHEFFEKT MIT FERNBEDIENUNG
DMX-BESTUURDE MULTI-LINE 'MUSHROOM' LED LICHT EFFECT MET AFSTANDSBEDIENING

natural_image
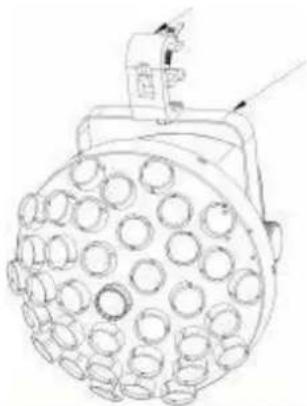
Technical line drawing of a circular mechanical component with multiple cylindrical cavities and mounting holes (no text or symbols)GB - User Manual
UNPACKING INSTRUCTIONS
Immediately upon receiving a fixture, carefully unpack the carton, check the contents to ensure that all parts are present and have been received in good condition. Notify the freight company immediately and retain packing material for inspection if any parts appear to be damaged from shipping or the carton itself shows signs of mishandling. Keep the carton and all packing materials. In the event that a fixture must be returned to the factory, it is important that the fixture be returned in the original factory box and packing.
CONTENTS OF THE CARTON
- 1 pc. Mushroom
• 1 pc. user manual - 1 pc. power cable
EXPLANATION OF SYMBOLS ON THE SILKSCREEN

The triangle containing a lightning symbol is used to indicate whenever your health is at risk (due to electrocution, for example).

An exclamation mark in a triangle indicates particular risks in handling or operating the appliance.

The unit complies with CE standards

For indoor use only

Minimum distance between the appliance and other objects

CAUTION DO NOT OPEN THE HOUSING SHOCK HAZARD
Please read this manual carefully before operating this product.
SAFETY RECOMMENDATIONS
- Please read these instructions carefully, they include important information about the installation, usage and maintenance of this product.
- Please keep this User Guide for future reference. If you sell the unit to another user, be sure that he also receives this instruction booklet.
- Always make sure that you are connecting to the proper voltage, and that the line voltage you are connecting to is not higher than that stated on the bottom of the fixture.
- The appliance is part of class I and must exclusively connected to an earthed mains outlet.
- This product is intended for indoor use only!
- To prevent risk of fire or shock, do not expose fixture to rain or moisture. Make sure there are no flammable materials close to the unit while operating.
- The unit must be installed in a location with adequate ventilation, at least 20in (50cm) from adjacent surfaces. Be sure that no ventilation slots are blocked.
- The minimum distance luminaire from that part of the luminaire or lamp to the lighted object is 0.5m.
- Do not operate the unit for more than 8 hours continuously. Let it cool down before you operate it again to lengthen its lifetime.
- Maximum ambient temperature (Ta) is 45^ . Don't operate the fixture at higher temperatures.
-
In the event of a serious operating problem, stop using the unit immediately. Never try to repair the unit by yourself. Repairs carried out by unskilled people can lead to damage or malfunction. Please contact the nearest authorized technical assistance center. Always use the same type of spare parts.
-
Make sure the power cord is never crimped or damaged.
- Never disconnect the power cord by pulling or tugging on the cord.
- Avoid direct eye exposure to the light source while it is on as sensitive persons may suffer an epileptic shock (especially meant for epileptics)!
- The product is for decorative purposes only and not suitable as a household room illumination.
- If the external flexible cable or cord of this luminaire is damaged, it shall be exclusively replaced by the manufacturer or his service agent or a similar qualified person in order to avoid a hazard
- If the lenses are visibly damaged by scratches or cracks, stop using the unit immediately and replace the damaged lenses.
DISCONNECT DEVICE
Where the MAINS plug or an appliance coupler is used as the disconnect device, the disconnect device shall remain readily operable.
FUSE REPLACEMENT
- Disconnect the power cord before replacing a fuse and always replace with the same type fuse.
- With a Phillips head screwdriver wedge the fuse holder out of its housing.
- Remove the damaged fuse from its holder and replace with exactly the same type of fuse (BGDP ∅5x20mm 250V\~2A).
- Insert the fuse holder back in its place and reconnect power.
INSTALLATION
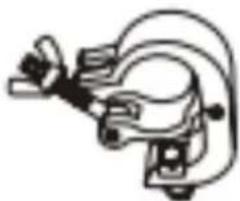
The unit should be mounted via its screw holes on the bracket. Always ensure that the unit is firmly fixed to avoid vibration and slipping while operating. Always ensure that the structure to which you are attaching the unit is secure and is able to support a weight of 10 times of the unit's weight.
The installation must always be secured with a secondary safety attachment, e.g. an appropriate safety rope.
Never stand directly below the device when mounting, removing or servicing the fixture.
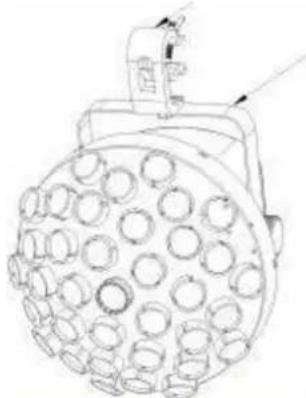
Insert an M8 screw through the ∅12.5mm hole on the hanging bracket to fix the mounting bracket.
natural_image
Pure mechanical component diagram without any text, numbers, or symbolsMounting bracket
natural_image
Technical line drawing of a circular mechanical component with multiple holes (no text or symbols)Hanging bracket
DMX CONNECTION
Connect an XLR cable to the male 3-pin XLR output of your controller and the other side to the female 3-pin XLR input of the light. You can chain multiple lights together through serial linking
The cable needed should be two core, screened cable with XLR input and output connectors. Please refer to the diagram below
DMX output
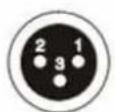
DMX Input
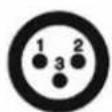
1: Ground
2: Signal (-)
3: Signal (+)
DMX ADDRES SETTING
Every unit must have a specific starting address. During signal transmission, the unit will receive channel control signals from the DMX controller through this starting address.
According to different requirements or for ease of use, the user can set several units to the same address, or alternatively, he can set up a different address for every unit.
If more than one units have the same address, all of them will receive the same DMX channel signal from the DMX controller. All connected units are jointly controlled, DMX controller can't control a device separately.
If every unit has a different address, they will be separate and accept separate DMX512 control signals through the separate DMX addresses, so that every unit will be controlled separately. this method must be based on channel quantity of device to determine a starting address.
This device has 6 channels, so the starting address of the first device will be set to 1, the second is 7(1+6), the third is 13(1+12) and so on.
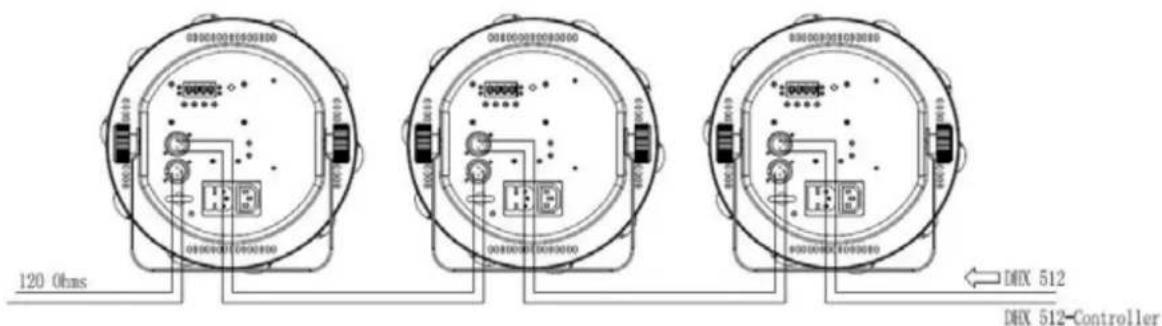
Address 13 Address 7 Address 1
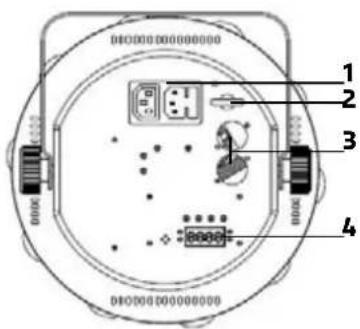
REAR PANEL
- IEC IN/OUT
- Safety rope
- DMX In/Out
- LED display
MENU
| Display Display Function | ||||
| Addr Enter | ▲ / ▼ | 001-512 Set DMX address | ||
| Chnd Enter | ▲ / ▼ | 3CH | 3 DMX channels | |
| 6CH | 6 DMX channels | |||
| Shnd | Enter | ▲ / ▼ | Sh1-Sh15 | Built-in shows from 1-15 |
| SLnd | Enter | ▲ / ▼ | Mast | Master unit |
| SL 1 | Slave unit | |||
| Lost(no DMX signal) | Enter | ▲ / ▼ | soun | Run sound mode if no DMX signal |
| Auto | Run Auto mode if no DMX signal | |||
| blac | Blackout if no DMX signal | |||
| SP_A Enter | ▲ / ▼ | A.001-A.100 | Auto show, speed low to fast | |
| SP_N Enter | ▲ / ▼ | N.000-N.099 Motor speed, low to fast | |
| Sens Enter | ▲ / ▼ | S000-S099 Sound sensitivity adjustment | |
| Manu Enter | ▲ / ▼ | Co_1--Co_9 Manual test for color macro | |
| Led Enter | on Backlight on | ||
| off Backlight off | |||
| disp Enter on Reverse display on | |||
| off Reverse display off | |||
| Fhrs Enter Total operating hours | |||
| Ver Enter Current software version | |||
| defa Enter Factory default setting | |||
REMOTE CONTROL
| Button | Function |
| Stand By | Stand By OFF/ON |
| Pattern- | decrease sound/auto show |
| Pattern | sound/auto show 7 |
| Pattern+ | increase sound/auto show |
| Speed- | decrease LED auto speed |
| Speed | LED auto speed: 50 |
| Speed+ | increase LED auto speed |
| R | run red led auto show |
| G | run green led auto show |
| B | run blue led auto show |
| R+G | run Red+green auto show |
| G+B | run green+blue auto show |
| B+R | run blue+red auto show |
| R+G+B | run red+green+blue auto show |
| Sound sound mode | |
| Auto | auto mode |
| Laser R | no function |
| Laser G | no function |
| Laser B | no function |

RECOMMENDATIONS FOR BATTERIES

This symbol indicates that used batteries should not be disposed of with household waste but deposited in separate collection points for recycling.
ATTENTION
Batteries shall not be exposed to excessive heat such as sunshine, fire or the like.
When the internal batteries are not to be used, remove them to avoid damage caused by battery leakage or corrosion.
Danger of explosion if battery is incorrectly placed. Only replace by the same or equivalent type.
Keep new and old batteries out of the reach of children.
If the battery compartment doesn't close properly, stop using the product and keep it out of the reach of children.
WARNING
Do not swallow the battery. Danger of chemical burns.
The supplied remote control contains a button cell. In case of ingestion, it might cause serious internal burns within only 2 hours that might lead to death.
If you are in doubt whether the batteries have been swallowed or introduced into any other part of the body, contact immediately a doctor.
Explanation of DMX Channel Charts please see at the end of the manual - page 18
SPECIFICATIONS
Power supply 100-240V\~50/60Hz
Consumption 46W
Fuse ....BGDP ∅5 x 20mm 250V\~ 2A
Light source 27 x 1.5W RGB 3in1 LED
Max. ambient temperature 45°C
DMX in & output 3-pin XLR
Lens beam angle 25°
Dimensions 250 x 250 x 220mm
Weight 2,05kg

IMPORTANT NOTE: Electric products must not be put into household waste. Please bring them to a recycling centre. Ask your local authorities or your dealer about the way to proceed.
MANUEL D'UTILISATION
DÉBALLAGE
DISPOSITIF DE COUPURE
REPLACEMENT DU FUSIBLE
natural_image
Simple line drawing of a mechanical component or tool (no text or symbols)Crochet
natural_image
Line drawing of a circular mechanical component with multiple holes (no text or symbols)Etrier
CONNEXION DMX
MENU
RECOMMANDATIONS POUR LES PILES
natural_image
Pure mechanical component diagram without any text, numbers, or symbolsKlammer
natural_image
Technical line drawing of a mechanical component with circular holes and a protruding arm (no text or symbols)Haltebügel
DMX VERBINDUNG
MENU
HINWEISE FÜR BATTERIEN
natural_image
Pure mechanical component diagram without any text, numbers, or symbolsKlem

natural_image
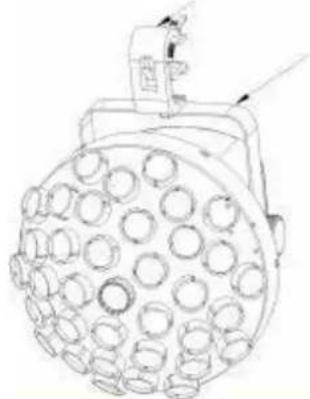
Technical line drawing of a spherical industrial lamp with multiple circular components (no text or symbols)Houder
1: Ground 2: Signal (−) 3: Signal (+)
INSTELLING VAN DE DMX ADRES
ADVIES VOOR BATTERIJEN

Designed by LOTRONIC S.A.
Av. Z. Gramme 9
B - 1480 Saintes
- UNPACKING INSTRUCTIONS
- CONTENTS OF THE CARTON
- EXPLANATION OF SYMBOLS ON THE SILKSCREEN
- CAUTION DO NOT OPEN THE HOUSING SHOCK HAZARD
- SAFETY RECOMMENDATIONS
- DISCONNECT DEVICE
- FUSE REPLACEMENT
- INSTALLATION
- DMX CONNECTION
- DMX ADDRES SETTING
- REAR PANEL
- RECOMMENDATIONS FOR BATTERIES
- ATTENTION
- WARNING
- SPECIFICATIONS
- MANUEL D'UTILISATION
- DÉBALLAGE
- DISPOSITIF DE COUPURE
- REPLACEMENT DU FUSIBLE
- CONNEXION DMX
- RECOMMANDATIONS POUR LES PILES
- DMX VERBINDUNG
- HINWEISE FÜR BATTERIEN
- INSTELLING VAN DE DMX ADRES
- ADVIES VOOR BATTERIJEN
Brand : AFX
Model : MUSHROOM-2.0
Category : Lighting